#usereus
Explore tagged Tumblr posts
Visit Tumblr Blog
Explore Tumblr blogs with no restrictions, modern design and the best experience.
Last Seen Tumblr Blogs


Fun Fact
In Q3 of 2020, 31% of US users access the Tumblr app daily.
Text


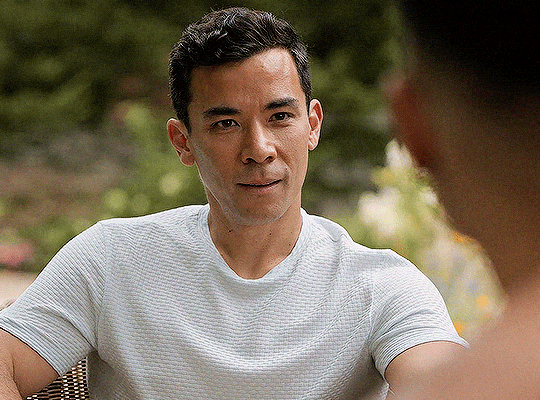
THE PITT 1.01
#the pitt#*#*airi#thepittedit#tvedit#quicklings#kallypsos#usergiu#tuserhol#userrebekah#tuserambs#userwintersoldado#userarrow#usereus#userlolo#tvdoctors#s1#1x01#michael robinavitch#melissa king#robby x king
80 notes
·
View notes
Text


jackie confirmed as shauna's ex
#yellowjackets spoilers#yellowjackets#jackieshauna#shauna shipman#jackie taylor#jackie x shauna#yellowjackets s3#yellowjackets season 3#yellowjacketsedit#yellowjacketsnetwork#96yellowjackets#gifs#byzil#usereus#usercb#userbecca#userallisyn#userbru#usermarta#usersnat#userpayel
1K notes
·
View notes
Text


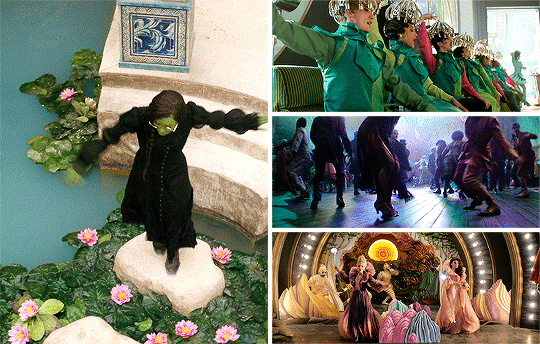
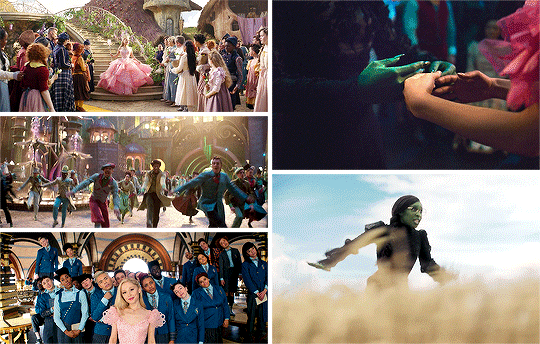


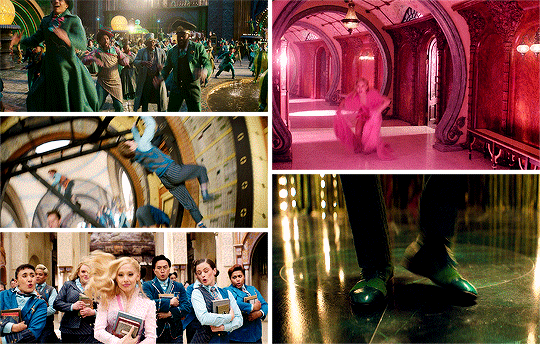
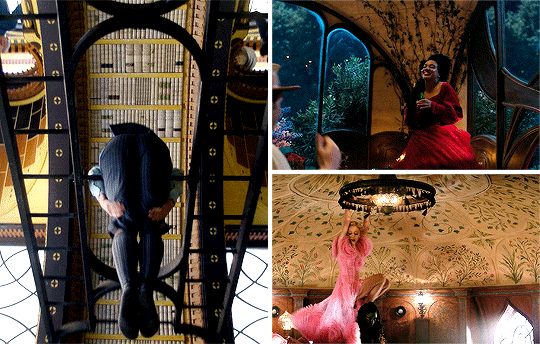


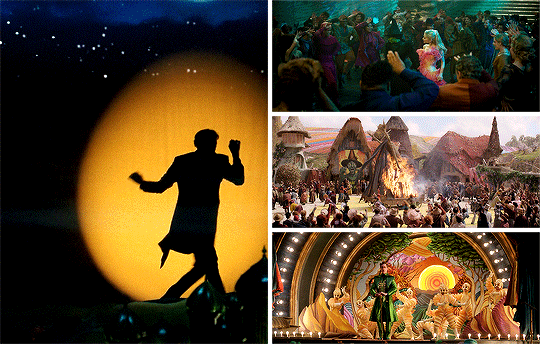

BEST DANCING PER YEAR (as voted by my followers) ↳ 2024: Wicked
Christopher Scott - choreographer Emilio Dosal, Comfort Fedoke, Leah Hill, Will Loftis - associate choreographer Peter Francis - choreography coordinator Wayne Cilento - stage choreographer
#wicked#wicked 2024#filmedit#musicaledit#wickededit#ariana grande#jonathan bailey#cynthia erivo#userahri#uservale#usertreena#singinprincess#usertj#bladesrunner#usernatty#userbunneis#userwintersoldado#userarrow#usercats#usereus#my edit#my gifs#filmchoreo#bestchoreo#the best dancing but not my best work!#had to work through so many obstacles but here we are#just barely got it done in time <3#congratulations to wicked very deserved#i'll probably make smaller edits for the other high voted movies#thank you everyone who voted!
1K notes
·
View notes
Text
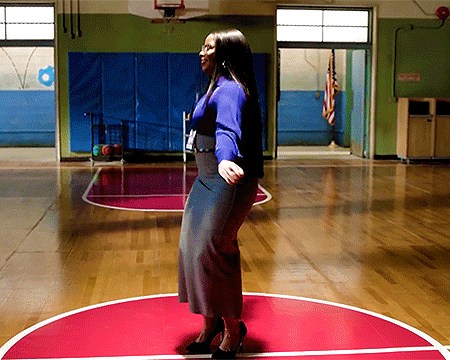


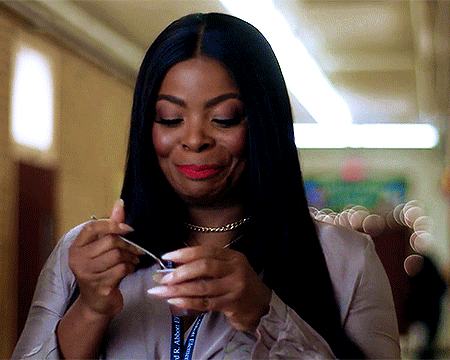
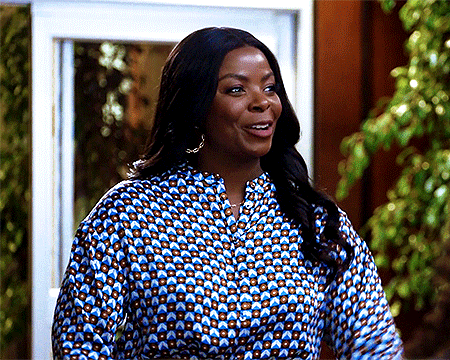

get to know me meme >> Favorite Female Characters [36/?] Ava Coleman (Abbott Elementary)
I didn't get ringworm, but I did get a tapeworm. Seafood restaurant next to the gas station. Got it. Passed it. Worth it.
#aeedit#sitcomedit#abbottelementaryedit#tvedit#cinemapix#dailyflicks#avacolemanedit#chewieblog#*#gtkm4#userbuckleys#usertenacious#userrobin#tuservaleria#usertina#useremsi#userdean#userholtz#userjessica#useraudrey2#usermarella#userarrow#tuserju#usercats#usernolan#userruta#usergiu#tuserhol#usereus#her putting the stickers on the rubix cube takes me out
717 notes
·
View notes
Text


SCREAM (2022) dir. Tyler Gillett & Matt Bettinelli-Olpin COMPANION (2025) dir. Drew Hancock
#my gifs#scream 2022#companion#screamedit#companionedit#companion 2025#scream#horroredit#finalgirlsource#filmedit#filmtvtoday#usermaguire#tuserlucie#userrajan#usersole#usergoose#userairi#userbess#usermadita#userbuckleys#userdanahscott#userchibi#userhann#tuserheidi#tuservaleria#usercats#usergiu#userahri#usereus#userholtz
580 notes
·
View notes
Text


FIRE ISLAND (2022) dir. Andrew Ahn
#fire island#*gifs#fireislandedit#filmedit#movieedit#filmgifs#userotp#usergay#romancegifs#fyeahmovies#mlmsource#mlmedit#lgbtedit#dailyflicks#cinemapix#cinematv#filmtvcentral#userstream#userfilm#userveronika#chrissiewatts#userbunneis#usermimsi#userrobin#usertina#userarrow#usercats#userbaz#usereus#userpriyas
488 notes
·
View notes
Text


THE ROOKIE | 7.07 • The Mickey
#ruta.gifs#ruta-did-a-thing#the rookie#therookieedit#tvedit#dailyflicks#tvarchive#filmtvtoday#filmtvcentral#cinemapix#cinematv#usersource#dilfgifs#userthing#usertelevision#televisiongifs#userblorbo#crimeshowsource#mialook#useradds#usercharisse#userairi#userabs#usercourt#userrin#userjessica#tusermimi#userarrow#kallypsos#usereus
442 notes
·
View notes
Text


Daredevil: Born Again | 1x01: Heaven's Half Hour
#was rewatching for my moments of foggy and heard this dialogue and was like. all right. so we're doing this :)#daredeviledit#daredevil born again#ddbaedit#matt murdock#foggy nelson#karen page#janie makes stuff#tuseruta#tusermira#userkarolina#userchibi#userbess#tuservaleria#userholtz#userjessica#jmorganz#usereus#userarrow#daredevil spoilers#ddba spoilers#death tw#marveledit#mcuedit#urerroh
256 notes
·
View notes
Text


#would i lie to you#bob mortimer#lee mack#panel show#gifs#mine#mine:wilty#wilty 18.09#tvedit#userrobin#quicklings#usergiu#usereus
297 notes
·
View notes
Text


CLARK KENT AND MARTHA KENT SMALLVILLE | 1.04 “X-ray”
#smallville#smallvilleedit#tvedit#s1#1x04#clark kent#martha kent#clark x martha#userstream#userbbelcher#chewieblog#userlolo#userelsbeth#usereus#usercallie#usersnat#userbelle#usertana#*#by yusi#flash tw
226 notes
·
View notes
Text


CLARK KENT & LOIS LANE SMALLVILLE | 5.21 “Oracle”
#smallville#smallvilleedit#tvedit#clark kent#lois lane#cloisedit#chewieblog#userbbelcher#userstream#userelsbeth#usercallie#usereus#userneptune#usertana#userkraina#usertreena#userlolo#dcedit#dcmultiverse#*
236 notes
·
View notes
Note
Coloring anon here, yes, I would definitely like to know more about how you color frame by frame and the other techniques you mentioned! It would be much appreciated, thank you!
Hi anon! I'd be happy to go over my preferred methods for colouring!

First resort (ideal):
Painting over shots with little movement (the first method in this tutorial)
Colour manipulation using selective colours (the second method in this tutorial; alternate tutorial -> i also sometimes add a hue/saturation layer on top to manipulate the cyans/blues as well)
Second resort:
Keyframes for shots with consistent movement where it's easy to hide "imperfections" (tutorial 1, tutorial 2)
Last resort:
Frame by frame colouring -> DISCLAIMER: the way I do this method is the easiest way I've gotten it to work for me but that also means that it's very inflexible when it comes to editing any of the colouring afterwards. Once you start colouring in frame animation mode you're basically locked in so you need your gifs to be exactly the way you want them prior to adding your colour
So in this tutorial I'll go over how I do my frame by frame colouring as well as how I create actions to automate the repetitive parts of this process! (Some resources that explain how to create actions are here: 1 2)
To use the select subject feature you will need Photoshop CC 2018 or later
Step 1: Preparing your gif with base colouring
So first you want to do your base colouring for your gif in timeline mode, which I've explained here. I keep my gifs short (ideally 40 frames or less) since this colouring process is tedious!
I make sure that in my hue/saturation layer, I turn the saturation in the yellow, green, cyan, and blue tabs all down to -100 (and for the yellows I usually add around +20 to +60 in lightness)
Here's my gif with the base colouring that I'll be starting with:

Note: turning down the saturation in almost all the colours gives you that nice silver/grey neutral background to paint on top of. It's a lot less noticeable when your painted layers aren't perfect
Step 2: Converting to Frame Animation Mode
I use the save action from this action pack to convert my gif from timeline mode to frame animation mode.
You cannot edit your base colouring from this point onwards!
Step 3: Using Select Subject
If you're recording an action this is the step you would *start recording*
This is what your window should look like:

Making sure your first frame and first layer are selected, go to Select at the top of your window and click Subject

You should then see the marching ants outline around the person in your gif

You then want to create a new solid colour fill layer (which can be found when you click that little circle icon at the bottom of your layers panel), and set the layer blending mode to colour.
The layer mask will automatically be created since you had the marching ants outline.

Since my person is in colour and not the background, I want to invert the layer mask by clicking on it and using command + i (or ctrl + i), and now this is what it looks like:

Note: Select subject isn't always perfect!!!, depending on how cluttered the scene is and how much contrast there is between your person and the background, select subject could either do a really good job like it did here, or screw up a little like it did here:

That's okay though because it still gives us a good base to start from! We can fix any issues by painting with black and white brushes on the layer mask.
Step 3.5: Create clipping mask
Thanks to @wolfchans for telling me about this because it gives us back a little bit of flexibility when colouring frame by frame! Instead of merging down, we can make a clipping mask instead. Right click the solid colour fill layer and select create clipping mask.


If you're recording an action, it's at this point where I would *stop recording*
Step 4: Fixing the layer mask if needed
So now I want his jacket and t-shirt to also be purple, and to show his fingers behind the glass. I make sure the layer mask is selected, and paint with a brush at 60-70% hardness (painting with black erases the colour, painting with white shows the colour). User smaller brush sizes to paint smaller details!
This is what my canvas and layer mask look like now.

Step 5: Repeat
Now I click on my second frame and second layer, and repeat steps 3-4. As you can see, using the clipping mask allows you to still see and edit the colouring of the previous frame, just make sure you click on the right frame and it's corresponding layer when you're doing further editing.

This is where an action is super helpful in cutting down all the repetitive steps and clicks you need to do. So at this point I'd just play the action I created and paint on the layer mask as needed.
Repeat for all your frames and then you're done! After this I convert it back to timeline mode again so that I can add my text and do any other effects such as blending or transitions. Hope this helped!!
#answered#Anonymous#*tutorial#userbeanie#userwintersoldado#userishh#userfaiths#usercats#usertj#tuserhol#userahri#usereus#usershreyu#userchibi#userbunneis#usermibbles#uservivaldi#carolook#userbuckleys#usertenacious#tuserheidi#userholtz
208 notes
·
View notes
Text


YELLOWJACKETS — S3E4: 12 Angry Girls and 1 Drunk Travis
#yellowjackets spoilers#yellowjackets#nat scatorccio#natalie scatorccio#sophie thatcher#yellowjackets s3#yellowjackets season 3#yellowjacketsedit#yellowjacketsnetwork#96yellowjackets#gifs#byzil#usereus#usercb#userbecca#userallisyn#userbru#usermarta#usersnat#userpayel
1K notes
·
View notes
Text


platonic shuffle ➛ fun & games the west wing (1999—2006) | s04e12
#*#*shuffle#by em#tvedit#twwedit#cj cregg#leo mcgarry#tuserhol#tuseruta#usergiu#tuserambs#userobiwans#usereus#tvarchive#cinematv#filmtvtoday#usersource#popularculturesource#popcultureds#filmtvcentral#userthing#usertelevision
164 notes
·
View notes
Text


And goodness knows, the wicked's lives are lonely. Goodness knows the wicked die alone. It just shows when you're wicked, you're left only on your own.
#wickededit#gelphieedit#filmedit#*#favquotes#elphabathroppedit#glindauplandedit#userbaz#tuserheidi#userjessica#usernolan#userdean#userrobin#userbeanie#userahri#userarrow#tuservaleria#usereus#carolook#useradds#usercats#useraudrey2#userkarolina#usertina#usergiu#tuserju#userbunneis#usertenacious#userholtz#userbuckleys
657 notes
·
View notes
Text
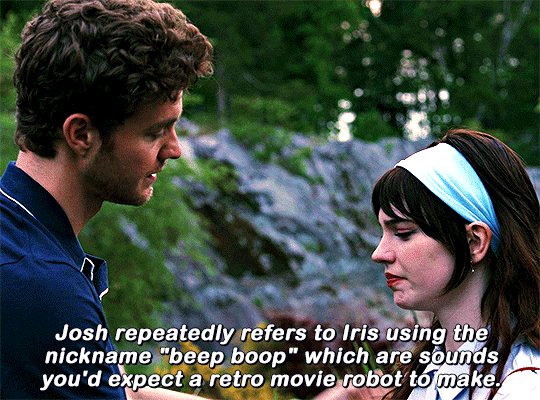


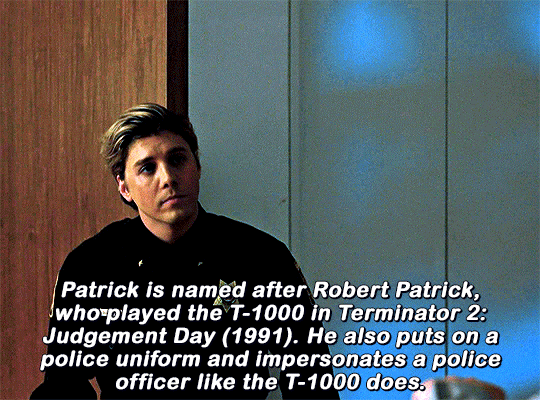
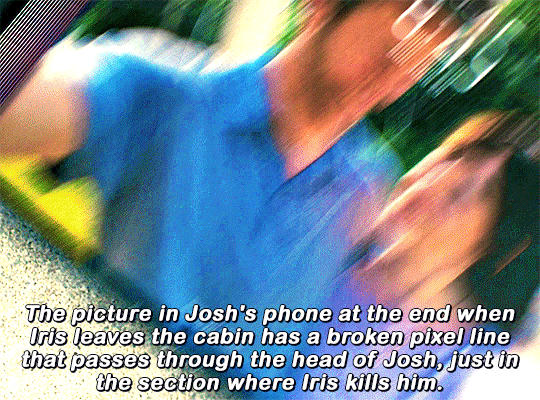

COMPANION (2025) + trivia
#my gifs#companion#companion 2025#companionedit#filmtvtoday#horrorsource#filmedit#filmgifs#userrsun#userchibi#userhann#tuserheidi#tuservaleria#usercats#usergiu#userahri#usereus#userholtz#usercamena#userarrow#usernolan#tuserko#usertj#useradds#underbetelgeuse#userbuckleys#usersalty
431 notes
·
View notes