#to refer to references with doll joints/physiology
Text
.
#Note To Self:#I use the tag#Mannequins#to refer to references with doll joints/physiology#and the tag#Dolls#to refer to physical dolls (or depictions thereof)#I have a tag for#Puppeteers#but while most depictions of puppets would qualify as either 'dolls' or ''mannequins'#'Puppets' doesn't necessarily describe all instances I would tag as 'dolls' or 'mannequins'#I also have a tag for#Constructs#which similarly refers to artificial beings shaped from some material#But not all of them are humanoid#and generally constructs are animated#which isn't necessarily the case for dolls or mannequins etc#Note the tags#Gynoids#and#Automata#may also have doll joints or physiology#But are separate tags to keep their stylistic differences distinct for categorization purposes#Automata are generally a subclass of constructs#Golems#are another subclass
0 notes
Text
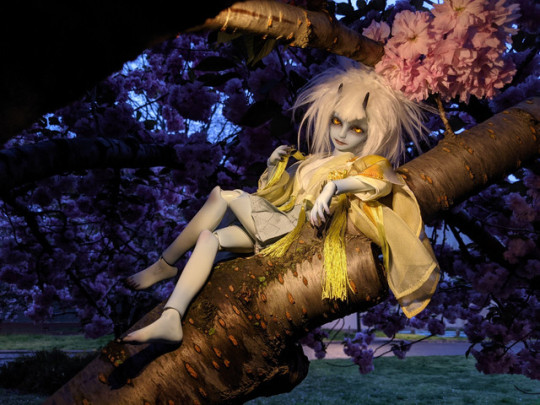
The Making of Fubuki
((Reposting from Den of Angels workshop thread because I wanted my friends to be able to see~))
After years of pining after dolls I couldn't afford as a broke teenager, my first BJD was a Bobobie Sprite I purchased for my 18th birthday. Unfortunately, she didn't live up to my expectations and I never really bonded with her. Her face was cute enough, but the Bobobie body lacked the grace and posing ability I imagined for the Unseelie faerie I'd been daydreaming of for years. Sueding and wiring didn't help, blushing and tattooing highlighted her blockiness, it was a mess.
I packed her away and tried not to think about my disappointment for 12 years. In the meantime I learned to build and paint resin garage kits, inherited one of my sister's dolls, bought some others, took anatomy & physiology in college, and did a couple extensive restorations and full-body modifications.
I was sure I had thrown her away at some point as a failed project, but last weekend I found her tucked away in a doll bag I thought was empty. Having just finished substantial mods on a Dollshe body, and awaiting an unfinished Unoa kit for my birthday in September, I decided that I owed it to her to try again.
Doll nudity below the cut, looooong post--
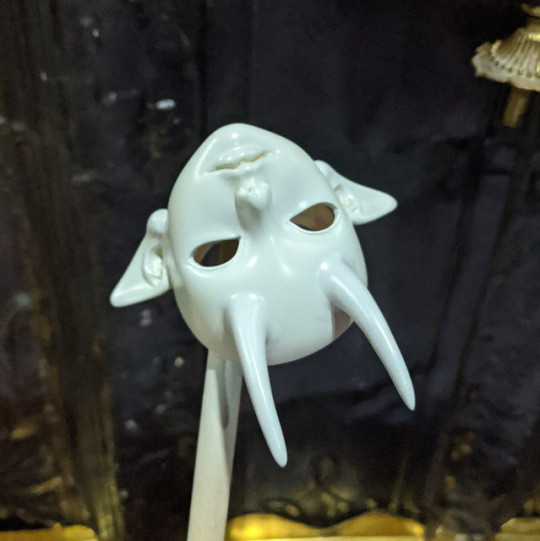
My Sprite was originally going to be a pooka with golden eyes and extensive woad tattoos. The golden eyes are incredible, so those are staying, but she's now going to be a blue oni to fit in with the rest of my collection. My plan is to do extensive additive epoxy work, and then to use Krylon Fusion to give everything a unified finish. The goal of the project is to reduce the... idk, STRAIGHTNESS of the old Bobobie body. I was never going to be happy with it, the lines were all far too rigid.
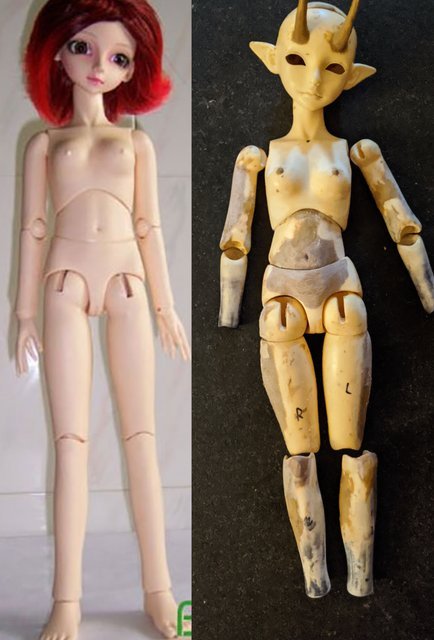
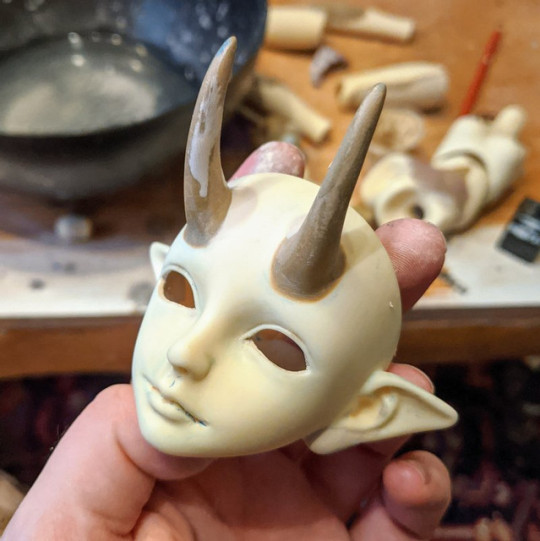
Head: Modified mouth for a wider, smirking smile. Magnets added to headcap (old Bobobie used an S-hook iirc; I did this part back in 2008). Forehead drilled for 3mm brass rod armature, and epoxy used to sculpt horns over rod.
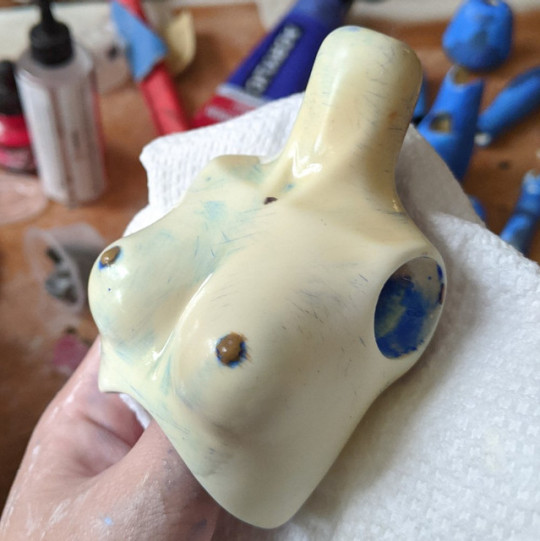
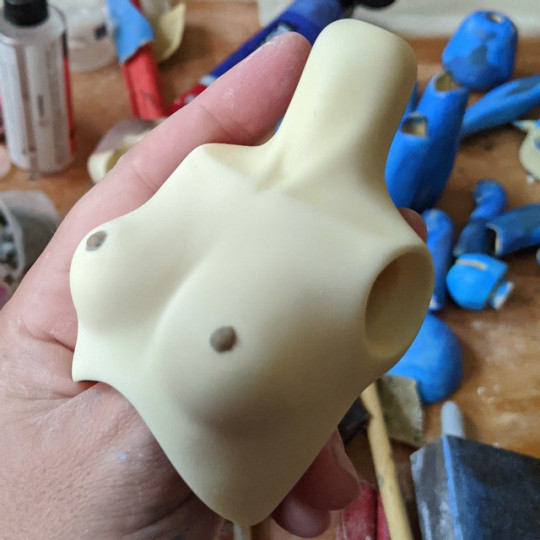
Bust: Substantial subtractive modifications to breasts, which involved removal and readdition of nipples. Addition of epoxy clay to back and shoulders to give a more curved body line in profile. Deepening of shoulder sockets with 18mm eye bevel, followed by sanding to make shoulders narrower.
Waist: Reshaping of upper torso joint into sphere for smoother range of motion. Subtraction of resin in back and addition of epoxy in front to enhance lumbar curve.
Hips: Substantial reshaping of lower waist seam to more naturally follow the pelvic girdle. It reminded me of granny panties before Added epoxy to butt, again for lumbar curve.
Thighs: Suwariko joint mod (cut the thigh and added a PVC insert to enable swivelling at the hip). Added epoxy to make her thighs look less straight.
Calves: Removed 1cm of length at the ankles and rebevelled the socket. Removed resin at the ankles to bring them in, and added epoxy at the calves to make them curvier.
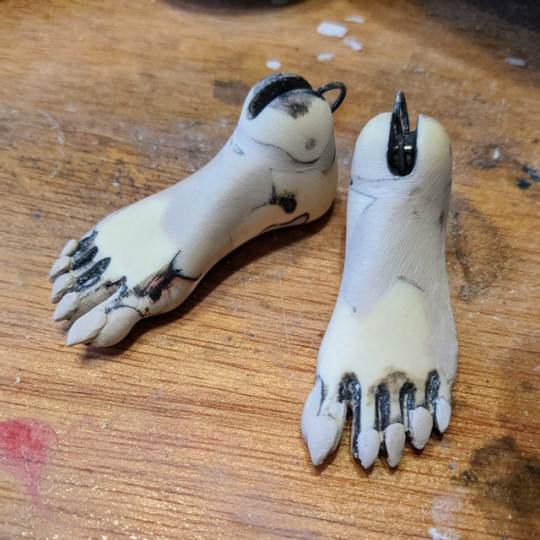
Feet: Sculpted little claws, which were cute, and then decided the feet needed to be 5mm longer. Cut across, drilled and pinned with brass rod for structural strength, gap filled with epoxy clay. I also modded her feet to have defined arches and balls back when I first got her. Alas, spitting into the ocean.
I added S-hooks, but did so by drilling the ankle and inserting brass rod to form the axle for the hook.
Arms: The proportions on her upper arms BOTHERED me! they were so SHORT! and I only just figured out that's what I hated about them last week! I added 5mm to the upper arms by cutting them in the middle and using SteelStik to make a structural repair (plumber's epoxy putty has a shorter open time but far greater structural strength than artist's epoxy clay). Sanded the heck out of the wrists to give them a more delicate taper.
Hands: Beyond salvage. The hands were my least-favorite part of this sculpt. I tried to bulk them up to look less spidery but it was just too difficult... I've ordered a different pair of MSD hands which will have claws added, and then when everything is painted it'll all match.
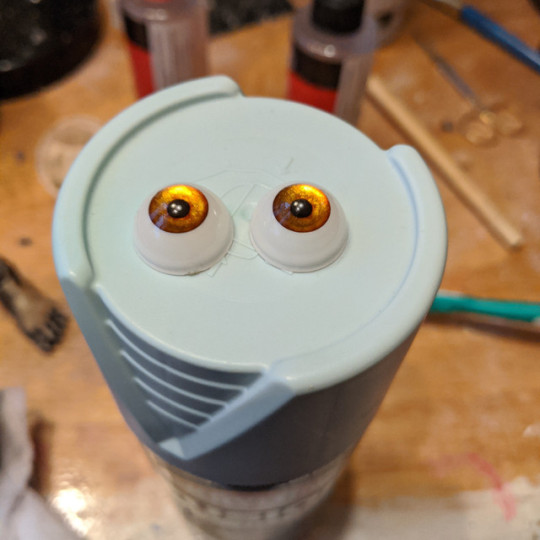
Thanks for reading this far! Here's a preview of what her golden eyes look like next to Krylon Fusion in Antique Blue.
((first progress post))
I think I'm mostly done adding epoxy clay (at least where it'll show; presumably the wrist sockets will require tweaks to fit the new hands), so now it's time for finish sanding. I start with 60 grit for shaping, then switch to a 120 grit sanding sponge.
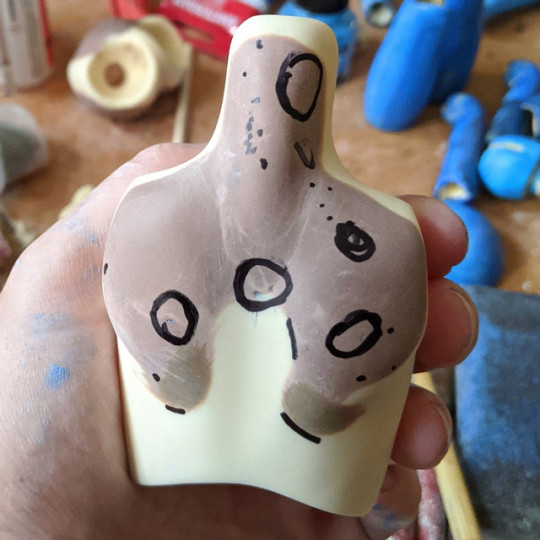
To check for scratches, pinholes, and inadequately feathered edges, I apply a wash of diluted acrylic paint. Once the paint has dried, I scrub the piece with a nylon scouring pad. Paint remains in the surface irregularities.
All sanded with 220 grit. I don't think I'll be going higher than 400 because I want there to be some tooth for the paint.
Any pitting in the epoxy clay that can't be sanded out is marked with a Sharpie and will be patched with Tamiya spot putty.
I did a test spray of the Krylon Fusion on the headcap and it's fantastic! Holy cow is it *poisonous* tho, I'm used to working with volatile chemicals but this was something else. Get OUT OF THE AREA between coats and leave it outside until it stops outgassing, not just until it's ready to handle.
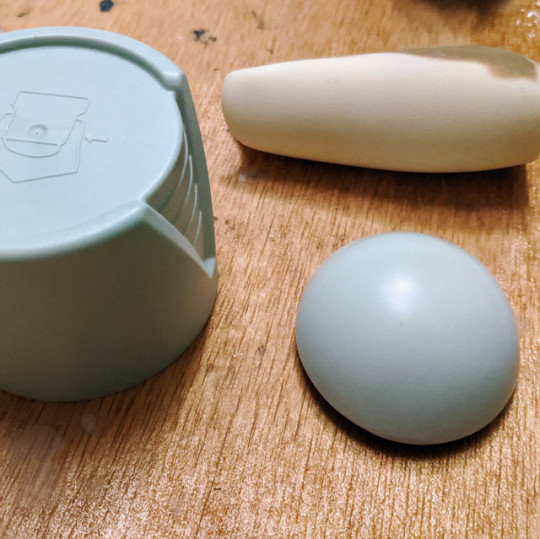
This test piece is four light coats sprayed 1 minute apart, allowed to cure for 4 hours, and then wetsanded to remove the spray texture. It's pretty sturdy but I will wait several more days to see how it continues to cure before experimenting with matte sealants.
((progress update 2))
Haven't done much but sand-and-fill-and-sand-and-fill, but my 14mm beveller came in today so I can start deepening her elbow and ankle sockets.
Added some epoxy clay to the insides of the eyewells so 14mm eyes will fit with no gap.
I need a needle file to clean up the corners of her mouth...
Monster feets! Nails on the right came out better than the left, still need to feather-sand everything.
Elbows progress. The early Bobobie elbows are I guess /technically/ double-jointed because the joint is a sphere with two slots, but I thought I could do better than that. You can see epoxy clay spliced in to make the sphere into a peanut: this isn't a structurally sound repair unless you pop it apart and drill/pin/glue-epoxy it back together.
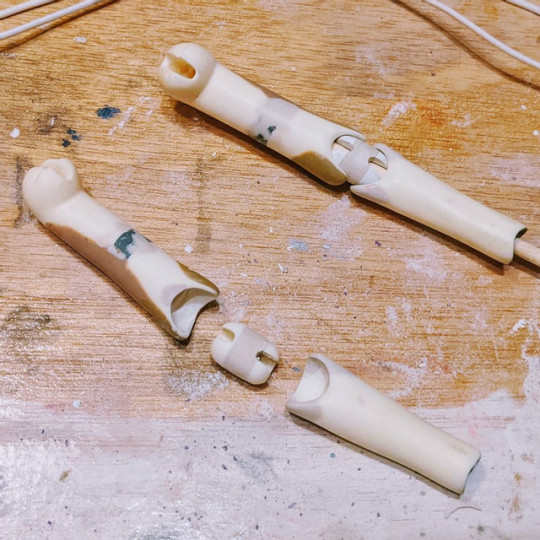
View from the back. By keeping the joint heads spherical with no elbow-shaped detailing, there's some rotation as well as flexion, which I like.
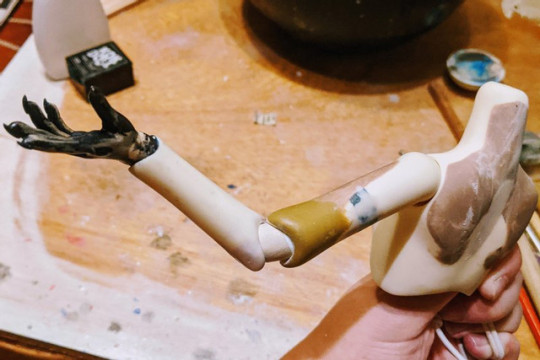
Touching her face with one of her old hands. I hope the new ones come soon!

((progress update 4))
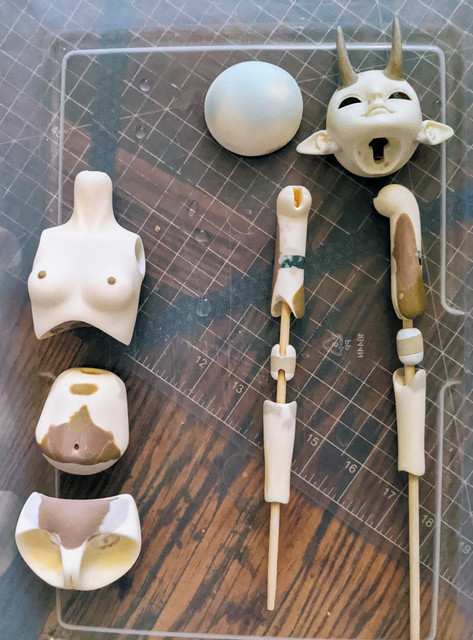
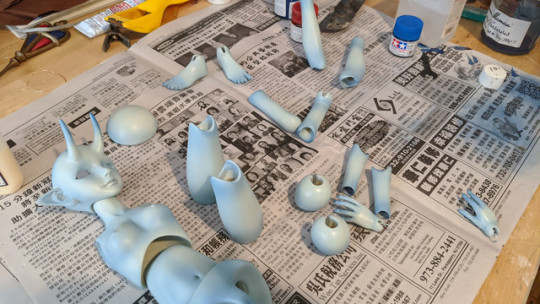
In good news, these parts are all ready for paint! It's really hard to do prepwork with no filler primer, hope I didn't miss any spots...
In less good news, her new hands arrived and they are... very smol ;u; I forgot that the new trend for slim minis means that everyone has TINY LITTLE HANDS.
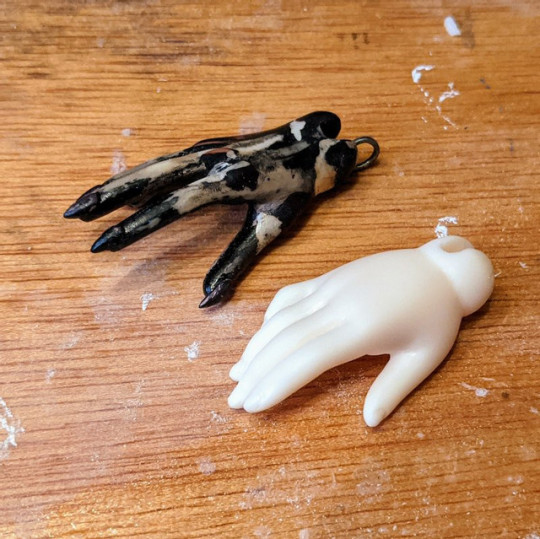
They are, however, beautifully sculpted and a good 3D reference for what needs fixing and how.
Bobobie palm is very short relative to fingers: I made a transverse cut behind the knuckles and added epoxy to lengthen
More curved volume across the back of the hand: Not necessarily realistic, but looks a little cuter, plus it makes the transition into the cylinder of the wrist look less stylistically jarring.
More defined joint angles: Some of these I did via cut-and-thermoform repositioning, mostly I'm aiming to fake it by building up and carving away at the weird smooth curves.
The fingers are just TOO SKINNY: But obviously I'm not going to squish rice-grain-sized blobs of epoxy to the fingers, right? It's too fiddly, it doesn't want to stick. What's the solution? Brace for a truly hideous WIP image--
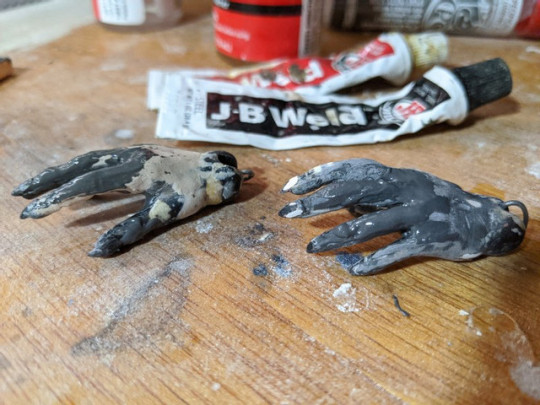
"AAAAAAGH WHAT IS THAT DARK GRAY MESS" it's JB Weld epoxy! It's like load-bearing, slow-curing modeller's putty! Slathering putty onto an armature and then carving it away to refine the shape is how anime figure artists make hands and detailed hair. I was thinking about it from a polymer clay technique/perspective so I missed the obvious solution. Hand in the foreground has more layers than the hand in the background, every layer gets the shape a lil closer.
((progress post 5))
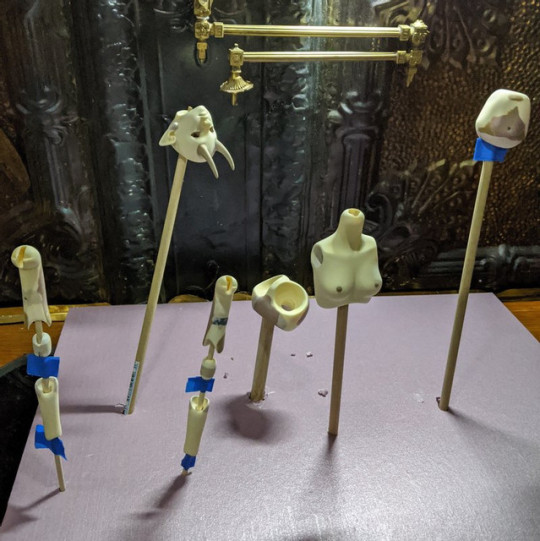
Parts set up on sticks so I can handle them without touching...
... and after 4 light coats!
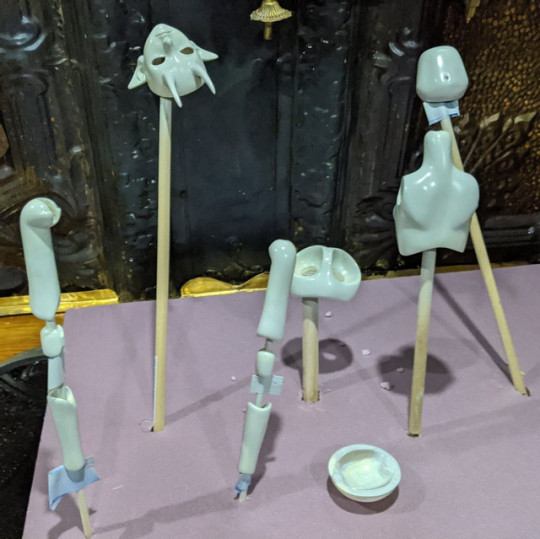
Closeup of the head, lil' glossy because it's still drying. For the deeper areas like the joint slots, mouth, and the crannies of the ears, I'm going to have to decant some of the paint into a jar and apply it with a sacrificial brush.
((progress post 6))
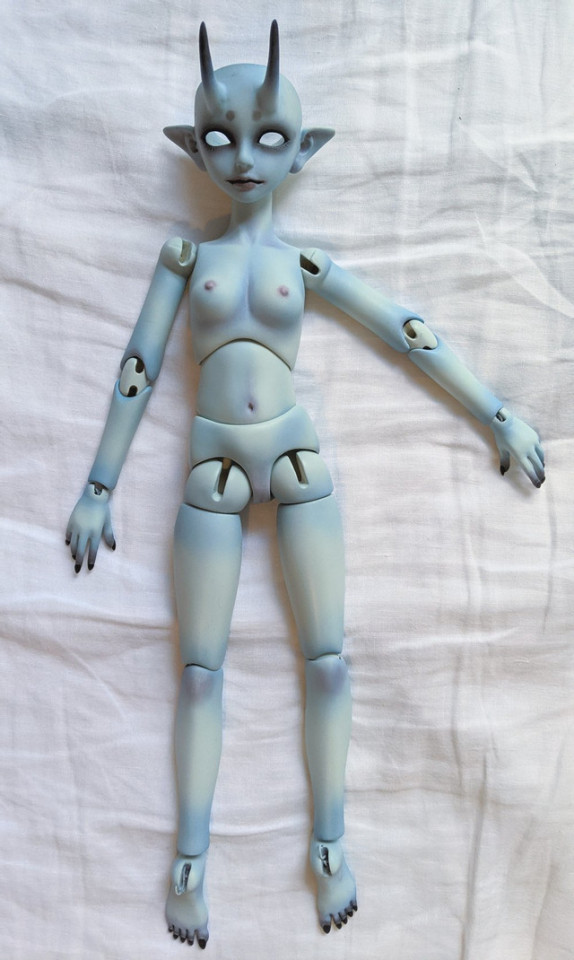
I return from Depression! I finally finished sanding-and-spraying the Krylon Fusion coats, gave her a last polish with microfine to even out the texture, and have started blushing her. I'm using a mixture of Tamiya X-series acrylics applied via airbrush for basic contouring, then I'll go back in with pastel to add warm tones and details.
Fun discovery: in an attempt to cover some accidental overspray, I tried spraying the Fusion directly into the paint cup of the airbrush and using it to "erase" back to the base color. I'm NEVER using this product straight from the can again, it goes on so smooth and gorgeous from the airbrush! No orange peel or bubbles to sand away. I'm seriously tempted to get a can of pink and try blushing with it.
((progress post 7))
Doing a faceup over a spray-painted substrate is HARD I want to CRY. I talked about sanding out the spray texture to get an untextured surface, right? Welp, didn't/couldn't sand well enough in the corners of the mouth and the folds of the eyelids, so it's crusty-looking with pastels over it and now there's nothing I can do about it that doesn't involve stripping down to resin and starting again.
((final post))
Sueded and strung!
I didn't take pictures of the sueding process because I was using Barge Cement and it is messy and time-sensitive. I used masking tape to make templates of her joints, transferred to some thin gray lamb suede I found on eBay, and glued it fuzzy side out. The suede was thicker than real pliver, more like the thickness of silicone KIPS discs, but I think it worked out without too many fit issues.
The trim store had 3.5mm elastic in a beautiful slate-blue color that I thought would look nicer in the joint slots, so she's strung throughout with thicker elastic.
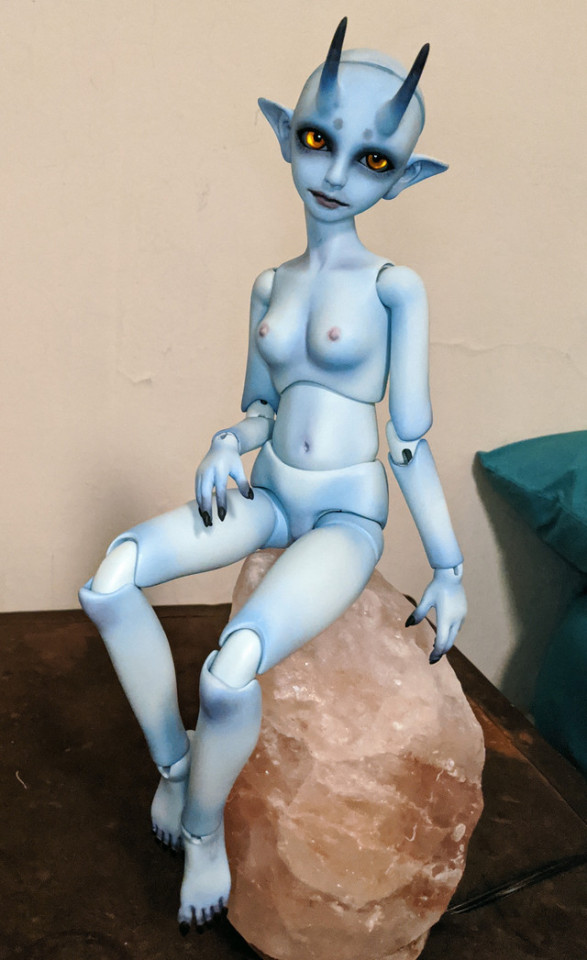
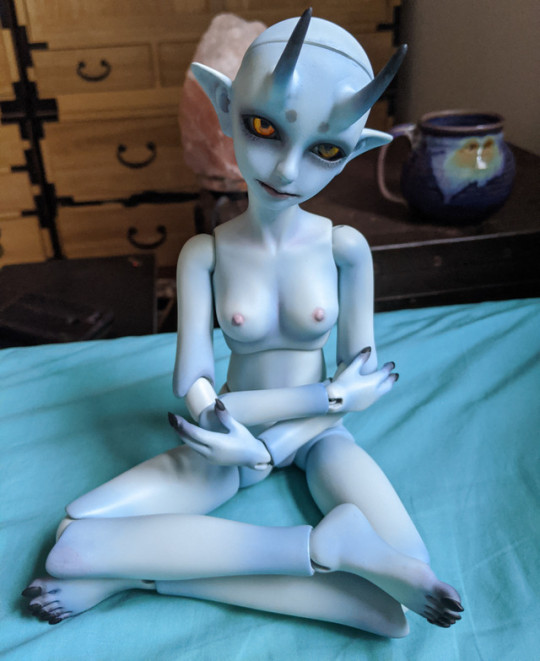
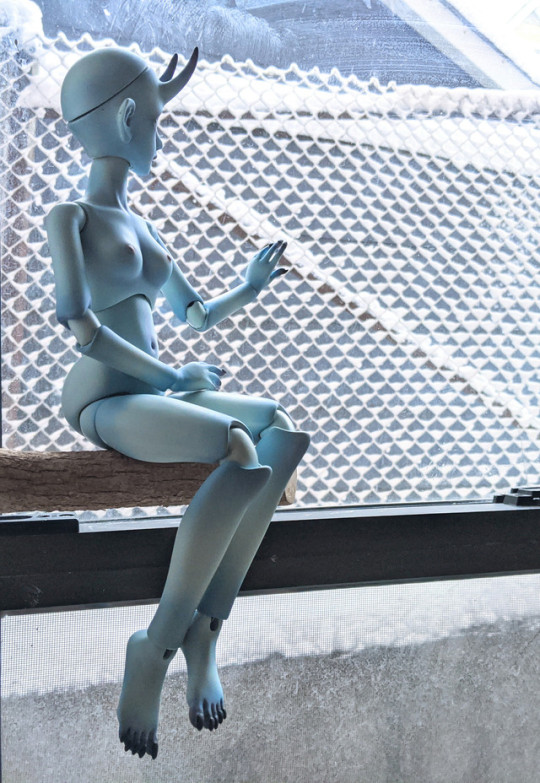
Some more poses to show off the functional mods~
Suwariko joints let her sit crosslegged, and more mobile wrists let her put her hands into the pose.
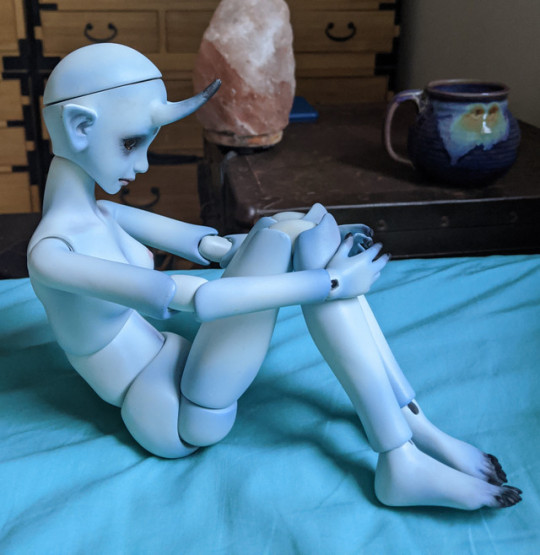
A more ball-and-socked shaped contact surface at her waist lets her slouch at a full range of angles instead of being locked into two.
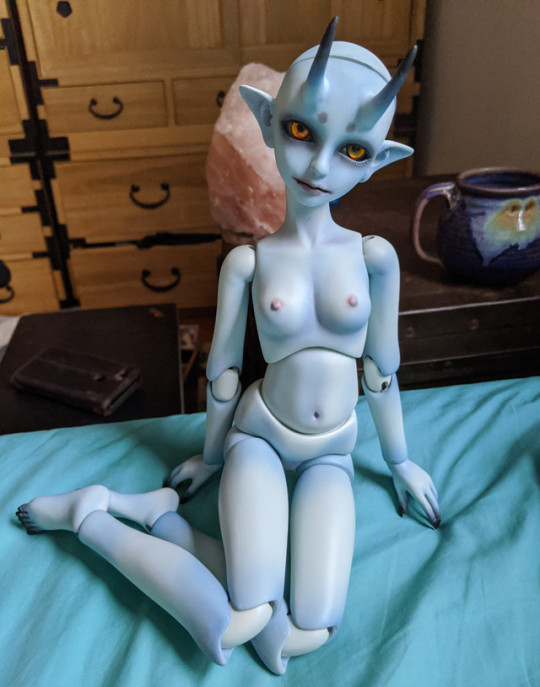
With longer upper arms, she can reach the ground in this pose! You can also see how the modded waist joint lets her cock her hips.
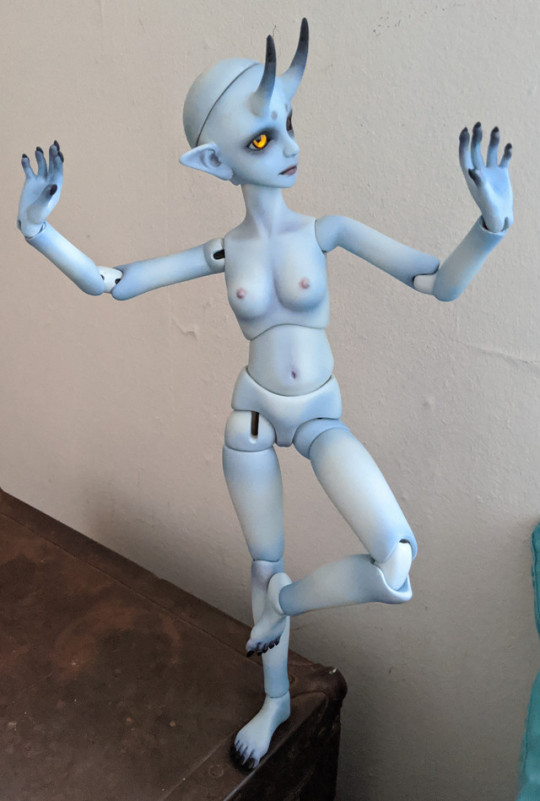
She could always stand with locked knees. I think she needs some wire in her legs to let the suwariko joints hold their rotation against gravity, but I'll see how the elastic tension settles in first.
A parting shot out the snowy window. We've been having a hard time picking between a few names for her, but I think this settles it. Welcome back, Fubuki~
26 notes
·
View notes
Text
The Very Meaning And Uses Of The Articulating Doll Model
By Sharon Powell
The mannequin is often be called articulated doll that is used by tailors, dressmaker especially in displaying or fitting clothes. Term also is used in size life dolls alongside simulated airways use in teaching first aid, advance airway and CPR management skills. Those are just some uses of articulating mannequin.
Every abstract bendable model features the chrome elbow of joints which allow the arms form into moving down and up and right to left. Place those flexible mannequins on tempered base glass and then attach stabilizing rod in calf the unit. Full body scene and the abstract and the bendable features shall shine in glossy finish in white. Then dress it in variety of the outfits then that gloss finish would look very fantastic in storefront.
Foam like Styrofoam and polyfoam could used in filler for the cushioning. Positioning of the dolls could safe and then firm in resisting against the dashes and bumps via neighboring manikin or surrounding people. That collision in mannequins are important consideration specifically in exhibition hall then in retail store.
The ball doll jointed is a fully articulated model make up from urethane resin. Original doll was made in japan yet other companies have start making those too. Though the making of own jointed doll could get the expensive after they add those cost of the materials all together that is great way in making the doll of dreams.
The medical stimulation doll, models or any related artifacts like sim man, transparent manikin anatomical is widely use at medical education. Those sometimes are referred also to virtual patients. Term manikin would refer exclusively to those kinds of models through some would be used also.
Heat danger would induce in a lot of fire cases. In those conditions, the human subject could not be use in testing or measurements due in potential risk, the mannequins are designed in replacing humans. It obvious which those shells in manikin far different comparing with skin. The sensors would be implanted, and related mathematical dummies are assembling for the stimulation.
State of art and the future trend of advance tool would be summarized. The development of the manufacture technology, signal processing and computer science capacity, more humanlike of simulator could predict psychological and physiological responses of the human body in variety of condition. It could make some significant contributions in realistic evaluation performance for the protective clothing at dangerous environments.
The bid should without eyes and bald. One could make the eyes and wigs themselves those could time difficult, expensive and consuming. There are people buy just wigs, shoes and eyes from variety bid companies. In making the shopping easier, make sure that the model would fit the standard sizes.
Allow those paper clay in drying completely. Once that has dried, using the rotary tool or craft blade in slicing torso and the limb pieces alongside. Cutting the head along the part of crown. Removing the core from the inside paper clay of the shell. One should not reassemble head cap. Those would remain separate so be careful.
About the Author:
When you are searching for information about articulating mannequin, come to our web pages online today. More details are available at https://ift.tt/2UlQtUY now.
The Very Meaning And Uses Of The Articulating Doll Model
from FreeBestsOf https://ift.tt/2JX1Fqh
0 notes
Last Seen Blogs

temmtamm
TemmTamm

waste-not-want-not-gu
Waste Not, Want Not


jettsetgo
Gore Hound

sillygloworm
The GloWorm Scheme