#thorsbjerg trousers
Text


I Made Some Little Pants -or- Pants for Horse People (and/or Bike Riders) -or- Topology is Destiny
My most recent brainworm has been trying to figure out the Thorsbjerg Trousers pattern (based on a finding of Viking clothing at Thorsbjerg), and so I sewed up this small scale version to figure out where the Issues might be (I'm not going to try to install the waistband).
More below the cut (since there is a lot more)
Matthew Marino (PDF tutorial here: here: http://www.hurstwic.org/library/how_to/thorsbjerg_trousers.pdf) notes, "The front part of the rise panel creates two seams that run on either side of the male organ rather than right over it."
I think this is brilliant, and a benefit to anyone with genitalia; I don't think it matters what parts you have: having a thick seam run right over the sensitive bits is not always comfy. I'm sure someone will have some delightful comments to make, but imagine you're riding a horse for most of the day: you're gonna chafe.
He also notes, "The inseam diverts from the inner thigh at about the knee and runs to about the midline of the buttocks. When sitting on modern chairs this puts a seam right under your weight and can be irritating. However, when sitting on a horse where the weight is concentrated more to the surface of the inner thigh, the seam is out of the way."
(I imagine that this would not only not irritate you, but not having a seam in the middle of your thigh would also not irritate the horse.)
This explains the extreme funkiness of that seam along the backs of the legs. See the trapazoid in the back (the right-hand picture)? That's the back panel. And the skinny strip in the middle? That's the rise panel. Everything else is one or the other leg: the weird curvy tab wraps around under the crotch and then up into the back panel.
I just could not visualize how this worked, even watching Nille Viking's video series on these trousers (here: https://www.youtube.com/watch?v=lhUQ3O4l310&list=PLn71_-p0gczyU08x0lx2s-IT3s2HH6Eli&index=7), until I had cut out the leg panel in paper and messed around with it.
I'd say that this is an Intermediate-to-Advanced pattern (based on my limited experience) because the leg panels have some really mind-blowing curves. When attaching them to straight sections (or, for the knee to butt seam), you have to basically hold the cloth the way it will live when it's done, and stitch it that way (it reminds me of Bernadette Banner and Babara Pesendorfer's discussion of how to construct a proper lapel). A lot of this happens on the bias (the diagonal), where the fabric is stretchy, and this is both helpful (I had to stretch the leg panel to get it to line up with the rise panel properly) and probably also makes it more tricky. I don't know that I did it correctly, but at least I have an idea of what I'm getting into*
* Ha-ha! I probably don't.
Nille gives the absolutely brilliant advice to sacrifice an old pair of well-fitting jeans to serve as your pattern and demonstrates how to do this in the second video of the playlist. But I didn't have a pair of jeans I wanted to cut up, so I went with Matthew's tutorial instead.
Matthew includes a to-scale pattern in his tutorial. If you output this single page to a PDF and/or very high-quality JPEG), then import that into a word processor, you can scale this up to fit the margins, which is what I did. And because it's in scale, you can (say) fold your favorite pants in half, measure from the point of the crotch directly across the pants, and this is your Point M to B-line measurement. Once you have determined that, you can measure that line on the pattern print-out (I recommend millimeters for easier calculations), and then you have a scale of how many inches/cm to a millimeter you have, and you can use that to math out the rest of the pattern (and adjust it to your actual measurements).
With respect to Matthew's pattern:
Line J-M-D is your thigh circumference. Even though line J-M goes off at an angle, because that tabbed curvy bit wraps around the crotch to the back, line J-M actually ends up being horizontal in the end. I experimented with extending point J out a bit (for wider hips), and had to rotate the original I-J curve (rotating around point I) outward so that it lined up with the new point J -- it's important to maintain the curve, as it has to to match up with the weird curvy line on the other side of the leg (curve E-D). Doing this seemed to work all right on my little mock-up.
Matthew doesn't specifically mention how to measure the height of the back panel ("Rise part b"). I thought it would make sense that this hem would probably fall right above the maximum outward curve of the tailbone; I feel like this would not end up rubbing against the back of a saddle. I'm not sure how to make sure changes in the vertical dimension of this would end up impacting the shape of the leg panel; those strange tabs off to the side end up being sewn to the bottom of the back panel, so I think this warrants further experimentation.
The next step will be a full-sized mock-up. I have no idea when I'll get around to it, but I think I will probably be anachronistic and install a zipper on one side of the rise panel, since it'll all end up being under a tunic anyway and I'm really not going for full historical authenticity.
3 notes
·
View notes
Text
completely obsessed with how much of clothing throughout history has been just like....the same thing but you don't realize it because Culture and Expectation Of Us And Them Being Alien To One Another n shit and like yeah there are some obvious examples of this, like ku trousers (with the crotch) are hella similar to a lot of various germanic/slavic trousers of a similar date (i swear what im thinking of is not the thjorsberg trousers but goddammit it might be the thorsbjerg trousers) because it just so happens that if you take two rectangles folded hotdog style and then fold a square down the diagonal and sew those puppies together you get a pretty good approximation of human legs + junk + extra space for maneuverability!!! not to mention, aside from shaping and various pleats and gathers a lot of skirts and dresses kind of look the same when you get down to it, but like okay okay okay okay,
this is the one that got me:
you weave a rectangle of fabric that's about half the width of your body (shoulder to shoulder) and long enough to go from your shoulders to about your knees or ankles, and you do that three more times so you get four rectangles. save out one of the rectangles and fold it hotdog style and then snip it down the center and sew them into long tubes you have two sleeves. sew the back half of the armhole of a sleeve to one rectangle (the back panel)
you then either:
sew the front of the armhole of your right sleeve onto the second rectangle and the front of the armhole of your left sleeve onto the third and final panel and then wrap that shit up around you as a robe/kaftan/deel/hanbok/kimono/hanfu kind of thing, or,
cut your third rectangle in half to make two mini rectangles. cut each of your mini rectangles on the diagonal so you get two triangles from each mini rectangle (that's four whole triangles for anyone counting at home). sew the front of your armholes into the last remaining big rectangle (now your front panel) and sew up the shoulders. Finally you put the hypotenuse of two of your triangles together and sew that shit up, repeat, and then sew the triangles into the open flaps between your front and back panels, and you have a motherfucking tunic
and it's like yeah!
no fuckin duh!
that's what happens when you've got fucking rectangles and a human body, which is the usual state of things with most textile sciences!!
but fuckin still!!!!
#its late o clock here and i should be asleep by like an hour at least but my brain locked in on this and wouldn't let it go#bad dog bad dog drop it#fashion#fashion history#sewing#crafting#to be clear i would not endorse any of the order of this for sewing instructions#sew your panels together and THEN put in sleeves as far as im concerned usually#saying things in this order because thats the easiest way to get across how samseies and yet how different feeling things are
2 notes
·
View notes
Text
Thorsbjerg trousers
Thorsbjerg Trousers
So, it's taken way longer than I initially expected, but I've finally finished my version of the Thorsbjerg Trousers for reenactment!

In the 1850s, two pairs of trousers were recovered from a votive deposit from the Thorsbjerg bog, now in Germany, one of which was exceptionally well preserved. Now, these date from the Roman Iron Age (2nd-5th centuries AD) [Hald 1980, 70; Möller-Wiering 2011, 48], and my main period of reenactment is the 9-11th centuries in England, but they still seemed to be the most suitable to recontruct because a) the 10th Century trouser fragment from Hedeby has a similar crotch design, suggesting a continuity of construction into the later Early Mediaeval periods; b) the Hedeby fragment suggests baggy trousers [Hagg 1984, 30-31, Figs 14-16], though Anglo-Saxon art (e.g. the Bayeaux tapestry, below) suggests tight-fitting trousers like the Thorsbjerg examples were popular in England (and better befitting my Anglian character); and c) there aren't many Early Mediaeval trouser patterns that are as well-preserved or studied as those from the Thorsbjerg bog.

Now, with all reconstructions, especially for use, some compromises must be made. Unlike certain sites I found that claimed to sell accurate Thorsbjerg trousers, except without feet, or leg slits, a loose-fit, with a different waistband, etc, I'm going to be honest and just make a full break down on some of the differences between my trousers and the original pattern.

[Hald 1980, 329]
• Stitching: the originals use a type of stitching primarily known from the finds in the Thorsbjerg bog ("Thorsbjerg type"), however this particular type of stitching results in high, sticking-up seams, and doesn't finish off all the raw edges [Möller-Wiering 2011, 45, Figure 1.20]. They're wool, so it doesn't /super/ matter whether the raw edges are completely finished (it'll felt together eventually), but still, I wasn't comfortable with this approach. Instead, as a novice sewer (this is only my second complete garment of significant size, the other being a linen undertunic in the Skjoldehamn pattern) I stuck with what I had used before: back-and-fell seams. These are a variant of the "run-and-fell" seams that were the most popular type in York in 10th century, for linen at least (and thus well-suited to my character from Northumbria) [Walton 1989, 408]- a simple running stitch (or a backstitch in my case, 'cause, y'know, I don't want them falling apart) holding the two panels together, reinforced by folding the longer seam allowance over the shorter and felling it flat against the cloth. This results in a flat seam that looks very similar on both sides of the garment (so it can be reversible), although the actual stitching can only be seen from one side. It works well, and particularly on the foot seams it makes more sense to have a seam that's already flat.
• The legs, seat and crotch: the main difference between my pattern and the original is that I made mine symmetrical, with straight lines running down the legs (basing it off a "Simple version" that I was initally sent and slightly dissatisfied with). This made it a lot easier to draft and cut from the original.
• The simple version was significantly wider at the waist, as it used rectangular seat and crotch pieces - I turned these back into more authentic trapezia, though I kept the front-back symmetry so as to avoid overcomplicating the pattern. I did, however, choose to keep the gores in the groin area, as I've been warned multiple times by reenactors across the board that all authentic trouser patterns are prone to tearing in the groin, and these will significantly reduce the risk of this.
• The waistband: the original waistband is sort of rubbish, tbh - it's a single strip of fabric with some completely unfinished, inconsistently-sized belt loops sewn onto it, intended to be folded over so it could not be seen from the outside [Hald 1980, 329]. I decided on a more elaborate approach, using an integrated drawstring. I used a 10cm wide bit of fabric, and backstitched it to the outside of the trousers (folding it over so the seam was invisible). I then finished this seam by whip stitching the inside of the waistband in place, and putting a running stitch about 1cm up the waistband to finish the seams inside. This running stitch is the only one visible from the outside of the garment!
• I later realised that I could have finished the backstitched seam, and then sewn the inside of the waistband in place, and there would have been no visible stitches on the outside of the garment, but I didn't really have enough seam allowance for that (the top of the legs and seat were relatively uneven), and the running stitch is barely noticeable anyway!
• Also, the drawstring comes out at two buttonholes sewn into the inside of the waistband - this part will typically be covered by a tunic anyway, but this helps hide it just in case.
• The feet: the only difference between the feet on the original and mine is that I made my top segments a little wider, so I didn't need a separate heel gore to fit it over my feet.
• The heels: the original trousers feature a separate heel piece that covers the top of the foot and sews into the bottom of the trouser legs. Instead, I simply extended my trouser legs to reach the top of the feet pieces (I did actually extend it too far, but I might shorten that with darts/internal hems later). This simple solution was possible because of my approach to the...
• The ankles/slits: on the original trousers, the seams end c. 30cm from the top of the heel piece and the edges are hemmed in place [Möller-Wiering 2011, 49-50]. This means that the bottom of the leg can be the right size to fit snugly around the ankle while still allowing the foot through!
• Now, I decided on a different approach: to avoid having a large hole at the bottom of the legs, I used a "false slit" - where I sewed the trousers such that a small fold would be visible on the outside of the trousers where the slit would have been, into which I can put the cords and other fastenings! This would allow me to still tighten the trousers to fit tightly, but if these fastenings failed, I could still wear the trousers without a conspicuous hole down the calf!
Don't do this.
This was a bad idea.
• I'm relatively happy with the results, but it greatly increased the complexity of sewing these slits - I had to constantly re-check the fits to make sure I hadn't made the false slit flaps too wide, and the legs too thin to fit my foot through as a result; I was constantly faffing about with how wide the false slit would be; it made calculating the geometry to put the buttonholes for the cords into the false slit flaps much more difficult (as I was now trying to find distances along a curve that I hadn't sewn into the trousers yet).
Don't do this.
Just do a proper slit if you're going for that tight-fitted look - it'll save you loads of time.
If you want baggier trousers, or are going to wear winingas over the top, just don't bother - use a leg that never gets thinner than your heel measurement.
• Finally, the cords: the original trousers feature, along the edge of the slit, a series of cords, around 6.5cm apart. These are looped in place through two holes each on the fabric, going through one layer of the hem of the slit where necessary [Möller-Wiering 2011, 50, Figure 1.27]. Though these might not have been actually used as the closures for the slit (there's no wear on them suggesting that they've been regularly pulled tight), I reckon that they may simply have been replaced before deposition - so I've used a similar solution to tighten my false slit :)
• The disdvantage of this method is that I needed to sew 16 buttonholes (2 per cord, on each side of the false slit, twice for each leg), which took AGES.
• The decision to use false slits instead of actual ones also made this a lot harder, as I kept losing the needle as I inverted the leg, while it would have been trivial to access the reverse if there had been a handy gap in the garment.
• Also I'm currently using inauthentic jute string for these. I've learnt fingerloop braiding recently, and we (as a reenactment group) came together for a natural dyeing workshop about a fortnight ago, so I now have some naturally-dyed skeins of wool that would be /perfect/ to turn into cords for these trousers - but that can waitr a few days now the sewing's done!
Hagg, I (1984) /Die Textilfunde aus dem Hafen von Haithabu/. Schleswig: Schleswig-Holsteinisches Landesmuseum für Vor- und Frühgeschichte.
Hald, M (1980) /Ancient Danish textiles from bogs and burials/. Copenhagen: The National Museum of Denmark.
Möller-Wiering, S (2011) /War and Worship/. Oxford and Oakville: Oxbow Books.
Walton Rogers, P (1989) /Textiles, cordage and raw fibre from 16-22 Coppergate/. York: Council for British Archaeology.
2 notes
·
View notes
Photo

“A Homey Welcome” Summer is running its course while the harvest tide of autumn is at our corner; yet fun’s life remains eternal. August has just passed this week, paving way to the gates of September. Tonight, my mum @paganojanine and I made some good real pasta carbonara with guanciale. It brought us all into a realm of rustic and authentic Italian flavor fare that brought us memories of our holiday to Italy three years ago. So far, as for my projects, I have just begun a Viborg shirt (an 11th century Danish Viking Age shirt) for my dad lately in August (it is a real challenge to sew yet is fun!); and there are numerous other projects as well. And in addition, I am seeking to also sew my dad a pair of Haithabu pants, mum a Køstrup apron dress (smokkr) and a Birka women’s coat/caftan, @jmpagano a Jorvik/Dublin cap and a woolen serk (shift); @chickiepagano a Kragelund tunic and a pair of Thorsbjerg trousers; and myself a Haithabu tunic and pants. What are you looking forward to this autumn? Are there any good dishes you would like to cook? Do you have any projects to work on? #pasta #pastacarbonara #carbonara #guanciale #realitalianbacon #foodie #linguine #linguinecarbonara #September #autumn #summer #cooking #homecooking #bacon #eggs #egg #cheese #LaFamigliaPagano #LaFamiglia https://www.instagram.com/p/CEsSUnwDRGh/?igshid=1or6k7q5ctlg6
#pasta#pastacarbonara#carbonara#guanciale#realitalianbacon#foodie#linguine#linguinecarbonara#september#autumn#summer#cooking#homecooking#bacon#eggs#egg#cheese#lafamigliapagano#lafamiglia
0 notes
Photo
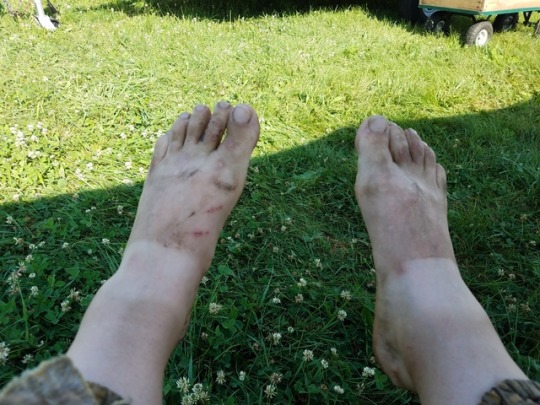


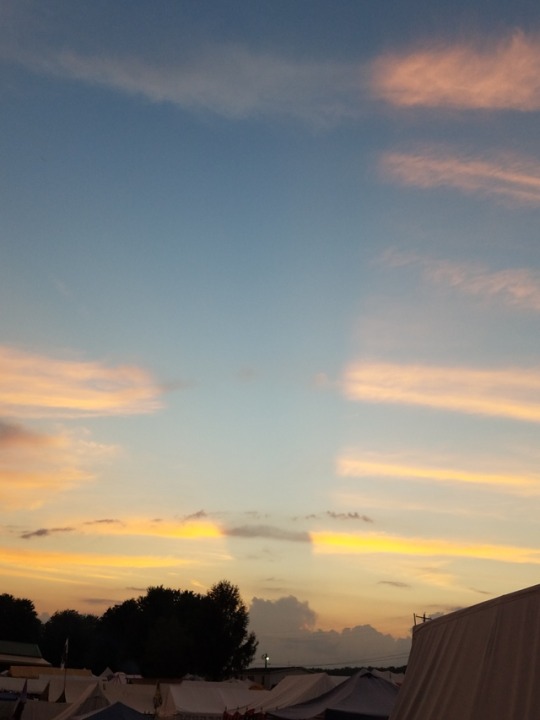


Pennsic, Peace Week, Wednesday. There are dirt, gravel, and grass paths everywhere, and although they have a water truck come through a few times a day to put enough water down to lay the dust for a while, after walking anywhere, you just get covered in dust. Since I sweat heavily (no petite 'glistening' for me), this means that I get a very entertainingly heavy layer of dirt on my feet. Shot a couple of 'before and after' pictures to illustrate the point. Hopefully it just provides another layer of sun-filtering protection. I try to put on a lot of sunblock first thing in the morning, but I don't always reapply to my feet because sunblock plus dust = gooey mud. So far I've manage to avoid getting burnt anywhere except the tip of my nose, which gets mopped frequently during the day because of the afore-mentioned highly efficient and enthusiastic personal cooling system. I'm managing to stay cool, though, through sweating, hydration, wearing a hood to shade my head (lightly sunburned the top of my head on day one, smartened up immediately). Also moistening the hood because evaporative cooling is handy. The phrase 'go soak your head' is actually a kind and helpful statement around here. And, of course, TECHNOLOGY. Bless the phase cooling packs that I bought. I sewed a little backpack sleeve that perfectly fits one, and every time I swing back through camp, I toss the warmed one into the cooler and pull out a new frozen one. As long as I keep some ice and a lot of cold melt water in the cooler, they refreeze in about 15 minutes and keep me fairly comfortable for 2-3 hours, which is plenty long enough for most of the classes. Worth every dime. Decorated my refillable mug with a braided strap yesterday, because everyone at Pennsic has an identical mug, and it makes it easier to keep track of. Also, since the mugs are black this year, the light colored leather is much more pleasant to pick up. Also... pretty! It took a while to find a good braiding tutorial online, because my google searches tend heavily toward videos, and (first world problems) I only have 1 gig left on my data plan for the month. But it was easy, and a few other people in camp have asked if I'll decorate their mugs, too. Started stitching a leather bag for a bottle so I can carry more water or iced tea around with me, might finish it tonight. Classes started yesterday, and I took one on how to construct the... umm... some sort of trousers... thorsbjerg, I believe. Came back and told Jeanie (Gewn) about it, and she said 'oh, the pants of unsewability.' They do have a really interesting assembly process, but the instructor very helpfully had a set of precut fabric that was all edged with velcro, which was a fabulous way to demonstrate the order to stitch them together. I shared that tidbit with Jeanie, and she immediately announced she was going to have to share it with several of her friends who also teach classes, because it's all well and good to explain how to fold and stitch things, but actually SEEING makes all the difference. Will type more later, have to leave for another class (an exploration and comparison of Viking hoods). Sunset last night was fascinating, apparently there was a really TALL cloud just over the horizon that was blocking the sunset, so there was a really cool pattern of sunset/not sunset colors on the clouds. Oh, and lunch was prosciutto wrapped carrots, because why not.
1 note
·
View note
Last Seen Blogs

shaokahntier
Trump Wears Givenchy

taketheringtolohac
Red, the Blood of Angry Men

beez4days
Bees4days

edcastfan
calenturas ajenas

threefiveeightmemesovertwo
358/2 Memes