#there’s foil on my tooth and I used gold acrylic paint on my face
Explore tagged Tumblr posts
Visit Tumblr Blog
Explore Tumblr blogs with no restrictions, modern design and the best experience.
Last Seen Tumblr Blogs


Fun Fact
There are dozens of funny blogs to kill time on Tumblr.
Text

My vibes are 10000% Aziraphale, but you wouldn’t necessarily know it to look at me
#not even legit cosplay#there’s foil on my tooth and I used gold acrylic paint on my face#hand twins#good omens#good omens Crowley#heavenly bee#it’s a thrift-store turtleneck and shit from my craft drawers
20 notes
·
View notes
Text
How I made my own vintage Pomni!
Based on this tutorial, with my own modifications and sewing pattern!
Let's begin!
Here's a total list of the things I used here.
Shiny fabric: blue and red
Acrylic paint. Colors: White,red,blue,black
Gold ribbon
White sculpey clay
Tin foil
Mod podge (for sealing the paint)
Jingle bells
Dark brown yarn
Glue
And depending on how you want to handle crafting the body you can either follow the original tutorial and make one out of any fabric you'd like, filling it with plastic beans and stuffing,
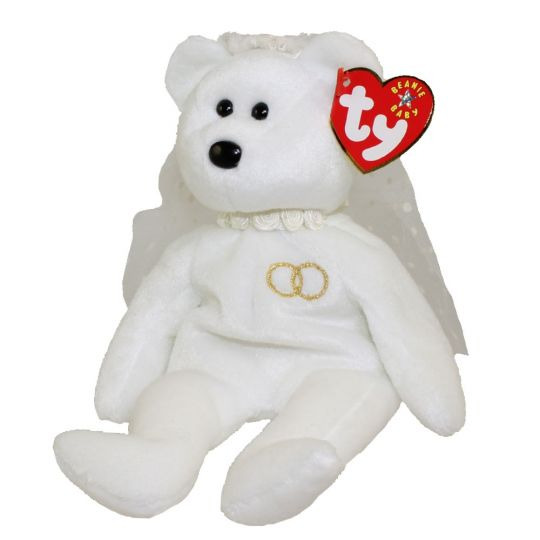
Or you can do what I did and cheat a little! I actually used the body of a beanie baby to save time. You'll find tons of these guys at the thrift store, usually for about a dollar each. The one I used for Pomni looked like this.
All I did was carefully undo the stitching on the bear's head and set Pomni's clay head in the opening!
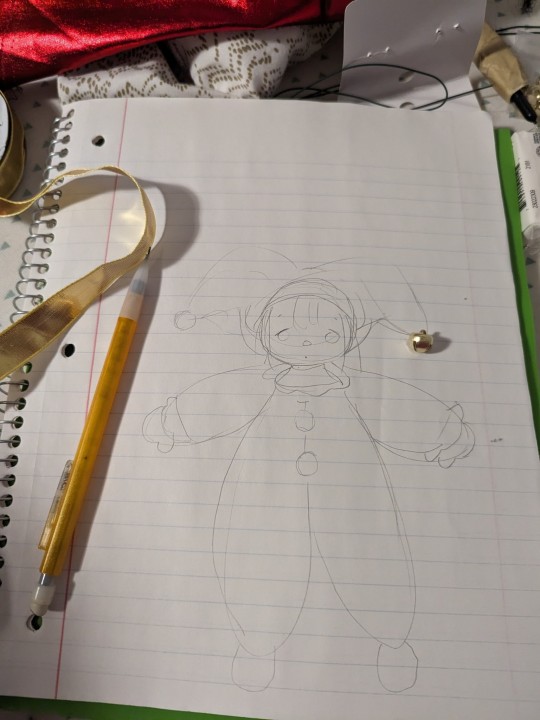
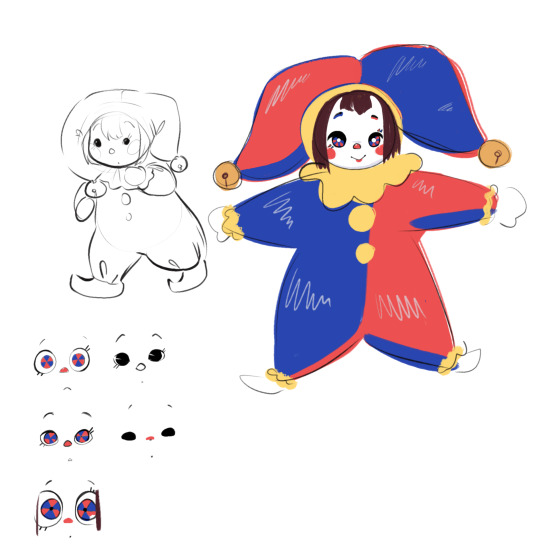
Now for the steps! The first thing I did was gather my materials and make a concept sketch.
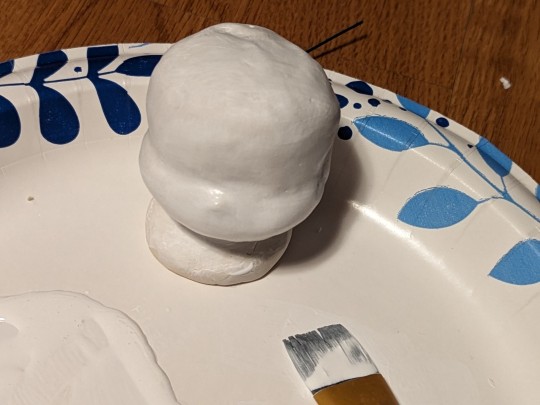
Then since I already had a body for Pomni, I rolled a ball of tin foil slightly smaller than I wanted the head to be, and covered it in sculpey clay. Then I molded the face into a nice cute shape! Don't worry if the back of the head is lumpy, you won't see it under the hat and hair.
Make sure to add a neck that tapers outwards at the bottom so the head stays in the neck hole of the plush body!
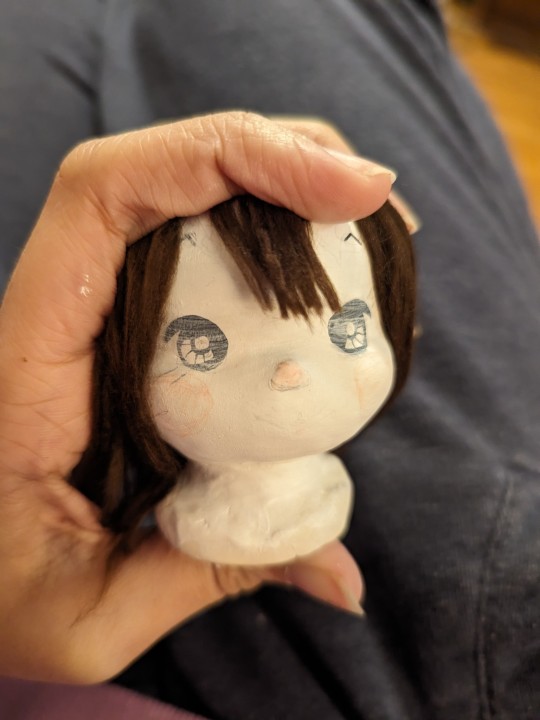
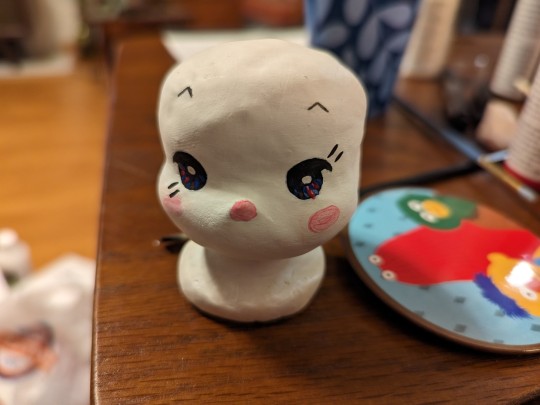
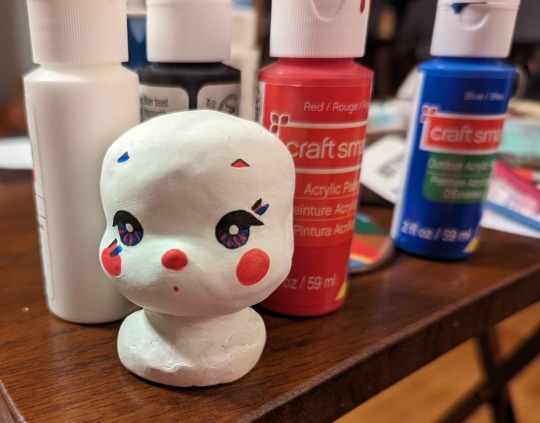
After baking the clay, I painted the head white and sketched out the face lightly with pencil before painting on the details. I even added a little bit of glitter to her eyes! Then when I was satisfied with the face, I sealed the paint with mod podge. It added a nice shine to her face which adds to the porcelain look!
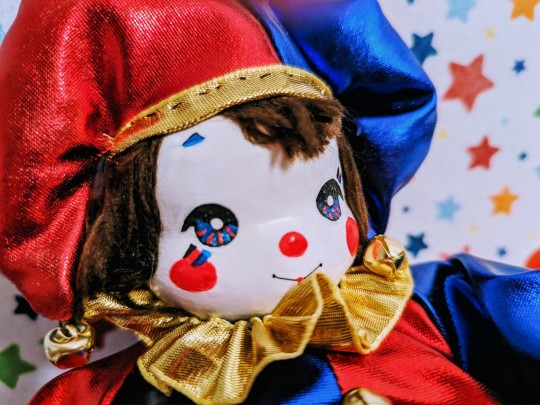
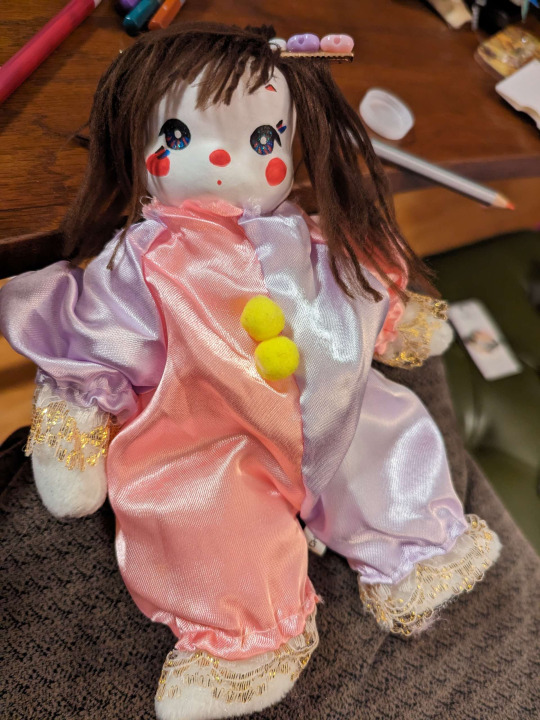
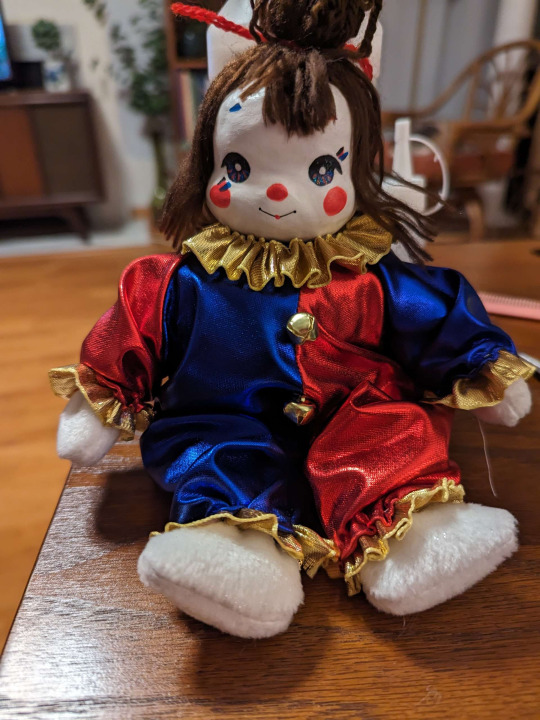
I'd bought a clown doll at a thrift store with a similar outfit to the one I wanted to make for Pomni, which I reverse engineered to make my own pattern! Here's In-progress Pomni wearing the other doll's outfit.
I cut out these patterns to use for the outfit.
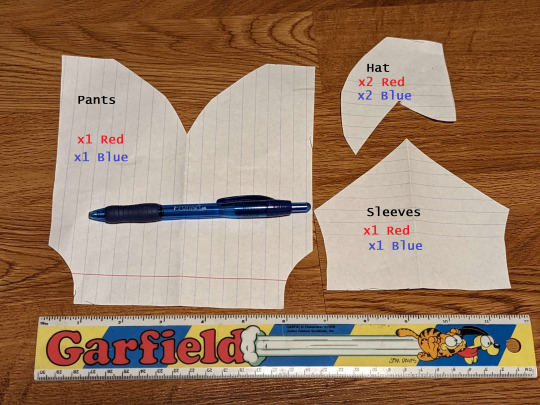

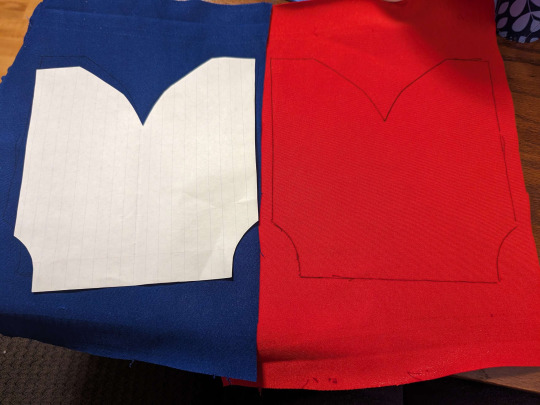
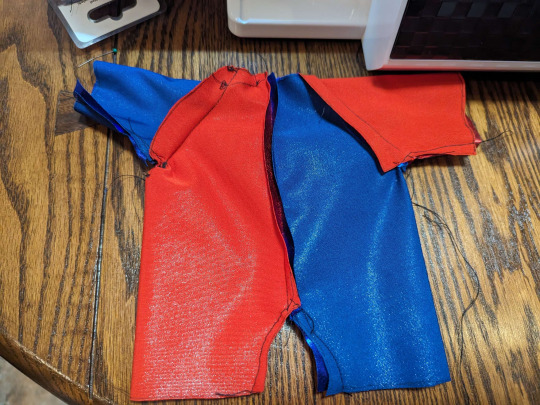
After cutting out the pants they should look like this when put together and folded. Turn them inside out and sew them together at the middle, including the crotch. Leave the top and the pant legs open.
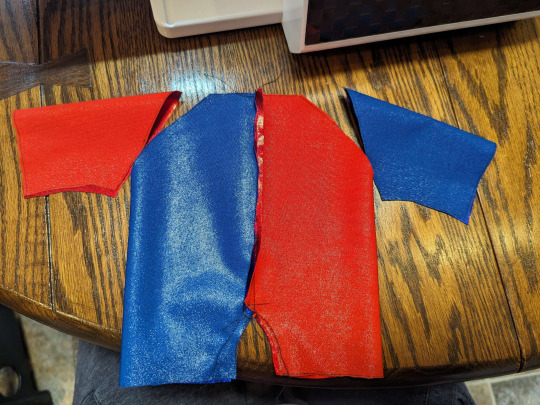
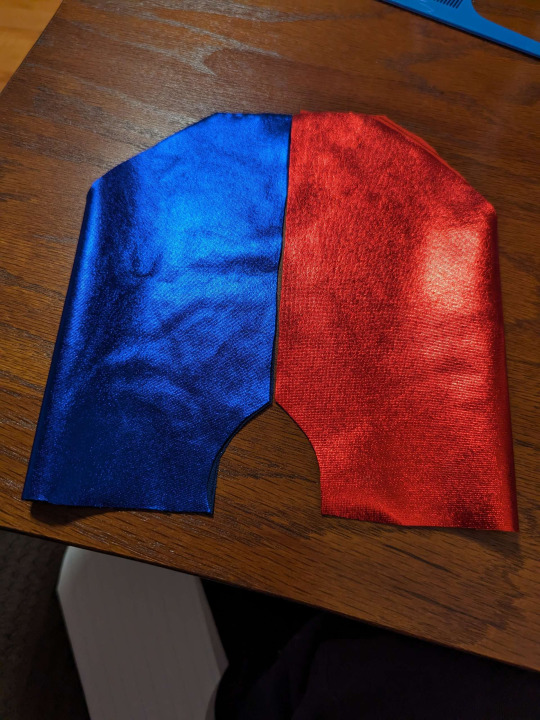
The sleeves should look like this cut out and folded. Make sure they're inside out just like the pants, and sew these at the sleeve openings at the top. Remember to leave the neck hole open!

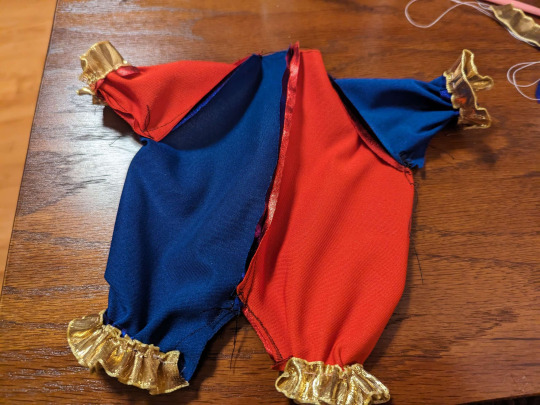
Here's where we add the ribbon at the ends! Fold up the base of the pant legs and sleeves to hem the ends, and scrunch up the gold ribbon to sew around the borders while you're hemming them. It'll scrunch the ends a little bit, giving the outfit that poofy look.
Then turn it inside out!
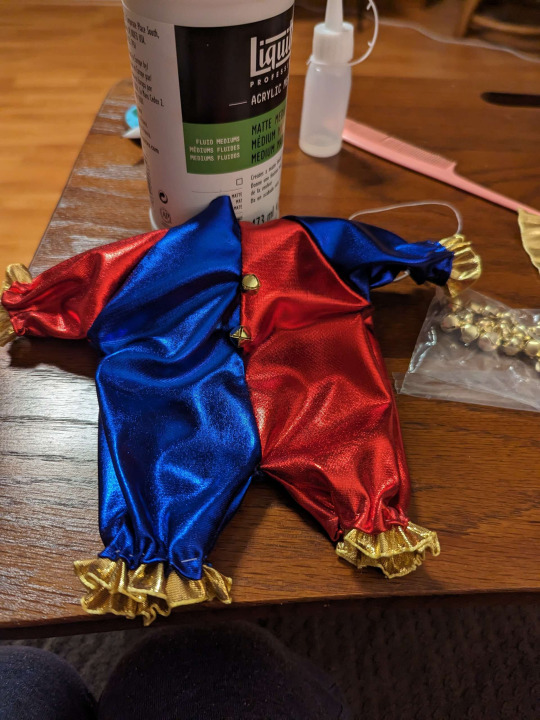
I sewed the bells on and put the outfit on pomni! Then I simply cut another piece of ribbon and made a little ruffle for her neck. It's not sewed to the outfit just so it's easier to take on and off.
For Pomni's hair I got the yarn and combed it out with a fine tooth comb until the texture became softer, and then used a flat iron on it (VERY briefly. just for a second!!!!) to straighten it out. For more tips on this look up yarn doll hair tutorials on youtube! Then I just glued it to her lil head and styled it like so.
I don't have any progress pics for the hat but it was pretty simple. Just cut out the shapes and sew them up!

Then add the hem with a ribbon folded in half, and the bells!
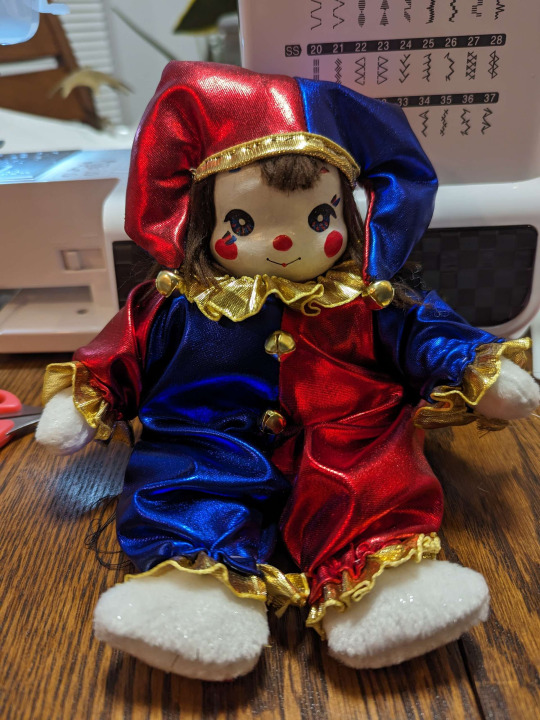
TADAA! A baby pompom for you!
484 notes
·
View notes