#starting tomatoes from seed indoors
Explore tagged Tumblr posts
Text
youtube
Yesterday the weather outdoors was super terrible, so my Solarpunk Action was setting up a little gardening station in the corner of my laundry room so I could get tomato seedlings started.
#solarpunk#Solarpunk Presents Podcast#podcast#podcasting#solarpunk action week#SPAW#tomatoes#seedlings#grow light#how to start tomato seedlings#starting tomatoes from seed#starting tomatoes from seed indoors#gardening#gardening in canada#indoor seed starting#Solarpunk Action Week#Youtube
0 notes
Text
My one (1) bell pepper seedling has grown a singular little leaf after having its cotyledons eaten. Proud of you buddy
#I'm not getting ANY bell peppers this year but that's okay#honestly I greatly enjoy just gardening and watching my plants grow!!!! like these guys are living and thriving and it's because of me!!!!#this is my 1st year growing stuff from seed and my bell peppers did NOT want to germinate except for ONE#everything else germinated like wild and now I'm stuck with hundreds of tomato plants and so much basil#and some very big pumpkin and gourd plants#I have plans next year for more gourds and trying watermelons AND I'm going to start them indoors#words of sheoth
6 notes
·
View notes
Text
🌿indoor garden update: hydroponics edition🌿
I got a grow light, a fan from a yard sale, higher quality soil from my local plant nursery and some hydroponic gardening supplies since my last post. And now i have plenty more plant children!!!

My kitchen scrap radishes and green onions didn't survive, due to a fungus gnat infestation in the soil I used. I managed to save most of my other plants, but the soil those two were in was so infested I had to get rid of them :( but I have added: hot peppers, chives and cherry tomatoes!! Those are the larger pots in the middle of the wood shelf. Two of those started sprouting!! The chives haven't sprouted yet but I have hope. And the tomato plant I had last time got so big I had to separate the seedlings and put them in individual pots:

Theres seven total but i only took a pocture of these six. They're doing very well!! They love the banana fertilizer I made. And I've added some more seedlings to my greenhouse: (first image) more basil, lavender, pepprmint, parsley, catnip and sage. As well as thyme and oregano in the second image here:


I poked holes in the bottom of a recycled spinach container and used that for the thyme and oregano.
Now for my hydroponic jars: butter lettuce (2), Chile peppers (2), cilantro, spinach, bok choy, emerald oak lettuce, and romaine lettuce. These are doing really well too!! This butter lettuce is grown from scraps:

I put it in a coffee filter net i rigged up until my hydroponic supplies arrived, and i transferred it once i got them. So i thought i messed it up and killed the plant but she's growing!! She's strong too. And here's the others that are growing from seeds:

The romaine lettuce and the bok choy are the ones in the back that have the tallest sprouts. I can't wait to take pictures of all the jars once the root systems grow more and I can remove the socks!!!
Oh and here's the orchid. She's doing amazing:

[Image ID: the first image shows my whole indoor greenhouse tent in front of a permanently sealed glass door. All my plants are visible in the image with the pink orchid being the star of the show at the top of a capital A shaped wooden shelf and the sunlight is shining through the glass and feeding all the plants. A table and chair set and a peach tree is somewhat visible, outside in the background.
The second image shows six terracotta colored plastic pots with two-ish inch tall tomato seedlings in each one. They're healthy and happy, and one pot has a yellow gnat sticky trap sticking out of the soil on the side of the pot.
The third image shows a plastic bin full of eleven biodegradable seedling starter pots, these are the basil, parsley, pepprmint, catnip, lavender and sage, and three of the cups towards the top of the image are sprouting but it's hard to see. The fourth image right next to the last image shows a recycled clear plastic spinach container filled with soil with a cardboard divider in the middle and another yellow gnat trap against the divider, sticking out of he soil. No sprouts yet. There's also recycled plastic wrap on one of the edges for trapping the humidity in the planter but it's pulled back for now.
The fifth image shows a wide mouth mason jar full of nutrient water and a beautiful butter lettuce plant growing out the top, out of a black net cup thats touching the water inside the jar. The biggest leaves are about three inches long. My hand is visible in the image as I'm holding the jar.
The sixth image shows six larger wide mouth mason jars with the same arrangement, though the clay pellets im the black net pots are still visible since these are younger plants. The two jars in the back have the tallest sprouts and the two in the middle have smaller sprouts. The two in he front have no sprouts as I planted thoe seeds just yesterday. A part of my grow light is visible in this image, it's got four long lights attached to one base and all the long lights are facing out on different directions but one light is showing. All the plant jars have black socks covering the glass parts which will be removed when strong root systems grow in.
The final image shows my pink orchid. It's hook shaped, so the plant is growing upright and to the left a bit. And she's supported by a stick holding her up. But she's healthy and happy and all her flowers are soft and vibrant. Her leaves at the bottom are a dark but beautiful green and shes currently living in a white pot. End ID]
#hatchet grows things#gardening#indoor gardening#vegetable garden#growing food#solarpunk#solarpunk aesthetic#punk#hydroponic gardening#hydroponics#sustainability#recycling#ecopunk#hopepunk#described
39 notes
·
View notes
Text
HOBBIT VIBES
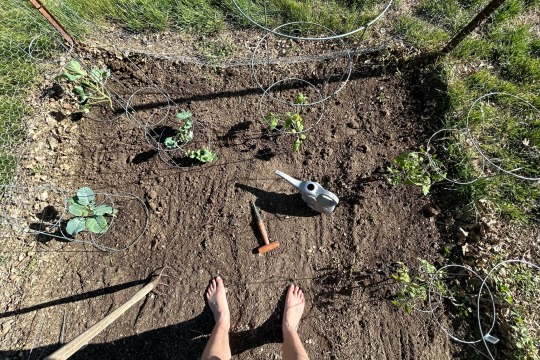
I started to plant in my garden today!!! These are seedlings I picked up from some neighbors a few weeks ago (kale, collards, broccoli, 3 kinds of tomato). Tomorrow or Monday I'm gonna start some seeds indoors and outdoors for various things.
Thank you, earth. Thank you, plants. 💚🌱
13 notes
·
View notes
Text
life update 02/10/25 - gardening, seed starting, website, markets, etc etc
things have been super hectic and busy busy busy but i wanted to do a big update on life stuff so hereeeee we goooooo
so i did a market yesterday yippee!!! i had a lot of fun and even though i spent more than i made, i still believe it was a success and very worth it! here's photos of our booth, because i teamed up with two of my friends! one provided art prints, keychains, and stickers to sell while the other sold bead bracelets and crochet pieces! and lil ol' me sold my plants and paintings as usual!
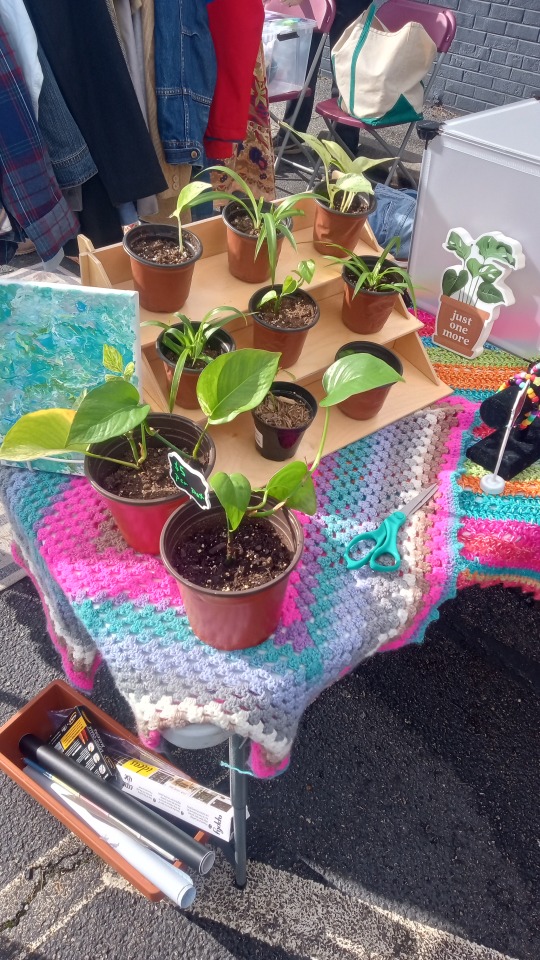
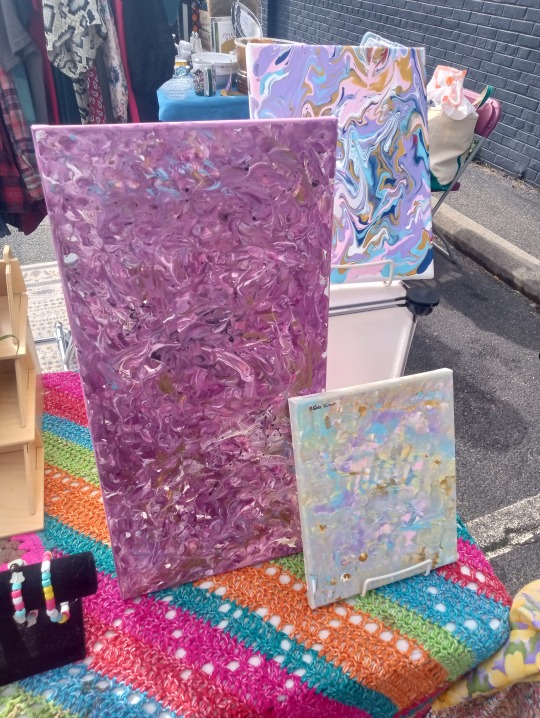
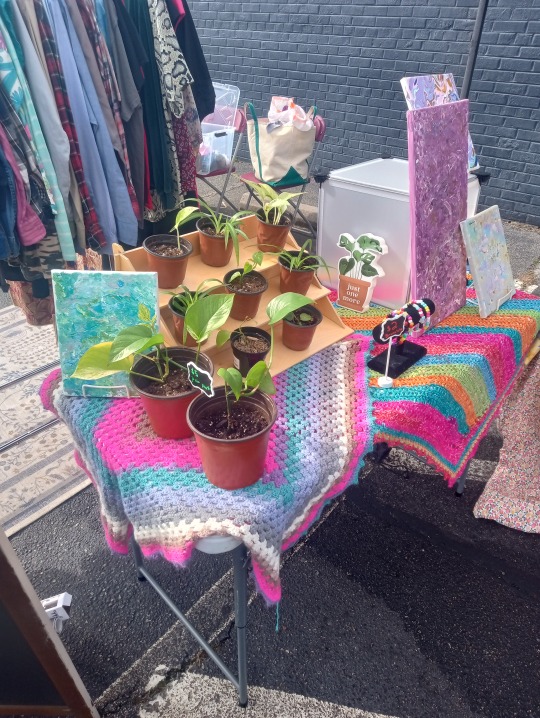
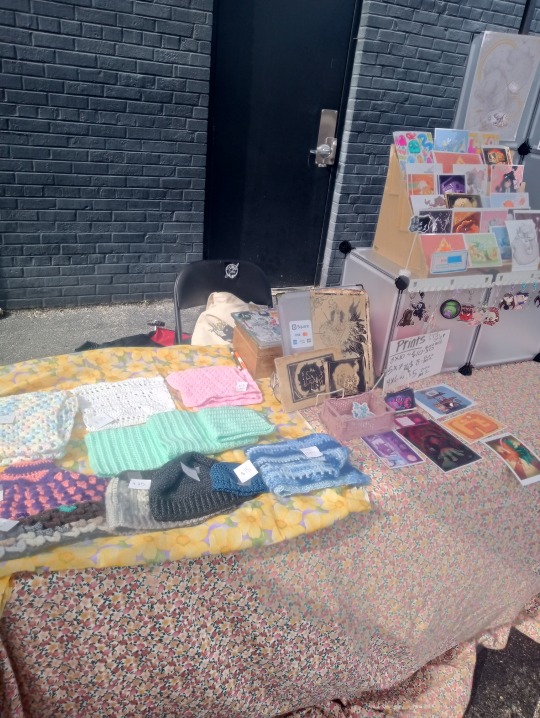
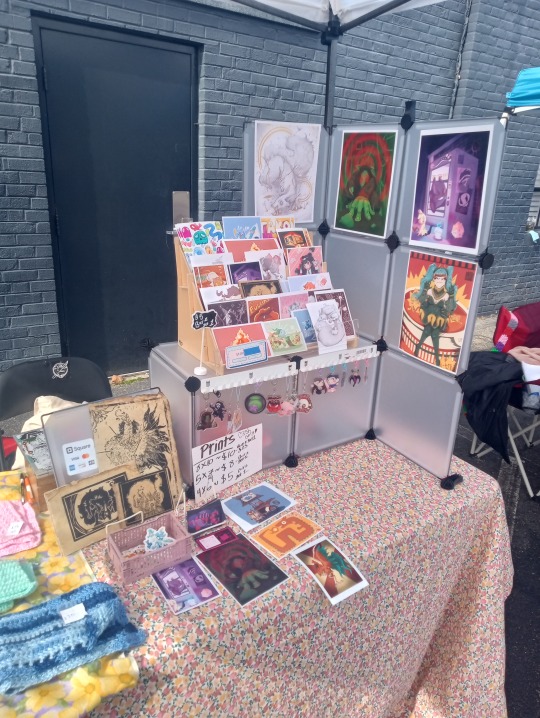

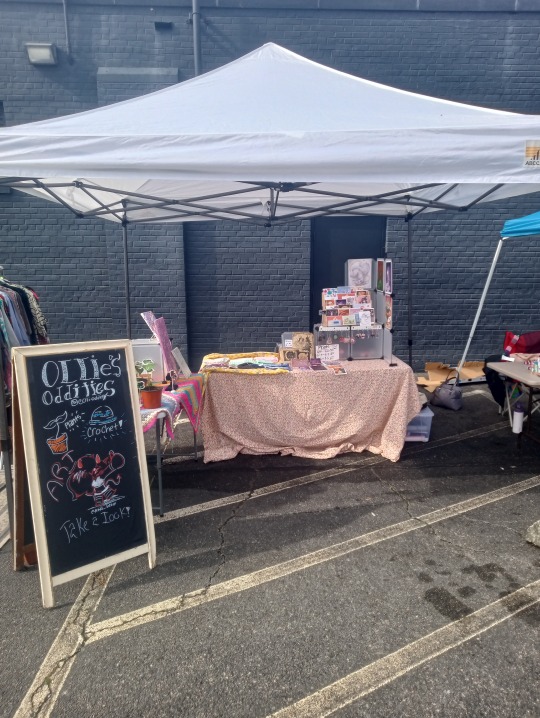
i was really proud of our setup, and it looked great! i now own the canopy, a-frame sign, and the smaller table because i got them for free from a local closing business. it's sad that they're shutting down, but i'm thankful they gave me so much great stuff to use for markets! in the future, i hope to improve my setup even more - i saw a couple other outdoor vendors with rugs and racks and hanging curtains, and i might try some of those ideas in the future too!
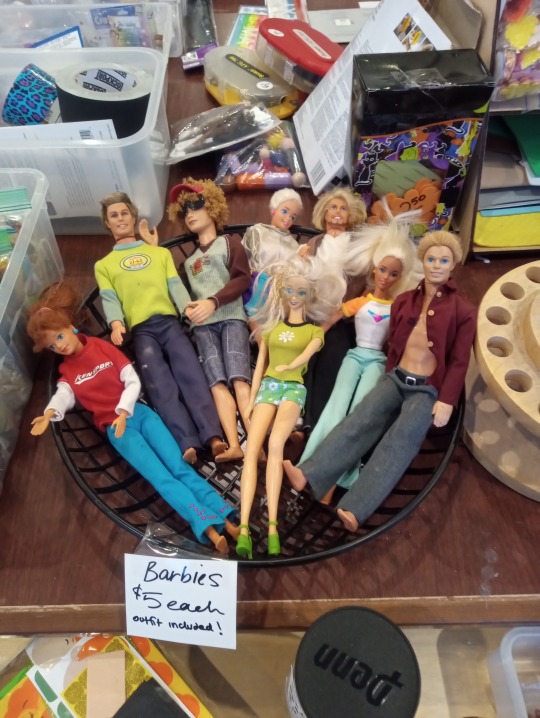
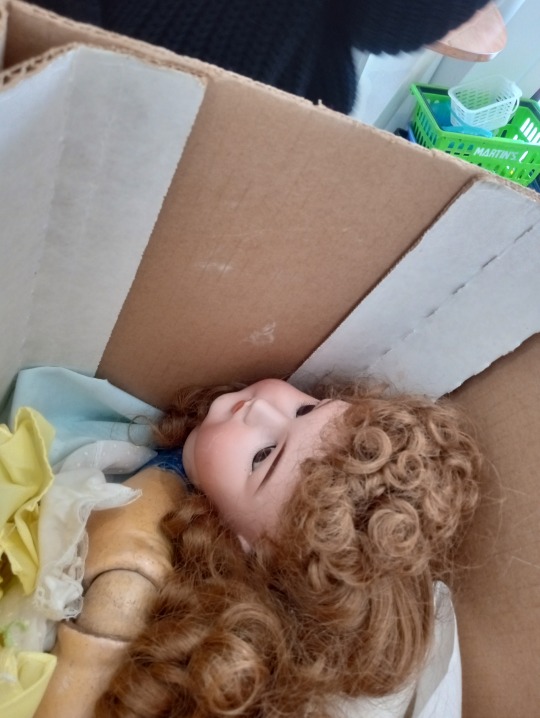
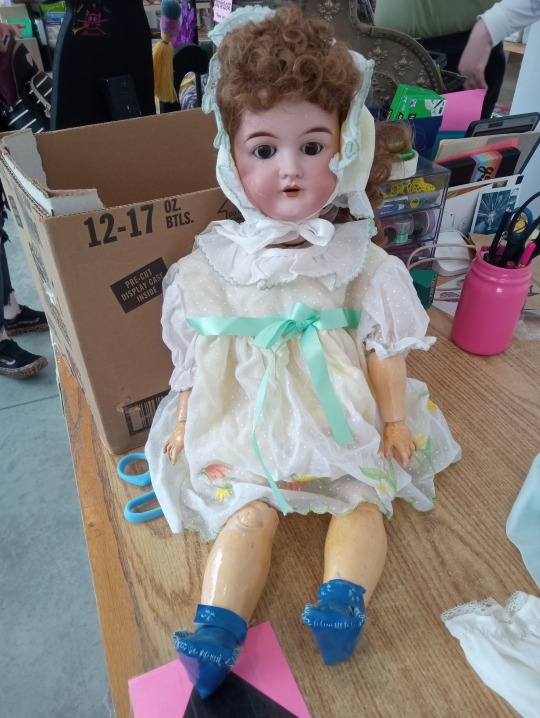
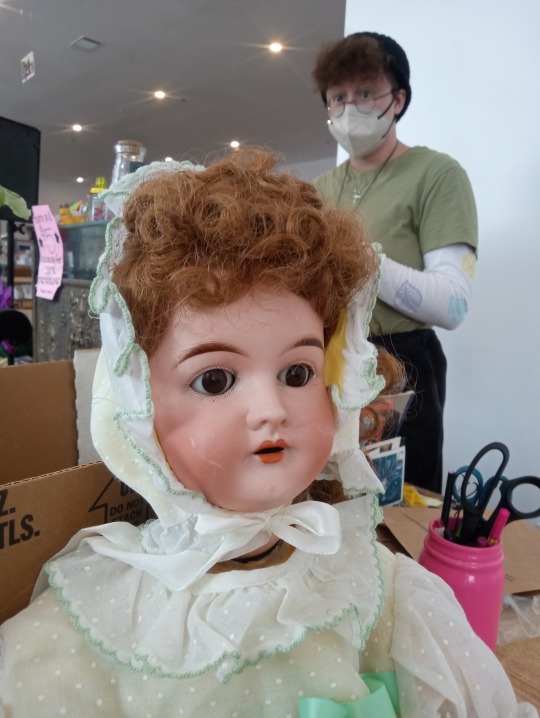
i also started my new job at a local creative reuse center! my official job title is reuse & education specialist, which means i manage front-end store operations, process donations, coordinate with volunteers, assist with educational outreach and events, and more! it's been really fun honestly, and we get so many cool and weird donations! here's quite a few that i snagged photos of (the haunted doll's name is patty lmaooo)!
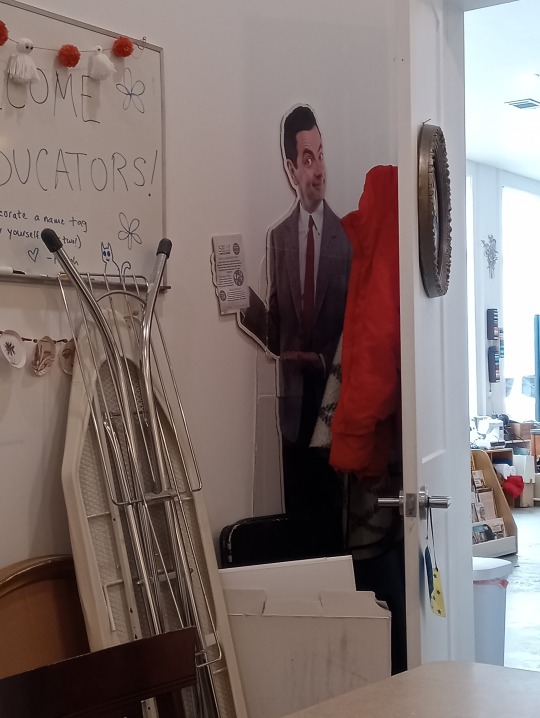
i also started working in the garden a bit during the couple of warm days we'd been having! i know i probably shouldn't have, but i did buy some new bags of soil to put down for those original flower beds i made up against my back deck. i also bought these window boxes forever ago that i intended on putting on the back deck railing, and so i finally started filling them with dirt and seeds that need to be cold-stratified, so i'm hopeful they'll grow? maybe, idk and don't really have a lot of experience with cold stratification other than knowing you can refridgerate seeds that need it.
i also have hopeful, tentative plans for the front yard flower beds i was working on a while ago, so i'll update you on that if i end up working on it. but in the meantime, here are the photos from my backyard.
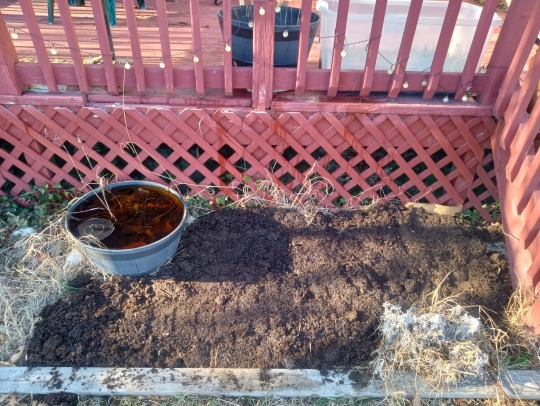
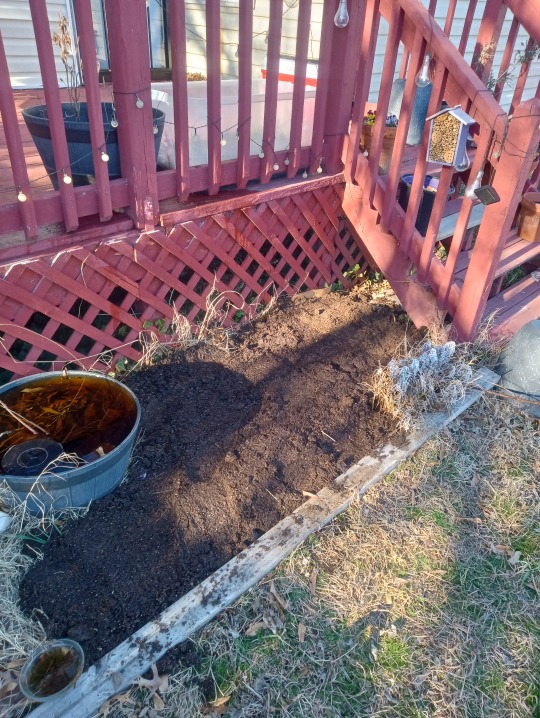
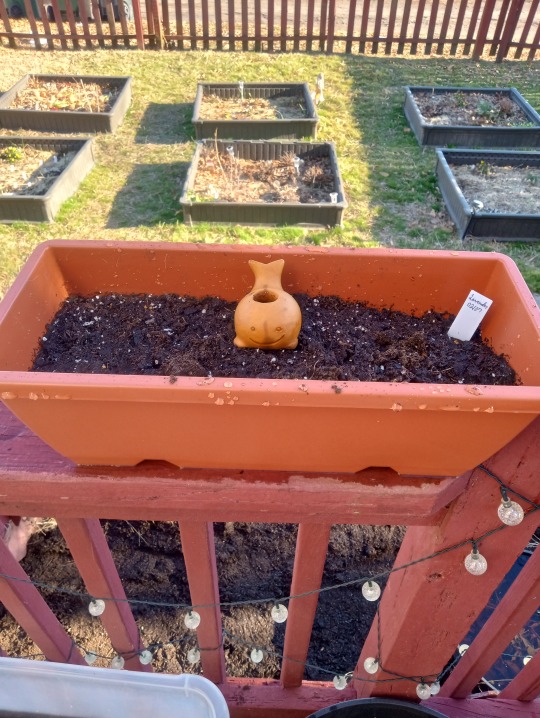
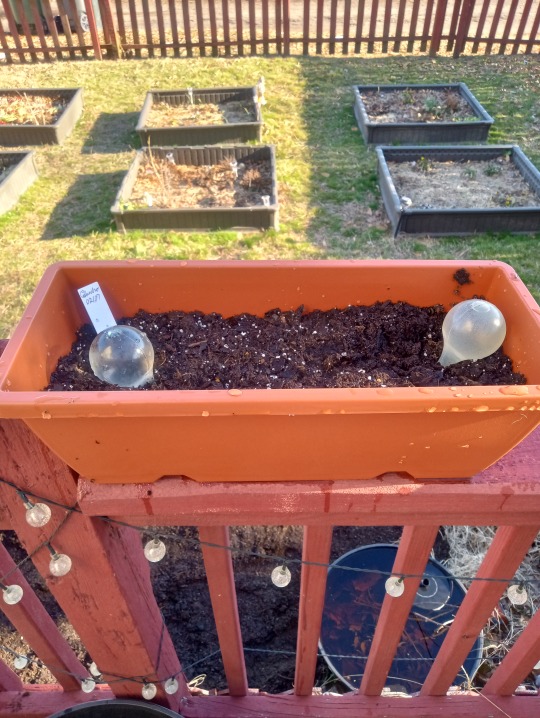
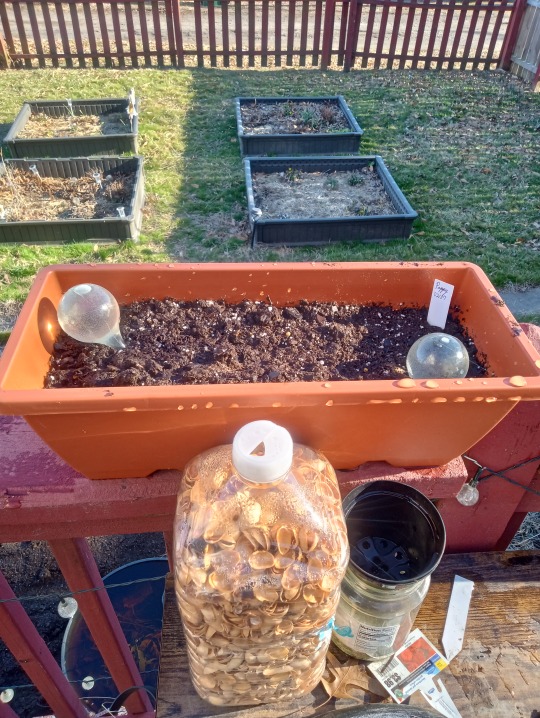
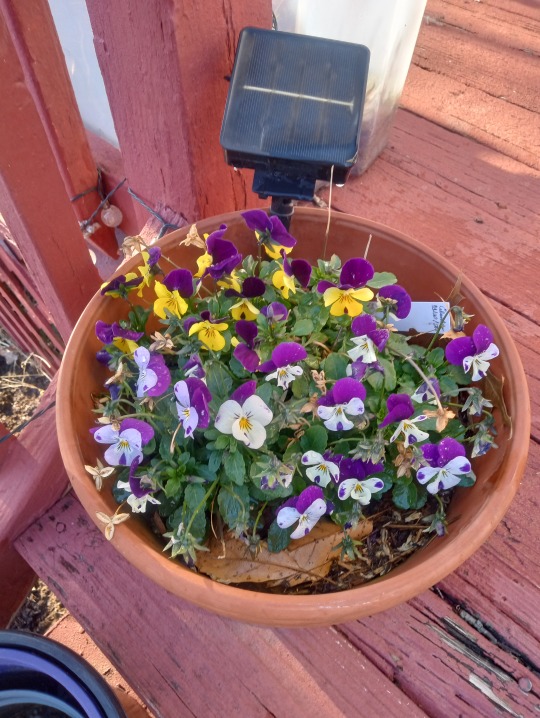
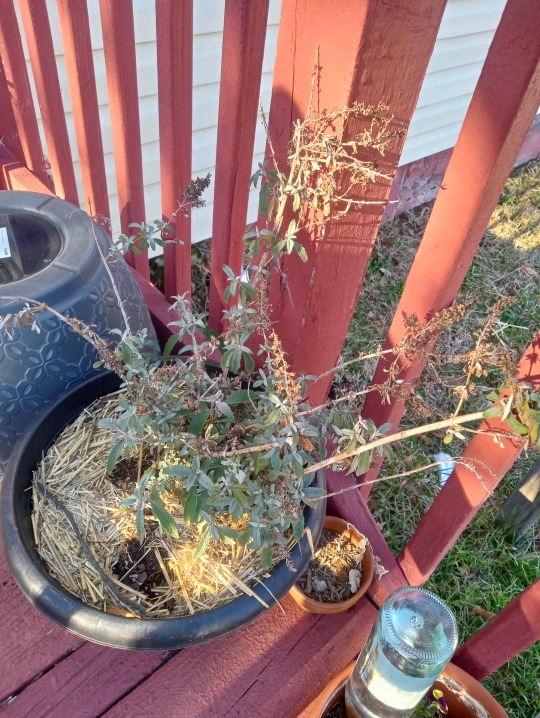
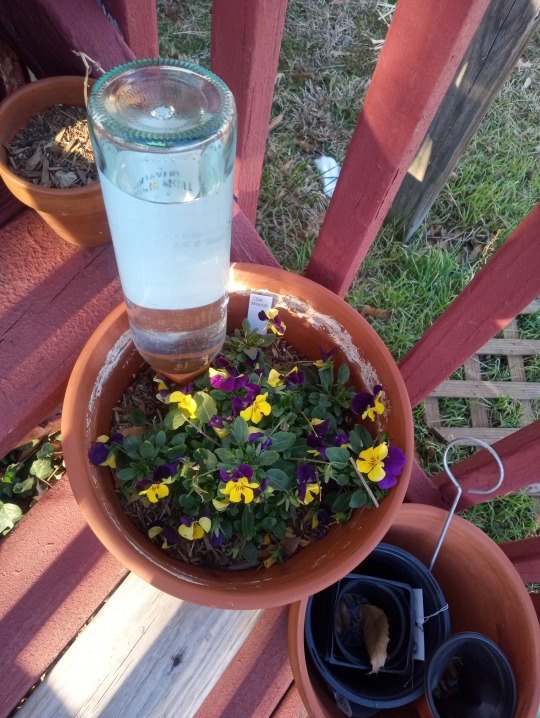
in the window box planters that are now on the deck, i planted one with lavender seeds, one with poppy seeds, and one with cilantro seeds (i know these don't need cold stratification but i had handfuls of just loose seeds that fell out of the packet and there were SO MUCH loose seeds that i just threw them into the pot tbh). i also did throw down some more cold stratification seeds on that dirt that i placed, i think i planted: lavender, bee balm, assorted poppies, st. john's wort, joe pye weed, and white yarrow! i kinda just sprinkled them out as much as i could throughout the soil, so hopefully they grow? i'm kinda just messing around tbh. my violas are also still going on strong, and my butterfly bush will get up-potted in the late spring i think!
i've also been starting seeds indoors!
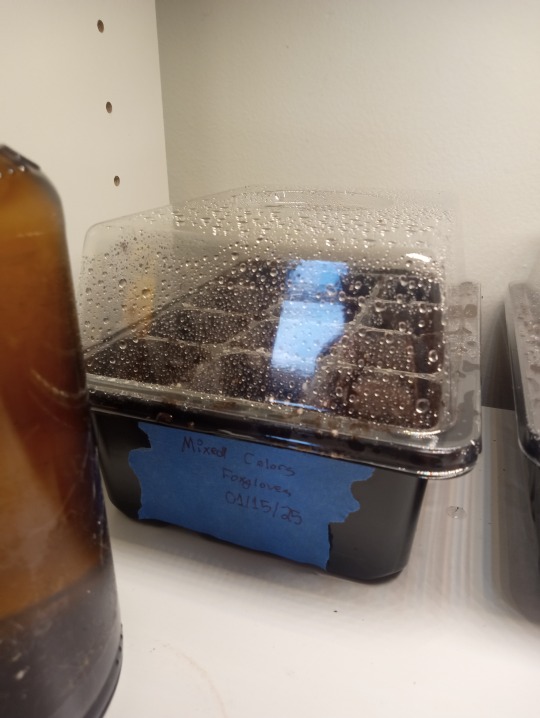
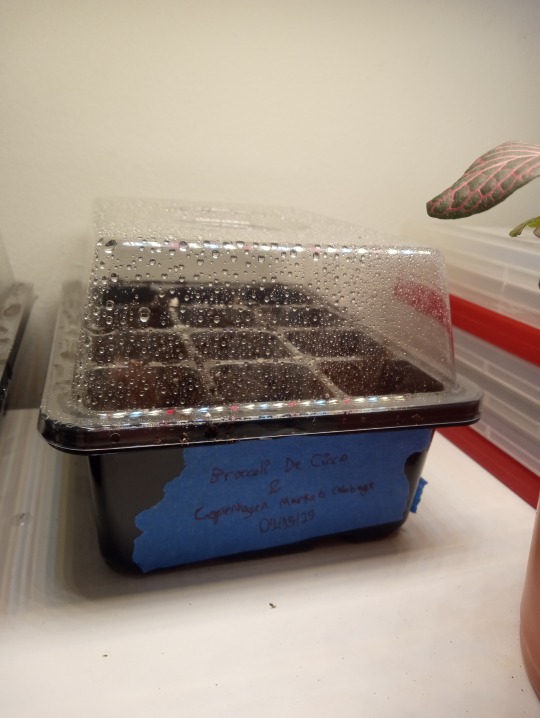
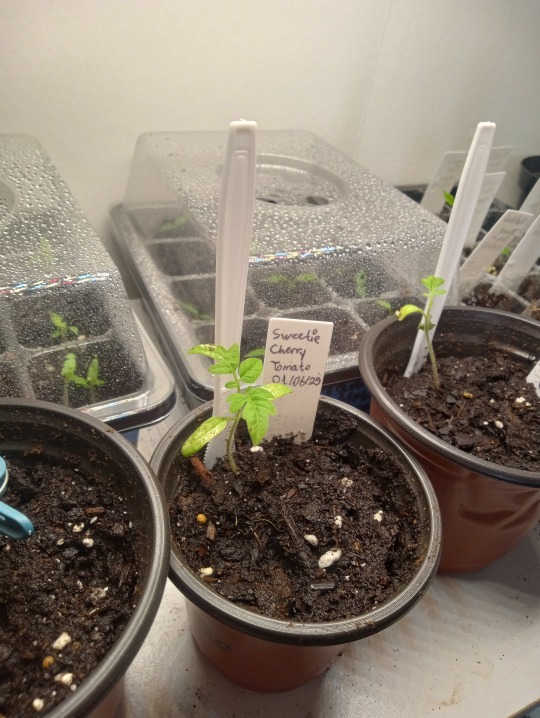
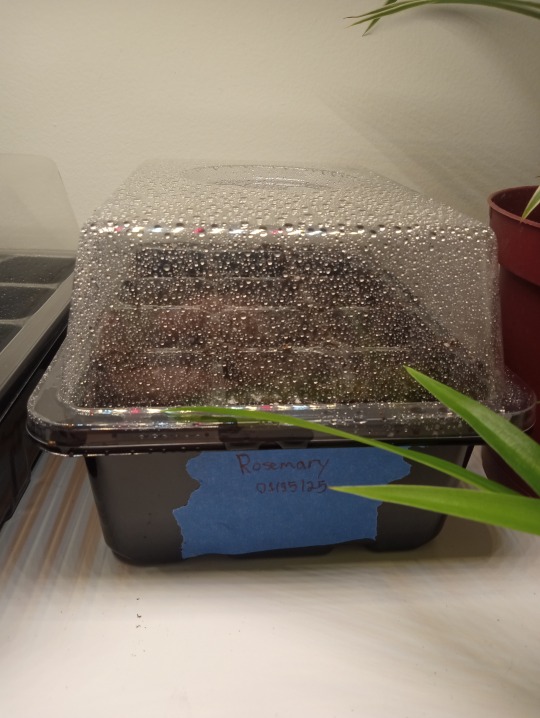
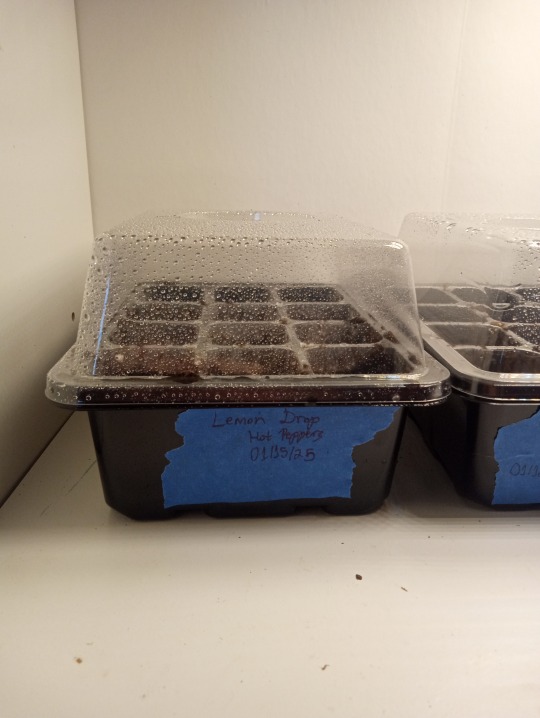
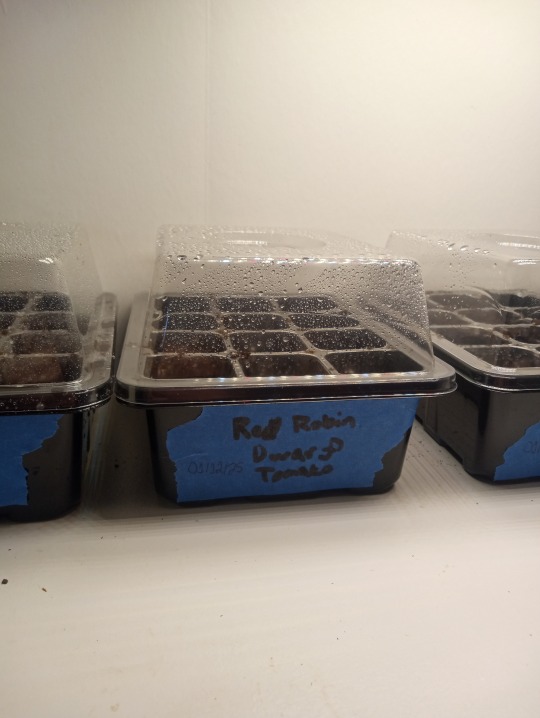
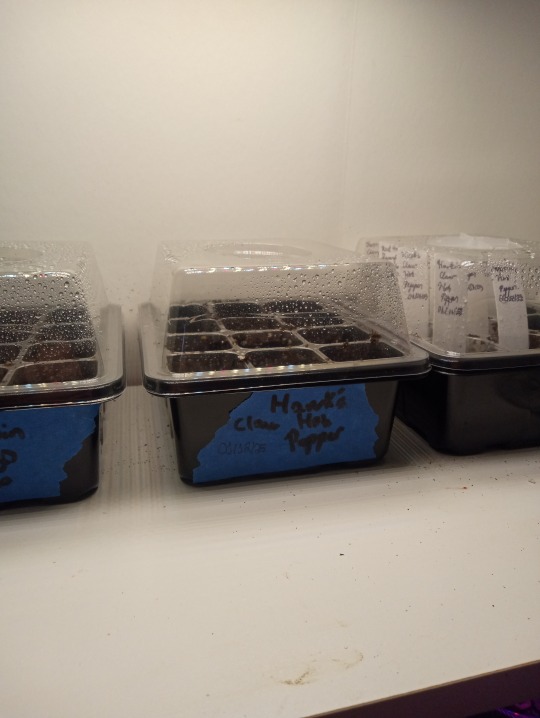
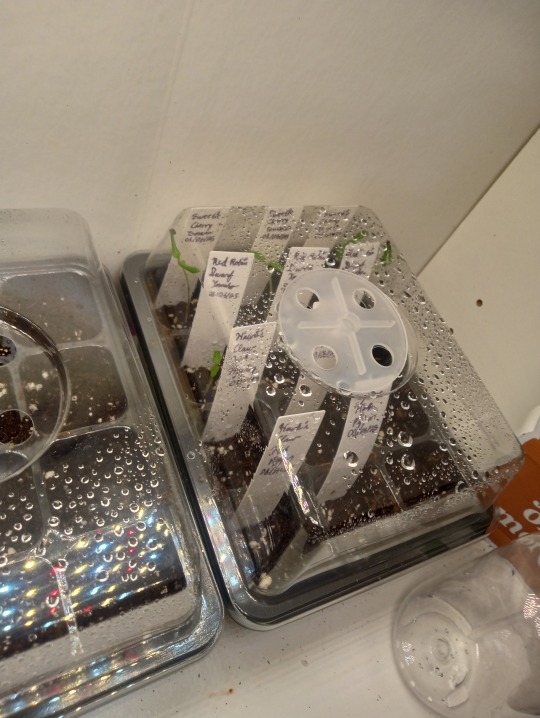
they're all nicely labeled and i also admittedly started a bunch of sweetie cherry tomatoes just bc i'm *eager* okay i want to be back in the garden so badly!!!
i'm not able to upload more photos into this post, but this is mostly everything that's been going on! things have been good honestly, even though i got sick with the flu for a bit! i hope you're all doing well!
#oli being silly#garden update#life update#personal post#gardening#hobby: gardening#plantblr#seed starting#seeds#art market#farmers market#market#vendor#vendors#market stall#oli's nonprofit job
16 notes
·
View notes
Text
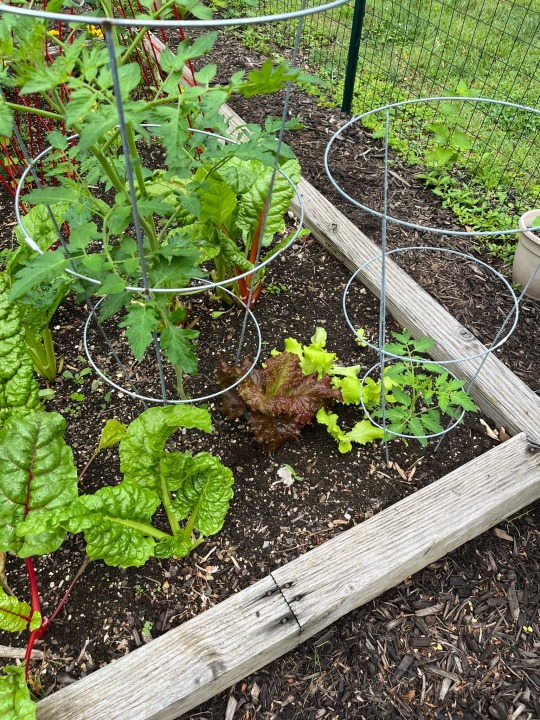
The tomato plant on the left is a volunteer. The one on the right I started from seed indoors. Gardening is a great practice in letting go of the illusion of control.
15 notes
·
View notes
Text
planting schedule is plugged into the calendarrrrrrr
mood for the evening: lying in bed twirling my hair while I put little hearts next to my favorite varieties of tomatoes in a seed catalog
#let's goooooo#in about four months when I start my tomatoes and ground cherries#and about a month after that I will attempt to start basil from the seeds I collected this year#once I figure out which seeds are basil#guess who didn't label ANTYHING#wanna get some of those little brown packets for seed collecting#ANYWAY#unless I also decide to start my marigolds indoors or pick up more herbs this will be it for early starts next year#the rest will be direct-sown#AND I actually looked up when I can do second batches of stuff like carrots#like a smart person#(the farmer's almanac website has a little planting calendar I can look up based on my zip code which is very fancy)#(I picked up something from my library a couple of years ago but it wasn't very useful)#gardening#for the record I still haven't completely torn down this year's garden...
35 notes
·
View notes
Note
looking into growing sunflowers rn! so i have a question, if u dont mind! :33 what variety and/or tips would u recommend to someone who has semi limited gardening knowledge ? ive grown tomatoes and cucumbers but not especially well, and this is my first year rlly putting full energy into gardening! im a little intimidated tbh lol :p theyre just so stunning
ooooh sunflowers 😍😍 good news! they're super easy to grow! BUT... but but but... always a catch: sunflowers suck out a lot of the nutrients in the soil - or put toxins in the soil. depends on who you ask. the internet isn't really sure which one it is. the point, though, is they do NOT want to be planted alongside any other plant!! any type of sunflowrs all next to each other, don't care. happy as can be. but the second you want to put any sunflower next to anything else... anything else gonna struggle. SO! with that in mind... i would recommend the sunniest spot in the entire available area and grow a biiiig patch of them suckers! make them all nustled in to each other, 4 to 6 inches apart is just fine and that way they will hug each other and not fall down on their own. and the soil doesn't matter. around here there is clay, and they grow fine in clay too. sand is okkkk... just need a little extra watering. and sunflowers do love water - so if it hasn't rained in about 2 days then give it a good watering.
also - if you are able - start the seeds indoors. squirrels and mice and birds love sunflower seeds to eat just as much as we do, so if you direct sow them into the ground then they could be eaten! find a pot and fill it with the seeds, cover with soil about 1 inch deep, keep it moist, and once they sprout in about a week and they're about 2 inches tall, transplant outside! they don't mind getting roughed up, so don't freak out if your first time starting from seed -> transplant.
as far as varieties... to be honest whatever one looks the prettiest to you!! they all have the same needs, it's just more how they were bred to look rather than how to grow. my favorite is the mammoth sunflower, simply because they live up to their name and get taller than our one story house!! either visit a local hardware or garden store or go online and just look at sunflower varieties! if you can't choose then do what i do and close your eyes and pick 🫣👉🌼
hope that helps!! 🌼💚🌱

#ask me about seeds#gardening#home garden#food not lawns#homestead#nature#homegrown#homesteading#food#grow food#gardenblr#garden blog#suburbia farming#suburbian agriculture#suburban agriculture#suburban farm#sunflower#how to grow#sunflower seeds
15 notes
·
View notes
Text

Arts professional to garden blogger pipeline? LOL anyway...
It's very early in the year, but I live in an area with an extremely short growing season, so this year I'm trying to start as many of the plants that would need more love inside as possible. Last year, we planted tomatoes directly into the garden boxes and unfortunately the plant had only started producing fruit at the very end of our viable growing time.
We had to harvest them all still green, as a result, and we had way too many tomatoes for us alone to eat, so the majority of them got given away and we didn't really get to enjoy them over the entire summer.
This year I'm hoping we can start enjoying tomatoes way earlier by planting the seeds indoors now!
Anyway, we get roasted chickens a lot, and it's a lot of plastic waste, and I needed a greenhouse but didn't want to buy a big one because of the cost. These little containers are kind of perfect tho??? They've got venting abilities too which is great.

I'm starting these five plants now and then I still have broccoli and squash to start later in the season, as their indoor starting times don't have to be as long as these ones. I'm doing a pollinator/native plant garden in addition to my vegetable garden this year, and the marigolds are for pest control.
(Not pictured here, a secret sixth plant: the green pepper package since I finished it and tossed it before I decided to do this, oops xDDD).
I have a bunch of other flowers as well, but they can all be direct sown. I'll be planting sweet peas, sunflowers (red and yellow), cosmos, and I have hollyhock but since this area has a lot of small children and people wandering between backyards when you wouldn't want them to, I don't think it's probably safe to actually plant it outside of a balcony garden here so I won't be sowing them this year (I'd gotten them for last year when I was on my own at an apartment, and so my flowers wouldn't have been accessible to anything but birds and pollinators from my balcony).
I've planted mouse melons before in this area, but they were from a mature seedling -- we had a huge yield, and I want to try pickling them still, so I've started them indoors myself this year. Very excited.
Also exceptionally excited about the blue cherry tomatoes if only because I find it very novel when vegetables aren't 'traditional colours'. Hehehehe.

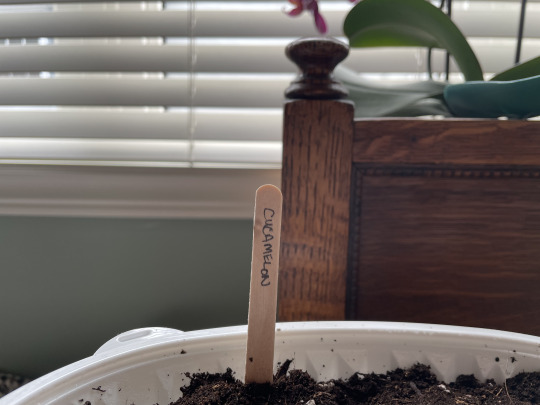
anyway long story short I started all my indoor greenhouses and I don't have like -- grow lights or anything but I'll do my best. LOL Guess this counts as planting day one.
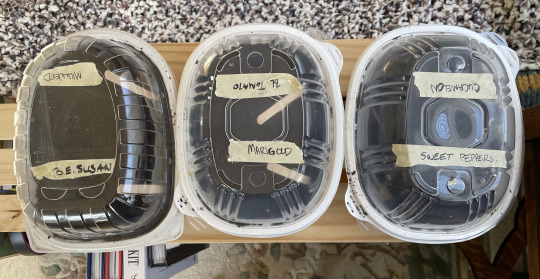
#plant blogging#plants#vegetables#gardening journey 2024#I've been very stressed this year and gardening makes me feel....less stressed. So here we are#thebxghag blogs
23 notes
·
View notes
Text
Morning garden check because I am absolutely not moving out of the ac today unless I have to--it already feels like trying to breathe through a wet sack.
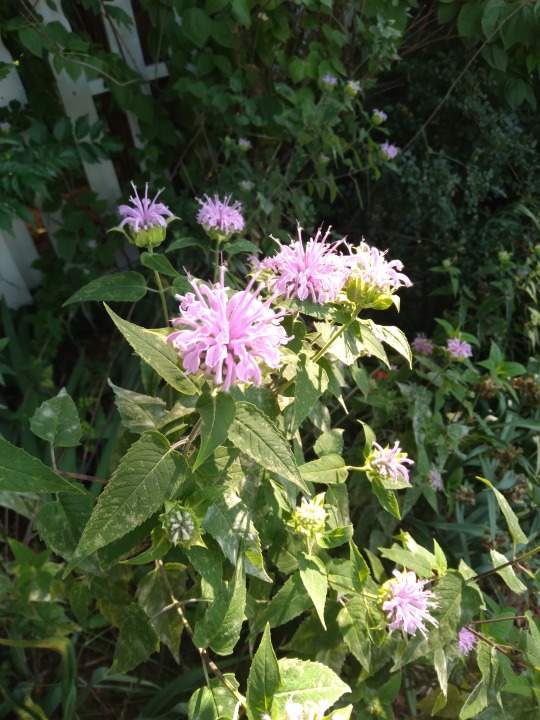
Bee balm is flowering. Meanwhile its foliage is being consumed by powdery mildew. I've had this bee balm for at least five years now and this is the first time it's flowered. It was planted in too shady a location at first and then had to recover from transplanting after I moved it. It's still in part-shade but seems to like it fine. The spread doubled in size last year instead of flowering.
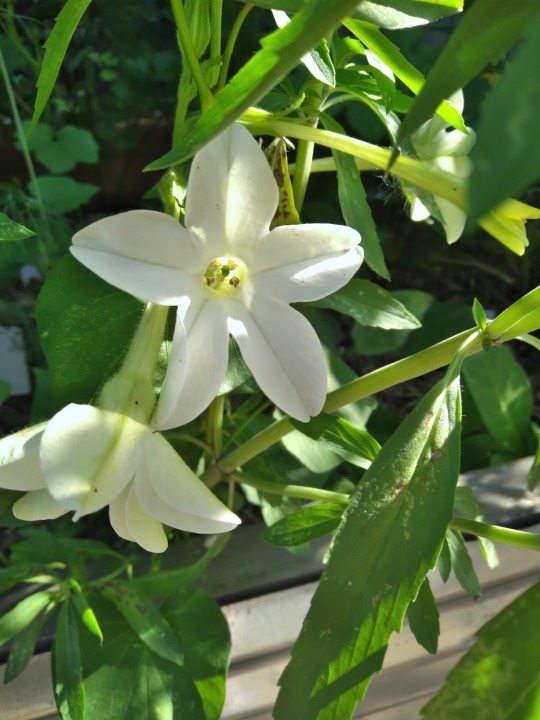
Some of the nicotiana in the front raised bed is flowering. It has been for several days now but the blossoms have only been open in the early morning.
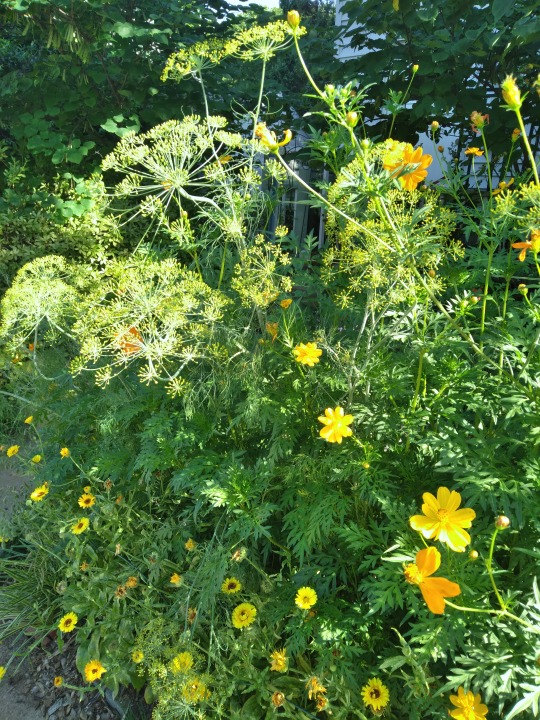
The flower hedge in the in-ground front bed looks so good right now! Height-wise it's got the calendula along the bottom, cosmos in the middle, and dill flowers above them all. There's also borage, but it's in-between flushes of flowers atm. Plus there's radish seed pods draped over everything, but they're slowly getting removed as I feed them to the chickens. Not pictured is the cornflower 'bush' to the right which desperately needs deadheading.

I am much happier with this African marigold. I'll be tagging it for seed collection and snipping the other two disappointing blooms off. I have been collecting seed from the all-yellow French marigolds already. The two varieties are in different parts of the garden, hopefully far enough apart so they don't hybridize...if they even can, I have no idea.
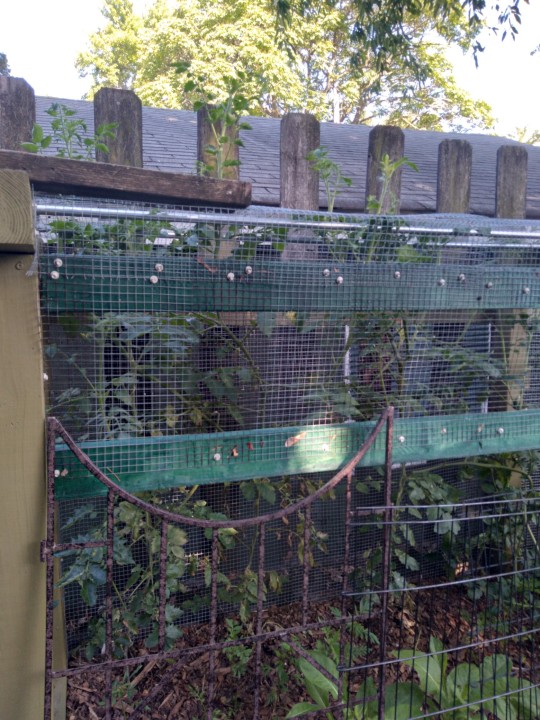
Oops! Looks like it's time to see if those string trellis hooks I made out of wire hangers work as intended to lower the tomato plant while supporting it. One of them has grown a full foot out the top of the enclosure! And probably will be even taller by the time I try lowering it because, as I said, I ain't doing nothing in this heat.
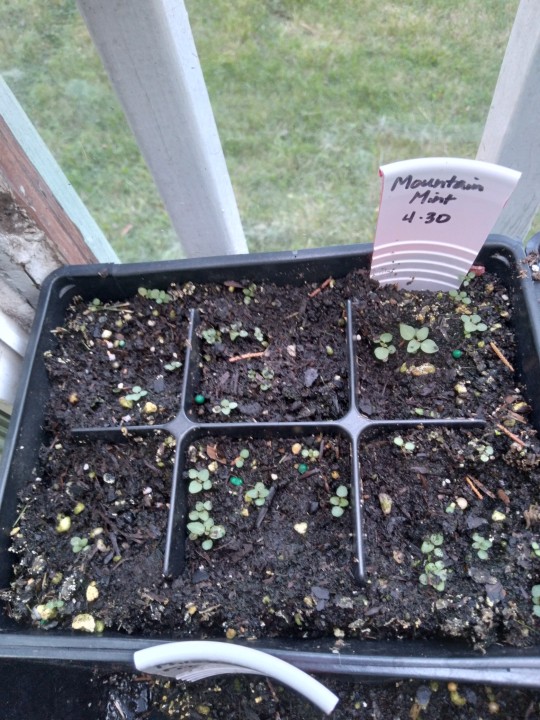
Oh hey, lookee here! The second sowing of mountain mint decided to germinate. At the start of the heat wave. Fantastic. I'll be keeping an eagle eye on it to make sure it doesn't crisp as this has been a season-long project now.
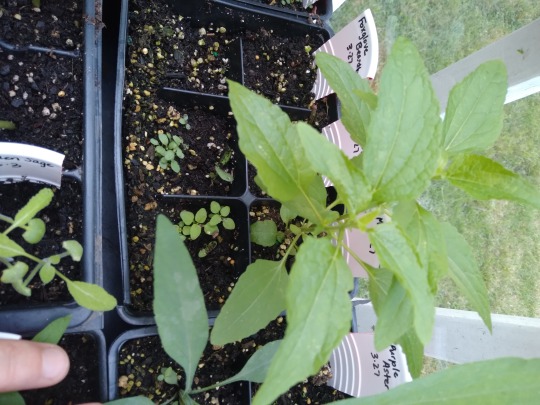
Some additional mist flower has also germinated. The originals are about ready for potting up, as you can tell. Still waiting on a lot of the other wildflowers that I got seed from at the library's natives program (and then stratified in the freezer for a month). These germinations 2+ months after sowing have renewed my hope though.
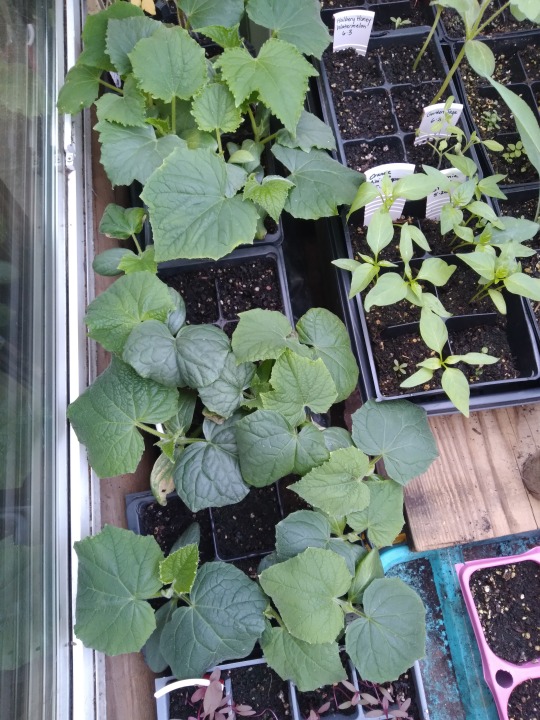
My cucumber seedlings working on hardening off in the grow frame, mostly overnight right now. I pull them inside at the least sign of stress, but they've been able to handle several hours of morning sun now. The goal is to transplant them out next week on a slightly cooler and hopefully overcast day. If sunniness persists then I'll probably do an evening transplant and consider my shading options the next morning.

First purple coneflower blossom!
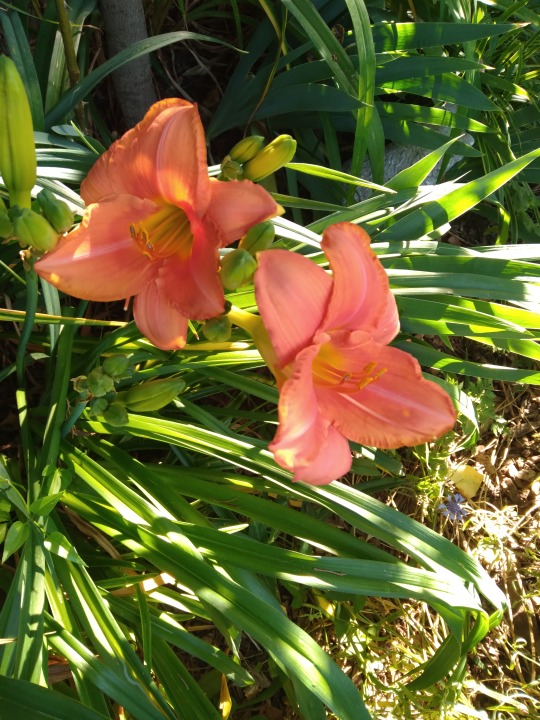
And another fancy daylily. Forgot I had one this color--just a little more pink than the common daylilies I have everywhere. And of course shaped differently.
I was thinking of starting some lettuce indoors to put in the spaces that I removed the bolted bok choy from, but then I remembered all the already started seedlings that I had from the seed from the seed library. So today will be spent indoors figuring out what will do okay in mostly shade. I'll just wait until late summer to do lettuce.
#gardening#flower gardening#seed saving#seed starting#germination#in addition to all the traditional beneficial insects i also saw regular old houseflies pollinating the dill#so that was interesting
2 notes
·
View notes
Text
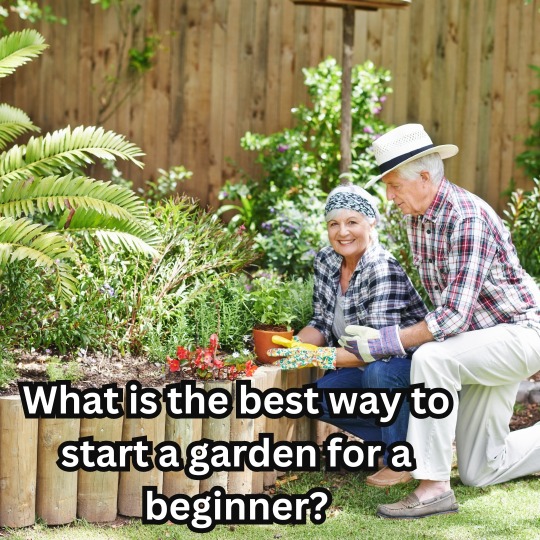
Introduction to Gardening for Beginners
Gardening is a rewarding and therapeutic hobby that can transform your outdoor or indoor space into a thriving sanctuary of plants, flowers, and vegetables. Whether you aim to create an English cottage garden, grow organic flowers, or cultivate a vegetable garden, starting as a beginner can be both exciting and overwhelming. This guide will walk you through the best way to start a garden, covering everything from selecting plants to understanding garden design principles.
Understanding Your Space
Before you begin planting, it's crucial to understand the space you have available. Whether you're planning an indoor garden, an English cottage garden, or a vegetable garden, the key is to assess the light, soil, and space conditions.
Indoor Gardens
For those interested in indoor gardening, consider the amount of natural light your home receives. South-facing windows are ideal for most houseplants, providing ample light throughout the day. If your space lacks natural light, consider investing in grow lights.
Outdoor Gardens
Outdoor gardening requires an assessment of your yard or garden plot. Observe how much sunlight different areas receive, noting which spots are in full sun, partial shade, or full shade. This information will guide your plant selection, ensuring you choose plants suited to your garden's conditions.
Choosing the Right Plants
Selecting the right plants is vital for a successful garden. As a beginner, start with plants that are easy to grow and maintain.
Easy Indoor Plants
Spider Plant: Hardy and adaptable, perfect for beginners.
Pothos: Low maintenance and can thrive in low light.
Snake Plant: Tolerant of neglect and ideal for low light conditions.
Succulents: Require minimal watering and are great for sunny windowsills.
Easy Outdoor Plants
Marigolds: Bright, cheerful flowers that are easy to grow from seed.
Sunflowers: Fast-growing and visually striking.
Lettuce: Quick to grow and perfect for salads.
Tomatoes: Popular and rewarding, providing fresh produce for your kitchen.
Garden Design Principles
Designing your garden involves more than just planting; it requires planning and understanding some basic design principles.
English Cottage Garden
An English cottage garden is characterized by its informal, densely planted flower beds. To achieve this look, mix various flowers, herbs, and vegetables, ensuring a continuous bloom throughout the growing season.
Plant Variety: Combine perennials, annuals, and biennials for a dynamic and colorful display.
Pathways: Create charming, winding paths using natural materials like stone or gravel.
Focal Points: Incorporate elements like arbors, benches, or birdbaths to add interest and structure.
Vegetable Garden
A vegetable garden can be both beautiful and productive. Consider the following tips:
Raised Beds: Ideal for beginners as they improve drainage, reduce weeds, and make planting and harvesting easier.
Companion Planting: Grow plants together that benefit each other, such as tomatoes with basil or carrots with onions.
Succession Planting: Maximize your garden’s yield by planting different crops in the same area throughout the year.
Gardening Tools and Supplies
Having the right tools can make gardening more enjoyable and efficient. Here are some essential gardening tools for beginners:
Hand Trowel: Perfect for planting and transplanting small plants.
Pruning Shears: Essential for trimming and shaping plants.
Garden Gloves: Protect your hands from thorns, dirt, and blisters.
Watering Can/Hose: Ensure your plants get adequate water, especially during dry spells.
Garden Fork: Useful for turning soil and mixing in compost.
Preparing the Soil
Healthy soil is the foundation of a thriving garden. Here’s how to prepare your soil:
Test Your Soil: Determine your soil’s pH and nutrient levels using a soil test kit.
Amend the Soil: Based on your soil test results, add compost, manure, or other organic matter to improve soil fertility and structure.
Mulching: Apply a layer of mulch to conserve moisture, suppress weeds, and regulate soil temperature.
Planting Techniques
Understanding proper planting techniques will ensure your plants establish well and thrive.
Spacing: Follow the recommended spacing guidelines for each plant to prevent overcrowding and promote healthy growth.
Planting Depth: Ensure seeds and transplants are planted at the correct depth, typically indicated on seed packets or plant tags.
Watering: Water your plants thoroughly after planting to help them settle into their new environment.
Caring for Your Garden
Regular maintenance is crucial for a healthy and productive garden. Here are some tips for ongoing garden care:
Watering: Consistent watering is essential, especially for young plants. Water in the early morning or late afternoon to reduce evaporation.
Weeding: Regularly remove weeds to reduce competition for nutrients and water.
Fertilizing: Feed your plants with organic fertilizers according to their specific needs.
Pest Control: Monitor for pests and diseases. Use organic pest control methods, such as introducing beneficial insects or using natural sprays.
Indoor Plant Care
For indoor plants, consider the following care tips:
Lighting: Ensure your plants receive the appropriate amount of light. Rotate plants regularly for even growth.
Watering: Avoid overwatering by checking soil moisture before watering. Most houseplants prefer to dry out slightly between waterings.
Humidity: Increase humidity for tropical plants by misting them or placing them on a humidity tray.
Repotting: Repot your plants when they outgrow their containers to provide more space for root growth.
Creating a Sustainable Garden
Sustainability is becoming increasingly important in gardening. Here are some ways to create an eco-friendly garden:
Composting: Recycle kitchen scraps and garden waste to create nutrient-rich compost.
Rainwater Harvesting: Collect rainwater in barrels to reduce water usage.
Native Plants: Choose native plants that are adapted to your local climate and require less maintenance.
Organic Practices: Avoid synthetic chemicals and opt for organic fertilizers and pest control methods.
Inspiration from Botanical Gardens
Visiting botanical gardens can provide inspiration and ideas for your own garden. Here are some famous botanical gardens to explore:
Royal Botanic Gardens, Kew (UK): Known for its diverse plant collections and stunning landscapes.
New York Botanical Garden (USA): Offers a wide variety of plant species and themed gardens.
Singapore Botanic Gardens (Singapore): Features tropical flora and the iconic National Orchid Garden.
Butchart Gardens (Canada): Famous for its beautifully designed flower displays and themed gardens.
Connecting with the Gardening Community
Joining the gardening community can provide support, advice, and inspiration. Here are some ways to connect:
Local Gardening Clubs: Join clubs to meet other gardeners and participate in events and workshops.
Online Forums: Engage in online gardening forums and social media groups like the #houseplantcommunity or #gardeningtips.
Garden Shows: Attend garden shows and expos to learn from experts and discover new plants and tools.
Conclusion
Starting a garden as a beginner can be a fulfilling journey that enhances your connection with nature and provides a sense of accomplishment. By understanding your space, choosing the right plants, designing thoughtfully, using proper tools, and maintaining your garden diligently, you can create a beautiful and thriving garden. Embrace the learning process, seek inspiration, and connect with the gardening community to grow your gardening skills and enjoy the many benefits this hobby offers.
Additional Tips and Resources
To further assist you on your gardening journey, here are some additional tips and resources:
Gardening Books for Beginners
"The Vegetable Gardener's Bible" by Edward C. Smith: Comprehensive guide on growing vegetables.
"The Flower Gardener's Bible" by Lewis Hill and Nancy Hill: Detailed instructions on flower gardening.
"Indoor Gardening: The Ultimate Beginner's Guide to Grow Beautiful Plants in Your Home" by Leslie F. Halleck: Focuses on indoor gardening techniques.
Gardening Magazines and Websites
Garden Gate Magazine: Offers gardening tips, plant profiles, and design ideas.
Fine Gardening: Provides expert advice on all aspects of gardening.
Royal Horticultural Society (RHS): Wealth of information on plants, gardening techniques, and garden design.
Gardening Apps
PlantSnap: Helps identify plants and provides care instructions.
Garden Answers: Allows you to ask gardening questions and receive expert advice.
GrowIt!: Connects you with local gardeners and offers plant recommendations.
Getting Started: Step-by-Step Guide
To summarize, here's a step-by-step guide to help you start your garden:
Assess Your Space: Determine light conditions, soil type, and available space.
Choose Plants: Select easy-to-grow plants suited to your environment.
Design Your Garden: Plan your layout, considering aesthetics and plant needs.
Prepare the Soil: Test and amend your soil to ensure optimal growing conditions.
Plant: Follow proper planting techniques for healthy establishment.
Maintain: Water, weed, fertilize, and monitor for pests regularly.
Learn and Connect: Continue learning through books, magazines, and the gardening community.
By following these steps and utilizing the resources provided, you'll be well on your way to creating a beautiful and thriving garden.
#gardening for beginners#gardening#gardeningloverfamily#grading#gardeninghour#plantblr#plants#nature#flowers#gardeningtshirt#cottagegarden#plantlife
12 notes
·
View notes
Text
our garden here is CURSED
first the squirrels and probably skunks were eating and digging up strawberry plants and any new seedlings from various plants, so we've got cages and mesh around a bunch of plants now and have been starting them indoors and covering them with milk crates and stuff, BUT once the sunflowers were big enough and out in the garden after my mom took the crate off—BEHEADED!!! one of the animals (skunk? voles? the ravens?) has just been chopping the heads off of the sunflower plants 😭😂
last year the tomatoes also didn't grow too well... and our watermelon seeds aren't sprouting and the watermelon plant apparently is all collapsed and looking kind of ragged, but watermelons aren't exactly the easiest to grow even in eastern WA
still, we've never had so much trouble with a garden before lmao and everyone else in the neighborhood has big tall sunflowers so it's like, why are the animals killing our sunflowers specifically?? and so on
2 notes
·
View notes
Text
🌼🌿Indoor garden update!!🌿🌼 (For some of my plants, not all of them)
Here are the hydroponic jars (from left to right: kitchen scrap butter lettuce, seeded butter lettuce and romaine lettuce, emerald oak lettuce, spinach, bok choy, slow bolt cilantro)


And here's the tomato plants. These ones are getting so tall so fast!! Some of them even gained like an inch and a half since the last update:


And here's the basil, coneflowers and daisies. They are growing much faster and much stronger with the homemade banana fertilizer ive been feeding them. The basil is the green pot, the coneflower are in the purple pot and the daisies are in the yellow pot:

I plan on turning the wall in my dining room into a hydroponic system wall, because hydroponic gardening is by far my favorite way of growing things. And i feel very lucky that my family hoards cardboard boxes and stuff like that because I want to use the bigger ones to fill up the backyard with cardboard planter boxes for veggies. And the peach tree in the backyard is blooming!! So I'll have to trim some of the blooms off the tree so it doesn't get overloaded when the fruit comes in. Sorry for the photo quality lol

🌿🌼🍀🪻🍑☀️🌿
[Image ID: the first six images show seven large wide-mouth mason jars with plants sprouting in all of them. They're all filled with nutrient water and have black net pots in the top half of the jars that are pulled with wet clay pellets where the plants are growing from. The first image is a smaller wide-mouth jar with butter lettuce grown from kitchen scraps. The new leaves are about six inches long and very healthy looking, growing in all different directions. The second image shows two of the larger jars, the one on the left being butter lettuce grown from seeds and romaine lettuce. The butter lettuce sprouts are about an inch to an inch and a half and the romaine lettuce sprouts are about four to five inches tall, growing like crazy in all different directions and theres so many. These three jars I've described so far are the only jars in the bunch that don't have black socks covering them, the rest have socks covering the jars up to the top due to their lack of sturdy root systems. But for the photos I've pulled the sock down on each of the covered jars to show their labels.
The third image shows a large covered jar, this one is emerald oak lettuce. The sprouts are somewhere between half an inch and a full inch tall. The fourth image shows a jar showing the spinach label. The spinach sprouts are about an inch and a half to two inches tall, and they're growing in a few different directions. The fifth image shows bok choy sprouts and these sprouts are about the same height if not a little taller and they're growing in multiple directions. The sixth image is of the slow bolt cilantro, which just begun sprouting. There's one sprout that's about half an inch tall.
The seventh and eighth images show my tomato plants. All in terracotta colored plastic pots and one pot has a yellow gnat trap on the side. One image shows six pots, all with plants varying in size, with the biggest ones being five and a half inches tall. The taller ones have more leaves and all the pots have crushed egg shell in the top soil. The next image is of the seventh tomato plant which is the biggest one, easily being six inches tall. My hand is in the photo becauseim holding it up.
The next image shows three pots on a wood shelf, a green one with basil sprouts, a yellow one with daisy sprouts and a purple one with coneflower sprouts. The sprouts are all pretty small, ranging from half and inch to an inch tall but the leaves are much bigger. Especially the basil and the cone flowers. The basil pot is in a translucent purple glass plate.
The last image shows some parts of my peach tree in my back yard, though not much of he yard is visible in the image except for the fence. The leaves are big and green and beautiful and tiny peaches are starting to form on the branches.
Parts of my backyard are visible in all photos but it's a bit blurry due to the material of the greenhouse tent covering the glass window. End ID]
#solarpunk#gardening#hydroponic gardening#hydroponics#vegetable garden#indoor garden#indoor gardening#hatchet grows things#garden#ecopunk#hopepunk#described#solarpunk aesthetic#solarpunk gardening
52 notes
·
View notes
Photo
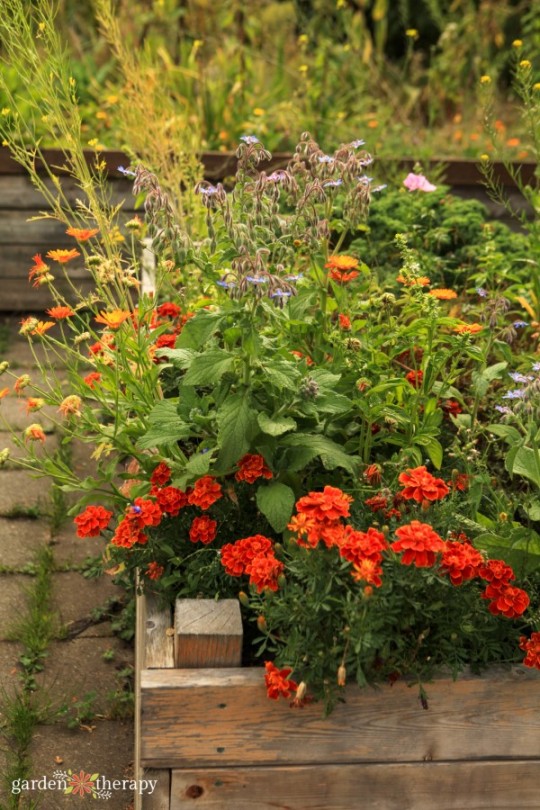
Just like superheroes, there are some flowers that have some pretty amazing superpowers. Learn about companion planting with five of the best flowers that keep bugs away from your garden. Did you know that flowers have superpowers? Some stop nematodes in their tracks. Others attract aphids away from your veggies. And, some are just so darn powerful that they will repel every tick, cockroach, and bedbug in sight! Pretty and powerful? Now that’s the kind of organic gardening I can get behind. These five super flowers repel bugs in the garden and add their own special brand of style, too. This post will cover… As an added bonus, some of these flowers may attract pollinators! What is Companion Planting? First, let’s talk about companion planting. Companion planting is taking advantage of the strengths of some flowers by planting them near certain veggies. Some flowers have benefits for your garden that go beyond a pretty face. Those benefits include: Adding flowers to the veggie patch is both pretty and practical. You can add these five super flowers to the vegetable garden to send pests running. This veggie garden is also full of flowers for companion planting. Top 5 Flowers To Use For Companion Planting These hard workers will add beauty to your garden while doing some very important jobs. Learn about my favourite flowers for companion planting. Borage Plant borage near your tomatoes to deter tomato hornworms. In addition to preventing those pesky little fellows, borage makes a lovely ornamental with its delicate star-shaped light blue and pink flowers. Bonus: Borage is edible! The flowers taste like a mild, sweet cucumber and are a good addition to summer salads, along with those pest-free tomatoes growing beside them. Light Needs: Full sun to partial shade Water Needs: Moist, well-draining soil Start From Seed: Sow directly into the ground after the threat of frost has passed. Companion Benefits: Deters tomato hornworms and cabbage worms; attracts bees Companion Planting: Plant near tomatoes, squash, and strawberries Borage is great at self-seeding, so don’t be surprised to see it return next year. Nasturtium Aphids are attracted to nasturtiums. We know, we know, you thought this was supposed to be about deterring pests, not attracting them, but hear us out. Aphids are so attracted to nasturtiums that they prefer them over your more prized veggies, such as peas or beans. This means they will leave the vegetables alone and simply head to the nasturtiums planted nearby to feast. Then…all those aphids hanging around in one spot will in turn attract beneficial insects like ladybugs that will eat the aphids and benefit the garden in other ways too. Nasturtiums also deter whiteflies, squash bugs, and potato bugs, so they are a great choice to add to any vegetable patch. Light Needs: Full sun to partial shade Water Needs: Moist, well-draining soil Start From Seed: Sow indoors and transplant, or sow directly into the ground after the threat of frost has passed. Companion Benefits: Deters whiteflies and cucumber beetles; trap crop for aphids; attracts predatory insects Companion Planting: Plant near cucumbers, zucchini, radishes, melons, Brassicas, squash, and tomatoes Nasturtium is also edible! It has a slight spicy, peppery taste. Chrysanthemum Chrysanthemums contain a natural insecticide called pyrethrum, which means they keep away silverfish, ants, cockroaches, bedbugs, fleas, lice, and even ticks. Talk about a powerhouse pest repellent! However, pyrethrum will also deter beneficial insects, so you may not want to plant too many around the garden if you are trying to encourage good bugs. Light Needs: Full sun Water Needs: Moist, well-draining soil Start From Seed: Sow directly into the ground after the threat of frost has passed. Companion Benefits: Repel ticks, silverfish, ants, cockroaches, bedbugs, fleas, and lice Companion Planting: Plant near any plant you want to deter pests from Try planting chrysanthemums in pots to deter pests from fellow patio plants. Marigold Plant some marigolds next to your tomatoes to keep them healthy and happy. Marigolds contain a phytotoxin called alpha-terthienyl, which prevents nematodes (AKA roundworms) from munching on the roots of your precious tomato plants. Marigolds also work wonders when planted near Brussels sprouts, cabbage, broccoli, and cauliflower because they will prevent cabbage worms from joining the party. Light Needs: Full sun Water Needs: Moist, well-draining soil Start From Seed: Start indoors or sow directly into the ground after the threat of frost has passed Companion Benefits: Deters nematodes, whiteflies, Mexican bean beetles, tomato worms, and cabbage worms; attracts slugs away from your vegetables Companion Planting: Plant near carrots, cucumber, lettuce, peppers, potatoes, tomatoes – most vegetables other than beans. Marigolds are easy to tuck in amongst your veggies. Petunia Petunias are gorgeous and come in every colour of the rainbow. As if that weren’t enough, they also protect beans from most pests and work to prevent squash bugs, potato bugs, and are a good general pest deterrent that keeps most bug baddies at bay. So go ahead, brighten up your vegetable garden and protect it at the same time with petunias in every bed. Light Needs: Full sun Water Needs: Moist, well-draining soil Start From Seed: Start indoors because they are slow to germinate Companion Benefits: Deters squash bugs, potato bugs, general pest deterrent Companion Planting: Throughout your garden Petunias are more than a basket flower! They’re a good, all-around pest deterrent. Companion Planting FAQ How close do you need to plant companion plants? Companion plants should be planted as close together as possible without infringing on spacing requirements. I like to pop in these flowers in between my rows of vegetables and in empty spaces wherever possible. What are some zucchini companion plants? Plant zucchini with oregano, corn, peas, radishes, beans, and nasturtium. What are some beet companion plants? Plant beets with brassicas, lettuce, mint, corn, leeks, garlic, kohlrabi, and bush beans. Don’t plant beets with pole beans. What are some lettuce companion plants? Plant lettuce with brassicas, beets, radishes, garlic, onions, cucumbers, strawberries, carrots, celery, squash, spinach, and marigolds. I hope this helps you know which flowers to plant in your garden to take maximum advantage of their superpowers! More on Companion Planting A city girl who learned to garden and it changed everything. Author, artist, Master Gardener. Better living through plants. Source link
#GARDEN_TOOLS#BACKYARD_HABITAT#COMPANION#COMPANION_PLANTING#DETER#FLOWERS#GARDEN#MONTH_MAY_WEEK_5#NATURALLY#PESTS#PLANTING#SUPER#THERAPY
3 notes
·
View notes
Video
tumblr
February Garden Update: Preparing for the Growing Season
As February comes to a close, it's been a busy time in the garden! While winter is still hanging around, it's the perfect month to start preparing for the spring growing season. Here’s what we’ve accomplished so far and what’s still on the to-do list.
Garden Tasks Completed in February
Clearing Beds – We’ve been hard at work removing debris, old plant material, and weeds from the raised beds to prepare for new plantings. This is an essential step to prevent diseases and pests from overwintering in the garden.
Adding Compost – To enrich the soil, we added a fresh layer of compost to the garden beds. This will provide essential nutrients for the plants and improve soil structure for the upcoming season.
Installing Low Tunnel Row Covers – With unpredictable late-winter weather, row covers are essential for protecting early plantings. These tunnels help regulate temperature, keep moisture levels stable, and prevent frost damage to tender seedlings.
Starting Seedlings Under Lights – Indoor seed-starting is in full swing! So far, we have sown brassicas (broccoli, cabbage, kale), onions, artichokes, peas, cilantro, parsley, lettuce, and spinach. These seedlings are growing on heat mats under lights, preparing to be transplanted into the garden as soon as it warms up.


Garden Tasks Still to Do
Transplanting the Raspberry Pots – The raspberry canes are still in their pots, waiting to be transplanted into their permanent location. This needs to be done soon to ensure they establish strong roots before the growing season begins.
Clearing the Strawberry Patch – While the strawberry plants have survived the winter, the patch is in need of some serious cleanup. Removing dead leaves and runners will encourage healthy new growth and better fruit production in the coming months.
Transplanting Seedlings – As soon as the temperatures stabilize, we’ll be moving our indoor seedlings out into the garden beds. The row covers will help them transition from their indoor environment to outdoor conditions.
Starting More Seedlings – Next up on the seed-starting list: tomatoes, peppers, beets, chard, and tomatillos. These warm-season crops need a head start indoors before they can be transplanted after the last frost.


6 notes
·
View notes
Text
I've been working on starting native plants from seed indoors for the past year and considering it a huge success on the rare occasions I'd get as high as 60% germination rate. However, I just recently started my tomatoes for the year indoors, the first veggies I've started indoors since last year's tomatoes were planted and I began focusing solely on natives, and I got like a 90% germination rate right off the bat. I'd kind of forgotten how nice and easy it can be working with plants bred for human cultivation rather than native wildflowers that will do as they will.
3 notes
·
View notes