#sorry if the reshade look a bit harsh
Explore tagged Tumblr posts
Text

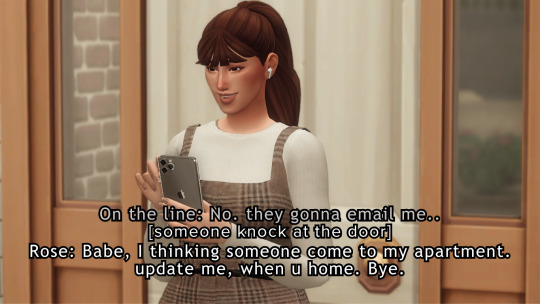
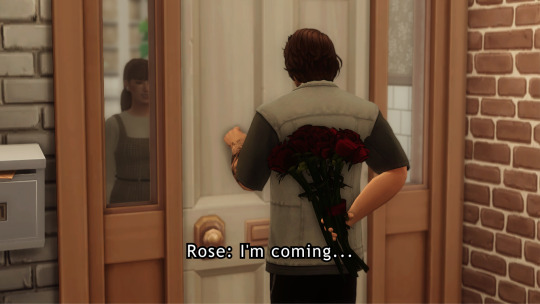
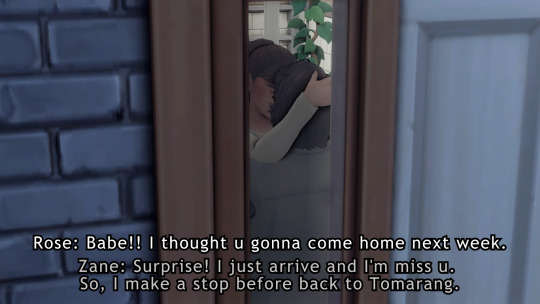


Unexpected surprise.
transcript under the cut.
On the line: I got the Lot for the Restaurant and I'll be back home soon.Miss u, Honey.
Rosé: I thought u gonna wait until u got the documents.. Miss u more.
On the line: no. they gonna email me
[someone knock the door]
Rosé: Babe, I think someone come to my apartment. Update me when u home.Bye.
Rosé: I'm coming..
Rose was so shock knowing that her boyfriend Zane, was infront her apartment door. And excitedly hugging him.
Rosé: Babe!! I though u gonna come home next week .
Zane: Surprise! I just arrive and I miss u. So, I stop by before back to Tomarang.
Zane: I have another surprise for u..
Rosé: Not again..
Zane: Ur favorite flower, Miss Rose.
Rosé: Aww..u don't have to..
Rosé: But, thank you.
Zane: Most welcome.
Rosé: I love u
Zane: me too..
#the sims 4#the joy of life challenge#the sims 4 legacy#the sims 4 gameplay#sims 4#sims 4 legacy challenge#ts 4#tjolc#CG 02#Sims: Rose'mary S.Rodriguez#Sims: Zane Thomsons#sorry if the reshade look a bit harsh#the pose i use make the pose look dark and i had to edit to make it clear.#alright i will have tjol extra to introduce u guys Rose bf
39 notes
·
View notes
Note
How do you get such pretty lighting in your photos? Is it relight? Would you ever do a mini tut? 🤞
halloooo! i would say relight helps elevate the lighting a bunch, i do also utilize these lights (i find that ts4 neon lighting is missing vibrancy, so these are amazing!) as well as these (i love the shadow/spotlight one if i need to add in a harsh shadow to help make things look like flash photography in a dark room). i like to mess around with contrast and color mixer in camera raw filter (for photoshop however, reshade maybe gshade has a lightroom shader and that's awesome as well!) as for like a tutorial, i can give you some pointers!
when working with relight, sometimes it helps a bunch to have a low-lit room, it seems a bit counterintuitive, but i find that the photo can get easily overexposed. (i show example below of photo before and after with relight). relight is sometimes a bit tricky because certain angles don't work well, like GAWD i was having trouble with one of the photos from the photoset yesterday, but i literally just moved the camera a little to the left and for some reason it worked ._. SO don't be afraid to try weird angles!

^ also this little dude, super awesome, move it adjust it a bunch to see what you like! as you can see, i set my intensity pretty high, a lot of the times i max it out if i can ._.

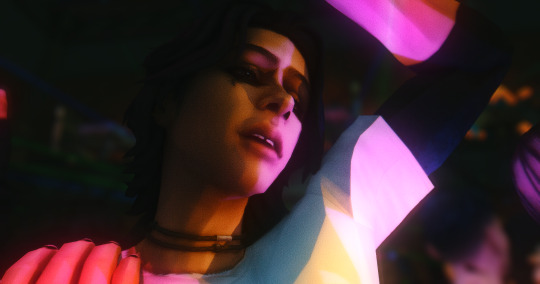
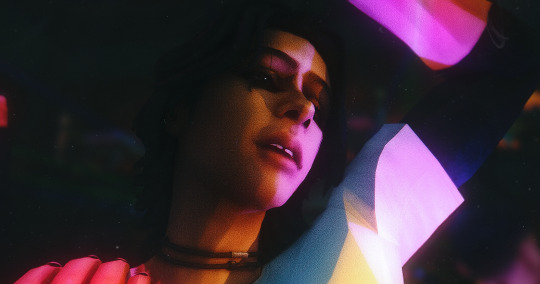
i wanted to add with relight, add it to the top of your order so you can avoid things looking murky/washed out!
LMAO sorry if this was all over the place, lighting is an extensive process for me sometimes, but i find that layering details is key. i do like to study lighting in cinematography and photography, i especially love street photographers that have like really cool photos with neon lighting! i find that this helps me have a better understanding too! :)
30 notes
·
View notes
Note
Hey there, hope you’re having an amazing day and week! First of all I absolutely love all of your photos and you’re sims are stunning! 😍
I don’t know if you’ve answered this before but how do you edit your photos to look so amazing?? I’m trying to step up my photoshop game and would love some pointers! 💛
this is so kind of you to say, i might just cry 🤗🥰 thank you so much for taking the time to say this! i really appreciate it! honestly you made my day and week so thank you!! ❤💕
i have not actually answered this before, and i'm 100% happy to give pointers! i am still learning myself, so i will also leave a bunch of resources at the end of this post that really helped me, just because im really bad at explaining things at times, so i apologise in advance for that! i am also happy to make a video explaining all this, if that's easier for anyone, so if you would like that, please let me know and i will! i know lots of people are very visual learners so i truly am happy to!
1. Reshade is not necessary. I use reshade, but you do not need to, I know a lot of computers can't handle that and ive seen so many photos come out just as amazing without it. But, if you can use reshade, i like to use this preset by @breadcrumbss3 and usually any by the lovely @intramoon !! I use them all with the latest version of reshade (4.9.1) and tweak it (very rarely) if i need it to look different.
2. Topaz Clean is super helpful, and i use it a lot just to smooth everything out. it's especially good if you do a lot of gameplay pics and just want a quick little thing to do without having to do it manually. I would go here (sims 3 tutorial hub) to get it without having to...well...spend money we could use to buy things on the sims :) if you need a direct link to anything, let me know. i personally use this action set by avonlea, as i just have to click a button and it does it all for me. however, if you dont want to use topaz, you can get the same sort-of effect by reducing the noise, i found a tutorial here as well for you.
3. Shadows!! If you're doing edits shadows are really good at bringing some depth! i often over-do them whoops, but usually it just makes it look more real. i normally do a soft shadow over all the main parts of the face or body that need it, using the overlay blend layer before going into a harsher shadow for areas like the nose and edges of the mouth to define it more. for this i use a smaller brush and a brown-ish colour, with the multiplier blend layer. i will sometimes then blur it out using gaussian blur, depending on how harsh it is. there's a really good tutorial i watched for this that i'll link down below!
4. colouring and psds! there are so many out there, but usually i just play with the colours myself until i get what i like. but otherwise i'll use this big set of psds that come with a bunch of options.
5. hair strands! i love doing this, it's my favourite part!!! i have a drawing tablet, which makes it a bit easier to do but again sometimes mine can still look crazy when i over do it haha. if you would like to do hair strands and stuff, i use this brush set :)
Those are the main things i can think of, i hope it's at least somewhat helpful, i know im really bad at tutorials. a video would probably be easier to showcase things, but i wasn't sure if you wanted that. again im totally happy to do one if you'd like that! now these are some really good sources and tutorials that i use a lot (most are for the sims 4, but it's basically the same for the sims 3 too):
- TS4 Basic Editing Tutorial in Procreate (although most of these effects you can use in photoshop, which is what i did)
- Sims 4 | Screenshot Editing Tutorial
- Intramoon's tutorials
- This one by Pea-Milk is really good too!
- Lamatisse's Tutorial
- PeonyPyxels Tutorial
sorry about this mess, hope you could understand somewhat! thank you again for the lovely words. if you wanted to know about anything in particular, dont be afraid to ask again or pm me! have a beautiful day!
38 notes
·
View notes
Text
docharvard’s stardew mega modlist v.2
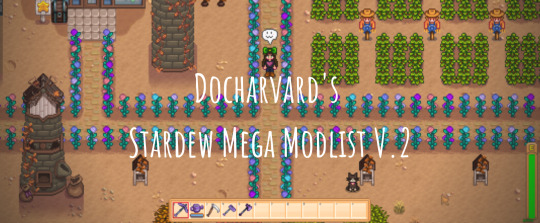
howdy doody everyboody!
my last modlist did pretty well with regards to notes, but there have been some major changes to both stardew and my modlist since then, so i thought it was high time i made a new one! once again, this is mostly graphical overhauls, with a few gameplay tweaks and cheats here and there. most of these mods are fairly popular, so chances are you would already know them, but i hope this compilation finds its use anyway. now, without further ado, the list starts under the cut!
one final warning before i proceed, as of today 21st of February 2020, some of these mod’s official releases do not work with Stardew 1.4.5, but they do have unofficial patches floating around on the forums that update them to work with this patch, and i will be linking to those instead of the official releases for those mods (you will need a chucklefish forums account to download them). if you see this in a few months or weeks time from when it is posted, it is probably in your best interests to check the official releases for updates.
ENGINES/PRE REQS most of, if not all, the mods on this list will require some combination of the following engines to run. i know nothing about coding, so i cannot give an apt description of what they do or how they work, but trust me, you will need them. if you don’t download all of the mods in this list, you might not need all of them, check the requirements segment on a mods nexus page to see which of these engines you will need to run it.
SMAPI - SMAPI is the modding API for Stardew, necessary for all modding (besides old xnb mods).
Content Patcher
Custom Critters
Json Assets
Mail Framework Mod
More Grass
PyTK
SpaceCore
TMXL Map Toolkit
QUALITY OF LIFE mods that don’t change the game significantly, but slightly improve the base mechanics to make it easier/better.
Auto Animal Doors - automatically opens all barn and coop doors at a set time every morning, and closes it once all animals are back inside at night.
Big Silo - increases the hay capacity of silos to around 200k.
Casks Everywhere - gives the player the ability to put casks anywhere, instead of only in the basement of the house.
Crop Transplant - gives the player the ability to move crops and trees without destroying them.
Mod Update Menu - puts a handy-dandy extra button on the main menu that shows you your modlist and whether any mods are out of date. clicking on a mod in the list will take you to its web page, if you want to download the updated version. (sometimes, like SMAPIs console, it is wrong. occasionally will tell you a mod is out of date when it isn’t, but is more often right than wrong.)
No Crows - removes crows, no more losing crops to those thieving corvid so-and-so’s.
No Fence Decay - fences no longer decay and break down over time. they stand for time immeasurable, like the monolith in space odyssey, or the empty shell of a blockbuster video.
Safe Lightning - lightning will only strike lightning rods, or if none are available, it will not strike at all.
Stack Everything - gives the player the ability to stack every item in the game, items like casks can now be stacked instead of having a 1:1 ratio in inventory/chest space.
UI Info Suite - ui overhaul(ish) that adds things like being able to see if you’ve pet an animal that day, whether the travelling merchant is in town, what your luck is for the day, or how many days a crop/keg has until it’s finished, etc. this mod is a must have for any playthrough, even if you’re going completely vanilla. possibly the most useful mod that exists for stardew.
GAME TWEAKS things that add mechanics or change gameplay. immersion (i don’t know what else to call it)
Babies Take After Spouse - makes your children actually look like the offspring of your chosen spouse. also adds some more outfits for toddlers, if you’re into that.
Canon Friendly Dialogue Expansion - adds a metric buttload of new dialogue for all of the friendable characters, in case you’re sick of seeing the same four sentences on loop.
Cat Gifts - bit of a misnomer, makes your pet (either cat or dog) occasionally bring you gifts of random items. it’s pretty darn cute.
Climates of Ferngill - expands the games weather system, as well as tweaking the original one, to add new things like fog, and weather that changes over the span of a day instead of being one set thing.
Eemie’s Bees - adds bees! they hang around your beehives! very cute!
Lunar Disturbances - adds a rad lunar system to the game, including an overhead moon that goes through phases. also adds stuff like eclipses and blood moons.
Mizu’s Flowers - adds so many new flowers to the game. frankly, it’s quite homophobic how few variations are in the base game.
Oasis Greenhouse - completely reworks the greenhouse to be way bigger (on the inside, it doesn’t take up more space on the actual farm) and have more rooms in which to do greenhouse things, like spots to grow trees.
Seasonal Villager Outfits - stardew residents will now change clothes on the reg, including during different events, depending on the weather, and with the seasons.
Slime Hutch Winery - retextures the slime hutch to look Not Garbage, and adds a customisable inside space that you can combine with Casks Everywhere to make a usable winery.
cheats there is only one mod in this section but i couldn’t figure out what other section to put it in.
CJB Cheats Menu - it’s a cheats menu. for cheating. amongst normal cheaty things like infite health and stamina, gives you the ability to increase your movement speed, and harvest crops with a scythe, which i find immensely useful.
AESTHETIQUE who needs the orignal graphics when you’ve got soft pastel versions? most of these are by elle, aka junimods. she’s good at aesthetic overhauls, sue me.
Bathroom Replaces Spouse Room - replaces the spouse room with one of three nicer looking bathrooms, in case your spouse has decided to have an unchangeable hideous colour scheme that does not go with the rest of your house, like all of them do.
Better Artisan Goods - retextures the artisan goods (milk, cheese, fruits, etc) to look prettier/more accurate.
Elle’s Cat Replacements - highly customisable cat retexture, including fur patterns, and the colour of its collar.
Elle’s Critter and Butterfly Replacements - retextures the little critters and butterflies that hang around the valley.
Elle’s Dog Replacements - same as the cat replacements but for dogs. the nomenclature is difficult to grasp, i know.
Elle’s New Barn Animals - retextures of all the barn animals, with a whole bunch of customisation options to choose from for each.
Elle’s New Coop Animals - same as the barn animals one. shocker.
Elle’s Seasonal Buildings - highly customisable retexture of all the buildings on the farm. pick from a bunch of designs and colour palettes to make your farm the best representation of you it can be. or don’t, i’m not your dad, i can’t tell you what to do.
Flippsie’s Alternative Lamp Posts - retextures lamp posts to look a little more victorian and aesthetic-y.
Garden Variety UI - customisable ui colours! let’s you customise the look of all the menus, inventory bar, etc, from a buuuunch of different colours and designs.
Industrial Kitchen and Interior - retextures the kitchen appliances and benches to a softer aesthetic.
Starblue Valley - reshades the whoooole of stardew to make it colour gooder. greens are more green, blues are more blue, and the whole game looks a lot less yellow and harsh. much softer and easier on the eyes.
Wildflower Grass Field - retextures and adds a bunch of variation to the grass that grows around the valley. instead of one grass texture everywhere, there is now over 50 possible combinations, really makes the whole place look much more realistic and varied.
Yellog’s Wood Craftables - retextures and redesigns the craftables (chests, beehives, kegs, cheese press, etc) to have a softer palette, with a rustic wooden aesthetic.
and that’s that folks! i also use these two harvey dialogue expansion packs, but that’s because he’s my favourite bachelor, so i kept them off the general list. i hope y'all found this modlist useful, sorry it took me so long to get around to making/updating it. thank you so much for all the followers on this newer sideblog of mine, it’s really cool to see other people enjoying a game that i love so much. catch y'all on the flipside! ^-^
#stardew#stardew valley#stardew valley modding#stardew modding#stardew mods#stardew valley mods#stardew modlist#stardew valley modlist
76 notes
·
View notes
Note
how do you take such awesome pictures for your look books and cc ??
Aww thank you sm!! ❤️ Taking a good pictures of sims? Hmm...I’d say focus on making sure the lighting is not too harsh or contrasty and taking a picture in the best angle! (Sorry it’s a little bit weird to explain haha 😆) Camera angles are really a big part in taking good photos, so just move the camera around here and there to find the most flattering angle you like ✨ I also find that different lighting positions/brightness can make a sim look quite different, so don’t go too bright (It can make the sim look REAALLY contrasting and hides fine detail) or too low (The face wil look much duller and less lively, in a way) Just experiment with different things, bug those are my top tips! 💕 Oh! And lighting add ons like Reshade are really handy to make colors pop, but if you’re computer cannot handle it very well, play around with curves, saturation, etc. in your editing program ^^
Of course, I am at all no pro at making pictures, but these are what I’ve found that works pretty well :D I hope this helps! 💖
10 notes
·
View notes