#so I recommend you look at the source material
Explore tagged Tumblr posts
Visit Tumblr Blog
Explore Tumblr blogs with no restrictions, modern design and the best experience.
Last Seen Tumblr Blogs


Fun Fact
Tumblr has been providing a Korean-language service since 2013.
Text

Faithful to The Source Material
There’s something ironic about this gossip that, insistently, comes to the media saying Cavill left TW, because of script differences that weren’t faithful to the source material, right when he was in a PR that went terribly wrong. First of all,:
· Did he leave or was invited to leave?
· Was it really because of script differences to the source material only, or there’s something else?
· Was he bothering too much, back-seat driving and changing the script?
· Was he hitting on colleagues and causing trouble on set among cast and production?
You will have to follow me on this. First of all, this guy is very disciplined and always demonstrated to be very passionate about this story. Cavill really believes in his characters. He wouldn’t leave for his own will, unless something very serious was going on, on set. Differences from the source material don’t seem to be enough for an actor to leave a project he was always passionate about and he will always face that, working as an actor. And, if not able to accept a script the way it is, it’s going to be hard for him to work.
But, I don’t know the books nor the games. I’m not a geek. So, I really couldn’t speak about differences, only about the series I watch. And, let me say I’m not very fond of fantasy nor Superhero movies. What attracted me to TW was Cavill, more precisely, his phisique du role and presence on screen. He impressed me.
I could say it was my first contact with the man Henry Cavill. I had seen The Tudors years before – Great series! I recommend you watch it. -, but I confess Charles Brandon didn’t impress me that much, maybe because the series was so good, I didn’t focus on one character or actor, but the entire cast. Myers gave a show and was fantastic, the entire cast was phenomenal. The series is great!
Then, one day, see a spoiler of TW and I go like: “Who is that guy?” and I started researching and that’s when I discovered he was Charles Brandon, also Superman and had been in the theatres with MoS. I, then, looked deeper in research, watching as many interviews as I could so as to know the actor and most of his movies. I don’t need to say I fell in love with him. Who doesn’t? He seemed so respectful to fans, so polite and really a gentleman, that it captivated me (that was the first time I followed a celeb) and I believed Hollywood was, finally, changing. But, how could I be so wrong?
I loved the first season of TW. The way it was presented, bringing past and future to present scene was very bright, clever and really attracted my attention. It was like putting a puzzle together. But, when watching season 2... That was a very different experience. On season 3, the impression I had was that the authors were tired, giving up and writing anything by halves and cutting corners, just to keep the series moving forward. Then, the news Cavill would be out of the show. I completely lost interest. He was the perfect Geralt.
So, was he invited to leave or jumped out of the boat foreseeing a future close failure? Because, without a doubt, Geralt was a turning point in his career and, it gave him more spotlight. It brought him recognition as an actor. Leaving a project he was in love with and a character he was passionate about, means something wasn’t right. What calls my attention is the rumours about him being difficult to deal with on set and having an improper behavior towards colleagues, only appearing when he left TW production and in parallel to his last PR stunt.
Cavill could have flirted with colleagues. I remember two different moments, in which he had a narcissistic behavior towards Freya. In one, he clearly and evidently ignores her on stage in front of a crowd, going straight to compliment Anya, leaving Freya standing there surprised and confused. That was clearly, a narcissistic behavior. In a third moment, during an interview with Anya, we can notice his attempt at flirting when he hands her the microphone, trying to touch her fingers, which she subtly rejects. He clearly, didn’t consider the fact she was almost engaged.
Cavill is not a saint and we sure don’t know at least, half of what goes on behind cameras, where I believe he’s a different person. He has a bad drinking habit, smokes and might, as well, be a jerk as a man, when in private moments. And, the damage control adopted to this last PR showed his narcissistic side. But, I don’t think he caused trouble with female colleagues on set. It’s more likely, the production was pissed for realizing they would lose him, who was taking the series on his back, and wanted to avoid the reason he left, the gossip about “differences from the source material”. They didn't want that to gain attention, trying to save the production by screwing the reputation of who would make the production end, so people would think he left for another reason, trying to keep the show on air.
Before the news of Cavill leaving TW, there was never a single comment against his conduct and behavior towards colleagues and he was always careful with his rep. Until he left TW and fell in a PR trap. Maybe, TW production got really pissed with Cavill for leaving in the middle of the production, knowing that it would cause the end of the series. And, they may be behind the choice of his stunt for this PR and the smear campaign. Viscuso was a trap, no doubt about it. And, whoever indicated her to this PR (working on the behalf of this smear campaign) - maybe a colleague or a false friend, jealous of his success -, used Viscuso as a bait to create the perfect opportunity to screw Cavill’s image.
As soon as the PR stunt was announced, the tabloid giving the news wrongly identified her (intentional?), a TV show made fun of the pap walk (preordered?) and the first post on his IG of this PR became a joke, while DG seemed to make an ironic comment below it. Something was off and whoever was managing his page mocked a third and last post bringing a picture of the couple. His team probably, decided to do it as an attempt to disguise the smear campaign he was suffering from someone related to the industry (maybe, from TW production), ending up sacrificing this PR and intentionally, turning it into a circus to deviate attention from who was really behind this.
I believe there was (or still is) an attempt to screw his rep from someone who works in the Industry, with a certain influence, to make a tabloid give misinformation about this PR stunt and a TV show mock it, as if sending the following message: “It’s important to be faithful to the source material as it is to the truth you sell about yourself”. But, now, as this person managed to have his fandom pissed with him (in part, thanks to his damage control), there’s no need to be so emphatic. Yes! The smear campaign didn’t start in the fandom. It started in the Industry, more likely, among TW production. But, to hide that, Cavill adopted a narcissistic damage control (his biggest mistakes) to disguise the situation, gaslighting his fandom to make them accountable for something that the Industry started against him.
17 notes
·
View notes
Text
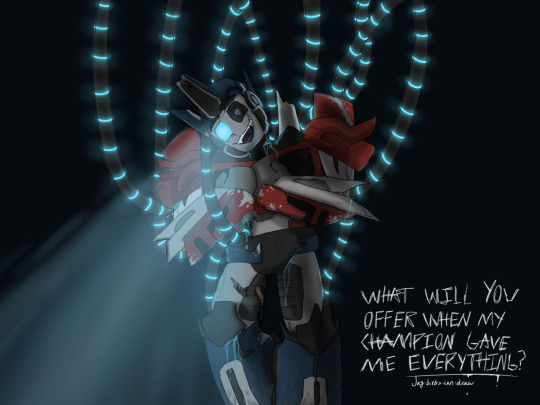
Totally silly not spooky at all (well I created it so I guess I wouldn’t think so) depiction of ‘Optimus’ in @lets-try-some-writing’s silly little Forbidden Sight fic
My promise has been fulfilled
Also I’m finally on summer break!!
#this took forever#worth it#their fic is so unsettling#i’m not very good at body horror#so I recommend you look at the source material#transformers#artists on tumblr#tfp optimus prime#tfp#transformers prime#fanfiction
183 notes
·
View notes
Text
how c.ai works and why it's unethical
Okay, since the AI discourse is happening again, I want to make this very clear, because a few weeks ago I had to explain to a (well meaning) person in the community how AI works. I'm going to be addressing people who are maybe younger or aren't familiar with the latest type of "AI", not people who purposely devalue the work of creatives and/or are shills.
The name "Artificial Intelligence" is a bit misleading when it comes to things like AI chatbots. When you think of AI, you think of a robot, and you might think that by making a chatbot you're simply programming a robot to talk about something you want them to talk about, and it's similar to an rp partner. But with current technology, that's not how AI works. For a breakdown on how AI is programmed, CGP grey made a great video about this several years ago (he updated the title and thumbnail recently)
youtube
I HIGHLY HIGHLY recommend you watch this because CGP Grey is good at explaining, but the tl;dr for this post is this: bots are made with a metric shit-ton of data. In C.AI's case, the data is writing. Stolen writing, usually scraped fanfiction.
How do we know chatbots are stealing from fanfiction writers? It knows what omegaverse is [SOURCE] (it's a Wired article, put it in incognito mode if it won't let you read it), and when a Reddit user asked a chatbot to write a story about "Steve", it automatically wrote about characters named "Bucky" and "Tony" [SOURCE].
I also said this in the tags of a previous reblog, but when you're talking to C.AI bots, it's also taking your writing and using it in its algorithm: which seems fine until you realize 1. They're using your work uncredited 2. It's not staying private, they're using your work to make their service better, a service they're trying to make money off of.
"But Bucca," you might say. "Human writers work like that too. We read books and other fanfictions and that's how we come up with material for roleplay or fanfiction."
Well, what's the difference between plagiarism and original writing? The answer is that plagiarism is taking what someone else has made and simply editing it or mixing it up to look original. You didn't do any thinking yourself. C.AI doesn't "think" because it's not a brain, it takes all the fanfiction it was taught on, mixes it up with whatever topic you've given it, and generates a response like in old-timey mysteries where somebody cuts a bunch of letters out of magazines and pastes them together to write a letter.
(And might I remind you, people can't monetize their fanfiction the way C.AI is trying to monetize itself. Authors are very lax about fanfiction nowadays: we've come a long way since the Anne Rice days of terror. But this issue is cropping back up again with BookTok complaining that they can't pay someone else for bound copies of fanfiction. Don't do that either.)
Bottom line, here are the problems with using things like C.AI:
It is using material it doesn't have permission to use and doesn't credit anybody. Not only is it ethically wrong, but AI is already beginning to contend with copyright issues.
C.AI sucks at its job anyway. It's not good at basic story structure like building tension, and can't even remember things you've told it. I've also seen many instances of bots saying triggering or disgusting things that deeply upset the user. You don't get that with properly trigger tagged fanworks.
Your work and your time put into the app can be taken away from you at any moment and used to make money for someone else. I can't tell you how many times I've seen people who use AI panic about accidentally deleting a bot that they spent hours conversing with. Your time and effort is so much more stable and well-preserved if you wrote a fanfiction or roleplayed with someone and saved the chatlogs. The company that owns and runs C.AI can not only use whatever you've written as they see fit, they can take your shit away on a whim, either on purpose or by accident due to the nature of the Internet.
DON'T USE C.AI, OR AT THE VERY BARE MINIMUM DO NOT DO THE AI'S WORK FOR IT BY STEALING OTHER PEOPLES' WORK TO PUT INTO IT. Writing fanfiction is a communal labor of love. We share it with each other for free for the love of the original work and ideas we share. Not only can AI not replicate this, but it shouldn't.
(also, this goes without saying, but this entire post also applies to ai art)
#anti ai#cod fanfiction#c.ai#character ai#c.ai bot#c.ai chats#fanfiction#fanfiction writing#writing#writing fanfiction#on writing#fuck ai#ai is theft#call of duty#cod#long post#I'm not putting any of this under a readmore#Youtube
6K notes
·
View notes
Text
— sidelines
pairing : yeon sieun x reader
warnings : bit of angst, mentions of hospitals
word count : 3.7k
summary : sieun spent his days watching life from the sidelines, content with having nothing to lose. That’s until you arrived, and suddenly, he couldn’t bear the thought of losing the one thing that made him feel alive.
a/n : i highly recommend to listen to "sidelines" by Phoebe Bridges while reading this xx (if you’ve read my fanfic “unspoken”, you can consider this one as a beginning of their love story!)

—
You weren’t exactly excited to start another school day at Eunjang High. It wasn’t like anyone looked forward to it, but at least most people here had their little groups, their cliques, their drama. You didn’t.
Not even because you were shy, just selective.
It was easier to stay out of things when most of your classmates had their hands in something shady, fights, trouble, things you didn’t want to be wrapped up in. Most people were either too loud, too aggressive, or just... not your kind of company. You kept to yourself. And you were fine with that.
But today, your peace was interrupted when you stepped into class, early enough to avoid the hall crowd, only to find someone sitting at your desk.
You paused mid-step, pulling out one of your earphones.
The guy had his head down, arms folded like he’d been asleep there all night. He didn’t even flinch at the sound of the door.
You narrowed your eyes slightly. About to speak up when you caught a few murmurs behind you.
“Apparently he’s a genius.”
“Huh? Then why transfer here?”
“I heard he killed someone.”
You glanced sideways. The source of the whispers - two guys known for making up multiple rumours - caught your eye and quickly looked away, pretending they weren’t just gossiping two feet away from you.
You sighed and walked toward your desk. You weren’t superstitious, and you weren’t about to get into a rumor spiral on a Monday morning.
You reached the desk, second row from the back, and gently tapped the guy on the shoulder.
Nothing. So you leaned down a bit. “Hey.”
Finally, he stirred. Slowly, as if gravity worked harder on him than the rest of the world. His head lifted just enough for you to see his sharp half-lidded eyes.
You kept your voice neutral. “This is my desk.”
He blinked at you once.
Then looked away.
Then laid his head back down.
You stood there, frowning. Not because he ignored you, exactly - more because you had no idea what kind of interaction just happened.
After a second, you simply sighed and nodded to yourself, grabbing your bag to sit in the desk directly in front of him. It’s not like it was worth to pick a fight for a desk.
You put your earphones back in and was about to pull out your notebook to study some more material before the teacher comes, when you realised you had left it in the drawer of your desk.
You exhaled through your nose, already annoyed by that out of ordinary Monday and pulled out one earbud again before leaning back just enough to tap on his arm a second time. Maybe a little firmer this time.
This time, he didn’t lift his head, but you heard a faint sigh escape him.
You blinked, unimpressed.
“Okay?” you muttered, voice just loud enough for him to hear, “You’re the one who stole my desk? I just need the notebook inside it.”
He shifted slightly, slow and clearly reluctant, but eventually lifted his head just a little to lazily reach toward the drawer beneath the desk for your notebook.
His fingers brushed over the inside surface, then paused. Nothing. He glanced inside with a sliver more interest this time, hand searching again. Still nothing.
You narrowed your eyes, shifting your weight to one leg. “Move a sec.” you said, not exactly aggressive, just impatient.
You stepped forward and leaned down next to him, resting one hand on the edge of the desk for balance, your other brushing a few stray pens aside as you peered into the drawer yourself. He stiffened a little at how close you were standing, your presence very much in his personal space.
You leaned further, your hair nearly brushing his shoulder, lips slightly parted in thought as you scanned the empty drawer.
You clicked your tongue. “I swear I left it here-”
You paused, then smacked your forehead lightly. “Wait. No. No, I left it on my bookshelf.” You sighed and straightened up with a dramatic groan, brushing off your skirt and glancing at him for the first time.
And that’s when your eyes met.
He was already staring at you. Not startled, not nervous—just watching. Quietly. Unreadable.
You meant to say something, maybe a thanks or a joke, but the words kind of stuck for a second.
Because now that you were actually looking at him, really looking, he wasn’t quite what you’d expected.
That was the first time you actually saw his features.
His features were oddly soft, despite the deadpan expression. His eyes weren’t cold like you expected. They were wide and dark, kind of doe-like beneath the messy fringe of his hair. His skin was annoyingly clear, and his lips were full and soft-looking.
You blinked.
He blinked back.
Then, clearing your throat, you took a step back, “Right. My bad.” you said flatly, waving your notebook-less hand in a vague gesture before returning to your new desk in front of him.
No reply. Just quiet breathing and the faint creak of him shifting in his seat again, lowering his head on his arms.
You slipped your earphones back in and leaned your cheek against your fist, trying to get back into the zone. But the silence behind you felt just a little different now.
Sieun stared at you a few more seconds before diving back into the arms of Morpheus, trying to stay unbothered by your sudden approaches.
He wasn't used to being noticed, not necessarily in the shy kind of way, more like he just didn't care to step into the spotlight. People were messy, unpredictable and often crossed lines that were then hard to redraw.
So he watched from the sidelines, kept his head down and slept through the noise. It was easier this way.
That same evening, you were leaving the school’s library later than usual. Finals were creeping closer, and you had more materials to catch up on than you liked to admit. The sun had already dipped below the buildings, and the streetlights had flickered on in their usual lazy rhythm.
That’s when you saw him.
Sieun, earphones in, hoodie on, hands stuffed in his pockets, walking a few paces ahead on the empty sidewalk. You weren’t even sure it was him at first, but the way he dragged his steps, the slight slump of his shoulders… yeah, that was definitely him.
Your brain told you to just go home but your feet moved before you could think twice about it. You picked up pace, caught up to him, and gently tapped his shoulder.
He turned, a little startled, pulling one earbud out. His expression shifted the second he saw it was you, eyebrows lifting slightly, not quite a smile, but something softer than his usual stoic.
“What are you doing here?” he asked, voice low but not unfriendly.
You grinned. “Following you, obviously.”
His eyes widened, not dramatically, but enough to make you laugh, glancing away sheepishly before adding, “I was just heading home from the library.”
You fell into step beside him, talking like it was the most natural thing in the world. He didn’t say much, but he didn’t put his earbuds back in either.
A few minutes later, you passed the small family-run restaurant you’ve gone to since you were a kid.
“I’m starving,” you said, already slowing your pace. “I’m eating here.”
He nodded slightly, like he was about to walk away.
But before he could, you slipped your arm around his—lightly, barely more than a hook—and guided him toward the door. He didn’t resist, but you felt him stiffen slightly, eyes glued to where your arms touched.
You greeted the older lady at the counter with your usual grin. She lit up at the sight of you and already began preparing your usual.
“Double it this time!” you called before heading toward your usual table and finally letting go of Sieun’s arm.
You sat down, still smiling, still talking about how your teacher gave a three-page worksheet for fun. But mid-sentence, you noticed him—still standing, his expression unreadable.
“I should go.” he said suddenly.
You blinked. “What?”
He shifted on his feet. “Thanks, but I have to go home.”
You frowned. “The food’s good, I swear. You’ll regret it!”
Sieun let out a soft sigh. Not annoyed, not angry, just tired.
“I don’t know why you’re like this,” he said quietly. “But I’m not looking to make friends.”
It wasn’t harsh. Just matter-of-fact. Like he was trying to set a boundary that even he wasn’t fully convinced of.
Your smile faltered, just for a second. You nodded slowly, but instead of pushing back, you just looked at him with a quiet calm.
“I didn’t say I was trying to be your friend,” you said, voice light, but steadier than before. “I just didn’t wanna eat alone.”
He stared at you a beat longer. Then another.
And then, slowly, wordlessly, he pulled out the chair across from you and sat down.
You didn’t say anything for a few minutes as you noticed his small glances toward the door and the tension still clinging to his shoulders. But then you slowly started talking about a new story of yours, not expecting a response anymore, just making him comfortable in your company.
He didn’t laugh. But he listened. You could tell from the way his eyes would twitch at certain points, or how he shifted ever so slightly when something you said caught him off guard.
Then the food came, steaming bowls, a dozen tiny plates with pickled radishes and crispy kimchi, all warm and familiar.
You looked at him. He didn’t move. He just stared at the tray like he wasn’t sure what to do with it.
Without a word, you picked up your chopsticks and reached across his tray, placing a few of your favorite side dishes on top of his white rice. Nothing dramatic, nothing too much—just a quiet gesture. You didn’t say anything, just went back to eating your own meal, eyes on your bowl, giving him space to catch up.
For a moment, he didn’t move. And then, slowly, almost hesitantly, he picked up his chopsticks. You didn’t look up, but from the corner of your eye, you saw him take a small bite of the rice you topped, chew, and swallow.
You smiled. Soft and barely-there.
He didn’t say a word. Neither did you. The restaurant filled the silence for you—soft clinks of metal bowls, the faint hum of an old TV in the back, the quiet muttering of the older lady behind the counter.
But for the first time in a long time, Sieun didn’t feel like he needed to leave right away. He didn’t feel the itch in his spine to retreat. He just stayed. Ate. Sat across from someone who didn’t expect him to be more than what he could offer.
That evening didn’t change everything. He didn’t suddenly start texting first or waiting outside classrooms like some eager cliché. He still kept to himself, still stayed quiet, still lived on the edge of everyone’s world. But somehow, you started to slip into his orbit without asking permission.
The classroom was half full when he walked in, earpods tucked in, expression unreadable. Same as always. But when he sat down, he noticed it.
A small pack of vitamin gummies on his desk. The same kind you were chewing the other day in the restaurant.
He stared at it. Then at you—already seated in front of him, pretending very obviously to tie your shoelace even though both shoes were still on.
You peeked back at him. “You gonna eat them or just burn a hole through the wrapper?”
He blinked once, slow. “You put this here?”
“Do you see anyone else giving you stuff to take care of your immune system?”
Silence. Then, Sieun reached out, slowly picked up the pack, and tucked it into his pencil case, avoiding your gaze.
Later that week, you caught up to him just after last period ended, your steps quick against the linoleum.
“Hey, wait up!” you called.
He didn’t. Not really. But he didn’t speed either which was new.
You fell into step beside him, out of breath. “You walk like someone’s chasing you.”
“I am.” he said without thinking.
You blinked. “Huh?”
Sieun didn’t reply. You tilted your head.
“That was... was that a joke?” you asked.
He stayed silent. The corner of your mouth twitched.
“I didn’t think you could do that!” You exclaimed, smiling excitedly.
Still no response. But the way he turned his face slightly toward the window told you he was hiding something. Perhaps the tiniest smile tugging at the corner of his lips.
The next shift in your dynamic happened by accident.
You were sitting under the small pavilion just outside the school gate, waiting for the rain to calm down. Most students had already left, but you’d forgotten an umbrella.
Sieun, earbuds in, walked past, only to stop halfway down the steps when he saw you. You waved your phone in the air. “No signal. Can’t even call for a ride.”
He stood there for a beat, then slowly walked back. Opened his umbrella.
You blinked. “Wait, are you—?”
“Come on,” he said, eyes not meeting yours.
You stood quickly, scrambling over, squeezing under the small umbrella with him. “It’s gonna be a tight fit.”
“Then walk fast.”
You were halfway down the block when you looked up at him. “I’ll pay you back for this heroic rescue. One day.”
“You already did.”
“What? When?”
“The food. That night.”
“Didn’t think it was that special.” You chuckled.
“You’re the first person who took me out to eat something.” He admitted, his grip on the umbrella handle tightening slightly. “So it felt special to me.”
And in that moment—feet splashing in puddles, your shoulder brushing his, raindrops ticking against plastic—you realized the hard walls Sieun has been building up so hard throughout his entire life, were finally starting to fall apart.
The following week, you didn’t appear at school on Tuesday. At first, Sieun thought maybe you were just late. But class started. Then lunch passed. Then the final bell rang.
No teasing pokes to his ribs. No gummy vitamins tossed onto his desk. No sudden voice asking if he'd finally figured out how to smile.
And yet the silence was louder than anything you ever said.
He found himself packing his bag slower than usual. He kept glancing at your empty desk as though you’d come sprinting in, out of breath, waving some excuse and asking if he missed you too.
He didn’t.
But maybe he did.
By the time he left the school building, his hands were already fishing out his phone. The screen glared back at him in the soft evening light, showing your last five messages, each one as chaotic and cluttered as your speech.
He’d replied, once. “You’re dramatic.” to which you replied with an offended sticker.
This time, for the first time, he typed first:
“You were absent today.”
He stared at the screen, thumb hovering, unsure of what exactly he was supposed to send as he wasn’t the best with words.
Then, his phone rang. He answered fast, too fast, maybe. But he wasn’t met with your voice.
“Hello? Is this… Sieun?”
He frowned slightly. “Yes?”
“I’m Y/N’s mom. I found her phone. I figured someone named Sieun would probably wonder since she’s been in the hospital since this morning…”
His world stilled. The word echoed, too loud in his ears. Hospital.
“What hospital?”
Y/N’s mom didn’t even have the time to explain what happened before Sieun hung up the call with trembling fingers. His brain couldn’t even process her tone or phrasing, the only word that rang loud in his head was hospital.
He ran.
Ran past the gates of Eunjang, past busy streets and honking cars, ignoring the burn in his lungs and the ache in his legs.
When he reached the hospital, sweat sticking to the back of his neck and breath shallow, he didn’t stop to think about how crazy he must’ve looked. He walked up to the front desk with shaking hands, giving your name, waiting while they looked it up. His heart drummed against his ribs like a warning.
Room 207.
He made his way there, steps slowing the closer he got. The quiet of the hospital hallways made the tension worse.
When he stood in front of the door, his hand hovered over the handle. He wasn’t even sure what he’d say, or if he even should be here.
But he opened it anyway.
And there you were.
Laying down on the narrow hospital bed, eyes closed, IV hooked up to your arm. Your lips were parted in soft breaths, a blanket pulled up to your chest, your hair a bit messier than usual.
Sieun’s breath hitched. His feet locked in place.
He’d never seen you like this. Still. Quiet.
You always filled every space you walked into with noise, movement, warmth — and now you were just… still.
His chest tightened so hard it hurt.
Then, your brow furrowed and you let out a soft groan, shifting under the blanket. You stretched with a whiny noise, eyes fluttering open.
You flinched when you saw someone standing there.
Then smiled. “Hey!” you exclaimed, rubbing your eyes, “you scared the hell out of me. You look like a ghost.”
But the moment you registered his expression, not angry, not sarcastic, just scared, your smile slowly fell.
“…Sieun?”
He didn’t speak. He just stared.
You blinked. “Oh, right. Okay. I’m fine, I promise. I just fainted this morning because apparently I overworked myself. No sleep, too much coffee, etc.” You waved a hand. “They gave me some IVs, made me nap for hours, and now I’m fine. Look.” You stretched your arms up and wiggled your fingers. “Alive and functioning.”
But Sieun didn’t respond right away.
He walked closer slowly, eyes never leaving your face.
Then, finally, he spoke, his voice low, hoarse, like it got lost somewhere on the way there.
“I thought something happened to you.”
A long silence.
You softened, your lips parting. “I’m really okay. You didn’t have to run all the way here.”
“I did.” he snapped.
You stared at him.
Not because he snapped. But because it wasn’t like him to raise his voice, not even like that. It wasn’t loud, not really. But it was shaken.
“Sit for a minute.” you said softly, patting the chair next to your bed.
Sieun hesitated, his eyes flickering to the seat in the corner of the room, but finally he let out a long sigh and settled on the chair next to the bed — not quite next to you, but closer than he’d usually get.
“I’m sorry,” you said quietly, watching him. “Didn’t mean to worry you like that. I swear, I’m fine now. Just… a bit dramatic with the whole fainting thing.”
He didn’t answer at first. Just sat there, hands on his knees, gaze fixed on the IV line as if it offended him.
You tilted your head. “Are you mad at me?”
“No.” he muttered.
“…You sure?”
He nodded once.
But you weren’t convinced.
“You know you didn’t have to come here.” you added carefully.
“I know.”
“…But I’m glad you did.”
Finally, that got his attention. He turned slightly, eyes meeting yours. They looked tired, not physically, but something heavier.
“I wasn’t gonna come.” he said after a pause, voice low.
“Wow, thanks!” you teased gently, hoping to ease whatever tension was still coiled in him.
But he didn’t even crack a smirk.
“I wasn’t gonna come,” he repeated, “but the second I heard the word hospital, I just… moved.”
You blinked, surprised at how honest he sounded.
“I’ve never—” He paused. “I’ve never ran for anyone.”
You opened your mouth, then closed it.
“I didn’t think I cared that much,” he finished quietly. “But I do.”
The room fell still.
You didn’t know what to say. You always teased him for being unbothered, unreadable, cold even. But now — now he was just a boy who didn’t know what to do with a feeling that showed up without warning.
You reached out, lightly tapping his knee with your fingers. “Well… you care,” you said softly. “And that’s kinda nice to know.”
He looked at your hand. Then at you.
You smiled. “Even if it took a hospital bed to get you to admit it.”
That earned the tiniest huff from him — not a laugh, not really, but close. A slight release of breath through his nose. For Sieun, that was basically a chuckle.
You leaned back into your pillow, watching him.
He didn’t move. Just stayed there, hand still clenched, like he didn’t know how to unwind from the day’s weight.
“Want me to scoot over?” you offered, patting the mattress.
He blinked at you like you were insane.
You snorted. “I’m kidding! … Unless?”
He shook his head, but you swore the corners of his mouth twitched.
You reached for your water bottle, took a sip, then tilted your head toward him. “You can stay a bit, if you want.”
“…Yeah,” he said after a long beat. “Okay.”
And just like that, the silence between you shifted — from tense to comfortable. And Sieun stayed.
Not because he had to.
But because he wanted to.
He sat there with his hands resting on his knees, eyes finally steady, no longer darting or restless. For the first time in a while, his mind wasn’t busy with numbers, deadlines, or that pressure to be something. It was just you. The sound of your voice, the faint beep of the IV machine, and the soft pull in his chest that he didn’t want to shake off.
All this time, he’d been watching the world from the sidelines — moving through it without ever really touching it.
But then you came into his life.
And now, for the first time… he wanted to know what it felt like — to want to stay.
To want something more.
Because now, he had something to lose.
You.
#kdrama x reader#yeon sieun fanfic#yeon sieun fluff#yeon sieun#yeon sieun x reader#sieun x reader#sieun#weak hero class two#whc2#whc1#weak hero class one#weak hero class 1#kdrama#fanfiction
703 notes
·
View notes
Text
"the magnus protocol had a whole ARG beforehand? what?"
yes! it did!
"oh so I need to have participated in this whole big thing to actually understand the podcast?"
not at all! from the official post-mortem put out by RQ, "while the ARG was not something that was necessary to participate in to understand the magnus protocol, it was designed to contain a wealth of background story and context that would enrich any player's listening experience."
"a wealth of background context that would enrich my listening experience 👀👀👀 how can I learn about this?"
SO glad you asked. sadly, many of the materials made for the arg have been taken down since the game ended 😔 (ex., the official OIAR, magnus institute, and bonzoland websites. (edit ii: I found partial wayback machine captures! see below) though @strangehauntsuk is still up!), so we're a bit low on primary sources, but in terms of learning about what happened:
for a starting point, I would really recommend this video by @pinkelotjeart
youtube
it's super accessible, it was made in real time as the game progressed and follows the solving and revelation of clues as they happened, it hits all the major points of the mystery and moments of community insanity while eliding some of the nitty gritty puzzle grinding, 10/10 would recommend.
here's the official summary put out by RQ, and I'd recommend reading through this once you've already gotten a basic handle on the flow of the story and the basic connections between major clues and events. it's got some fun behind-the-scenes info and lays out the thought process behind the puzzles in simple terms
here's the full masterdoc of all puzzles and resolutions put together in the statement remains discord server. masterdoc my absolute BELOVED, masterdoc my bethrothed, masterdoc my soul mate. I'd recommend this as a second port of call after the above video as it either contains all details about the puzzles or links to other expanded docs that do.
here's the narrative summary doc that lays out all the plot and lore discovered in three pages of plain prose. if you just want to get to the good bits as fast as you can and get blasted directly in the face by contextless lore bombs, this is the doc for you. if you don't want to start with the video, I'd say this is another good entry point.
once you've got the lay of the land, some of the game materials that I found particularly interesting include:
the in-universe east germany expat usenet forum, with all content translated into english. most of it is irrelevant space filler with occasional extremely sus lore, but I still found it fun to read through. love to soak in some fictional forum drama.
chdb.xlsx, the spreadsheet of the names of all the children the protocol 'verse magnus institute was studying/experimenting on. EDIT: here is a version of the sheet without any annotations and with all of the names in their original order, kudos to @theboombutton for catching that the commonly shared copy had the order swapped around.
klaus.xls, a (very corrupted) spreadsheet with what looks like the classifications of a bunch of old OIAR cases.
EDIT: have a few more saved materials from the game that I forgot to include.
an in-universe audio ad to apply to the OIAR that ran before archives episodes and kicked off the whole game.
an in-universe video ad to apply to the OIAR, this one is an official upload that's still up from the game itself. you can subscribe to the OIAR's official youtube channel today, if you so chose.
the robo-voicemail greeting from the OIAR's phone line.
EDIT II:
here is a wayback machine capture of the OIAR's official website.
here is a wayback machine capture of the bonzoland website.
(pretty sure both of the above captures just archived the home pages, though I haven't tried clicking all of the links. I'd say they're still worth looking at, the home pages give a good window into the vibes.)
once you start poking around in these documents, you'll find a bunch of links to others with further information, the materials I've included here just contain what I feel to be the most relevant details to getting a broad feel for the whole game. once again, huge shout out to the statement remains server, I was barely in there as the ARG was in progress and only ducked my head in every so often to find links like these. true mvps of the fandom.
#gonna pin this for a bit because every day I get 2-5 asks saying 'there was an arg? how do I learn about it?'#tmagp#video#marina marvels at life
6K notes
·
View notes
Text
So You Want to Read More about Chinese Mythos: a rough list of primary sources
"How/Where can I learn more about Chinese mythology?" is a question I saw a lot on other sites, back when I was venturing outside of Shenmo novel booksphere and into IRL folk religions + general mythos, but had rarely found satisfying answers.
As such, this is my attempt at writing something past me will find useful.
(Built into it is the assumption that you can read Chinese, which I only realized after writing the post. I try to amend for it by adding links to existing translations, as well as links to digitalized Chinese versions when there doesn't seem to be one.)
The thing about all mythologies and legends is that they are 1) complicated, and 2) are products of their times. As such, it is very important to specify the "when" and "wheres" and "what are you looking for" when answering a question as broad as this.
-Do you want one or more "books with an overarching story"?
In that case, Journey to the West and Investiture of the Gods (Fengshen Yanyi) serve as good starting points, made more accessible for general readers by the fact that they both had English translations——Anthony C. Yu's JTTW translation is very good, Gu Zhizhong's FSYY one, not so much.
Crucially, they are both Ming vernacular novels. Though they are fictional works that are not on the same level of "seriousness" as actual religious scriptures, these books still took inspiration from the popular religion of their times, at a point where the blending of the Three Teachings (Buddhism, Daoism, Confucianism) had become truly mainstream.
And for FSYY specifically, the book had a huge influence on subsequent popular worship because of its "pantheon-building" aspect, to the point of some Daoists actually putting characters from the novel into their temples.
(Vernacular novels + operas being a medium for the spread of popular worship and popular fictional characters eventually being worshipped IRL is a thing in Ming-Qing China. Meir Shahar has a paper that goes into detail about the relationship between the two.)
After that, if you want to read other Shenmo novels, works that are much less well-written but may be more reflective of Ming folk religions at the time, check out Journey to the North/South/East (named as such bc of what basically amounted to a Ming print house marketing strategy) too.
-Do you want to know about the priestly Daoist side of things, the "how the deities are organized and worshipped in a somewhat more formal setting" vs "how the stories are told"?
Though I won't recommend diving straight into the entire Daozang or Yunji Qiqian or some other books compiled in the Daoist text collections, I can think of a few "list of gods/immortals" type works, like Liexian Zhuan and Zhenling Weiye Tu.
Also, though it is much closer to the folk religion side than the organized Daoist side, the Yuan-Ming era Grand Compendium of the Three Religions' Deities, aka Sanjiao Soushen Daquan, is invaluable in understanding the origins and evolutions of certain popular deities.
(A quirk of historical Daoist scriptures is that they often come up with giant lists of gods that have never appeared in other prior texts, or enjoy any actual worship in temples.)
(The "organized/folk" divide is itself a dubious one, seeing how both state religion and "priestly" Daoism had channels to incorporate popular deities and practices into their systems. But if you are just looking at written materials, I feel like there is still a noticeable difference.)
Lastly, if you want to know more about Daoist immortal-hood and how to attain it: Ge Hong's Baopuzi (N & S. dynasty) and Zhonglv Chuandao Ji (late Tang/Five Dynasties) are both texts about external and internal alchemy with English translations.
-Do you want something older, more ancient, from Warring States and Qin-Han Era China?
Classics of Mountains and Seas, aka Shanhai Jing, is the way to go. It also reads like a bestiary-slash-fantastical cookbook, full of strange beasts, plants, kingdoms of unusual humanoids, and the occasional half-man, half-beast gods.
A later work, the Han-dynasty Huai Nan Zi, is an even denser read, being a collection of essays, but it's also where a lot of ancient legends like "Nvwa patches the sky" and "Chang'e steals the elixir of immortality" can be first found in bits and pieces.
Shenyi Jing might or might not be a Northern-Southern dynasties work masquerading as a Han one. It was written in a style that emulated the Classics of Mountains and Seas, and had some neat fantastic beasts and additional descriptions of gods/beasts mentioned in the previous 2 works.
-Do you have too much time on your hands, a willingness to get through lot of classical Chinese, and an obsession over yaoguais and ghosts?
Then it's time to flip open the encyclopedic folklore compendiums——Soushen Ji (N/S dynasty), You Yang Za Zu (Tang), Taiping Guangji (early Song), Yijian Zhi (Southern Song)...
Okay, to be honest, you probably can't read all of them from start to finish. I can't either. These aren't purely folklore compendiums, but giant encyclopedias collecting matters ranging from history and biography to medicine and geography, with specific sections on yaoguais, ghosts and "strange things that happened to someone".
As such, I recommend you only check the relevant sections and use the Full Text Search function well.
Pu Songling's Strange Tales from a Chinese Studios, aka Liaozhai Zhiyi, is in a similar vein, but a lot more entertaining and readable. Together with Yuewei Caotang Biji and Zi Buyu, they formed the "Big Three" of Qing dynasty folktale compendiums, all of which featured a lot of stories about fox spirits and ghosts.
Lastly...
The Yuan-Ming Zajus (a sort of folk opera) get an honorable mention. Apart from JTTW Zaju, an early, pre-novel version of the story that has very different characterization of SWK, there are also a few plays centered around Erlang (specifically, Zhao Erlang) and Nezha, such as "Erlang Drunkenly Shot the Demon-locking Mirror". Sadly, none of these had an English translation.
Because of the fragmented nature of Chinese mythos, you can always find some tidbits scattered inside history books like Zuo Zhuan or poetry collections like Qu Yuan's Chuci. Since they aren't really about mythology overall and are too numerous to cite, I do not include them in this post, but if you wanna go down even deeper in this already gigantic rabbit hole, it's a good thing to keep in mind.
#chinese mythology#chinese folklore#resources#mythology and folklore#journey to the west#investiture of the gods
2K notes
·
View notes
Text
Evo Bio 101

Annoyed at the prospect of wasting time during his simple lectures, Craig's misplaced ambitions lead to a first hand lesson in (d)evolutionary biology.
Was possessed by the idea and couldn't not write it haha! Here's a story taking hair growth and brutification to the extreme ! Hope you enjoy! -Occam

It’s not that Craig didn’t want to teach the class, he was grateful to have a chance to instruct on anything even remotely close to his research area. Intro to Evolutionary Biology was directly in his wheelhouse and given how cutthroat his department was he was more than happy to jump at the chance.
It’s just- the class was so introductory it’s insulting. The course is required for all students in the university’s tiny biological anthropology program and judging by the recommended syllabus given to him by the department head, there’s not a day where Craig is going to teach his students anything they don’t already know.
Complaining under his breath as he makes his way to the classroom across campus, the doctoral candidate wonders if any of his undergraduates are even going to show up given how remedial the material seems. Kicking the air he wishes to himself that he’ll get the chance to teach them something novel. To show them what their field is all about, how man became man rather than droll lectures on Darwin’s finches and Mendel’s peas.
As soon as he utters the words to no one he shivers and his skin prickles with goosebumps before he fully stumbles over himself just outside the classroom door. There’s a quiet buzzing in the air and he looks around to find its source before noticing the time on an overhead clock and realizing he’s already late. Bumbling into the classroom he adjusts his tie and apologizes as he rushes to get his laptop set up.
“Sorry guys! Always forget these dinky 101 courses are relegated to the middle of nowhere,” there are a few quiet laughs but the lecturer is sure they’re just trying to appease him. He knows because he’s laughed at countless half-jokes from professors over the years. Craig continues to awkwardly mumble to the class as he waits for his equipment to bootup. After getting his introductory powerpoint running he wipes his brow and for the first time turns to look at his small class.
It’s then that he notices how warm it is in the room. Wiping his forehead, his stuffy sleeve wicks sweat from his brow and he assumes it’s just from nerves at standing in front of the bored faces of students who have done nothing today but go over reading lists and play icebreakers. Might as well get this over with. “Welcome all to the intro course on Evolutionary Biology! I’ll be your instructor, Craig Stoll. See a few familiar faces around here from courses I’ve TAed, you guys can just call me Craig. I assume this is no one’s first rodeo-”
Craig opens his mouth to slyly complain about how basic the material is, to mock the university requiring people well on their way to becoming experts in the field to waste time going over the most absolute basics. But before he can speak, it’s like his throat has been zapped free of moisture. He tries to clear his throat a couple times, stretching open his mouth in between doing so as he struggles in front of his few students.
Smiling awkwardly as his forehead sweats even heavier under the bright lights above the lectern he turns and digs through his bag for the water bottle that scarcely leaves his side. Still turned away from the class he forces it to his lips and guzzles for a few seconds straight. After a moment he pauses and breathes heavily for a few seconds, gasping for air just as hungrily as he was gulping for water, and then he gets right back to it. Lifting the bottle perpendicular to the Earth as he drinks like he’s dying of thirst.
All students present eye him apprehensively, most of them had seen him countless times over the years sitting performatively uptight as he graded assignments and aided professors as needed. Never could they imagine him doing something so uncouth. One sophomore whispers to her neighbor, Dawson, concerned at how nervous the researcher seems. He replies mocking Craig, excited to see the meek man who gave him a 79 on a final last semester crash and burn.
Letting his bottle fall away once more there isn’t a thought in his mind questioning how peculiar what just happened was. He was thirsty, and now he no longer is. Simple. Craig turns back with a wide smile at his classroom clearing his throat once more this time successfully. He doesn’t notice how his voice echoes through the lecture hall, decidedly deeper than it should be, “Ahh, that’s better! Sorry again y’all!”
In the front row a student motions for him to wipe his face as water is clearly dripping down his ever-so-slightly shadowed jaw. Craig’s face burns red as he does so, for the first time realizing himself that he’s acting a tad strange. This is only more apparent as he feels a burp begin to rise. He did drink that water awfully fast. Before the thought even occurs to him to silence it he lets it loose, producing the loudest burp he’s ever heard. Stunning the classroom to silence.
Even the student eager to watch Craig fail was shocked enough to grimace in second hand embarrassment as he sees the man’s eyes dull while burping like an animal in front of his class before scrambling back to his senses. “Oh jeez, I don’t know what’s gotten into me today- Let’s just, uhm, get to it.”

Directing his class’ attention to the slides he squirms and adjusts his tie with sweaty palms as he realizes how uncomfortable his clothes feel all of a sudden. Struggling to get the thing loose he grunts and flexes his feet as he suddenly feels confined. Trapped in his shoes. Shaking his head to stay focused he pointedly ignores the feeling of his toes poking the front of his dress shoes and starts lecturing.
Clicking past the introduction his brow furrows as he sees the title of the first slide of substance, ‘What is Evolutionary Biology?’ Grunting once more, Craig scratches his chest as he can’t help but address what he thinks to be the elephant in the room, unaware of the eyes staring at him as his arms seem to be stretching out from their sleeves. Not noticing as his perpetually clean shaven face suddenly begins to sprout stubbly sideburns and a scratchy neckbeard.

No, suddenly the rising anger in his mind can’t help but address how stupid it is that his boss is making him explain to these people essentially majoring in evolutionary biology what those words mean. Clenching his jaw as he yanks the tie from his neck and tosses it to the floor he speaks up, his voice clearly rougher than it was even seconds ago, “This is- You all know what evolutionary biology is, obviously,” his voice cracks deeper as he tries to remove his jacket, ignoring how it gets stuck on arms that have impossibly begun to lengthen. Hanging lower and heavier as he struggles against clothes that suddenly feel like they’re holding him captive. “You all know already!”
He hammers a fist down onto his lectern and hears the sound of his shirt tearing from the back. Students flinch in shock and a few begin to gather their things as Craig stares at his arm. His hand shouldn't be that big. Isn’t that big. Seeing the few thick hairs starting to pepper his bulkier wrists, Craig turns to look down at his chest as it begins to grow, grunting ever deeper he stares as two meaty pecs begin to strain the button-up.
Hairs poke through the straining placket as they start to spread above the neckline. Every movement sends further sounds of tearing garment through the classroom as Craig tries to understand what he’s seeing. His voice sounds even duller, brutish even as he cries out, “What goin- What’s, grgh, happening to me-” Thicker fingers yank off his shirt sending sweat and buttons flying into the classroom, freeing pecs that were not there even a minute ago.


Many students begin to flee the classroom as their instructor begins feeling up his chest with hands growing hairier. The student who was initially concerned dials emergency services as she ditches her laptop and begins to race out the door, terrified as Craig’s thickening brows start to just out further from his forehead. The man who was waiting to watch him awkwardly stumble over his words rather than join his fleeing cohort just watches enthralled. Staring at his widening jaw as it is promptly covered with a thick beard.
Unaware of the small horde of students in flight from his lecture as his newly fat palms cup itching pecs as they grow meatier, Craig groans and apologizes to whoever remains as he leans underneath the small podium to deal with the sharp pain in his shoes. His ass bursts free from his pants, exposing briefs barely holding up and cheeks that are rapidly being decorated by a forest of fur. His wider back bumps into the lectern as he struggles to free his thick feet from shoes that were already a tad too snug.


Speaking accompanied by the sound of his tearing at leather shoes, Craig tries to continue the lecture in between increasingly common grunts, “So me, unh- I think you uhhh- you know this evo- uhh” The one remaining student, Dawson, begins creeping closer, deadset to see this through to the end. Slowly pulling out his phone and setting it to record what is clearly some impossible miracle of science. Some reversion towards a more primal state, a devolution. Dawson smirks as he imagines how far this will set him ahead in the field.
Craig finds himself suddenly much less preoccupied with said science as he frees his newly hairy feet from their binds, leaving sweat steaming off of their wider soles as they continue to crack larger. Instead, mind leaking intelligence, he begins to drool and quietly grunt to himself as his cock begins to throb. Buried in a bush of thick and curled pubes which are themselves haloed by massive burly thighs, his rougher hands easily claw off his briefs to free his bobbing cock. Dripping with pre he sees veins visibly pulsing as what must be a foreskin begins to encroach towards a head almost purple and pre-covered.

Dawson sneaks onward, zooming in to capture how Craig’s beard raises higher on his face to meet with the hair on his head growing wild. His eyes flicker across strange bulging muscles on his instructor’s shoulders as they’re rapidly blanketed by a forest of curls thicker than his own pubes. The student's mouth slightly waters as he adjusts the frame to capture the man’s massive hands as he begins to masturbate in the classroom. And then he drops his phone.
On high alert, the man-no-longer jumps with a start and hits his head on the lectern, guffawing as he rubs the spot he foolishly bumped. Falling to the floor himself, Dawson is torn between fleeing like the rest of his wiser cohort and staring at a living breathing caveman. He can’t resist simply being the first man to witness prehistory.
Beyond that, Dawson can’t help but stare at the exposed pits of a man he assumed was as smooth as marble. He’s almost possessed, staring at the wild jungle of pit hair that flies free from the brute’s raised arm, dripping with sweat. There are almost visible stink lines as body odor that hasn’t been found on the earth for thousands of millenia begins to fill the room. And the longer he stares, the longer he smells, he begins to lose any will to do anything but submit.
Perhaps it’s simply a biological reaction that Dawson finds himself rooted to the spot, taking in heady breaths of the fetid scent. Why else would his mouth fall open as his cock starts to rise at the sight, Craig speaks up seeing his own remaining pupil sitting there in some state between primal lust and fear. Feeling his cock bob against the podium and seeing himself nude in this clinical classroom, some semblance of self returns to the once-doctoral candidate.
“Dawsugh- Need help. Cra-ug ugh- Crag need help, nowugh” His jaw stings with pain as it widens more, his lips struggling to create sounds he knows he should be able to. As he stares down on the male planted on the ground he feels those bizarre instincts begin to return once more. His skin prickles, back cracking as it compacts while his chest grows wider with every heaving breath. Putting on mass as his mind begins to grow foggy once more.


Crag struggles to stay focused, struggles to remember who he is, what he’s doing. What that strange rectangle is at this lesser man’s feet. But with every precious second his twenty-first century concerns begin to evaporate. Worries about the grind of academia, disdain at being shoehorned into reading powerpoints no one cares to hear, the monotony of driving home in rush hour traffic. Everything begins to fade. Everything that is, besides the need to dominate the hairless, beta man staring at him.
Dawson can scarcely make heads or tails of what happens next as he sees the brute pounce on him. He feels the man’s calloused hands tear at his clothes and lies in repose, waiting for whatever Crag, apparently, is to do next. Desperately wanting fulfillment no man has experienced before. His hands clutch the caveman-apparent’s back, feeling the scratch of hair thicker than man can grow and the bulging sticky muscle beneath.
Feeling the man’s river of precum dripping down his abs, Dawson begins to feel the prickle of his treasure trail regrowing as his feverish mind realizes his future far too late. Every inch of skin touching the man begins to change likewise. Arms he was never shy of lengthen just as he saw his least favorite TA’s did minutes ago, decorated with hair and bulging larger with thick muscle.


Even quicker than he witnessed happening to Craig er, Crag, hair begins to engulf him. The concerted efforts towards maintaining his clean-cut appearance is absolutely erased as every inch of his form prickles with thick, dark hair growth. Crag sloppily kisses him and leaves a growing beard in the wake of his tongue. Forearms that have had the lightest coat of blonde peach fuzz erupt with fark jungles of hair before launching even further, coating his increasingly clumsy fingers and biceps twitching stronger with every haphazard movement.
Dawson’s hips reflexively hump into the man dominating him. His changing cock scratches against the man’s essentially fur covered torso which only heightens the student’s rapturous delight and accelerates his transformation. In no time at all the complexities and desires of the life he lived are wiped and replaced by a need to do nothing more than seek sustenance and pleasure. To serve and be served by the Crag who begins to hoist him against a wall and hump.
His handsome face changes, bones restructuring as hands he doesn’t recognize as he clings to Crag who is more monster than man. Feeling his rising cock rubbing against his new alpha’s as it begins to change he knows he is on the fast track to join him. He feels his vocal chords thickening as he cries out in ecstasy, Crag finally claiming what is his. Longer toes burst through tennis shoes, curling on the floor as nails yellow and thicken.
Dawson’s sharper and larger teeth bite Crag’s shoulder as they continue to frot and fuck. They continue until their sweat and ancient semen coats much of the room, their new balls having apparently quite the short refractory period. When they finally tire or get bored their snores sound loud enough to break glass as they curl up together somewhere behind the podium. Bonded mates of a world that hasn’t existed for hundreds of thousands of years.


Well before the pair were done with consummating their new forms, the whole building was placed on lockdown. Quarantine crews working hastily to contain whatever impossible pathogen has apparently begun to infect the campus. Scientists across the world wait with bated breath from some update on whatever impossible goings on are hidden behind that yellow quarantine tape. Hearing the horrified testimonies of those students that escape does little to sate their curiosities, though it does invite them to be lab rats as scientists watch each and every one of them hoping to observe their own prehistoric changes.
It’s only a matter of time before some foolhardy explorer or researcher desperate for a discovery breaks the seal and finds something they could never be prepared for. Sooner rather than later the mounting need to know will be insurmountable. Sooner rather than later whatever this plague of the past they tried to keep behind lock and key will spread. And then those foolish enough to remain nearby will get a first hand experience on the nature of evolutionary biology. And to think, Craig Stoll was so concerned that nothing of note would come of the course.
#male tf#mental change#muscle tf#hair growth#reality change#dumber#personality change#musk tf#devolution#male transformation
483 notes
·
View notes
Text
Book binding 101: Materials
I’ve decided to do a series of posts on how to book-bind since I talk about it a lot, and I think it’s a really fun process. This post will include various inexpensive alternatives to “professional” supplies, many of which you will have at home. Not everyone can afford a cricut and that’s ok! I will also be listing more expensive materials for people who want to invest a bit more into the craft, but they absolutely are not a must.
This first post will focus on a list of supplies you can use to make books, but will not yet get into the instructional part of it. That will come later!
Anyway…
Bookbinding Materials: Essentials
These are items you need to bind, but many you can find around your house!
Sewing thread: Any thread will work for bookbinding, though waxed threads can help reduce tangles. You can also double up thread as another way to prevent tangling if you so choose. Waxed thread is definitely more expensive, so it can be good to use what you have starting out. Here’s a link to the waxed thread I used for those that are interested. You can buy it in a lot of different colors! (White is good if want an “invisible” thread).
Sewing needle: A lot of people say to use a curved needle for binding, but I’ve never found it to be much different from using a regular needle. If you have one, I would recommend a larger needle, however, since it’s better for piercing through signatures (aka the stacks of pages you bind together). In other words: there’s no special needle you need to bind books.
Ruler: I’d recommend any metal ruler since it’s better to use as a straight edge for cutting. There’s a good chance you already have one. It’s just used for measuring and being a straight edge. Nothing fancy.
Paper: Any paper will work. What you wanna use depends on your project really: if you’re binding together a work of text you’ll want to use some kind of printer paper (of course). If you’re making a sketchbook, you can fold up some sketching paper. I like to get sketchbooks with perforated edges so I can tear them out easily if I want to use a blank page for bookbinding. You can also buy large sheets of paper made for any medium. For example, if you want a sheet of water color paper, just search “large watercolor paper sheet”.
Awl (or all alternative): An awl is a tool used to poke sewing holes. It’s nice because it’s sharp and ergonomic, but you can totally also use a pushpin or even a sewing needle.
Bone folder (or a bone folder alternative): A bone folder creates sharp creases when you fold your pages, making them lay flatter. It also helps define the hinge gap on finished books, making it open easier. You can use a ruler if you don’t have one.
PVA glue: PVA glue is what to look out for when it comes to binding glue. There are some designed specifically for bookbinding, which spread out a bit faster than ones that aren’t. You can also use tacky glue which IS a PVA glue.
Book board: Also sometimes called chip board, Davey board, or mat board. This is what you’ll use for hard cover books. It is important to use book board specially, as cardboard will warp. You can buy book board directly, or you can cut the covers off of old textbooks or binders, unwrap the paper/plastic around the board, and use that!
Box cutter or utility knife: for cutting the board
Decorative paper and book cloth: For wrapping around cover boards and for endpapers. Book cloth can also be used to cover boards. You can also draw your own designs on Bristol paper if you want (or any paper with a similar thickness/durability). When it comes to decorative paper I like to either get scrapbook paper or rolls of fancy handmade paper (you can get those on Etsy, through paper source, or through bookbinding websites).
Bookbinding materials: Optional (and not crazy expensive)
These are supplies that you don’t need for binding but that can make the process easier and/or help with the decorative elements of your books. I’d recommend these things for when you’ve been binding for a while and feel these things could be helpful!
Paper trimmer: can cut a few sheets of paper evenly—I find it really helpful for endpapers
Stencils: Super helpful if you want to add text on the covers
Stamps: Good for adding text and also great for adding illustrations if you’re not able to draw them on your own. You can buy ink pads for them or use markers by coloring over the stamp lightly and using the stamp immediately so it doesn’t dry (I’ve tested this with alcohol markers and it works very well)
Paint markers: great for drawing directly on the cover. Since they’re opaque they can imitate the look of vinyl. You can also get them super painterly if you want. The internet usually talks about poscas but there are tons of different brands. Do some research, figure out what you like & can afford.
Hot foil pen & heat transfer foil: Perfect if you want to add foil to your covers but don’t want to spend a ton of money on a cricut. A lot of binders uses the foil quill brand, but there are ones that cost less and work the same (I have both a cheaper one & an actual foil quill because I wanted some nib variation. As long as the pen has good reviews that aren’t from bots you should be good). Also remember: don’t use foil designed for going through laminators (I.e. decofoil) . It doesn’t work the same way.
Bookbinding Materials—Expensive
These are materials I’d recommend for people who have been bookbinding for a while & feel that it’s something they really want to invest in. To be fully transparent, I’m a college student and don’t own these and have little personal experience with them. However, I know a lot of binders who love them!
Cricut machine—Cricuts are cutting machines that can make precise cuts into paper, wood, bookboard, or vinyl. A lot of binders will cut designs out of vinyl and apply them to the covers using a heat press.
Book press—What it sounds like. The pressure helps the pages lay flat and stay even. That being said you can stack heavy books on top of your projects, it just may not have the same even pressure. I also know some people will DIY these, so if you’re skilled with power tools you can give it a go!
Paper guillotine—like a paper trimmer but bigger and can cut more sheets of paper at once. I believe really good ones can also be used to cut bookboard!
Those are all the materials I can think of! Hope this can work as a good starting point for those interested in the craft. I’ll definitely be posting more info about bookbinding for people who are interested :)
-Zoë💗
#bookbinding#book binding#fan binding#craftblr#information#tutorial#book binding resource#resource#book binding 101
887 notes
·
View notes
Text
Okay, now I'm cranky
Not that I even do more than glance at LinkedIn every few weeks or so, as I have friends there. But THIS is beyond the pale. (Or even the Pale, which is another story. Is this actually a real person based in Limerick?? [I have my doubts.) But if so, they should be ashamed.)
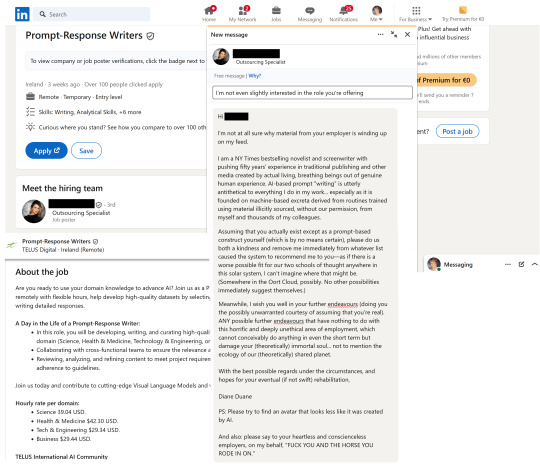
(transcription:)
Hi [(theoretical) person whose name I've obscured],
I'm not at all sure why material from your employer is winding up on my feed.
I am a NY Times bestselling novelist and screenwriter with pushing fifty years' experience in traditional publishing and other media created by actual living, breathing beings out of genuine human experience. AI-based prompt "writing" is utterly antithetical to everything I do in my work... especially as it is founded on machine-based excreta derived from routines trained using material illicitly sourced, without our permission, from myself and thousands of my colleagues.
Assuming that you actually exist except as a prompt-based construct yourself (which is by no means certain), please do us both a kindness and remove me immediately from whatever list caused the system to recommend me to you—as if there is a worse possible fit for our two schools of thought anywhere in this solar system, I can't imagine where that might be. (Somewhere in the Oort Cloud, possibly. No other possibilities immediately suggest themselves.)
Meanwhile, I wish you well in your further endeavours (doing you the possibly unwarranted courtesy of assuming that you're real). ANY possible further endeavours that have nothing to do with this horrific and deeply unethical area of employment, which cannot conceivably do anything in even the short term but damage your (theoretically) immortal soul... not to mention the ecology of our (theoretically) shared planet.
With the best possible regards under the circumstances, and hopes for your eventual (if not swift) rehabilitation,
Diane Duane
PS: Please try to find an avatar that looks less like it was created by AI.
And also: please say to your heartless and conscienceless employers, on my behalf, "FUCK YOU AND THE HORSE YOU RODE IN ON."
625 notes
·
View notes
Note
Why did wheat become a widespread staple crop given that it's difficult to harvest/transport/etc? This is not meant to be snarky or combative in any way, it's a genuine question. Are there any books you'd recommend for learning more about this kind of economic and technological history? Thanks.
sorry, i've long since forgotten all the actual books i've read about it, but i will always recommend This Guy:
also as very much a non-expert, my semi-informed opinion on Wheat is that growing complicated and difficult compared to going to the grocery store, and doesn't stack up very well to living in a food forest like north and south americans managed, either.
however, wheat is a grass, and grass grows in a lot of places that people also like to live in, and so wheat farming isn't as crazy a venture as it might otherwise seem.
in a lot of climates, it's possible to plant the grass, harvest the grass seeds, and store the seeds long enough to get you through the part of the year where there's nothing much to eat. if you manage your social and material technology right, you can store a lot of the seeds, and you can even transport them around before they rot, meaning you can now export the seeds from places where grass grows into places where it doesn't. the stalks of the grass that you can't eat provides food for the animals you need to help you grow the grass. and transport the seeds, too.
the social structure required to grow wheat in bulk (a steep and violent hierarchy) does three things: feeds everyone in it with enough extra that the guys on the bottom of the organization can survive to grow more wheat next year, and allows the guys on the top can sequester the rest as profit, consolidating their power. the third thing is that as land is converted to wheat fields, it stops yielding any other food but wheat, which locks people into the system for good. once a people depend on a staple cereal grain for their main source of calories, there isn't an easy way back: forests are chewed away for more wheat fields and those woodlands that remain are shifted towards hardwoods for agricultural tools, rather than food forests with fruit/nuts/shrubs, and even those maintained as game preserves still can't support the needs of entire villages.
in arid and semi-arid conditions, it's even harder to step away from dependence on grain farming because there the agricultural development is along rivers where the land can be irrigated, and the population of people supported by grain production is extremely concentrated into those small areas rather than spread across the entire biome.
in the northern parts of eurasia where grain couldn't be produced at scale because it was too rocky and too cold, people mostly went fishing, and when they grew stuff it was hardy root crops like beets and turnips.
DISCLAIMER: this is all very approximate. but now you know as much as i know.
P.S actually here's the last thing about wheat: it probably all started as a way to reliably source and produce beer, which was invented a long time before bread. bread was invented from wheat when the guys who were producing the beer seeds wanted to start exporting beer seeds to people who wanted beer far away, so they baked the seeds into tablets you could easily transport and then ferment with water once you got to your destination. eventually the traders who were transporting the beer kits started eating them, too, and crackers as a snack food really took off. look up the wikipedia article on beer if you don't believe me.
#wheat#agriculture#you want kings? that's how you get kings#you start out just wanting to source some beer reliably#then you fucking get kings#what a racket
249 notes
·
View notes
Text
Digital Stamp Making Tutorial
Hello, and welcome to the long-awaited(at least on my part) digital stamp-making tutorial from neosprites! I’d like to preface that I learned what I was doing from this tutorial so it may be a bit redundant, but if anything I get a bit more specific. Thank you so much to @graphic--horde for your work, it changed me as a graphic maker. This is gunna be a long post so feel free to bookmark it for later. Now, onto the show!

The frame I will be using for this tutorial (which is the frame I use on 99.9% of my stamps) I found from the above linked post, which I believe is from a creator that OP lost track of. Its inner dimensions are 94x50 pixels and its outer dimensions are 99x56 pixels. Here it is!

Find your material! - I recommend using websites like Tumblr and searching with the “GIF” filter only on, or alternatives such as Giphy or Tenor. Your browser may let you directly save the .gif file; if not and you are noticing it restricts you to save it as a .webp file you can try an extension like “Save webp as PNG or JPEG” (for Firefox but I image other browsers have similar functions, but I really recommend you switch to Firefox). To use this you will right click on your source .gif like normal but instead of clicking on “Save image as…” click “Save webP as…” and then click “GIF”. You should be redirected to the website ezgif.com where we will actually be doing all of our editing! Here’s the .gif we’ll be working with.

Convert to GIF (optional) - if you used the extension from the above step you should already be ready to click the blue “Convert to GIF” button. If not, go ahead and open ezgif.com and click on “webP” and then “WebP to GIF”; then convert to a gif with the blue button.

Resize the GIF - now that we have a gif ready to edit, let’s make it the right size. The easiest method I have found is to change it directly to the frame’s inner dimensions, 94x50 pixels. [EDIT: Make sure in the aspect ratio drop drop menu you select "stretch to fit" and not "center and crop to fit" like I did in the photo example.] Click “resize” and then type [94] in for the width and [50] for the height. Next press the blue “resize image” button.


Add the frame - next click “overlay” then click the thin blue button that says “Extend canvas size(use if overlay exceeds GIF sizes)”. This will give us some extra room to add the frame onto the design. Next click “Browse…” and find the frame you have saved onto your device, then click the blue “Upload image” button.


After that it’s going to be misaligned, that’s normal! It will say you have the option to drag it into place, but don’t bother. That’s one of the reasons my old stamps look wack, it’s just harder to do. Instead type [44] in for the Left box and [22] in for the Right box. It took me a while to figure out these dimensions to be honest, and I’ve only tested it with this frame so I don't know if it works with others. Then click the blue “Generate image” button.


Crop the transparent edges - click on “crop”. You will have the option to check a box that says “trim transparent pixels around the image” however, I don’t recommend this as it tends to crop a few of the frame’s pixels with it sometimes. Next, set the Left position to [44] and the Right position to [22]. For the other dimensions we will use the outer dimensions of the frame which are 99x56 pixels, this will trim everything except the tiny spaces in between the stamp frame’s spikes. Type the width as [99] and the height as [56] and click the tiny blue button that says “set”. After that click the blue “Crop image” button.


Save and use! - all that's left is to click “save” and upload the graphic to your liking. (best seen on dark mode obviously)

If you’d like to tag me in stamps you’ve made using my tutorial I would love to see them, but it’s not required!! Make sure to always give credit for pictures/gifs when you can and try not to make stuff out of personal/fan art. Thank you to the person in my inbox who requested this tutorial, I had been meaning to for a while but it was just the kick I needed. :)
#carrd graphics#carrd resources#carrd stuff#rentry graphics#rentry resources#rentry decor#rentry pixels#rentry stuff#rentry inspo#deviantart#neocities#mine#my graphics#my tutorials#resources#tutorials#tutorial#how to#stamps#blinkies#graphics#web graphic#old internet#early internet#spacehey#da stamps#page decor#custom#old web#frames
361 notes
·
View notes
Text
I was wrong.
over the last few weeks, i started heavily questioning my beliefs.
i noticed that some of my desires came in faster than other desires. some of them (as you may see in my recent posts) took years to reflect, but some of them got reflected so fast at the speed of light.
i’ve been told by various people that there’s usually a time delay for desires to materialize in the 3D, and for some reason, it resonated with me. that’s why i mention it in my answers because i was merely basing it off of my own experiences with the law.
but something clicked for me recently. i watched a video by missy renee, about why people haven’t seen their manifestations for years. i’m just going to put it out there that you don’t need to pay for coaching. there are a lot of manifesting coaches that don’t know what they’re talking about, and when you read source, it’s a lot more telling. missy renee is not one of those coaches. she has read source and has even applied those teachings into her life. if i have to recommend a coach for you to watch, though, it would be her.
anyways, there was a line that she said that i immediately wrote down because it caused so much confusion in me. basically, she said that the reason why we have yet to see things come to pass is because we are still identifying with our old beliefs — our old story — and due to this, we become double-minded. this double-mindedness is then perceived as the “time delay.”
in that moment, i slowly leaned back in my chair. it was an “a-ha” moment for me, but it was also a little harrowing.
how long have i held myself back from just accepting that i am the person that i wanted to be? how long have i been limiting myself, telling myself the old story over and over again like a broken record? more importantly, i’ve been telling other people that there is such thing as a “time delay” because i decided that i should experience the delay.
so when i wrote a list and just allowed my higher self to figure it out, some of them came in so fucking fast at the speed of light. it stunned me. that’s when i realized that i was holding a false belief.
i never thought that i’d be writing an apology post, but here i am. i’m holding myself accountable because i was the one that wrote that there is such thing as a “time delay,” but in reality, there isn’t. sure, you don’t have to be pitch perfect with your beliefs, but when this desire has no conflict with your beliefs — when you have no resistance, when you aren’t arguing with yourself about whether you have it or not — then there’s no delay.
i remember some people said that it should not take more than thirty days, and i used to think that it’s bullshit, but now i can clearly see that there is a reason why they believe this. it’s not even about the length of time, but about how frequent you return to the state. it’s all about you accepting that the person you want to be is who you are now.
besides that, i want this post to be a reminder that everyone’s beliefs are constantly changing. there is always going to be expansion, growth, an inevitable withering of the old beliefs and the blossoming of new beliefs the more we learn about how this all works. this is why i want people to go back to reading source, to not always take everyone’s posts as “truth” or “the gospel” because we are all still learning in the end. learning never ends.
edit: i don't mean to say all this for you to start focusing on the physical reality as your primary reality. i still wholeheartedly believe that this is merely a reflection of your beliefs, and ultimately, it is all about who you are choosing to be right now despite what it looks like.
220 notes
·
View notes
Note
Don't wanna be a bother but I bumped into ur touchstarved oc stuff and do you have any pointers for drawing in the touchstarved style? I can't really nail it down 100% but you do so... pretty please?
Hii yeah ofc, it's no bother at all no worries! You sent me this at the right time actually jsdhksd I'm in the middle of redesigning Emma right now and I've been taking a close look at the art style again, so it's all fresh in my mind!
Assuming you already have your design ready and have found a pose or composition you like, replicating the art style will probably come down to getting the lineart and shading to look similar.
About the lineart:
Probably goes without saying, but you'll need a pen with the opacity turned off to get the clean, ink-like lines. If you use CSP I recommend the default textured pen, which I think has a similar look, but honestly any pen will do.
The thing you have to look out for the most when doing the lines is the darkest shadows. It's a bit tricky to explain, and I think a lot of it comes with practice, but you have to look for the places where the darkest shadows would be, or where the light could barely reach. Once you spot them, instead of shading them you create a sharp shape and paint them black, like so:
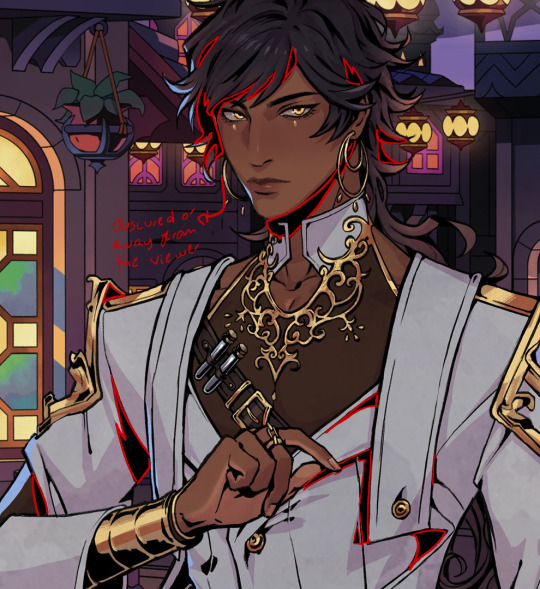
I also recommend varying the thickness of your lines, but not at random. Instead, try to keep lighting in mind while you draw them. You could draw one continuous thin line for something, and then only thicken it where it falls away from the light, or where it'd create an occlusion, or wherever you want a shape to stand out from another. A thick line will essentially either "push back" or separate things in space, while a thin line will pull it forward or make things look like they're closer together.
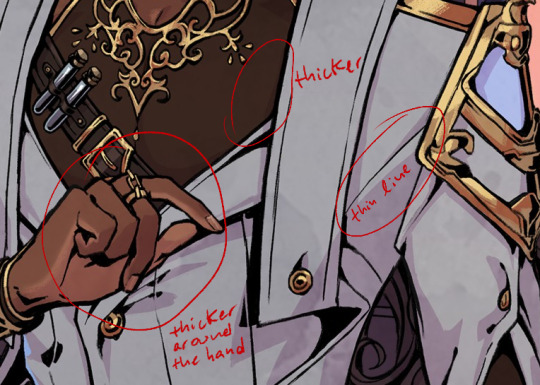

You can also exaggerate the shadows in order to create more contrast. Like in the case of Kuras' sleeves and coat, for example- you could argue that some bounce light could still get in there, but with the shadows exaggerated it creates a really nice, clean shape. You can also separate these shapes from other lines by leaving a small space between them and the lines.

The metal might look a bit different, but it follows the same logic as everything else- your darkest shadows will be pure black. It might look like it has more shadows but that's just because it's more reflective, so the light is usually concentrated on highlight and bounce light areas, so the tones around those areas will be darker.
About the shading:
From what I've noticed, it's all about keeping it subtle and simple. If you color pick the characters, you can see the variation between light and shadow is subtle and not all that contrasting. Most of the contrast is done with colors, not values.


The light source is usually from the top right, characters are pretty well lit, and there's a little bit of a blue backlight from the left that helps them stand out against the backgrounds.
The shading is mostly sharp, cel shading, rarely blended. Wherever there's blending, it's usually subtle or a gradient
They also use gradations to indicate color shifts, like the colors in Leander's coat. You can do this with the gradient tool or an airbrush.
I recommend picking 1 color for light, 1 color for shadow, and maybe 1 inbetween midtone to use sparingly in places where you want a very subtle shadow. You can go more fancy if you're trying to create something that looks more like the game's CGs, but if you're going for the same look as the sprites, it's better to keep it simple.
You can shade manually each part of the character, or you can try using a multiply layer. For multiply, I like shifting the color towards a warm or pinkish tone and keeping it light and desaturated to get a similar look as the sprites.
Highlights are used very sparingly, only on a few places like the nose, mouth, eyes, and a few on the hair. Maybe occasionally somewhere else, but only if necessary, like in the case of very reflective materials like metal, gold, glass and leather.
The characters also usually have subtle textures on their clothes, and you can quickly create something similar by using a textured brush and an overlay or multiply mode. Like so:
It's subtle, but makes a difference in my opinion! You can try this with a lot of different textured brushes to get the exact look you're going for.
That's all I could think of right now! If you have any questions or wanna know anything specific I didn't mention here, let me know!
127 notes
·
View notes
Text
hi everyone so ages ago i translated watari's diary from the movie tie-in material L File No. 15 (sourced from this post by @mikami) but i just realized i never posted it here?? of all places??? so here you go! i recommend reading this translation along with the screenshots from that post since there are pictures that i did not bother actually including.
(spoilers for the live action films!)
---
QUILLISH WAMMY'S DIARY
The following diary was included in the discovered files. It is thought to have been written by Quillish Wammy (who is said to have gone by "Watari" while acting as L's intermediary), but as with the previous files, it contains information of dubious veracity.
May 7, 1973
Recently, I find myself thinking idle thoughts.
The metal I invented, which is superconducting under 28.7°C, is now used in 87% of electrical cables worldwide. It has brought me great wealth. Too much to know what to do with, I feel. No matter how much money I accumulate, there is no way to buy a human life, so I can't imagine any interesting way I could spend it.
May 12, 1973
Today, I had a revelation.
My talents mainly skew towards the sciences, and there are many things I can do with them, but also many things I cannot. But what if I use my wealth and my enthusiasm to raise new talents? Then there will certainly be one or two who can achieve things I cannot. Extremely interesting. To what extent can humans cultivate their talents? This is what I should dedicate the rest of my life to finding out.
I will gather children with talent and intelligence from all over the world — the brain develops very quickly from ages 9 to 13, so children around that age range should work best — and educate them thoroughly. Eventually, I believe, they will be able to change the world. Perhaps I will call the institution Wammy's House.
[Notes on the children]
F: Strong sense of justice, and quick to action — which is why he can make mistakes.
R: Has recently shown interest in astronomy. Has fallen asleep while looking through a telescope before, and thus contracted a cold. Twice.
K: Talented in multiple fields. Has perfectly understood almost everything I teach. I have not yet determined which area she is most skilled in — very exciting.
*1 (T/N: shaky translation): Many researchers have reason to believe members of Wammy's House are referred to by single letters of the alphabet. However, there is no consensus as to what extent these nicknames were used. Some suggest only Quillish Wammy and the person themselves recognized the nickname.
February 23, 1987
Today, I have learned a lesson. Sometimes an overly nurtured talent goes beyond the will of the person who nurtured it. [T/N: I genuinely can't tell if he's talking about the kid raising their talent or Watari raising the kid] K has left Wammy's House of her own volition. This is the first time something like this has happened since I founded Wammy's House. I feel a strong sense of loss.
---
[Notes on the children, 2]
D: Mainly talented in physics. Frequently smashes radio-controlled models, possibly to conduct their own experiments. The degree of destruction is being monitored.
P: Often found with their nose buried in a novel. I think I will try teaching them psychology once they are a little older. It would be nice if they showed some interest in profiling.
L: Invests in stocks. Clearly talented, but so far an unknown variable.
July 10, 1994
Currently, out of all the children, L holds most of my interest.
While he does show interest in existing fields of study, he is even more enthusiastic about using his own methods (adjacent to statistics) to make deductions. Right now, he is spending the most time on criminal investigations. He is working against actual human beings, which is why the cases are so complex and difficult to unravel… He seems immensely fascinated by this.
L, when in pursuit of an objective, is able to immediately determine the necessary information. L. You are my hope.
August 13, 2005
L has selected FBI agent Naomi Misora for the Los Angeles B.B. Murder Cases. It seems he did so in recognition of her bravery and deductive abilities. L dislikes unnecessary physical exertion, since he wants to keep his mind functioning as quickly as possible. Thus, he has to rely on others to act as his agents on the scene. Naomi is reliable.
[A photo of Naomi, along with the text:]
Naomi Misora FBI Investigator Achieved investigator status unusually quickly Specialty: Marksmanship Intelligent and passionate
---
February 26, 2006
I was present at an ICPO conference today. The focus was exclusively on the "Kira case." Criminals all over the world are dying of simultaneous heart attacks. Some members of the public might call this "judgment," but it is murder. L is very intrigued by this new type of crime.
*2: The Kira case, as detailed in the other files, refers to the phenomenon where criminals globally die of simultaneous heart attacks. Rumors flew around the Internet claiming that "'Kira' is our savior and carries out justice," and the name was attached to the phenomenon even though this was not actually proven yet. Since the case affected the entire world and was growing in momentum rapidly, the ICPO's response was necessarily rushed.
March 2, 2006
It seems Naomi Misora and Raye Iwamatsu are now engaged. They are planning to hold the ceremony in Japan. Naomi says she is retiring from the FBI. That took me by surprise.
I am unsure how L feels about Naomi's decision, but he has chosen her for his plan to make contact with Kira. Raye will be the driver. I'm sure Naomi will carry out the plan perfectly. Yes, L's choice is correct. But making a bride approach a murderer… making her groom drive her there…
L. That calmness in you is what I hoped for, what I raised. Still. Is hesitation not an option for you?
March 10, 2006
It's been raining since morning. It's coming down in sheets. I haven't seen such weather for a long time.
L believes there is a 97% probability Kira is in Japan, so we are headed there. Even so… Why did L say something like that? He never says things so sentimental, so unsettling… Could it be that he can see something I can't even imagine lurking in the future of this case? L, why did you say, "I might not be able to come back?" You are only in charge of directing the investigation. There's no reason to think you will come face to face with danger.
The lesson I learned from K is once again swirling in my head. Sometimes an overly nurtured talent will go somewhere I cannot follow…
L. Tell me you weren't thinking straight. Please. Tell me it was just the rain.
---
April 1, 2006
The twelve FBI agents who L ordered to tail the families and associates of the Japanese police have all died simultaneously of heart attacks. …Including Raye Iwamatsu… It was a shock, considering the pattern up to now, that Kira would kill so many human beings who weren't criminals. I think L wasn't able to predict it either.
I tried expressing my condolences to Naomi Misora over the phone, but I couldn't reach her. I am worried.
April 2, 2006
L met the Japanese investigators in person. Starting from now, he will work together with them to advance the investigation. L has never shown his real face to anyone before now. I can feel his anxiety about this case radiating off this decision. Or perhaps it's impatience?
L asked them to call him Ryuzaki.
[Notes on the Japanese investigators]
Soichiro Yagami: Chief of the task force assigned to the "Kira case." Overflowing with a particularly Japanese sense of justice. Trustworthy.
Ukita
Aizawa
Sanami: The only woman on the investigation team. A little too kind.
Mogi
Matsuda: A hot-headed young man. Slightly too presumptuous.
---
April 11, 2006
L is fixated on Light Yagami. He says that the probability of Light being Kira is only around 1% to 3%, but from his behavior, I can't help but think it must be higher. But although I suppose Light is decently intelligent, he's nothing more than a regular college student. To even consider the possibility of him being a mass murderer, there has to be some additional factor — an inconceivable one.
What is it?
Are we fighting against something entirely new?
[A photo of Light, along with the text:]
Light Yagami Student majoring in law at To-Oh University. A prodigy — he has already passed the bar exam. Hates to lose; focuses on winning in everything. His father is the chief of the task force, Soichiro Yagami.
[Memo so I don't forget my orders]
An emergency order from L. Written below so I don't make a single mistake.
Macarons (DALLOMIU) x 12 boxes
Marshmallows (MEIGI-YA) x 12 bags
Donuts (Donkin Donuts) x 12 bags
Black tea (F and N) x 12 cans
Potato chips (Golbee) (specifically BBQ flavor) x 2 bags
[T/N: The potato chips are the type Light eats in The Chip Scene — they're consomme in the original Japanese (both manga and diary) but BBQ in the Viz translation, which I'm going with.]
*3: The Donkin Donuts company shut down all its stores in Japan in 1998. Therefore, this memo conflicts with the range of time in which L and Quillish Wammy were thought to be in Japan. Whether this is a mistake on Wammy's part or an indication that the diary is of unreliable origin is still a topic of discussion.
April 15, 2006
I think the incomprehensibility of what happened today will stay with me for the rest of my life. Naomi Misora shot herself. It was after she told L, "I'll use my own life to prove that Light Yagami is Kira." But Naomi wasn't able to prove anything.
She must have, in her own way, found something confirming her theory. Considering her actions up to now, she wouldn't have made such a declaration without some kind of proof. But she took Light's girlfriend hostage at the museum. She killed her. And then she took her own life. Why would she do such a thing?
It wasn't like her. No matter how I think about it, it wasn't like her. She looked almost… confused, right before her death. Not like Naomi at all.
[Photo of Shiori, a movie-only character!]
Shiori Akino Student majoring in law at To-Oh University. Dating Light Yagami. Possesses a strong sense of justice and articulates her ideals clearly. Postscript: Was shot and killed by Naomi Misora at the Oumei Museum of Art.
*4: Naomi Misora's murder of Shiori Akino and subsequent suicide is the greatest mystery of this case. As Quillish Wammy wrote here, the question "Why did Naomi kill Shiori?" is still entirely unexplained; some have even proposed that it had no connection to the Kira case at all. Also, in regards to Shiori, it bears mentioning that some believe she was dating Light Yagami while others believe they were simply classmates.
---
April 18, 2006
The construction of the Kira Response Building is complete. We will be moving the investigation headquarters there.
[Memo with cutouts so I don't forget]
[T/N: As you can see in the Tumblr screenshots, this page of the diary is entirely filled with cutouts from advertisements showing different parts of L's outfit.]
[picture of jeans]: The feeling of a new working style, a dominating sense of existence — Loose silhouette, straight frame. Its special characteristic is the five pockets it boasts on the front. Two of the pockets are integrated into the seams on the sides for a working-style taste. There is an adjuster in the back so you can adjust the size slightly.
[T/N: I tried for ages to figure out if this meant 5 or 7 pockets total, and then I decided accurate translation of an advertisement for jeans in the tie-in material for a movie spinoff for a 2000s manga wasn't worth this effort.] [No offense, L.]
[picture of sneakers]: A strong impact! Each step brimming with confidence — These shoes are made with the ripstop fabric used in military wear. It won't tear, no matter how much you wear the shoes out. Additionally, the camo pattern is piece-dyed with black and deliberately scuffed, giving it a tasteful finished look.
[picture of white sweater]: It looks good in any season: a must buy item — Silhouette is loose enough to hide the lines of your body. The neckline is also loose, so wearing it is a delightfully relaxed experience. The white color has outstanding compatibility with denim.
[picture of Hyottoko mask] Hyottoko mask
[doodle of white bag]
[picture of a chessboard] CHESS: The definitive version of the battle of minds
---
April 29, 2006
An individual calling themselves "the Second Kira" has sent video tapes to TV stations. Their patterns are clearly different from those of the Kira who has acted up to now. According to L's theory, while the previous Kira needed a face and a name for the murder, this Kira only needs to see someone's face to kill them.
Also, Light Yagami is now part of the task force. Light can't forgive Kira for taking his girlfriend's life. He's burning with determination to solve the case. He really is a smart teenager.
I wonder which L feels more for him: sympathy or competitiveness. Even I can't tell.
*5: In this time period, there were several unexplainable events, documented by the news and TV broadcasts in Japan at the time. For example, several police officers died of sudden heart attacks near the doorstep of the TV station that was broadcasting a message from the person claiming to be "the Second Kira" (including a detective whose name appeared in the earlier "Notes on the Japanese investigators"). It is thought that L's theory that "this Kira only needs to see someone's face [...]," as documented by Quillish Wammy above, was based on this incident.
May 11, 2006
Misa Amane has been arrested under suspicion of being the Second Kira. She is in confinement. The Japanese investigators seem somewhat opposed to this method. L is feeling cornered. It makes me anxious.
[Photo of Misa Amane, smiling in a sleeveless skull-and-crossbones shirt]
Misa Amane Idol There was an advertisement on the bus for fashion magazines with her on their covers. She seems to be a rather well-known figure in Japan.
Postscript: I have acquired Misa's photo albums, CDs, and DVDs as evidence. I passed them to L. L has not informed me of any new data from this analysis, but he has been playing the CD.
---
June 2, 2006
L announced to the investigators that "as of now, I have concluded that Light Yagami and Misa Amane are not Kira."
Light will still stay in the Kira Response Building to help with the investigation. L has accepted this. Could it be that L has recognized that someone else is on his level for the first time? I am happy for him, but also have complicated feelings about this. Is it possible that Light has become L's first-ever friend?
June 9, 2006
The Kira murders continue. L has been chewing his nails more often lately.
L, you should already know this: you do not need to carry the burden of all the world's crimes on your shoulders.
June 26, 2006
Light Yagami's theory may be our breakthrough in the case. His line of investigation has turned up a name: a Sakura TV newscaster, Kiyomi Takada.
[Photo of Kiyomi Takada, smiling placidly on a news channel, hands folded together]
Kiyomi Takada Newscaster for Sakura TV
She became the current face of the news channel EVENING SPOT after her predecessor Saeko Nishiyama's sudden death in a car accident. She quickly began hosting segments supporting Kira. She lives alone in a condo within the city.
---
June 30, 2006
You could say my scientific skills have started to rust, but as an inventor who tries to always think things through logically, I am feeling bewildered. There are "Shinigami," gods of death, who exist in this world. The Shinigami each carry a notebook, which is called a "Death Note." And the human whose name is written in the Death Note will die.
What on Earth? We've been up against Shinigami this whole time?
L was shocked. Unusual for him. But when I saw that surprise on his face, I actually felt relieved. At least Wammy's House — my creation — has not taken the capability for shock away from him.
Death Note: How to Use (Rules) — a partial excerpt
[T/N: Translations mostly copied from the Death Note wiki, with minor edits]
The human whose name is written in this note shall die.
If the cause of death is written within the next 40 seconds (in human-realm units) of writing the person's name, it will happen.
If the cause of death is not specified, the human will simply die of a heart attack.
After writing the cause of death, details of the death should be written in the next 6 minutes and 40 seconds.
If the time of death is written within 40 seconds after writing the cause of death — even if the cause of death is a heart attack — the time of death can be manipulated, and the death can go into effect even less than 40 seconds after writing the name.
The note will not take effect unless the writer has the person's face in their mind when writing his/her name. Therefore, people sharing the same name will not be affected.
The owner of the note can shorten their own life by using the note.
Even someone who does not own the note can use it by writing a name and thinking of a face, with the same effect as if they were the owner of the note.
After a name is written in the note, it cannot be changed.
The time of death written in the note must be within 23 days (in human-realm units).
July 3, 2006
Misa Amane has been released from the Kira Response Building.
July 4, 2006
The strange situation of a Shinigami coming in and out of the Kira Response Building has continued. I can't help but feel restless seeing a huge, white silhouette wandering about. This Shinigami is not cooperating with us, but isn't trying to hinder us either, it seems.
There have been multiple persistent calls for L to assist with the investigation into Princess Joan's overturned yacht. But L seems uninterested in any other cases right now. I have filed the investigation requests where he won't see them.
---
July 7, 2006
[This entry was translated here by @lunalit-river. I'll copy it over, but please show some love to the original post!]
L.
Was this the outcome of giving you the opportunity to learn? Was it arrogant of me to think that I had given you everything you needed? A genius without parents or relatives, without food or education, a genius who may have had a miserable past. Was I wrong?
L wrote his name in the Death Note.
Was this all for victory? Was this all for justice?
To fight something supernatural like the Death Note, it is true that we must arm ourselves with something that is also beyond human understanding.
It is highly possible that Light Yagami will write L's name in the Death Note. In theory, L must write his name in the Death Note first to prevent Light from doing so.
But don't human emotions have a tendency to refuse to accept the truth and instead hope to twist logic and theory?
L. Don't you ever place your emotions prior to your goals?
L. I never meant for things to end this way. Your talent has surpassed mine, and now you are consuming yourself. But I…
Today I learned F's death. Am I about to lose you, too? I have never felt so powerless as I do now.
L. I am confused. When I established Wammy's House, I might not have anticipated this.
I learned a lot from being with you, L, just as parents learn a lot from their children.
L. Just one sentence is enough. Please tell me you want to live.
L. L…
July 7, 2006
L Lawliet Heart failure Dies 23 days from now, peacefully, in his sleep
---
July 10, 2006
This is the end of the case, isn't it? Everything has been arranged. I will bring Misa to headquarters, and as long as Soichiro Yagami and the other Japanese investigators do as L says, everything should go perfectly. Tonight, the Kira case will be solved.
I have learned from L, who moves towards his goal still, indifferent in the face of death. I too will not waver.
L still has 20 days left. I'll spend them with him. Not because of everything I gave him in his lifetime, but because of everything I deprived him of. I can devote all my time to him now.
L, what do you want to do? You can play silly games, if you want. You can go make friends. If you don't mind my old age, I would gladly be your friend. Or your
Do you want to see sights you've never seen before? Do you want to feel breezes you've never felt? [T/N: He switches to polite speech just for this paragraph. Back to regular now.]
Get up from that way you always sit; let's go outside. Everything I took from you — the small, the inconsequential, the boring things — and the beautiful, dear ones too: let's go find them together. It's okay if you don't have any conclusions to draw. I just want you to have fun. To love the world in front of you. To savor it.
L. That's right. Just like a father and son on holiday.
I've been writing in this diary for forty years. I think I will stop in twenty days. I can't imagine anything I would want to write about, anything I should write about, would happen after that.
Alright. I'd better go and bring Misa over.
This is where the diary ends. The Kira case has been dormant ever since the last entry here.
#death note#watari#watari death note#l lawliet#:))))))))))) <- definitely did not cry translating this. not at all.
131 notes
·
View notes
Text
YOU WERE RIGHT ON THE BORDER
── ♡ REN
Give me all of this, give me all of you. warning: while this fic is sfw, the source material is an nsfw game. hence, i do not recommend that minors interact.

The waves crash, and the cold sea grazes your toes before receding. Patterned movement, yet you watch it with utter fixation despite not having moved even an inch into shallower water. Ren idles beside you, but you’re sure he lost focus once you began to feel the heaviness of his stare.
“Are you scared?” He asks quietly and gently, as he always does with you. Early into meeting him, it had annoyed you. Maybe it was the suffocating gentleness, almost coddling and fearful. Perhaps it had been far too long since someone last held you without hurting you. Now, it’s his fingertips brushing against yours that keep you grounded. It's funny how much could change in such little time. You almost forget to respond to him, shaking your head slowly.
“No, I’m just reminiscing,” You muse, and when you see a sympathetic glint in his bluebell eyes, you reassure him by playfully splashing some water in his direction. The impact reaches up to his lower calf. The corner of his lip twitches before he lightly returns the favour. It barely goes past your ankle. Always afraid of offending.
“Ren,” He hums in acknowledgement. “Tell me about what your life was like before.”
You already regret asking when he doesn’t respond. Silence doesn’t fit him, but you’re also too anxious to turn around and see the expression he is making. Your lips part, a “never mind” on the tip of your tongue before he cuts you off.
“Nothing exciting…” He trails off, reaching a slender hand to scratch at the back of his neck. You aren’t surprised at his lukewarm answer, considering he avoided all conversations that centred on him as if it were the plague. However, it doesn’t dull the sharpness of our disappointment and frustration. Ren held you dear; only a fool could disagree. Praising every mediocre action, spoiling you at the sliver of an opportunity, and admiring you as if you hung up every star in the sky. It felt like he could read you like a book. Yet, you knew nothing about him. It frustrated you. To be adored, yet not knowing his best friend’s name or if he had a favourite parent. It’s not like he birthed into existence the second you moved back home to Corland Bay.
Leon often teased you were never good at hiding your feelings; your emotions always making their way to your face. Hence, it takes Ren only a second to collect himself from his mistake, stumbling over his words as he assured you he wasn’t being purposefully secretive.
“It’s okay,” You attempt to pacify him, but you aren’t even half as enthusiastic; your words are hollow and void of honesty. From the corner of your eye, you see him catch his bottom lip between his teeth, fretting and lost. His fingers curl inwards and out, itching to touch you.
“It’s just that it didn’t matter…” He mumbles, his voice so quiet it could disappear with the ocean breeze. He finally looks up, connecting his stare with you, and something cold goes down your spine when you notice the lack of shine in his blue hues. “Nothing mattered before you, and nothing will matter after you.”
The air seizes in your throat. Yet, it’s Ren who looks as if he is struggling to breathe.
#pretty short fic im sorry#sorry gang they're kicking my ass in the office this is the best i can churn out for now#14 days with you#14dwy#14dwy x reader#14 days with you x reader#ren x reader#14dwy ren#14dwy redacted#14dwy redacted x reader#redacted x reader#x reader#reader insert#ren and angel are such freaks to me. they deserve each other#go be weird together into the sunset (i wave them off with a handkerchief and tears in my eyes)
142 notes
·
View notes
Note
Do you know any good sources for burn scar care?
I’m writing a character who was burned in a spaceship crash. The story is set several years after the fact, and I want to incorporate that detail into the story. What would a burn scar care routine look like?
Hey!
I generally recommend medical websites for this kind of stuff. There are tons of information readily available online, especially about things as common as a burn injury. Phoenix Society for Burn Survivors or MSKTC can be helpful for you.
While caring for a burn scar will be different for everyone (there's many types, degrees, plus just individual differences between burn survivors themselves) some of the things that you can include;
Burnt skin doesn't produce its own oils, so it gets dry. It needs to be moisturized, oil-based products (think coconut or grape seed oil) are often used. The heavier the lotion, the fewer times a day it needs to be applied.
Massaging a scar, especially when it's relatively new. It can be a massage, but stretching or just putting pressure on it is part of that too. It helps the skin from becoming extremely sensitive. Initially you do it delicately, but after the scars are matured it's fine (or recommended even) to put some force into it. This loosens them up.
Itching is a huge issue. Both massaging and moisturizing help with that, but if it's still causing problems then there are medications that could provide some relief.
Protecting the skin from the sun. All year, including cloudy weather. Sunblock, big hats, sunglasses if needed, all that. This applies to people with darker skin as well because the skin loses its pigment after a burn (it can sometimes come back but it's definitely not a guarantee).
Avoiding the heat. A lot of burn survivors will have problems with temperature regulation because burns damage the sweat glands, so they overheat faster. There's nothing burn-specific here, same protocol as for avoiding a heatstroke - drink water and keep out of the sun.
Wearing softer and looser clothing. Rough and tight clothes can cause blisters, and that is a Problem. Inappropriate materials could also induce more itching.
Taking pain meds. Chronic pain is common, so your character might need medication.
I definitely wouldn't say that this is an exhaustive list, but I think it's a good start. If you need more details, I think the resources linked above should work.
I'm glad to see people interested in burn scars being a disability that requires a lot of care rather than seeing it as a solely visual thing. Makes it much more authentic.
I hope this helps,
mod Sasza
475 notes
·
View notes