#sims 3 creation
Explore tagged Tumblr posts
Text


TS4 Crystal Creations SP - 4t3 conversion
I wanted to finish this one before Halloween but alas. At least it's done!
The fancy TS4 scripted objects are just... regular surfaces in TS3. The jeweler desk works like a regular one, the sales table is a (very nice imo) dining table and the round mystical grid thing is just a pretty tray.
That said, I managed to add vertical modularity to the cube shelf :) It's... just a slot, but they do stick to each other even against a wall!
Again, the uncluttered dining table is an edit of my own and not Peacemaker's, but I -do- plan on converting his add-ons later!
The rest is all straightforward :P All BGC, recolorable, highest polycount is around 1.8k for the jeweler desk. The missing items from the pack were made by @bioniczombie already!
(I do have decor, recolorable gems here if you're interested)
DOWNLOAD (package): Dropbox (SFS is acting up right now, will add a link when it goes back)
#ts3cc#s3cc#sims 3 cc#4t3#download#functional#seating#surfaces#lighting#storage#decor#crystal creations sp
603 notes
·
View notes
Text
The Fresh Prince Is Back - And He's Delivering Duck Tailed Porsches!

Let's hear it for the Fresh Prince, because after a year's long lay off, Mr Hold The Custom Content News Front Page has done it again.


There's no other car in the world that says fast, sporty, and fun like a Porsche, and let's be honest, we've all wanted that classic 'duck tail' RS model version in the game at some point - especially if you're a Taffer!

What are you waiting for - get mashing that download button and enjoy the awesome!
#sims 3#sims 3 cc#ts3#the sims 3#sims 3 cars#fresh prince creations#either you like fresh prince creations' custom content#or you're wrong
108 notes
·
View notes
Text


loved the new eyelashes, i'll probably use it all the time (˶ᵔ ᵕ ᵔ˶)
1998 hair ✩ dress ✩ shoes ✩ rings ✩ bracelet
#ts4#sims 4#ts4 cas#simblr#ts4 edit#i've been away for a while because i wasnt too well... still not 100% though but i missed playing the game#i'll be back soon to post my silly sims and reply people also need to check out everyone's creations i missed <3
157 notes
·
View notes
Text
I'm also a million hours into Baldur's Gate 3 and I finally figured out how to change it to Spanish
I have to say the most surprising thing was to see the official non-binary options in an official Spanish dub
Instead of like el elfo or la elfa for "elf", you see le elfe for non-binary; or el clérigo / la clériga for "cleric" it turns to le clérigue for non-binary
And just seeing things like amigue "friend", or une enane "a [NB] dwarf" is just... I don't know quite how to describe it
It's really cool but also so bewildering to see it so... officially?
I tell people about using -E endings of adjectives/professions for non-binary things, or the way people use gender neutral language, but I always have to tell people it's usually not officially accepted, that it's more common in certain circles or online but practically never officially accepted in standard castellano
So to actually SEE it officially recognized and there front and center in a game that's easily a contender for game of the year that's so popular is just... really cool and also leaves me stunned for a few seconds as my brain adjusts
[like I saw the le at first and I immediately assumed oh god it's French somehow, but no, it's el, la, then le non-binary which is cool but I'm going to go through everything thinking it's French or indirect objects]
#spanish#langblr#baldur's gate 3#language#languages#also no one needs to see my 180000 protagonists I make like sims that I'll never use I just like character creation sims#because immediately I'm like oh this person looks cool oh god what's a good name for them uhhhhh
559 notes
·
View notes
Text

PERSONAL BLOG / PSD BLOG / EDITFIGHT INFO

I TALK A LOT— CHECK THE #──୨ৎ creations of spice TAG FOR EDITS!!

ASK GAME ; 💧 — something about me 、 🌐 — rant about a character/series 、 🌀 — random image in my gallery 、🥢 — my opinion on you!

MY INSPIRATIONS — docele, hwizou, lovestis/vividhrt, fufumio

MENU ITEMS: resource dumps, graphics, stamps, userbars, userboxes, themepacks, layouts, PSDs, PSD showcase templates!
WILL NOT SERVE: western comics, the boyfriends webtoon, roblox games, vivziepop media, controversial media &/or characters, NSFW content, Dream SMP, real people, mouthwashing, the coffin of andy and leyley, class of '09, okegom, true crime, nekopara, gun girl z, south park, yandere simulator.
STORE NOTICE: I have no whitelist and everything is in the gray. it depends on how difficult the request is for me! sometimes I may be frustrated, sometimes I may be confident!


CREDS @bitterrbytes for the replycon / psds used 1 - 2 - 3 + 4 by @hwizou / editfight userbar, userbox & badge by @stagedsin

well done, you've reached the end! find the easter egg in this blog’s theme and guess who it refers to!
#──୨ৎ sichuan master#<- general#──୨ৎ creations of spice#<- editing#──୨ৎ the conversing heir#<- chats & requests#──୨ৎ bountiful usherings#<- resources#──୨ৎ a wistful smile#<- mutuals <3#──୨ৎ acquaintance of autumn#<- COWORKERS!!!#──୨ৎ interstellar liker#<- @Docele tag#──୨ৎ blue vivid!?#<- @Vividhrt tag#──୨ৎ opp chazuke#<- @Chachazuke tag#──୨ৎ n1 devicer#<- @Hwizou tag#──୨ৎ Digimon person#<- @Hyrulesshope tag#──୨ৎ chuuya glazer#<- @Gravitatives tag#──୨ৎ concerning polysho sims...#<- @Taiyoukeidisco tag
42 notes
·
View notes
Text
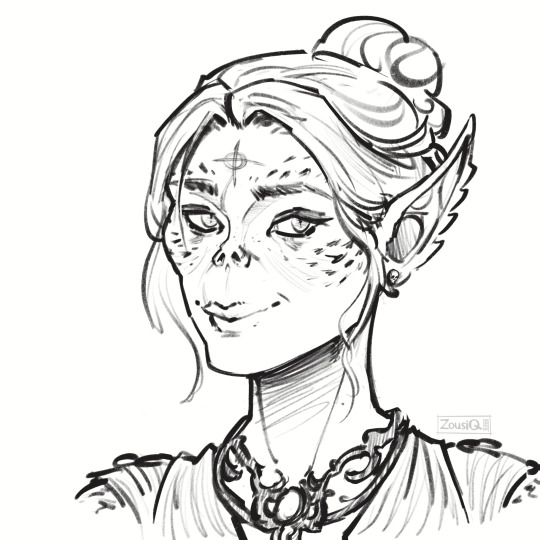
Sketch portrait for @\jacksofalltradess.bsky.social [bluesky]💜
#baldurs gate 3#bg3 tav#bg3 oc#bg3 commissions#bg3#bg3 durge#bg3 art#bg3 fanart#commission#baldurs gate iii#bg3 commission#artists on tumblr#I love doing these so much#Bg3 has one of the best character creation#i'd go as far to say even better than Sims#The gurlies always coming through with the mods too#man I love this game
23 notes
·
View notes
Text
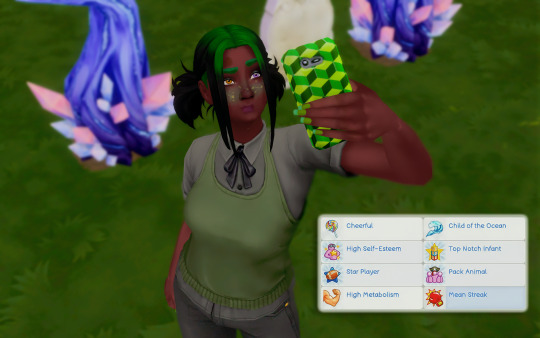
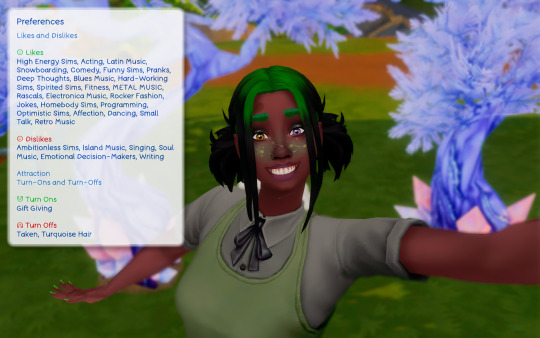
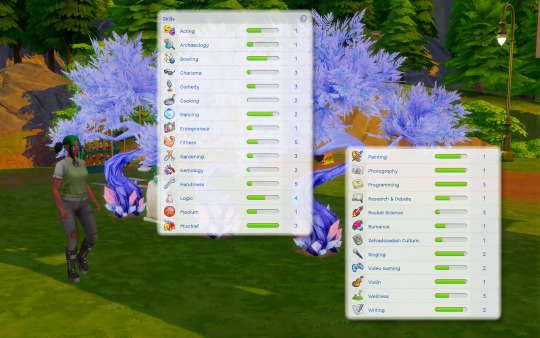
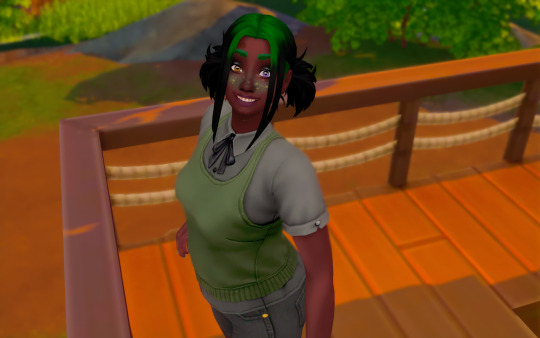
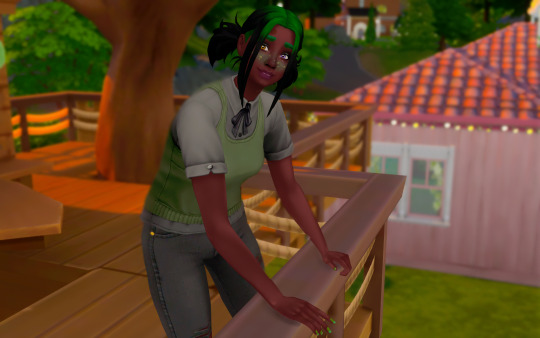
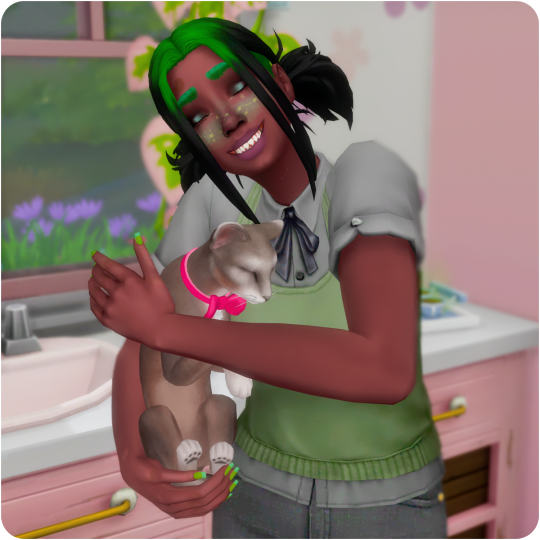
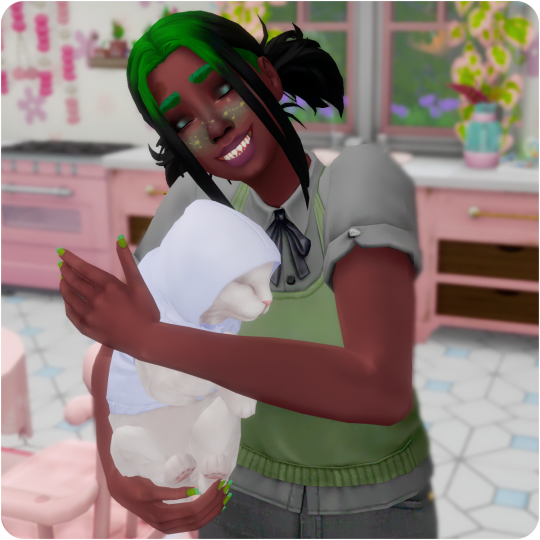
Nite Crowe for @jonquilyst Total Drama Sims: Season 3
Nite grew up in Glimmerbrook with her mom who was a spellcaster and a jewelry crafter. She lost her mom on a Winterfest night, but then was reunited with her ghost 👻
Nite doesn't live with her father, because he's an alien who abducted and impregnated her mom 👽 That makes Nite half-alien, but she hopes that her application for TDS 3 will be accepted even though no occults are allowed. Nite is a human sim and has no alien powers.
Nite likes nature and animals, she loves her two cats, Nougat and Baloo, dearly 🥰 🐱
Nite is a teen, but she's about to age up. I am bad at converting sim ages to real ones, but I guess that makes her 17 years old 🤷♀️
Even though Nite is about to become young adult she hasn't been in any romantic relationship or went on dates. She went to active high school, so it won't be something new to be around many teenagers. She is open to any romantic moments that may occur during show. If she'll find a friend or a romantic partner that would be a cool addition to this adventure.
Nite decided to compete on Total Drama Sims, because she wants to test herself and try something new. Nite tried continuing her mama's work after her death, but realized that making jewelry is not for her. She also tried to complete Reaper's Rewards Event, but that also wasn't for her. So she hopes to find her passion and maybe she will discover one on Total Drama Sims 💚
#ts4#sims 4#kissalopa sims#kissa sim: Nite Crowe#crystal creations gp: Nite#total drama sims season 3
45 notes
·
View notes
Text


inzoi / oinkoinkoink
#Inzoi#inzoi creation#Create A Zoi#Simblr#inzoi character studio#caz#inzoi demo#inzoi character creator#The Sims 4#The Sims#The Sims 3#TS3#TS4#high fashion#fashion#style#beautiful model#beauty#photography#my zois#canvas#zoiblr#my inzoi#inzoiblr#black women#black beauty#fashion model#y2k
23 notes
·
View notes
Note
Hi hey gurl! I've been trying to understand something... when it comes to performance, is it vertices or polycount that really matters? I’m trying to get a clearer picture of how they affect gameplay. Hope this isn’t too random tho 😂
Hey nonny, thanks for the great question! I'm not sure if you are looking for a non-creator answer or if you maybe have some experience with meshing, but I try to cover some technical aspects that hopefully will make you understand vertices and polygons better! It's a bit of a longer journey, so grab some snacks and settle in!
Disclaimer: This is my opinion and the definitions are how I came to understand them. I believe what I say to be correct, but I am also human and may have misunderstood something, and making mistakes can happen. Thanks for understanding! TL;DR There will be calculations made on every vertex and every face present in a mesh. So the more you have of either, the worse it is for performance, but if the vertex count is much higher than the poly count, the mesh is especially unoptimized and may impact performance more than it would in an optimized state. Vertex and polygons are actually connected, literally. To understand, we need to start with the basics.
Vertices are points in a 3d space that provide the foundations of a grid-like 3d structure, known as a mesh. Connected through lines known as edges, they form a 3d shape. Three edges form a triangle, or tri for short, also known as a face or polygon. These terms can be used interchangeably, but a tri always has three vertices, whereas faces and polygons can have more than three vertices.
A polygon with 4 vertices (known as a quad) is very commonly used in 3D-modelling, because it can be used to create very neat and well-structured meshes (it is easy to make grids using rectangular shapes). A mesh that is made in a grid-like way may have the same overall shape as one made out of triangles, but the flow of the edges is different, and this plays a role during animation. Having these grid-like lines is usually better for moving and animating characters and avoiding shading issues.

Most meshes for games are thus initially made with 4-sided polygons. These quads are usually further broken down into tris if they aren't already, and three is the least amount of vertices needed to form a coplanar surface.
When the quads of the left sphere are turned into triangles, the grid structure will remain intact:

We can further break down the elements of a polygon. Let's take a simple cube. It has 6 sides, or faces, and each face has 4 vertices that make up the corners. But if we count all the vertices, we will notice that each face shares vertices with other faces. So on a simple cube, we have 6 faces and 8 vertices.

Depending on how a mesh is made though, it may have a lot of edges. You can think of those like cuts in the mesh. If we wanted to cut up the cube, we would separate each face from each other. Now we still have the same number of faces (6), but the vertices are suddenly much higher, because now, every face has its own set of 4 vertices, meaning that we have a total of 24 vertices.

In video games, polygons are usually rendered as triangles. So for our cube, that would mean that every face would be diagonally cut in half, giving us a total number of 12 faces/polygons/tris.

If we take it to the next level and separate all of these triangles from each other, the vertex count would be 36! To recount, on a mesh that is not split, it's only 8. Having these cuts (or split edges, as they are commonly called) in strategic places in the mesh where vertices are split can be important for the final look of the mesh in the Sims games.
You may have already encountered some meshes that have dark spots or shading in some parts, often at the hems. That can happen if the mesh is not split correctly in these areas. It has to do with how the normals work (they are important to how light gets reflected off the mesh).
To not go too off-topic, I won't get into detail about that here.
Ideally, a mesh is only split where it needs to be so it will look right. If there are unnecessary cuts, then the vertex count (and with it, the polygon count) goes up when it doesn't really have to be. If a mesh has a lot of these areas where a lot of faces have their own vertices, then the vertex count is much higher than on a mesh with fewer split edges. This can be a sign that a mesh is not well-optimized. So if you see a mesh that has much more vertices than polys, you may want to question it in regards to performance. CC converters will probably know that Sims 4 meshes come with a lot of these cuts that are needed for Sims 4 because of the way the CC is made (for example, pants have such a split edge cut to allow boots to look tucked-in), but those are superfluous for TS3. So I encourage every Sims 3 CC creator to remove those to save on both vertices and polygons when they are converting! The thing is, in the game, the mesh will be processed and there will be calculations made on every vertex and every face present. Each vertex is indexed, and triangles need to be drawn from the information. Other processes will need to also use the vertices for their calculations. There is more going on during rendering than simply drawing the polygons. The shaders have to calculate their effects, the textures need to be rendered and applied accordingly, filtering such as anti-aliasing will be applied, etc. So the more geometry you have in a mesh, the worse it gets in terms of performance. More geometry means that the polygons are smaller and more numerous, which will in turn affect the vertex count too.
As CC creators, we cannot address all the factors that impact performance, as we can only influence a small part, but we can try to adhere to the game's standards to minimize the performance impact as best as we can. If we wish our meshes to be more detailed than what the game's standards are, then we impact the performance more.
Instead of just cranking up detail like crazy, it is good to see if we really need it. And ask questions such as how often will the player view the item closely? If the player is usually far away from the item or it is a very small item, making it super detailed will not really do much, since the item looks the same as a low-poly item from a certain distance. We can also make compromises and maybe make an item 50% more detailed instead of 200% more detailed, providing a more detailed item while minimizing the performance impact.
This is a bit off-topic, but since I'm here already, we may refrain from using a bigger texture for a very plain piece without any notable intricate detail (like a basic T-shirt, for example), since it already looks fine with a smaller texture, but it may pay off for a highly detailed texture which looks visibly better with a bigger texture, warranting the performance impact (like a lace blouse with an intricate pattern, stitching, and small buttons).
On that note, using the texture space efficiently can also do wonders to increase detail. Use all the real estate you have on that UV map (that is a 2d representation of your 3d mesh and used to apply the texture to the mesh). Have you tried upscaling the texture yet? Okay okay, I'll stop now and get...
Back on topic: The number of polygons also matters, not just the vertex count. When a mesh has lots of smaller polygons, a lot of them are necessary to form the entire mesh. Bigger polys will not provide as much fine details, but will have less impact on hardware because fewer calculations to be made. A good mesh uses only as much detail as needed while using as few polygons as possible to still maintain functionality.
Sims clothing meshes need to animate and move well, so they need to be able to flex at the joints, and the shape must also be able to change to accommodate body sizes, thus the mesh needs the minimum amount of geometry to achieve this and still look decent, which is a sweet spot the developers have to find to craft meshes that perform well while looking reasonably good.
A good habit for creators looking to make meshes for the Sims games is to look at similar meshes in the game and study them (so for TS3, check the original TS3 game meshes, for TS4, check the original TS4 game meshes). Check how many polys they use and how good the topology (structure) of the mesh is.
For example, how many rows of edges do they usually have, and what sizes are the polys usually? How many vertices are in one round of edge loops, for example for the arms? How are the different mesh parts connected to each other, where are split edges used? Then imitate that.
The professionals who made these original meshes knew what they were doing, and they optimized them to be gameplay-friendly, so if in doubt, copy what they do.
Game meshes are usually especially optimized and it is very much game-dependent how they are structured, so a mesh from a different game can look totally different. CC Creators looking to optimize performance in their meshes should try to match the original game's mesh in terms of structure and polycounts. This will also ensure they animate well!
If you made it this far: well done, thanks for bearing with me! I hope you feel more knowledgeable and ready to apply what you've learned to your own meshes or when selecting CC for your favorite Sims game.
#sims 3#reply#sims 4#sims meshing resource#ts3 meshing#sims polycounts#Sims CC creation#meshing theory#tutorial#ts3 tutorial#ts4 tutorial#my best tutorials are always based on asks#why do I always forget which tags I use for tutorials
36 notes
·
View notes
Text
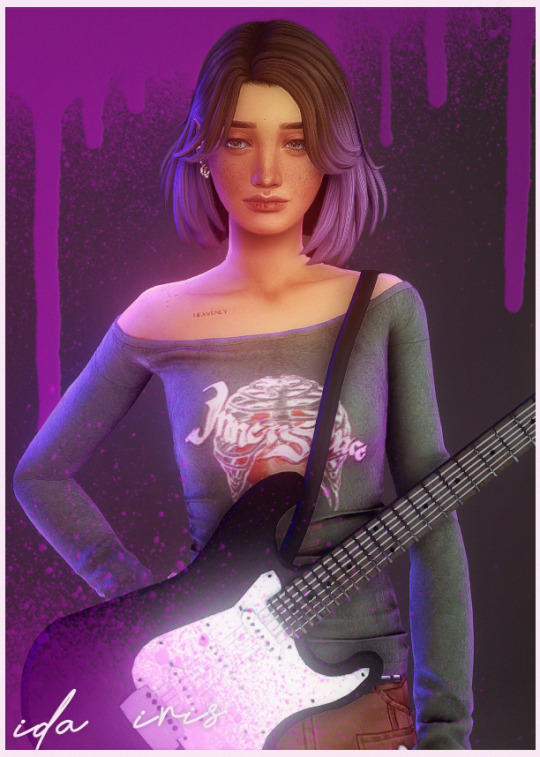
ida in her "student" era
#awww adore my bby girl!!!#just a little edit with her <3#the sims 4#ts4 simblr#the sims 4 edit#ida iris stonsberg#extra#edit_mine#btw my queue is almost over#it's for the first time in five months i think#honestly i have a hard time now but i hope i will restore my post creation mode#and my queue will be filled again 👀
31 notes
·
View notes
Text
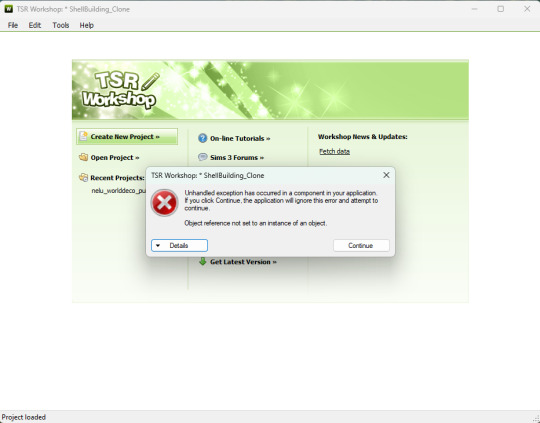
Okay, I've finally hit a point where I can no longer stand this shit. Does anyone know why in the world the latest version of TSRW gives out this error? I've tried searching for some answers, but to no avail. It happens almost every single time I use the application. I'm so sick and tired of it because every time it does, I can't get out of it without using the task manager nor can I try and open up a new object without it working correctly. If I do open a new object, it doesn't show the right thing. I'm thinking it's just something I'm gonna have to deal with, but I thought I'd try asking in the small chance that there is a way to stop this from happening. It makes creating cc for TS3 so incredibly frustrating to be honest🥲
11 notes
·
View notes
Text
Cringetober time starting with the man himself

#cheesebrackers art#:3#cringetober#dialtown#dialtown phone dating sim#fanart#art#god#hobos creations#hobo#direct doggo#direct dogman
225 notes
·
View notes
Text
Sharla Patrick
One of River's best friends at University.
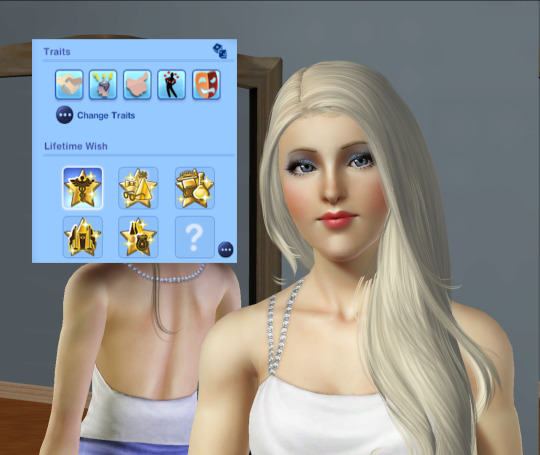
Her traits: Friendly, Genius, Good, Irresistible, Neurotic
A stunning blonde-haired, blue eyed beauty, she is often written off as a "dumb-blonde". Using that stereotype to her advantage, she plays along and suckers those who sell her short. Studying in the medical field, she is at university to get her undergraduate degree and then enroll in medical school.
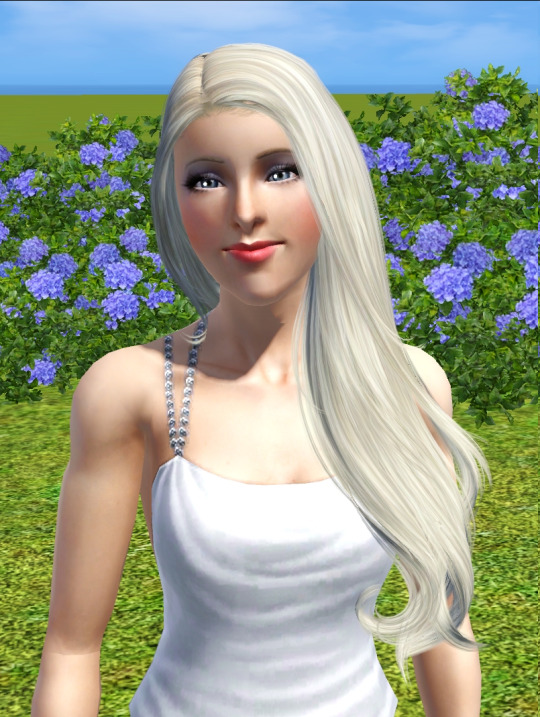
I'm not sure if I'm going to make her a part of the family - whether she meets one of Haruo's relatives in University. Haruo comes from a large family - evidently the Chikamoris in my Sims 3 Legacy breed well. 🤣
Right now I'm setting up all the sims that I want for the university section of the story. This is going to be fun. 🙄
#sims 3#ts3#sims 3 gameplay#river mcirish#sims 3 storytelling#river and haruo#haruo chikamori#sims 3 legacy#the chikamori legacy#Sharla Patrick#My Sims#Sim Creation#My Sims Stories
16 notes
·
View notes
Text
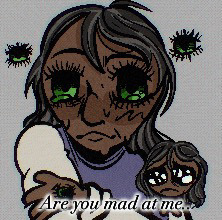
I uh. Don't know how to caption this. POV you are Martin
Original image:

#calvin’s creations#digital art#my art#procreate#the magnus archives#TMA#magpod#tma art#jonathan sims#ask to tag#|||#idk what else to tag this as. uh#if you know the original artist for the alien lmk and I'll credit back to them :3
28 notes
·
View notes
Text
Boycott!
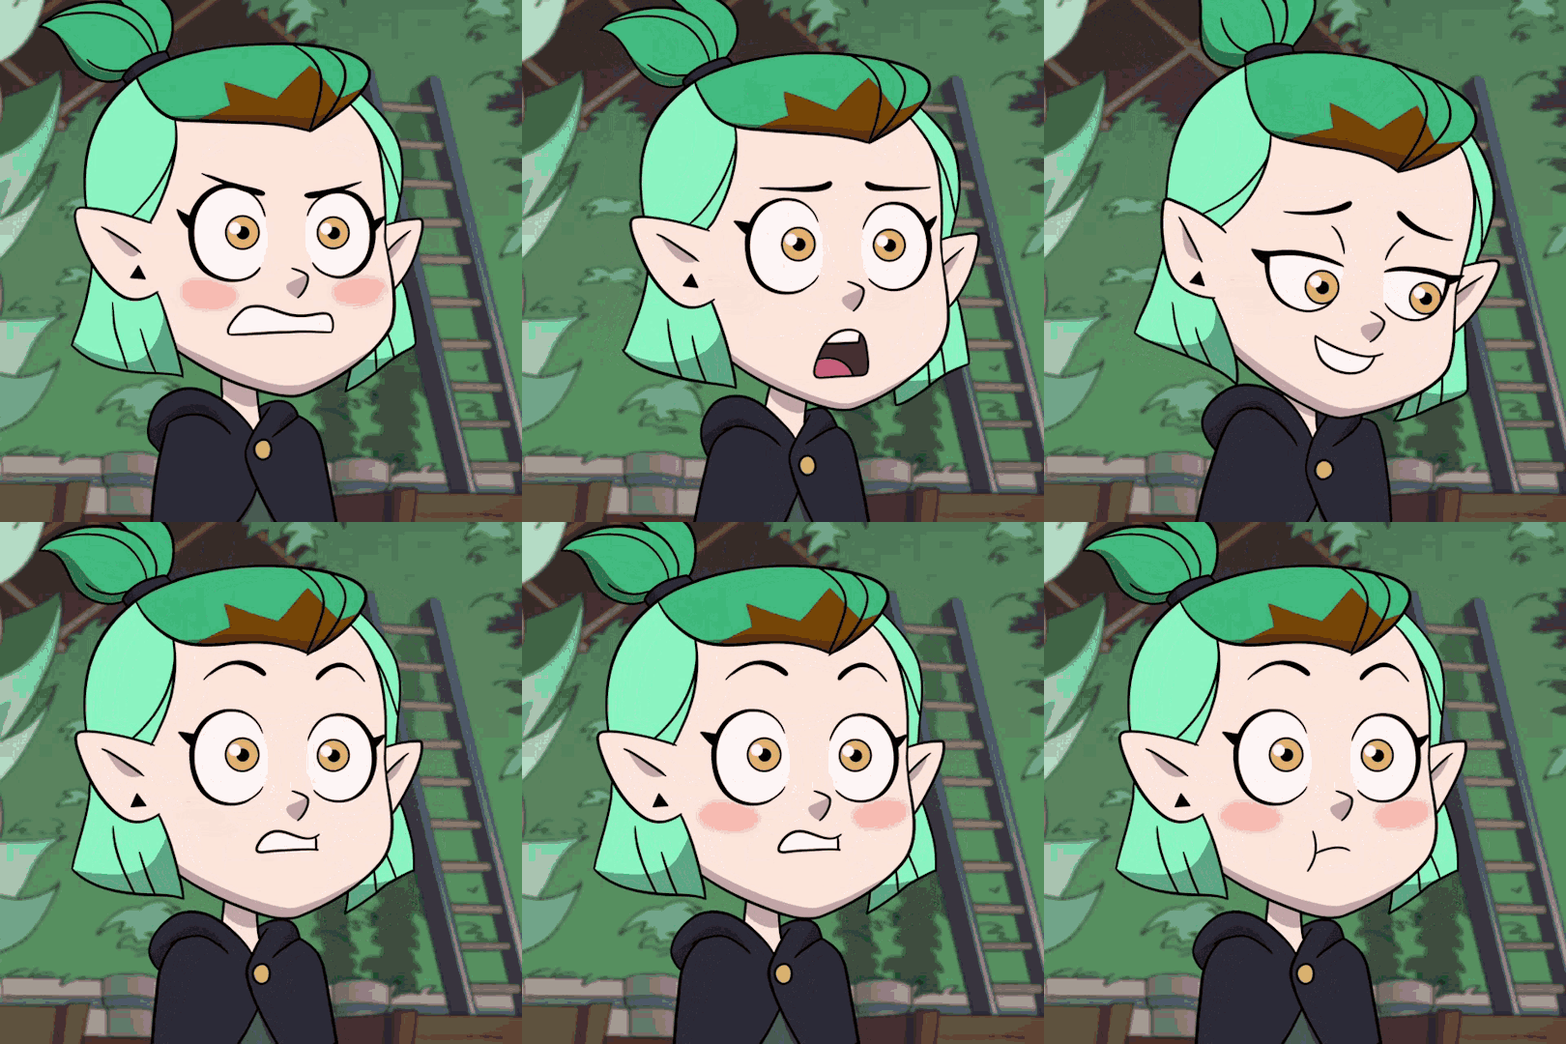
Now that I have your attention:
#gravity falls#palestina#gaza#israel#free gaza#cartoon#cartoonist#palestine#free palestine#israel is a terrorist state#amity blight#gay#the owl house#toh#save the children#save family#deadpool#deadpool and wolverine#deadpool 3#billford#the book of bill#the sims 4#sims 4#ts4#simblr#inzoi character studio#inzoi demo#inzoi#inzoi character creator#inzoi creation
21 notes
·
View notes
Text
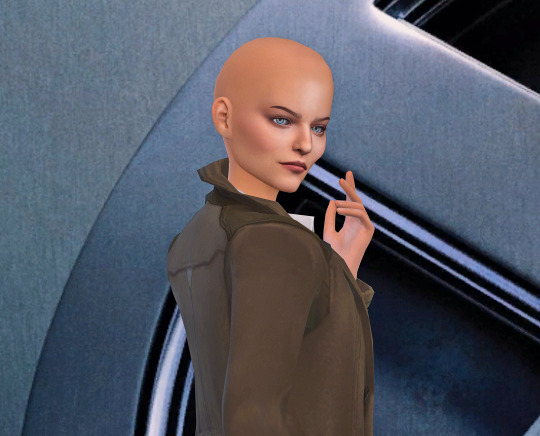
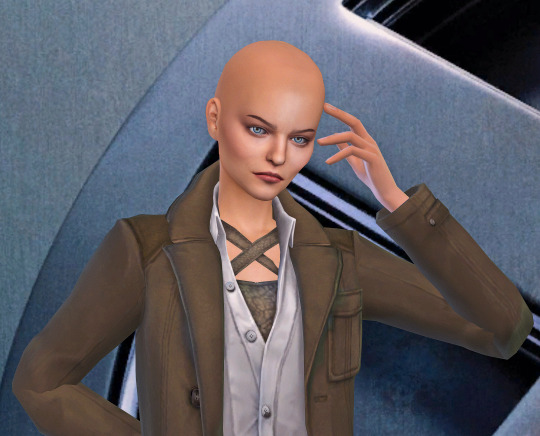
Created Emma Corrin as Cassandra Nova from Deadpool & Wolverine! 😁
#sims 4 community#ts4#the sims 4#ts4 cas#cas#gaming#video games#sims#character creation#cas ts4#simblr#deadpoolandwolverine#deadpool and wolverine#marvel cinematic universe#marvel#emma corrin#cassandra nova#deadpool 3#fan art
22 notes
·
View notes