#s4 werewolf cc
Explore tagged Tumblr posts
Text


AWOOF
#sims 4#ts4#maxis match#sims character#ts4 werewolf#werewolf#ts4 werewolves#ts4 cas#ts4 lookbook#s4 lookbook#ts4 occult#ts4 gameplay#ts4 maxis match#ts4 cc#animals#ts4 outfits#ts4 townies#moonwood mill
517 notes
·
View notes
Text


HOWELL MAKEOVER
Your favorite werewolf doesn't look as shocked anymore.
Available to download on the gallery (mortanko). Don’t forget to toggle CC switch on before searching. Or download tray files on SFS.
More of my makeovers here.
—
ꕤ Lou ꕤ
Skin | Skintone | Skin details | Highlighter | Eyes | Eyebrows | Eyelashes (v6) | Hair | Eyeliner | Lips | Shirt | Jeans* | Shoes | Nails* | Bracelet | Earrings* | Hat
*simsresource. Adfly free!
Outfits in the preview are pasted through all the categories, make sure to change it accordingly.
—
Massive thank you to creators @obscurus-sims, @adelarsims, @wyattssims, @mmsims, @aharris00britney,
@vibrantpixels, @pralinesims, @pixelette-cc, @simstrouble, @dangerouslyfreejellyfish,
@sims3melancholic, @softerhaze, @poyopoyosim
—
@maxismatchccworld @mmoutfitters @sssvitlanz
#mortankocreations#my sims#ts4ccfinds#ts4cc#ts4mm#s4cc#simblr#ts4 simblr#sims 4#the sims 4#ts4#simblog#sims4cc#sims 4 cc#sims 4 mm cc#s4 mm#ts4 mm#mm cc#mmcc#sims makeover#moonwood mill#sims 4 werewolves#werewolf#werewolves#lou howell#howell
32 notes
·
View notes
Text
DigiLegs Vanilla Conversions
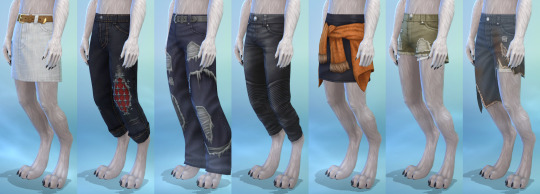
Lower body clothes edited for compatibility with my Digitigrade Werewolves override and DigiLegs for human/other occult sims. Currently includes the following packs (modular download, choose based on what packs you have):
Basegame (WIP)
Outdoor Retreat
Werewolves
Get Together (lower body only)
They'll be grouped together at or near the bottom of your sort order in CAS and show up for the same categories/filters as their vanilla counterparts. The only change I've had to make, unfortunately, is that everything is gender/frame restricted. Not doing that has been the main cause of Problems so unfortunately it's how it's gotta be.
These are not an override and don't work on their own; they require DigiLegs. They won't replace or alter the vanilla clothes they're based on, and are disabled for random. You'll have to manually replace the vanilla pants on NPC werewolves.
Download:
SimFileShare | Patreon
#ts4 cc#sims 4 cc#ts4 werewolves#s4:all#s4:clothes#s4:werewolf#s4:digitigrade#I'm also gonna add base game clothes eventually but that's a big project#ideally eventually more packs as well#all modular I've learned my lesson about merging too close to the sun
386 notes
·
View notes
Text


𝙃𝙚𝙮, 𝙎𝙞𝙢𝙢𝙚𝙧𝙨! 🌙 𝙒𝙚𝙡𝙘𝙤𝙢𝙚 𝙩𝙤 𝙢𝙮 𝙡𝙞𝙩𝙩𝙡𝙚 𝙘𝙤𝙧𝙣𝙚𝙧 𝙤𝙛 𝙩𝙝𝙚 𝙎𝙞𝙢𝙗𝙡𝙧 𝙘𝙤𝙢𝙢𝙪𝙣𝙞𝙩𝙮. 𝙄'𝙢 𝙚𝙭𝙘𝙞𝙩𝙚𝙙 𝙩𝙤 𝙞𝙣𝙩𝙧𝙤𝙙𝙪𝙘𝙚 𝙮𝙤𝙪 𝙩𝙤 𝙢𝙮 𝙣𝙚𝙬 𝙎𝙞𝙢𝙨 𝟒 𝙛𝙖𝙢𝙞𝙡𝙮:
The Brinsons
✨ Darius: A fierce yet loving werewolf who is the pack leader of the Wildfangs. He’s got a rugged charm and a protective nature, but his soft spot is definitely his family.
✨ Amara: The heart of the family, Amara, previously known as Amara Volkov, is a graceful and powerful werewolf. She is the daughter of Kristopher Volkov and sister to Rory Oaklow. She’s a master of herbal remedies and loves gardening under the moonlight. Amara's nurturing spirit keeps the family united and strong.
✨ Feyre: The newest addition to the Brinson family! Feyre is an adorable werewolf cub with a feisty nature. She is the granddaughter of Kristopher Volkov.
#ts4#ts4 simblr#ts4 gameplay#ts4 screenshots#the sims 4#sims 4#the sims community#simblr#the sims werewolf#the sims werewolves#ts4 werewolves#ts4 werewolf#moonwood mill#moonwood collective#my sims#the sims 4 cc#sims 4 cc#s4 cc#sims4cc#sims 4 custom content#ts4cc
20 notes
·
View notes
Text
Werewolf fur templates working with and without HQ mod now!

Good news!
After yet another day of investigations, we managed to make werewolf fur templates functional with and without HQ mod. Just go and grab the HQ replacement files here:
Link
If you grabbed the replacement files already, please redownload "GP12_HQ" and "GP12_HQ_templates and please delete the file "GP14_HQ_templates(HQ only)"
Please be aware that paint mode is not working with HQ mod and an attempt to use it while HQ mod is on will cause the game to crash.
Happy simming!
-RS
#sims 4 werewolves#ts4 werewolves#s4 cc#hq mod#s4cc#sims4 cc#ts4hq#ts4 cc#ts4cc#s4hq#ts4 hq#sims4 hq#ts4 werewolf#sims4 werewolf
146 notes
·
View notes
Text
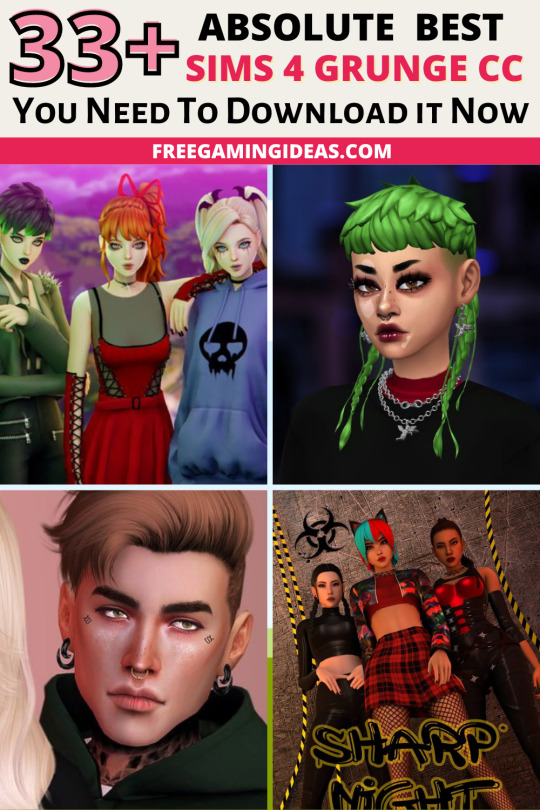
35+ Must Have Sims 4 Grunge CC to Spice Up Your CC Folder
If you’re looking to step up your Sims’ style game, then you need to add some Sims 4 grunge CC to your CC folder!
From distressed jeans and ripped tees to vintage leather jackets and punk-inspired accessories, these are the must-have Sims 4 grunge CC items that your sims need to create an unforgettable look.
You can find the post here.
#sims 4 grunge cc#sims 4 cc#sims 4 cc finds#sims 4 werewolves#sims 4 werewolf cc#sims 4 grunge maxis match cc#the sims 4 grunge cc#sims 4 grunge custom content#sims 4 custom content#free gaming ideas#freegamingideas#ts4 grunge#ts4 grunge cc#s4 grunge cc#ts4cc#sims 4 mm#ts4 mm#sims 4#sims 4 grunge mm#ts4#the sims 4
160 notes
·
View notes
Text
Anime werwolf skin(non overlay)

(free)
#werewolf#sims 4 werewolves#glorianasims#sims 4 SKIN#s4 skin#MMS#ts4cc#sims4#sims4cc#s4cc#cc#maxismatch#sims 4 maxis match#s4mm#sims community#ts4mm#sims 4 mm
29 notes
·
View notes
Text


Above: before-and-after pictures of this process. Thank you to @cloudywithachanceofsims, @silverthornestudfarm, and @blueridgeequines for giving me permission to use their coats as examples!
CK's Guide to Fixing Pixelated Horse Coats
As we all know, every time you paint a horse (or any pet or werewolf, really) in Create-a-Pet, it inevitably gets pixelated. This is due to the TS4 engine's compression of Sims textures, which it does to theoretically save on file space and load time. The more you paint on your horse (and the more you save it over and over again), the greater the artifact damage becomes, until you're left with a pixelated mess.
Luckily, I've figured out a way to fix it. Yay!
This method uses a program called chaiNNER, which is an incredibly versatile node-based graphics UI that (among many other things) uses AI models to upscale and process images. After a month and a half of experimenting on multiple different types of coats with about a dozen different models, I've identified two AI models that work best at repairing the artifacting damage done by TS4: RealESRGAN_x2plus and 2xAniscale. I extract the painted coats from the tray files using Cmar's Coat Converter, process them using chaiNNER, use Photoshop to make any touch ups (softening hard edges, fixing seams, adding in the appropriate hoof texture), and then create a new hoof swatch to put the newly fixed coat back into the game.
Fair warning: chaiNNER is a bit of a hefty program that requires significant RAM and VRAM to run. If you have a beefy gaming computer, you should have no issues running this (as long as no other major programs - games, graphics programs, etc. - are running as well). If you've got a lower end computer, though, your computer might not be able to handle it and this method might not be for you. Make sure to read all the documentation on chaiNNer's github before proceeding.
Before we begin, we're going to need to gather some resources. We will need:
A graphics program. I use Photoshop, but GIMP or any other program that can work in layers will work too.
chaiNNER
AI Models; these are the ones I use are RealESRGAN_x2plus and 2xAniscale
Cmar's Coat Converter to extract the coat textures from your tray files
Tray Importer (Optionally) to isolate your household tray files and save you the trouble of searching the Tray Folder
The TS4 Horse UV as a helpful guide to make sure all our textures are lined up properly
Sims 4 Studio to create your new package.
I recommend using S4S to export hoof swatch textures from the game or from existing hoof swatch cc. Some popular hoof swatch CC include @walnuthillfarm's Striped Hooves and @pure-winter-cc's Glorious Striped Hooves
This tutorial assumes you are familiar with the basics in how to use Sims 4 Studio, such as how to clone a base-game item & how to import and export textures, and the basic functions of your graphics program, such as adding multiple different image files together as layers. I'll try to keep my explanations as straight-forward as possible.
STEP ONE: Extract the Coats
Install Cmar's Coat Converter and run it. Cmar's Coat Converter works by looking through your tray files for specific texture files (ie. The coats of cats, dogs, horses, and werewolves) and converting them to png files. You can go through the households of your Tray folder one by one, but I typically just use Tray Importer to separate the household containing the horses I want to fix.
Save the extracted coats in a project folder. These are your OG coats.
STEP TWO: Extract the hoof textures
Open up S4S. To extract the hoof swatches from the base game, create a new package by clicking CAS -> New Package, filter everything by species (ie. Horse) and then part type (Hoof color). Highlight all the basegame swatches and then save your new package.
Open up that package and then extract the texture for each swatch. Save them in your project folder (In a 'basegame hooves' folder to keep things organized).
To extract the textures from Hoof Swatch CC files, simply open them up in S4S and repeat the above.
STEP THREE: Download the AI Models
Right as it says on the tin. These are the models I use currently & some notes about them:
RealESRGAN_x2plus - this model is THE workhorse. It repairs artifact damaging with minimal loss to texture quality and results in a very smooth coat. It may sometimes darken the texture a little bit, but it's not noticeable in-game. That being said, it has a harder time with finer details such as spots, individual ticking for roans, dapples etc. I run this one first on all the coats because it usually does the job.
These models are trained to find and repair any incidence of artifacting/jpeg damage and approximate what the image is supposed to look like. The reason RealESRGAN_x2plus has an especially hard time with spots/dapples/tiny repetitive details etc. because it registers those areas as particularly damaged and works extra hard to smooth it out… which can sometimes result in a bit of an iffy coat repair. When things don't turn out the way I want, I turn to...
2xAniscale - I use this model for any appaloosas, roans, sabinos etc. that have very fine detail and came out mangled by RealESRGAN_2xPlus. It's also good for light-duty repairing (in cases where people have only 'saved' the coat once, as opposed to working on it on and off). While not strong enough on its own to tackle the more heavily damaged coats, it still does a decent job while keeping the fine details intact.
Go make a folder somewhere and name it 'AI Models' or something similar, and drop these guys in there.
STEP FOUR: Setting up chaiNNER
Obviously, go ahead and download chaiNNER, and then (through chaiNNER itself) download & install the dependencies. You really only need PyTorch for this, so if you'd like, you can skip NCNN, ONNX, and Stable Diffusion.
At first glance, chaiNNER is a bit overwhelming. It is unlike any other graphics ui I've seen before, but the basic premise is pretty straightforward: you 'chain' together specific functions ('nodes') in order to get your result.
We're going to start by setting up a chain for single coat conversions.
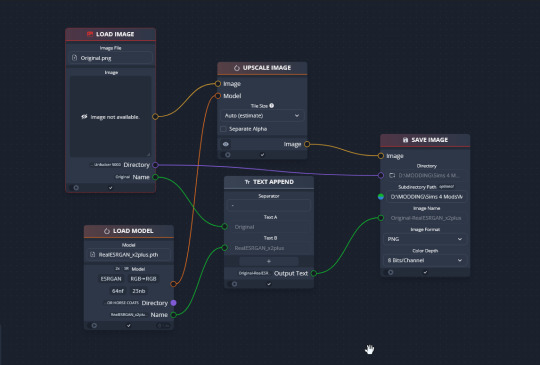
Drag & drop these nodes into your workspace:
Load Image
Save Image
Upscale Image
Load Model (From the PyTorch tab only!)
Text append
Next, connect the nodes just as I have connected them in the image.
Load Image, obviously, loads your image. We then tell the program we want to upscale that image by linking to the Upscale Image node. Upscaling can't happen without a model, so we then want to link Upscale Image with Load Model.
Text Append takes the original name of the image and combines it with the model name. This is super helpful, because if you're playing with many models at a time, you need to tell your result images apart. Link the output text to the Save Image Model.
Finally, Save Image obviously saves the image. We link the directory from Load Image to save it in the same place as the OG image, or, optionally, add in a file path link to another folder (in my case, I load images from a folder called 'Unprocessed' and save them into a folder called 'Processed'. Link the image from Upscale Image to Save Image to complete this chain.
Go in and select your image, model, and save locations.
Ta dah! You made your first chain.
To create an Iterator to batch process coats, we follow the same general idea, only we use 'Load Images'.
STEP FIVE: Run chaiNNER
Go ahead and run chaiNNER. Repeat using 2xAniscale if your spotty/dappled coat comes out funky.
Optionally, you can also add 'Resize' between 'Upscale' and 'Save Image' so the output texture is the same size as the OG. I like keeping mine big, as it makes it easier to fix any fine details in Photoshop.
STEP SIX: Combine in Photoshop
Go ahead and open up the horse UV, your coat texture & hoof swatches in Photoshop. This is a fairly straightforward process: layer the hooves overtop the texture, and then hide all hoof layers except the one you want. Make sure everything is lined up properly using the horse UV.
This is also where you would go in and fix any sharp, jagged edges you might spot. I often notice jagged edges on white face markings. Since the head is often one of the worst areas for artifacting, the AI models don't really have much to work with, resulting in jagged edges as they try to extrapolate what had been there 'before'. Either paint over it or use blur to smooth it out.
I personally would also remove any stray color that isn't the horse texture (body + ears). It won't hurt to leave it there, but I personally like things neat and tidy. Use the horse UV as a guide.
I also add in any little details using extracted stencils & layer masks.
Save your new coat as a png. Optionally, downsize it by 50% back to the original size. I don't do this because I'm very forgetful, but this would definitely help in keeping your package size smaller.
STEP SEVEN (Optional): Make a thumbnail
I make thumbnails for all the coats I do because it makes it much easier to identify them under the Hoof Swatch category. TS4 thumbnails are 144 x 148. You can label it with your horse's name, or stick a headshot in there etc. whatever works for you that will help it stand out from the other hoof swatches.
STEP EIGHT: Put it all Together
Finally, we've come to the end.
Using S4S, create a new package cloned from a hoof swatch. Import your new coat into 'Texture', and your thumbnail into 'Thumbnail'. Make sure you import the thumbnail for both Male and Female!
Check to make sure there aren't major seams, and that your texture is properly projected onto the S4S horse model. If there are seams, go back to check that your texture is lined up properly with the Horse UV. If there are minor seams (legs, chest, underbelly etc.) you can carefully paint (using the same color as on either side of the seam) just beyond the UV mesh boundaries to close the seam.
Then, go into Categories, scroll down, and uncheck Random. This will prevent random townie horses from wearing the coat.
Save your package.
Congratulations! You're done!
#ts4 tutorial#ts4 resource#ts4 guide#Ts4 horse cc#ts4 equestrian cc#sims 4 horse cc#sims 4 equestrian cc#ts4 equestrian#sims 4 equestrian#ts4 horses#sims 4 horses#ts4 horse ranch#sims 4 horse ranch#sims horses
71 notes
·
View notes
Text
Bonus Retexture of Candy hair by Enriques4

Long wavy pigtails maxis match hairstyle. Originally made by Enriques4, recolored in a wide variety of unnatural hair colors
- 96 Colors - Custom Thumbnail - Female - Teen + - All Occults (Except Werewolf) - Maxis Match - HQ Compatible -Previews are taken with HQ mod-
❌MESH REQUIRED❌ - Mesh link in download section -
Want to know what HQ mod is? Or maybe you want to know how to install it yourself? Find all info and all you need to start using HQ mod ✨HERE✨
✨My Socials✨

Original Creator / Mesh Owner : @enriques4 Huge thanks to all the amazing cc creators I have used cc from in my previews.

✨DOWNLOAD MESH✨ (REQUIRED)
✨DOWNLOAD RETEXTURE✨ (TSR)
💜Get 6$ off the annual TSR VIP subscription using the code: SHOP_PinkyCustomWorld12💜

@remussirion : Skin, Eyebrows, Eyes, Blush @plumbobjuice : 3D Eyelashes @julhaos : Eyeshadow, Eyeliner IzzieMcFire : Lips @beto-ae0 : Dress @gossipgirl-s4 : Tattoo @suzuesims : Earrings (CC not listed I do not remember who made)
#ts4#ts4cc#ts4 cc finds#ts4 hair#ts4 maxis match#ts4 free cc#retexture#simblr#tsr#the sims resource#thesimsresource#ts4 cas#ts4 mm#ts4 maxis hair#ts4 colorful#ts4 alternative#ts4 fantasy#the sims 4#the sims 4 cc#sims 4#sims 4 cc#sims#sims cc#pcw#pinky#candy#enriques4
14 notes
·
View notes
Text
discussion post #2 (i think?)
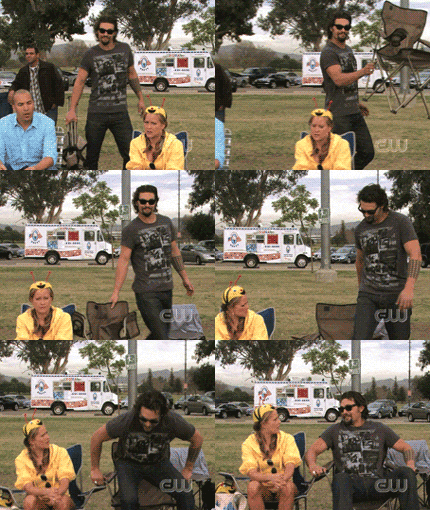
This may have been a small update but More Things happened and we gotta talk about it. (Or, I'm gonna talk about it.) More like a ramble, really.
Thoughts? Comments? Concerns? Speculation? Let's talk about it. 🤔
Behind the Scenes stuff:
first off, I wouldn't have the ability to even remotely do ANY of this part without @anothersimsstory's CC conversions and I'm glad I had the foresight of downloading it when I did. (they didn't delete their shit or anything but you know how it is sometimes) and the monitor by Theraven (I don't think they have a tumblr? they have a forum tho), and the EKG leads by @jellypawss. It really pays to make niche CC!!
I had to make swatches for the monitor since it is an important visual thing... but it was wholly contingent on me finding something that's close to actual vital signs and I looked everywhere but they were all stock images and obviously didn't work for what I needed. I then had to search high and low for for it, but I found it. For real!! I had to use TWO laptops (one for settings and the other for the actual monitor) and I screenshotted it, slapped it into paint to save it, make it a swatch, rinse/repeat for I think 15? idk how many
you may think, Ennie, that's a bit much, and I say, my attention to detail game is insane when it doesn't need to be but dammit, the visuals have to make sense from a glance. That and the offchance of someone who knows read the monitor would point something out about it. That said! I tried parcing out what EtCo2 is but all I got from it is was "high number bad".
seriously, I spent... a Stupid amount of time setting that up. 🅱️lease clap for me -- I can safely say that I don't think anyone else would go that far.
I told myself after finishing The Incident I was not gonna be doing 5/6 rigs all in one shot again. (����)
The lighting situation drove me up the damn wall and after a point, I just said fuck it. What I didn't anticipate was the stark contrast of John and The Werewolf talking and the memory in terms of setting. It's really cool, I think.
I fretted over this part the whole time because I didn't know what order I wanted and what I was going for, but I think I escalated it properly.
For The Werewolf's veins, I had to do the ol' S4S shuffle, but they are a combination of 3, maybe 4 and ofc had to make outfits for the progression, which is why he's still rocking the half-sleeve look (and from an age/timeline stand point makes him 21/22ish). You know what, let's look at them again!
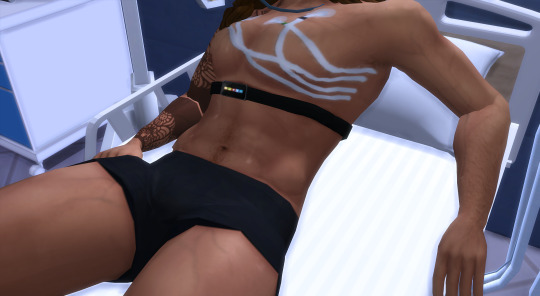
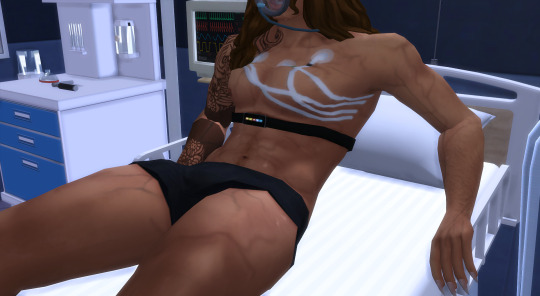
it's a good look
Speaking of... I had to make a lot of The Werewolf solo poses and I found out that uh, it's all in the brows; they can completely change the meaning. It's bad enough with the angles and the general body language. (Or maybe not? Eh.)
Another visual thing -- The Big Scene... that one, I had going back and forth with it until I decided going all white for The Werewolf's eyes (or lack of pupils). It was far more striking and way scarier than the 'blank' eyes I tend to go with.
seriously, I contemplated on tagging it as a jump scare.
Oh! and the shaking of 3 pics, that was spur of the moment because I really kept going back into the post and something was just missing. I have a (cracked) PhotoMosh and I played with the setting a bit and bingo.
It is probably my favorite post so far. I had to settle with the fact that it's not gonna be the one to be spread around. Or any of it really.
Story Stuff:
There's so many crumbs in this! So. Many. There's even a loaf of bread or two. If you tell me what you're picking up on and you're on some kind of track, you get a cookie (🍪). (I'm serious, btw)
John's clearly shook. This may be the first time we've really seen him like this. And The Werewolf is nonchalant... (I will admit John looks very pretty when he's like this lol)
...or is he? I think there are more cracks in the dam than you'd think. A while back in a post that's somewhere on this blog, but John has a tendency to play with his hands when he's anxious.
Another thing that I just noticed is that they didn't really look at each other; I wonder what that's all about?
I've said it once and I'll say it again; even though they share the same body, John and The Werewolf look very different from one another, and I think that's neat.
Jordan being real about taking advantage of the fact that they're getting paid $$$ and they'd be dumb to not take up the offer.
I had to remember that Brian did not know John was a werewolf at this point in time, or even begin to really put 2+2 together. I call it a bit of genre blindness, helped by the fact that this didn't happen all the time. He just rolled with it. Also, wow he looks very young without his tats; ofc this was the college years and he was beginning to fill out/eating good.
Mark is the smartest dude in the whole story. He said, nope, nuh uh, I'm OUT. IYKYK.
There were so many pics I wanted to take of Daniel punching The Werewolf right in the solar plexus (or thereabouts it might've been slightly lower than that). As they say in the FGC, he failed to block that overhead.
I'm glad I decided to leave in the fact that The Werewolf couldn't see too well.
The Werewolf blew his vocal cords out screaming. He said that shit with his soul. Rarely do I go with the funky text with him since that's his "big scary werewolf" voice (that and he rarely speaks like that). My man said "I'll make you suffer my pain." Beautiful. Can't wait to see how that plays out.
That said, The Werewolf did work himself up to the point of nearly killing himself on accident. But as Charles predicted, his body hit the emergency button and shut that shit down.
I spent the most time worried about this part because it needed to get the point across without it being so... cheesy?
also, I have to say? The Werewolf is a Swearwolf. *rimshot*
The Fucking Around part has ended... The Finding Out part is really going to be fun to watch. (I mean, you can already do this if you haven't but now you have way more context.)
There's something about The Werewolf that's becoming apparent (to us). He's still holding back on his actual feelings. Not only that... he hasn't gotten to John himself and I think that's where it's really gonna go down. John knows this; he's not naive to think that he didn't have a role in all of this too. Something to think about.
Charles is a flat out Nasty Man (very derogatory) and yet, I kinda enjoy writing it.
I do love how he is formal with names, "dear ____" and referring to John's formal name Johnathan.
which I always forget this mfer is named Johnathan. Nobody calls him that.
#ennie rambles#spoilers#story discussion#i think that might be it or at least at this time#i may add to it via reblog if i think of something else#thoughts? comments? concerns? speculation?
6 notes
·
View notes
Note
46 and 56 for the fanfic writers questions please! 😊
46) If you could only write one type of AU for the rest of your life, what would it be?
110% its Hellfire/CC adopting Steve. I can spend all of my life writing fun new ways for those idiots to trip over Steve before S4 lol.
There's just a lot I feel you can do with them? Like having them explore not just the lab, but the burnt out version of Starcourt, or literally encountering Steve / the party during anything that happened in the prior three seasons, there's a lot of moments you can insert them and change things.
56) Are there any fics that you would change or rewrite if given the chance?
Yes! I'd redo a lot of the werewolf steddie stuff, which I honestly still kinda sometimes think about doing LOL. If I started over with it a second time I think I'd be coming at it from a bit more of a monster/emotional whump pov and less of just having fun with werewolves. One of the ideas I wanted to play with was the demogorgan evolution line being a mimic of a werewolf's different forms and how that would impact a Kas!Eddie.
8 notes
·
View notes
Text
Pride
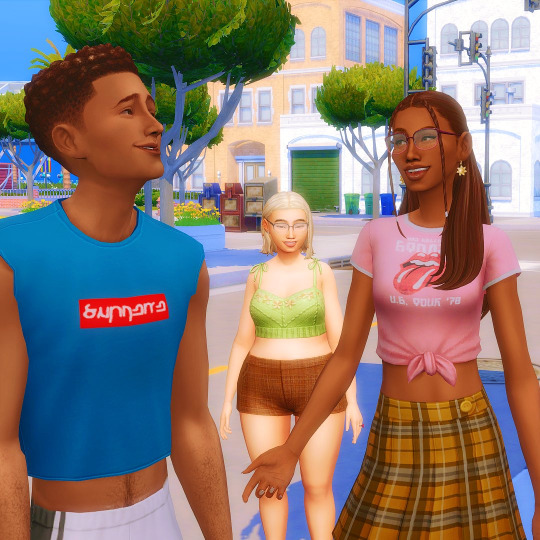
The last time we saw the Harrises, Willow has just graduated High School and was on vacation week before starting her first term. This time we wake up along with Leo while he calls the gang to go on their Pride trip!
"San Sequoia awaits! I hope you guys are ready!"
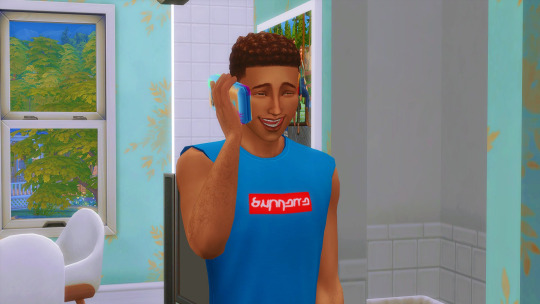
Leo, Marcos, Dani, Molly, Ash and Kevin were gonna spend the weekend at a cool SimsBnB they found right next to the bridge! Sid and Vannah were in Britechester at a Summer course prepping for their senior year.
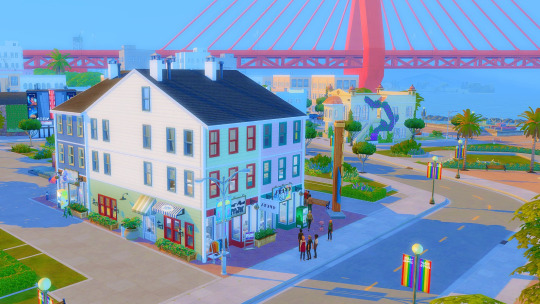
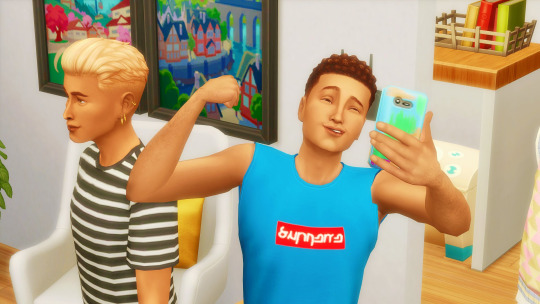
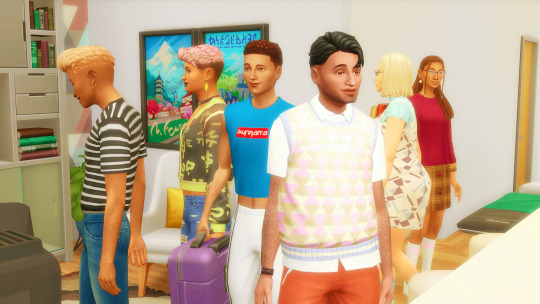
Maybe in the end, for the siblings, it was the best, since this has sort of become a couple's vacay! Ash and Kev had this thing going on for a while, but being away from her mom maybe was what Molly needed to give the next step with Dani...
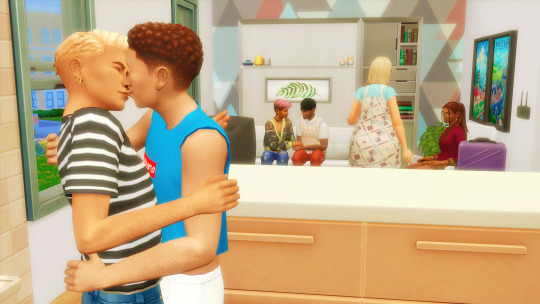

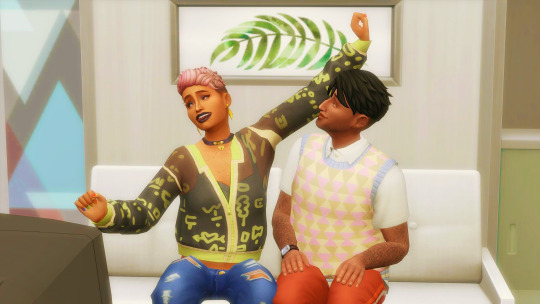
That afternoon, the gang went to the movies to watch the new live-action adaptation of Sepulcher Invader. It was kinda bad, but they were all so happy with the whole trip their bored moodlets didn't even matter!

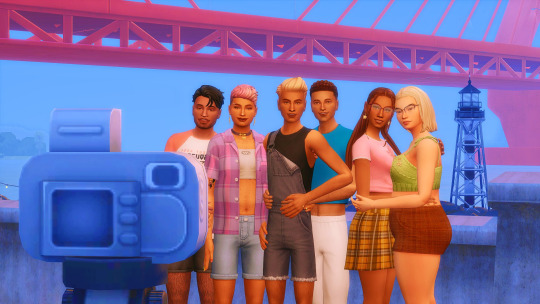
After the movie it was almost dawn, so they used the good lighting for some vacation pictures. They could not go home without a photo of the iconic bridge!
Molly told a bit about the city bar to Dani before they got ready for the party.
"...and that's when the twinky werewolf put the cops to run. Sims said it was a historic night!"
"Wow, he sounds so cool!"



Party time! Since it was Pride, Dorothy's was filled with deco sims! It was Drag Performance Night, so the sitting area was just as full as the dancefloor.
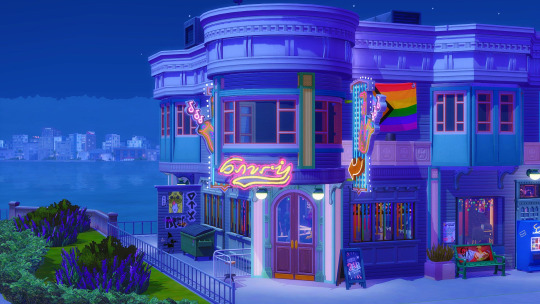
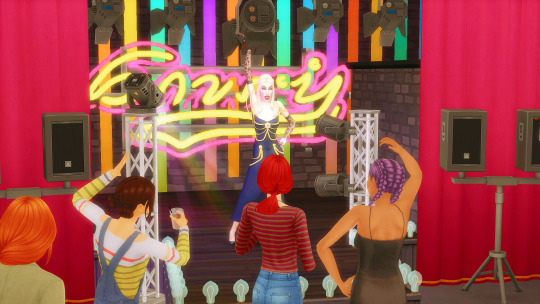

The club part of the bar was also packed! The teens danced the night away to the unknown NPC DJ.
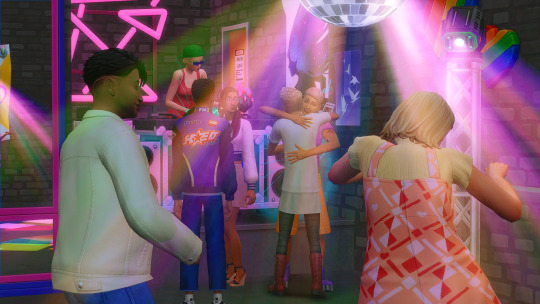
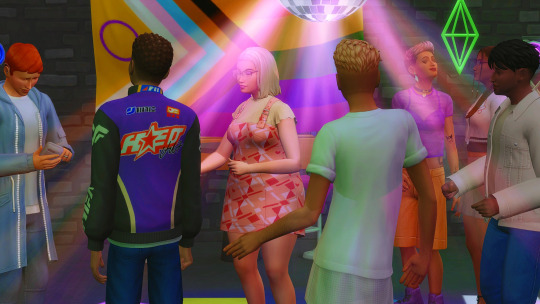

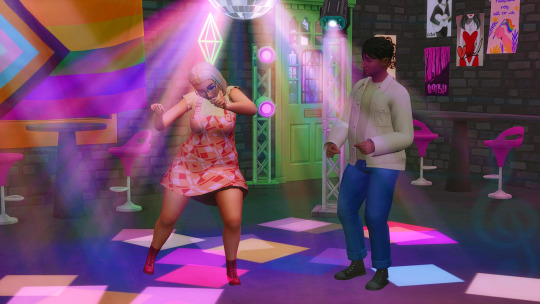
While Molly spent her long-lasting batteries dancing, Leo and Marcos sat outside for some fresh air.
"So, like West Coast Simerica so far?"
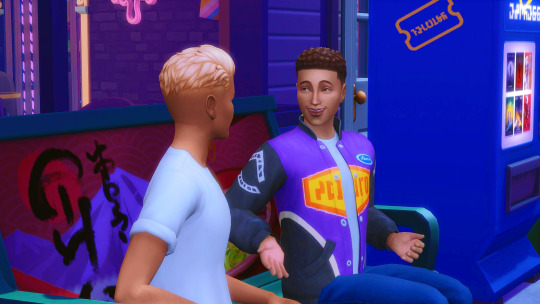
"It's so pretty and warm! I feel like I'm drying up from all that Eastern humidity, Copperdale is so rainy! Here's also queer AF so many points to that!"
"Imagine if we could live here! It's a short car trip to Del Sol Valley. You could work at Plumbob Pictures!"

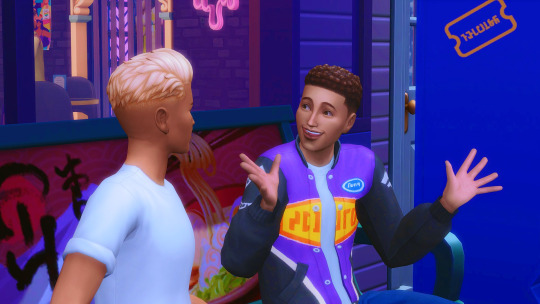
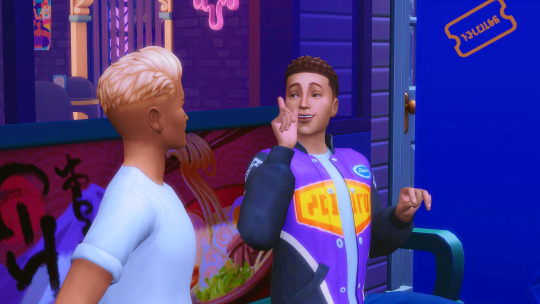
"If only there was any excuse so I could convince my parents we could live here..."

"Well, lucky for you the Watcher isn't subtle at all. Look behind you. Isn't this awfully convenient?"

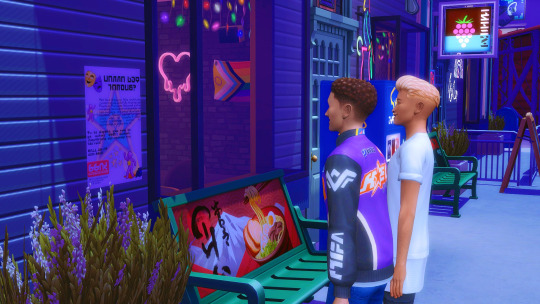
"'Wanna Get Famous?'
IT'S. A. PBP. INTERNSHIP! Multiple internships, given by this San Sequoia Arts Institute! Oh my Watcher, do you think this is our generation's story arc?"

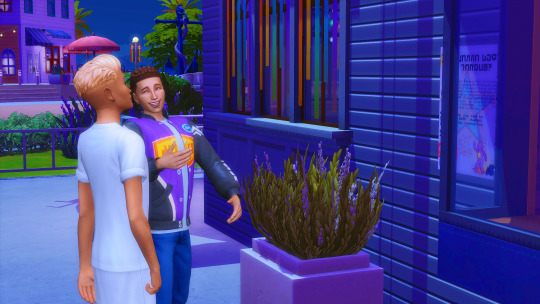

"Well, according to their website, the criteria for enrollment is fine... Thankfully we have all those Drama Club hours, plus we'd be active sims so that counts positively too", Marcos explained.
"Us? In San Sequoia? Trying an internship for woohoocking TV? This gotta work!"
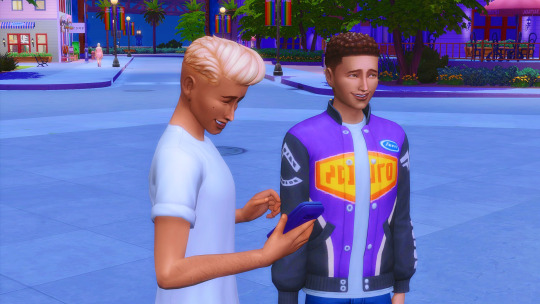
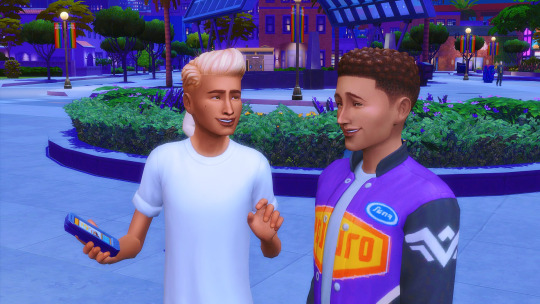

"This poster is here, baby. The Watcher wouldn't go through S4S and make CC if it wasn't gonna work. Have faith!"

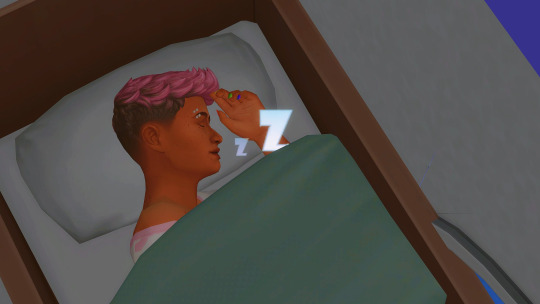
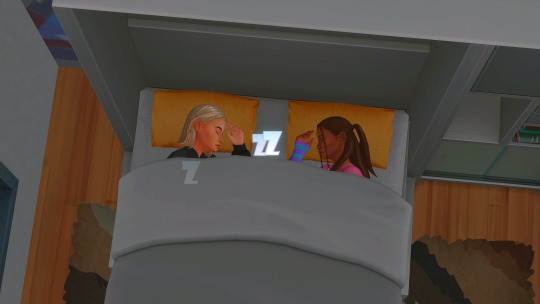
The gang called it a night and went to their rental to rest. Soon, Leo would have to share his news with Moe and Tito!


1 note
·
View note
Text
How to make regular TS4 clothing compatible with DigiLegs: PART 1
This tutorial assumes you're converting for my digitigrade mesh used in my DigiLegs and werewolf override, but it should also apply to any other funky-shaped legs you might want to do this with. Useful either if you want your digitigrade sim to be able to wear a piece of vanilla maxis clothing, or for converting cc (please get permission from the creator where applicable before doing so, especially if they make their own meshes).
I'll do my best to make this tutorial accessible to relative beginners, but I'm assuming that you already have some basic blender knowledge. If you don't, there are a lot of good tutorials that explain its clusterfuck of an interface better than I could, so I recommend finding a few of those and familiarizing yourself with the software before you continue.
You'll need Sims 4 Studio, blender, and potentially an image editor like Gimp or Clip Studio Paint (anything that can handle transparency) depending on the clothing.
This first part will cover shorts and anything else that ends above the knee (along with some extra s4s stuff like category settings and CAS thumbnails that I do to make them look better and behave properly in-game); next section will cover long loose pants which is a somewhat different process, as well as cuffed pants, skintight leggings, and other things that might require some heavier editing and altering of the shadow map, UV, and textures.
Getting Started
Base meshes are available for download here. Please don't reupload them unaltered, and don't alter the edited part of the leg mesh (knees down, basically) or it may mess up their ability to match up seamlessly with other digitigrade parts. The most effective way to use them is to append them to the project you're working on and frankenstein them onto your mesh as needed rather than modifying the blend files themselves, especially if you're making WW parts since these don't include Turbodriver's rig.
Mesh Editing For Shorts
Shorts, miniskirts, and anything else that ends above the knee are great because you don't need to do much, if any, actual sculpting, and once you know how it's relatively quick to do.
To start, export the mesh for the shorts you want to convert the same way you did the legs, all LODs. If you're converting cc, it's possible the original creator won't have made proper LODs (some don't because it's incredibly tedious, but it's good practice and improves visuals and performance in-game), and if that's the case you might want to make some LODs, but I won't tell you how to live your life.
For this, I'll be using these base game vanilla shorts, since I need to convert them anyway. Because when I think of satyrs, obviously I think of khaki shorts.
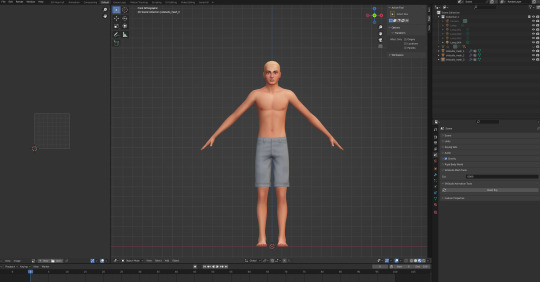
Yeah.
Append the digitigrade mesh via File>Append. navigate to where you put the legs, pick the mesh you want (make sure the one you're importing is the same LOD and frame as the mesh you're altering), select the object folder, and import s4studio_mesh_1.
You'll end up with a situation that looks something like this. Do not be alarmed.

I don't know why it imports these things along with the mesh (there's a non-zero chance someone will yell at me for doing it wrong and it's not supposed to be like that) but in my experience you don't need any of it, so deselect the mesh and delete everything else that imported.
At this point, to make things easier on yourself, you'll want to hit numpad 3 for orthographic side view, set viewport shading to solid, and hit alt+Z to toggle x-ray view.
Take note of how many objects make up your mesh. For most maxis shorts (and probably a lot of cc ones) there are three that divide up the legs, and it's important that you maintain that number and don't remove/replace any of them, otherwise the mesh will be broken once you import it to S4S. It's finicky like that.
Select the digitigrade legs and go into edit mode, then select everything up to here:
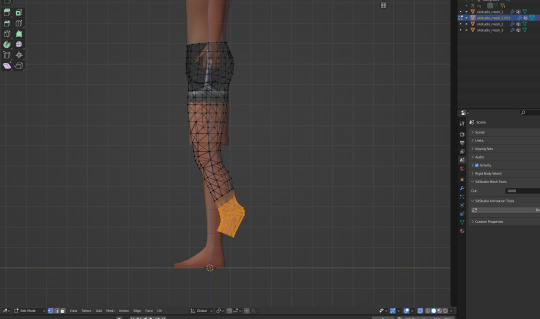
Separate this bit into a new object (P>Selection), then go back to object mode. Select the separated lower leg bit you just made, then SHIFT+select the lowest piece of the vanilla leg (select them IN THAT ORDER, very important), and hit ctrl+J to join them into one object. Go to edit mode for the newly joined leg bits, and delete the vanilla part, leaving only the lower piece of the digitigrade leg. If you've done everything right up to now, your mesh list will still look like this.

or whatever it looked like when you started, plus the one appended mesh.
Now go back to the main digitigrade mesh and select up to here:

separate it and repeat the process you just did, replacing the next leg segment up.
Now go into the topmost part of the vanilla shorts, and select only the leg part and delete it (it's almost always detached from the shorts in vanilla clothes and very easy to select, but with cc this might be a mixed bag and could take more time/effort to do). At this point you should have only the digitigrade leg and the shorts themselves.
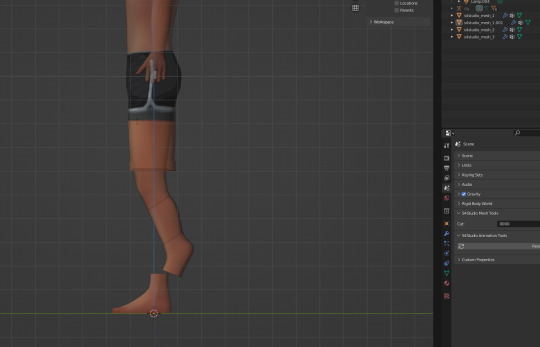
You now want to go back to the uppermost section of the digitigrade mesh and delete most of the top part of it, trimming it down so that the leg ends just inside the shorts.
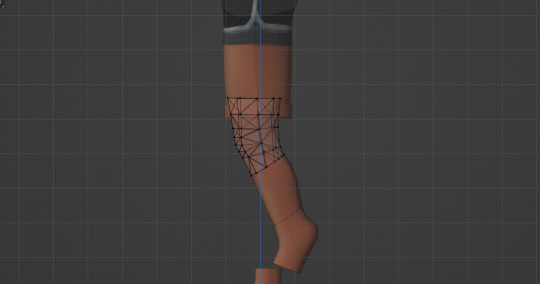
For a lot of shorts and skirts, especially shorter ones, this is all you'll have to do, but in this case I'm going to move those very top/front vertices back a tiny bit, just to make sure there won't be any clipping during animations. I also like to switch viewport shading back to material preview mode at this point to make it easier to see if there are any bits poking through that shouldn't be.

At this point you join the upper legs and shorts like you did with the other two segments (again selecting the digitigrade mesh first and the vanilla shorts second) and by the end your objects list should be back to this:

Now you're done, you can save and import to S4S. the digitigrade legs are already weight painted and have their UVs set up and everything so you don't need to do anything more to them, they'll just work, and as long as you don't edit the mesh or uvs they should blend seamlessly with all the hooves/paws just like the naked leg.
Now do the same thing for the other three LODs. Maybe while singing a sea shanty to stave off the tedium (personally I like listening to podcasts while I do batches of these, it's kind of like knitting for people who love eye strain take breaks from your computer, kids).
S4S Categories/Thumbnails
The three main things you want to do with any digitigrade conversion are disable it for random, restrict opposite frame, and uncheck all occults. That should prevent any broken leg situations. Don't forget to apply to all swatches any time you make a change (I say this because I forget about 30% of the time and end up having to go back and fix it).
At this point, you don't have to do anything more. The clothes will function as they should in-game. If you want nicer looking thumbnails though, and you have the digitigrade werewolves override, there's one more thing I like to do.
Make sure all the thumbnails are blank and check only the werewolf occult in the categories tab, then save and load up the game. Find the clothing you just made in CAS (it will probably show up by default on werewolves of whichever gender you made it for) and cycle through all the swatches to generate new thumbnails that look like this:
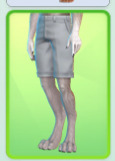
instead of this:
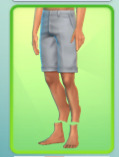
Once all the thumbnails are generated, exit the game and export them all (if some of them appear blank, restart S4S and they'll usually show up), uncheck the werewolf occult, clear the thumbnails again, and re-import the werewolf ones. This ensures they won't randomly switch back to the human ones. And it's way faster and easier than making your own custom thumbnails with screenshots and cropping/editing, which is important if you're doing a large amount of these things.
And voilà, you've got your own DigiLeg-compatible clothes. I'll be updating the tutorials as needed for clarity/any information I forgot to include, so please message me if something doesn't make sense or I need to go into more detail on something, and I'll edit it with more/better info. I also entirely learned this through trial and error, so if there's a better way to do any of it that you happen to know, tell me that too, this is just the best way I've worked out to do it.
64 notes
·
View notes
Text
progress report
i've (nearly) done the hat!!
look at this before/after


the only thing to change is slightly fix the mesh but it's not a big deal!
next...
i've made the bionical limbs texture! and it even looks kind of nice i think?

maybe too maby details on the hands but idk
and the biggest thing.....and the biggest issue at the same time. the suit!!
how it must look in the game/how it actually looks in the game


idk about u but i definitely see an issue here lol
this is not the first time when such a thing arrives to me, however before it was with the hat and i found what was the issue quite quickly. in this case — no idea what went wrong. i'll probably spend the whole weekend trying to repair the thingy
future plans/to do list:
- the obvious one — fix the suit
- clown collar to end up Fizzarolli's look(?) mb
- i was also thinking about making his broken horns but i'm not quite sure i have enough of experience in using blender rn to do that
- better skin textures/scars for Blitzø and Fizz
- oh oh I need to show up my babiesss that are already done ! (M&M, my lovies)
- find a little bit more CC to create Stolas, Ozzie etc. (there's never enough of CC i swear to satan) ESPECIALLY something related to werewolfs cause omfg they're SO BADLY DONE in ts4 and i kind of need to create Loona
(if i won't find anything i'll cry and then i'll just create her in her human form as i'll do with Stolas and Ozzie) ((i know we've never seen Ozzie's human form, but that's exactly why ✨fandom interpretations✨ exist))
- finally give up on creating my own CC and start to actually create the sims themselves cause omfg i literally spend more time in s4s/blender/ps/md/zb than in the actual game kmp
WIP — Fizz' jester hat


there's......quite a lot of issues with this one but I'll try to fix it asap
#helluva boss#the sims#the sims 4#the sims 4 cc#the sims 4 custom content#the sims 4 helluva boss#the sims cc#ts4#ts4 cas#ts4 cc#helluva boss fizz#helluva fizz#helluva fizzarolli#helluva boss fizzarolli
20 notes
·
View notes
Photo
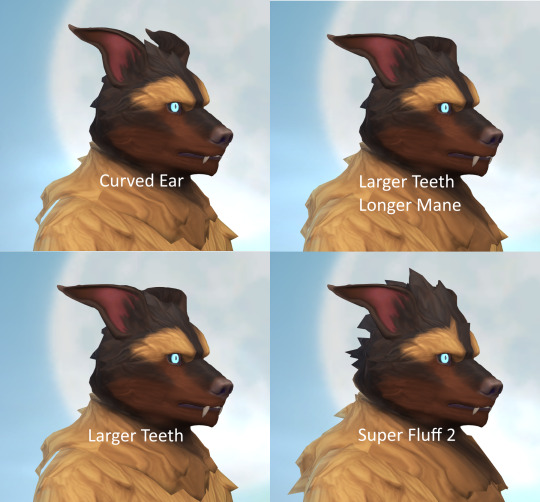
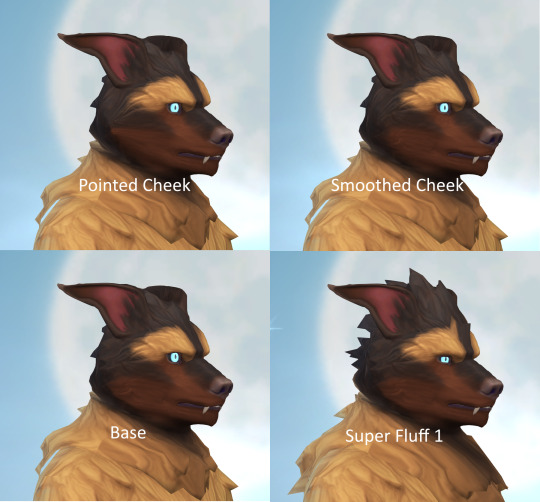
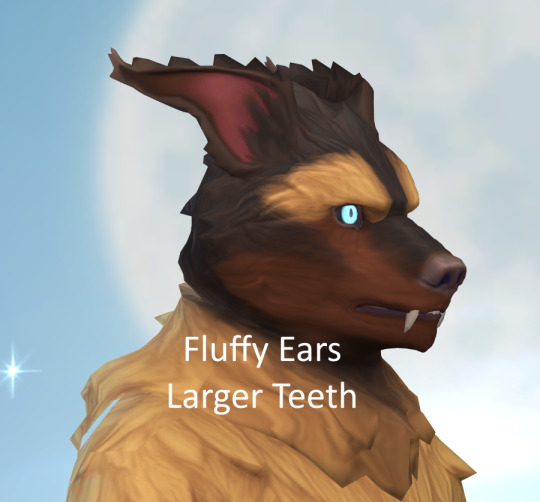

Here are the mesh variations of my head edit. Everything I publish for werewolf CAS will be in here, the link has all past-present and eventually future releases: http://simfileshare.net/folder/171145/ About the new head meshes: skin detail with forehead slot, available for both genders. No more extreme distortion thus far.
566 notes
·
View notes
Text
Bonus Retexture of Taali hair by LeahLillith

Long high pigtail alpha hairstyle originally made by LeahLillith. Recolored in a wide variety of unnatural hair colors.
- 96 Colors - Custom Thumbnail - Female - Teen + - All Occults (Except Werewolf) - HQ Compatible -Previews are taken with HQ mod-
❌MESH REQUIRED❌ - Mesh link in download section -
Want to know what HQ mod is? Or maybe you want to know how to install it yourself? Find all info and all you need to start using HQ mod ✨HERE✨
✨My Socials✨

Original Creator / Mesh Owner : @leahlillith Huge thanks to all the amazing cc creators I have used cc from in my previews.

✨MESH DOWNLOAD✨ (REQUIRED)
✨RETEXTURE DOWNLOAD✨ (TSR)
💜Get 6$ off the annual TSR VIP subscription using the code: SHOP_PinkyCustomWorld12💜

@obscurus-sims : Skin overlay @carolldesign : Eyebrows Coffeemoon : 3D Eyelashes @remussirion : Eyeshadow, Eyes @angissi : Eyeliner FashionRoyaltySims : Lips @camuflajesims : Top @gossipgirl-s4 : Tattoo @pralinesims : Nose Piercing Me : Blush (CC not listed I do not remember who made)
#ts4#ts4cc#ts4 cc#ts4 hair#ts4 alpha hair#ts4 free cc#retexture#the sims 4#the sims 4 cc#sims 4#sims 4 cc#sims#sims cc#simblr#tsr#the sims resource#thesimsresource#ts4 colorful#ts4 alternative#ts4 fantasy#ts4 alpha cc#ts4 alpha#ts4 cas#pcw#pinky#taali#leahlillith
14 notes
·
View notes