#ps 101
Explore tagged Tumblr posts
Text
W imię Prawdy! C. D. 392
25 czerwca 2024 roku W tym dniu ważne były dla mnie poniższe treści z liturgii słowa i liturgii godzin: ,,Sennacheryb, król asyryjski, wyprawił posłów do Ezechiasza, polecając: «Tak powiecie Ezechiaszowi, królowi judzkiemu: Niech tw��j Bóg, w którym pokładasz nadzieję, nie zwodzi cię zapewnieniem: Nie będzie wydana Jerozolima w ręce króla asyryjskiego! Oto ty słyszałeś, co zrobili królowie…
0 notes
Text
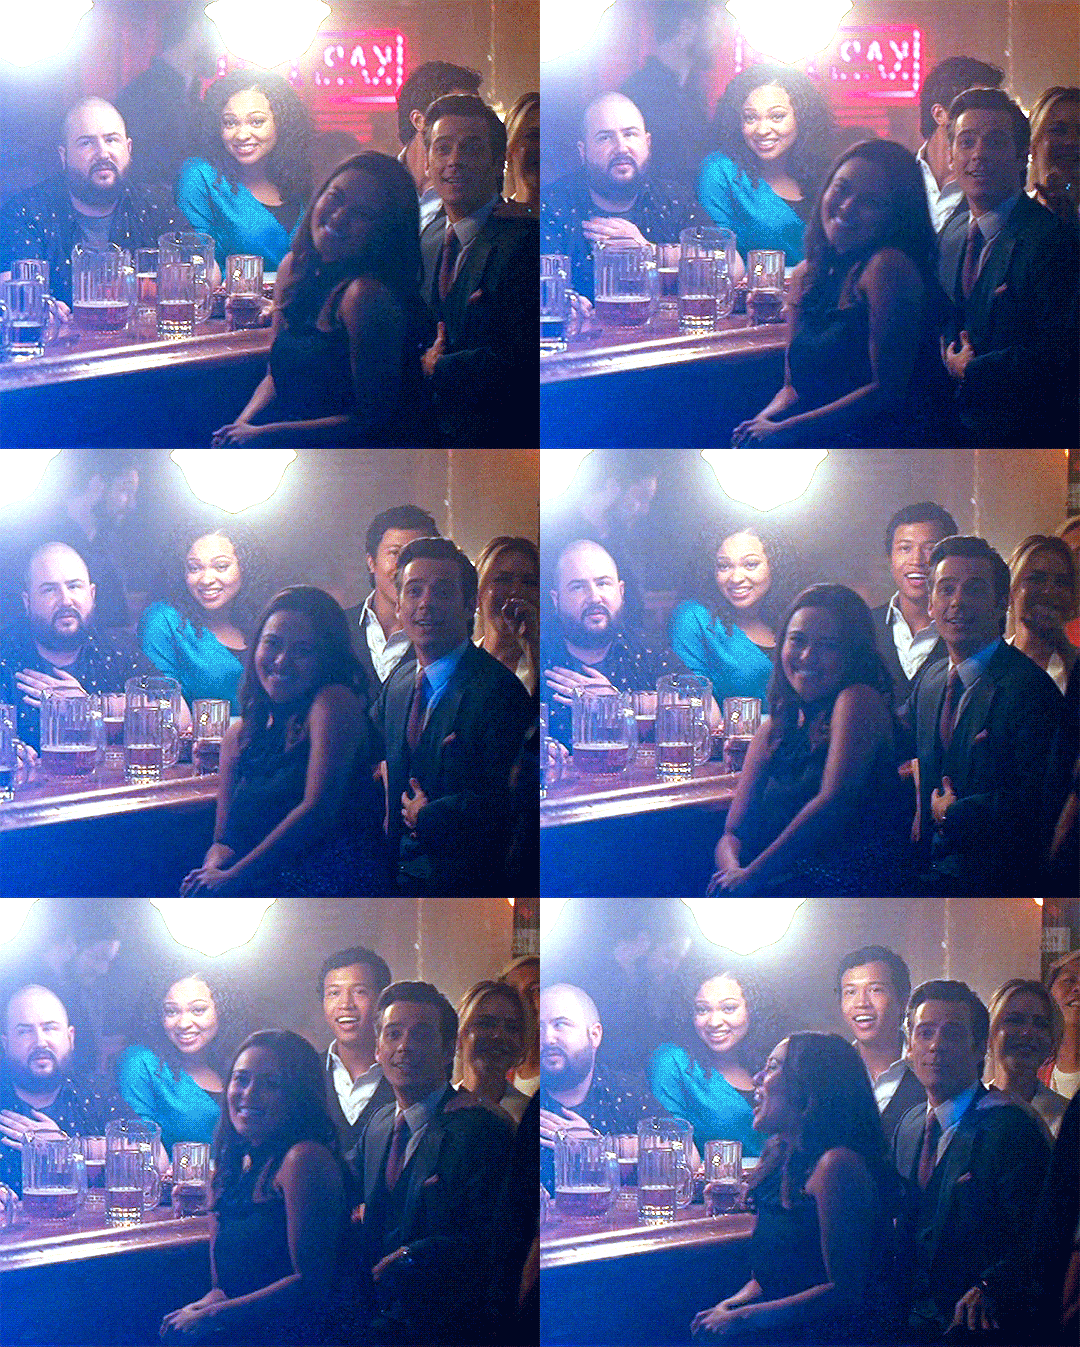

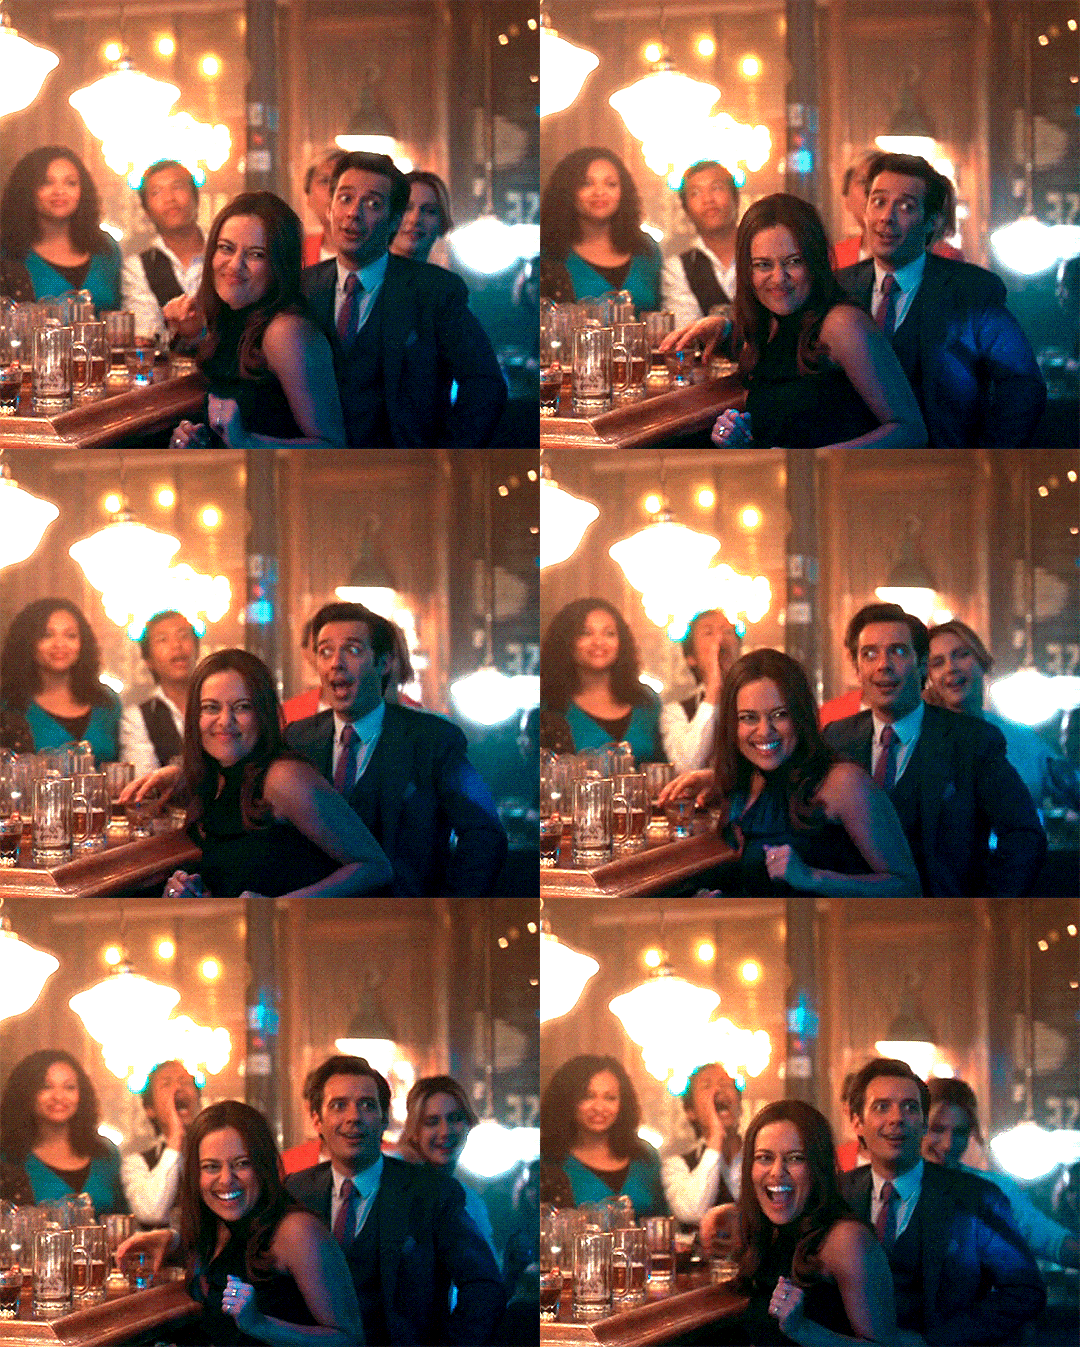
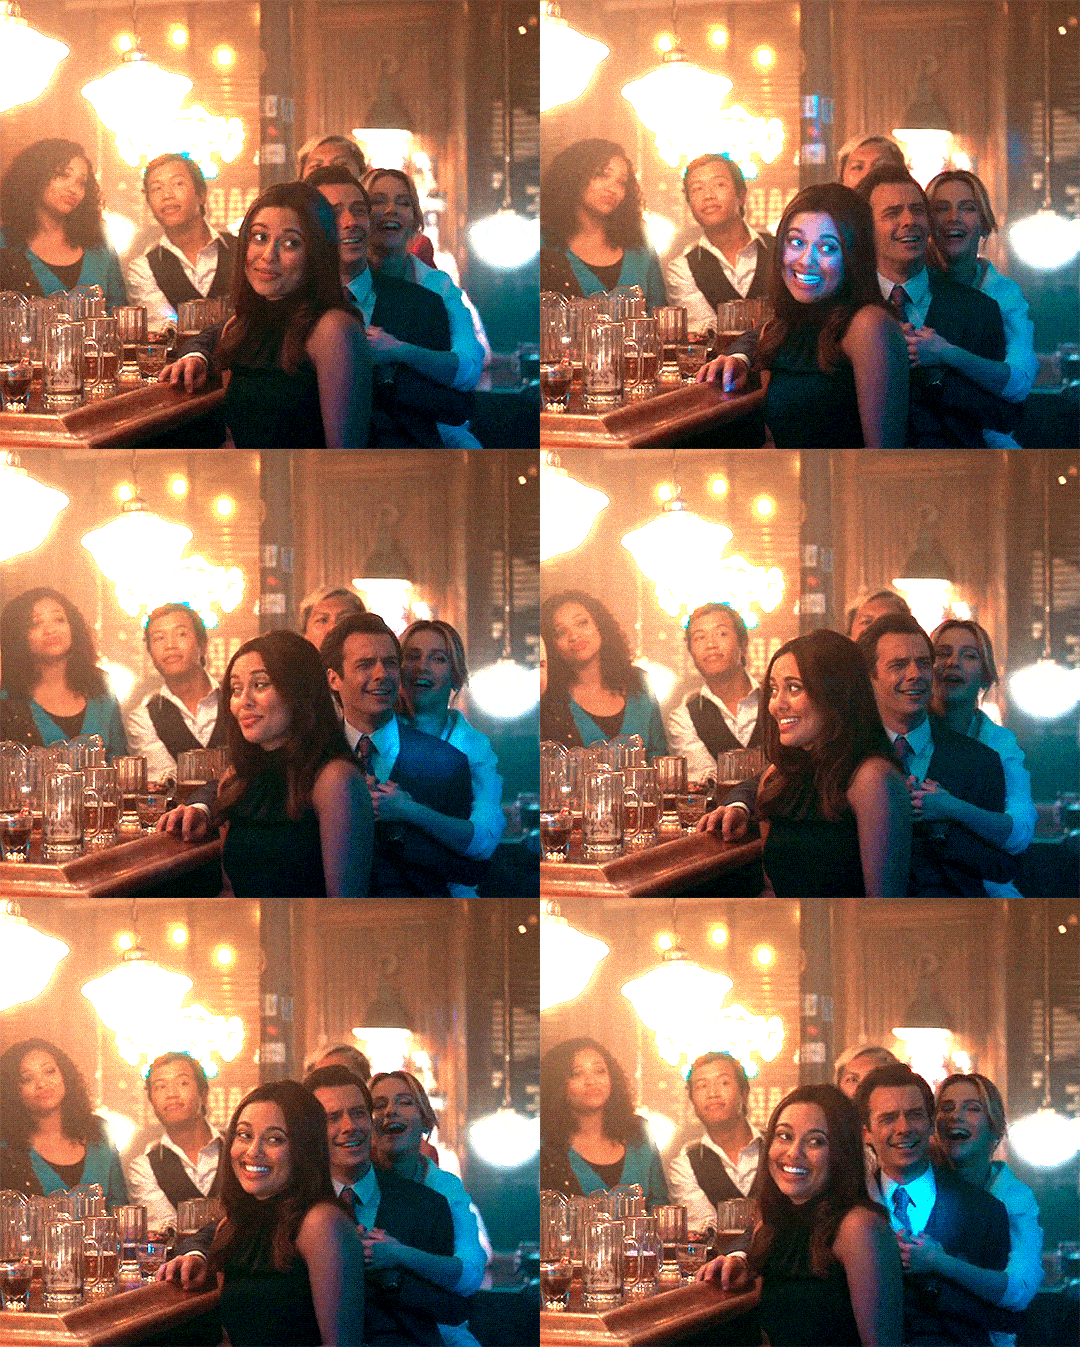
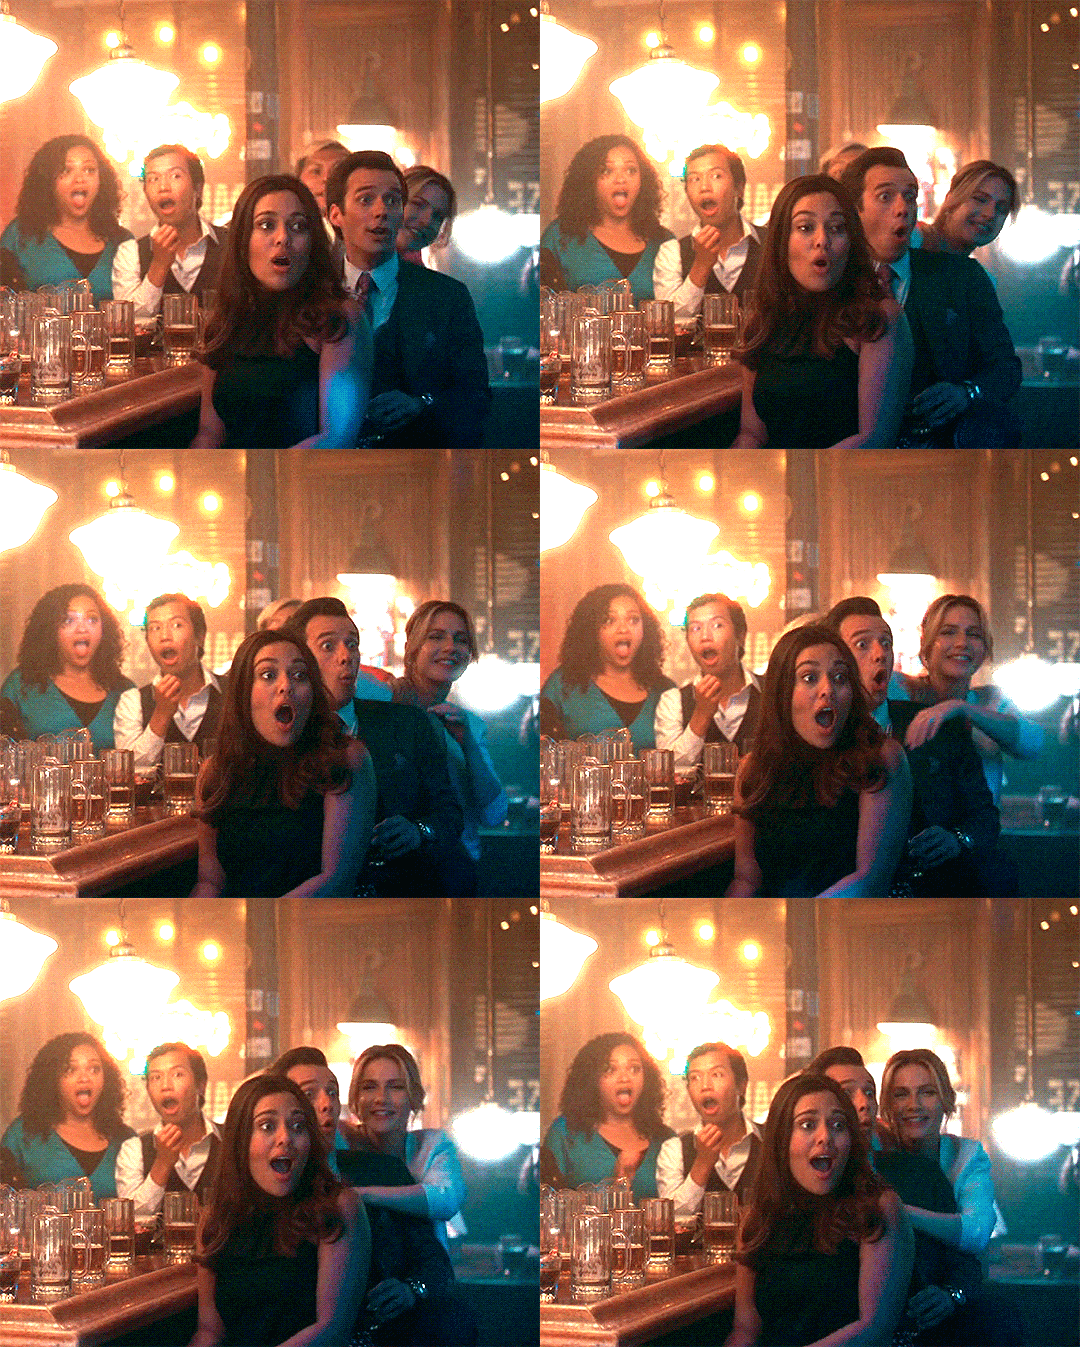



Quogan in Zoey 102 ↳Part 12
#quoganedit#quogan#zoey102edit#janielook#userlauraj#userzackmartin#otpsource#quinn pensky#logan reese#zoey 102#zoey 101#mine#quoganin102#sorry this is late#ps gave me hell#and i'm not happy with this coloring#oh well
140 notes
·
View notes
Text
miguel o'hara more like miduel o'hara reject authority embrace anarchy #hotgirls4spiderpunk
#4am posting but i do not understand why some of y'all are obsessed with this man#i know you all love tragic dilfs but come on. look around you#ps ps ps let daniel kaluuya into your heart#how to be cringe 101#hobie brown#spider punk#astv#across the spiderverse#spiderman
25 notes
·
View notes
Text
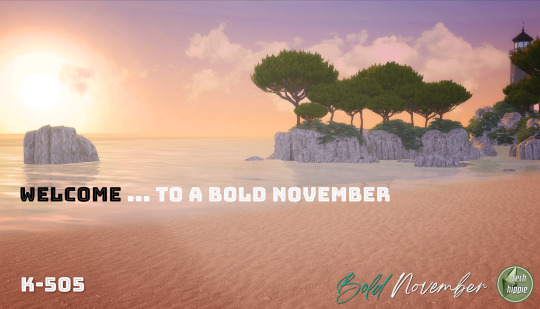
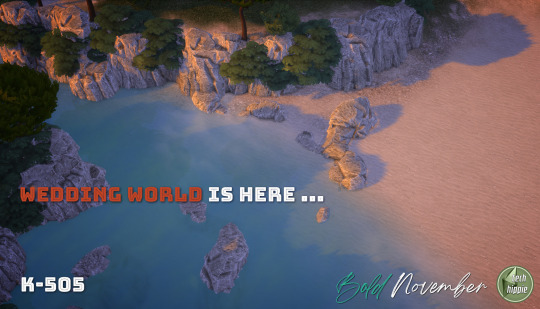
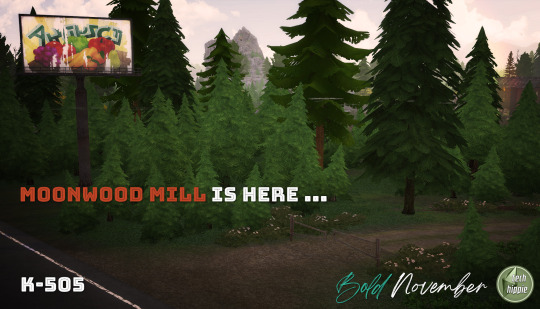
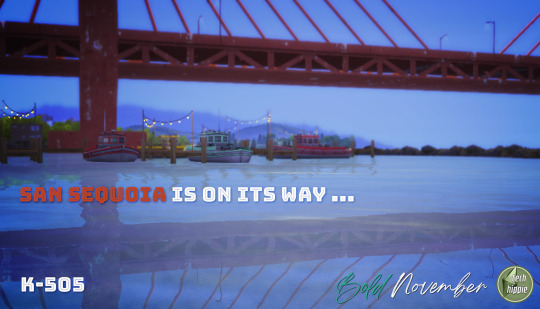
TARTOSA & MOONWOOD MILL : BOTH WORLDS ARE HERE :) SAN SEQUOIA IS ON ITS WAY ...
So, as said and shown in our previous post : Tartosa, the Wedding World and Moonwood Mill are finished and ready to download :)
TARTOSA : All grounds are now textured ! Some sidewalks were changed for a better look ( we think so ... Hope you'll like it )
Because of the light and many maxis glitches, we made more changes in Tartosa than expected ...But to get the mark to be an Italian getaway, we took some artistic liberties. We think the end result is not bad. It is clean, yet authentic and old looking. Tartosa now exults in lazy walks and languorous evenings ;)
Unsurprisingly, some files are connected to the Base-game : you have to re-download the K-505 base-game AND the K-606 files to get all the details <--- we made a silent update :)
Why a silent update ? Because, in order to update the whole K-Mods and be ready for the next expansion, we have to update many many files : it will be the case during all our Bold November and certainly in December too :D
MOONWOOD MILL : Compared to Tartosa, Moonwood Mill textures redux was much more enjoyable to do :) A bit tricky sometimes but so much grass ! and we love grass ! so much than we really have to update the K-707 as soon as possible :D
In order to get new wood roofs, and the updated wood floors, we updated the K-606 AND the K-101 files to get all the details <--- we made silent updates :)
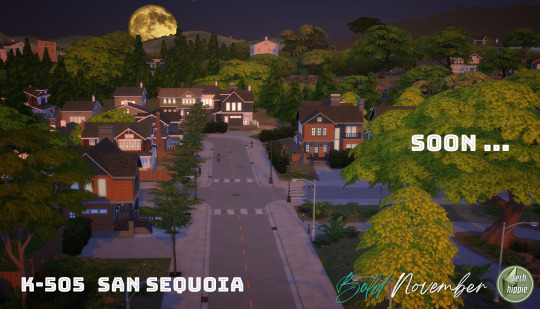
SAN SEQUOIA : San Sequoia is coming :) soon :) very soon :) what else ?
- - - - - - - - - - - - - - - - - - - -
Remember : Just as always, there’e … unexpected surprises. We had to make some changes into some other K-Mods to get it right. So, don't be mad, we try to make all this as convenient as possible for you, and we are not responsible for Maxis glitches and changes ;)
Certainly, there will be more updates to come, so stay tuned ...
If you think our work is worthing :)
Give us some caffeine : ko-fi // paypal
k-505 Wedding World download
k-505 Moonwood Mill download
k-606 Architek Mod download
k-101 Builder Mod download
Ans as usually, have fun !
PS : we are currently dealing with our host ( regarding all the downloads problems ) and hope to be hosted on new servers ... So, do not message us about now, wait a week, it is a work in progress !
xoxo
#sims 4#sims 4 custom content#sims 4 download#sims 4 wysiwyg#sims 4 build#sims 4 cc#the sims 4#ts4#k hippie#sims 4 wedding#sims 4 werewolves#sims 4 world#k-mods#k 101#k 505#k 606#tartosa#moonwood mill#sims 4 mod#sims4
782 notes
·
View notes
Text
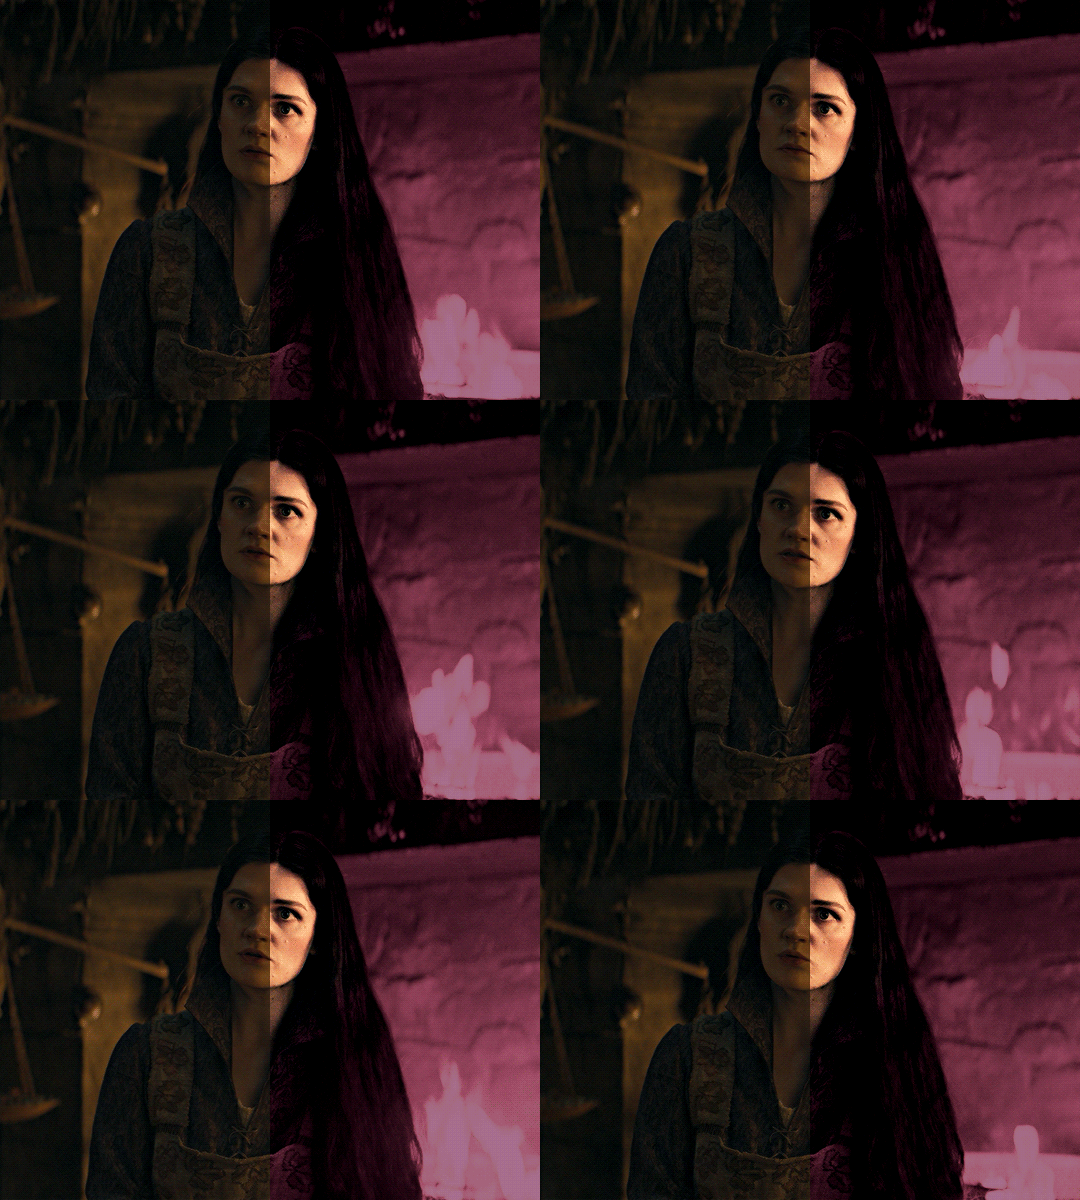
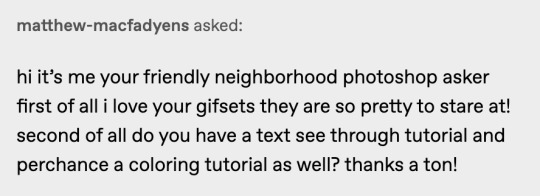
i was asked by @matthew-macfadyens for a colouring tutorial, so here we go ! i've been making gifs for almost 4 years now and finally feel comfortable and confident in my skills to make a full tutorial on my colouring process. there are so many different ways people colour gifs, and there's no wrong way, this is just how i do it ! i learned to gif by reading so many tutorials and picking and choosing what works for me, so hopefully this can help someone out !
if this tutorial helps you, please considering supporting me ! buy me coffee ♡

TUTORIAL UNDER THE CUT
what you'll need: - photoshop ( i use ps cc 2023 & frame timeline ) - basic ps knowledge ( how to make gifs, how to sharpen gifs, general understanding of adjustment layers, layer masks and blending modes ) - a whole lot of patience
helpful resources:
the beginner's guide to channel mixer by @aubrey-plaza
giffing 101 by @cillianmurphy
gif making for beginners by @hayaosmiyazaki
colouring yellow-tinted shots by @ajusnice
becca's mega colouring tutorial by @nataliescatorccio
@usergif

PART ONE: BASE COLOURING
- step 1: curves - step 2: exposure - step 3: colour balance - step 4: selective colour - step 5: levels - step 6: brightness / contrast - step 7: gradient map
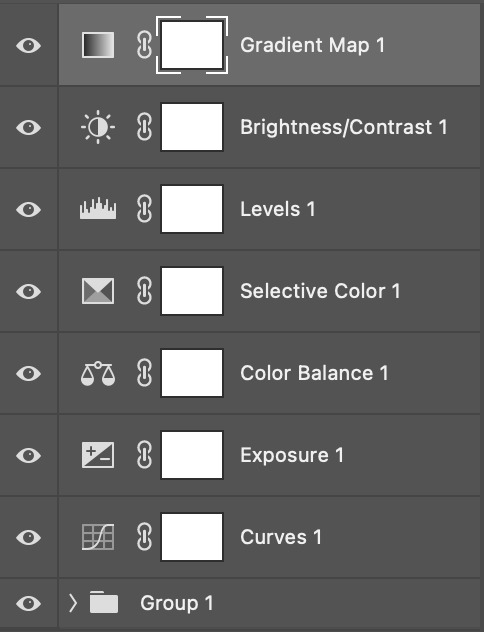
okay so, before we get started, this tutorial is for colouring only. at this point, i've already gotten my screencaps, imported them into photoshop, made the actual gif & sharpened the gif. the above image includes what my typical adjustment layer stack looks like !
STEP ONE: CURVES
a lot of people do the majority of their heavy lifting in curves...i'm not one of those people. i've never gotten the hang of curves and haven't been able to fully taken advantage of everything it can offer. i use curves to mainly brighten up my gif and to start my process.
i use the "auto" button in the curves function - this automatically corrects the curves for your gif ( mainly the brightness / contrast )
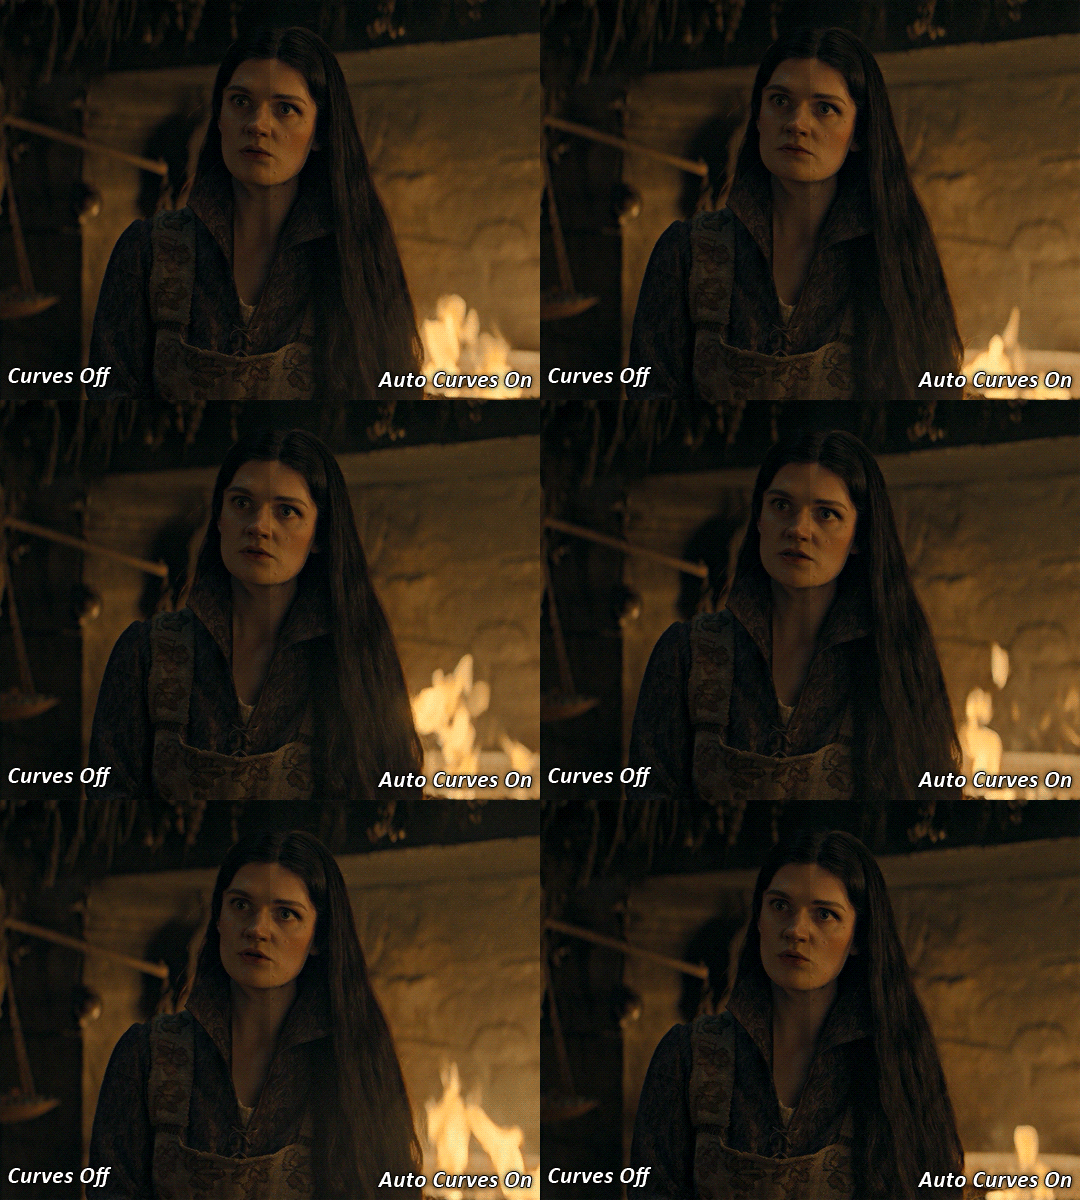
you can see that the auto curves has brightened up the gif and evened out the brightness/contrast. i just find this gives a better starting point for the colouring process.
STEP TWO: EXPOSURE
this step is for, you guessed it, brightening the gif more and evening out the contrast and blacks. i don't have any real rules for doing this, the amount i highten the exposure and contrast is different based on the scene and the show, however, i tend to stay around +1 on both exposure and gamma correction.
exposure effects the brightness of the gif and gamma correction effects the blacks and contrast. this step also effects the saturation of the gif, so it's important not to go too crazy. i often end up coming back to this step every now and again to adjust and fiddle with it.
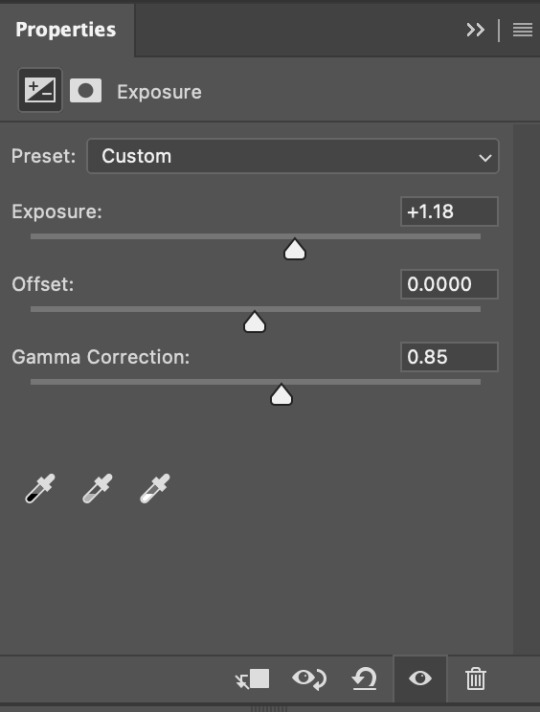
for this gif, i put the exposure at +1.18 and the gamma correction at 0.85
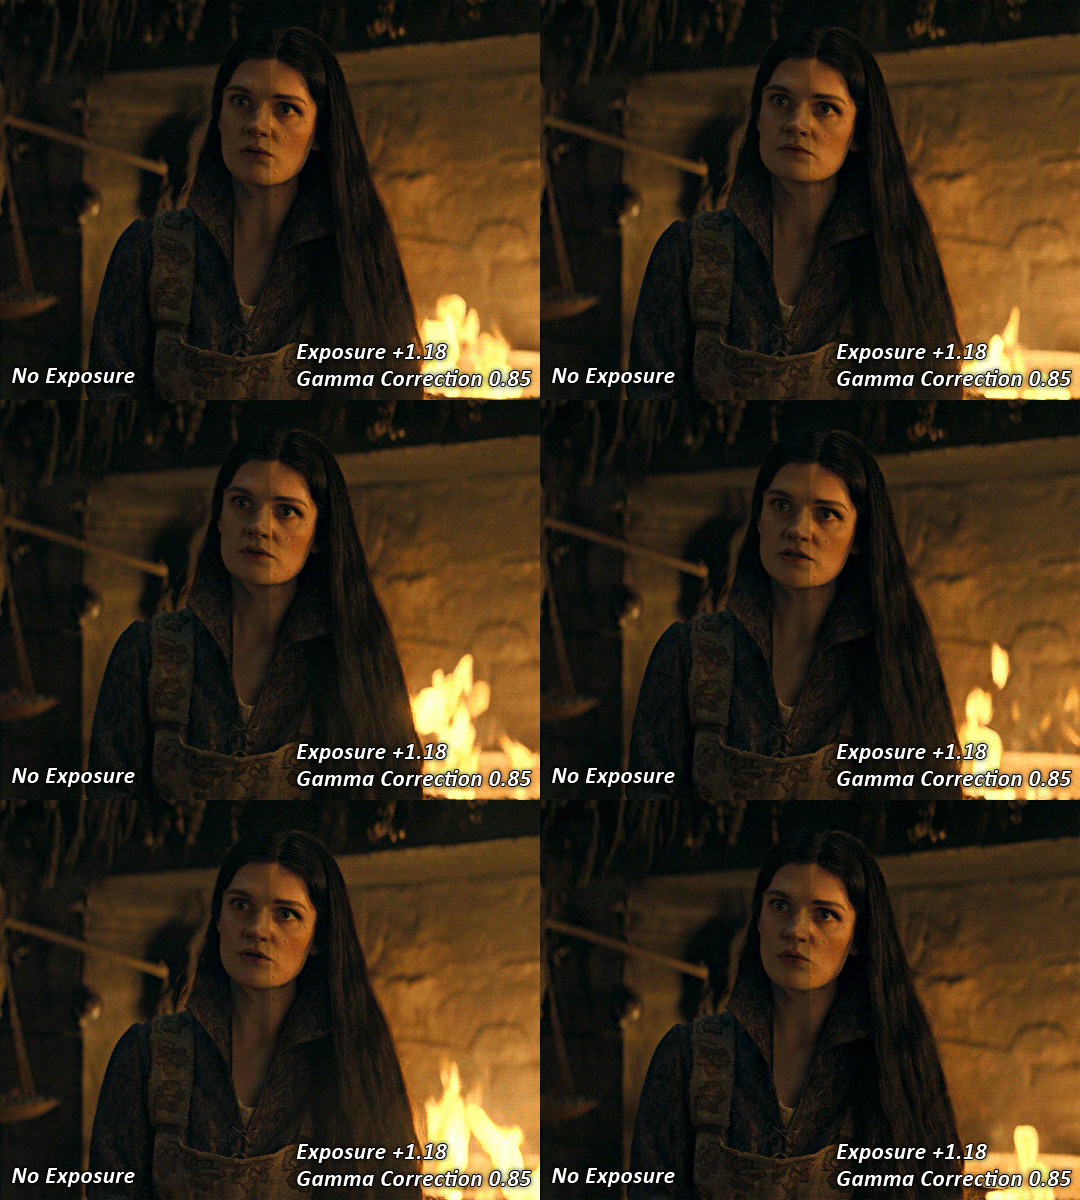
you can see this step serves to add some more brightness and contrast - it also adds some more saturation, that we don't always want, but don't worry, that's what the next steps are for !
STEP THREE: COLOUR BALANCE
i use this step to do a lot of my heavy lifting - i'm a whore for colour balance. this serves to even out the colours and help neutralize the colours for an easier canvas. it's important to understand the basics of colour theory for this, i recommend checking out the channel mixer tutorial i listed above, because a lot of those steps applies to colour balance.
essentially, there's three separate profiles to edit on - highlights, midtones and shadows. in each profile, you have 3 colour sliders. the top one is your cyan to red, middle is magenta to green, and bottom is yellow to blue. the colouring of the scene will decide where to move your sliders.
for example: if your original scene has a cyan tint to it, you'll want to pull your slider to the right, towards the red to help neutralize the cyan. if your scene has a green tint, you'll want to pull it left towards the magenta. as you move the sliders, you'll notice that sometimes it brings out other colours you don't necessarily need, you can adjust the other sliders to help neutralize further.
i always do my main correction in the midtones profile.
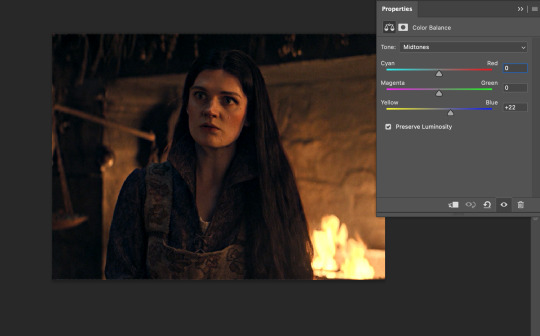
since this scene has a heavy yellow tint, my first step was to adjust the bottom slider. i pulled the slider to the right towards blue at +22. you can see this helped get rid of a lot of the yellow, but adding in the blue warmed up the reds and made it more saturated.
to help with this, i pulled the top slider left towards cyan to help neutralize that red.
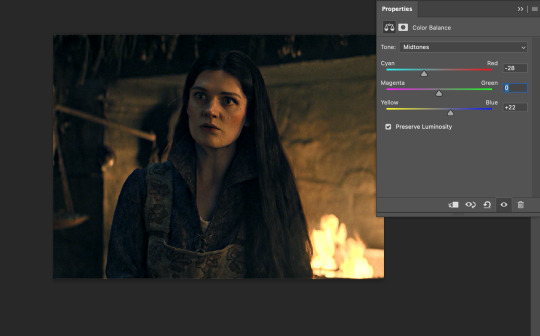
i pulled the top slider to -28 and you can see this cut out that heavy saturation and redness. it's looking a lot better, but now it's a little too green for my liking. this is where that middle slider comes in!
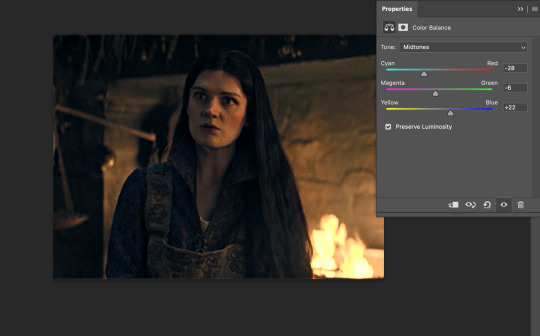
i pulled the middle slider to -6 towards the magenta to help counteract the green that came in. ( i ended up going back in and adjusting the bottom slider to +10 instead, as it was a little to blue )
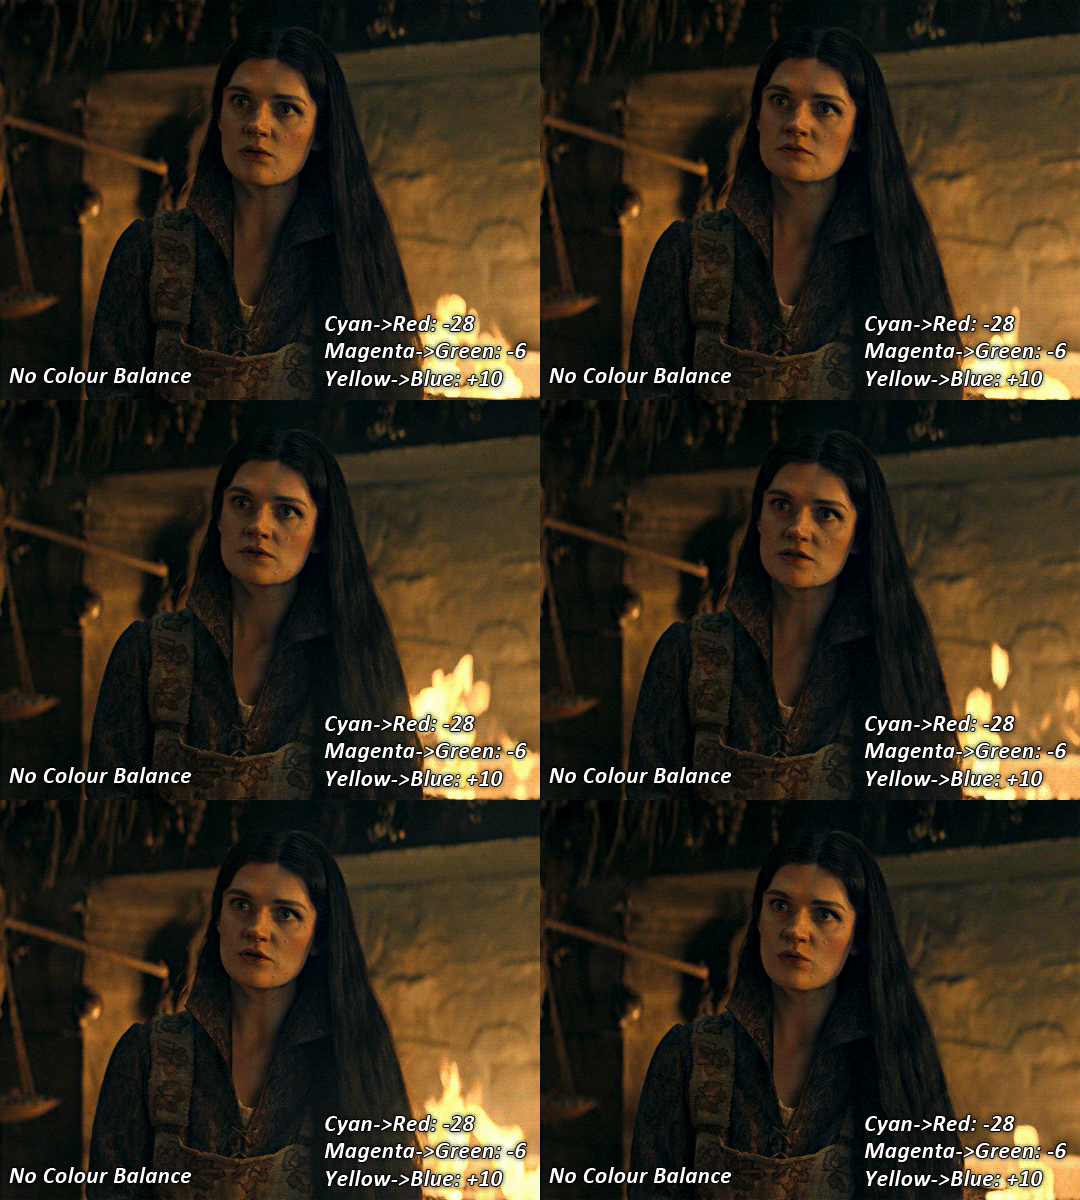
you can see this step really did the heavy lifting, helping to neutralize the canvas so that it's easier to work with...but it's not quite perfect yet!
STEP FOUR: SELECTIVE COLOUR
a lot of the same principles around colour theory apply to selective colour! this is where i go to adjust the colours according to what my colour palette is. for this gif, the overall colour is going to be purple, so i'll adjust the individual colours with that in mind.
i only ever adjust my red, yellow, white and black profiles! sometimes i'll do the other colours, but that's only for tweaking the final colour. i normally don't touch them at all.
ps: you'll notice i prefer a cooler toned gif, and almost always go for a more magenta looking red/yellow.
i always start with my yellows:
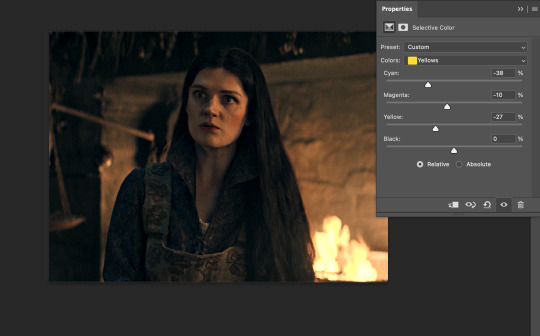
in the yellow profile, i pull my cyan towards the left to -38 (this helps eliminate the green in the yellows) and my yellow slider to the left to -27 (this cools down the yellows. i top it off by adjusting my magenta slider to -10, to help lower the saturation of the yellows.
you'll notice this step got rid of most of the green undertones - that's because the green was nested inside the yellows, so by taking out a lot of the cyan and yellow, you're left with a warmer yellow as opposed to a cooler yellow.
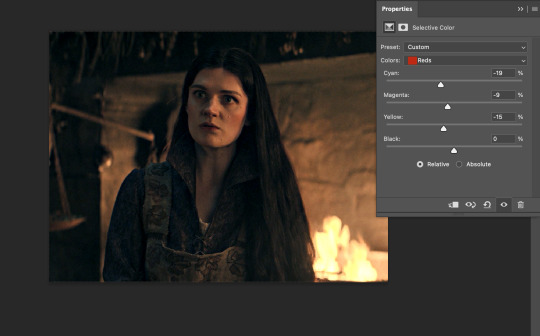
next i go on to my reds. this step will mainly effect the alys's skin tone, but i'm going to do pretty much the same as above but with much less dramatic of a change. lowering your colours in your red profile too much can lead to a very saturated gif, which is not what i'm going for.
i pulled my cyan slider to -19, magenta to -9 and yellow to -15. you can see this helped add some more cooler tones to the reds.
the next profiles are your white and black profiles. i use white to brighten the lightest parts of the gif. no rhyme or reason here, i just pull the black slider towards the left...usually around -25. for the black profile, i always move the black slider towards the right. anywhere from +3 to +8, depending on the gif. for this gif, i did +8. this darkens the blacks and, in my opinion, helps the gif pop!
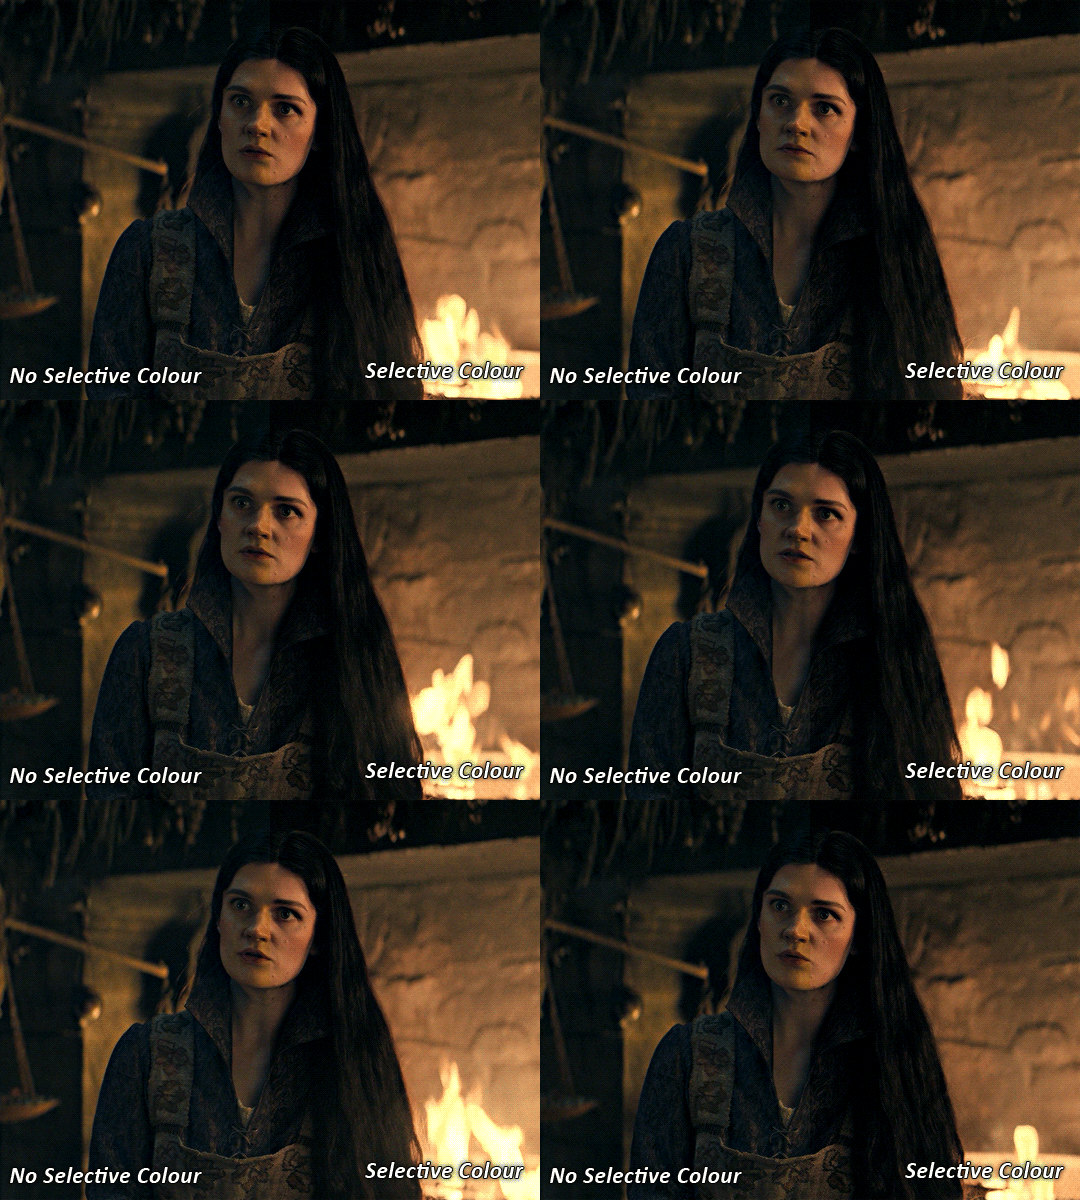
you can see this step got rid of the yellow tint, gave the gif a more neutral look and adjusted the reds to better compliment a purple colour scheme !
STEP FIVE: LEVELS
this adjustment has three toggles - i'm not 100% sure what each toggle really does, i just know that by pulling the leftmost toggle to the right, it darkens your gif, and pulling the rightmost toggle to the left brightens your gif.

this step is so hard to explain, but really i just pull the toggles around until it looks good...sorry !
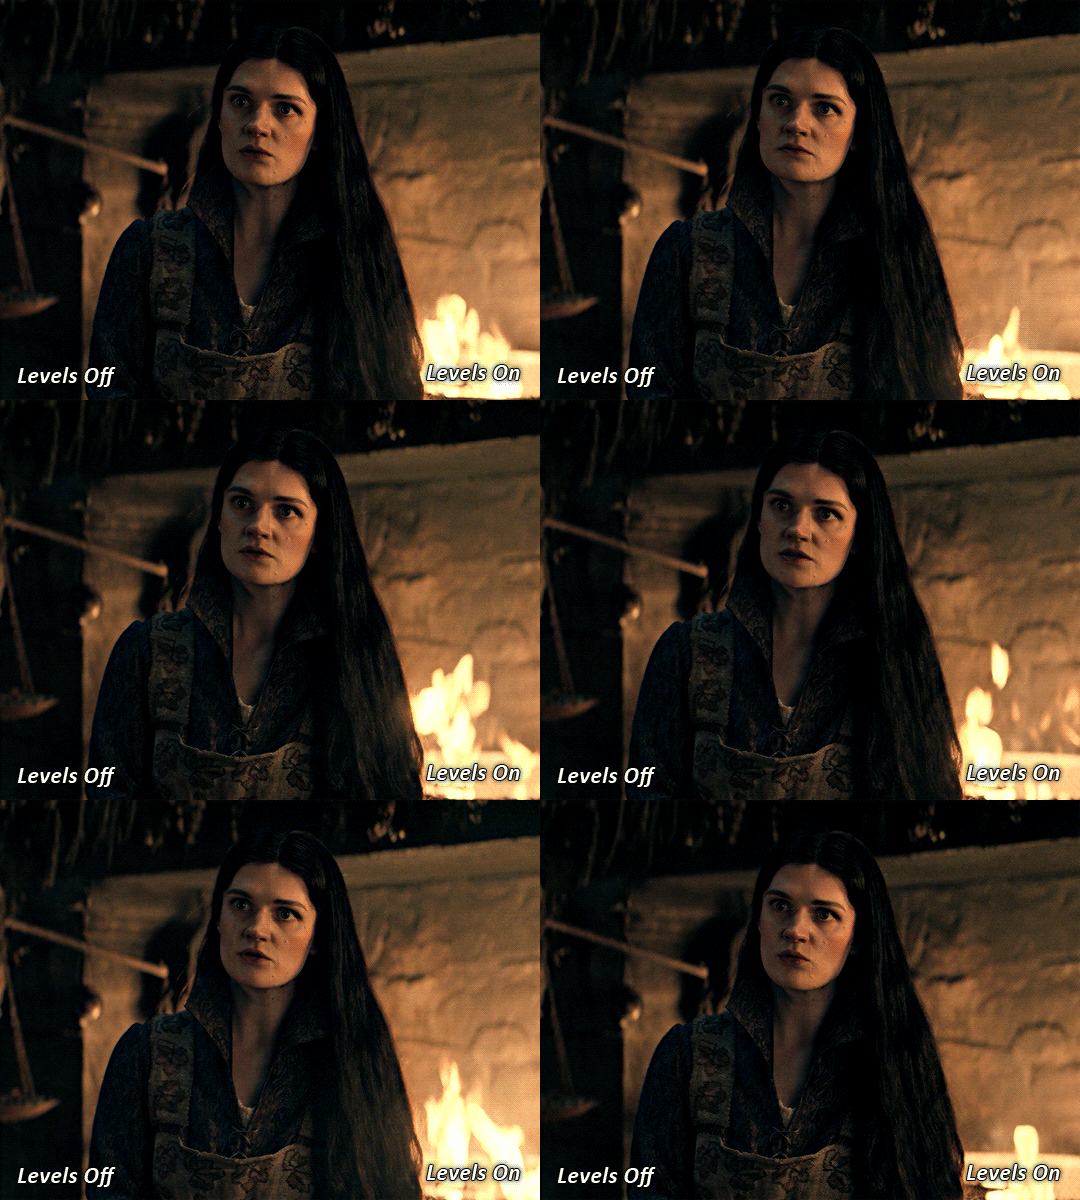
STEP SIX: BRIGHTNESS / CONTRAST
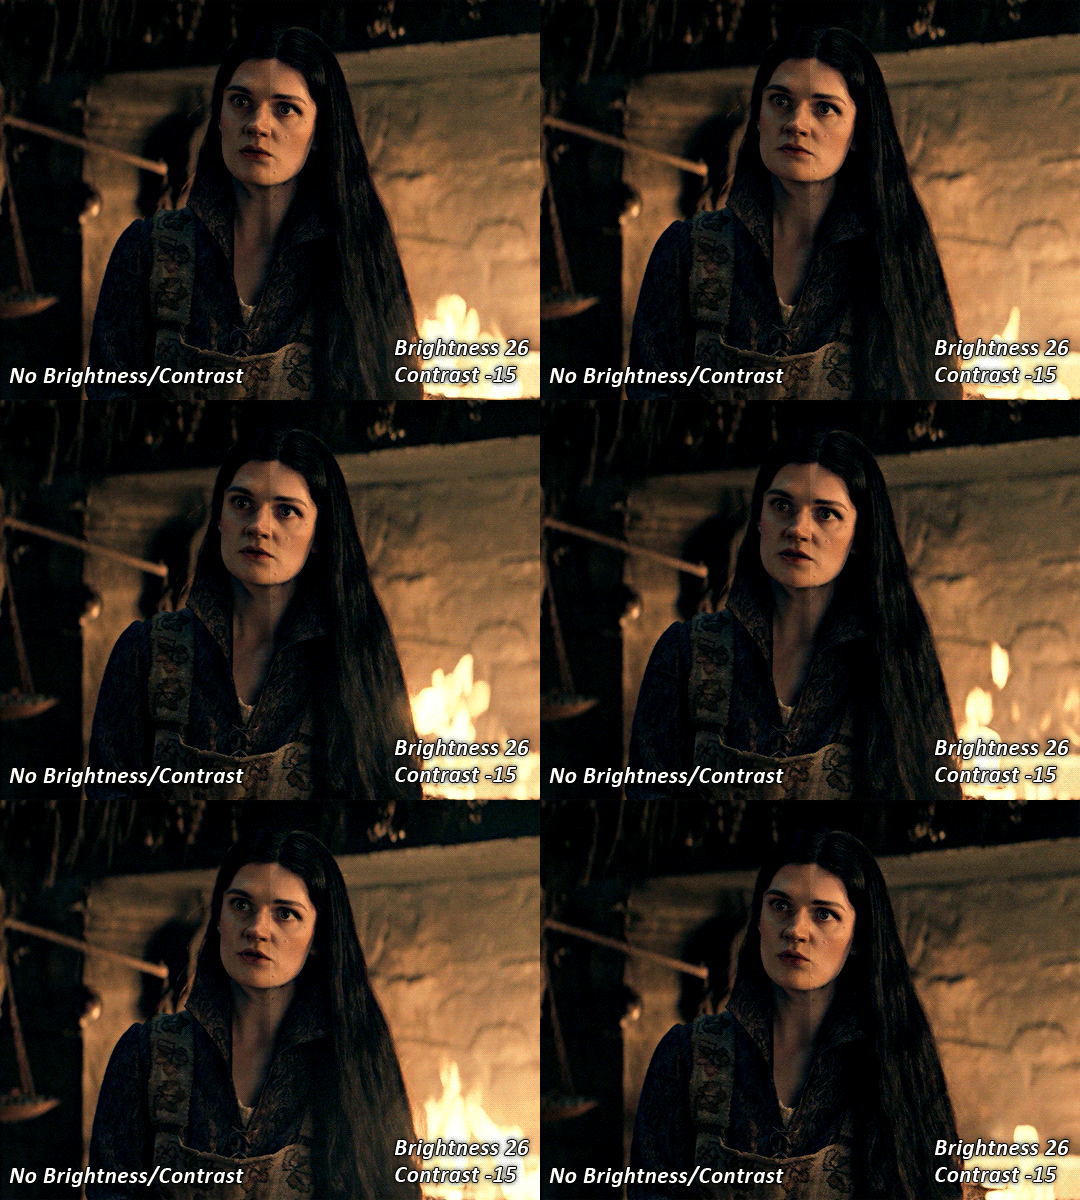
this step is exactly what it says on the tin...it brightens your gif. this step is based on your scene and personal preference, there's no real guide to it.
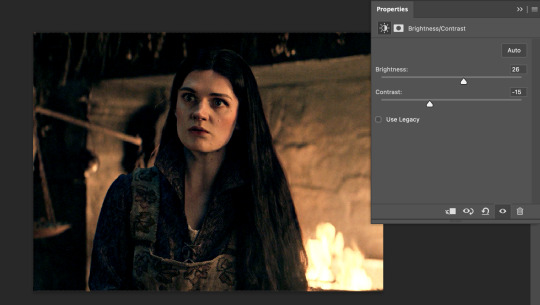
i always pull my brightness slider to the right ( brighter ) and my contrast slider to the left ( less contrast ).
STEP SEVEN: GRADIENT MAP
this last step is something i learned from @nataliescatorccio ! i add a gradient map to the top of my stack, and choose a lighter colour of what i want my overall gif to be. in this case, i used a very light purple!
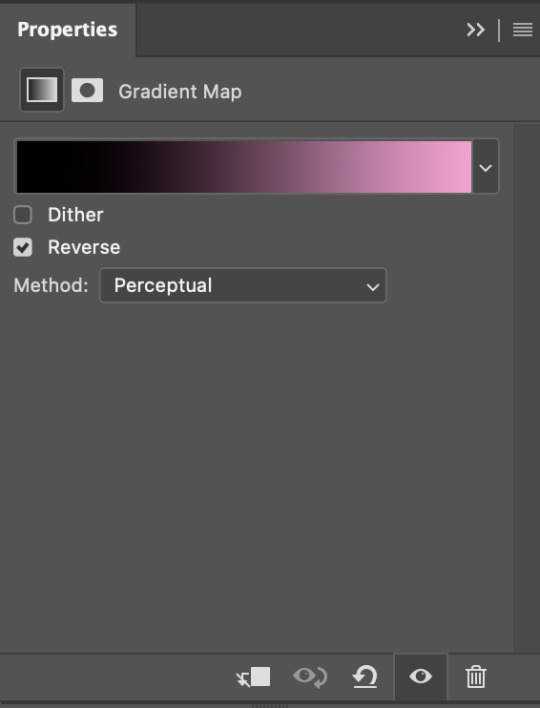
i then set the blending mode to "soft light" and lower the opacity to anywhere from 20-30%. for this gif, i did 30%
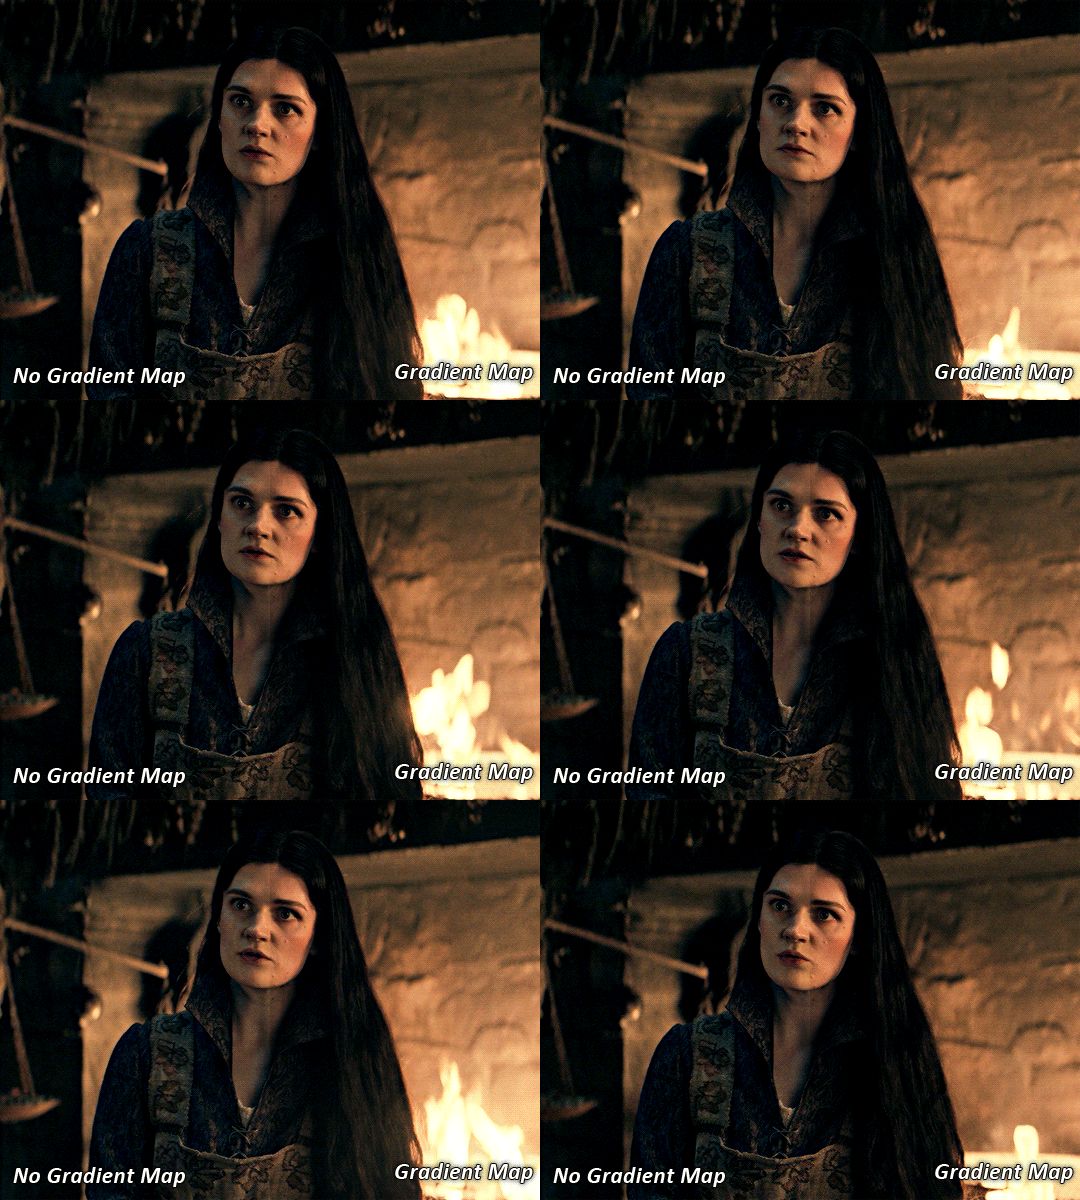
this step will help make your colour pop once you do your main colouring!

PART TWO: PAINTING & COLOURING
- step 1: layer 1 - step 2: layer 2 - step 3: layer 3 - step 4: final touches
okay, so my actual colouring process is based in 3 layers. for this gif, i'm using a deep purple/mauve colour !
STEP ONE: LAYER ONE
between your brightness/contrast and gradient map layers, add another blank layer. change the blending mode of this layer to "colour" and set the opacity to 40%.
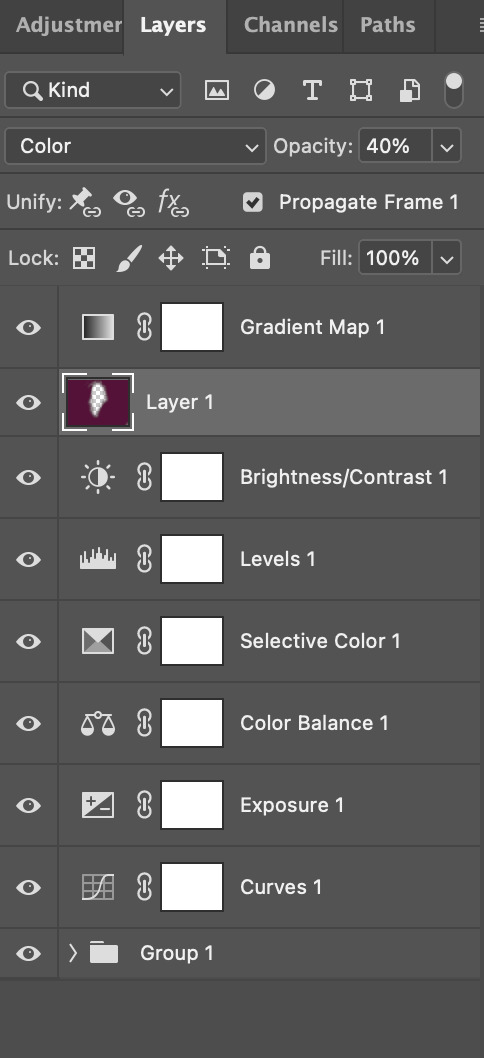
then, using a soft round brush with an opacity of 100% ( size of the brush is your preference, i typically use around 108 ), colour the parts of the gif you want coloured !

you can see this helps us get the canvas to a more uniform purple colour!
STEP TWO: LAYER TWO
for layer two we're going to do the exact same thing. add a layer above your previous, set to "colour" at 40%. we're going to go over the same areas!
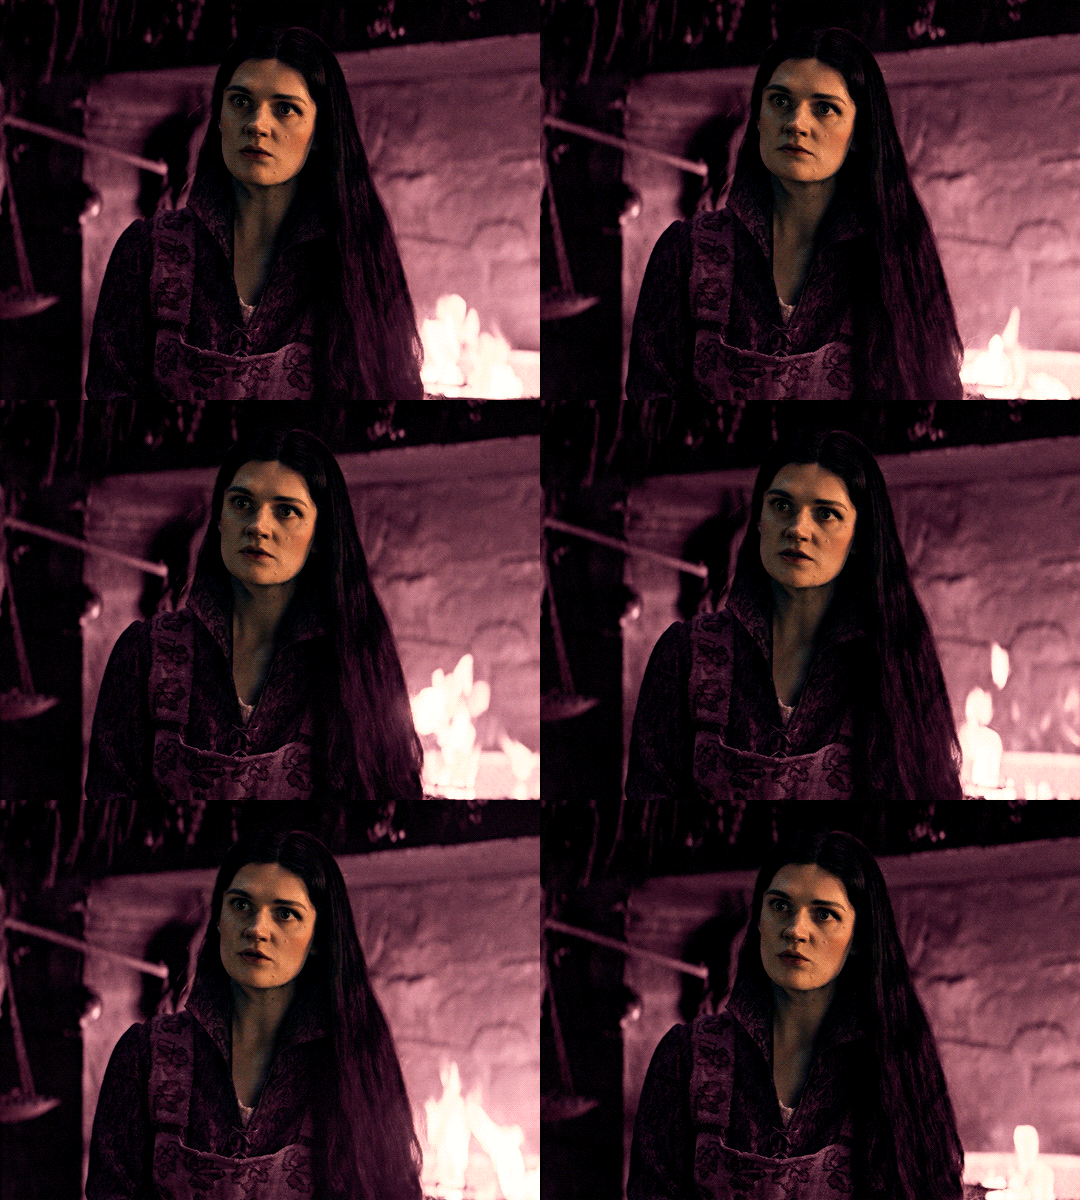
you can see this helped get the purple so much more vibrant and closer to what our final colour is going to be!
STEP THREE: LAYER THREE
for our final layer, add another layer above the previous 2, set your blending mode to "multiply" and your opacity to anything from 60%-100%. for this gif, i did 60% !
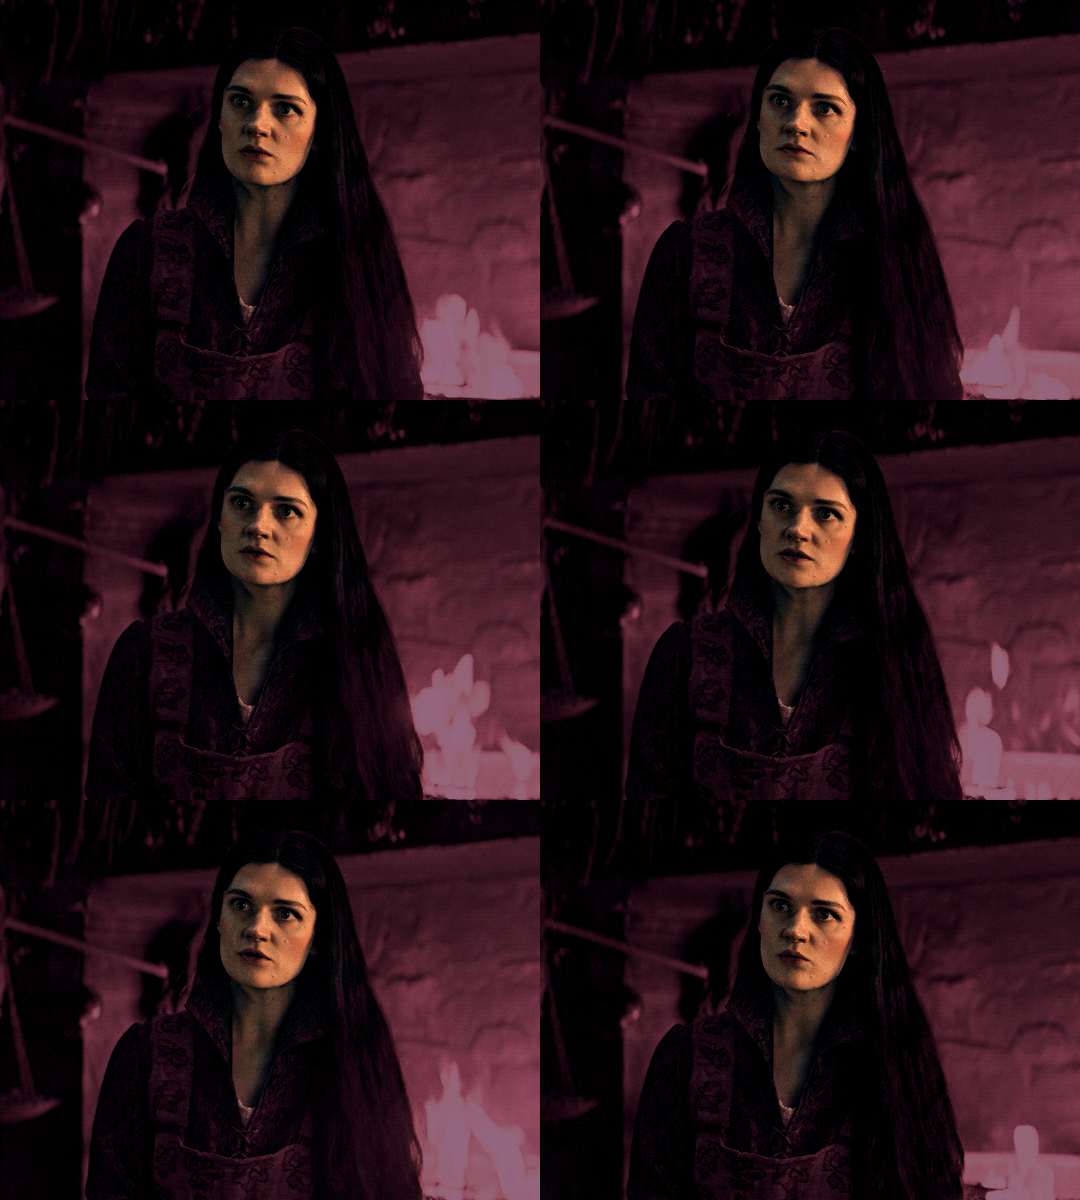
now, our colouring is pretty much done but you can see that, now that our colour is down, alys's face is still a little too blue/green/yellow for the background purple. the next step, we're going to adjust and add final touches!
STEP FOUR: FINAL TOUCHES
at this point, i went back into my selective colour layer and adjusted my yellows & reds and went back into my colour balance layer to adjust everything overall.
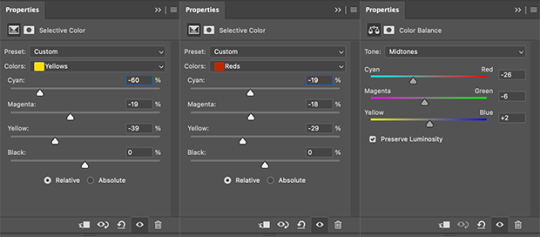
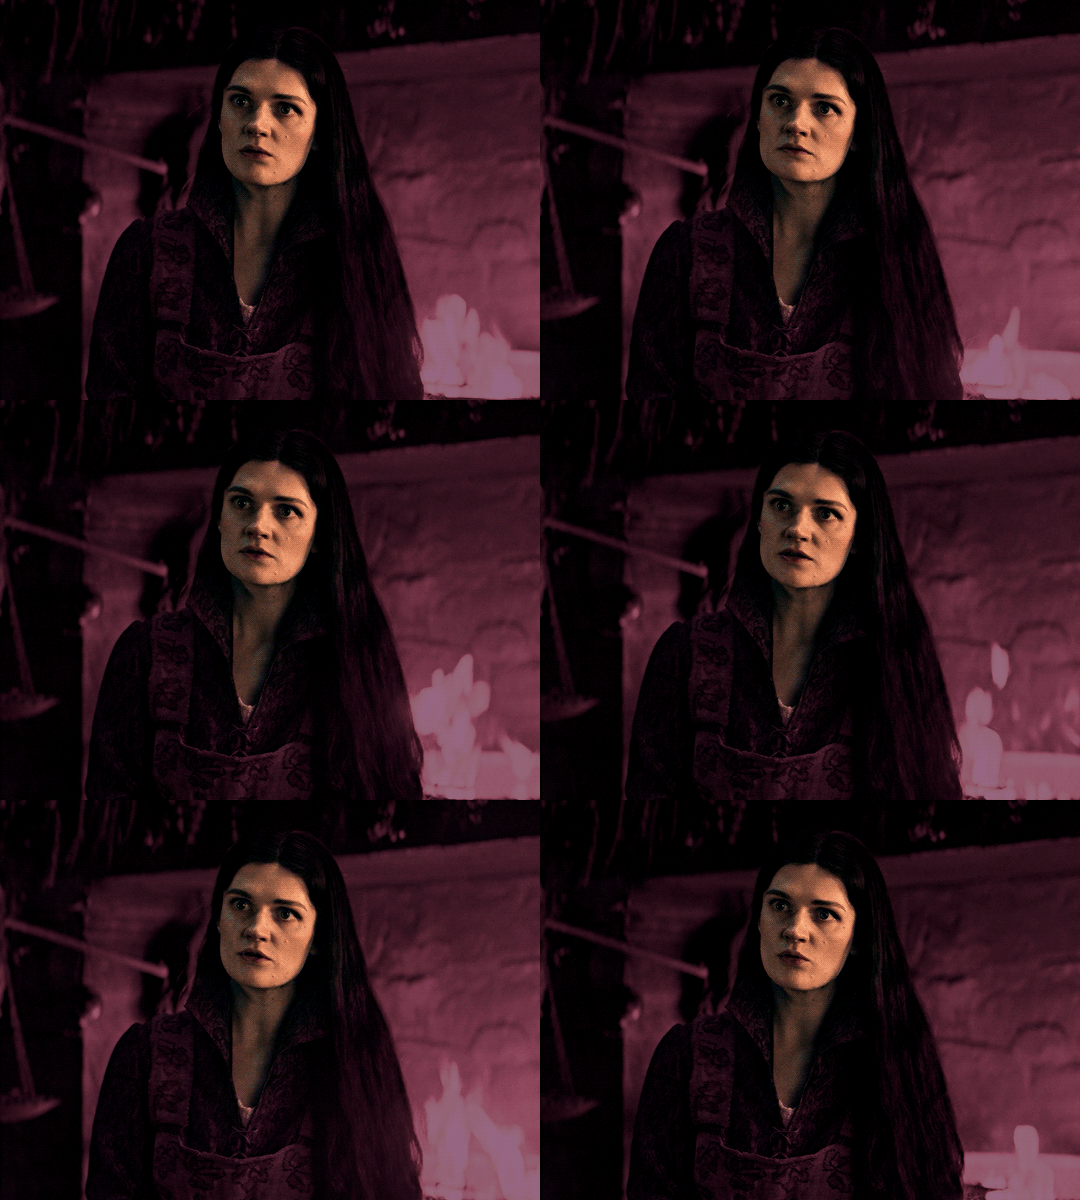
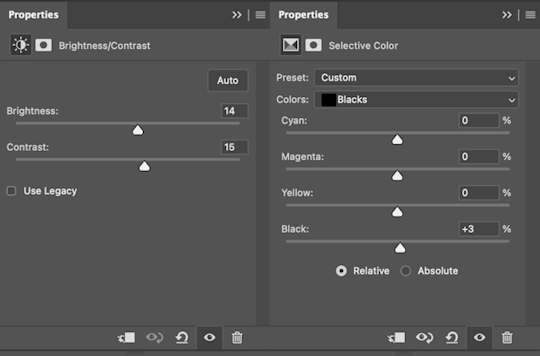
at this point, i'm going to go in and add some adjustments layers above everything - i usually add some brightness/contrast, and a selective colour layer to darken the blacks.
which brings us to our final result:
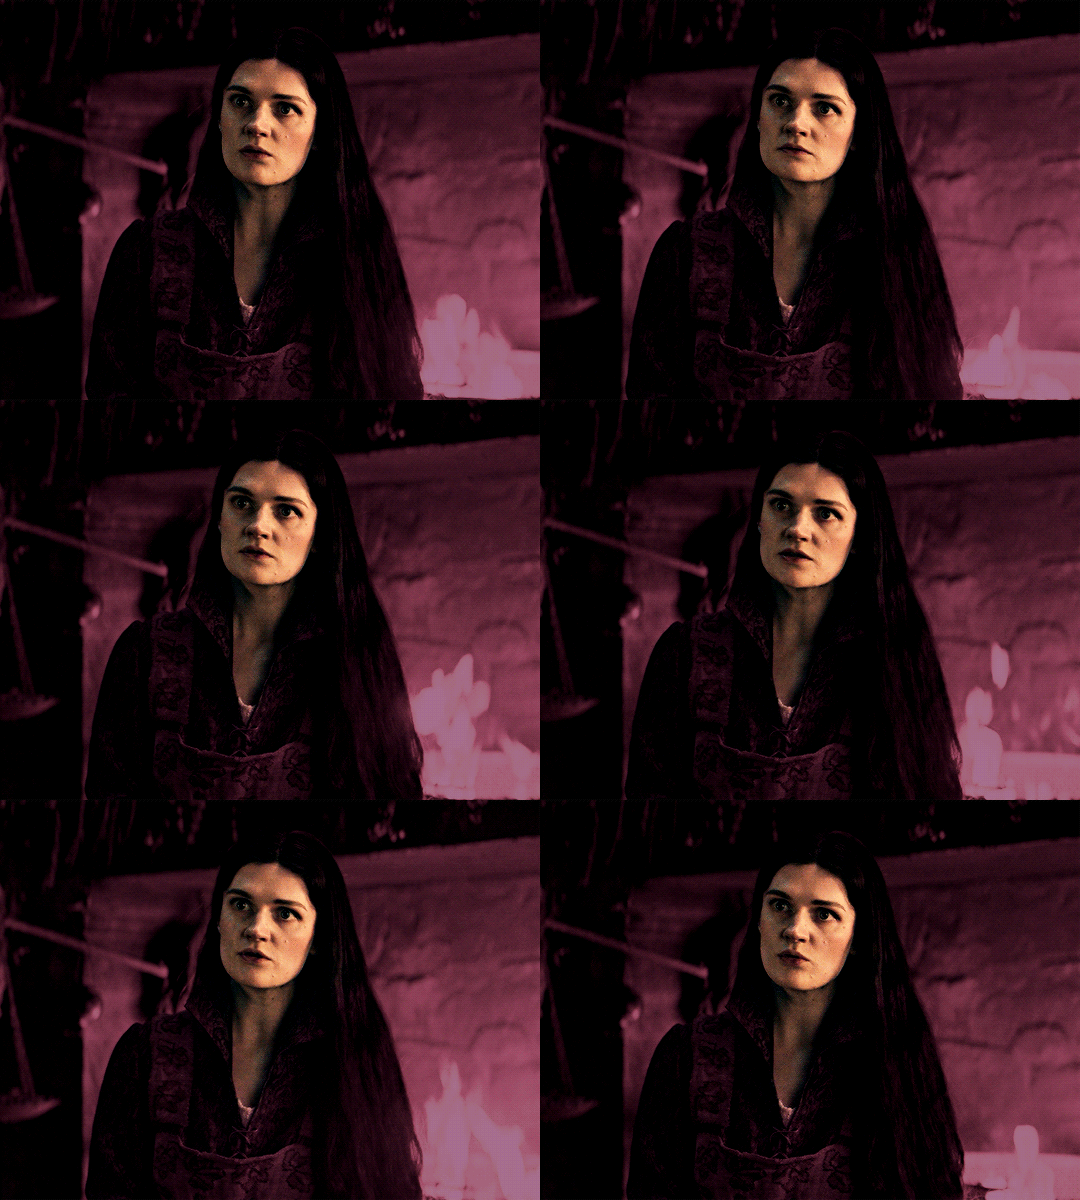
#usergif#dailyresources#pscentral#ps tutorial#tutorial#coloring tutorial#allresources#userbecca#tusermich#userjoelle#ughmerlin#mialook#*tutorial#**
201 notes
·
View notes
Text
ARGUING / CONFRONTATION 101: HOW TO NOT 'GET OWNED' OR 'GET CAUGHT' IN ALTERCRATIONS.
Little miss don't read How To posts over here
For starters I hope by now you know people do not argue to exchange ideas they argue to measure deek size and find out who is the alpha. Its neverrrr about what's right its about WHO is right. My go to is just don't get caught in one? But sometimes you do sometimes you can't not. In my usual chaotic way I'll just dump everything I know you figure it out by yourself.
Let's take hypothetical situation- you got caught in a lie. Because I refuse to believe a fully grown woman will be caught in a push and pull about opinions I refuse to accept that. You're past 16 grow up. The way people work is the easiest way to establish power is to publicly disempower someone. What Candace Owens did. You find someone with power (and everyone has power) , you disempower them publicly you take some of that power. Because power is transferred not created. so people constantly try to find faults in others and when they find one BINGO they got you BUT. BUT. You see that thing Keke Palmer did with Usher and her baby sperm donor? That's power. That's refusing of letting go of that power. That's what I want to teach you, how to not get owned. (PS, I looooooove liars but don't lie if you don't have to, and I'll teach y'all how to lie so you stop sabotaging yourself). SO I caught you in a lie. I make a public show of 'calling you out' on it. Fully expecting you to stand up for yourself by going into defence so I can actuallyown you and in a sweeet sweeeet sweeet public play that will make me the big dog and you just a pathetic lying little bitch. Remember when I told you I'll teach you how to people???????? MOOOOOOOOTHHHHHHHHHERRRRRRR KNNNNNNNNNNNNNNOWWWWWWWWWWS BEEEEEEEEEEEESSSSSSSSST. First. Never. Ever. Ever. EVER. In your entire life. Jump into defense. Don't ever get defensive it's better to go down with your pride. Can you see a lion defending itself against a rabbit? Exactly. The politics of the jungle work like this- you're either prey or predator. In this survival game we call life- you NEVER . EVER. EVER. Want to signal you're prey. We don't run. We don't hide. We don't defense. Sometimes we really are prey but even then we play tactical defense. What do we do in our hypothetical situation here?
Exaggeration. This is my favorite go to ever. Its when you take the bait but in a way that makes them look bad. In a uh huh uh huh way. When there is no tangible evidence and it's your word against mine, whoever goes into offense / accuser will always have the upper hand because a) you can not prove a negative. Law girls will tell you you can not prove that you did *not*. Two offense is the power point and it's already taken so now you have to fall into defense. And defense is already powerlessness. By being accused, you've already lost. So you can take it, but too far that it loses meaning.
Example; I accuse you of say, sleeping with someone. You can't prove that you didn't. So I hit you with the oh I heard you spread your legs for x so you could get this. And you just- sigh. Lean back. Slap on your most bored face. Sip your coffee. Say yes actually I did. Him and his dad and your dad and my dad and triple orgy with the Oligarchs of Russia. We have tapes on the black market. Wait have you ever done ab Eiffel tower? X and your dad did it and I went all night then they gave me this Y thing that I'm obviously not smart enough or capable enough to get by myself because I'm obviously some dumb blond girl yes you're right Andrew can I work now or do you want it in writing. Yes you're right. And I'll fuck them all plus you if you want for this other thing I want that I'm again not smart or capable enough to get by myself as you can tell. Can I wear my earpods back. I need to visualize fucking Enhypen for a ticket, as a girl like me does. Is there anything else you want from me? Video essay?? My soul? What?
2. Yes. And? Yeah I did now what? Why? Because the power of accusing or argument is to make you look smaller and to make you ashamed. When you're not, the cards are reversed. Now they get to feel the shame. Same scenario - you slept with X for Y. So they make a scene about it. First, it doesn't matter of it's true no one cares about the truth. It's not about truth it's about power. You've been alive long enough for this. Soo it doesn't really matter if you did or didn't. So you sigh. Plug one side earpod off. Sip your coffee. Nod. Say nothing, give them the most blank stare ever. So you accept? You nod again. Look at your watch. Look at their forehead. Then neck. Then waistline. Then shoes. Then back to forehead. Then back to your watch. Then eyes. Then arch a brow. Say nothing else. Whatever they say, you nod. Let them trip over their words looking to make you feel guilty. Say nothing outside one word answers. Or simple nods. Actually no words, just nods. Cross your legs. At some point get your earpod back on and go back to work.
3. The whatever you say my guy tactic. The talking to a 9 year old tactic. The awww you little guy!! Tactic. The get them off their game tactic because people that come in accusation come with power, so making them look infantile takes it all away and they have to struggle to get it back. Same accusation, you go- in a soft voice, an awww voice - ah is that so? *Turn to your laptop* when was this? And I was in the room? Wait I was doing the hanky panky? Does he know about this? Oh, that sounds good I guess *sip your coffee* sorry, when exactly was this? Ahhh I see. Okay. So *pause, scroll a bit* sorry, where were we? Oh yeah. Yeah okay I guess. Is there anything else you needed cause I *look at them* wait sorry. What again?
#Again I had points#Again I lost focus for a SECOND#Moved in with the new rich and felt my gold digger flow right back#So I'm back bitches
124 notes
·
View notes
Text
💛✨01: How to Pronounce Penguins Correctly: A Guide for Dr. Strange’s Speech Therapy ✨💛
Hey, Tumblr fam, can't believe I'm doing this It’s your girl, Serena Stark, here with a very necessary 101 because apparently, Stephen Vincent Strange himself—yes, the one who got an MD and a PhD at the same time, cannot pronounce penguins.
Like, seriously, how do you mess this up? But hey, I’m here to help. Consider this your crash course, Doc:

Step 1: Break it down, nice and slow. Say it with me: Pen-guins 📝 Pen like you're signing autographs as a famous neurosurgeon or my fanclub merch. 📝 Guins rhymes with "twins" (you know, Laurya and Loki's thing, just for you to remember it better). Not "gween" or "gwong," Stephen. It’s “gwin.”
Or split it into Peng-wins 📝 Peng as in what you think you are—because you definitely think you're the "big shot" around here. 📝 Win as in winning—you know, something you constantly compete with me for, even when you know I’m gonna crush you in every contest
Step 2: Now, say it together: PEN-GWINS. ❌ Not “Pingwings.” ❌ Not “Penglings.” ❌ Not “Pengwengs.” ❌ Definitely not whatever Benedict Cumberbatch said in that one documentary.
Step 3: Practice makes perfect. 🐧 Repeat after me: "Penguins are adorable flightless birds." Now say: "Serena is amazing for teaching me this."
Step 4: If you still can't do it... Well, I guess we’ll just enroll you in preschool again. Kids today know how to say penguins better than you.

Look, you can open portals to alternate dimensions, but can’t wrap your tongue around penguin? Priorities, Doctor.
🖋️ Extra Credit: Watch David Attenborough say it correctly and tell me you don’t feel inspired.
And now, for Exhibit A, the most infamous video of all time: 🎥 The Original Penguin Debacle
Yes, Stephen, this is your multiversal twin. Watch it. Study it. Learn from his mistakes.
Exhibit B, auditory reference: The Correct Pronunciation
You're welcome, Strange. Now go forth and say penguin like the functional adult you pretend to be. 🐧✨
PS: I love you, but I will roast you forever if you keep saying “pengwengs.” 👀

Tagging: @strangeofficial
Bonus: Tagging @wong-the-not-wizard, @multiversal-lesbian and @tia-the-sorceress too for moral support (and backup roasting)
#our doctor here cannot pronounce penguins #someone call christine to help him practice #stephen strange needs speech therapy #magic can't fix this speech fail #penguins deserve justice
#serena stark#marvel#mcu#marvel mcu#marvel cinematic universe#iron gal#mcu rp#marvel rp#serena stark speaks#serena stark 101#pronunciation 101#doctor strange#dr strange
55 notes
·
View notes
Text
FUCK! (II)

synopsis. You hated your roommate but he had the biggest crush on you, fuck.
pairing: fboy!jk x fem!reader
genre: f2l, e2l, roommates au, fboy au (wow so many cliches), comedy au, mature themes, bad language, sex jokes.
warnings. mature explicit themes, wet dreams, jealousy, exes and oh’s, simp koo, fboy koo, horny koo, yn is stressed as always, a cute coffee date, lovesick koo! bad decisions 101.
disclaimer. this is purely fictional and this doesn’t represent bts’ jungkook irl. mature themes 18+ content ahead. mdni. ps. this jungkook thinks w his dick 👍
note. hi, share feedback plz, send asks because they keep me really motivated <333 ENJOY!
series masterlist.
 tag list [1]: @theblueslytherin @telepathytae @bergandysam @ughbandmembersx @taemond-in-the-ruff @dopepbanditlightpie @jungkooksseuphoria @ninanyctophilla @nk719 @wobblewobble822 @bruisedscrewedandtattooed @babycandy111 @alicebleu @withluvjm @bangtannie7 @ghaieeunitl @bloopkook @chocomintkook @kookie-vuitton @uzumegui @goodkamma @actuallyada @kagami-s-void @jeonpendejo @blushblossomsblog @1-in-abillion @yahjiminssrecs @rheee-exe @tae-hibiscus @sangwoosimpie @dimguin @onlythebest-106 @cprcupcakkev@breadcheeksseokjin @aprilspring @laurynne5 @aureumjeon @lovebts-beca @luv—you @slid3er @bebejungkook @koo-kz @jamlessstars @shinyun @kookwolf @author-ssi @kakuzone @aliimac94 @bnagtanx1306 @pb-n-juju @mintsugarmy @apollukee @fairy-jaykay

Jungkook wants you.
It’s clear, no matter what he does, you’re always stuck in his mind. You’re buried deep inside his brain,
The man wakes up panting. His blurry vision slowly clears out as he tries to calm himself down. “F-Fuck!” He exclaims, looking around to see the walls of his bedroom.
The scene plays out clearly in his mind, the dream so vivid and he finds himself distracted.
“Kook…”
You barely whisper, caressing his cheeks as you lean closer to him, Jungkook feels his heart rate quicken, your scent already taking over his consciousness, “you’re so good to me.” You confess, looking into his eyes with your wild E/C ones,
His knees feel so weak.
His eyes settle on your mouth, he can feel himself foaming, “such a good boy…” he praise him, your tone is so sultry, he cannot bring himself to utter a single word.
You have him tranced.
“So much better than he ever was..” you lovingly stare at him, lusty haze clouds your eyes, Jungkook can’t even focus on your words.
You’re such a dream for him.
“Good boys deserve a good kiss.” Your words send a shiver down his spine, and you kiss him, hard.
And he doesn’t hesitate to kiss you back with the same passion.
“SHIT. now I’m hard.”
He’s embarrassing. “Fuck I’m such a whore.” He mumbles to himself, but the guy can’t stop smiling, last night was so good.
You were so close to him, protected in his arms as he held you so gently, Jungkook could live last night forever again.
But you were so broken too, crying so softly, it wasn’t easy for him to see you like that, you hardly ever opened up to him.
You were a closed off person, maybe wrong wording but you didn’t really like to share much about your life with him.
“You deserve the world YN…” Jungkook sighs and gets up from his bed, he stretches his shoulders, yet the ache between his legs doesn’t really let him move too much.
He ignores it and picks up his phone.
Today was Monday, you were at work, and he needed to get ready for work too, Jungkook opened your number and bit his lip.
His fingers type and he smiles like a fool.
yn 💌: coffee at 7?
me: cool, near your work place right?
and with a huge smile on his face, he puts the phone down.
“This shower is definitely going to be so long.” He sighs again, excitement flowing through his veins.
He was truly in love for the first time.
With you.

You wait for Jungkook to come, the place smells like heaven to you, fresh smell of coffee brewing, God you could stay here forever.
Today was exhausting at work but when was it not? Your boss was a pain in the ass, you hated rich narcissistic people.
But, thank you to the person that invented coffee.
“Hello ma’am, ready to order?”
You look up and give the waiter a small smile, “in a few minu- hey babe.”
Jungkook’s voice almost startled you, there he stood in all his glory, a t shirt and tight jeans with a rough leather jacket on his body.
He looked good but he was late.
“You’re late, Jeon.” You roll your eyes as he sits down right in front of you, a cheeky smile on his lips, he was awful.
But it was Jungkook.
“sorry, work was awful.” You couldn’t disagree with him on that. “True…. So, I’m gonna order.” You turn your attention to the waiter.
“Sorry for the wait…. But I’ll just take this one, please?” You point on the menu, “thank you.” You thank the man and jungkook follows your lead.
As the waiter leaves, Jungkook speaks up. “You’re gonna pay for my coffee right?” He jokes, you smile.
“Of course my invitation so my treat.” You both giggle and your eyes wander around the cafe.
Your smile dies as soon as a familiar face comes into your view.
“What’s wrong, YN?”
Jungkook stares at you with worry, “YN?”
“K-Kyung soo’s here.” That’s all you can say but Jungkook gets the hint immediately, “so?” He questions, his jaw clenching as he notices your tense demeanour, “he’s coming towards us.”
“Fun!” He mumbles. “Don’t worry I got you.” He grabs your hand and squeezes it.
You close your eyes and try to calm down.
“YN?!”
That voice, you can’t forget it, you open your eyes to see that familiar face once again in a long time. “Hey Kyung soo!?” You force a smile out, unknowingly giving Jungkook’s hand a firm squeeze back.
You feel so nervous and anxious.
“Nice seeing you here! You still get coffee from here huh? You look good, YN.”
Your ex boyfriend points out and you feel your cheeks heat up.
You’re not sure why.
“U-Uh y’know I like specific places.” You reply, not noticing Jungkook who’s almost glaring at your ex.
“Of course, umm, who’s this?”
Kyung soo noticed however, and asks you, “o-oh yes! This is Jungkook..” you introduce your housemate awkwardly to your ex boyfriend.
“Oh- her boyfriend.” Your eyes widen and you look at Jungkook with absolute shock.
“O-Oh.”
“Yeah, nice to meet you, who are you?”
“Her ex, u-uh nevermind, YN it was nice to see you, hope you’re happy.” The other man hurries away, you stay frozen at your place.
“WHAT WAS THAT, JUNGKOOK?”
“I said I got you.” He winks, a wicked smile on his face and he shrugs.
Being your fake boyfriend was only step one into becoming your real boyfriend.
“Oh look, our orders are here!”
And Jungkook was a determined man.
#jungkook smut#bts smut#jungkook x reader#jungkook ff#jungkook fanfic#jungkook fanfiction#bangtan smut#bangtan fic#bts fic#bts fanfction#jeongguk smut#jeon jungkook x reader#jungkook x you#smut#jjk smut#jjk fic#jjk x reader#jungkook fluff#jungkook angst#jungkook au
1K notes
·
View notes
Text
dogfighting 101: 04 - 'nix is sick of this shit
wc: 595
synopsis: phoenix prides herself on knowing almost everything pertinent, it's the parts she doesn't know that leaves her on edge.
main masterlist
athena-verse master post
a/n: the support with this universe has been incredible, thank you all so much, i really enjoy being able to write shorter pieces as an outlet while working on my 10k an update longer series. (ps: taglist is still open!)

“Okay. What the hell is going on?” Natasha's voice is firm.
Bob to his credit seems a little anxious from where he's stood a few feet behind her. He's obviously trying to respect your privacy, but something tells you he's also there to be a witness for whatever this confrontation was about.
“You're going to have to specify Phoenix,” you tell her flatly.
You were sat on a bench in the locker room, redoing your hair before your next run. You’d needed a moment to splash some water on your face and refocus. Bob and ‘Nix were still in their gear as well, they were next on the rotation.
“Where do I even start? You and Rooster? Him and Maverick? How about Harvard and Yale’s attitude too?” she huffs and you meet her gaze challengingly.
“Don’t worry about it,” is all you offer in response.
Natasha lets out a groan, and Bob winces. “Well it's too late for that!” she huffs, very clearly annoyed.
“Leave it alone, ‘Nix,” you tell her, tone serious.
“No! I have never heard you shout at someone like that, especially not while in the air! Honestly, I’ve never heard Rooster get that wound up either! What the fuck is going on?”
“Seriously, Nat, just drop it,” you tell her, shaking your head.
“I can't! I won’t! I’m going on this mission Athena, you know it and I know it. I don't know why Hangman only ever listens to you, or why he leaves every one else out to dry, but I do not want him leading that team. I need it to be you and Rooster. But if you and Rooster can't fucking get along we're all screwed.”
You frown at her and you understand where she's coming from, but part of you can’t help but stay closed off, especially about this. “Nat, we don't have the time, and honestly… honestly it’s none of your business,” you say voice firm.
The look in her eye turns hard, but you stand your ground. You’d always been able to give it to each other straight, calling the other out when necessary, and drawing hard lines when needed. This was one of those times.
“This isn’t like you, and it’s not like Rooster and there’s something going on that you’re both ignoring,” she decides.
There’s a lot we’re ignoring, you want to say. “Let it go, Trace. Final warning,” you say instead, you’re honestly not entirely sure what will happen if she keeps pushing, you’re not sure you want to see who would win in a battle of wills between the two of you, you know you both will get hurt in the process.
She seems to have the same realization because instead of pushing further, she lets out another groan, “This isn’t over!” she shouts as she stomps off, a bashful Bob in tow.
“I would never dream,” you mutter sarcastically after her, tucking your hair back up, and then heading back to the waiting room.
You want to say the cold water and redoing your hair helped, but you feel just as exhausted as you did after stalking off the tarmac leaving Bradley behind. You see him when you walk in, and his eyes focus on you. Your lips tug down and you turn looking for your next partner.
You spot Fritz still waiting by your gear, and you offer a tense smile as you pick up your vest and sling it back on.
“Ready?” he asks.
“Yeah, let’s hit it,” you confirm, before following him back down to the tarmac.
...
everything: @butterfly-skinnylegend
athena’s tags: @omgbrianab @smoothdogsgirl @bazellawriz @sbrewer21 @inky-sun @djs8891 @rory-cakes @geeksareunique @je6291 @kee-0-kee @fanreader75 @whoismurphyslaw @samanddeaninatrenchcoat
#meet ‘thena#daisy’s fics#top gun#top gun maverick#top gun fic#top gun maverick fic#top gun imagine#top gun maverick imagine#mitchell!reader#iceman#tom kazansky#pete mitchell#maverick#hangman#jake seresin#bradley bradshaw#rooster#phoenix#natasha trace#bob#robert floyd#yale#harvard#brigham lennox#logan lee#reuben fitch#mickey garcia#fanboy#payback#hangman x reader
93 notes
·
View notes
Text

୨ ♡ ୧︰ TAROT 101: developing your intuition.
Hello lovelies, welcome to the first post of my Tarot 101 series! After receiving a few questions, I decided to incorporate a series of tips and tutorials for other self-taught readers. Today, I'm answering a follower's asks sent in my DM's. I'm tackling it separately, so it makes more sense to other people to read it. PS: Since this is a major work in progress and I'm not an all-knowing, almighty entity, please provide feedback, comments or concerns you might have! Thank you.
☁️ ˚ NAVIGATE ༉ ‧
INSTAGRAM ୭ YOUTUBE ୭ MASTERLIST ୭ PAYHIP

How you develop your intuition and psychic abilities while reading tarot?
There is not one size fits all. While many readers recommend connecting to oneself, that's just the basis of it, really, but the main concept is to look at yourself, compassionately. Without the judgment of our everyday lives and the chaos of getting things right in the first attempt. You cannot be honest with yourself (or your intuition), if self-denial is the state you're living in. Or worse: if you view the truth as punishment.
It's always going to be a journey of discovery, and the first thing about spirituality is that you need to keep an open heart to the magic. Skepticism may get you far ahead in your career or financial matters, but when it comes to intuition, you can't grasp onto logic all the time.
With tarot, it's a little more practical: learn and lean into the cards. Notice I didn't say memorize, because many of us are busy enough with our everyday schedules. Just tap into them. Look at them. What does The Lovers remind you of? Maybe it takes you to the story about the Garden of Eden. Or- maybe it reminds you of your parents, their golden youth before marrying.
Again. No judgement. Let your stream of consciousness free. A huge part of reading tarot is allowing your imagination to run wild. Although the Devil card can symbolize obsession or addiction at first, take into account the spread, the topic. The context. What is your body telling you about the images you see?
We often underestimate the symbolism behind the cards. Without considering the traditional meanings,take one card out of your deck and just look at it. What colors are prominent? What do these colors represent in modern society? Do these people look happy? Are there any people at all? Where are they? Let your mind weave a story.
As a tarot reader, what you do on daily basis for intuition and tarot reading? What practices, book, or some kind of information which help you for tarot readings?
There are many things that have helped me, personally, but I'm going to mention some of the best practices I've seen, both for myself and for others.
› Stay creative. If it means drawing, writing, or painting, then stay creative. Find whatever little (or big) ways you can express your creativity. Remember you don't have to be "good". You can just be. Creativity exists in a lot of ways.
› Engage with other readers. Observe them. You can find a tarot reader that deeply resonates with you and watch how they read. Test if it works for you. Remember this is your practice, it's your sacred space, so you don't have to follow someone else's rules.
› Read, if and when you can. I personally recommend the book "History of Tarot" by Isabelle Nadolny, but not everyone can afford books or the time to read them. There are plenty of Youtube tutorials and free guidebooks on Biddy Tarot, for example. I also love Servant of The Fates' blog. They're both different and great, reliable sources.
› Start small. You can pull one card a day. Get a journal, write its meaning (or what it means to you) and record your progress. In a few months, when you return to it, you might find it surprising.
› Let yourself not know everything. No one does. Sometimes, you'll need to pause, go back to a guidebook and read the meaning all over again. Other times, you'll look at the spread and feel nothing. That's okay too. We're not meant to know all the answers.
Is meditation really important for reading tarot? Why? How much time do you spend daily for tarot readings and spiritual practices?
Since this is more of a personal matter, I'll be talking about myself. I don't meditate as often as most readers. Three times a month, maybe? I have a busy schedule and I can only meditate before bed, if I'm not too sleepy. Many people find that meditation makes them anxious or they're not able to fully let go. Other people find it that being in silence or taking a walk is more useful to them. Relaxation and meditation come in many, many forms. The important thing is to nurture your body and soul more than to adhere to rigid rules.
However, when it comes to saving time for readings or spiritual practices, I don't set rules for myself. It never works for me.
I let it flow. Sometimes, I go weeks on end without really consuming tarot content and I bond with my decks occasionally. And other times, I'm reading daily, journaling and trying to improve my skills. Since I have a billion other things to care for, I'm not always able to prioritize tarot as much as I'd like, but the important thing is to stay passionate, stay curious and get back to it. Better late than never.
When you're getting started, let yourself try. If you get it wrong, at least you'll be one step closer to getting it right.

amourdivine. 2021 - 2024 © do not copy, redistribute or edit my content.
#pick a card#tarotblr#tarot reading#pick a card reading#tarot#pac reading#tarot witch#witchblr#tarot community#tarot reader#tarot tips#witch tips#divination#tarot cards#spirituality#mine.#series: tarot 101#tarot 101: 001
269 notes
·
View notes
Note
would you have any pictures/content of dezik and tsygan, the first dogmonauts? i saw a few pics on google, but they wouldn't tell me which is which (though by the name, i assumed tsygan was the black and white one, because 60s). love your blog <3 <3

Hii! I don't have a lot but I'm happy to share what I know. Dezik and Tsygan did a suborbital flight in July 1951. It was top secret at the time and only became known to the public in 1991. Dezik is the white one and Tsygan the black-and-white one.
They were trained before the flight, including the centrifuge.
Their rocket went up 101 km to the edge of atmosphere. The flight lasted about 20 minutes. They spent 4 minutes in zero gravity.
They landed about 20 km from the starting point and were both in good health.
A week later, Dezik did another suborbital flight (partnered with a dog called Lisa). The parachute didn't open on landing, so unfortunately they both died. :'(
Tsygan was adopted by one of the space engineers and lived the rest of his life with the family.

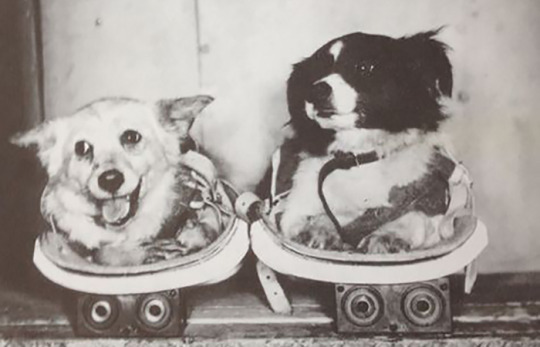
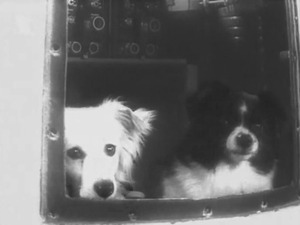
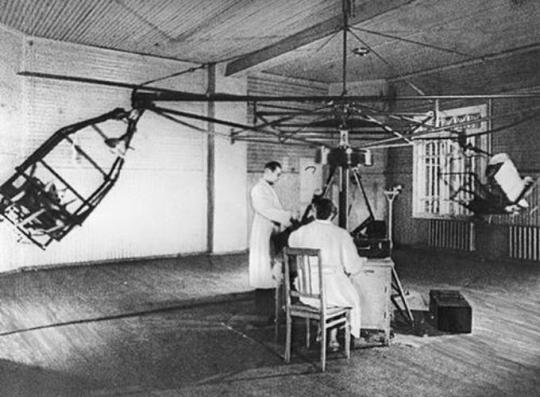

PS: dogmonauts! :D
353 notes
·
View notes
Text
hi loves, here r some current wips u can look forward to!!!!
— r/AITA (blade x reader)
serial killer on the news that looks suspiciously like your boyfriend? / OR both you and blade turn to reddit (of all platforms) for relationship advice. r/AITA -> am i the asshole for...
— the tyrant's favourite (wriothesley x reader)
duke x servant, regency / historical au, basically detailing his blatant favoritism towards u, forbidden love but he dgaf, probably longfic!!
— how to win my husband over 101 (mydei x reader)
royalty au, arranged marriage / marriage of convenience, ib how to get my husband on my side, kinda sunshine x grumpy, SLOWburn, longfic ;)
— plausible deniability (sunday x reader)
sunday's "bad" habit of rubbing his neck whenever he lies [EVENT REQ!!]
— NO TITLE YET (phainon x reader)
in which your boyfriend, who also happens to be your brother's best friend, tries to win your brother's approval —your brother being none other than mydei ;)
— POLL [FIC OUT SOMEDAY LMFAOO]


PS CLICK ON ORIGINAL POST TO SEE UPDATES ON MY WIPS NOT REBLOGS!
#✧rentalks!#will be updated from time to time!!#to keep track of my stuff lol#wips#genshin fanfic#hsr fanfic
107 notes
·
View notes
Text

the good old days.
who's crying? no one's crying.
ps. i SWEAR i didn't think of JAPANESE 101 while choosing my name.
26 notes
·
View notes
Text
Johnny Boy (Chapter 1) Werewolf! Soap x reader
Once upon a time, you would've done anything for John Mctavish. He had been your older brother's cool best friend, and you were always desperate for him to see you as more--until one fateful night that ends up with you pregnant and him...gone. Fast forward six years and you've made a good life for yourself with your daughter Emma, with Johnny none the wiser. Until one day, he decides to knock on your door.
Warnings: this will be dark Johnny, he's a werewolf so in my fics they don't really have the same morals. There will be smut in the future, and this will be quite a slowburn.
PS. shoutout to @ceilidho for inspiring this Johnny fic, especially in the future you will see Johnny calls reader "kitty" and ceilidho absolutely came up with that amazing nickname and I love them for it :) Read their stuff for more Johnny fics!
You couldn’t remember the last time Emma had slept through the night.
She was always a restless little thing, even as a baby. She hardly cried during her first year of life, quiet as a lamb with her wide blue eyes and pursed mouth, squirming out of swaddles and cradles with a single-minded determination. Your wee old man, you used to say, always looking out at the world and finding it lacking.
She didn’t get those blue eyes from you, though you wish she had. It was as if you weren’t allowed to forget him.
Emma was curled around you like a cat, her dark hair sprawled across your pillow. She didn’t like to be alone at night, but that was common for baby wolves, always searching for the closest source of warmth.
You spent half your time researching, reading books like How to Raise a Wolf Pup 101, or Ensuring Your Child Stays Connected to Their Inner Animal and enrolling her into a mixed kindergarten, where pups and children co-mingled (usually) without incident. It helped that you had grown up with a werewolf, you could look at his early life and see the flaws in the way his parents raised him.
You always worried, worried that you weren’t doing as good a job as someone like her would, worried that you weren’t feeding her a proper diet despite the fact that you spent another good chunk of your time preparing raw meat to mix with her school lunch. She was so small for her age, but she had John’s spirit, all wild-hair and quick temper.
Today was going to be a hard day for you both. Today was the day of the funeral.
Emma’s great grandfather took a turn last week and died at a rather impressive age, considering his history. He was a charming old wolf, but back in the day had belonged to the underground fighting rings London used to harbor, where wolves and humans alike ripped each other apart in grimy warehouses and subway tunnels. You had a suspicion that he had involved John in it a handful of times, when Johnny was just a skinny teenager with bruised knuckles.
But Emma loved Grandpa Jack, and the funeral wasn’t going to be easy for her. She understood death in a way you hadn’t when you were six, hearing the old man’s heart stop from across the hospital lobby during your visit last week.
Emma shifted against your neck, breathing in your smell. It was as comforting for you as it was for her , her hair tickling your nose.
“Emma?” You whispered, jostling her. “Emma, it’s time to get up.” It was already eight, and the funeral was going to be at ten. You needed a shower and Emma needed breakfast–nothing put her in a worse mood than skipping breakfast.
Emma grumbled, tucking herself deeper in the blankets. You smiled to yourself, sliding out of the blankets. “Fine, but you’re getting up when I’m out of the shower.”
She nodded, tucking her head under the pillows. In another life, John used to do the same thing, growling whenever you tried to wake him before ten.
You had thought of him often lately. You blamed it on Jack’s death, the scary thought that John might actually turn up at the funeral–but Tom had reassured you that the last he had heard from John was that he was in the Middle East, a half a world away.
You undressed, laying out the neat black dress and ballet flats you had chosen the night before. You kept the door cracked, so you could keep an eye on Emma.
If Jack hadn’t been Emma’s grandfather figure, you would simply not go. John’s mother liked you well enough, at least, more than she liked her son, but you understood why he left.
Not enough to forgive him for it, of course, but that was probably because he spent one night with you, knocked you up, and then disappeared completely for four years. He resurfaced two years ago, reaching out to Tom, your brother and his best friend, by sending an expletive-filled letter about the violent and bloody years he had spent in the military. Tommy came to you first and asked if you wanted him to know about Emma.
That was the kicker. When you learned you were pregnant, you spent months and months trying to reach him, calling whatever high-ranking officer you could find–but they all said the same thing: John Mctavish agreed to have his life before the military erased in the records, therefore he no longer existed.
He had no intention of coming back. And he didn’t even attempt to contact you along with Tommy, the girl that he had grown up with, the girl that used to love him more than anything in the world.
Emma was awake by the time you were out and dressed, her eyes bright at the thought of breakfast.
“Cereal?” She asked hopefully.
You opened your mouth to refuse, thinking of the sugar but then you remembered that she was going to have to see her grandfather’s corpse today. You shrugged, “Sure, Em, as long as you have eggs too.” Emma nodded eagerly. She had the appetite of a grown man, and wasn’t particularly picky–something you were grateful for every day.
She was quiet as you cooked, her eyes focused on your black dress. “Do you think Grandpa Jack is going to haunt us?”
You paused, halfway through flipping a fried egg. With Emma, it was best to really think about your answer. “Well,” you said, gesturing for her to start on her plate of raw, sliced liver. “Do you want him to?” “I think so. He could just stay in his armchair like he always used to,” Emma said thoughtfully. “We should leave one of his books out for him, just in case.” Her obsession with ghosts started when bloody Tom let her watch one of those cheesy ghost-hunting shows. Instead of being terrified, she found it exciting, the thought that people can remain even in death.
To tell her that Grandpa Jack wasn’t going to prop his ghostly specter up on your ratty armchair and read his ancient western novels would break her heart. So you nodded, scraping two eggs onto her plate with the liver. “Alright. We’ll pick one before the funeral. I’m sure he’ll need a break from your cousins bickering by now.” She smiled and dove into the liver. It was good for her, of course, the vitamins and the minerals in organ meat, but that didn’t make you any less squeamish watching your child tearing into the raw flesh.
Your own breakfast was a cup of black coffee and nerves, your stomach twisting into knots. He wasn’t going to be there, you told yourself. He had stayed away for this long, your idyllic little life with your daughter and your job at the library wasn’t going to be interrupted by the man that had abandoned you.
You didn’t want things to change. You didn’t want him here, in your space, with your daughter that you raised alone.
Jack and Tom had helped of course. The old man had done his best to teach your little girl to not chew on the furniture or chase the squirrels up the tree, and your parents and Tom spoiled her endlessly.
Emma helped you wash and dry the dishes, nuzzling your hip affectionately. “You smell like you did when you went to work at the book place,” she said, sensing your anxiety. “How come? Do you think Grandpa Jack’s family’ll ruin things?”
Jack’s family, not John’s. You hadn’t told her much about her biological father, and Emma was observant enough to understand that he wasn’t ever going to be around. It didn’t seem to bother her, she had enough males in her life patting her head and teaching her how to play rugby.
“No, of course not, bear,” you said, tweaking one of her dark pigtails. “I’m just…I’m really sad. I’m going to miss your grandfather.”
She nodded, her mouth pursing in that mournful way she did when she was a baby. Back then, you had convinced herself it meant that she somehow knew her father wasn’t there, that you were doing this all alone and she knew you would fuck it up. “I still smell him in the living room.”
You kissed the soft crown of her head. “I know, bear, I’m sorry.” Together, you picked one of his Louis L’Amour novels off your rickety little bookshelf. “This was the one he was reading,” Emma said, carefully opening it to the page he had dog-eared. “We’ve got to remember to turn the pages every day, Mommy. He always reads so slow.”
“Once in the morning and once in the evening,” you agreed, patting the worn-down leather. His imprint was still in the cushions, a big, tall man worn down by years of violence.
You were going to miss him. He had come to your door shortly after Emma was born, a suitcase in hand. “I’m moving in, love,” he said. “She’ll need a wolf in her life and I’m all you’ve got.” You could have cried with relief back then. He had had such a way with her, always shushing her cries by cupping her in his big, callused hands and bringing her to his barrel chest.
“I raised Johnny and fucked it up,” he had said, following the tiny whorl of her ear with the tip of his finger. “I’ll do my best to help you with her, pup, you loved my boy more than he deserved.”
You helped Emma into her frilly black dress, the one Jack had chosen himself. He wanted to buy her something nice, to be his darling little granddaughter for him one last time.
She sat quietly while you braided her hair, uncharacteristically still. “Ready?” You asked.
She nodded, glancing one last time to the Louis L’Amour on the armchair.
Tom greeted the two of you at the door, a tall, skinny man that still looked like the stubborn big brother you knew. He had retired from the military last year to settle down in the house across from yours and got a job doing the only thing he really liked doing–which was cooking french dishes for eight hours a day and shouting until he was blue in the face.
He smiled sadly, sweeping Emma up in a hug. “Hullo, bear,” he said, kissing her cheek. “You look dashing.”
“Grandpa Jack made me wear it,” she said, frowning disapprovingly at the ruffles on the sleeves.
Tom laughed, but it was hollow, his eyes shifting to you before swiftly flitting away. “Of course he did. Here, I’ll watch Em for a bit if you want to mingle, Johnny’s mother was looking for you.”
Of course she was. Anxiety twisted deeper in your gut, the coffee bubbling up your throat. “Alright,” you said lightly, forcing a nod. “I’ll be inside if you need me, bear.” She nodded, turning to her uncle with a single minded purpose–to convince him to let her have some of the biscuits in the tin he had brought.
Susan, John’s mum, was sitting in the lobby of the funeral home, sorting the trays of casserole into neat rows. She was a thin, tired woman with the same blue eyes as your daughter.
“Susan,” you said, “I heard you were looking for me.” You opened your arms as she came in for a hug, her body brittle against yours. She had been sober for a few years now, mostly because you had refused to let her near Emma while she was drinking–which used to be every day.
“I need to tell you something,” Susan said, gripping your palms in a hard grip. “I just…I don’t know with Daddy gone now…” her eyes welled up.
You hugged her again, shushing her gently. “It’s alright, Susan,” you said, “Whatever it is can’t be that bad.”
Looking back, you were a right bloody idiot. Susan pulled away from you, joy sparking her face as she smiled. “Honey, he’s home.” Stupidly, you thought she was talking about Jack.
She wasn’t.
The hair prickled at the back of your neck, your body aware before your brain could catch up. Your stomach twisted, dread spilling down your spine like ice.
He was behind you.
You refused to look, your eyes still locked with Susan’s teary gaze. “No,” you said quietly. “No, tell me you didn’t just let me walk into this.”
She had understood when you asked her not to tell John. She understood that her son had chosen war over you once again and that he didn’t deserve to be in your life.
“I’m sorry,” Susan said, squeezing your arm apologetically.
A hand brushed against your shoulder, big and warm and so familiar it hurt.
“Hey, bonnie,” John said roughly, his voice deeper than it used to be.
You couldn’t help yourself, you had to see.
You pushed away from Susan, looking up into the familiar face of John Mctavish.
He looked ten years older, but no less handsome, scars turning his face into something you didn’t recognize, something like a predator. He was still keeping his hair in that stupid fucking mowhawk, but he had gained an impressive amount of mass, so tall and thick he looked like a stranger.
You couldn’t breathe.
Johnny. The only man you’ve ever loved. The father of your child.
The man that took your virginity and abandoned you, all in one night.
“It’s been awhile,” he said, his accent twisting up his words.
You blinked.
Emma.
Emma was outside and he had no idea. You had to leave, take her away from him.
“It could have been longer, John,” you said, your voice so cold it stung your tongue as you spoke. The ache in your chest was overtaken by rage, pure and hot. “Excuse me.” You pushed past him, suddenly grateful you hadn’t worn the heels when your knees gave a funny little tremble.
He moved, as if to catch you, as if to hold you still while he came up with whatever bullshit excuse he could think of–but you were faster, putting the crowd and tables between the two of you as you made a break for the door.
Emma, Emma, Emma.
Tom was with her, her skinny knees in his lap as they split a delicate almond biscuit.
“Mum?” Her head went up, sniffing the air. “Mum, what’s wrong?”
Tom knew. He looked at you, guilty as sin. “Love,” he began, but you were already ripping her out of his arms, her arms and legs flailing as you made a break for the parking lot.
The funeral home’s door burst open, slamming against the wall with a crash that had you shoving your daughter into the back of your car, utterly deaf to her squawking.
But John had already seen her. Smelled her. He stood in front of you, frozen in place.
“How old is she?” He asked, deadly calm. His blue eyes burned, like they used to when he was a teen, hormonal and angry. Always so angry.
“Go fuck yourself, Mctavish,” you snapped, reaching for your door.
He was already there, hand slamming against your car door with a crack that split the air. Johnny really was different now, confidence stiffening his spine, his sheer size making you take a step back.
What did they do to him overseas? He looked like he was about to eat you alive.
“No,” John said, sounding like a wounded animal. “Ye wouldn’t keep something like this from me.” “You’re right,” you said coldly. “I wouldn’t have. Then I spent three years of her life waiting for you to get your head out of your fucking arse. I called. I emailed. I sent a hundred fucking letters.” He made a noise like you gutted him, his eyes going to Emma.
She was curled up in the back of your car, wide-eyed and staring at John. Her father.
Of course she would know. She could smell it on him, her own flesh and blood.
“I…I didn’t know,” John said, “Hen, look at me-”
“I don’t care.” You wanted to scream. You wanted to cry. You wanted to dig your nails into his skin and hurt him like he hurt you. “We don’t need you, we never needed you. I loved you, and you left for years. Deal with the consequences.”
Johnny Mctavish, a wolf, a soldier, flinched from you.
It wasn’t the victory you thought it would be.
You ripped your door open, and he let you. You put the car in reverse and sped out of the parking lot, and he let you.
“Mum?” Emma said cautiously. “Mum was that…”
“We’ll never see him again, Em,” you said, utterly sure of that fact. “Forget him. John always runs.”
187 notes
·
View notes
Text
08/22-23/2024 Daily OFMD Recap
TLDR; David Jenkins; Rhys Darby; Taika Waititi; David Fane; Samba Schutte; Madeleine Sami; Kristian Nairn; Alex Sherman; Bronson Pinchot; Damien Gerard; Vico Ortiz; Reminders to Vote; Adopt Our Crew: GalaxyCon San Jose Videos; Call to Action Aug 30th; Fan Spotlight: Citizen Dame Podcast; Truly Docked Event in Tx Reminder; Love Notes; Daily Darby/Today's Taika;
== David Jenkins ==
David has been sharing more beautiful artwork by our crew. This time is the brilliant @thozaarmitage <3, and he's right, just SO GOOD.

Source: David Jenkins Twitter
== Rhys Darby ==
First up, some words of wisdom on how to success in life from Rhys' Tiktok!
Next up: Rhys' (And Minnie's!) movie Uproar won Best Oceania Film 2024 at the Septimius Awards!

Last but not least, it looks like Rhys has a new project coming up-- check out the article here!


Source: Variety Article
== Taika Waititi ==
Some "August b&w Shots" from a friend of Taika

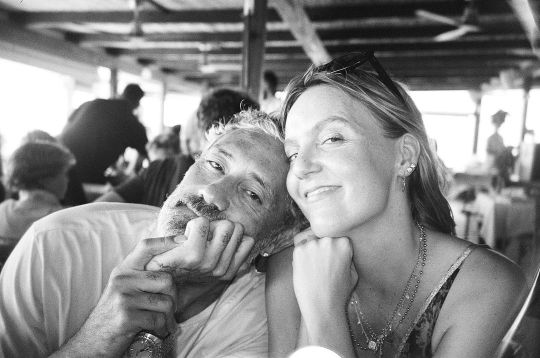
Source: Christabel Rose Instagram
Previews of the season finale of Time Bandits!
instagram
And a short video by Rita.
Source: Rita Ora's Tiktok
== David Fane ==
David out with a John Asi!

Source: John Asi's Instagram Stories
== Samba Schutte ==
Samba's sharing more info regarding the upcoming Advanced Chemistry Theatre Screenings! You can buy tickets here!

📍 Arlington Capitol Theater 🗺️ Arlington, MA 🗓️ Date: 9/3 💬 Q&A 📍 Village East 🗺️ NYC 🗓️ Date: 9/4 💬 Q&A 📍 The Screening Room at 1313 🗺️ Wilmington, DE 🗓️ Date: 9/6 🕒 Time: TBD 📍 Lark 🗺️ Larkspur, CA 🗓️ Date: 9/7 💬 Q&A 📍 Harkins 101 via Phoenix Film Festival 🗺️ Scottsdale, AZ 🗓️ Date: 9/9 📍 The Ashland 🗺️ Ashland, OH 🗓️ Date: 9/10 🕒 Time: 4:30 PM 📍 More Info 📍 Laemmle Monica 🗺️ Santa Monica, CA 🗓️ Date: 9/12 🕒 Time: 7:30 PM 📍 Rodeo Cinema 🗺️ Oklahoma, OK 🗓️ Date: 9/18 📍 Gateway Film Center 🗺️ Columbus, OH 🗓️ Date: 9/18 🕒 Time: 7:30 PM 📍 Cinestudio 🗺️ Hartford, CT 🗓️ Date: 9/21 🕒 Time: 7:00 PM 💬 Q&A 📍 Esquire 🗺️ Cincinnati, OH 🗓️ Date: 9/22 🕒 Time: Matinee
Source: Samba Schutte's Instagram Stories / Good Deed Entertainments Instagram
== Madeleine Sami ==
Madeleine's been promoting Season 2 of Double parked! There's some shots of her and her costar as well as a new trailer! Check them out below!
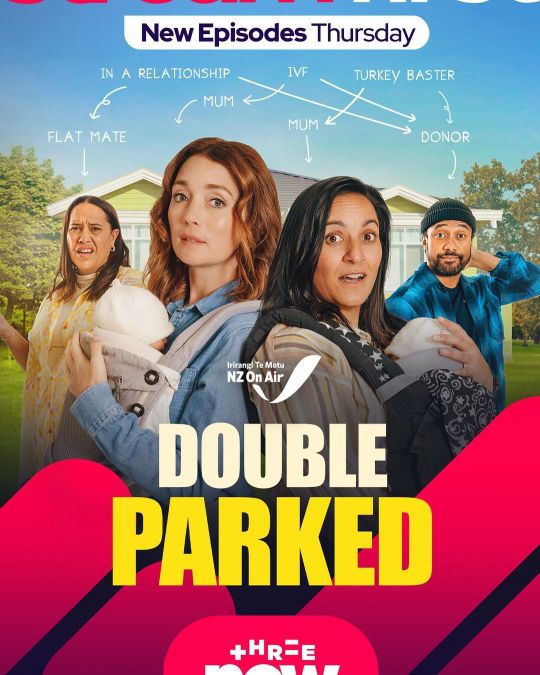
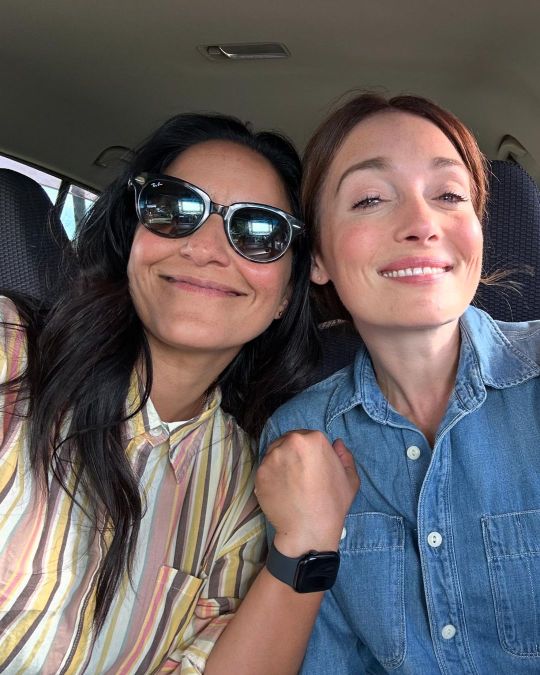
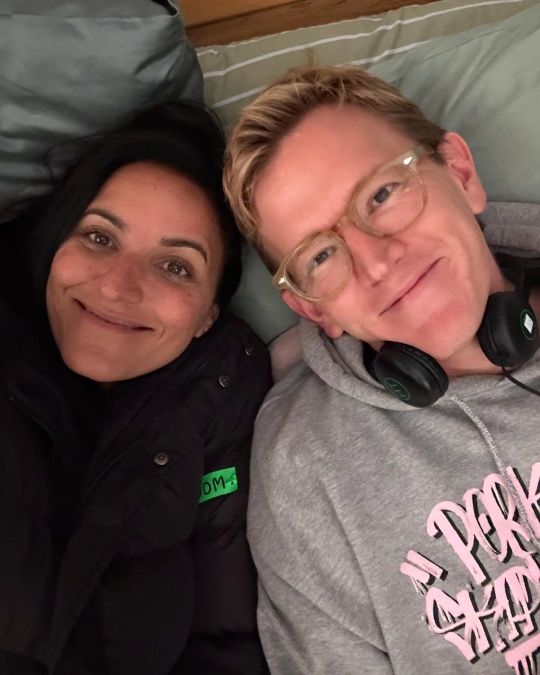
Source: Madeleine Sami's Instagram
instagram
== Kristian Nairn ==
Kristian is going to be in New York City on September 24th at The 92nd Street Y for an exclusive In Conversation & Signing! You can visit 92 NY.org to get tickets!

Source: Kristian Nairn's Instagram
Also~~ Kristian wrote a thank you note for @smudgeandfrank who recently saw him and the rest of the cast at GalaxyCon Raleigh! If you HAVENT seen their work, please check out their instagram!

Source: Kristian Nairn's Instagram
== Alex Sherman ==
Alex has been poking his head out lately which we love to see!!


Source: Alex Sherman's Twitter
== Bronson Pinchot ==
More Ned Low Musings from Bronson as well as his other characters! (PS: Sorry Tumblr DOES NOT want to share this video for some reason? 1. You can visit it here on Instagram 2. More Ned Low)

Source: Bronson Pinchot Instagram
== Damien Gerard ==
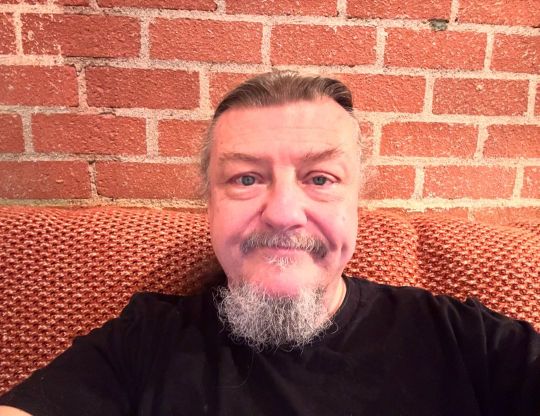
Damien out at a secret studio in their Green Room! Looking forward to see what you're up to sir!
Source: Damien Gerard's Instagram
== Vico Ortiz ==
Vico's got more OFMD BTS up on Patreon!

Source: Vico's Patreon
== Reminders To Vote ==
Thank you @adoptourcrew for the reminders!

Source: Adopt Our Crew's Twitter
== Adopt Our Crew ==
One of the awesome things our friends over at @adoptourcrew have been up to lately is going to cons! They had some fun questions to ask our lovely cast and crew!
=Vico Ortiz=
instagram
= Kristian Nairn =
instagram
= Call To Action =
@adoptourcrew is asking for your help on August 30th to get OFMD trending again!


Source: Adopt Our Crew's Instagram
== Fan Spotlight ==
= Citizen Dame Podcast =
There's another episode of Patreon exclusive OFMD Weekly series up! This week is The Art of Fuckery. It's just as fun as it sounds, if you're a patron feel free to check it out! If not, and you're interested, you can become a patron on their Patreon!

Source: Citizen Dame Patreon
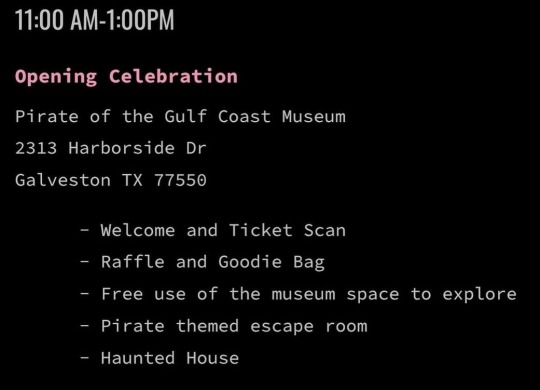
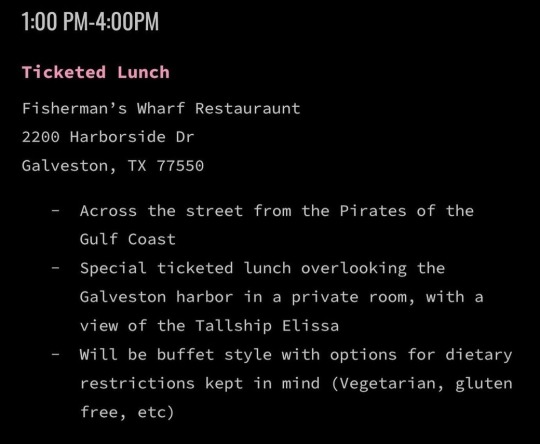
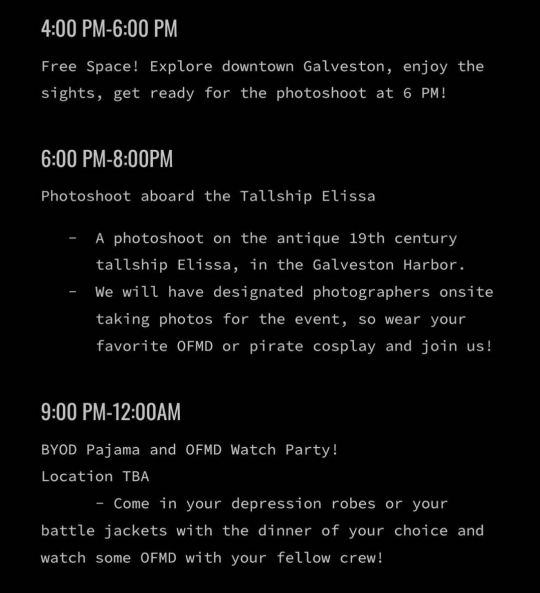
= Truly Docked Sept 21-22, 2024 =
We're just a month away from the Truly Docked event in Galveston TX, and events have been announced! You can still purchase tickets here!


Source: Truly Docked Instagram
== Love Notes ==
Hey there lovelies! It's the weekend for a bunch of you! Huzzah! Hopefully this week wasn't too crazy for you and you're getting a chance to take a load off! Tonight I really just wanted to say thank you for all your kindness. Seriously. You all remind me every day that the world isn't a dreary place, but one filled with wonder, light, and good-intentioned people. Whether you're sending @ofmdlovelyletters to crewmates, or sharing artwork/fics, or making beautiful gifs, or sharing stills, sending a quick dm to check in on folks, or a comment with something kind, you are making the world so much more manageable. Sometimes when I'm having a bad day at work, even if I don't have time to interact much, I just come on and scroll through tumblr and see all of the things you all are up to, and I can feel the warmth radiating from all the wonderful things you're doing.
I can feel the love, even when it's not directed at me, that's how much love there is out there. It's like coming home to a warm fire and a soft rug to lay on and a blanket, and a cup of hot tea to warm the soul. You all make so many tiny waves each day, and those waves come back and go on to make other waves, and there's nothing more wonderful than someone being kind when they could have been harsh. You make the world a better place. You make this world worth living in, and fighting for, and full of hope.
So yeah.. I just wanted to say thank you lovelies, you truly have helped so many people through so many things you'll never ever be able to comprehend, and you do it with love. Thank you for being kind, and loving, and you <3 PS: This made me think of you all, thank you for being that reason for me and so many others <3

Source: FullSpiritQuotes Instagram
== Daily Darby / Today's Taika ==
Tonight's theme is disaster! Gifs courtesy of the magnificent @thunderwingdoomslayer and @celluloidbroomcloset!


#Instagram#ofmd daily recap#daily ofmd recap#david jenkins#samba schutte#kristian nairn#save ofmd#adopt our crew#long live ofmd#rhys darby#rhys darby faction#taika waititi#vico ortiz#bronson pinchot#madeleine sami#Damien Gerard#Alex Sherman#David Fane#rita ora#citizen dame podcast#well and truly docked event#tell tale tv voting
57 notes
·
View notes
Text


Yeah, lower, baby.
AHEM
PS She took him out to do charity. This is amazinggggg. It's like "the care and feeding of poor little meow meow 101" made flesh.
37 notes
·
View notes