#pro audio equipment
Explore tagged Tumblr posts
Visit Tumblr Blog
Explore Tumblr blogs with no restrictions, modern design and the best experience.
Last Seen Tumblr Blogs


Fun Fact
The total number of visits Tumblr.com received during January 2021 is 327 million.
Text
Why a DJ Stand is More Than Just a Stand: Stability and Organization for Your Setup
If you’ve ever set up a DJ rig, you probably know how chaotic things can get. Between the wires, decks, mixers, and controllers, your workspace can start to look more like a spaghetti factory than a professional DJ booth. But here’s something you may not have considered: Did you know that the right DJ stand can provide stability and organization for your equipment setup?
A good DJ stand is often overlooked but plays a pivotal role in elevating your performance (pun intended). Beyond just giving your gear a home, it ensures that your setup is stable, organized, and functional—qualities that are crucial for any successful gig. Let’s explore how a well-chosen DJ stand can make your life easier and your performances smoother.

The Basics: What is a DJ Stand?
A DJ stand is essentially a sturdy table or frame designed specifically to hold DJ equipment. Unlike a standard table or desk, DJ stands are purpose-built to accommodate the weight, size, and shape of your gear. They often include additional features like adjustable heights, cable management systems, and even shelves for laptops or extra controllers.
While it may seem like a simple piece of furniture, its impact on your workflow and performance is anything but basic.
Why a DJ Stand is a Must-Have for Performers
If you’re still debating whether a DJ stand is necessary, here’s why it should be considered a vital part of your setup:
1. Stability You Can Count On
Picture this: You’re in the middle of a high-energy set, and someone bumps into your makeshift table. Your equipment wobbles, and for a split second, your heart skips a beat.
A professional DJ stand eliminates this worry. These stands are designed to hold your gear securely, even in busy environments like clubs or outdoor events. Their sturdy frames and non-slip surfaces ensure your equipment stays exactly where it needs to be, no matter how intense the vibes get.
2. Organization Made Easy
One of the biggest challenges for DJs is keeping cables, gear, and accessories organized. A DJ stand with built-in cable management options and multiple tiers can help declutter your workspace. Not only does this make your setup look more professional, but it also ensures that you can find what you need quickly.
When you’re working in a fast-paced environment, every second counts. A clean and organized station allows you to focus entirely on your performance instead of fumbling around with tangled wires.

3. Ergonomic Design for Comfort
Performing for hours can take a toll on your body, especially if you’re bending over an improperly positioned setup. Many DJ stands come with adjustable height settings, allowing you to customize your workspace to a comfortable level.
This ergonomic benefit might not seem like a big deal at first, but over time, it can significantly reduce strain on your back and neck, keeping you energized throughout your set.
Features to Look For in a DJ Stand
Not all DJ stands are created equal. To get the most out of your investment, here are some features to consider:
1. Adjustable Height
Whether you’re tall, short, or somewhere in between, an adjustable stand lets you set the perfect height for your needs. This is especially useful if you perform in different venues where stage heights might vary.
2. Portability
If you’re a mobile DJ, you’ll want a stand that’s easy to transport. Look for foldable or lightweight options that are quick to set up and pack down.
3. Weight Capacity
Make sure the stand can support the weight of your gear. Check the manufacturer’s specifications to ensure it can handle your controllers, mixers, and other equipment without wobbling or sagging.
4. Cable Management
Built-in cable management systems help you keep cords neatly tucked away, reducing tripping hazards and making your setup look clean and professional.
5. Additional Storage
Some DJ stands come with extra shelves or tiers for laptops, controllers, or even drinks. These added features can help you keep everything within arm’s reach, so you’re not constantly bending down or stepping away during a performance.
How a DJ Stand Enhances Your Performance
Now that we’ve covered the basics, let’s talk about how a good DJ stand can directly improve your performance:
1. Increased Confidence
Knowing that your gear is stable and secure allows you to focus entirely on your music. There’s no need to worry about a table collapsing or cables getting unplugged mid-set.
2. Improved Workflow
An organized workspace means you can transition between tracks seamlessly and troubleshoot issues quickly. With everything in its place, you’ll spend less time searching and more time creating.
3. Professional Presentation
Your setup says a lot about you as a DJ. A sleek, organized station gives off an air of professionalism, which can leave a lasting impression on event organizers and audience members alike.
Tips for Choosing the Right DJ Stand
Choosing the perfect DJ stand depends on your specific needs and performance style. Here are some tips to help you make an informed decision:
Measure Your GearBefore buying a stand, measure the dimensions of your equipment to ensure it will fit comfortably.
Think About Your Setup If you use multiple pieces of gear, look for a stand with multiple tiers or extra space.
Consider Your Mobility For DJs who travel often, portability is key. Look for lightweight models with quick assembly features.
Test It Out If possible, visit a professional audio shop to test different stands in person. This gives you a better sense of their stability, weight, and ease of use.
Where to Buy Your DJ Stand
When purchasing a DJ stand, it’s essential to buy from a professional audio shop. Not only do they offer high-quality products, but their knowledgeable staff can help you find the best stand for your setup. A professional shop is also more likely to carry stands with warranties and support, giving you peace of mind with your purchase.
#audio#audio gear#music#dj#professional audio#audio shop in brooklyn#brooklyn#dj gears#dj stand#dj setup#audio shops#dj accesories#audio accessories#pro audio equipment
3 notes
·
View notes
Text
How to Maintain Your Fog Machine for Long-Lasting Performance
A fog machine is one of the most exciting pieces of equipment for parties, concerts, stage performances, and even haunted house setups. It adds an extra layer of atmosphere that makes any event feel immersive. But like any other piece of audio-visual equipment, a fog machine requires proper maintenance to keep it running smoothly. Without the right care, you might find your fog machine failing right when you need it most. To avoid costly replacements or last-minute failures, here’s everything you need to know about maintaining your fog machine for long-lasting performance.

1. Use the Right Fog Fluid
The type of fog fluid you use directly affects the longevity of your machine. Not all fog fluids are created equal, and using the wrong one can cause clogging or excessive residue buildup. Make sure you’re using a high-quality, water-based fog fluid that matches your machine’s specifications. Avoid using homemade solutions, as they can damage the internal components and shorten the lifespan of your device.
2. Clean the Machine Regularly
One of the most common reasons fog machines break down is a lack of regular cleaning. Over time, the fog fluid leaves behind residues that can clog the system and reduce performance. Here’s a simple cleaning routine to follow:
After every use: Run distilled water through the machine to flush out any leftover fog fluid.
Every 20 hours of use: Use a cleaning solution (a mix of distilled water and white vinegar in a 3:1 ratio) to break down any built-up residue. Simply pour the solution into the tank, run the machine for a few minutes, and then flush it out with distilled water.
Wipe down the exterior: Dust and grime can settle on the machine, so clean the exterior with a damp cloth to keep it in good condition.
3. Store Your Fog Machine Properly
Proper storage is just as important as regular cleaning. If you’re not using your fog machine for an extended period, follow these steps:
Empty the fluid tank completely to prevent residue buildup.
Run distilled water through the machine to clear any remaining liquid.
Store the machine in a dry, cool place away from direct sunlight and extreme temperatures.
Keep it covered to prevent dust accumulation.
4. Check and Replace Worn-Out Parts
Like any other machine, parts of your fog machine will wear out over time. Some components to regularly inspect include:
Nozzles: These can become clogged, affecting the machine’s ability to produce fog. If cleaning doesn’t solve the issue, replacing the nozzle might be necessary.
Pump: If your machine isn’t producing fog even with the right fluid and a clean nozzle, the pump may be failing.
Heating Element: Over time, the heating element can accumulate residue that reduces its efficiency. If cleaning doesn’t restore performance, consider replacing it.

5. Avoid Overheating the Machine
Most fog machines require a warm-up period before they can start producing fog. However, continuously running the machine for long periods without giving it a break can cause overheating. To prevent this:
Follow the manufacturer’s recommended operating times.
Allow the machine to cool down between uses, especially during long events.
Keep it in a well-ventilated area to prevent heat buildup.
6. Test the Machine Before Every Use
The last thing you want is to set up your fog machine for an event only to find that it’s not working. To avoid last-minute surprises, test your fog machine before every use. Check if it produces fog efficiently, ensure the fluid levels are sufficient, and confirm that all components are functioning properly.
7. Use the Machine in a Clean Environment
Dust and debris can easily get sucked into your fog machine, causing internal clogs and reducing its lifespan. Whenever possible:
Keep the machine off the ground or in a dust-free space.
Avoid using it in excessively humid or dusty environments.
Use a protective cover when not in use.
8. Purchase from a Reputable Audio Shop
A well-maintained fog machine can last for years, but the quality of the machine itself plays a crucial role. Investing in a high-quality fog machine from a professional and reputable audio shop ensures better performance, longevity, and access to replacement parts and expert advice when needed.
Taking care of your fog machine isn’t complicated, but it does require consistency. By using the right fog fluid, cleaning the machine regularly, checking for worn-out parts, and storing it properly, you can extend its lifespan and ensure it delivers impressive fog effects every time. A little maintenance goes a long way in keeping your machine running smoothly and avoiding costly replacements. Whether you use your fog machine for events, performances, or entertainment, keeping it in top shape guarantees that it will be ready to create an unforgettable atmosphere whenever you need it.
#music#audiogears#audio#dj#audio shops#professional audio equipment#brooklyn#brooklyn audio shop#fog machine#fog#pro audio gears#pro audio shop#pro audio equipment's#pro audio equipment#pro audio gear#pro audio#dj set up#speakers
1 note
·
View note
Text
Experience ATI Pro with DJ Sarzen
Join DJ Sarzen, one of the leading figures in the DJ community, as he takes you through the unmatched audio and lighting technology of ATI Pro. Renowned for its innovative designs and powerful sound, ATI Pro equipment is the go-to choice for professionals seeking top-tier performance.
With DJ Sarzen's expertise and experience, see how ATI Pro gear enhances live performances, roadshows, and large-scale events. From crystal-clear sound to impressive lighting setups, ATI Pro delivers the ultimate professional experience.
Check out DJ Sarzen’s setup and behind-the-scenes action with ATI Pro’s latest audio and lighting solutions. Whether it's the stunning clarity of their audio systems or the dynamic effects of their lighting solutions, ATI Pro stands as the industry leader in pro audio and lighting.
Visit Website: https://www.atipro.in/
Why ATI Pro?
✅ Unmatched sound quality for any venue or event ✅ Advanced lighting solutions for dynamic performances ✅ Trusted by top DJs and event professionals worldwide ✅ Cutting-edge technology designed for superior performance
#DJ Sarzen#ATI Pro Technologies#Indian DJ Expo#Best DJ Speakers#Pro Audio Equipment#DJ Sound System#Line Array Speakers#High-Performance Speakers#DJ Booth Setup#Professional Audio Gear#Club Sound System#Loudspeakers for DJs#Best Sound System Brand#DJ Equipment India#Live Sound Performance
1 note
·
View note
Text
Learn how to choose the right pro audio equipment for your studio with Top Tips. Improve your sound game and content creation with must-have studio accessories, the keys to success behind every content creator.
#pro audio equipment#pro audio#home audio#audio equipment#audio system#amplifier audio#music audio#microphone stand#home gadgets
0 notes
Text
Elevate Your Sound: The Best Podcast Equipment for Beginners

Starting a podcast is an exciting endeavor, but it's essential to invest in the right podcast equipment for beginners to ensure your content sounds professional and engaging. In this article, we'll explore the must-have equipment for beginner podcasters and how it can help you kickstart your podcasting journey on the right foot.
Why Podcasting Matters
Accessible Medium: Podcasting allows you to reach a global audience, sharing your thoughts, stories, and expertise.
Versatility: Podcasting covers various niches, from storytelling and education to entertainment and news.
Essential Podcast Equipment for Beginners
Microphone: A good-quality microphone is the foundation of your podcasting setup. USB microphones like the Blue Yeti offer excellent sound quality and ease of use for beginners.
Headphones: Invest in closed-back headphones to monitor your audio and ensure there are no unwanted background noises.
Pop Filter: A pop filter reduces plosive sounds (pops and hisses) for clearer audio recordings.
Boom Arm or Mic Stand: These accessories hold your microphone in place, reducing handling noise and making it easier to position your mic.
Audio Interface: While optional for beginners, an audio interface can further improve audio quality and control.
Recording and Editing Software
Audacity: This free, open-source software is excellent for recording and editing audio. It's beginner-friendly and packed with features.
Adobe Audition: If you're looking for more advanced editing capabilities, Adobe Audition is a powerful choice.
Recording Space and Acoustics
Quiet Space: Find a quiet location for recording to minimize background noise.
Soundproofing: Consider adding simple soundproofing solutions like foam panels or blankets to improve audio quality.
Promoting Your Podcast
Cover Art: Design eye-catching cover art to attract listeners on podcast directories.
Consistent Schedule: Stick to a regular release schedule to keep your audience engaged.
Conclusion Embarking on your podcasting journey is an exciting step, and having the right podcast equipment for beginners is crucial to achieving professional and engaging audio content. Start with essential equipment like a good-quality microphone, headphones, and recording software, and gradually expand your setup as you gain experience and your podcast grows. Remember that consistency and dedication are key to building a loyal audience. With the right equipment and commitment, you can share your voice, stories, and expertise with the world through the powerful medium of podcasting.
0 notes
Text
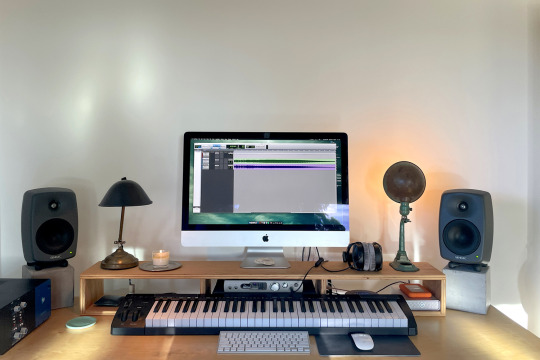
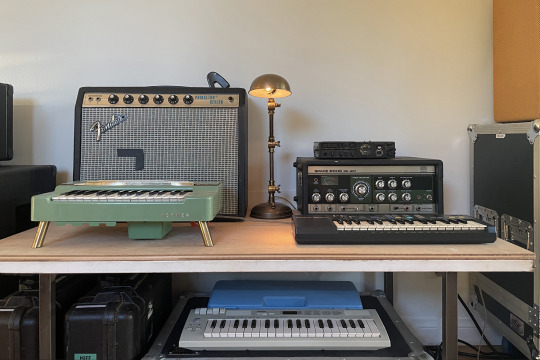

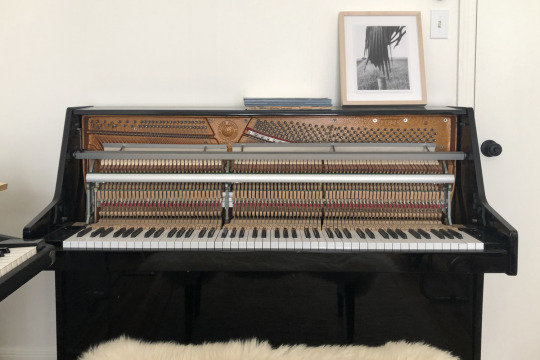
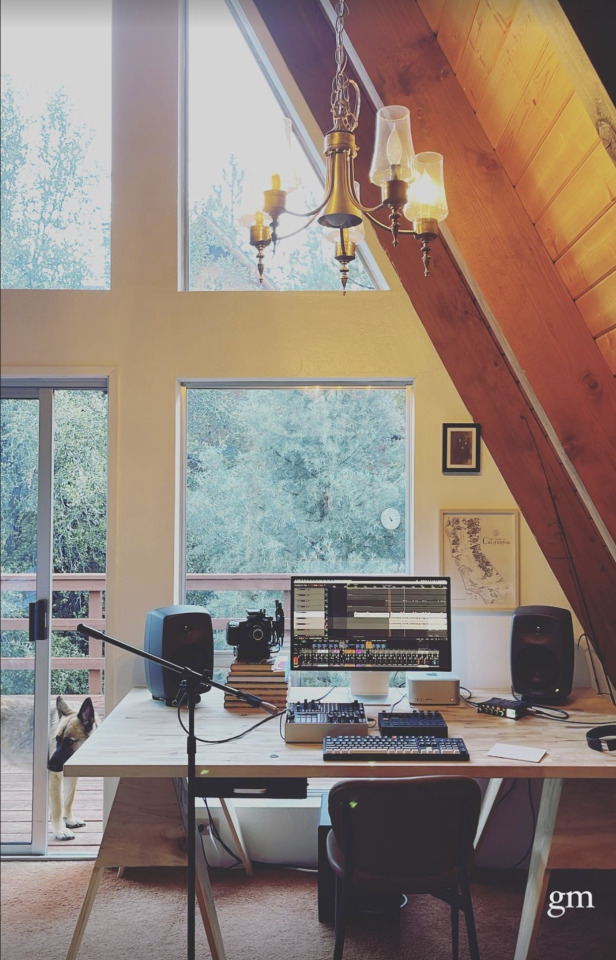
B A L M O R H E A | Austin, TX
➜ In the studio with Balmorhea (via Headphone Commute)
#balmorhea#headphone commute#home studio#studio#audio production#audio#audio equipment#musician#music studio#music producers#studio setup#bedroom producer#pro tools#ableton#fl studio#piano#workspace#creative space#creativity#austin texas#genelec#audio producer#producer#electronic music
51 notes
·
View notes
Text
Linsoul KZ ZS10 PRO X: Deep bass, clear highs, all-day comfort.

View On WordPress
#Audiophile Earbuds#Best Earphones 2024#Detachable Cable Earphones#Earphones Review#Gaming Earbuds#High-Fidelity Sound#In-Ear Monitors#KZ ZS10 PRO X#Music Lovers Gear#Professional Audio Equipment
0 notes
Text

Pro Audio Equipment Online Usa | Worldmusicsupply.com
Looking for pro audio equipment? Worldmusicsupply.com is the right place for you. We carry a wide range of products from top brands, so you can find what you need for your next project. For further info, visit our site.
Pro Audio Equipment Online USA
0 notes
Text
DJ Table & Stand Setup: Choosing the Right Gear for Stability and Comfort
If you’ve ever watched a DJ perform live, you know how important their setup is. A stable and well-organized DJ table and stand can make the difference between a smooth, stress-free performance and a chaotic mess of wobbly gear and tangled cables. Whether you’re an aspiring DJ setting up your first gig or a seasoned pro looking to upgrade your setup, choosing the right DJ table and stand is crucial for stability, comfort, and efficiency.

Why Your DJ Table and Stand Matter
At first glance, a DJ table might seem like just another piece of furniture. But in reality, it plays a significant role in how well you perform. A sturdy, well-positioned table ensures that your equipment remains stable, minimizing the risk of accidental falls or vibrations that can affect sound quality. Additionally, the right stand setup helps with organization, giving you quick access to your gear while maintaining an ergonomic posture to prevent strain during long performances.
Key Factors to Consider When Choosing a DJ Table & Stand
Not all tables and stands are created equal. Here’s what you need to consider before making a purchase:
1. Stability and Durability
A shaky table is a DJ’s worst nightmare. When choosing a table, look for one made of high-quality, durable materials like steel or reinforced aluminum. The table should have a solid frame that can support the weight of your mixer, turntables, laptop, and controllers without bending or wobbling. Adjustable feet or rubberized grips can also help keep the table steady on uneven surfaces.
2. Proper Height for Comfort
DJing often requires long hours of standing, so your table’s height is essential. An ideal DJ table should be at a comfortable height—typically between 36 and 42 inches—to prevent back strain. If you plan to use different venues with varying stage heights, consider a table with adjustable legs for maximum flexibility.
3. Portability and Ease of Setup
If you’re a mobile DJ, portability is a huge factor. Folding tables or lightweight, collapsible stands make transportation and setup much easier. Some stands even come with carrying cases, making them perfect for DJs who frequently travel between gigs.
4. Space and Equipment Compatibility
Your table should have enough surface area to fit your gear while leaving room for smooth movement. Consider your setup—will you be using a full DJ controller, turntables, or just a laptop and mixer? Make sure your table can accommodate everything while keeping cables organized and out of the way.
5. Cable Management
Messy cables can quickly turn your DJ station into a tangled disaster. Many DJ tables and stands now come with built-in cable management features, such as cutouts or dedicated trays to keep cords neatly organized. This not only looks professional but also reduces the risk of accidentally unplugging something mid-performance.
Types of DJ Tables & Stands
Depending on your needs, you might want to consider different types of DJ tables and stands:
Standard DJ Tables – Simple, sturdy tables designed specifically for DJing. They offer ample space and stability for most setups.
Adjustable Height DJ Stands – These allow you to customize the height to fit your preference, reducing strain during long performances.
Laptop Stands – If you rely on DJ software, a separate laptop stand can keep your computer at an optimal height while freeing up space on your main table.
Controller Stands – Ideal for DJs using a controller-based setup, these stands provide a secure and ergonomic position for mixing.
Folding or Portable Stands – Lightweight and easy to transport, these are perfect for mobile DJs or those working in different venues.

Setting Up Your DJ Table and Stand for Maximum Efficiency
Once you have the right table and stand, the next step is setting up your gear for optimal performance. Here are some tips:
1. Position Your Equipment Strategically
Arrange your gear in a way that makes mixing seamless. Your controller or mixer should be centrally positioned, with your laptop slightly elevated for easy viewing. Turntables or CDJs should be within reach, allowing quick access without unnecessary movement.
2. Maintain a Clean Setup
A cluttered workspace can be distracting. Use cable ties or Velcro straps to bundle cables neatly and avoid tripping hazards. Keeping your setup clean not only looks professional but also helps you focus on your performance.
3. Test for Stability Before Performing
Before every gig, do a quick test to ensure your table and stand are stable. Give it a slight shake—if it wobbles, make adjustments or use stabilizers to prevent movement.
4. Ensure Proper Lighting for Visibility
Many DJs perform in dimly lit environments, making it difficult to see controls and cables. Consider adding LED strip lights or small clip-on lights to illuminate your workspace without being distracting.
Investing in Quality DJ Equipment for Long-Term Performance
A well-thought-out DJ table and stand setup can significantly impact your comfort and performance. Investing in high-quality, durable equipment ensures you get the best out of your DJing experience while avoiding unnecessary stress or technical issues. Purchasing from a professional and reputable audio shop provides access to expert advice, reliable gear, and support when you need it.
Your DJ setup is more than just your music—it’s about creating an environment that supports smooth transitions, efficient mixing, and a professional appearance. Choosing the right DJ table and stand helps you stay organized, comfortable, and in control of your performance. Whether you’re spinning at a nightclub, wedding, or music festival, having a stable and well-structured setup will enhance your confidence and ability to deliver an unforgettable set. Take the time to assess your needs, invest in the right equipment, and set up your gear strategically. Your back, your gear, and your audience will thank you for it!
#audio#audio gear#music#dj#professional audio#audio shop in brooklyn#brooklyn#dj gears#dj tables & stand#dj equipments#pro audio shop#pro audio gears#dj stands#pro audio equipment#pro audio
1 note
·
View note
Text
Multi-Room Audio: Can You Fill Your Entire Space with Perfect Sound?
Imagine walking from your bedroom to the kitchen, then to the living room, and your favorite song follows you seamlessly, with no interruptions or dips in quality. That’s the magic of multi-room audio—a setup that allows you to stream music throughout your home without missing a beat. But is it really possible to fill an entire space with perfect sound? Let’s dive into the details and find out how you can achieve a flawless multi-room audio experience.
What Is Multi-Room Audio?
Multi-room audio refers to a system where multiple speakers are connected and can play the same or different music in various rooms. This setup can be wireless (Wi-Fi or Bluetooth-based) or wired (using in-wall speakers and dedicated connections). The goal is to create a synchronized audio experience that enhances how we enjoy music, podcasts, or even home theater sound.
How Multi-Room Audio Works
There are two primary ways multi-room audio functions:
Centralized System: All speakers are connected to a central hub, allowing control through an app, remote, or voice assistant. This system often integrates with smart home devices.
Independent Smart Speakers: Each speaker connects wirelessly to the same network and communicates with the others, providing a cohesive audio experience.
Wireless systems are becoming more popular due to their flexibility and easy setup, but wired systems still offer reliability and superior sound quality.

Key Factors for Achieving Perfect Multi-Room Sound
To get the best experience, you need to consider several factors:
1. Speaker Placement Matters
The positioning of speakers significantly impacts how sound travels. Here are a few tips:
Even Distribution: Place speakers strategically in each room to avoid sound gaps.
Avoid Corners and Walls: Placing speakers in corners can distort the sound due to reflections.
Height Considerations: Mounting speakers at ear level enhances clarity and immersion.
2. Connectivity and Compatibility
Multi-room systems rely on stable connections. Wi-Fi-based setups tend to be more reliable than Bluetooth, as they allow for higher-quality audio transmission and better synchronization.
Check Network Strength: Ensure a strong Wi-Fi connection throughout your home.
Choose Compatible Devices: If mixing different speaker brands, ensure they support the same wireless protocol (such as AirPlay, Chromecast, or proprietary apps).
3. Audio Synchronization
One major challenge is ensuring that all speakers play in perfect sync. Even a slight delay can make the experience frustrating. Most modern systems have built-in synchronization features, but here’s what you can do:
Use a Strong Network: A mesh Wi-Fi system can help reduce lag.
Update Firmware: Ensure all speakers are running the latest software for optimal performance.
4. Room Acoustics and Sound Customization
Every room has unique acoustics that can affect sound quality. Hard surfaces reflect sound, while carpets and curtains absorb it. Here’s how to optimize sound in different spaces:
Living Rooms: Use multiple speakers to balance sound across a larger area.
Bedrooms: A single speaker might be enough, but ensure it's placed away from sound-absorbing furniture.
Kitchens & Bathrooms: Opt for waterproof speakers if moisture is a concern.
Many multi-room systems allow you to fine-tune sound settings using equalizers, so take advantage of these features to personalize your listening experience.
Benefits of a Multi-Room Audio System
So why should you invest in a multi-room setup? Here are some key benefits:
Seamless Music Experience: No need to restart your song every time you move between rooms.
Independent Control: Play different audio in separate rooms if family members have different tastes.
Smart Home Integration: Many systems work with voice assistants for hands-free control.
Party Mode: Synchronize all speakers for an immersive sound experience during gatherings.

Potential Challenges and Solutions
While multi-room audio systems offer convenience, they can come with a few challenges:
Interference & Dropouts: If you experience lag or disconnects, consider using an Ethernet connection for critical devices or upgrading to a stronger router.
Device Compatibility Issues: Some older speakers may not support modern streaming protocols, so check compatibility before purchasing.
Setup Complexity: While wireless systems are easier to install, larger setups may require professional assistance.
So is Perfect Sound Achievable?
Yes, but it depends on careful planning. By selecting the right speakers, ensuring strong connectivity, and optimizing placement, you can create an immersive and seamless multi-room audio experience.For those considering an upgrade, exploring options at a professional audio shop can help ensure you get high-quality equipment that suits your needs. Whether you’re a music enthusiast or just love the idea of having your favorite tunes fill every corner of your home, multi-room audio is a game-changer worth investing in.
#music#audiogears#audio#dj#dj gears#professional audio equipment#dj gear#audio shops#brooklyn#brooklyn audio shop#pro audio equipment#audio equipment#sound#audio equipments
1 note
·
View note
Note
headcanons for how Idia and Malleus play Minecraft?
~ Headcanons for twst characters playing Minecraft.
I was a little late, but here are the headcannons! :D
Also, a little friendly reminder that English is not My native language and if you find errors in the text, please write to me about it.
Another parts about :
Azul and Lilia!
Riddle and Leona!
Jade and Floyd!
[Idia]
1) Absolute pro.
2) During the entire game, big bro has already set up His own server with tens of hundreds of buildings, houses and cities, on which all of Ignihyde plays...
But for you, beginners, He will of course make a new one.
3) Lives not in an ordinary house, but in a secret underground complex with hundreds of traps, secrets and secret passages. The entire dungeon is arranged quite professionally and beautifully, in a black and blue palette, using wool, clay, stone and several types of thin blocks and half-blocks, steps and other things. Instead of ordinary torches, he uses blue torches with soul fire.
4) He doesn’t trust his account to anyone except Ortho, but he tries to make sure that his beloved younger brother doesn’t waste any important resources or do anything unnecessary.
5) His favorite and least favorite location is Nether.
6) His base is guarded by three dogs with blue collars.
7) The same walking guide that explains to everyone and everything how to play and answers all kinds of questions.
8) The bro on the server has absolute power... After all, he is the admin here and the main expert in cheat codes.
9) Despite the fact that he feels much more confident in the square world, he still does not like to interact with other players and prefers to play alone. If there are too many players on the server, He either rushes to retire, or barely uses the microphone and hangs around somewhere in the corners.
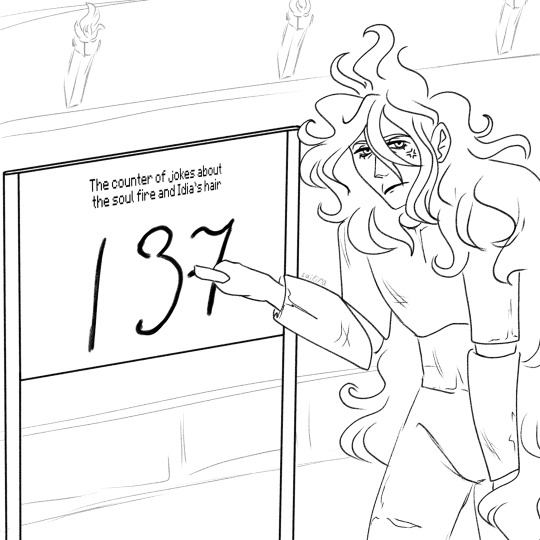
He is most comfortable playing with Lilia, Ortho, Azul and possibly Yuu.
10) Keeps a joke counter when someone compares His hair to the blue soul fire (137)...
11) Loves block art and other buildings like statues of favorite anime characters.
12) Usually, he plays with a ton of shaders, mods and other additions, but since not all dorms are equipped with powerful hardware, like in Ignihyde, bro have to play with a minimum amount of additional details.
13) Knows all the cool bugs, recipes, theories and locations of Minecraft.
14) In one of the secret rooms he built a cemetery for His pets.
15) Of all the players, he comes to the server most often, and could have reached the dragon in one day, if not for Ortho’s gentle reminder that on a joint server you need to play TOGETHER.
16) His main fear is if His mother somehow logs onto the server.
17) Always swears at updates.
18) Sometimes he seriously thinks about buying the rights to the game...
19) Minecraft is my life!
20) MINECRAAAAAAAAAFT
(Insert audio from that screaming russian schoolboy meme)
[Malleus]

1) He doesn’t know what Minecraft is and when Yuu and Idia invite him to play (Invitation???? He’ll definitely join!), he asks Lilia what “Minecraft” is and what spell can He use to get into this mysterious world?
2) When he sits down at the computer for the first time, he falls into a crisis and looks at the square icon for a long time (3 hours), in sincere bewilderment.
Then he decides to try to figure it out on his own... And accidentally blows up the computer.
(Poor Lilia.)
4) FINALLY having figured out the controls on the phone (Still poor Lilia), he came onto the server and falls into a new crisis and shock from the appearance of the game...
"This is definitely... It will be interesting..."
5) Absolute noob. Bro sometimes even forgets that his character is weak and mortal. Several times, He simply walks into lava, forgets to eat, or swims in the water for a long time and is genuinely perplexed as to why his character is dying.
6) Tsunotaro's house is a simple wooden box made of dark oak logs, vines and flowers. There is no floor - only fragrant green grass. The windows are also missing and replaced with fences. Right at the doorstep is a garden with flowers, and on the roof there will be creepy, crooked figures made of blocks and half-blocks of stone and basalt (Gargoyles were planned).
Perhaps He will try in the future to rebuild the house into something more gothic, but Tsunotaro like architect, is like a Grim like nutritionist... Yuu is His most frequent guest and Draconia, according to all the rules of etiquette, tries to feed the visitor and force him to stay as a guest with Him, like a decent owner.... Oh, Yuu invites Him to visit...?
...He will definitely come and build Yuu a crooked gargoyle as a sign of gratitude... And I hope that a human child will be smart enough not to destroy His building...
.......No, I'm serious. Don't.
7) He doesn’t understand anything and either follows other players 24/7 or gets lost and Idia eventually finds him a couple hundred chunks away from the spawn location, trying to make friends with the bat.
8) Griefers? Who is this? Is there such a crazy person who would try to break down His house...?
9) Oddly enough, his main occupation is taming everyone he can. Cats? Parrots? Dogs? A whole farm with a variety of livestock from small to large? Two little slimes? Strange guy with white eyes behind the tree? Yuu? He will take care of everyone.... Rest assured)
+ Animals in this game do not age and cannot die unless you put them in danger, or play it safe and give them name tags....
10) The same guy whose game constantly crashes for some reason or whose microphone crashes.
11) Belongs to the type of people who can simply take and give another player either a beautiful, freshly picked flower, or incredibly rare and expensive armor or weapons, with several layers of enchantment, which He obtained from an unknown place and in an unknown way.
12) For a reason unknown to anyone, all mobs such as monsters, villagers and pillagers, except animals and children, bypass him.
13) Loves to wander through abandoned villages and mines.
14) In PVP he is not particularly smart and sticks with more neutral and calm players and rarely gets into fights with anyone... If at all anyone wants to fight with Him.
15) He dreams of building a GIANT Gargoyle, but so far, all he gets is another crooked, creepy pile of stones, only of larger sizes.
16) When he learns that the goal of the game is to kill the dragon and take It's egg, his reaction is literally: ....Mother?🤨
17) He doesn’t want to fight with His relative, and when Idia kills the dragon, he bursts into His room with lightning and thunder in order to interrogate the corpse of Gloomurai, which did not survive several heart attacks.
18) Tsunotaro took the egg for Himself and built a kind of temple for It (Surrounded by gargoyles, of course), and sincerely waited for it to hatch, until Lilia, who came to the rescue, said that this was not possible in the game.
19) Conclusion: One was disappointed because He could not atone for the brutally murdered dragon mother and raise Her child, and the second, although He laughed amicably, still grabbed a couple of Vietnamese (Briar Valley) flashbacks.
(Poor Malleus and Lilia)
20) Later, scared to death, Idia will install a mod especially for Tsunotaro that allows him to hatch and tame a dragon from the egg he received in The End 😊
(Poor Idia)
That's it! I am waiting for your new requests :3
Reblog Me, please? <:]
#art#мой арт#artists on tumblr#memes#twisted wonderland#twst#twst idia#idia shroud#twisted wonderland idia#malleus draconia#twst malleus#twisted wonderland malleus#malleus x reader#malleus x yuu#twst memes#minecraft#twst characters playing Minecraft#twst headcanons#headcanons#reblog me#request#funny#cute
276 notes
·
View notes
Text
I've been working on this for a long time, and I still didn't go over everything I want to go over, so this is going to end up being a multi part series on how I make my wavs, as well as a bit of general audio engineering.
Reed Behind the Scenes Part One:
Microphones and Recording Environment
A couple of notes before we begin:
For this series I'm going to focus on audio recordings, not video recordings, as they are very different mediums with different requirements. I am by no means an expert, I just have a little more experience with audio production than the average person.
All of my equipment is in the Android/Microsoft ecosystem, and as such I do not have much experience with Apple products. I apologize in advance if anything I discuss does not work within the Apple ecosystem.
Let's talk about microphones. You can't make a recording without one, whether it's the one in your phone or a standalone mic. I use the latter, but some phones have decent mics. Since we just mentioned Apple products, I will say that I have heard that the microphones in iPhones are pretty good these days. When I record on my phone, I prefer to use a dedicated recording app, because it allows me to record directly to an mp3 or wav file that I can then export to my computer for editing, as opposed to recording a video and trying to rip the audio later. I use an app called Voice Record Pro, but there are plenty of voice recording apps out there.
For my best quality work, I use my microphone. You don't need a super fancy mic to make good recordings, but the kind of mic you get is important. There are many different kinds of mics at many different price points, but they generally fall into two categories: USB and XLR. USB microphones can plug directly into your computer, whereas XLR mics need to pass through an interface first. For the vast, vast majority of people looking to get a mic for making fetish content, I am going to recommend getting a USB mic, and the main reason is cost.
For XLR mics, you need two pieces of equipment: the mic itself and an audio interface to run it through to a computer. Not to mention XLR cables, a stand, and a mount. Even if you get a relatively inexpensive XLR mic, after you get all of the other equipment and accessories you need, you may as well have splurged on a decent USB mic.
I only recommend investing in a good XLR if you want to pursue a professional audio career of some kind, and even then I'd wait to sink serious money into it until after you've gotten your feet wet and know that it's really what you want to do. These can be very difficult industries to break into. I do professional voice work, so for my setup I have a Neumann TLM 103, Focusrite Scarlett Solo audio interface, and a Surface Go tablet for recording. More on that in a bit.
In both USB and XLR there are generally three types of microphone: condenser (which is also sometimes called capacitor), dynamic, and ribbon. I'm not going to get into ribbon mics, because you don't need one just for snz content, and I'm not well-versed in them anyway. Most of the mics you will encounter when shopping for one online will be either condenser or dynamic.
Condenser mics are more sensitive than dynamic mics, so they're generally clearer and better suited for voice work. I'm using the word “generally” a lot here, because there's such a wide range of mics, and you may very well find a dynamic mic that works better for your voice and your space than a condenser mic. Unfortunately, the only way to really know for sure is to get one, try it out, and return it if it doesn't fit your needs.
There's this idea that dynamic mics are better for untreated spaces, because they're less sensitive and will therefore pick up less background noise. That's not exactly true. Dynamic mics do pick up fewer audio frequencies than condenser mics, so if you have some background noise that's outside of your mic’s frequency range, then that may not get picked up. Your average background noises, though—loud neighbors, motorcycles and trucks driving by, your cat meowing, the hum from your PC fan—those sounds will still get picked up. The best thing to do is to sound treat your space, but we'll get to that later.
I'll post a few recommendations, but I haven't used any of these mics for myself, so these are recommendations from the voice acting community at large as good budget mics. Any prices are USD, and unfortunately I don't know the global availability of these mics.
USB Mic Recommendations:
Blue Yeti USB
AudioTechnica AT2020 USB (Note that there is also an XLR version.)
Both can be purchased under $100 pre-owned. Both retail for around $130 new. If you're in the US, the nice thing about the Blue Yeti is that you can walk into just about any Best Buy and pick up a brand new one on the spot.
XLR Mic Recommendations:
RØDE NT1 5th Gen
AudioTechnica AT2020 XLR (As mentioned above.)
The AT, at about $100 new, costs less than half as much as the RØDE at $250. If you're set on an XLR but shopping on a budget, that may be the mic for you. The RØDE, on the other hand, is a great introductory mic for professional voice work. For these mics you'll need an audio interface, also called a preamp. A solid one for the budget-conscious, and what I use, is the Focusrite Scarlett Solo, which will set you back about $100 new.
The microphone I use, a Neumann TLM 103, retails for about $1,200 new. You can sometimes find them under $600 pre-owned. They're pretty much the gold standard in the animation industry for how well they can handle loud sounds, like yelling and screaming, without clipping. I invested in one several years ago when my husband got a nice bonus from work, for which I am eternally grateful. Do not go this far unless you are serious about voice work.
Now that you've learned far more about microphones than you ever wanted, let's talk about sound treatment for your recording space. Whether you're using a dedicated mic or your phone, sound treatment will always elevate the quality of your recordings. Even the highest quality mic in an untreated space will sound worse than an average quality mic in a well-treated space.
What is sound treatment? Sound treatment is taking steps to reduce and eliminate the amount of background noise and reverb from the space you are recording in. Have you ever noticed a slightly echoey quality to your voice in recordings? Like you can "hear the room"? That's reverb. When you speak, the sound waves go from your mouth to the microphone , but they also go out into the room and reflect off of the walls before coming back and hitting the microphone again, creating that slight echo. You'll need a sound treated space to prevent that from happening.
One fairly easy and inexpensive way to do this is to utilize thick moving blankets. You can try tacking them up in a closet or hanging them from a booth frame. I currently use a recording booth made from a PVC pipe frame with a double layer of moving blankets hung around it and draped overtop. (Here’s a link to a video tutorial on how to build your own). Another method is to use sound dampening panels hung on the walls of your recording space. A lot of folks use those textured foam tiles. Just be careful with those because if you get really cheap ones the foam can be poor quality that doesn't dampen sound very well. (The Foam Factory sells great acoustic foam, but the cost can add up quickly depending on the size of your space.)
I've also seen booths that are made by lining the walls of a closet with carpeting, so if you happen to have some carpet remnants that might work for you. I’m upgrading my own recording space by converting a closet into a recording booth. I'm building sound panels made from wooden frames filled with sound dampening insulation that I’ll hang on the walls. (Here's a link to that tutorial as well, but that option costs a few hundred dollars in supplies.) If nothing else, a closet filled with hanging clothes can do in a pinch to dampen background noise.
Let's talk a little bit about computers while we're on the topic of background noise. Remember way back when I mentioned my Surface Go tablet? Now remember when I talked about how mics can pick up PC fans? The Surface Go is how I get around the problem of PC fan background noise. The Surface Go doesn't have a fan, so it doesn't make any noise. I can bring it into the booth with me, hook my interface up to it, and use it to run my recording software. I'll then transfer the file to my main PC for editing. If you can do so with your space, you could potentially get cables that are long enough to leave your PC tower outside of the recording space so you can't hear the fan. Definitely cheaper than buying a tablet just for recording.
For editing, I use Audacity, which is a free digital audio workstation, or DAW. Another popular DAW is Reaper, which is "free" in that they don't limit the trial version, so you don't need to pay to use the full version (although they'd really like you to buy a license). I'm not going to go too far into depth on software and editing here, since I plan to do a Part Two on how I edit my recordings. Besides, this post has gotten long enough, and this seems as good a place as any to end it. I'm always open to questions on this kind of thing. Like I said, I'm not an expert, but I'll answer what I can, and if I don't know the answer I'll do my best to find the information for you. Thanks for reading this far, and I hope you've learned something that's helpful or at least interesting to you in some way 😊
9 notes
·
View notes
Text
Learn how to choose the right pro audio equipment for your studio with Top Tips. Improve your sound game and content creation with must-have studio accessories, the keys to success behind every content creator.
0 notes
Text
The Evolution of Pro Audio Equipment: From Analog to Digital

In this blog, we'll delve into the fascinating evolution of pro audio equipment, tracing its journey from analog to digital. So sit back, relax, and let's explore the revolutionary advancements that have shaped the world of professional audio.
The Analog Era:
A. In the early days, pro audio equipment relied on analog technology, using electrical signals to capture, process, and reproduce sound.
B. Analog equipment included mixing consoles, tape recorders, equalizers, compressors, and amplifiers, among others.
C. The warmth and character of analog audio became highly sought after, making it a staple in the industry.
2. The Digital Revolution:
A. The introduction of digital technology revolutionized the pro audio landscape, bringing about significant improvements in audio quality, flexibility, and convenience.
B. Digital audio processing replaced traditional analog circuits with digital signal processors (DSPs), enabling precise manipulation and control over sound.
C. A major breakthrough was the advent of digital audio workstations (DAWs), which allowed recording, editing, and mixing of audio using computers. d. The transition from analog to digital brought about the integration of multiple functions into a single device, reducing the need for extensive equipment racks.
3. Advantages of Digital Pro Audio Equipment:
A. Increased Precision: Digital processing allows for precise adjustments, ensuring cleaner and more accurate sound reproduction.
B. Greater Flexibility: Digital systems offer the ability to recall and save settings, allowing for easy replication and experimentation.
C. Enhanced Signal Processing: Digital processors provide advanced features like real-time equalization, dynamic range control, and effects, expanding creative possibilities.
D. Improved Workflow: The integration of multiple functions within a DAW streamlines the audio production process, saving time and effort. e. Connectivity: Digital systems offer seamless integration with computers and other digital devices, enabling easy data transfer and collaboration.
4. Hybrid Solutions:
A. To cater to different preferences and requirements, hybrid solutions emerged, combining the best aspects of analog and digital technologies.
B. Analog gear is often used alongside digital systems to add warmth, character, and a tactile feel to the audio production process.
C. Hybrid setups offer the flexibility of digital control while incorporating the sonic qualities of analog equipment.
Conclusion: The evolution of pro audio equipment from analog to digital has revolutionized the way sound is captured, processed, and reproduced. With the advent of digital technology, pro audio enthusiasts have witnessed unprecedented improvements in audio quality, flexibility, and workflow efficiency. At ProAudioLA.com, we offer a wide range of cutting-edge pro audio equipment for sale to meet the diverse needs of professionals in the industry. Embrace the possibilities of the digital era and elevate your audio production to new heights.
Remember to visit ProAudioLA.com to explore our extensive catalog of pro audio equipment and discover the tools that will take your sound to the next level.
0 notes
Text
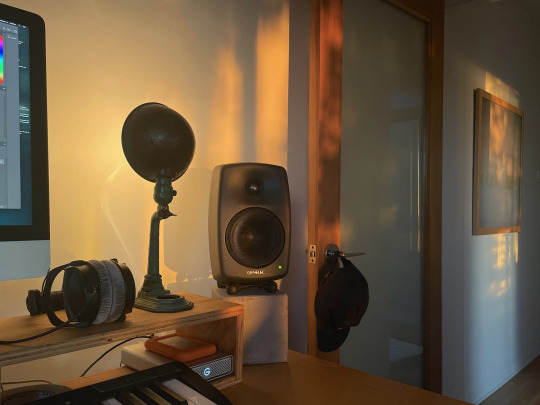
D A V I D R O T H B A U M | Art abode
#home studio#studio#audio production#audio#audio equipment#musician#music studio#music producers#synthesizer#eurorack#recording studio#studio setup#workspace#creativespace#creative space#creativity#reel to reel#ableton#fl studio#pro tools#digitakt#genelec#art#producers#producer#audio producer#music producer#electronic music
63 notes
·
View notes