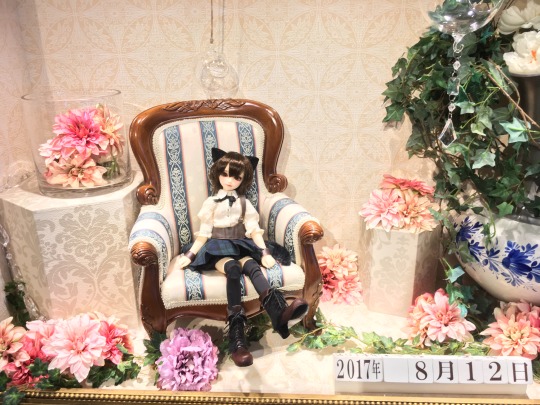
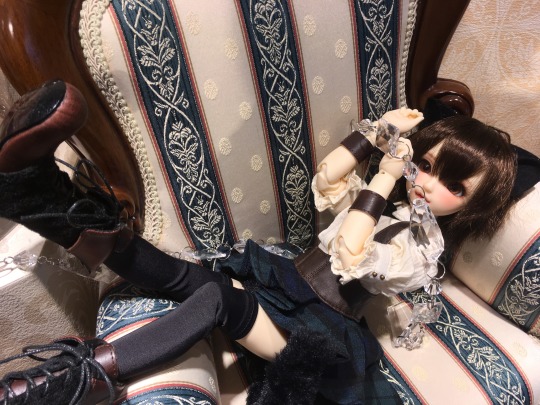
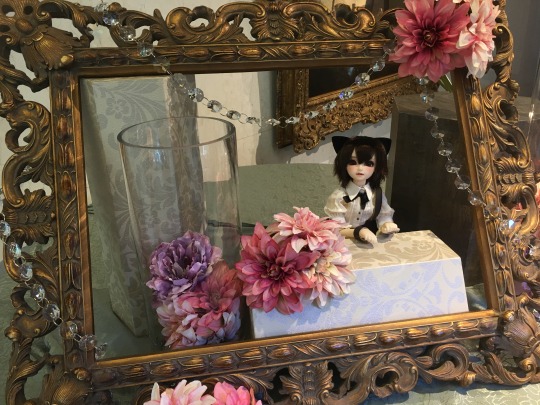
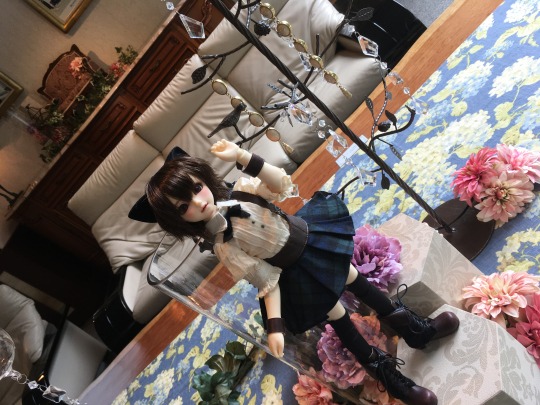
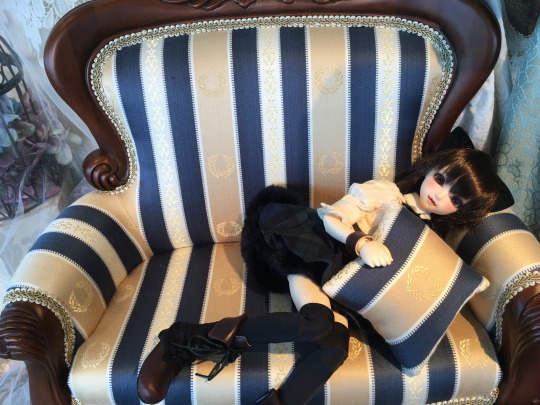
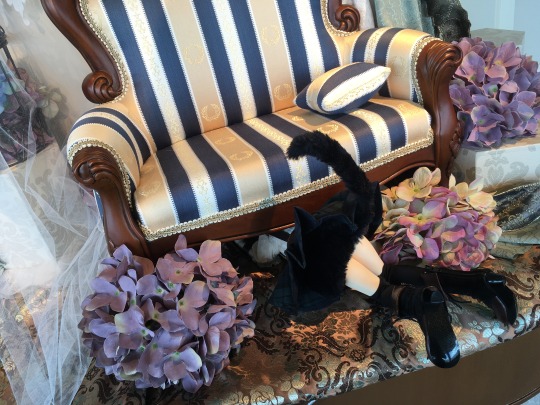
#one day I want to do some cute display photos of my SD outfits like these too!
Explore tagged Tumblr posts
Visit Tumblr Blog
Explore Tumblr blogs with no restrictions, modern design and the best experience.
Last Seen Tumblr Blogs


Fun Fact
US Tumblr user growth rate is estimated to slow down to 4.1%.
Text


Some official VOLKS x BABY, THE STARS SHINE BRIGHT collaboration photos that I especially love~ෆ
#lifestyle#baby the stars shine bright#volks#super dollfie#I've been doing some database work and these photos are just so lovely that I wanted to post them here#one day I want to do some cute display photos of my SD outfits like these too!
55 notes
·
View notes
Text
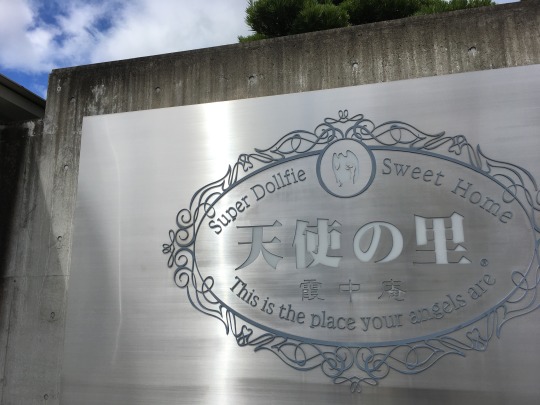
Report: Tenshi no Sato visit
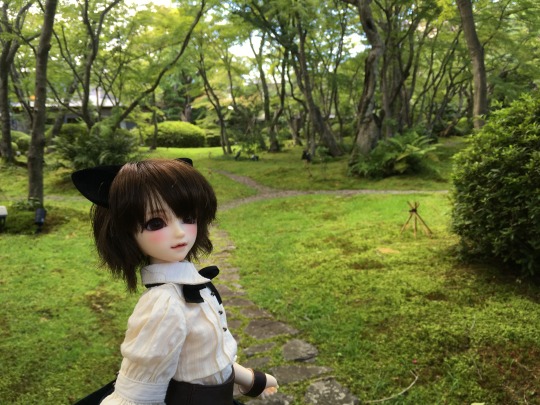
Last Saturday I visited Tenshi no Sato in Arashiyama, Kyoto for the first time. For those who don't know, this is the ‘mecca’ for Super Dollfie – Akihabara Doll Point is more the mecca for Dollfie Dream, although Tenshi no Sato is a great deal more impressive. Tenshi no Sato roughly something like ‘angel’s homeland’, and is partly a store, museum and an overall beautiful facility specifically for Super Dollfie fans. Photos weren’t allowed in all parts of TnS, but I did take as many as I could in the places where they were allowed. This is just a recap of my stay there and what it was like.
Tenshi no Sato is very easy to get to from Saga-Arashiyama station – and there’s actually a sign pointing the way near the station exit.
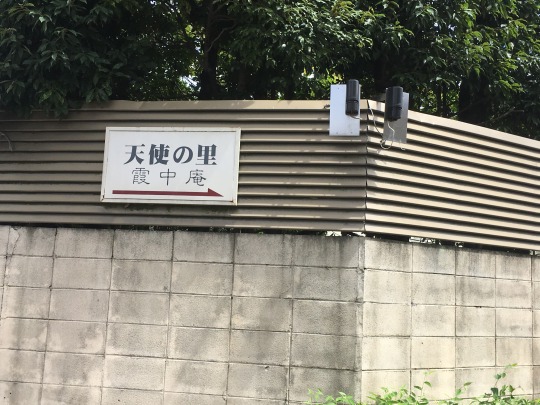
The walk takes you around a massive wall – the area was way bigger than I expected! Eventually we get to the front entrance.
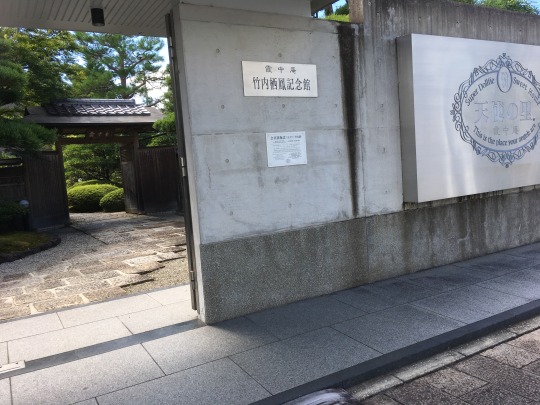
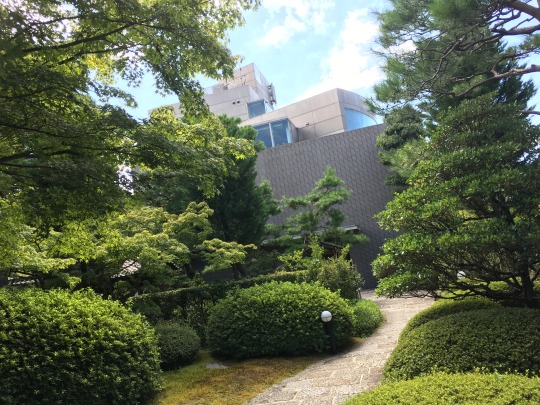
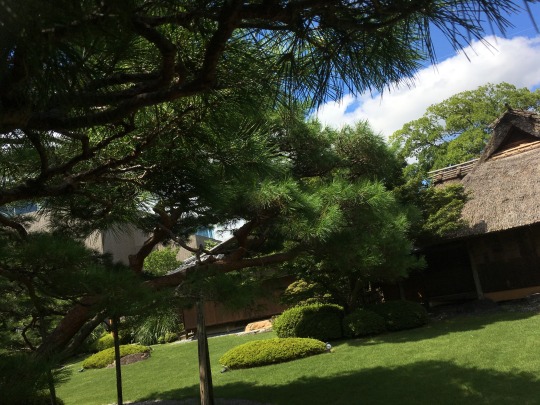
You can see the entrance to the garden. The garden is absolutely huge and surrounds the building.

Visitors are free to walk around in it – however, they have to be Super Dollfie fans. I noticed on the website that it’s actually against the rules to come here if you only want to see the garden and have no interest in the dolls. I am willing to be that this has happened numerous times in the past – I mean the huge walled garden right near the station does kind of stand out and SD isn’t exactly mainstream. (Not to mention that this garden is absolutely beautiful) Whatever happened in the past, there’s now the explicit rule that normies aren’t allowed: if you aren’t here for dolls, then you aren’t here at all bucko.
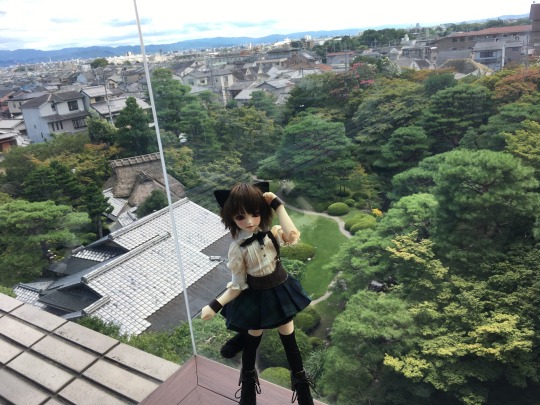
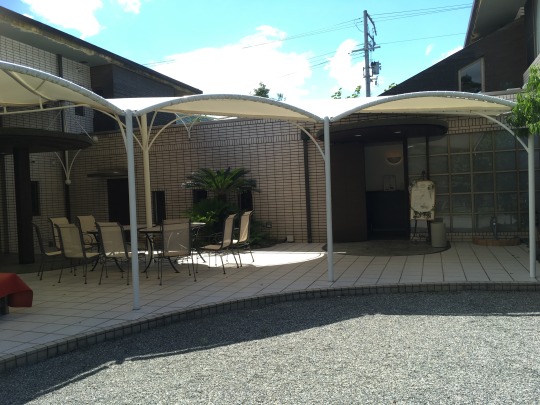
This building you can see is the main building, which is four storeys high plus a basement floor!
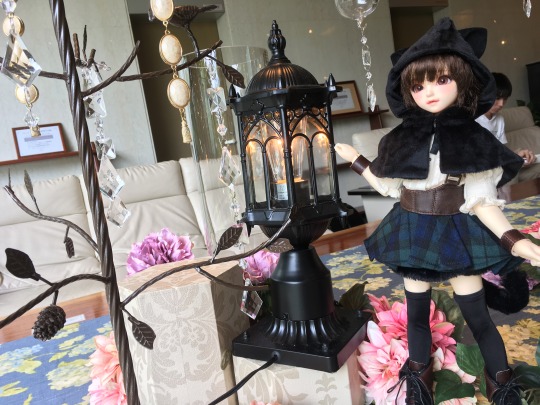
The first floor is a general meeting/photography area that has themed displays throughout the year, and many glass cases with the limited edition tenshi SDs within. There were also numerous props around to take souvenir-type photos, so I got a bunch of Renee, who I bought with me as she’s my first and currently only SD. (Even though Dollfie Dream are also made by Volks, they’re recently made them no longer allowed at Tenshi no Sato – except in the bookable private photo studios. Those are pretty cool, and I did consider booking so I could take pics of Rin there, but they were kinda pricey - the idea is to book the rooms with a bunch of people who all share the cost.)
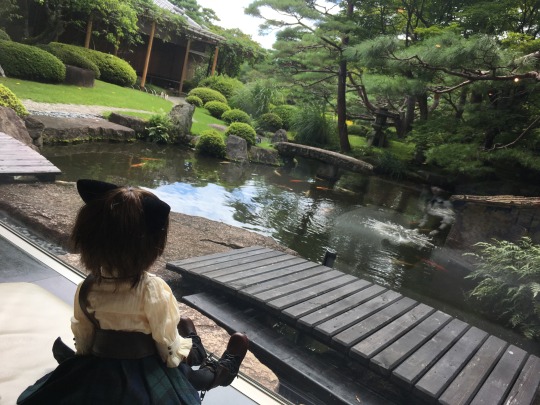
There’s also a huge glass window that gives a nice view of the garden.’
At the far end of the hall is the…alter? I guess you would call it. People who get Full Choice orders here will get to welcome their dolls there in the Omukae (Greeting) Ceremony. Every Volks doll store in Japan (the Tenshi no Sumikas, plus Tenshi no Mado in Harajuku) have a special area for this, but the Sato one is incredibly extra. I was kinda hoping that I’d get to see one of the ceremonies happen, but unfortunately if any happened that day they were after we left. We were there as soon as it opened, so there weren’t that many people around the place (a lot more had shown up when we were leaving though.) I really should have taken a photo of it... I did put a short vid of the room here on instagram where you can see the alter in the back. You can borrow a basket to carry your doll around the facility with you, which is cute.
The basement floor is the store, and its laid out absolutely beautifully. Photos weren’t allowed, but there were 3 parts to the store. One part is the same part that’s at other Volks stores in Japan, Tenshi no Sumika (Angel’s Nest), where they sell all the licensed Volks outfits and accessories, as well as a small spot for non-official outfits sold by dealers. The second part, near the register, featured a bunch of special Kyoto-themed products that could only be bought at Tenshi no Sato, such as tea and snacks and some other merchandise featuring the creepy black cat mascot. The third part is the most exciting, the beautiful room full of coordinate models ready for purchase, some of which (like the yoSDs) can only be bought there. (Tenshi no Sato and Tenshi no Mado in Harajuku are the only Volks stores where they sell these coordinate models). For the second time I managed to resist buying a SDM40 boy. 8’)
I also just wanna mention that the shop staff were incredibly nice, helpful and also pretty adorable themselves. They all were really happy to see Renee and thought she looked adorable sitting in the basket, and when I said SDM40 was my favourite sculpt one of the staff made the SDM40 girl wave at me. Stop making this more difficult ;-; If I hadn’t just gotten Renee I would have almost certainly left that room with one of the 40s. It’s a hall of temptation.
Also on this floor was the huge room dedicated to the Full Choice system, where people can place their orders for customized dolls and consult with the staff about their head sculpts, eyes and what the makeup should look like. After the payment is done, the dolls will take about 2 months to be completed, after which the owners can either have them shipped to their (Japanese) address or come back to the store for the incredibly extra yet somewhat adorable ceremony. Full Choice is available at other Volks stores in Japan, but TnS has a few special options only available there – such as fantasy ear parts, tan skin and genderless bodies. I’m used to the relatively small Full Choice counter in the Fukuoka Volks showroom so seeing such a giant room was really cool. And extremely tempting. I resisted the urge because I just got Renee, but I’m still here for one year so who knows…anyway.
On the third and fourth floors is the Super Dollfie museum, where past models are displayed. Since I only joined this hobby proper about 2 years ago, it was really cool to see the older ones and how different they looked back then. It was also really cool seeing so many of the ones I’d only seen in photos in ‘person’. There was also a space for displaying the current One-off models for sale – dolls with previous limited edition sculpts with new makeup and clothing made especially for them by certain dealers. They’re always incredibly expensive but they’re fun to look at. (They also have these in most Volks stores)
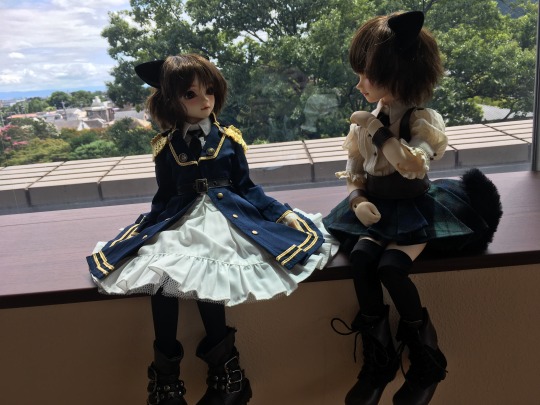
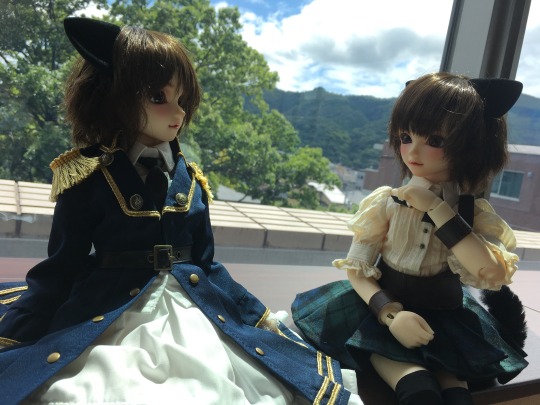
Nearby there were some more chair props so I took a few more pics of Renee.
The top floor was another nice spot to relax, with a few more photo props.
It also had a really cool view of the town and mountains, plus the beautiful garden.
By chance, there was another Renee there as well!
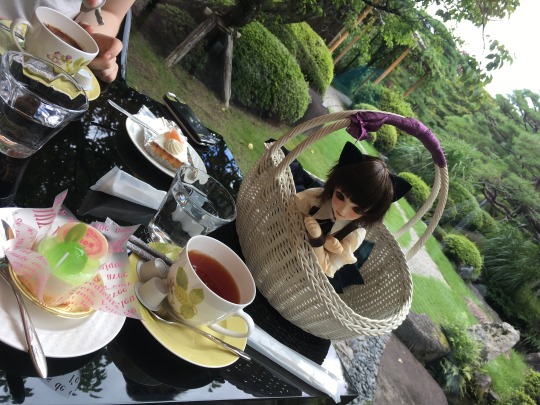
We then went back down to the café. I’ve seen people complain that the café is too expensive, but it doesn’t seem that drastically different to a lot of other Japanese cafes to me. (or Australian cafes, for that matter). The cakes were cute and the tea was nice, so I’m not complaining. It seems like they change up the cakes on offer every now and then cos the selection was different to what I saw in an online report from a year or so ago. I got the green apple mousse cake and some tea.
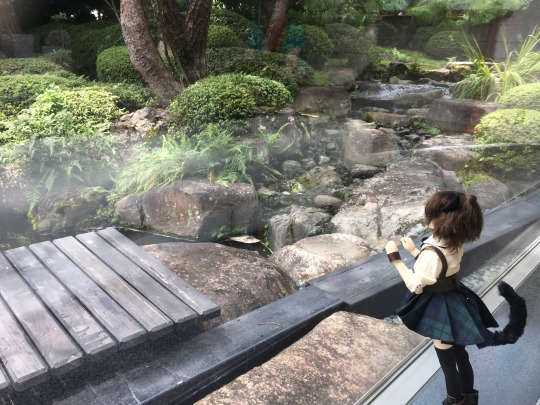
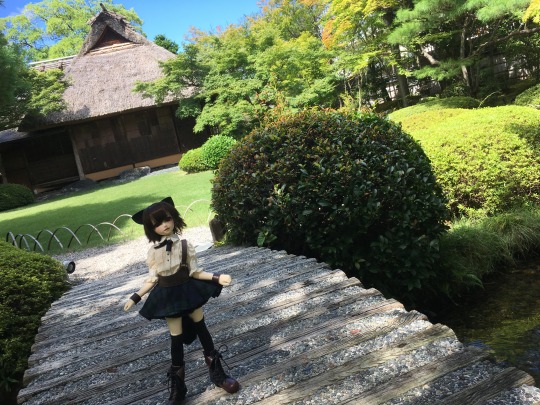
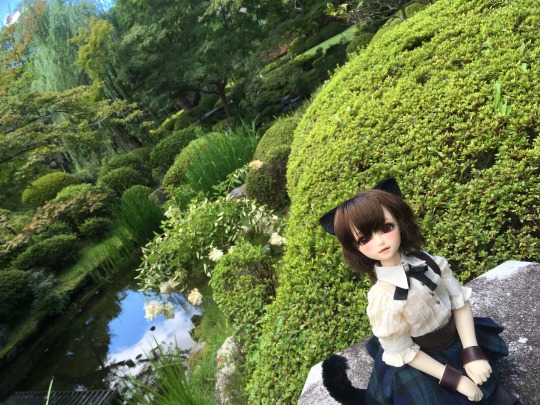
Next we went outside to explore the garden, which was a lot bigger than I expected.
If you follow the path through you eventually get to the Beauty Salon, which is where they can fix up broken, dirty, yellowed etc dolls, redo damaged faceups, etc. I saw a troupe of guys head in there with a huge suitcase.
As for what these more traditional looking buildings are…I’m not sure. They didn’t seem to be open. I –think- they might have special events here sometimes, faceup classes, etc? If anyone knows enlighten me, I was really curious about them.
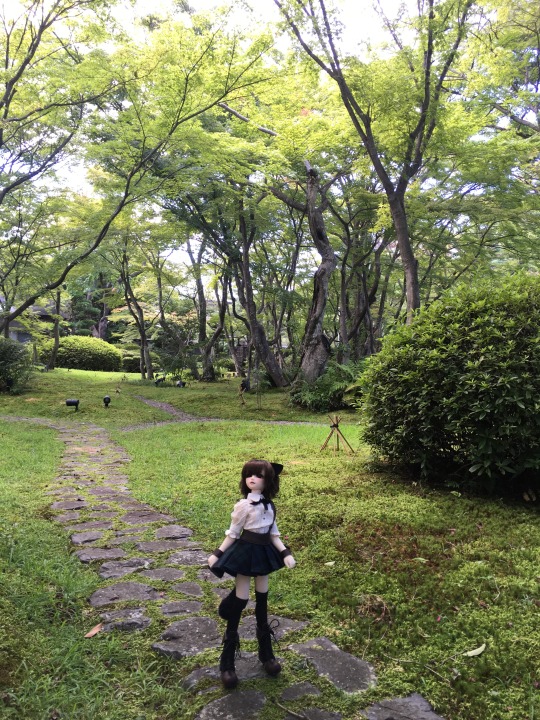
No one else was in the garden, and it made me wonder if you were even allowed to take photos of dolls here. But the gardener saw me taking Renee back out and didn’t complain. He actually did come up to offer to take a picture of me and deadybones though. I guess no one wanted to be outside because it was so damn hot…although there weren’t that many people inside either, and those that were seemed to have Full Choice appointments or were otherwise busy.
Some more pics of the garden:
Anyway, it was a beautiful building in a beautiful area and I was glad I got to visit and do Renee’s first proper photo shoot there. It was nice to have the place so empty as it felt like I had it to myself a lot of the time, but I’d like to go again when more people are around just to see everyone’s dolls.
I’m a VIP member since I currently live in Japan, but it’s still possible for overseas SD fans to visit Tenshi no Sato – you just need to apply for a one-day visitors pass which acts like a temporary VIP card. (The instructions are all on the website in English.) Note that it doesn’t allow you to do Full Choice – you need to live in Japan for that due to the 2 month wait – but you can buy any of the coordinate models.
17 notes
·
View notes
Photo
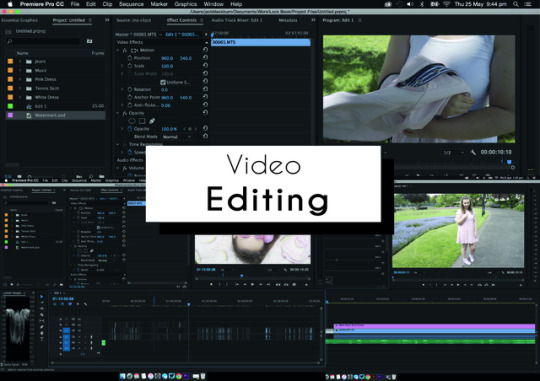
After the shoots hand finished completely I straight away started editing my video. I watched some Youtube videos beforehand to practise, as I’m not very familiar with this skill. To begin, I imported the footage from the SD card, which I had used for filming. I then created a new project in Adobe Premier Pro and dragged all of the clips onto the timeline. I began sorting through the clips trying to find the best pieces of footage and separating them from the not very good parts. When I hand finished this I assembled the footage into a rough timeline and kept the rest of the footage in case I needed any extra clips. I hand two ideas drawn out on a storyboard for the intro of my video, one option was all of the outfits on one clip next to each other and the other was the outfits displaying one after the other. I tried the first idea by creating a white line in Photoshop, saving it as a PNG file and inserting it as a reference. I then cut the chosen clip, which were long shots of the full outfits so they would fit in the border. I also made the second intro, which was just the outfit clips one after the other on the timeline. After I had done this I played it to see what I thought, I also asked my peers what they thought about it. After consideration I think I liked the second intro better, it went along to the beat of the music and as my video is a VHS style it should look sort of home-made and rough. Having the borders makes it look too edited and unnatural. Even though my peers felt like the first intro looked more interesting, they agreed that it doesn’t fit my video style. As I had already chosen my music I didn't need to find any then so I just downloaded the song and inserted it onto the timeline. The music is a very important element to the video, as it has to flow to the beat of the song. So I made fine edits of my video by clipping and placing the footage together so that it went in time to the song. When I had finished this I started colour correcting and grading the footage. As my video has a summer theme to it, I wanted the sky to look bluer as it sometimes wasn’t very on the days of the shoots. So I edited the colour selection so the blue was a higher value. As I had already edited the photos using a filter in Adobe Lightroom, I wanted to base my video off of this so my work flows and links together. I copy and pasted the same filter from Lightroom into the video and I also adjusted the brightness, highlights, saturation and contrast within the software. Throughout this editing process I constantly revised and reviewed my video to make sure it fits my theme and is going the way I planned. I then added the VHS effect. As I had no idea how to do this I followed a tutorial I found online which showed me how to create a VHS look. The tutorial told me to download different elements, which I added to certain clips throughout the video. This was called wave effects and wave warps. I also added noise, sharpened the image and gaussian blur to every clip by copy and pasting to make the video look more realistic. I looked online on a website called Freesound which has copyright free sound effects that anyone can download. I felt like this would add an extra element to the video and I found sounds such as a tennis ball bouncing. I imported the sound effects and dragged them onto the timeline and matched them to the clips. I then watched the whole video through to see how it looked. I realised that I didn’t really like the sound effects as it sounded quite odd, as you can't hear any other noises only the music and the specific sound effects. I again asked my peers how they felt and they said it didn’t sound natural and didn’t really fit. So I got rid of them. I created text elements on Adobe Illustrator such as the play symbol and the date to make it look like a VHS video and also end credits and special thanks. I used a font called ‘VCR’ and ‘Champagne & Limousines’ which I had downloaded from Dafont.com. I saved these as a PNG file and dragged them onto the timeline and added them to the appropriate parts. I used the date the 21st of June on the screen as this is the first day of summer and my video has a summer theme. Finally, I decided to create an intro before the video begins using a storyboard. I wanted this to look like a desktop of a computer and someone is clicking on the video. I feel like this will make the video look even more home-made and personal. It also adds an extra element to the video to make it unique and stand out from other stylised videos available. I created this by using a screen recording programme called QuickTime. I also followed instructions which I found online about how to change desktop icons to different images to continue the style of the video and make the desktop look cute. I then started recording the desktop screen and I moved the mouse towards the VHS tape icon called ‘Pastel Summer Lookbook’. I then added this recorded clip to the timeline at the start of the video. I added sound effects such as a slight computer whirring noise and a click noise to make it seem more realistic. Next I had to make the start of the video look like it had been actually clicked on, I animated the scale and position keyframes to make the video fill the whole screen. I’m really happy with the way my video has turned out. I used my research and inspiration throughout the video so that it looks exactly how I planned it to. I made sure to consider my constraints such as by not making it it explicit or inappropriate for my younger audience. I also made sure my target audience would also enjoy the video. As my target audience age range is quite large I didn't want to make the video too childish or serious and I think I found a good balance of this in my video. Overall, I’m so happy with the outcome.
0 notes