#no results / vanilla extract option - just choose!
Explore tagged Tumblr posts
Visit Tumblr Blog
Explore Tumblr blogs with no restrictions, modern design and the best experience.
Last Seen Tumblr Blogs


Fun Fact
1,644 Tumblr posts in 1 second.
Text


#let's settle this#no results / vanilla extract option - just choose!#jujutsu kaisen#haikyuu!!#sukuna#oikawa tooru#polls#posts
430 notes
·
View notes
Text
Quick curiosity poll about the "femboy". Its hard to clarify all of the options in the character limit for polls, so choose the one that fits best! Eg, if you're some variant of NB or genderqueer, but still largely consider yourself a trans woman, I know those aren't mutually exclusive categories- just pick one.
38 notes
·
View notes
Text
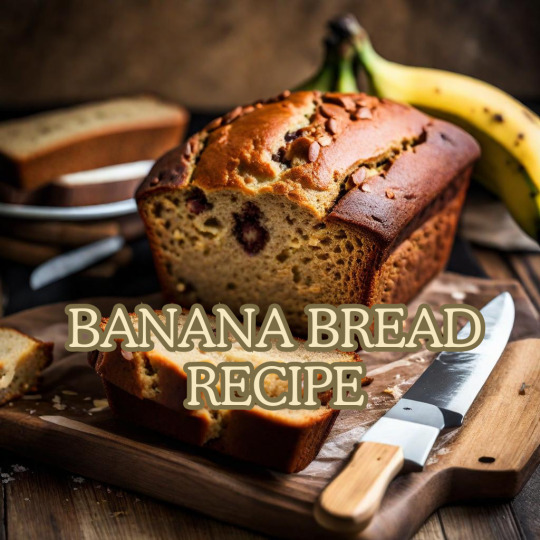
The ultimate mix and match qucik bread recipe:

if something is beautiful it should be shared and cherished, and this banana bread recipe is the most beautiful thing I have ever seen. It’s a formula for making quick breads/muffins from a Food Network Magazine from like 2012 and it works miracles. It’s so flexible and delicious. Also ignore the part where it says to only use 1 fruit or vegetable type, I’ve mixed and matched to get to 1 cup. My all time favorite is banana zucchini bread. And it’s scalable!! I love using it to use up produce thats about to go bad. Its a very flexible and adaptible recipe/ recipe framework. Recipe in text form:
Choose a Flavor: Prepare one cup of fruit or vegetable (1 kind) such as pear(shredded and squezzed dry), apple(shredded and squezzed dry), banana(mashed), carrot(shredded), or zucchini(shredded and squezzed dry) *Note from me: I have used mixtures of multiple of these fruits/veggies adding up to one cup like a mix of zucchini and banana with great results. I have also had sucess using 1/4 cup cut up dried fruit (such as raisins) mixed with 3/4 cup warmed up applesauce*
Pick Your Mix-Ins: Choose up to 1 3/4 cups total of the following ingredients (use no more than 3/4 cup nuts). Toast and chop any nuts; chop any large dried fruit: walnuts, pecans, almonds, hazelnuts, pistachios, dried cherries, dried cranberries, dried currants, raisins, dried figs, dried apricots, pitted dried dates, rolled oats, chocolate chips, shredded coconut. *Note from me: I never add oats, but if you do add a lot of them you may have to decrease the amount of flour you use slightly*
Prepare the Pan: Preheat the oven to 350 degrees F. Lightly butter one 9-by-5-inch loaf pan or three 6-by-3-inch mini pans. *Note from me: you can also use muffin or mini muffin tins*
Make the Batter: Mix 1 1/4 cups flour, 3/4 cup sugar, 1 teaspoon each baking powder and salt, and 1/2 teaspoon each baking soda, cinnamon and nutmeg in a large bowl; add your dry mix-ins (from step 2). In a medium bowl, whisk 2 eggs, 1/2 cup cooled melted butter or vegetable oil, 1/2 cup plain yogurt or sour cream, 1 teaspoon vanilla extract and 1 teaspoon citrus zest (optional). Stir your fruit or vegetables (from step 1) into the egg mixture, then fold into the dry mixture until just combined. *Note from me: you can use any mix of white & brown sugar, and you can use AP flour or a mix of AP and whole wheat flour, also playing around with differnt seasonings and flavorings is fun*
Bake the Loaf: Spread the batter in the prepared pan/pans. Bake until a toothpick inserted into the center comes out clean, about 55 minutes for a standard loaf, 35 to 40 minutes for mini loaves. Cool 30 minutes in the pan(s) on a rack, then turn out onto the rack to cool completely. *Note from me: check at like 15-20 minutes for muffins*
Make a Glaze: Prepare a glaze, pour on the cooled bread and let set, 15 to 20 minutes. Chocolate: Whisk 1 cup confectioners' sugar, 2 tablespoons cocoa powder, 2 tablespoons milk, 1/4 teaspoon vanilla extract and a pinch of salt. Vanilla Bean: Whisk 1 cup confectioners' sugar, 1 tablespoon milk and the seeds from 1 vanilla bean. Brown Butter: Brown 3 tablespoons butter over low heat; cool slightly. Whisk with 1/2 cup confectioners' sugar and 1 tablespoon milk. Use immediately. Citrus: Whisk 1 cup confectioners' sugar, 1 tablespoon each milk and citrus juice, and 1 teaspoon citrus zest. Cream Cheese: Whisk 1 cup confectioners' sugar, 3 tablespoons softened cream cheese, 2 tablespoons milk and 1/4 teaspoon vanilla extract.
Happy baking and enjoy!!!
#banana bread#baking recipes#zucchini bread#food network#food network magazine#apple bread#applesauce bread#carrot bread#recipes#cooking#family recipe#recipe sharing#magazine recipe#baking#banana#apple#zucchini#carrots#applesauce
9 notes
·
View notes
Text
Breakfast The Famous 5-Minute That Melts in Your Mouth
Why Everyone Loves This 5-Minute Breakfast Recipe
Simple Ingredients for a Satisfying Start to the Day
One of the main attractions of this recipe is its simplicity. You’ll need:
Slices of bread – any type will do, but softer breads like brioche or white bread give the best results.
Butter – adds flavor and crispiness.
A pinch of sugar – enhances the sweetness subtly.
1/2 cup milk and 1 teaspoon sugar – for soaking, adding richness, and tenderness.
Essential Ingredients You’ll Need
Each ingredient in this recipe plays an essential role in achieving the perfect balance of flavor and texture. Let’s look at why each component is so important:
Bread: The foundation of the recipe, bread absorbs the milk and sugar, creating a delicious, custard-like texture when fried.
Butter: Helps create a golden, crisp layer on the outside while keeping the inside tender.
Milk: Adds moisture and softness to the bread, making it melt-in-your-mouth delicious.
Sugar: Adds just enough sweetness to complement the buttery taste without overwhelming it.
Bread Options: Choosing the Best Bread for the Recipe
Choosing the right type of bread can slightly alter the texture and taste of the final product. Here are a few options:
White bread: Soft and absorbent, it gives a fluffy, tender result.
Whole wheat bread: Adds a bit more fiber and a nutty flavor, though it may not be as soft.
Brioche or challah: For a richer and slightly sweeter result, try these options.
The Perfect Balance of Milk and Sugar
The milk mixture helps soften the bread and infuses it with flavor. The 1/2 cup milk with 1 teaspoon of sugar provides just the right amount of sweetness, especially when fried with butter. If you prefer a slightly sweeter version, feel free to add a bit more sugar or even a dash of vanilla extract.
Butter’s Role in Adding Flavor and Crispness
Step-by-Step Guide to Making the 5-Minute Breakfast
Now let’s dive into how you can make this breakfast quickly and perfectly every time!
Step 1: Preparing the Bread
Cut the bread slices as needed and arrange them on a plate for easy access. Soft bread is usually best because it soaks up the milk mixture better and results in a tender texture.
Step 2: Mixing Milk and Sugar
In a bowl, combine 1/2 cup of milk and 1 teaspoon of sugar, stirring until the sugar dissolves. Some enjoy adding a dash of vanilla or cinnamon for extra flavor.
Step 3: Frying to Perfection
Preheat a pan over medium heat and add a tablespoon of butter.
Dip each slice of bread into the milk mixture briefly on each side. Let any excess drip off.
Place the bread in the pan and fry until golden, allowing the milk to absorb fully as it cooks.
Tips for Perfecting This Breakfast Recipe
Achieving the perfect golden brown exterior while keeping the inside tender requires just a few simple tips:
Don’t over-soak the bread: A quick dip is usually enough.
Use medium heat: High heat might burn the butter and make the bread cook unevenly.
Adjust for sweetness: Feel free to add a touch more sugar or even cinnamon for a special twist.
Why This Recipe is Perfect for Busy Mornings
With only five minutes needed to prepare, this recipe is perfect for those mornings when time is limited but breakfast is essential. This quick breakfast option can be enjoyed by kids, adults, and everyone in between, making it a family-friendly choice.
Nutrition Insights: The Health Benefits of Ingredients
While this recipe does contain a small amount of sugar, it’s balanced by the benefits of milk and bread. Milk provides calcium, protein, and essential vitamins, while whole-wheat bread adds fiber for digestion and long-lasting energy.
Variations and Customizations for Personal Taste
This recipe is incredibly versatile, allowing you to customize it to suit your taste.
Adding Fruits or Spices
For extra flavor and nutrition, try adding fresh fruit like banana slices, strawberries, or blueberries. Spices like cinnamon or nutmeg can add a warm, aromatic touch.
Savory Version of This Breakfast Recipe
If you prefer a savory breakfast, consider adding a pinch of salt instead of sugar, and sprinkle with black pepper or chives for a unique twist.
How to Serve This Delicious Breakfast
Serve with fresh fruit, a dollop of Greek yogurt, or a sprinkle of powdered sugar. Pairing it with a smoothie or coffee completes this breakfast, creating a balanced and satisfying meal.
Frequently Asked Questions (FAQs)
1. Can I use almond milk instead of regular milk? Yes, almond milk works well and adds a nutty flavor to the recipe.
2. What’s the best way to avoid soggy bread? Avoid over-soaking the bread in the milk mixture; a quick dip is all that’s needed.
3. Can I store leftovers? It’s best enjoyed fresh, but you can refrigerate leftovers in an airtight container for up to one day.
4. Can I add more sugar to the milk mixture? Yes, you can adjust the sweetness to your liking.
5. What’s a good topping for this breakfast? Fresh fruit, honey, or a sprinkle of cinnamon make great toppings.
6. Can this recipe be made vegan? Yes, replace butter with a dairy-free alternative and milk with almond or oat milk.
Conclusion: A Delicious, Quick Breakfast to Start Your Day Right
This 5-minute breakfast is more than just a recipe; it’s a warm and comforting start to the day that anyone can make. Simple, customizable, and irresistibly delicious, it’s a recipe that’s sure to become a staple.
1 note
·
View note
Text
Vanilla: A Versatile Ingredient and Its Substitutes

Vanilla is one of the most popular and versatile flavorings in the world, known for its sweet, floral aroma and the warmth it adds to desserts, drinks, and even savory dishes. While the rich flavor of a vanilla bean is highly sought after in many recipes, vanilla products come in various forms, including extracts, pastes, and powders. Sometimes, you might not have the exact type of vanilla on hand and need to make a substitution. Let's explore the various ways you can substitute different forms of vanilla and how to get the best results in your cooking.
Understanding Vanilla Beans and Their Substitutes
The most luxurious form of vanilla comes from the vanilla bean, which contains thousands of tiny seeds and has a strong, pure flavor. However, vanilla beans can be expensive and difficult to find. If you're looking for a substitute for a vanilla bean, there are several options depending on what you have in your pantry.
One of the simplest options is to substitute vanilla extract for a vanilla bean. Vanilla extract is made by soaking vanilla beans in alcohol, which extracts the flavor compounds. It’s widely available and much more affordable than whole vanilla beans. As a general rule, one vanilla bean can be replaced with 1 to 2 teaspoons of vanilla extract in most recipes. This makes substituting vanilla bean for extract an easy and cost-effective choice when you're in a pinch.
Another common alternative is vanilla bean paste, which has the consistency of a thick syrup and contains both vanilla seeds and extract. When you want the look of vanilla seeds in your dish but don't have a bean on hand, you can substitute vanilla paste for vanilla extract. It’s also a good vanilla bean replacement for dishes where you want a more intense vanilla flavor. If you're wondering how much vanilla bean paste to use instead of extract, the ratio is usually 1:1, meaning you can use 1 teaspoon of vanilla paste to replace 1 teaspoon of vanilla extract.
Substituting Vanilla Paste, Powder, and Extract
Another question that often arises is how to handle substitutions between vanilla extract, paste, and powder. Vanilla bean powder is made from ground vanilla beans and provides a concentrated flavor. If you need a vanilla bean powder substitute, vanilla extract or paste can work well. For every teaspoon of vanilla bean powder called for in a recipe, you can use 1 to 2 teaspoons of vanilla extract or the same amount of vanilla paste. This is a simple way to adapt a recipe when you're out of powder but still want that rich vanilla flavor.
When it comes to substituting vanilla bean paste for vanilla extract, it’s important to consider the consistency of the paste, as it’s thicker than extract. In most cases, a 1:1 substitution works, but keep in mind that paste can add more depth and richness to your recipes. If you're making a delicate dessert, like custard or crème brûlée, and you want to see those lovely black vanilla specks, paste is often preferred over extract.
Making the Right Choice for Your Recipe
Choosing the right vanilla bean substitute depends on what you're making and the flavor intensity you're looking for. If you're baking a simple cake or cookie, using vanilla extract instead of a bean will likely work just fine. However, for recipes where vanilla is the star, like ice cream or frosting, you might want to use vanilla bean paste or powder to mimic the flavor and appearance of the real bean.
In more robust dishes, like baked goods or custards, it’s often fine to substitute vanilla bean paste for vanilla extract without making major adjustments. The paste will offer a slightly more concentrated flavor and the visual appeal of vanilla seeds, making your dish both taste and look more luxurious.
For those looking to keep things simple, vanilla extract is the most versatile and widely used vanilla product, and you can easily substitute extract for vanilla bean or paste in most recipes without compromising too much on flavor. However, if you're making something where texture and appearance are important, like a rich vanilla pudding or a light whipped cream, using paste or even powder might give you a more authentic vanilla experience.
Conclusion
Whether you’re using a substitute for a vanilla bean or trying to decide between vanilla extract, paste, or powder, understanding how to swap these ingredients is key to maintaining the delicious vanilla flavor that enhances so many dishes. Substituting vanilla bean for extract, or even using paste instead of extract, is an easy way to adapt recipes when you don’t have the exact ingredient on hand. With a little knowledge, you can confidently experiment with different vanilla products and still achieve great-tasting results.
To increase your knowledge about vanilla, check this article from WebMD about the health benefits of vanilla.
1 note
·
View note
Video
youtube
Cách làm bánh từ khoai lang - Làm vườn &; trồng rau | O...
Sweet potatoes are a versatile vegetable that can be used in a variety of recipes, from savory dishes to sweet treats. One of the most delightful ways to enjoy sweet potatoes is by turning them into delicious cakes. This guide will walk you through the process of making cakes from your homegrown sweet potatoes, combining your love for gardening with your passion for baking.
Ingredients:
2 medium sweet potatoes (about 2 cups mashed)
1 cup granulated sugar
1/2 cup brown sugar
1/2 cup vegetable oil or melted coconut oil
2 large eggs
1 teaspoon vanilla extract
1 1/2 cups all-purpose flour
1 1/2 teaspoons baking powder
1/2 teaspoon baking soda
1/2 teaspoon salt
1 teaspoon ground cinnamon
1/2 teaspoon ground nutmeg
1/2 teaspoon ground ginger
Optional: 1/2 cup chopped nuts or raisins
Instructions:1. Prepare the Sweet Potatoes:
Harvesting: If you’re growing your own sweet potatoes, harvest them when the skins are firm and the leaves begin to die back. Cure them in a warm, dry place for about a week to improve flavor and texture.
Cooking: Peel the sweet potatoes and cut them into chunks. Boil in a pot of water until tender (about 15-20 minutes). Drain and mash them until smooth. You should have about 2 cups of mashed sweet potatoes. Let cool.
2. Preheat the Oven:
Preheat your oven to 350°F (175°C). Grease and flour two 8-inch round cake pans or line them with parchment paper.
3. Mix Wet Ingredients:
In a large bowl, whisk together the granulated sugar, brown sugar, and oil until well combined. Add the eggs one at a time, beating well after each addition. Stir in the vanilla extract and the mashed sweet potatoes until smooth.
4. Combine Dry Ingredients:
In a separate bowl, whisk together the flour, baking powder, baking soda, salt, cinnamon, nutmeg, and ginger.
5. Combine and Mix:
Gradually add the dry ingredients to the wet ingredients, mixing just until combined. Avoid overmixing. If desired, fold in the chopped nuts or raisins.
6. Bake the Cakes:
Divide the batter evenly between the prepared cake pans. Smooth the tops with a spatula.
Bake in the preheated oven for 25-30 minutes, or until a toothpick inserted into the center of the cakes comes out clean.
7. Cool and Frost:
Allow the cakes to cool in the pans for about 10 minutes, then transfer them to a wire rack to cool completely.
Frost with your favorite cream cheese frosting or a simple glaze if desired.
Tips:
Sweet Potato Varieties: Choose varieties that are sweet and starchy, such as Beauregard or Jewel, for the best results.
Storage: Store leftover cakes in an airtight container at room temperature for up to 3 days or refrigerate for up to a week.
Conclusion:
Making cakes from sweet potatoes is a wonderful way to incorporate your homegrown produce into your baking. The natural sweetness and moist texture of sweet potatoes create a delicious and unique cake that is sure to impress. Enjoy your homemade sweet potato cake with a cup of tea or coffee, and share the joy of your garden’s bounty with friends and family!
0 notes
Text
The Ultimate Guide to Mastering Chia Pudding.

Is Chia Pudding Actually Good for You?
Despite the word pudding being involved, chia pudding is actually good for you. Especially if you keep an eye on the sweetness levels. Chia seeds are packed with omega-3 fatty acids, fibre, protein, and essential minerals such as calcium, magnesium, and zinc. When you soak them in liquid, they expand and form a gel-like substance, making the pudding not just tasty but also incredibly satisfying. This makes chia pudding a fantastic option for starting your day with a sustained release of energy or for a snack that keeps those hunger pangs at bay without weighing you down. The high fibre content is great for digestive health, while the omega-3s support heart health and reduce inflammation.
How to Make Chia Pudding
The basic chia pudding recipe Making chia pudding is surprisingly simple and requires just a few minutes of prep time. Start with a basic ratio of 1 part chia seeds to 4 parts liquid. Almond milk, coconut milk, or any plant-based milk of your choice works well, giving the pudding a creamy texture and a subtle flavour. You can of course use good old dairy milk too. Just mix the chia seeds with the liquid in a bowl or jar, add a touch of sweetener like honey or maple syrup if desired, and stir. Then, let the mixture sit for a few hours or overnight in the refrigerator. The seeds will absorb the liquid, swell up, and transform into a deliciously thick and creamy pudding. This basic chia pudding recipe serves as the perfect canvas for all sorts of tasty and nutritious additions. Chocolate chia pudding We may think of the basic recipe above as classic chia pudding, but it was possibly chocolate chia pudding that heralded the beginning of the love affair. Feel free to adjust the cocoa level. If you like really dark chocolate you could probably get away without adding any sweetener at all. Ingredients: 1/4 cup chia seeds 1 cup almond milk (or any milk of your choice) 2 tablespoons cocoa powder, unsweetened 1-2 tablespoons honey or maple syrup, to taste 1/2 teaspoon vanilla extract Instructions: Mix Ingredients: In a mixing bowl or a mason jar, combine all the ingredients. Mix well to ensure the cocoa powder is fully integrated and there are no lumps. Refrigerate: Cover the mixture and refrigerate for at least 4 hours, or ideally overnight. This waiting period allows the chia seeds to absorb the liquid, swell up, and turn the mixture into a pudding-like consistency. Stir and Serve: Once the pudding has set, give it a good stir. If the pudding seems too thick, you can add a little more milk to reach your desired consistency. Garnish and Enjoy: Enjoy it as it is, for a chocolatey treat, or add fresh fruit, nuts, or other toppings of your choice.
Chia Pudding Variations
There are two ways to get the most from chia pudding. You can add your extras at the beginning, where they will soften and become part of the pudding itself. Or you can make up the basic recipe, and layer on your toppings later. The results are dramatically different. Bursting with berries Add your favourite mixed berries, such as strawberries, blueberries, and raspberries, for a burst of tangy sweetness. Ray of sunshine Choose coconut milk instead of almond milk and add diced mango, pineapple, and a sprinkle of shredded coconut. Peanut butter banana Mix in a spoonful of peanut butter and top with sliced bananas. Matcha green tea Add a teaspoon of matcha powder to the basic mixture. Lemon raspberry refresher For a refreshing twist, mix in some lemon zest and fresh raspberries. Caramel apples Swirl in some homemade or store-bought caramel sauce and top with diced apples. Adding a superfood boost The great thing about chia pudding is that you can dress it up for a decadent dessert, or keep it super healthy. Add fruit powders Fruit powders work really well stirred into the basic recipe right at the beginning. Add extra seeds Sprinkle with super seeds for an extra layer of crunch Add cacao nibs Cacao nibs make everything better, with a raw chocolate hit and crunchy texture. Not to mention the antioxidant boost. Decadent dessert ideas Here are a few ideas for emphasis on the pudding part of chia pudding. This is grown-up dessert time. Espresso and dark chocolate Whisk in a shot of espresso and fold in dark chocolate chips. Cardamom and caramel pear Infuse the pudding with cardamom and top with caramelised pears. Rose and pistachio Add rose water and sprinkle with crushed pistachios. Or go all the way with candied rose petals. Saffron, almond, and honey Infuse with a few threads of saffron. Top with roughly chopped almonds and a drizzle of honey. Crystallised ginger: Stir in chopped crystallized ginger. How long will chia pudding last in the fridge? Kept in an airtight container, your chia pudding will stay fresh in the fridge for up to 5 days. Just be aware that any fresh fruit additions, whilst they won't go off exactly, may become soggy and unpalatable. Some fruits will fare better than others. Bananas won't keep well for more than a day. Top tips for the perfect chia pudding Sometimes, despite it all, your chia pudding might not turn out exactly how you imagined. But don't sweat it! Here are a few common hiccups and how to fix them: Too Runny? If your chia pudding hasn’t thickened after a few hours in the fridge, it might need a few more chia seeds. Start by adding a teaspoon more, stir well, and give it a little more time. Too Thick? On the flip side, if it’s more like chia concrete than pudding, you just need to whisk in a little extra milk until you reach your desired consistency. Lumpy Texture? No one wants a lumpy pudding. Ensure to give it a good mix after adding your chia seeds to the milk. A whisk works wonders for breaking up clumps. Halfway through the setting time, give it another stir. Not Sweet Enough? If it's not hitting the sweet spot, feel free to stir in a little honey, maple syrup, or your favourite sweetener. Flavour Lacking? Sometimes, simple is perfect, but other times, you crave that extra oomph. Feel free to experiment with extracts, spices, cocoa powder, or even a dollop of jam or peanut butter to elevate your pudding game.
When to Eat Chia Pudding
Chia pudding is incredibly versatile, making it a fantastic choice for any time of day! Enjoy it as a refreshing breakfast to kickstart your morning with a nutrient-packed meal that’ll keep you full and energized until lunch. It’s also an excellent mid-day snack to help you power through the afternoon slump. Or, if you’re looking for a light yet satisfying dessert, chia pudding can be your go-to treat. We hope that we have tempted you to try experimenting with chia pudding, whether you want new ways for a healthy breakfast or some quick and easy decadent desserts. Take a look at our full range of store cupboard superfoods that are designed to make getting your daily nutrient boost simple and delicious without the fuss or the waste. Not entirely sure about superfoods? Read our in-depth guide. This article was reproduced on this site with permission from operafoods.com.au the site for “Healthy Breakfast Supplies”. See original article:- The Ultimate Guide to Mastering Chia Pudding. Read the full article
0 notes
Text
Exploring the World of Flavored Coffee

In the vast universe of coffee, the niche of flavored coffee holds a unique place, captivating the palates of both traditionalists and adventurers alike. For those who relish their coffee with a twist, HeBrews Coffee presents a compelling assortment that promises to elevate your daily coffee ritual. In this detailed exploration, we dive into why HeBrews Coffee's flavored coffee offerings are not just beverages but an experience worth savoring.
What Makes Flavored Coffee Enticing?
Flavored coffee often gets a mixed reception among purists, but there's no denying its popularity and appeal. The primary allure of flavored coffee lies in its variety and the ability to marry classic coffee tastes with imaginative and comforting flavors. From the sweet whispers of vanilla to the boldness of hazelnut, flavored coffees cater to an array of tastes and preferences.
Why Choose HeBrews Coffee?
At HeBrews Coffee, the journey of flavored coffee begins with the selection of premium beans. The coffee beans are medium-roasted to perfection, providing a balanced canvas that complements the natural and artificial flavors infused into them. The result? A cup that's robust yet smooth, with flavor notes that are vibrant yet not overpowering.
Craftsmanship and Quality
HeBrews Coffee prides itself on its artisanal approach. Each batch of flavored coffee is crafted with meticulous care, ensuring that the flavoring enhances rather than masks the natural coffee taste. This delicate balance is what sets HeBrews apart in the world of flavored coffees.
Sustainability and Ethical Sourcing
Understanding the importance of sustainability, HeBrews Coffee sources its beans from farms that practice environmentally friendly farming methods. This commitment not only supports the planet but also ensures that the coffee you enjoy is of the highest quality.
A Tour of HeBrews Coffee's Flavored Selections
Let’s take a closer look at some of the standout flavors from HeBrews Coffee, each designed to offer a unique tasting experience.
Vanilla French Silk
A classic flavor that never goes out of style, the Vanilla French Silk offers a creamy, rich texture akin to the luxurious fabric it's named after. Perfect for those who enjoy a gentle, aromatic finish to their coffee.
Caramel Crunch
For those with a sweet tooth, the Caramel Crunch is a delight. It blends the buttery richness of caramel with a slight hint of nuttiness, providing a satisfyingly sweet yet balanced cup.
Hazelnut Heaven
Hazelnut Heaven is a testament to HeBrews Coffee's flavor mastery. This option infuses the earthy, full-bodied flavor of hazelnuts into the beans, creating a warm, comforting brew that's perfect for chilly mornings.
Chocolate Raspberry Dream
Combining the indulgence of chocolate with the tartness of raspberry, this flavor is both bold and refreshing. It’s an ideal choice for those looking to add a fruity yet rich dimension to their coffee.
Brewing the Perfect Cup of Flavored Coffee
To fully appreciate the depth of flavors in HeBrews Coffee, proper brewing is key. Whether you prefer a drip coffee maker, French press, or a pour-over, ensure your brewing method allows the flavors to unfold beautifully. Here’s a quick guide to get the best out of your HeBrews Coffee:
Water Quality: Use fresh, filtered water to avoid any impurities that might interfere with the coffee’s flavor.
Grind Size: Match the grind size to your brewing method. Typically, a medium grind works best for most methods, including automatic drip and pour-overs.
Water Temperature: Aim for water that’s about 195°F to 205°F to ensure optimal extraction.
Brew Time: Adjust the brew time according to the method to prevent over or under-extraction, which can significantly affect taste.
Pairing Flavored Coffee with Food
Flavored coffee is versatile when it comes to pairings. For instance, the Vanilla French Silk pairs wonderfully with pastries like croissants or cinnamon rolls, while the Chocolate Raspberry Dream can be a delightful companion to a chocolate dessert or a raspberry tart.
Conclusion
Flavored coffee from HeBrews Coffee offers more than just a caffeine kick; it's a gateway to exploring new taste horizons in your coffee cup. With each sip, HeBrews invites you to experience flavors that comfort, excite, and satisfy. Whether you’re a seasoned coffee aficionado or new to the world of flavored coffee, HeBrews Coffee ensures that each cup is a memorable part of your daily routine.
So why wait? Dive into the flavorful world of HeBrews Coffee and discover your new favorite blend today. Whether at home or in the office, let HeBrews transform your coffee moments into an extraordinary experience. Visit HeBrews Coffee to explore the full range and find your perfect match.
0 notes
Text
Banana Bread Recipe for High Altitude
Introduction to High Altitude Baking
Hey there, fellow baker! If you're soaring high in the mountains and craving some delicious banana bread, I've got just the recipe for you. Living at a high altitude means adjustments in your baking game, but don't worry, I've got you covered.
Baking at high altitudes presents unique challenges due to changes in air pressure and humidity, affecting the outcome of baked goods. Among the recipes that require adjustments, banana bread stands out for its popularity and adaptability.
Understanding Banana Bread
Importance of Banana Bread
Banana bread holds a special place in many households as a comforting treat that repurposes overripe bananas into a delicious snack or dessert.
Challenges of High Altitude Baking
At higher elevations, reduced air pressure and moisture levels can lead to unpredictable results in baking, including overly dense or dry banana bread.
Ingredients for High-Altitude Banana Bread
Flour and Leavening Agents
Choosing the right flour and adjusting leavening agents are crucial for achieving the desired texture and rise in high-altitude baking.
Bananas and Moisture Content
Ripe bananas not only provide sweetness but also contribute to the moisture content of the bread, which is vital for preventing dryness at altitude.
Sugar and Sweeteners
Balancing sugar and other sweeteners ensures the perfect level of sweetness while enhancing the overall flavor profile.
Fats and Flavor Enhancers
Incorporating fats like butter or oil adds richness to the bread, while flavor enhancers such as vanilla extract or spices elevate its taste.
Adapting the Recipe for High Altitude
Adjusting Flour Ratios
Reducing the amount of flour helps counteract the dryness typically experienced at higher altitudes, resulting in a moister loaf.
Altering Leavening Agents
Increasing the amount of baking soda helps compensate for the reduced effectiveness of leavening agents in thin air, promoting proper rise and texture.
Managing Moisture Content
Adding an extra banana or a splash of buttermilk helps maintain the necessary moisture level, preventing the bread from becoming too dry during baking.
Ingredient
Sure, here is the ingredient table with quantity, quality, and the making process step by step for the high altitude banana bread recipe:
Ingredient
All-purpose flour
Baking soda
Salt
Ripe bananas
Unsalted butter
Granulated sugar
Large eggs
Vanilla extract
Buttermilk
Chopped nuts (optional)
Chocolate chips
Ground cinnamon
Steps to Make Banana Bread Recipe for High Altitude:
Step1. Preparation:
First, warm up the oven to 350°F (175°C).
Then, coat a 9x5 inch loaf pan with butter or cooking spray.
Step2. Mix Dry Ingredients:
In a big bowl, mix the all-purpose flour, baking soda, and salt until they're all combined well.
Step3. Prepare Bananas:
Peel the ripe bananas and place them in a separate bowl.
Mash the bananas using a fork until smooth and no large chunks remain.
Step4. Cream Butter and Sugar:
In another mixing bowl, cream together the softened unsalted butter and granulated sugar until light and fluffy.
Step5. Incorporate Wet Ingredients:
Could you put the eggs, one at a time, into the butter-sugar mix, and make sure to beat well after adding each one?
Stir in the mashed bananas and vanilla extract until evenly combined.
Step6. Combine Wet and Dry Ingredients: Gradually add the dry ingredients to the wet mixture, alternating with the buttermilk, beginning and...Continue. Click here
1 note
·
View note
Text
How can I achieve the right consistency for my ganache?
Achieving the right consistency for your ganache recipe is important, as it can vary depending on how you plan to use it. Ganache is a versatile mixture of chocolate and cream that can be used for various purposes, such as filling for truffles, glazing cakes, or as a frosting. Here's how you can achieve the desired consistency for your ganache:
Choose the right chocolate: The type of chocolate you use will affect the consistency of your ganache. Dark chocolate, milk chocolate, and white chocolate will yield different results. Dark chocolate tends to create a thicker ganache, while white chocolate creates a thinner one.
Heat the cream: In a saucepan, heat heavy cream over medium heat until it's hot but not boiling. You should see small bubbles around the edges of the cream. For dark chocolate, you can heat it a bit more to make a thicker ganache.
Chop the chocolate: Chop the chocolate into small, uniform pieces. This will help it melt evenly when you pour the hot cream over it.
Combine the chocolate and cream: Pour the hot cream over the chopped chocolate and let it sit for a minute or two to soften the chocolate. Stir gently, starting from the center and working outward, until the chocolate is completely melted and the mixture is smooth.
Adjust the consistency:
For a thicker ganache: If you want a thicker ganache for truffles or a thick cake glaze, use more chocolate relative to the amount of cream. You can also let the ganache cool at room temperature for a while to thicken naturally.
For a thinner ganache: If you want a thinner ganache for a cake drip or a smoother glaze, use less chocolate relative to the cream. You can add a bit more warm cream and stir until you achieve the desired consistency.
Flavorings (optional): You can add flavorings like vanilla extract, liqueurs, or other extracts to enhance the flavor of your ganache. Just make sure to add them while the ganache is still warm and stir well.
Allow it to set: Let the ganache sit at room temperature for a while or refrigerate it, depending on your desired consistency. Ganache will continue to thicken as it cools. Be patient and test the consistency as it cools to ensure it reaches the desired thickness.
Remember that ganache can always be adjusted by adding more cream to thin it or more chocolate to thicken it if you don't get the right consistency initially. The key is to be patient and adjust as needed to achieve the perfect texture for your specific application
0 notes
Text
Suger and Smile: The Ultimate Vanilla Honey Body Lotion and Pimple Removal Face Gel
In our pursuit of radiant, blemish-free skin, we often find ourselves overwhelmed by the sheer variety of skincare products available on the market. Two products that have been gaining significant attention in recent times are Honey Body Lotions and Pimple Removal Face Gels. Both promise to address distinct skin concerns and offer solutions that enhance your skin's health and appearance. In this comprehensive guide, Suger and Smile we delve into the world of skincare, focusing on the incredible benefits of Vanilla Honey Body Lotion and Pimple Removal Face Gel.
The Magic of Vanilla Honey Body Lotion
Vanilla Honey Body Lotion is not just another skincare product; it's a luxurious blend of natural ingredients that can transform your skincare routine. With its heavenly scent and nourishing properties, this lotion stands out in the crowded market. Here's why it deserves a spot in your daily regimen:
Deep Moisturization: Vanilla Honey Body Lotion is formulated with pure honey and vanilla extracts. These ingredients work together to provide intense hydration to your skin, keeping it soft and supple throughout the day. Say goodbye to dry, flaky skin!
Healing Power of Honey: Honey has been used for centuries for its healing properties. It soothes irritated skin, reduces redness, and promotes faster healing of wounds and blemishes. Incorporating honey into your skincare routine can lead to a healthier complexion.
Natural Antioxidants: Vanilla is rich in antioxidants that help combat free radicals, preventing premature aging and leaving your skin looking youthful and radiant. The combination of honey and vanilla in this lotion is a powerhouse of antioxidants.
Aromatherapy: The delightful aroma of vanilla in this lotion isn't just for show. It can have a calming effect on your mind, reducing stress and anxiety. Using Vanilla Honey Body Lotion can be a mini spa experience every day.
How to Use Vanilla Honey Body Lotion
Pimples can be a persistent and frustrating issue, affecting individuals of all ages. The quest for clear, blemish-free skin often leads us to try various products and remedies. Enter Pimple Removal Face Gel, a game-changer in the fight against acne and blemishes.
Key Benefits of Pimple Removal Face Gel
Targeted Treatment: Unlike some generic acne products, Pimple Removal Face Gel is specifically designed to target pimples and blemishes. It's like having a specialized ally in your skincare arsenal.
Gentle and Effective: This gel contains potent yet gentle ingredients that combat acne without causing excessive dryness or irritation. It's suitable for all skin types, including sensitive skin.
Quick Results: Many users have reported noticeable improvements in their skin within a few weeks of using this face gel regularly. It works by reducing inflammation, unclogging pores, and preventing new breakouts.
Confidence Boost: Clear skin can boost your confidence and self-esteem. With Pimple Removal Face Gel, you can face the world with a radiant complexion, free from the worries of acne.
Conclusion
In the world of skincare, choosing the right products is essential for achieving the glowing, flawless complexion you desire. Vanilla Honey Body Lotion and Pimple Removal Face Gel are two exceptional options that cater to different skincare needs. Vanilla Honey Body Lotion Incorporating these products into your daily routine can lead to remarkable improvements in the texture, tone, and overall health of your skin.
Remember, consistency is key when it comes to skincare. So, why wait? Embrace the power of Vanilla Honey Body Lotion and Pimple Removal Face Gel and embark on your journey to healthier, more beautiful skin today.
0 notes
Text
Making the perfect jam is a daunting task, but it can be done with just a few simple steps and the right ingredients. This article will discuss the benefits of berries, how to choose and prepare them, and the steps to crafting the perfect healthy jam. With the right ingredients for making perfect healthy berries jam and instructions, you can easily make a delicious and healthy jam that can be enjoyed all year round. Introducing the Perfect Healthy Berries Jam Recipe Making a delicious and healthy jam is easier than you think. With the right ingredients and simple instructions, you can easily whip up a delicious jam that can be enjoyed all year round. This recipe will show you how to make a healthy jam with fresh berries. It is easy to make, and the result is a delicious and nutritious jam that can be used for a variety of dishes. The Benefits of Berries Vitamins And Minerals Berries are packed with vitamins and minerals that are essential for a healthy diet. Berries are a great source of Vitamins A, C, and E, as well as minerals such as magnesium and potassium. They are also low in calories and fat, making them a great addition to any diet. Eating berries can help to reduce the risk of heart disease, high blood pressure, and some types of cancer. Choosing the Right Berries When it comes to choosing the right berries for your jam, you want to make sure you pick the freshest and most flavourful berries. You can find fresh berries at your local grocery store or farmers market. If you can’t find fresh berries, you can also use frozen berries. Just make sure to thaw them before using them in the jam. Preparing the Berries Once you have chosen the right berries, you need to prepare them for the jam. Wash the berries thoroughly to remove any dirt or debris. Then, mash the berries with a masher or a fork until they are a smooth consistency. You can also use a food processor or blender if you prefer. Crafting the Perfect Healthy Berries Jam Now that the berries are prepared, it’s time to craft the perfect healthy jam. Start by combining the mashed berries with sugar and lemon juice in a saucepan. Heat the mixture until it starts to boil, then reduce the heat and simmer for 20 minutes. Stir the mixture occasionally to prevent it from burning. List of Ingredients For Making a Perfect Healthy Berries Jam 3 cups of fresh or frozen berries 1/4 cup of freshly squeezed lemon juice Pinch of cinnamon (optional) Perfect Healthy Berries Jam Bringing it All Together Once the mixture has simmered for 20 minutes, add in the cinnamon (if desired) and stir the mixture. Simmer for an additional 10 minutes, stirring occasionally. The jam is ready when it has thickened and is a deep red colour. Refining the Recipe Once the jam is done, you can refine the recipe by adding in additional flavours. You can add in a splash of vanilla extract or a tablespoon of honey for an extra bit of sweetness. You can also add in some fresh herbs for a unique flavour. Storing the Jam Once the jam is done, let it cool completely before transferring it to airtight jars or containers. The jam should be stored in the refrigerator and will keep for up to two weeks. Enjoying the Perfect Healthy Berries Jam Now that your jam is done, it’s time to enjoy it! Spread it over toast, add it to yogurt or oatmeal, or just enjoy it on its own. This healthy jam is sure to be a hit with everyone! Making the perfect healthy jam is easy with the right ingredients and instructions. With this recipe, you can easily make a delicious and nutritious jam that can be enjoyed all year round. So grab some fresh berries and get started on making your own perfect healthy berries jam today!
0 notes
Text
What Do You Need To Make Cookies Recipe

Hey there, cookie lovers! Are you ready to make some delicious cookies? Making your own treats can be a great way to relax and express your creativity. If you want to get baking, the first thing you need is a good recipe! In this article, I'm breaking down everything you'll need to make your favorite cookies. So grab your ingredients and let's get started! Choosing The Right Recipe When it comes to baking cookies, finding the right recipe is essential. I always start by browsing online for ideas and recipes that look delicious - this helps me get creative when selecting my ingredients and substitutions. There are so many great cookie recipes out there; from classic chocolate chip or oatmeal raisin to more unique flavors like cherry almond or peanut butter cup. It's important to find a recipe that works with what you have on hand and can be tailored to meet special dietary needs if needed. I also find it helpful to read through reviews of each recipe before settling on one. This gives me insight into helpful tips or potential ingredient substitutions that might make the recipe even better. For example, a reviewer might suggest using applesauce instead of oil in a vegan-based cookie dough. Or maybe they'll share their experience with how much longer it took them to bake the cookies compared to the instructions given in the original recipe. Doing research ahead of time makes baking easier and often yields tastier results! Once I settle on a cookie recipe, I take some time to double check all of the ingredients listed so I know exactly what I need for success. Taking inventory beforehand prevents any last minute trips to the store which can save valuable time in the kitchen! Gather Your Ingredients I'll need to gather my dry ingredients first, so I'll grab some flour, baking soda, and salt. For the wet ingredients, I'll need some butter, an egg, and some vanilla extract. Once I have those, I'm all set to start baking! I'm so excited to get started and make some delicious cookies! Dry Ingredients First of all, you'll need to gather the dry ingredients for your cookie recipe. This includes things like flour, sugar, baking powder and salt. Make sure that you store them correctly in airtight containers so they don't spoil or absorb any moisture. It's also important to measure out each ingredient accurately - use measuring cups and spoons when needed. If a recipe calls for sifted ingredients such as cake flour or cocoa powder, make sure to do this before adding it into the mix! With these items in hand, you're ready to start making those delicious cookies! Wet Ingredients Next, you'll need to get the wet ingredients together. This includes things like butter and eggs. You can substitute certain items if needed - for example, some recipes allow you to use a plant-based butter in place of traditional dairy butter. Adding spices is also an option here, such as nutmeg or cinnamon! Just be sure not to add too much so that it doesn't overpower the other flavors. Lastly, make sure your ingredients are at room temperature before adding them into the mix - this will help them blend better and give your cookies that perfect texture. Preheat The Oven Ok, now that we've gathered all the ingredients for our cookies recipe, it's time to start preheating the oven. Depending on your type of oven and temperature control settings, this can take anywhere from 5 to 20 minutes. It’s important to make sure that you set your oven correctly so that the cookie dough doesn't burn when baking. Gas ovens generally need more time than electric models as they don't heat up evenly. Make sure to read the instructions carefully and adjust accordingly if you have an older model. For example, if your gas oven only has two knobs (one for temperature control and one for setting), then it is best to keep the temperature at 375°F unless otherwise specified in a particular recipe. Electric ovens tend to be easier to use because they usually have digital displays with preset temperatures that are easy to follow. When preheating your oven, always watch closely until it reaches the desired temperature. This may require some trial-and-error depending on how accurate your appliance reads temperatures so get ready for a bit of kitchen science! Once you're comfortable with how long it takes for your own specific device and its settings, you'll know exactly what needs adjusting next time around. Mixing The Dough I'm so excited to start making these cookies! The first thing I need to do is gather all of the ingredients, including butter, sugar, flour, and any other ingredients the recipe calls for. Next I'm going to cream the butter and sugar together until they're light and fluffy. After that, I'll slowly add in the flour, stirring until everything is combined. I can't wait to see how they turn out! Gather Ingredients First, let's gather all the ingredients we need to make our cookie dough. We'll need one cup of butter, two cups of sugar, two eggs and a teaspoon of vanilla extract. Of course, don't forget about measuring your ingredients! Keep in mind that it's important to use accurate measurements for best results. It also helps to store them properly when not using them so they are fresh for when you do. Lastly, grab some baking soda and salt before moving on to mixing the dough - these will help ensure a light and fluffy texture for your cookies! Cream Butter And Sugar Alright, now that we have all of our ingredients ready and measured accurately, it's time to start mixing the dough. Let’s begin by creaming together one cup of butter and two cups of sugar in a bowl with an electric mixer until light and fluffy. This is an important step as it will help add flavor to your cookies and make them nice and soft when they are done baking. When you're finished, be sure to store any extra cookie dough properly so you can use it again later! Now let's move on to adding in the eggs and vanilla extract for that final bit of sweetness. Add Flour Alright, now that we have added in the eggs and vanilla extract, let's move on to adding flour. When it comes to measuring out the flour for this recipe, there are a few options: you can either measure using cups or grams. I personally like to use a kitchen scale when measuring out my ingredients as it helps ensure an accurate measurement every time. So if you do decide to go with the weighing option, simply add two and a half cups of all-purpose flour into your bowl - no need for sifting! Once you've got the right amount of flour mixed in, your cookie dough should be ready to roll. Now it's time to get our hands dirty and start creating some delicious treats! Baking And Decorating Once you have the cookie dough ready to go, it's time for some serious baking and decorating fun! To start, decide what type of cookies you want to make. Do you want classic round shapes or would you prefer something more creative like stars, hearts, or even letters? You can also roll out your cookie dough and use cookie cutters in various sizes and shapes to get exactly what you're looking for. After that, it’s time to bake! When your cookies are finished, let them cool before beginning the next step – decorating! There are a variety of icing techniques available depending on the look and feel you're going for. Royal icing is perfect for creating intricate designs on sugar cookies, buttercream frosting works great when making sandwich-style cookies and fondant can be used to craft 3D figures with an impressive edge. If all else fails, simply sprinkle colored sugar over top your creations as they come out of the oven. No matter which technique you choose, be sure to have fun with it! Get creative by combining different colors and textures while adorning each individual cookie with its own unique design. Your friends will love the results no matter how they turn out so don't worry too much about perfection – just enjoy yourself along the way! Frequently Asked Questions How Long Does It Take To Make Cookies? Making cookies can be a fun, yet time-consuming activity. Depending on how many cookie flavors and shapes you'd like to make, the length of time it takes to bake them will vary. If you're baking only one type of cookie with one shape, it should probably take about 10 minutes for prepping the ingredients and another 8-10 minutes for baking. However, if you want to experiment with various cookie recipes or create different shapes from the same dough, then expect to spend at least 30 minutes in total! What Is The Best Way To Store Homemade Cookies? The best way to store homemade cookies is by pre measuring the ingredients and shaping them into whatever size you'd like. This will help ensure that your cookies don't get crushed or damaged when stored away. If you're using a cookie dough with butter, make sure it's tightly sealed in an airtight container before storing for maximum freshness. You can also freeze the cookie dough if needed - just thaw completely before baking! Can I Use A Stand Mixer To Mix Cookie Dough? Absolutely! If you have a stand mixer, it can be used to mix cookie dough. The benefit of using a stand mixer is that the ingredients are thoroughly blended together for an even consistency and texture in your cookies. Additionally, if you don't want to use a stand mixer, there are other ways to mix up the dough such as with hand-held electric beaters or just by hand with a wooden spoon. You could also substitute some ingredients like oil for butter or applesauce for sugar without compromising the taste and texture of your cookies. How Do I Know When My Cookies Are Done Baking? When baking cookies, it's important to pay attention to both the temperature and texture. The ideal cookie should be lightly browned around the edges with a soft but slightly firm center. To check if your cookies are done, insert a toothpick into the thickest part of one cookie. If it comes out clean, they're ready! You can also use an oven thermometer to ensure that your cookies have reached the optimal internal temperature of between 350°F - 375°F (177-190°C). What Is The Best Type Of Sugar To Use For Cookies? When it comes to baking cookies, the type of sugar you use can make a big difference! Granulated sugar is typically used for most cookie recipes because its fine texture helps create an even and consistent bake. Brown sugar can also be used in some recipes or as a topping - this type of sugar adds more moisture and flavor to your cookies. Depending on the recipe, either granulated or brown sugar will work well. Just remember that brown sugar usually has higher moisture content so you may have to adjust your ingredients accordingly! Conclusion Making cookies is an easy and enjoyable activity that you can do with your family, friends, or on your own. With the right ingredients and a few tips, you can easily make delicious homemade cookies in no time. The key to success is having all of the necessary ingredients on hand before getting started. Sugar, flour, butter, eggs—just some of the items needed for baking up cookie-making magic! Additionally, it's also important to know when your cookies are finished baking so they don't end up too soft or crunchy. With this simple recipe and guidelines in mind, I'm sure anyone can make perfect cookies every time. So go ahead, give it a try! You just may find yourself becoming quite the master baker in no time at all. Read the full article
1 note
·
View note
Text
first of all, i'd like to thank everyone for not collaborating in the notes (genuinely) - this post was a study in vanilla extract and the willing lack of swaying votes helps show the real results.
second of all, it's time to get into the nerd stuff.
i made this poll with one idea in mind: vanilla extract as a status quo. in almost every poll where it's an option, people choose vanilla extract. i've seen people voice that it feels like a duty to vote vanilla extract. generally, it's very, very difficult to get any option on a poll to win against vanilla extract. in this way, vanilla extract is the majority.
in real world applications, it would be very, very strange to have an option that's this popular that it's constantly chosen first regardless of other options. that's why the phenomenon stuck out to me. the memeification of vanilla extract made it seem unchallengeable as a competitor. i wondered, what would happen if it were challenged? what if the voter were told, directly, about this phenomenon?
in this poll, the other options are set up to urge the voter not to vote for vanilla extract. the voter is forced to consider the point being made. it would take a conscious, willing choice, against the questions posed by the poll, to vote vanilla extract.
this poll's results did not, however, render the study useless just by disproving the point made. in fact, these results answer one question and raise several more. the truth based on these results is that most voters did not agree that picking vanilla extract was a symptom of status quo. there are many reasons these voters could have chosen it instead - loyalty, spite, or even a true feeling that they would always want to choose vanilla extract anyways. but the fact is that of the sample, only about 30% of voters agreed - most voters did not feel that there was any pressure to vote vanilla extract.
i would've definitely liked to have a larger sample size for this. many polls have thousands upon thousands of votes and still end up with a majority vanilla extract. it's possible that an increased sample size could show a different vote ratio, and either further solidify or challenge these findings.
i'd like to thank everyone who voted - you may or may not have known you were in a small-scale recreational behavioral study. surprise! regardless of which option you voted, your earnest votes were extremely valuable. each of you may pick a goodie bag (this one's not a poll, don't worry). 🛍🎁
i'm not sure if i'll follow up on this study in the future. if anyone has questions or further interest in the poll, feel free to message me or shoot me an ask to talk about this!
and happy valentines day to those who celebrate! 🌷
238 notes
·
View notes