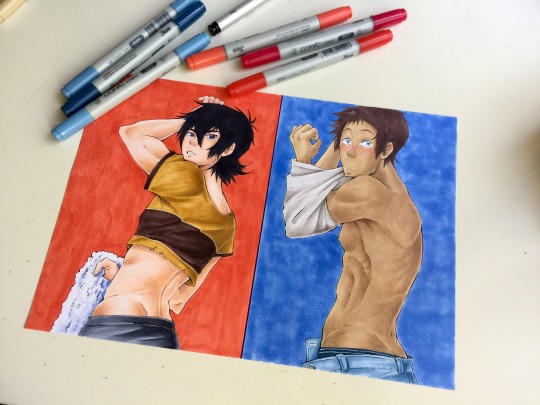
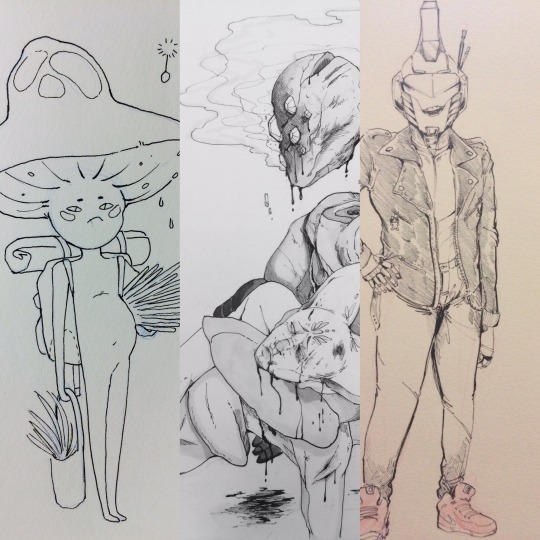
#materials: first pic - ink + digital coloring
Explore tagged Tumblr posts
Visit Tumblr Blog
Explore Tumblr blogs with no restrictions, modern design and the best experience.
Last Seen Tumblr Blogs


Fun Fact
130K people were victims of a chain letter scam that affected Tumblr in May 2011.
Text

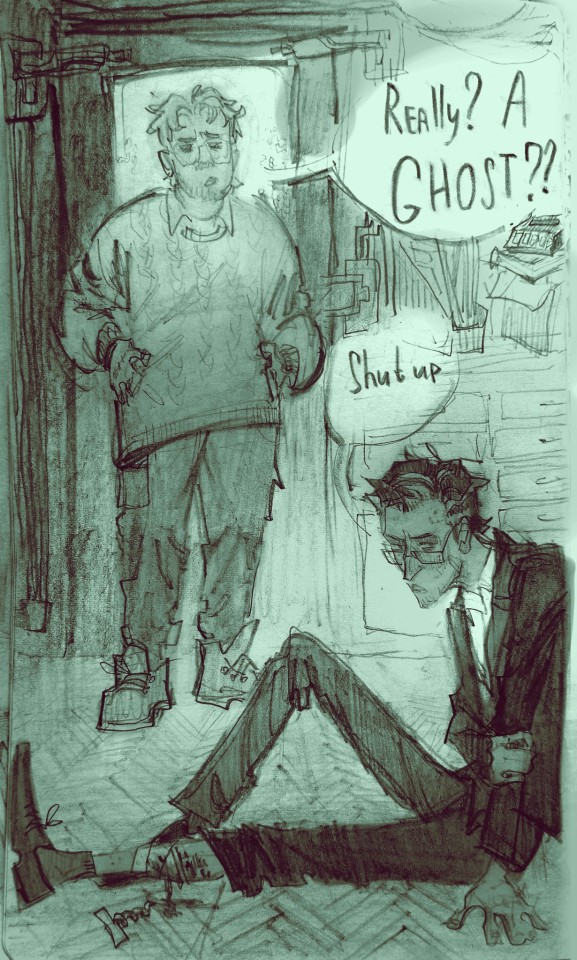
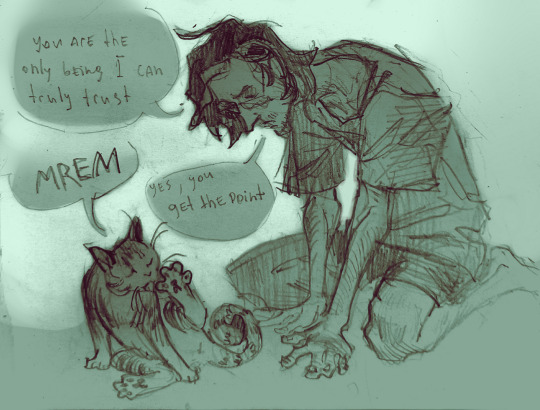
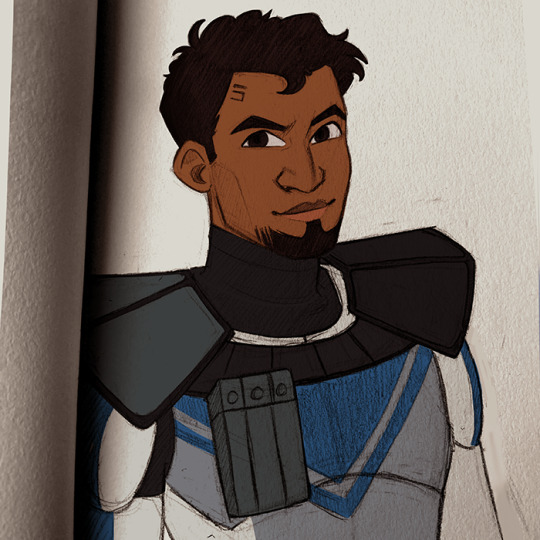
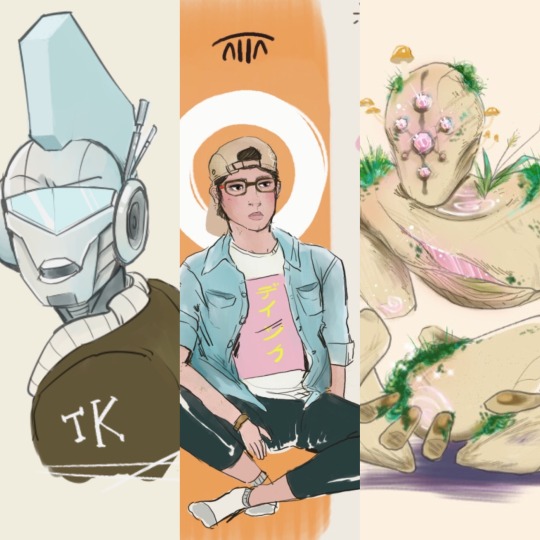
#materials: first pic - ink + digital coloring#2nd & 3d pics - pencil + d. c.#the magnus archives#tma#jonathan sims#martin blackwood#art#jmart
16K notes
·
View notes
Note
What art supplies do you use for coloring in your sketchbook? It looks amazing
Hey there! Thanks so much! Sorry if this feels like a trick, but I actually just draw lines/inks in my sketchbook and then I add color in Photoshop. I'll do a little explanation of how I add color though in case anyone finds it helpful!
Details and pics under the cut!
First I take a photo of the sketch:
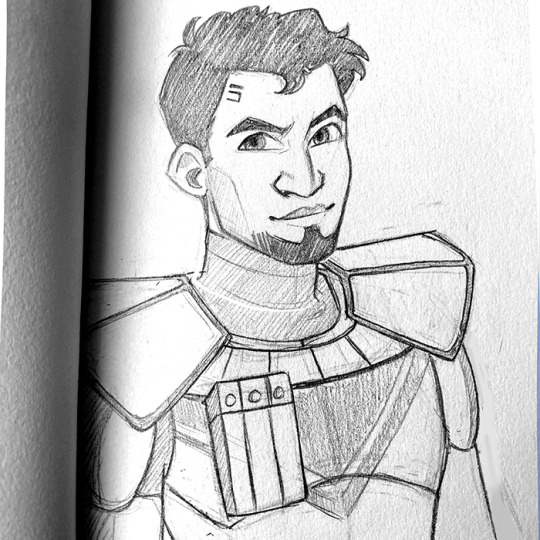
This one was done in 2023 so he's in pencil, but so far in 2024 all my sketchbook drawings have been with a ballpoint pen. Anyway I adjust the contrast how I like and sometimes I nudge things around if they were asymmetrical or if the head was too big, for example. In this image if you look closely at his neck you can see a "seam" where I had used the lasso tool to make an adjustment.
Then I add a bit of warm tone and cream background to everything:

Then I do the the colors on a "multiply" layer that's on top of the lines. I end up with this:
I could definitely stop here if I wanted to, but I like to do an "overpaint" layer on top of everything where I paint with a simple circle brush to bring out some details:
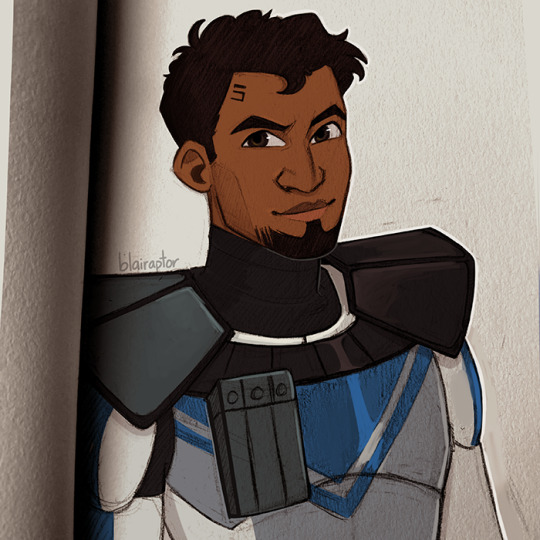
So in the final version you can see that I cleaned up his eyes and put the little sparkle of life in there, and I painted the shine on his armor. I also outlined his jaw so the contour wouldn't get lost against the neck of his black. On this drawing in particular I was really happy with the tiny highlights on his brow, nose, and the corner of his mouth. I thought it did a lot to put more life in the sketch!
Years ago most of the art I posted was sketchbook drawings with color added digitally. I had really missed doing that so I'm glad I'm back to it and that people seem to enjoy it. I think having the texture of the traditional materials is really appealing.
Thanks so much again for your ask!
23 notes
·
View notes
Note
Hello Rab, I just wanted to say that your art is huge inspiration to me. There just isn't many artists out there who work with color pencils, and your artworks with them are absolutely charming. If you have any tips along the lines of "things I wish I knew", I'd definitely be interested! (no pressure, of course !)
I'm sorry I'm so late in replying to this! This ask has made me so happy; thank you <3333
Things I wish I knew:
Sometimes expensive things are worse, but Prismacolors are GLORIOUS. Other colored pencils feel like working with tree bark compared to the pillowy-softness of Prismacolor wax.
I've tried soooo many different types of paper over the years. The more tooth (texture) to a piece of paper, the more layers of color you can pile up. I prefer less tooth because it requires less time to fill in those pesky white gaps you get while working with textured paper...but "good" paper like Bristol is actually TOO smooth for me. It took me like ten years to find this paper, which is my current favorite (not so smooth that you can't build up a couple layers of color, but not so toothy that you get white patches). It's not archival AT ALL though, which sucks.
I used to struggle a lot with line art, since the pencil wax would cover the lines. Here's my process now:
- I sketch on your average sketch pad, then use a LightTracer (light box) to ink my sketch onto Xerox paper. The nice thing about this method is I never lose the sketch, so if I mess up with my brush pens (which happens VERY OFTEN) I can just restart on a new piece of Xerox paper.
-Once I'm done with my line art, I scan the page. THEN I color my line art. Once I'm done, I scan the page again. Next I overlay the two scans in Photoshop via auto-align, and set the line art to "multiply" to create clean dark line art. I'm not sure whether the auto-align tool is available on other programs...I'm pretty sure you can do it on photopea, though. If you use colored pens for your line art, you can also use the hue tool to change your line colors.
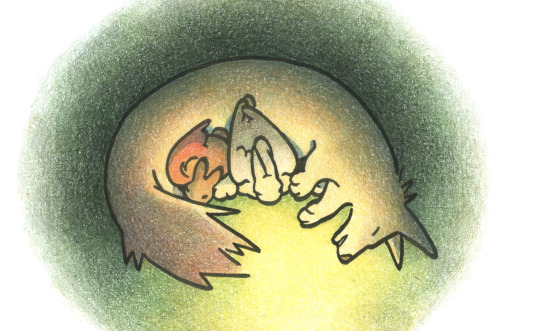
Pic without separate line art layer:
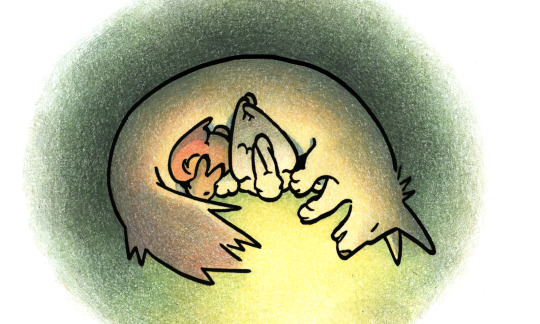
With line art layer:
Don't be afraid to use a pencil eraser to lift some color off the page. An eraser won't get rid of a color, but I regularly use erasers as damage control for areas that get too dark or muddy. Erasers can also be used to add texture.
Be aware that pure black can flatten or muddy a scene. You'll often see me "deepen" my black areas with colors like tuscan red, process red and indigo blue (or avoid black altogether).
On that note, don't be afraid to go dark! It can take courage to rip off the bandaid and put down a dark layer of color, but you gotta do what you gotta do to get some contrast. When I remember to play by the rules (heh), I color the light parts of my work first, then lay down a layer of indigo blue or dark green or tuscan red over all the dark areas to sort of force myself to stay dark.
Don't let anyone convince you traditional art is unmarketable, or that you'd be "smarter" to work digitally. Work with whichever materials or programs you want.
It's okay if you work slower than other artists. This is the lesson I'm still trying to learn! But it's true: You can't expect yourself to work "quickly" with colored pencils. As much as I love colored pencils, they're slow and can be very boring lmao. Don't burn yourself out with grand expectations.
16 notes
·
View notes
Text
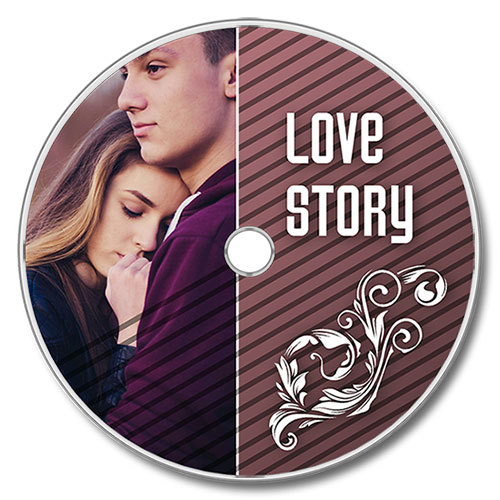
Limited Run CD Printing: Making the Discs and Presentation
how to print on a CD
Printing the CDs for the Short Run CD Producing Project
There are three primary methods that may be used to pic a short run involving Compact discs. If you're undertaking them on location then a person will most likely become limited by the first solution which is electronic (inkjet) printing. A professional publishing company will usually get display screen printing and lithographic stamping services on present too. Every single CD making process possesses its benefits and weaknesses and many of us will enter more aspect here:
how to print on a CD
Digitally branded Computer games
A digital CD producing machine uses a identical publishing method to your own personal standard desktop computer inkjet printing device. In fact, a lot of modern-day home printers feature a COMPACT DISC tray that allows an individual to weight an ink jet printable COMPACT DISK into the idea and run the item via the same printing brains that would normally printer upon paper. A specialized digital DISC printer is usually more of a focused machine that is fixed up in order to print just onto Compact disks and features an automated loading as well as unloading system for the actual vertebrae. This system signifies that the machine can easily print up to 190 Cd albums unattended and, while stamping with these products tends to be rather slow, they can end up being left to be able to print even though others elements of the task are dealt with.
This CONCEPT ALBUM printing course of action is simply really suitable for a small amount of CDs as this is certainly the slowest of the a few major methods. The process rate is not helped by simply the idea that after the particular printing is done, right now there is still a require for your application of some sort of clear lacquer layer for you to protect the printed exterior from moisture when taken care of. There are inkjet computer Compact discs on the market place that claim to have got a water resistant finish any time paper but they are generally still not as powerful and don't look seeing that good as a new colored disc. On the and also side, this process could be used to print out very high resolution graphics plus the finished item can certainly appearance fantastic when accomplished appropriate. There are additionally no fixed established charges with digital COMPACT DISC making which is great in case you only need 50 cds.
Monitor printing
CD display producing is a really popular, widely used practice for printing CDs. The task is an adaptation connected with the monitor printing procedure used for decades to help print onto papers merchandise and, indeed, it offers been taken to let printing onto many surface types to produce branded goods such as mugs, tee shirts and also USB memory supports. For the reason that name suggests, typically the process consists of the make of publishing screens by which each is employed to printing a different color on top of the disc. Some sort of COMPACT DISK screen printer provides your five printing stations and also applying a disc that possesses been in the past printed using a base coloring, that is possible to generate a print having some different colours included. Typically the machine is basically the twisting platen and because each shade is used at each stop, often the disc passes underneath any UV light that solutions the ink prior to up coming colour is utilized.
This kind of process can only always be used in order to print regions of solid colouring along with is not ideal with regard to stamping photographic images or maybe simple colour gradients. Exactly where art work has been exclusively designed to use this particular printing technique, though, the effects can be truly spectacular specially with the availableness of fluorescent in addition to material UV sensitive ink. Often the use of super excellent nylon uppers screens means in which the pic is well-defined, crisp and contains an remarkable texture to it. Any time set, the ink is incredibly robust and waterproof which is not easily damaged by means of rough handling of the actual dvd.
When it happens to short run DISC printing and using the particular tv screen printing technique, at this time there are set costs engaged, namely typically the screens as well as the films employed to help make the screens. Therefore, it's not the ideal process to be able to use at under 100 disks if price is a issue with the job. However, the more dvds which might be screen printed, often the lower the unit expense gets, plus there's additional bonus that once the actual window screens are made these people can be reused regarding reprints.
Lithographic (Offset) making -
This is yet another quite popular method for limited run CONCEPT ALBUM printing jobs. A lithographic printing unit doesn't have some sort of spinning platform like the display screen printer; instead it features turning cylinders. The tube this applies the printer on the CD has a new rubber baby blanket wrapped all-around it which usually rolls around the CD and also airport transfers the ink on to the particular disc surface. The actual lithographic printing method is simply perfect for printing complex photographic photographs onto a disc plus for printing images which may have subtle colour gradients, but it really is not ideal intended for printing pictures with significant areas of sturdy color as attempting to keep a consistent solid coloring spanning a large area may result in the patchy appearance on the concluded print.
As with display producing, there are repaired costs a part of lithographic publishing as stamping plates will need to be made upward for for every set of a muslim used. Work opportunities requiring a lesser amount of than 100 vertebrae can easily work out to possibly be more expensive each device than if the electronic digital printing process was employed alternatively. But, once far more, as the work range increases, so the product cost will fall in case a re-print of typically the career is required after that the printing discs could be kept and re-used.
Printing the Paper Areas
When it comes for you to printing the document components for a short manage CD printing project, invest your time and accomplish it thoroughly, it is definitely possible to produce a few extremely professional looking styles. The printer quality associated with a relatively affordable pc inkjet printer is often fantastic.
Printing CD Gem Event Paper Parts
You may buy accurately sized templates on the web to get making paper parts to travel into CD jewel circumstances, or you can merely buy several high good quality A4 size semi-gloss image paper or ink computer silk paper commodity with about 150gsm. The bonus along with buying templates for that rear end tray card usually are which the spine edges are going to be scored to make these people better to fold but this specific is something you can certainly do yourself if you aren't mindful. The front pamphlet can be a folded away sheet printed on each isn't stable to make way up 4 webpages and just about any more pages might be extra if required along with stapled along the spine. Providing you take your time together with the cutting (using any guillotine and not scissors) and are careful using the stapling then generally there is no reason precisely why avoid being able to appear up with something incredibly appealing.
There are a several of things to consider when printing paper elements for a CD gem situation, such as:
The particular front booklet may comprise of 2 pages should you print on both tips of any single panel which often is 120mm square, in addition to 4 web pages if anyone print on both edges of a double -panel 240mm x 120mm which will is and then folded. Soon after this, the book offers to consist of diversifiés regarding 4 pages credited to the technique they will are constructed. Take some sort of look at a new COMPACT DISC jewel case guide via your CD collection where there more than 4 internet pages and you will probably see why. A single booklet page 240mm times 120mm collapsed in fifty percent, makes 4 websites, nevertheless to add another linen where the spine is actually stapled, you must increase another some pages. Typically the content is generally fashioned with this requirement in head.
The back tray card can easily be imprinted on the two sides but then you will want a clear CD possessing rack in your circumstance to be able to help see the print out upon the inside. Also, often the flattened spine strips tend to be very slender and the idea can be difficult in order to about the quality folded border with out carefully scoring the actual inside initial. Any wording printed down the spine demands to be small plenty of to fit and centrally located for the ideal quality appearance.
Publishing COMPACT DISK Card Wallets
Yet again, you actually can buy templates to be able to make your CD credit wallets that can be printed as well as then "popped out" involving the template as the particular perimeters are partially pre-cut for yourself. You can furthermore print your own in 250 - 300 gsm silk or semi-gloss A4 size card. The navigation bars can be scored, creased / folded and also glued using the strong stuff to create perfectly good results.
1 note
·
View note
Text
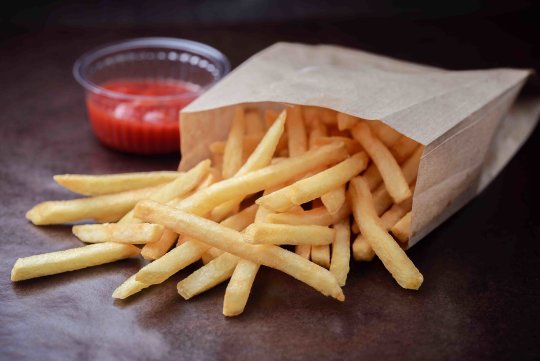
What is the Purpose of Custom French Fries Boxes?
Custom French Fries Packaging Boxes
French fries are the most likable and favorite fast food of everyone. Many restaurants packed this item in Kraft paper because Kraft paper is the best material for takeaway foods. We CustomBoxesZone provide you good and attractive French fries boxes that impact a good impression on clients and they force you to buy your boxes. You can easily customized Kraft paper French fries boxes according to the client's requirements. We also offer you wholesale deals when you ordered in huge quantities.
Purpose of Custom French Fries Boxes
As all, we know that fries are the most delicious food and everyone likes to eat this. French fries boxes are used to store the fries and keep this protective. French fries boxes available in the market in different colors, shapes, and printing but the customize French fries boxes cause to interact the more customers attention. Custom French fries boxes are user-friendly. Users easily mold this into their required shape and size that’s why everyone prefers custom French fries boxes. Our company is the best and high demand company and we offer you a variety of customization opportunities that make your custom boxes more flexible. For getting your customized French fries boxes than you can call us and tell us all specifications that you want. Our staff follows your all desires and manufactures your custom boxes according to you.
Customization Leads to Perfection
Printing and designing also customize according to the customer mindset. It leads to the perfection of your brand. We offer you high-quality material that is eco-accommodating and biodegradable. When you customize your boxes and design and packaging of your boxes according to the customer's desires then chances of your brand perfection are high. We CustomBoxesZone offer you high-quality material custom French fries boxes and a large number of customization options that you can get from us. Our team is fully concentrating while they packaging your custom boxes.
Custom Printed French Fries Boxes
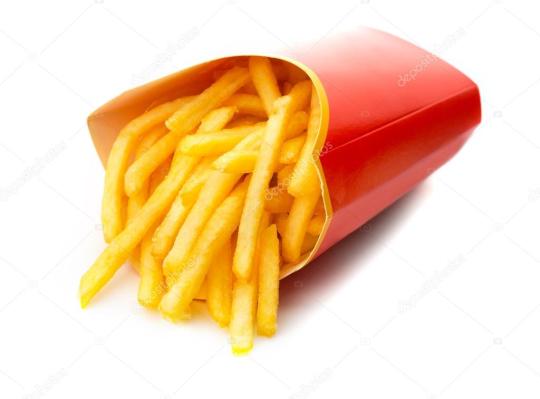
Printed logos and print the fries pics on French fries boxes make your box more eye-catching and charming. Customers attract to your packaging boxes when they see artistic printed French fries boxes because they prefer attractive boxes when they traveled and these boxes mostly used during traveling. We have high-quality printers that print your design in an enticing way and we used high-quality ink that not spread out and making your box more alluring. We offer you offset and digital printing. You can choose your desire style and customize your box according to you.
On-Time Delivery
Our services are very fast and the best services. Our aim is to keep our customers happy by utilizing our brand packaging boxes. Customers want to get their order as soon as possible and our first priority is to deliver your order in minimum time at your doorstep. We hired the most experienced and expert staff that doesn’t take too much time for manufacturing. They customize and prepare your custom French fries boxes in minimum time then they try to deliver your order before the deadline. If you have any issue or you don’t receive your order on time then you can contact us at any time. Our call representative is available for you at any time that listens to you carefully and resolves your all problems.
Why You Choose CustomBoxesZone
CustomBoxesZone is the best and good packaging company that offers you a variety of customization and wholesale opportunity. You can get all desired custom French fries boxes from us. We provide you our services within 24 hours. You can submit your request whenever.
Reference
#frenchfriesboxes#frenchfriespackaging#customfrenchfriesboxes#frenchfriesboxeswholesale#custompackagingboxes#customprintedboxes
0 notes
Note
Yo hey u fab artist u, I gotta a question. Um, I kinda want to start an artblog but I don't really do digital art, and I think not all of ur art is digital, so how do u get good quality pics of traditional art? When I try to take pictures it looks fuzzy, and u can't really see the lines that well, or its just bad quality and then I don't want to post it. Any tips on how to fix that?
Hey you, fab anon!
It’s great that you want to start your own art blog. I think every artist should do that, even if they think they’re not good enough, because, after a while, your followers and even yourself will be able to see how much you’ve improved and the best part is that they can be witnesses of your growth.
As you said, most of my art is traditional; I love black and white drawings with ink and coloring with comic markers, and, to be honest, it’s a huge challenge to get the digital image to look as good as the original piece.
I don’t usually “take pictures” of them. I use a scanner connected to a pc or a laptop where I edit them using photoshop. I you use photoshop, it’s important to know how to use the infinite editing options that the program offers.

Start with the image adjustments and play with the options there; learn what each of them do to your piece and think of how do you want to turn out. Do you want to change the colors? Or do you want to look as much as possible as your original piece?
An usual problem is that the whites aren’t as white as the paper so you can use ‘levels’ to fix that, even to darken the colors as much as you want, making the contrast more visible.

To fix the colors (if they’re not as cool as on your original piece) use 'selective color’ to fix each color separately: reds, yellows, greens… even neutrals, blacks and whites. Be careful to not to change them too much, being subtle is better.


If you see that your image is too yellowish or too blueish use 'color balance’ to fix it (remember to use the complementary color to do it).

If you’re not happy with the results, I encourage you to keep playing around with the options! If you’re inexperienced I assure you that you will improve in no time.
It is true that some times I take pictures of them, the stickers I make, for example. If you don’t own a scanner you will have to use a camera to show your art to the rest of the world. My first advice: don’t try to use it as a scanner, don’t try to take pictures to make them look like you scanned them, all straight and from above the piece. For aesthetic purposes, you can set the materials you used to create your art next to it, like pencils, pens, markers…

The key is to try to make your pictures as bright as possible and the colors vibrant. If you can get to make the picture clear enough to to make the strokes of the pen, marker or brush, visible, even better. Because that is what is so cool about traditional art, that you don’t have to fake the texture of the paint or the paper.
The most important things:
Light! Take the picture during day light. Use a lamp if you feel like you need to to fill the shadows from the opposite side of the window, but have in mind that natural light will give you a blueish color on the paper while the bulb light will add a yellowish one.
Editing! If you use your phone to take the picture I’m sure you will have some apps to edit pictures. Try to turn up the exposure and the contrast to make the whites even whiter and the blacks even blacker xD
Filters! If your drawing is a black and white piece you can alway try to use a b/w filter!
And the most important thing: CLEAN THE LENSES before taking the picture! It has happened to me before that the camera was filthy and it took me a while to realice why my pictures were so shitty lmao.
Sadly, in the end, the quality of your camera has a lot to do with the final results.
I hope this will help you! And if you start your art blog, don’t forget to send me the link because i will love to follow it!!
276 notes
·
View notes
Text
hey it’s a commissions post
hey so there’s a thing that i want really bad (it’s this)
and i want to earn it through my own work instead of dipping into my savings because i want to prove something to myself i guess
anyway! here’s the downlow:
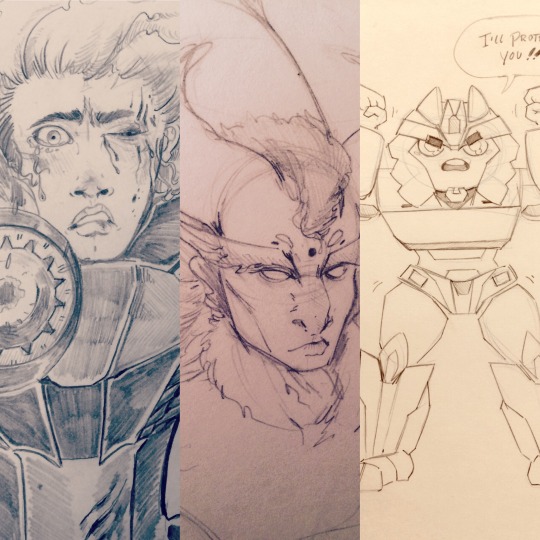
character pencils: $5-10 for head, $10-15 for bust
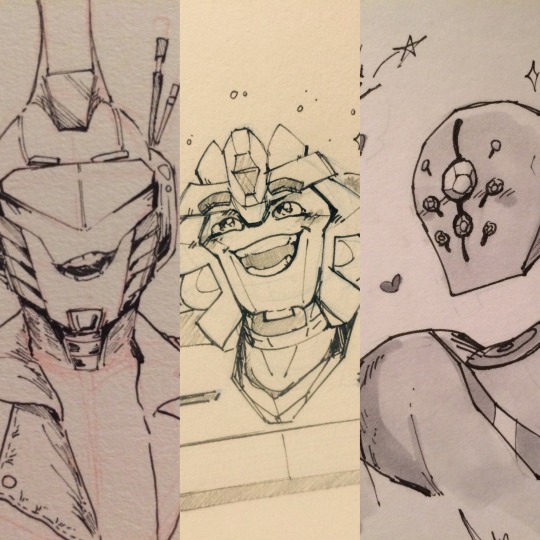
character inks: $10-15 for head or bust
character ink: $20-30 for full body (depending on the complexity of the character ofc)
character digital: $15-20 for bust, $25-35 for full body *will add simple bg (see middle pic) for free
wanna add some color?: additional $3 for head, $5 for bust, $10 for full body traditional, $15 for full body digital
of course not everything will come under the umbrella of ‘character’ commissions, so i am open to price negotiation!
what i will do:
your favorite show character
your oc
tattoo designs
character sketch sheets
if it isn’t explicitly on my ‘no’ list feel free to ask
what i will not do:
nsfw (i’m just not feelin’ it lmao)
kink/fetish related stuff (especially pedo stuff)
possibly gore but i’m open to discussing it
my email is at [email protected] but I would rather you messaged me on here first if at all possible! also please be prepared to give me reference material if you’re wanting me to draw your oc or your fursona or whatevs
thank you guys for your time!
-mango
150 notes
·
View notes
Text
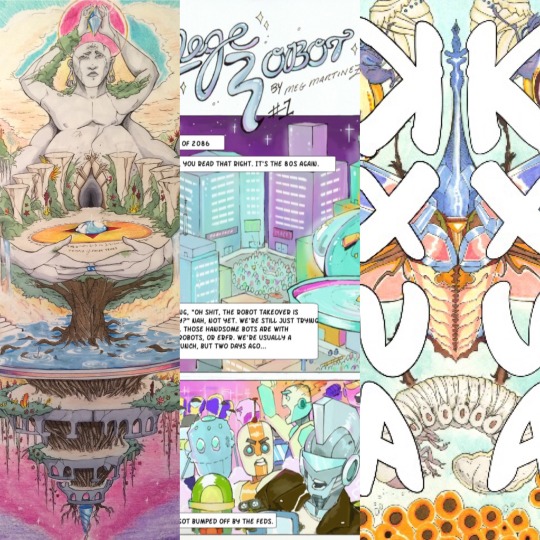
I need to draw a comic like this
16K notes
·
View notes