#lsm6ds3
Explore tagged Tumblr posts
Text
PCB of the day! Bluetooth + TFT = nRF52840 Sense Feather with TFT display 🛠️🔄🎚️
We have to redesign the Feather Sense https://www.adafruit.com/product/4516 - almost all the sensors went EOL over the last few years, but we're slowly getting to doing a refresh. Meanwhile…we're thinking of maybe making a product much like our Feather ESP32-S2 or S3 TFT boards https://www.adafruit.com/product/5483 but this time with an nRF52840. We made some low-power choices and stuck a BME280, PDM mic, LSM6DS3, and MMC5603 for environmental and motion sensing.
#adafruit#electronics#pcb#opensource#opensourcehardware#pcboftheday#bluetooth#tft#nrf52840#feather#display#bme280#pdm#microphone#lsm6ds3#mmc5603#nordicsemi#nordic#sensorsrefresh#newdesign#lowpower#environmentsensing#motionsensing#electronicsengineering#sensefeather#productinnovation#wirelesstechnology#innovation
3 notes
·
View notes
Text
Arduino Oplà

In diesem Beitrag möchte ich dir den Arduino Oplà vorstellen und anhand des Arduino MKR Zero zeigen, wie dieser programmiert wird.

Bezug eines Arduino Oplà
Den mir vorliegenden Arduino Oplà habe ich im Onlineshop Reichelt für knapp 45 € inkl. Versandkosten bestellt. Du bekommst dieses Modul aber auch in anderen Shops, wie nachfolgend aufgelistet: ShopPreisVersandkostenhttps://www.reichelt.de39,90 €5,95 €https://www.berrybase.de47,75 €2,90 €https://www.conrad.de63,99 €4,95 €https://www.voelkner.de58,92 €5,95 € Lieferumfang Zum Lieferumfang des Moduls gehört neben dem Modul selber noch ein paar Aufkleber, sowie ein kleiner gefalteter Zettel mit einer Grußbotschaft und einem Hinweis auf die Garantie. Zusätzlich wird noch ein kleines Kabel mitgeliefert, dieses dient dazu den Mikrocontroller mit Strom zu versorgen.


Offizielle Dokumentation
Auf der offiziellen Seite findest du viele Beispiele, welche du mit dem Arduino Oplà und einem zusätzlichen Mikrocontroller der Arduino MKR Familie durchführen kannst. Der Arduino MKR Zero ist der günstigste Mikrocontroller aus dieser Familie jedoch verfügt dieser über kein WiFi somit würde ich dir empfehlen den MKR 1010 zu verwenden. Aber dieser kann auch an den Arduino Oplà angeschlossen und programmiert werden. Vom Hersteller findest du auf YouTube einige Videos, in welchen dieses Modul und seine Funktionen vorgestellt werden. https://www.youtube.com/watch?v=HQhgfG9x6OE Da das Modul bereits seit mehr als 1 Jahr auf dem Markt erhältlich ist, gibt es bereits diverse Projekte mit diesem. Vor kurzem wurde eine zweite Version veröffentlicht, was bedeutet, dass die Vorgängerversion etwas günstiger / erschwinglicher geworden ist.
Aufbau
Zunächst kommen wir zum Aufbau, dieses Modul von Arduino verfügt über eine Vielzahl von Sensoren & Aktoren, welche recht einfach mit dem entsprechenden Mikrocontroller programmiert werden können. Sensoren - Drucksensor LPS22HB, - Intertialsensor (IMU): LSM6DS3 - Feuchtigkeits- /Temperatursensor: HTS221 - Licht, Gesten-, Annäherungssensor: APDS-9960 Aktoren - RGB Display - Summer - 5x RGB LEDs - 2x Relais (24 V) Besonderheiten - 18650 Batteriehalter - SD-Kartenslot - Groove Anschlüsse


Pinbelegung der Sensoren & Aktoren
Nachfolgend das Pinout des Arduino Oplà: BauteilArduino OplàTouchsensor 0D15 / A0Touchsensor 1D16 / A1Touchsensor 2D17 / A2Touchsensor 3D18 / A3Touchsensor 4D19 / A4Grove Anschluss "AN5"D20 / A5Grove Anschluss "AN6"D21 / A6SD-Card - CSD0Display - DCD1Display - CSD2Display - BL (Backlight)D3Display - RSTRESETLED - CKID4LED - SDID5INTD6BUZZERD7COPID8SCKD9CIPOD10SDAD11SCLD12Relais 2D13Relais 1D14 In der offiziellen Dokumentation findest du ein Bild mit allen Pins zum Modul.

Pinout der Vorderseite des Arduino Oplà

Pinout der Rückseite des Arduino Oplà
Programmieren in der Arduino IDE 2.0
Das Modul lässt sich in der Arduino IDE 2.0 sowie online im Web Editor programmieren. Da ich derzeit nur den Arduino MKR Zero vorliegen habe, kann ich die Beispiele derzeit lediglich in der Arduino IDE programmieren.

Nachfolgend möchte ich dir zeigen, wie du das Modul mit dem Arduino MKR Zero in der Arduino IDE 2.0 programmierst. Zunächst musst du aber über den internen Bibliotheksmanager das Paket "Arduino OplaUI by Alessandro Ranellucci" installieren. Dieses Paket enthält alle Bibliotheken zu den verbauten Sensoren / Aktoren.


Steuern der RGB LEDs mit den Touchsensoren Zunächst ein kleines Beispiel mit den Touchsensoren & den verbauten RGB LEDs. Die verbauten Touchsensoren sind sehr empfindlich, d.h. diese reagieren, schon wenn man den Finger nur leicht über das Feld hält. //Bibliothek zum entprellen der Taster / Touchsensoren #include //Bibliothek zum ansteuern der RGB LEDs #include //Objekte initialisieren für das entprellen der Touchsensoren Bounce btnBounce0 = Bounce(); Bounce btnBounce1 = Bounce(); Bounce btnBounce2 = Bounce(); Bounce btnBounce3 = Bounce(); Bounce btnBounce4 = Bounce(); //Array mit den initialisierten Objekten Bounce btns = { btnBounce0, btnBounce1, btnBounce2, btnBounce3, btnBounce4 }; //Parameter der RGB LEDs //auf dem Arduino Opla sind 5 RGB LEDs verbaut #define NUMPIXELS 5 //SDI an digitalen Pin D5 #define DATAPIN 5 //SKI an digitalen Pin D4 #define CLOCKPIN 4 //Objekt vom Typ Adafruit_DotStar mit den Parameter initialisieren Adafruit_DotStar leds = Adafruit_DotStar(NUMPIXELS, DATAPIN, CLOCKPIN, DOTSTAR_BGR); //Array mit den Status der LEDs int ledStatus = { 0, 0, 0, 0, 0 }; //Farben definieren uint32_t red = leds.Color(255, 0, 0); uint32_t black = leds.Color(0, 0, 0); void setup() { //begin der seriellen Kommunikation mit 9600 baud Serial.begin(9600); //beginnen mit Pin 15 //die Touchsensoren sind an den Pins 15 bis 19 angeschlossen int pin = 15; //eine Schleife von 0 bis 4 (kleiner 5) for (int i = 0; i < 5; i++) { //verbinden des Bounce Objektes mit dem Pin btns.attach(pin, INPUT); //entprellen mit 5ms btns.interval(5); //Pin um 1 incrementieren pin++; } //begin der Kommunikation mit den RGB LEDs leds.begin(); //setzen der Helligkeit der RGB LEDs auf 5 leds.setBrightness(5); } //Funktion zum ausgeben einer Textzeile auf der seriellen Schnittstelle //Parameter touch - ganzzahliger Wert für den Touchsensor welcher betätigt wurde void printMsg(int touch) { Serial.println("Touch" + String(touch, DEC) + " betätigt"); } void loop() { //Schleife von 0 bis 4 for (int i = 0; i < 5; i++) { //aktualisieren des Bounce Objektes btns.update(); //Wenn der Touchsensor betätigt wurde, dann... if (btns.rose()) { //ausgeben des Textes auf der seriellen Schnittstelle printMsg(i); //togglen des Status der LED ledStatus = !ledStatus; //wenn der Status der LED 0 ist, dann Farbe schwarz, andernfalls rot anzeigen uint32_t color = ledStatus == 0 ? black : red; //setzen der Farbe an der RGB LED mit dem Index aus der Schleife leds.setPixelColor(i, color); //anzeigen der Änderung leds.show(); } } } Read the full article
0 notes
Text
Vesc 6.6-based FSESC100A with aluminium anodized radiator

Voltage: 48V is_customized: Yes Type: electric modulation Origin: Mainland China Brand: FLIPSKY

Specs: - Firmware: Latest Version - Continuous current: 100A; instantaneous current: 200A - Voltage: 14V-60V(Cells: 4-13S; safe for 4S to 12S, voltage spikes may not exceed 60V! ) - BEC: 5V@1A - ERPM: 150000 - Control Interface Ports:USB,CAN,UART - Supported Sensors:ABI,HALL,AS5047,AS5048A - Input Set Support:PPM, ADC, NRF, UART, SPI, IIC - Modes:DC, BLDC, FOC (sinusoidal) - Regenerative capacity: Yes - Programmable: Yes - Motor wire: 10AWG - Power cable:8AWG - Size:75.4x63.7x31.1mm(Including heatsink) Feature: - Support four control modes: Current/Dutycycle/Speed /Position control mode. - Using 6pcs SFT01N10T high current MOSETS (100V 500A). - Protection functions: low voltage protection, high voltage protection, over-current protection, temperature abnormally protection, mosfets over-temperature protection. - Support the function of balancing car by connecting the IMU module through the IIC interface; support inertial measurement unit modules such as MPU9250, MPU9150, MPU6050, LSM6DS3, BMI160.


Read the full article
0 notes
Link
Je sors du divertissement avec un projet visant à rappeler aux utilisateurs de prendre les escaliers plutôt que l'ascenseur. Merci d'y laisser un commentaire (si possible en anglais), de mettre un pouce bleu et de partager pour lui donner de la visibilité.
0 notes
Photo

It's finished! 384 RGB LEDs controlled by an @arduino Nano Every (@MicrochipMakes atmega4809) LSM6DS3 Accel/Gyro 1200mah lipo and charger boost converter and power switch all in a 100mm/4in sphere. Video to follow... #Discoball #Maker #ledsphere https://t.co/aj58gsgtjX
0 notes
Text
ST, 상시 동작 6축 고성능 가속도 센서 및 자이로스코프 콤보 출시
ST, 상시 동작 6축 고성능 가속도 센서 및 자이로스코프 콤보 출시
ST마이크로일렉트로닉스(STMicroelectronics, 이하 ST)가 iNEMO™ 울트라(iNEMO™ Ultra)의 첫 번째 제품으로 고성능 상시(Always-on) 동작 가속도 센서 및 자이로스코프의 6축 콤보 모션 센서 LSM6DS3의 개발을 완료했다고 밝혔다.
이번 신제품은 디바이�� 자체 뿐 아니라 전체 시스템 전력의 효율성, 신호 잡음, 성능에 대한 새로운 표준으로 기대된다는 것이 회사측의 주장이다. LSM6DS3 콤보는 ST의 초저전력 STM32 마이크로컨트롤러와 결합할 경우 혁신적인 사물 인터넷(IoT) 제품이나 모바일, 웨어러블과 같은 기기에 내장되는 배터리형 스마트 센서 시스템 개발에 새로운 기회를만들어 줄 것이라는 것.
이 초소형(2.5mm x 3.0mm x 0.8mm)…
View On WordPress
0 notes
Text

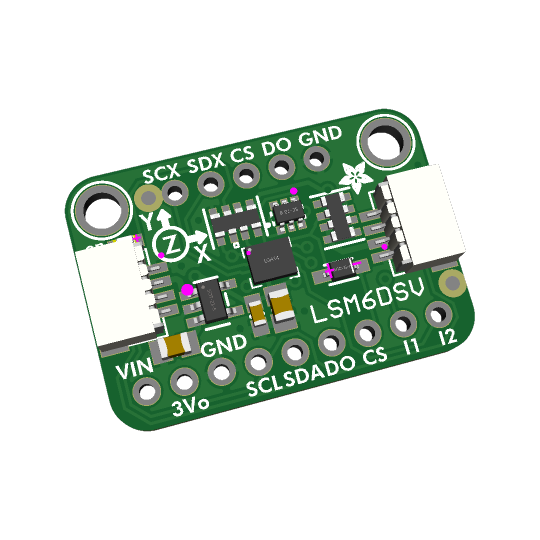
LSM6DSV is a fancy 6-DoF IMU sensor 🔧🌐🚀
We got a request on our Discord to carry a STEMMA breakout for the LSM6DSV (https://www.digikey.com/en/products/detail/stmicroelectronics/LSM6DSVTR/17038915) a 6-DoF IMU from ST in the same family as the LSM6DSOX and LSM6DS3 (https://www.adafruit.com/search?q=lsm6ds) apparently these are used by VR/motion capture folks! We chatted about the LSM6DS series on The Great Search (https://blog.adafruit.com/2024/01/08/the-great-search-replacement-gyro-accel-6-dof-for-lsm6ds33-thegreatsearch-digikey-adafruit-digikey-adafruit/) a few weeks ago, it'll be interesting to learn why this one, in particular, is so good for VR - one interesting thing is it has sensor fusion built in, so you don't have to run it on the host microcontroller (https://github.com/STMicroelectronics/STMems_Standard_C_drivers/blob/master/lsm6dsv16x_STdC/examples/lsm6dsv16x_sensor_fusion.c)
Anyway! It has the same pinout as the LSM6DSOX, so we just recycled our breakout but put this new chip on there, and we'll try it out!
#adafruit#sensor#LSM6DSV#6DOF#IMU#electronics#technology#innovation#virtualreality#motioncapture#engineering#gadget#stmems#breakoutboard#microcontroller
1 note
·
View note
Text
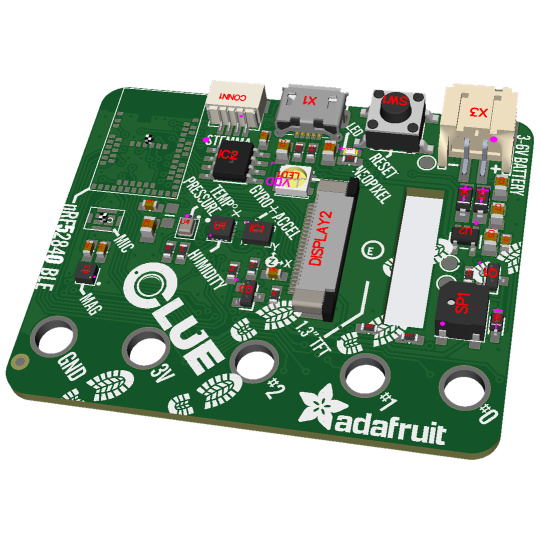
nRF52840 CLUE revision coming soon

Another revision! This time, it's the CLUE! (https://www.adafruit.com/product/4500) This board had a ton of unavailable sensors: the LSM6DS33 was discontinued, then the LIS3MDL price went up to $5 each, the BMP280 also went EOL, and finally, the APDS9960 was last-time-buy. We have enough to get these back in stock by swapping the LSM6DS3 for the DS33.
#adafruit#clue#microbit#nordic#nRF52840#electronics#techupdate#gadgetrevamp#sensorupdate#circuitboard#hardwarenews#engineering#diyelectronics#techinnovation#smarttechnology
1 note
·
View note
Text
More board revivals: nRF52840 Feather Sense

Coming soon is another revision - Feather nRF52840 Sense (https://www.adafruit.com/product/4516). This board had a ton of sensors that became unavailable: the LSM6DS33 was discontinued, then the LIS3MDL price went up to $5 each, the BMP280 also went EOL, and finally, the APDS9960 was last-time-buy. But, still, we have enough to get these back in stock by swapping the LSM6DS3 for the DS33. We'll do a much more extensive redesign soon, but this will 'buy' us a few months!
#adafruit#feather#nRF52840#electronics#sensorboard#techupdate#hardware#diyprojects#sensors#engineering#circuitdesign#innovation#productrevival
1 note
·
View note