#kubernetes secrets tutorial
Explore tagged Tumblr posts
Visit Tumblr Blog
Explore Tumblr blogs with no restrictions, modern design and the best experience.
Last Seen Tumblr Blogs


Fun Fact
Tumblr.com is the 103rd most visited website in the world.
Text
Master DevOps Like a Pro: Learn Terraform, Kubernetes, Ansible & Docker in One Course

If you're dreaming of mastering DevOps and landing high-paying roles in tech, there's no better time than now to level up your skills. Whether you're a system admin, developer, or IT professional aiming to break into the DevOps world, the right tools and training make all the difference. What if you could learn the most in-demand DevOps technologies—Terraform, Kubernetes, Ansible, and Docker—all in one place?
Introducing the DevOps MasterClass: Terraform Kubernetes Ansible Docker—a complete, hands-on course designed to equip you with real-world skills that employers are actively searching for.
Let’s explore what makes this course so powerful and why it might just be the best decision you make for your tech career.
🚀 Why DevOps Is Changing the Tech Industry
Before we dive into the tools, let's quickly understand why DevOps is a game-changer.
Traditional software development and operations used to work in silos. Developers wrote the code, and operations teams handled deployments. The result? Slow, buggy releases and constant miscommunication.
DevOps breaks those silos—it's a culture, a set of practices, and a toolkit that enables teams to collaborate better, release faster, and maintain higher software quality. With major companies like Netflix, Amazon, and Google using DevOps pipelines, the demand for skilled DevOps engineers is skyrocketing.
🎯 What Makes This MasterClass Stand Out?
There are dozens of DevOps tutorials online—but here’s why this DevOps MasterClass: Terraform Kubernetes Ansible Docker truly stands out:
All-in-One Learning: Learn four top tools in one place—Terraform, Kubernetes, Ansible, and Docker.
Real-World Projects: Not just theory. You’ll work on projects that simulate real DevOps environments.
Beginner to Advanced: No matter your level, the course guides you step-by-step.
Lifetime Access: Learn at your own pace and revisit anytime.
Industry-Relevant Curriculum: Aligned with what companies actually use in production.
🧰 The DevOps Toolkit You’ll Master
Let’s break down the four core tools you'll be learning—and why each is so important for modern DevOps practices.
1. Terraform: Infrastructure as Code Made Easy
Imagine being able to create, manage, and scale infrastructure with just a few lines of code. That’s Terraform for you.
Instead of manually setting up cloud resources (which is time-consuming and error-prone), Terraform lets you define everything as code. Whether it’s AWS, Azure, or GCP, Terraform handles it with elegance.
You’ll learn:
How to write Terraform configuration files
Create and destroy cloud resources with ease
Build reusable infrastructure modules
Automate cloud provisioning
This part of the course helps you build the foundations of Infrastructure as Code (IaC)—a must-have skill in modern cloud environments.
2. Kubernetes: Container Orchestration Done Right
Kubernetes, often called K8s, is the gold standard for managing containers. If Docker helps you build and ship containers, Kubernetes helps you scale, manage, and monitor them in production.
In the course, you’ll cover:
Kubernetes architecture (pods, nodes, services)
Deploying applications using YAML
Scaling applications up/down automatically
Handling updates and rollbacks
Managing persistent storage and secrets
This is essential if you’re aiming to run apps at scale and work with microservices.
3. Ansible: Configuration Management Without the Hassle
Ansible makes IT automation simple. It allows you to configure servers, install software, and manage services with human-readable playbooks—no coding headaches.
What you’ll learn:
Writing and running Ansible playbooks
Automating server setups (Linux, cloud VMs, etc.)
Managing app deployments with Ansible roles
Integrating Ansible with CI/CD pipelines
This will help you automate repetitive tasks and maintain consistent environments—a crucial DevOps capability.
4. Docker: The Foundation of Modern DevOps
Docker changed everything. It made app packaging and deployment incredibly easy. Instead of “it works on my machine,” Docker ensures it works everywhere.
You’ll master:
Dockerfile creation and image building
Working with Docker Hub and registries
Networking and volumes
Docker Compose for multi-container apps
Best practices for image optimization and security
Docker is the first tool many DevOps learners start with—and in this course, it’s covered thoroughly.
🔄 How These Tools Work Together in a DevOps Pipeline
These four tools don’t work in isolation—they complement each other perfectly:
Docker packages the application.
Ansible automates the server environment.
Terraform sets up the infrastructure.
Kubernetes deploys and scales your Docker containers.
By mastering this combo, you’ll be able to build a robust, automated DevOps pipeline that mirrors real-world enterprise environments.
💼 Who Should Take This Course?
The DevOps MasterClass: Terraform Kubernetes Ansible Docker is ideal for:
Aspiring DevOps engineers looking to enter the field
System admins who want to automate and modernize infrastructure
Developers who want to understand deployments better
Cloud professionals who need to work across platforms
IT managers who want to upskill their team or shift into DevOps roles
If you’re passionate about learning and ready to commit, this course is your launchpad.
🧠 What You’ll Build (Hands-On Projects)
Unlike dry tutorials, this course emphasizes hands-on experience. Expect to build and manage:
Real-world infrastructure using Terraform on AWS
Scalable deployments on Kubernetes clusters
Automated software installation using Ansible
Containerized web applications with Docker and Docker Compose
These projects will fill your GitHub portfolio—and help you impress hiring managers or clients.
📈 Job Market Value of These Skills
Let’s talk money. According to Glassdoor and Indeed:
DevOps Engineers earn an average of $115,000 to $150,000 per year
Terraform, Kubernetes, Docker, and Ansible skills are listed in 80% of DevOps job posts
Many companies are looking for multi-skilled professionals who can handle everything from infrastructure to deployment
Learning all four tools gives you a major competitive edge.
🧩 What’s Inside the Course (Module Breakdown)
Here’s a sneak peek at the modules:
Introduction to DevOps & Tools Overview
Docker Basics to Advanced
Working with Docker Compose
Ansible Playbooks and Automation
Terraform Infrastructure Provisioning
Kubernetes Architecture & Deployment
CI/CD Integration with DevOps Tools
Project-Based Learning
Every module includes real-world examples, quizzes, and projects to test your skills.
🌐 Why Learn from This Course Instead of Free Tutorials?
It’s tempting to rely on YouTube or blogs for learning. But here’s what this paid course gives you that free resources don’t:
✅ Structured Curriculum ✅ Lifetime Access ✅ Community Support ✅ Expert Instructor Guidance ✅ Projects to Build Your Portfolio
Investing in a high-quality course isn’t just about information—it’s about transformation. You go from knowing a tool to mastering it with confidence.
✨ What Learners Are Saying
⭐ “This course helped me land a DevOps role in just 3 months. The Terraform and Kubernetes modules were spot on.” — Ravi, India
⭐ “I was new to Docker and Ansible, and now I deploy apps in Kubernetes like a pro. Highly recommend this course!” — Jessica, UK
⭐ “Finally, a practical course that teaches how these tools work together. Worth every minute.” — Carlos, USA
🎓 Final Thoughts: Your DevOps Journey Starts Now
The tech world is evolving rapidly, and DevOps is no longer optional—it’s essential. With this DevOps MasterClass: Terraform Kubernetes Ansible Docker, you gain a complete DevOps skill set that’s immediately applicable in the real world.
Don’t waste time juggling multiple incomplete tutorials. Master everything in one comprehensive, expertly designed course.
👉 Take charge of your future. Learn the most in-demand tools. Build real projects. And become the DevOps expert companies are searching for.
Ready to get started?
Enroll in the DevOps MasterClass now and take your first step toward DevOps mastery.
0 notes
Text
Where Can I Find DevOps Training with Placement Near Me?
Introduction: Unlock Your Tech Career with DevOps Training
In today’s digital world, companies are moving faster than ever. Continuous delivery, automation, and rapid deployment have become the new norm. That’s where DevOps comes in a powerful blend of development and operations that fuels speed and reliability in software delivery.
Have you ever wondered how companies like Amazon, Netflix, or Facebook release features so quickly without downtime? The secret lies in DevOps an industry-demanded approach that integrates development and operations to streamline software delivery. Today, DevOps skills are not just desirable they’re essential. If you’re asking, “Where can I find DevOps training with placement near me?”, this guide will walk you through everything you need to know to find the right training and land the job you deserve.

Understanding DevOps: Why It Matters
DevOps is more than a buzzword it’s a cultural and technical shift that transforms how software teams build, test, and deploy applications. It focuses on collaboration, automation, continuous integration (CI), continuous delivery (CD), and feedback loops.
Professionals trained in DevOps can expect roles like:
DevOps Engineer
Site Reliability Engineer
Cloud Infrastructure Engineer
Release Manager
The growing reliance on cloud services and rapid deployment pipelines has placed DevOps engineers in high demand. A recent report by Global Knowledge ranks DevOps as one of the highest-paying tech roles in North America.
Why DevOps Training with Placement Is Crucial
Many learners begin with self-study or unstructured tutorials, but that only scratches the surface. A comprehensive DevOps training and placement program ensures:
Structured learning of core and advanced DevOps concepts
Hands-on experience with DevOps automation tools
Resume building, interview preparation, and career support
Real-world project exposure to simulate a professional environment
Direct pathways to job interviews and job offers
If you’re looking for DevOps training with placement “near me,” remember that “location” today is no longer just geographic—it’s also digital. The right DevOps online training can provide the accessibility and support you need, no matter your zip code.
Core Components of a DevOps Course Online
When choosing a DevOps course online, ensure it covers the following modules in-depth:
1. Introduction to DevOps Culture and Principles
Evolution of DevOps
Agile and Lean practices
Collaboration and communication strategies
2. Version Control with Git and GitHub
Branching and merging strategies
Pull requests and code reviews
Git workflows in real-world projects
3. Continuous Integration (CI) Tools
Jenkins setup and pipelines
GitHub Actions
Code quality checks and automated builds
4. Configuration Management
Tools like Ansible, Chef, or Puppet
Managing infrastructure as code (IaC)
Role-based access control
5. Containerization and Orchestration
Docker fundamentals
Kubernetes (K8s) clusters, deployments, and services
Helm charts and autoscaling strategies
6. Monitoring and Logging
Prometheus and Grafana
ELK Stack (Elasticsearch, Logstash, Kibana)
Incident alerting systems
7. Cloud Infrastructure and DevOps Automation Tools
AWS, Azure, or GCP fundamentals
Terraform for IaC
CI/CD pipelines integrated with cloud services
Real-World Applications: Why Hands-On Learning Matters
A key feature of any top-tier DevOps training online is its practical approach. Without hands-on labs or real projects, theory can only take you so far.
Here’s an example project structure:
Project: Deploying a Multi-Tier Application with Kubernetes
Such projects help learners not only understand tools but also simulate real DevOps scenarios, building confidence and clarity.
DevOps Training and Certification: What You Should Know
Certifications validate your knowledge and can significantly improve your job prospects. A solid DevOps training and certification program should prepare you for globally recognized exams like:
DevOps Foundation Certification
Certified Kubernetes Administrator (CKA)
AWS Certified DevOps Engineer
Docker Certified Associate
While certifications are valuable, employers prioritize candidates who demonstrate both theoretical knowledge and applied skills. This is why combining training with placement offers the best return on investment.
What to Look for in a DevOps Online Course
If you’re on the hunt for the best DevOps training online, here are key features to consider:
Structured Curriculum
It should cover everything from fundamentals to advanced automation practices.
Expert Trainers
Trainers should have real industry experience, not just academic knowledge.
Hands-On Projects
Project-based assessments help bridge the gap between theory and application.
Flexible Learning
A good DevOps online course offers recordings, live sessions, and self-paced materials.
Placement Support
Look for programs that offer:
Resume writing and LinkedIn profile optimization
Mock interviews with real-time feedback
Access to a network of hiring partners
Benefits of Enrolling in DevOps Bootcamp Online
A DevOps bootcamp online fast-tracks your learning process. These are intensive, short-duration programs designed for focused outcomes. Key benefits include:
Rapid skill acquisition
Industry-aligned curriculum
Peer collaboration and group projects
Career coaching and mock interviews
Job referrals and hiring events
Such bootcamps are ideal for professionals looking to upskill, switch careers, or secure a DevOps role without spending years in academia.
DevOps Automation Tools You Must Learn
Git & GitHub Git is the backbone of version control in DevOps, allowing teams to track changes, collaborate on code, and manage development history. GitHub enhances this by offering cloud-based repositories, pull requests, and code review tools—making it a must-know for every DevOps professional.
Jenkins Jenkins is the most popular open-source automation server used to build and manage continuous integration and continuous delivery (CI/CD) pipelines. It integrates with almost every DevOps tool and helps automate testing, deployment, and release cycles efficiently.
Docker Docker is a game-changer in DevOps. It enables you to containerize applications, ensuring consistency across environments. With Docker, developers can package software with all its dependencies, leading to faster development and more reliable deployments.
Kubernetes Once applications are containerized, Kubernetes helps manage and orchestrate them at scale. It automates deployment, scaling, and load balancing of containerized applications—making it essential for managing modern cloud-native infrastructures.
Ansible Ansible simplifies configuration management and infrastructure automation. Its agentless architecture and easy-to-write YAML playbooks allow you to automate repetitive tasks across servers and maintain consistency in deployments.
Terraform Terraform enables Infrastructure as Code (IaC), allowing teams to provision and manage cloud resources using simple, declarative code. It supports multi-cloud environments and ensures consistent infrastructure with minimal manual effort.
Prometheus & Grafana For monitoring and alerting, Prometheus collects metrics in real-time, while Grafana visualizes them beautifully. Together, they help track application performance and system health essential for proactive operations.
ELK Stack (Elasticsearch, Logstash, Kibana) The ELK stack is widely used for centralized logging. Elasticsearch stores logs, Logstash processes them, and Kibana provides powerful visualizations, helping teams troubleshoot issues quickly.
Mastering these tools gives you a competitive edge in the DevOps job market and empowers you to build reliable, scalable, and efficient software systems.
Job Market Outlook for DevOps Professionals
According to the U.S. Bureau of Labor Statistics, software development roles are expected to grow 25% by 2032—faster than most other industries. DevOps roles are a large part of this trend. Companies need professionals who can automate pipelines, manage scalable systems, and deliver software efficiently.
Average salaries in the U.S. for DevOps engineers range between $95,000 to $145,000, depending on experience, certifications, and location.
Companies across industries—from banking and healthcare to retail and tech—are hiring DevOps professionals for critical digital transformation roles.
Is DevOps for You?
If you relate to any of the following, a DevOps course online might be the perfect next step:
You're from an IT background looking to transition into automation roles
You enjoy scripting, problem-solving, and system management
You're a software developer interested in faster and reliable deployments
You're a system admin looking to expand into cloud and DevOps roles
You want a structured, placement-supported training program to start your career
How to Get Started with DevOps Training and Placement
Step 1: Enroll in a Comprehensive Program
Choose a program that covers both foundational and advanced concepts and includes real-time projects.
Step 2: Master the Tools
Practice using popular DevOps automation tools like Docker, Jenkins, and Kubernetes.
Step 3: Work on Live Projects
Gain experience working on CI/CD pipelines, cloud deployment, and infrastructure management.
Step 4: Prepare for Interviews
Use mock sessions, Q&A banks, and technical case studies to strengthen your readiness.
Step 5: Land the Job
Leverage placement services, interview support, and resume assistance to get hired.
Key Takeaways
DevOps training provides the automation and deployment skills demanded in modern software environments.
Placement support is crucial to transitioning from learning to earning.
Look for comprehensive online courses that offer hands-on experience and job assistance.
DevOps is not just a skill it’s a mindset of collaboration, speed, and innovation.
Ready to launch your DevOps career? Join H2K Infosys today for hands-on learning and job placement support. Start your transformation into a DevOps professional now.
#devops training#DevOps course#devops training online#devops online training#devops training and certification#devops certification training#devops training with placement#devops online courses#best devops training online#online DevOps course#advanced devops course#devops training and placement#devops course online#devops real time training#DevOps automation tools
0 notes
Text
Master Secure Kubernetes Secret Management with Best Practices
Introduction Kubernetes Secret Management: Best Practices for Secure Storage is a crucial aspect of deploying and managing applications in a cloud-native environment. In this tutorial, you’ll learn how to implement secure storage for sensitive data using Kubernetes Secrets. By the end of this hands-on guide, you’ll be able to design and deploy secure storage solutions for your…
0 notes
Text
Unlocking the Secrets of Learning DevOps Tools
In the ever-evolving landscape of IT and software development, DevOps has emerged as a crucial methodology for improving collaboration, efficiency, and productivity. Learning DevOps tools is a key step towards mastering this approach, but it can sometimes feel like unraveling a complex puzzle. In this blog, we will explore the secrets to mastering DevOps tools and navigating the path to becoming a proficient DevOps practitioner.
Learning DevOps tools can seem overwhelming at first, but with the right approach, it can be an exciting and rewarding journey. Here are some key steps to help you learn DevOps tools easily: DevOps training in Hyderabad Where traditional boundaries fade, and a unified approach to development and operations emerges.
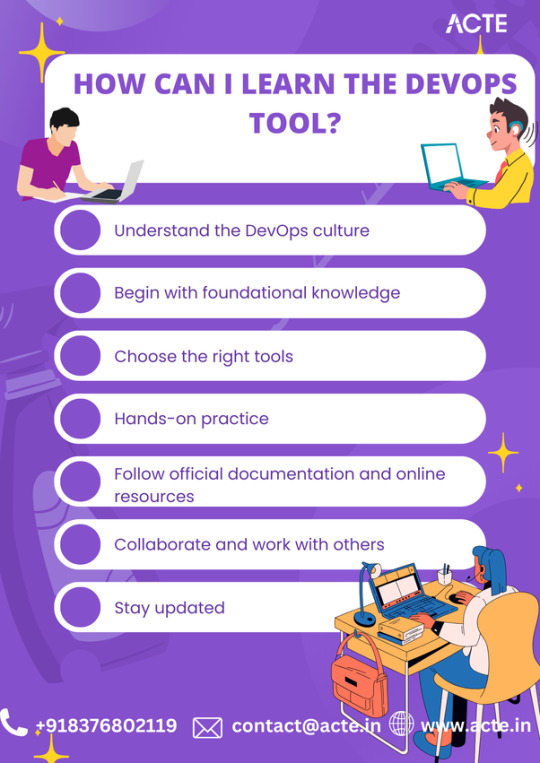
1. Understand the DevOps culture: DevOps is not just about tools, but also about adopting a collaborative and iterative mindset. Start by understanding the principles and goals of DevOps, such as continuous integration, continuous delivery, and automation. Embrace the idea of breaking down silos and promoting cross-functional teams.
2. Begin with foundational knowledge: Before diving into specific tools, it's important to have a solid understanding of the underlying technologies. Get familiar with concepts like version control systems (e.g., Git), Linux command line, network protocols, and basic programming languages like Python or Shell scripting. This groundwork will help you better grasp the DevOps tools and their applications.
3. Choose the right tools: DevOps encompasses a wide range of tools, each serving a specific purpose. Start by identifying the tools most relevant to your requirements. Some popular ones include Jenkins, Ansible, Docker, Kubernetes, and AWS CloudFormation. Don't get overwhelmed by the number of tools; focus on learning a few key ones initially and gradually expand your skill set.
4. Hands-on practice: Theory alone won't make you proficient in DevOps tools. Set up a lab environment, either locally or through cloud services, where you can experiment and work with the tools. Build sample projects, automate deployments, and explore different functionalities. The more hands-on experience you gain, the more comfortable you'll become with the tools
Elevate your career prospects with our DevOps online course – because learning isn’t confined to classrooms, it happens where you are
5. Follow official documentation and online resources: DevOps tools often have well-documented official resources, including tutorials, guides, and examples. Make it a habit to consult these resources as they provide detailed information on installation procedures, configuration setup, and best practices. Additionally, join online communities and forums where you can ask questions, share ideas, and learn from experienced practitioners.
6. Collaborate and work with others: DevOps thrives on collaboration and teamwork. Engage with fellow DevOps enthusiasts, attend conferences, join local meetups, and participate in online discussions. By interacting with others, you'll gain valuable insights, learn new techniques, and expand your network. Collaborative projects or open-source contributions will also provide a platform to practice your skills and learn from others.
7. Stay updated: The DevOps landscape evolves rapidly, with new tools and practices emerging frequently. Keep yourself updated with the latest trends, technological advancements, and industry best practices. Follow influential blogs, read relevant articles, subscribe to newsletters, and listen to podcasts. Being aware of the latest developments will enhance your understanding of DevOps and help you adapt to changing requirements.
Mastering DevOps tools is a continuous journey that requires dedication, hands-on experience, and a commitment to continuous learning. By understanding the DevOps landscape, identifying core tools, and embracing a collaborative mindset, you can unlock the secrets to becoming a proficient DevOps practitioner. Remember, the key is not just to learn the tools but to leverage them effectively in creating streamlined, automated, and secure development workflows.
0 notes
Text
Kubernetes Secrets Tutorial for Devops Beginners and Students
Full Video Link https://youtube.com/shorts/VXQSE4ftbtc Hi, a new #video on #kubernetes #secrets is published on #codeonedigest #youtube channel. Learn #kubernetessecrets #node #docker #container #cloud #aws #azure #programming #coding
In Kubernetes, Secret is an object that contains a small amount of sensitive data such as a password, a token, or a key. Using a Secret means that you don’t need to include confidential data in your application code. As the Secrets are created independently of the Pods that uses them, there is less risk of the Secret being exposed during the workflow of creating, viewing, and editing…

View On WordPress
#kubernetes#kubernetes explained#kubernetes installation#kubernetes interview questions#kubernetes operator#kubernetes orchestration tutorial#kubernetes overview#kubernetes secrets#kubernetes secrets and configmaps#kubernetes secrets as environment variables#kubernetes secrets best practices#kubernetes secrets encryption#kubernetes secrets management#kubernetes secrets spring boot#kubernetes secrets tutorial#kubernetes secrets vault#kubernetes tutorial#kubernetes tutorial for beginners
0 notes
Text
In this tutorial, I’ll take you through the steps to install minikube on Ubuntu 22.04|20.04|18.04 Linux system. To those new to minikube, let’s start with an introduction before diving to the installation steps. Minikube is an open source tool that was developed to enable developers and system administrators to run a single cluster of Kubernetes on their local machine. Minikube starts a single node kubernetes cluster locally with small resource utilization. This is ideal for development tests and POC purposes. For CentOS, check out: Installing Minikube on CentOS 7/8 with KVM In a nutshell, Minikube packages and configures a Linux VM, then installs Docker and all Kubernetes components into it. Minikube supports Kubernetes features such as: DNS NodePorts ConfigMaps and Secrets Dashboards Container Runtime: Docker, CRI-O, and containerd Enabling CNI (Container Network Interface) Ingress PersistentVolumes of type hostPath Hypervisor choice for Minikube: Minikube supports both VirtualBox and KVM hypervisors. This guide will cover both hypervisors. Step 1: Update system Run the following commands to update all system packages to the latest release: sudo apt update sudo apt install apt-transport-https sudo apt upgrade If a reboot is required after the upgrade then perform the process. [ -f /var/run/reboot-required ] && sudo reboot -f Step 2: Install KVM or VirtualBox Hypervisor For VirtualBox users, install VirtualBox using: sudo apt install virtualbox virtualbox-ext-pack KVM Hypervisor Users For those interested in using KVM hypervisor, check our guide on how to Install KVM on CentOS / Ubuntu / Debian Then follow How to run Minikube on KVM instead. Step 3: Download minikube on Ubuntu 22.04|20.04|18.04 You need to download the minikube binary. I will put the binary under /usr/local/bin directory since it is inside $PATH. wget https://storage.googleapis.com/minikube/releases/latest/minikube-linux-amd64 chmod +x minikube-linux-amd64 sudo mv minikube-linux-amd64 /usr/local/bin/minikube Confirm version installed $ minikube version minikube version: v1.25.2 commit: 362d5fdc0a3dbee389b3d3f1034e8023e72bd3a7 Step 4: Install kubectl on Ubuntu We need kubectl which is a command line tool used to deploy and manage applications on Kubernetes: curl -LO https://storage.googleapis.com/kubernetes-release/release/`curl -s https://storage.googleapis.com/kubernetes-release/release/stable.txt`/bin/linux/amd64/kubectl Make the kubectl binary executable. chmod +x ./kubectl Move the binary in to your PATH: sudo mv ./kubectl /usr/local/bin/kubectl Check version: $ kubectl version -o json --client "clientVersion": "major": "1", "minor": "24", "gitVersion": "v1.24.1", "gitCommit": "3ddd0f45aa91e2f30c70734b175631bec5b5825a", "gitTreeState": "clean", "buildDate": "2022-05-24T12:26:19Z", "goVersion": "go1.18.2", "compiler": "gc", "platform": "linux/amd64" , "kustomizeVersion": "v4.5.4" Step 5: Starting minikube on Ubuntu 22.04|20.04|18.04 Now that components are installed, you can start minikube. VM image will be downloaded and configure d for Kubernetes single node cluster. $ minikube start Starting local Kubernetes v1.10.0 cluster... Starting VM... Downloading Minikube ISO 150.53 MB / 150.53 MB [============================================] 100.00% 0s Getting VM IP address... Moving files into cluster... Downloading kubeadm v1.10.0 Downloading kubelet v1.10.0 Finished Downloading kubeadm v1.10.0 Finished Downloading kubelet v1.10.0 Setting up certs... Connecting to cluster... Setting up kubeconfig... Starting cluster components... Kubectl is now configured to use the cluster. Loading cached images from config file. Wait for the download and setup to finish then confirm that everything is working fine. Step 6: Minikube Basic operations To check cluster status, run: $ kubectl cluster-info Kubernetes master is running at https://192.168.39.117:8443
KubeDNS is running at https://192.168.39.117:8443/api/v1/namespaces/kube-system/services/kube-dns:dns/proxy To further debug and diagnose cluster problems, use 'kubectl cluster-info dump'. Note that Minikube configuration file is located under ~/.minikube/machines/minikube/config.json To View Config, use: $ kubectl config view apiVersion: v1 clusters: - cluster: certificate-authority: /home/jmutai/.minikube/ca.crt server: https://192.168.39.117:8443 name: minikube contexts: - context: cluster: minikube user: minikube name: minikube current-context: minikube kind: Config preferences: users: - name: minikube user: client-certificate: /home/jmutai/.minikube/client.crt client-key: /home/jmutai/.minikube/client.key To check running nodes: $ kubectl get nodes NAME STATUS ROLES AGE VERSION minikube Ready master 13m v1.10.0 Access minikube VM using ssh: $ minikube ssh _ _ _ _ ( ) ( ) ___ ___ (_) ___ (_)| |/') _ _ | |_ __ /' _ ` _ `\| |/' _ `\| || , < ( ) ( )| '_`\ /'__`\ | ( ) ( ) || || ( ) || || |\`\ | (_) || |_) )( ___/ (_) (_) (_)(_)(_) (_)(_)(_) (_)`\___/'(_,__/'`\____) $ sudo su - To stop a running local kubernetes cluster, run: $ minikube stop To delete a local kubernetes cluster, use: $ minikube delete Step 7: Enable Kubernetes Dashboard Kubernete ships with a web dashboard which allows you to manage your cluster without interacting with a command line. The dashboard addon is installed and enabled by default on minikube. $ minikube addons list - addon-manager: enabled - coredns: disabled - dashboard: enabled - default-storageclass: enabled - efk: disabled - freshpod: disabled - heapster: disabled - ingress: disabled - kube-dns: enabled - metrics-server: disabled - registry: disabled - registry-creds: disabled - storage-provisioner: enabled To open directly on your default browser, use: $ minikube dashboard To get the URL of the dashboard $ minikube dashboard --url http://192.168.39.117:30000 Access Kubernetes Dashboard by opening the URL on your favorite browser. For further reading, check: Hello Minikube Series: https://kubernetes.io/docs/tutorials/stateless-application/hello-minikube/ Minikube guides for newbies: https://kubernetes.io/docs/getting-started-guides/minikube/
0 notes
Photo
New Post has been published on https://dev-ops-notes.ru/blog/2017/11/29/how-to-integrate-zendesk-mobile-sdk-with-firebase-using-aws-lambda-or-google-cloud-functions/?utm_source=TR&utm_medium=andrey-v-maksimov&utm_campaign=SNAP%2Bfrom%2BDev-Ops-Notes.RU
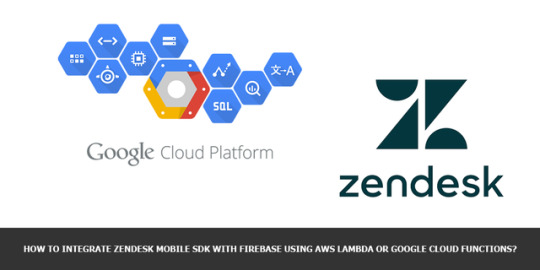
How to integrate Zendesk Mobile SDK with Firebase using AWS Lambda or Google Cloud Functions?
Everybody knows, that you may authenticate you users for Zendesk Mobile SDK using JWT (JSON Web Token). More over, there’re a lot of HOWTO-s, which are showing JWT implementation for many different programming languages. In this tutorial I’ll show you, how to use Google Cloud Functions, NodeJS with some additional npm additions to create a fully scalable and absolutely free Serverless JWT authentication backend for Zendesk Mobile SDK.
Why Google?
Of cause you may use AWS Lambda functions to implement the similar solution, but in my own opinion using a single product (Google Firebase) for iOS backend operations is much more easier, then using a couple of services from AWS. So, the main reason was Firebase.
At the same time Google gives you great logging solution for all its services, so you don’t need to implement something special and reinvent the wheel. Just use single solution for all your services.
And the third one – API. Of cause in my own opinion Google’s API is the best I’ve ever saw. Only Google provides your with the detailed explanation of most of the errors and provides you with the direct URL links to it’s console to, for example, enable the required service.
What is Serverless, Cloud functions and Lambda?
Think of it like a lightweight PaaS hosting based on container technologies with some limitations which makes this technology super fast and scalable. This hosting is storing your pieces of code which are, ready to be launched independently to solve one simple problem (call another function of web-service, save something to the database or send a email, for example), which could be solved in a short period of time.
Your piece of code is launched inside a container each time other cloud service triggers it or calls it directly via HTTP/HTTPS protocol like a traditional web service.
Why Serverless (AWS Lambda or CloudFunctions)?
We still not sparingly using the resources we need for each kind of solutions. We still using half loaded VMs to support long infrastructure scale times or for having ability to launch additional containers in Kubernetes cluster. In case of cloud we’re paying for such unused resources. Don’t know about you, but I do not want doing this.
Usage of cloud functions is allowing us to use available resources, let say, more frugally and at the same time it gives us an ability to scale faster then in case of using VMs or even containers. So, with CloudFunctions we can use the nature of the Cloud without thinking about our web-service scalability.
Of cause, all cloud providers are supporting serverless technologies, so, you don’t need to think about something like vendor-lock. You may easily switch your cloud provider in any time.
Serverless backend
First of all I’m assuming, that you already have:
Google Firebase account (Traditional Google Cloud is also OK, if you’re not using Firebase) and created Project inside.
You’ve installed Firebase SDK for Cloud Functions and created the initial project structure for your cloud functions.
You’ve read about Writing HTTP cloud functions
After that you’ll be easily be able to write something like this on Node.js Put the following code to you index.js file to create a cloud function called jwt_auth:
'use strict'; const functions = require('firebase-functions'); const admin = require('firebase-admin'); admin.initializeApp(functions.config().firebase); var jwt = require('jwt-simple'); var uuid = require('uuid'); var url = require('url'); var subdomain = 'dev-ops-notes'; // You Zendesk sub-domain var shared_key = '.....'; // Zendesk provided shared key exports.jwt_auth = functions.https.onRequest((req, res) => // Uncomment the following code if you want to //console.log('Request method', req.method); //console.log('Request: ', req); //console.log('Body: ', req.body); //console.log('Query: ', req.query); if (!req.body.user_token) console.error('No jwt token provided in URL'); res.status(401).send('Unauthorized'); return; const jwt_token = req.body.user_token; console.log("Verifying token..."); admin.auth().verifyIdToken(jwt_token).then(decodedIdToken => console.log('ID Token correctly decoded', decodedIdToken); let user = decodedIdToken; var displayName = user.email; if (user.displayName != null) displayName = user.displayName; var payload = iat: (new Date().getTime() / 1000), jti: uuid.v4(), name: displayName, email: user.email ; // encode var token = jwt.encode(payload, shared_key); console.log('Token', token) var redirect = 'https://' + subdomain + '.zendesk.com/access/jwt?jwt=' + token; var query = url.parse(req.url, true).query; if(query['return_to']) redirect += '&return_to=' + encodeURIComponent(query['return_to']); console.log('Redirect response', redirect) let response = "jwt": token res.status(200).send(response) return; ).catch(error => console.error('Error while verifying Firebase ID token:', error); res.status(401).send('Unauthorized'); return; ); );
In the code abode we’re importing some additional dependencies
firebase-functions – to have an ability to access to HTTP Request (req) and Response (res) objects and their properties.
firebase-admin – to have an ability to access Firebase Authentication features (like the checking of users tokens or credentials)
jwt-simple – it’s a small lib allowing us to form a right JWT response
uuid – lib for generating random UUID for JWT token for Zendesk
url – lib for parsing HTTP Request query string and processing redirect_url parameter provided to you by Zendesk to remember from what page did the user come, so we could include it in our request and pass back later
Checking for existence of user_token parameter inside HTTP Request and responding 401 Unauthorized if we did not find that parameter.
After that we’re verifying Firebase user token inside our request using verifyIdToken method, which is returning us Firebase user information in case of success.
After that we’re forming JWT response structure (see Anatomy of a JWT request for more details), adding return_to information from the Zendesk request and sending back 200 OK HTTP Response with the body containing our JWT token.
Now it’s time to go to the functions directory and install all the required dependencies:
$ npm install firebase-functions $ npm install firebase-admin $ npm install jwt-simple $ npm install uuid $ npm install url
Now you’re ready to deploy your cloud function using the command:
firebase deploy --only functions
At the command output you’ll see the function URL, which we’d need to provide to Zendesk Mobile SDK configuration at the next step (something like us-central1-<your-firebase-project-id>.cloudfunctions.net).
Zendesk configuration
First of all you need to Enable Mobile SDK at you account admin page:
Then we need to go to settings to Mobile SDK configuration and click “Add App” button
At the Mobile App Settings do the following:
Fill the Name of your application at Setup tab and enable JWT Authentication method.
Fill JWT URL with the URL you’ve got during cloud function deployment.
Put the JWT Secret to the shared_key variable and deploy the function once more again to update it with the same command you’ve already used.
Enable Zendesk Guide and Conversations support if needed at Support SDK tab.
Now, you’re able to use Zendesk Mobile SDK in your iOS application.
Using Zendesk Mobile SDK with JWT Authentication
I’ll not duplicate this great Zendesk tutorial, just watch the video and follow the next steps to embed Zendesk Support in your mobile app.
Will add just a few things here.
If you want to embed Zendesk Support as UITabBarItem, follow this tutorial: Quick start – Support SDK for iOS
If you want to use Zendesk Support as usual UIViewController, just use this code to launch it:
URLProtocol.registerClass(ZDKAuthenticationURLProtocol.self) let jwtUserIdentity = ZDKJwtIdentity(jwtUserIdentifier:idToken) ZDKConfig.instance().userIdentity = jwtUserIdentity let helpCenterContentModel = ZDKHelpCenterOverviewContentModel.defaultContent() ZDKHelpCenter.presentOverview(self, with: helpCenterContentModel)
Let’s come back to JWT Authentication in iOS App.
Full process of JWT Authentication process is shown here: Building a dedicated JWT endpoint for the Support SDK. This article is very important, because it shows how to debug the authentication process using curl, if something goes wrong.
IMPORTANT: The common mistake in most cases is misconfigured JWT token, which is usually not containing this 4 MUST HAVE fields:
iat
jti
name
email
Next, you need to provide current user information to Zendesk before launching Zendesk Support UIViewController. If you’re using Firebase as Authentication backend for your users in the app, just use the following code for example inside “Get Support” UIButton action:
if let currentUser = Auth.auth().currentUser currentUser.getTokenForcingRefresh(true, completion: (idToken, error) in if let error = error debugPrint("Error obtaining user token: %@", error) else URLProtocol.registerClass(ZDKAuthenticationURLProtocol.self) let jwtUserIdentity = ZDKJwtIdentity(jwtUserIdentifier:idToken) ZDKConfig.instance().userIdentity = jwtUserIdentity // Create a Content Model to pass in let helpCenterContentModel = ZDKHelpCenterOverviewContentModel.defaultContent() ZDKHelpCenter.presentOverview(self, with: helpCenterContentModel) )
Here we’re getting current user token (idToken) from the Firebase, configuring ZDKJwtIdentity object and providing it to Zendesk Support View (helpCenterContentModel) before launching it.
That’s it. Now you’re ready to provide professional support for your users using the most exciting Support platform ever!
8 notes
·
View notes
Text
Understand how K8s Components work together | Complete Application Deployment using Kubernetes Components
It's a hands-on, practical tutorial of deploying an application using different Kubernetes Components to REALLY understand how these components fit in together and how you can use them in your application setup.
So, instead of creating each component separate without context, this video goes through a complete application setup using pod, deployment, service, configmap and secret. Referencing diagrams, which show the browser request flow through these components will further help you understand the whole flow.
In detail we create the following components.
1) MongoDB Deployment
Creating the database container/pod, in which the mongodb runs.
2) Secret
Creating the Secret component, where the username and password are stored.
3) Internal Service
Creating the Service component for MongoDB to be accessible by other Kubernetes components.
4) Mongo Express Deployment
Creating the Mongo Express container/pod, in which the web application runs.
5) ConfigMap
Creating the ConfigMap component, where the MongoDB URL is stored.
6) External Service
Creating the external service component for Mongo Express to be accessible from outside the kubernetes cluster (from the browser)
This video was actually inspired from a viewers feedback. So I hope it helps in getting a bigger picture! 🌍🤓
submitted by /u/Techworld_with_Nana [link] [comments] from Software Development - methodologies, techniques, and tools. Covering Agile, RUP, Waterfall + more! https://ift.tt/2TaJA9w via IFTTT
0 notes
Photo

D3.js 5.0, and an introduction to functional programming in JS
#378 — March 23, 2018
Read on the Web
JavaScript Weekly

D3.js 5.0 Released — D3 continues to be a fantastic choice for data visualization with JavaScript. Changes in 5.0 include using promises to load data instead of callbacks, contour plots, and density contours.
Mike Bostock
Lazy Loading Modules with ConditionerJS — Linking JavaScript functionality to DOM elements can become a tedious task. See how ConditionerJS makes progressive enhancement easier in this thorough tutorial.
Smashing Magazine
The Best JavaScript Debugging Tools for 2018 — If you work with JavaScript, you’ll know that it doesn’t always play nice. Here we look at the best JavaScript debugging tools you can use to clean up your code and provide great software experiences to your users.
RAYGUN sponsor
▶ A 10 Video Introduction to Functional JavaScript with Ramda — Want to get started with functional programming in JavaScript? Ramda is a more functional alternative to libraries like Lodash, and these brief videos cover the essentials. You may also appreciate Kyle Simpson’s Functional-Light JavaScript if you set off on the functional programming journey.
James Moore
JavaScript vs. TypeScript vs. ReasonML: Pros and Cons — Dr. Axel is becoming a fan of static typing for larger projects and explains the pros and cons of it and how static typing relates to the TypeScript and ReasonML projects.
Dr. Axel Rauschmayer
A Proposal for Package Name Maps for ES Modules — Or how to solve the web’s “bare import specifier” problem.
Domenic Denicola
A TC39 Proposal for Object.fromEntries — It would transform a list of key/value pairs into an object.
TC39 news
How Unsplash Gradually Migrated to TypeScript
Oliver Joseph Ash
💻 Jobs
Engineering Manager — You’ll lead a team in building a product at scale and get the opportunity to manage and mentor while helping shape decisions.
Skillshare
Software Engineer at Fat Lama (London) — Technology and engineering is at the heart of what we do at Fat Lama - help us build the rental marketplace for everything.
Fat Lama
JavaScript Expert? Sign Up for Vettery — Create your profile and we’ll connect you with top companies looking for talented front-end developers.
Vettery
Place your own job listing in a future issue
📘 Tutorials & Tips
Getting Started with the Web MIDI API — Covers the basics of MIDI and the Web MIDI API showing how simple it is to create frontend apps that respond to musical inputs. It’s niche but also neat the Web platform can do this.
Peter Anglea
▶ 7 Secret Patterns Vue Consultants Don&'t Want You to Know — Clickbaity talk title, but Chris is both on the Vue core team and a great speaker :-)
Chris Fritz
Learn to Build JavaScript Apps with MongoDB in M101JS, MongoDB for Node Developers — MongoDB University courses are free and give you everything you need to know about MongoDB.
MongoDB sponsor
How to Write Powerful Schemas in JavaScript — An introduction to schm, a library for building model schemas in a functional, composable way.
Diego Haz
Getting Smaller Lodash Bundles with Webpack and Babel — Plus some tips for working with lodash-webpack-plugin.
Nolan Lawson
Elegant Patterns in Modern JavaScript: RORO — RORO stands for Receive an Object, Return an Object.
Bill Sourour
The Ultimate Angular CLI Reference Guide — Create new Angular 2+ apps, scaffold components, run tests, build for production, and more.
Jurgen Van de Moere
▶ Add ESLint and Prettier to VS Code for 'Create React App' Apps
Elijah Manor
Tips for Using ESLint in a Legacy Codebase — Techniques that can help you significantly reduce the number of errors you see.
Sheshbabu Chinnakonda
Free eBook: A Roundup of Managed Kubernetes Platforms
Codeship sponsor
Lookaheads (and Lookbehinds) in JS Regular Expressions
Stefan Judis
Unblocking Clipboard Access in Chrome 66+ — The Async Clipboard API supersedes the document.execCommand approach.
Jason Miller
Building Office 365/SharePoint Applications with Aurelia
Magnus Danielson
🔧 Code and Tools
GPU-Accelerated Neural Networks in JavaScript — A look at four libraries providing this type of functionality.
Sebastian Kwiatkowski
Get the Best, Most Complete Collection of Angular UI Controls: Wijmo — Wijmo’s dependency-free UI controls include rich declarative markup, full IntelliSense, and the best data grid.
GrapeCity Wijmo sponsor
better-sqlite3: A Simple, Fast SQLite3 Library for Node
Joshua Wise
ngx-datatable: A Feature-Rich Data-Table Component for Angular — No external dependencies. Demos here.
Swimlane
vue-content-loader: SVG-based 'Loading Placeholder' Component — It’s a port of ReactContentLoader.
EGOIST
DrawerJS: A Customizable HTML Canvas Drawing Tool — Live demo.
Carsten Schäfer
by via JavaScript Weekly https://ift.tt/2pzqNa9
0 notes
Text
2018-03-08 18 LINUX now
LINUX
Linux Academy Blog
AWS Security Essentials has been released!
Employee Spotlight: Sara Currie, Technical Recruiter
Linux Academy Weekly Roundup 108
Free SSL with Let’s Encrypt & NGINX
Michelle Gill – Becoming V.P. of Engineering
Linux Insider
Kali Linux Security App Lands in Microsoft Store
Microsoft Gives Devs More Open Source Quantum Computing Goodies
Red Hat Adds Zing to High-Density Storage
When It's Time for a Linux Distro Change
Endless OS Helps Tear Down Linux Wall
Linux Journal
Building a March Madness Bracket in PHP
Exim Vulnerability, GitHub Open-Sources Licensed, The Khronos Group Releases Vulkan 1.1 and More
Last chance: Subscribe now to get the highly anticipated comeback issue!
Best Laptop for Running Linux
diff -u: Linus Posting Habits
Linux Magazine
OpenStack Queens Released
Kali Linux Comes to Windows
Ubuntu to Start Collecting Some Data with Ubuntu 18.04
CNCF Illuminates Serverless Vision
LibreOffice 6.0 Released
Linux Today
Linux nl Command Tutorial for Beginners (7 Examples)
FreeTube - An Open Source Desktop YouTube Player For Privacy-minded People
Host your own email with projectx/os and a Raspberry Pi
Google Chrome 65 Now Rolling Out to Android Devices to Fight Malvertising
How to install ERPNext on Debian 9
Linux.com
LFS458 Kubernetes Administration
China SDN/NFV Conference
Protecting Code Integrity with PGP — Part 4: Moving Your Master Key to Offline Storage
One Week Until Embedded Linux Conference + OpenIoT Summit in Portland: Will You Join Us?
Kubernetes Graduates to Full-Fledged, Open-Source Program
Reddit Linux
Linux Networking Dietary Restrictions
Distros that randomise MAC address
This is a great idea - Using Android apps inside Linux with Anbox
Meet India’s women Open Source warriors
Apple's top-secret iBoot firmware source code spills onto GitHub for some insane reason
Riba Linux
How to install SwagArch GNU/Linux 18.03
SwagArch GNU/Linux 18.03 overview | A simple and beautiful Everyday Desktop
How to install Nitrux 1.0.9
Nitrux 1.0.9 overview | Change The Rules
Pixel OS 1.0 "Apu" Public Beta 1 overview | Meet Pixel OS
Slashdot Linux
NASA Spacecraft Reveals Jupiter's Interior In Unprecedented Detail
Most Americans Think AI Will Destroy Other People's Jobs, Not Theirs
Samsung's New TVs Are Almost Invisible
California Becomes 18th State To Consider Right To Repair Legislation
Oculus Rift Headsets Are Offline Following a Software Error
Softpedia
Mozilla Firefox 58.0.2 / 59.0 Beta 14
Evolution 3.26.6
Evolution 3.28.0 RC
Evolution Data Server 3.26.6 / 3.28.0 RC
Evolution Mapi 3.26.6 / 3.28.0 RC
Tecmint
How to Install Particular Package Version in CentOS and Ubuntu
How to Enable and Disable Root Login in Ubuntu
8 Best Tools to Access Remote Linux Desktop
How to Install NetBeans IDE 8.2 in Debian, Ubuntu and Linux Mint
How to Install NetBeans IDE in CentOS, RHEL and Fedora
nixCraft
400K+ Exim MTA affected by overflow vulnerability on Linux/Unix
Book Review: SSH Mastery – OpenSSH, PuTTY, Tunnels & Keys
How to use Chomper Internet blocker for Linux to increase productivity
Linux/Unix desktop fun: Simulates the display from “The Matrix”
Ubuntu 17.10 no longer available for download due to LENOVO bios getting corrupted
0 notes
Text
Mastering Azure Kubernetes Secrets Management and Ingress Control
Introduction This tutorial provides a comprehensive, hands-on guide to mastering secrets management and Ingress controllers in Azure Kubernetes Service (AKS). We will cover the fundamental concepts, implementation guides, code examples, best practices, testing, and debugging. By the end of this tutorial, you will have a deep understanding of how to securely manage secrets and configure Ingress…
0 notes
Text
Backing Up Percona Kubernetes Operator for Percona XtraDB Cluster Databases to Google Cloud Storage
The Percona Kubernetes Operator for Percona XtraDB Cluster can send backups to Amazon S3 or S3-compatible storage. And every now and then at Support, we are asked how to send backups to Google Cloud Storage. Google Cloud Storage offers an “interoperability mode” which is S3-compatible. However, there are a few details to take care of when using it. Google Cloud Storage Configuration First, select “Settings” under “Storage” in the Navigation Menu. Under Settings, select the Interoperability tab. If Interoperability is not yet enabled, click Enable Interoperability Access. This turns on the S3-compatible interface to Google Cloud Storage. After enabling S3-compatible storage, an access key needs to be generated. There are two options: Access keys can be tied to Service accounts or User accounts. For production workloads, Google recommends Service account access keys, but for this example, a User account access key will be used for simplicity. The Interoperability page links to further documentation on the differences between the two, so this article does not go into those details. To create a User account HMAC (Hash-based Message Authentication Code) keys scroll down to “User account HMAC” and click “Create a key”. This generates an access key and accompanying secret. These keys will be used as an AWS access key and secret later on. The user account also needs access to the bucket that will be used for backups. This can be set up by selecting the bucket in Storage Browser, and going to the Permissions tab. Operator Configuration Once a key has been created and the account permissions are verified to be correct, the Percona XtraDB Cluster (PXC) Operator needs to be configured to use the new keys. First, the access key and secret need to be base64 encoded. For example: $ echo -n GOOGFJDEWQ3KJFAS | base64 R09PR0ZKREVXUTNLSkZBUw== $ echo -n IFEWw99s0+ece3SXuf9q | base64 SUZFV3c5OXMwK2VjZTNTWHVmOXE= The -n parameter to echo is important, without it a line break will also be encoded and the key won’t work. Next, the base64-encoded values need to be stored in the deploy/backup-s3.yaml file in the PXC Operator directory as the AWS_ACCESS_KEY_ID and AWS_SECRET_ACCESS_KEY like this: $ cat deploy/backup-s3.yaml apiVersion: v1 kind: Secret metadata: name: my-test-backup-s3 type: Opaque data: AWS_ACCESS_KEY_ID: R09PR0ZKREVXUTNLSkZBUw== AWS_SECRET_ACCESS_KEY: SUZFV3c5OXMwK2VjZTNTWHVmOXE= After modifying the file, the secrets need to be stored in Kubernetes using: $ kubectl apply -f deploy/backup-s3.yaml In the cr.yaml of PXC Operator the backup destination is defined as follows: storages: s3-us-central1: type: s3 s3: bucket: my-test-bucket credentialsSecret: my-test-backup-s3 region: us-central1 endpointUrl: https://storage.googleapis.com/ bucket is the name of the bucket as created in Google Cloud Storage, credentialsSecret must match the entry in backup-s3.yaml. endpointUrl is the “Storage URI” as shown in the Interoperability tab of Google Cloud Storage. Now that the backup destination has been defined, to take an on-demand backup the backup/backup.yaml file needs to be modified: apiVersion: pxc.percona.com/v1 kind: PerconaXtraDBClusterBackup metadata: name: my-test-backup spec: pxcCluster: cluster1 storageName: s3-us-central1 Here pxcCluster needs to match the name of the cluster, and storageName needs to match the entry in cr.yaml. After modifying the file an on-demand backup can be started using: $ kubectl apply -f deploy/backup/backup.yml From here on the documentation for PXC Operator at https://www.percona.com/doc/kubernetes-operator-for-pxc/backups.html can be followed, since after configuring the Google Cloud Storage destination taking and restoring backups works exactly as it does when using Amazon S3. Conclusion As you can see, using Google Cloud Storage together with Percona Kubernetes Operator for Percona XtraDB Cluster is not difficult at all, but few details are slightly different from Amazon S3. Be sure to get in touch with Percona’s Training Department to schedule a hands-on tutorial session with our K8S Operator. Our instructors will guide you and your team through all the setup processes, learn how to take backups, handle recovery, scale the cluster, and manage high-availability with ProxySQL. Percona XtraDB Cluster is a cost-effective and robust clustering solution created to support your business-critical data. It gives you the benefits and features of MySQL along with the added enterprise features of Percona Server for MySQL. Download Percona XtraDB Cluster Datasheet https://www.percona.com/blog/2020/07/20/backing-up-percona-kubernetes-operator-for-percona-xtradb-cluster-databases-to-google-cloud-storage/
0 notes
Text
This tutorial has been written to help you install Minikube on CentOS 8 / CentOS 7 with KVM Hypervisor. Minikube is an open source tool designed to enable developers and system administrators to bootstrap a single node Kubernetes cluster in their local machine – Laptops, Desktop workstations in minutes. This is ideal for development and POC purposes, but not for running Production workloads. For installation of Minikube on Ubuntu / Debian Linux system, check: How to install Minikube on Ubuntu / Debian Linux. In a nutshell, Minikube packages and configures a Linux VM, then installs Docker and all Kubernetes components into it. Which you can manage and deploy applications from kubectl running in the host system. Kubernetes Supported features Some of the features which you can run from Kubernetes running in Minikube are: DNS NodePorts ConfigMaps and Secrets Dashboards Container Runtime: Docker, CRI-O, and containerd Enabling CNI (Container Network Interface) Ingress PersistentVolumes of type hostPath Minikube supports both VirtualBox and KVM hypervisors., but this guide is for running Minikube with KVM on a CentOS 8 / CentOS 7 Linux machine. Step 1: Update system Run the following commands to update all system packages to the latest release: sudo yum -y update Step 2: Install KVM Hypervisor As stated earlier, we’ll use KVM as Hypervisor of choice for the Minikube VM. Here is our complete guide on the installation of KVM on CentOS / RHEL 8. How To Install KVM on RHEL 8 / CentOS 8 Linux Install KVM on CentOS 7 Confirm that libvirtd service is running. $ systemctl status libvirtd ● libvirtd.service - Virtualization daemon Loaded: loaded (/usr/lib/systemd/system/libvirtd.service; enabled; vendor preset: enabled) Active: active (running) since Mon 2020-01-20 14:33:07 EAT; 1s ago Docs: man:libvirtd(8) https://libvirt.org Main PID: 20569 (libvirtd) Tasks: 20 (limit: 32768) Memory: 70.4M CGroup: /system.slice/libvirtd.service ├─ 2653 /usr/sbin/dnsmasq --conf-file=/var/lib/libvirt/dnsmasq/default.conf --leasefile-ro --dhcp-script=/usr/libexec/libvirt_leaseshelper ├─ 2654 /usr/sbin/dnsmasq --conf-file=/var/lib/libvirt/dnsmasq/default.conf --leasefile-ro --dhcp-script=/usr/libexec/libvirt_leaseshelper └─20569 /usr/sbin/libvirtd Jan 20 14:33:07 cent8.localdomain systemd[1]: Starting Virtualization daemon... Jan 20 14:33:07 cent8.localdomain systemd[1]: Started Virtualization daemon. Jan 20 14:33:08 cent8.localdomain dnsmasq[2653]: read /etc/hosts - 2 addresses Jan 20 14:33:08 cent8.localdomain dnsmasq[2653]: read /var/lib/libvirt/dnsmasq/default.addnhosts - 0 addresses Jan 20 14:33:08 cent8.localdomain dnsmasq-dhcp[2653]: read /var/lib/libvirt/dnsmasq/default.hostsfile If not running after installation, then start and set it to start at boot. sudo systemctl enable --now libvirtd You user should be part of libvirt group. sudo usermod -a -G libvirt $(whoami) newgrp libvirt Open the file /etc/libvirt/libvirtd.conf for editing. sudo vi /etc/libvirt/libvirtd.conf Set the UNIX domain socket group ownership to libvirt, (around line 85) unix_sock_group = "libvirt" Set the UNIX socket permissions for the R/W socket (around line 102) unix_sock_rw_perms = "0770" Restart libvirt daemon after making the change. sudo systemctl restart libvirtd.service Step 3: Download minikube You need to download the minikube binary. I will put the binary under /usr/local/bin directory since it is inside $PATH. sudo yum -y install wget wget https://storage.googleapis.com/minikube/releases/latest/minikube-linux-amd64 chmod +x minikube-linux-amd64 sudo mv minikube-linux-amd64 /usr/local/bin/minikube Confirm installation of Minikube on your system. $ minikube version minikube version: v1.23.2 commit: 0a0ad764652082477c00d51d2475284b5d39ceed Step 4: Install kubectl We need kubectl which is a command-line tool used to deploy and manage applications on Kubernetes.
curl -LO https://storage.googleapis.com/kubernetes-release/release/`curl -s https://storage.googleapis.com/kubernetes-release/release/stable.txt`/bin/linux/amd64/kubectl Give the file executable bit and move to a location in your PATH. chmod +x kubectl sudo mv kubectl /usr/local/bin/ Confirm the version of kubectl installed. $ kubectl version --client -o json "clientVersion": "major": "1", "minor": "22", "gitVersion": "v1.22.2", "gitCommit": "8b5a19147530eaac9476b0ab82980b4088bbc1b2", "gitTreeState": "clean", "buildDate": "2021-09-15T21:38:50Z", "goVersion": "go1.16.8", "compiler": "gc", "platform": "linux/amd64" Step 5: Starting minikube Now that components are installed, you can start minikube. VM image will be downloaded and configured for Kubernetes single node cluster. Edit Libvirtd configuration file and set group: $ sudo vim /etc/libvirt/libvirtd.conf unix_sock_group = "libvirt" unix_sock_rw_perms = "0770" Restart libvirtd daemon: sudo systemctl restart libvirtd Add your username to libvirt group: $ sudo usermod -aG libvirt $USER $ newgrp libvirt $ id uid=1000(jkmutai) gid=989(libvirt) groups=989(libvirt),10(wheel),1000(jkmutai) For a list of options, run: $ minikube start --help To create a minikube VM with the default options, run: $ minikube start The default container runtime to be used is docker, but you can also use crio or containerd: $ minikube start --container-runtime=cri-o $ minikube start --container-runtime=containerd The installer will automatically detect KVM and download KVM driver. * minikube v1.23.2 on CentOS 8.4 * Automatically selected the kvm2 driver * Downloading driver docker-machine-driver-kvm2: > docker-machine-driver-kvm2....: 65 B / 65 B [----------] 100.00% ? p/s 0s > docker-machine-driver-kvm2: 11.40 MiB / 11.40 MiB 100.00% 1.09 MiB p/s 1 * Downloading VM boot image ... > minikube-v1.23.1.iso.sha256: 65 B / 65 B [-------------] 100.00% ? p/s 0s > minikube-v1.23.1.iso: 225.22 MiB / 225.22 MiB 100.00% 103.78 MiB p/s 2.4 * Starting control plane node minikube in cluster minikube .... If you have more than one hypervisor, then specify it. $ minikube start --vm-driver kvm2 Please note that latest stable release of Kubernetes is installed. Use --kubernetes-version flag to specify version to be installed. Example: --kubernetes-version='v1.22.2' Wait for the download and setup to finish then confirm that everything is working fine. $ minikube start * minikube v1.23.2 on Centos 8.4 * Automatically selected the kvm2 driver * Downloading driver docker-machine-driver-kvm2: > docker-machine-driver-kvm2....: 65 B / 65 B [----------] 100.00% ? p/s 0s > docker-machine-driver-kvm2: 11.40 MiB / 11.40 MiB 100.00% 1.09 MiB p/s 1 * Downloading VM boot image ... > minikube-v1.23.1.iso.sha256: 65 B / 65 B [-------------] 100.00% ? p/s 0s > minikube-v1.23.1.iso: 225.22 MiB / 225.22 MiB 100.00% 103.78 MiB p/s 2.4 * Starting control plane node minikube in cluster minikube * Downloading Kubernetes v1.22.2 preload ... > preloaded-images-k8s-v13-v1...: 579.88 MiB / 579.88 MiB 100.00% 71.91 Mi * Creating kvm2 VM (CPUs=2, Memory=6000MB, Disk=20000MB) ... * Deleting "minikube" in kvm2 ... * Creating kvm2 VM (CPUs=2, Memory=6000MB, Disk=20000MB) ... * Preparing Kubernetes v1.22.2 on CRI-O 1.22.0 ... - Generating certificates and keys ... - Booting up control plane ... - Configuring RBAC rules ... * Configuring bridge CNI (Container Networking Interface) ... * Verifying Kubernetes components... - Using image gcr.io/k8s-minikube/storage-provisioner:v5 * Enabled addons: storage-provisioner, default-storageclass * Done! kubectl is now configured to use "minikube" cluster and "default" namespace by default Step 6: Minikube Basic operations The kubectl command line tool is configured to use “minikube“. To check cluster status, run: $ minikube status minikube
type: Control Plane host: Running kubelet: Running apiserver: Running kubeconfig: Configured $ kubectl cluster-info Kubernetes master is running at https://192.168.39.2:8443 KubeDNS is running at https://192.168.39.2:8443/api/v1/namespaces/kube-system/services/kube-dns:dns/proxy To further debug and diagnose cluster problems, use 'kubectl cluster-info dump'. Your Minikube configuration file is located under ~/.minikube/machines/minikube/config.json To View Config, use: $ kubectl config view apiVersion: v1 clusters: - cluster: certificate-authority: /home/jkmutai/.minikube/ca.crt extensions: - extension: last-update: Mon, 27 Sep 2021 00:44:49 EAT provider: minikube.sigs.k8s.io version: v1.23.2 name: cluster_info server: https://192.168.39.195:8443 name: minikube contexts: - context: cluster: minikube extensions: - extension: last-update: Mon, 27 Sep 2021 00:44:49 EAT provider: minikube.sigs.k8s.io version: v1.23.2 name: context_info namespace: default user: minikube name: minikube current-context: minikube kind: Config preferences: users: - name: minikube user: client-certificate: /home/jkmutai/.minikube/profiles/minikube/client.crt client-key: /home/jkmutai/.minikube/profiles/minikube/client.key To check running nodes: $ kubectl get nodes NAME STATUS ROLES AGE VERSION minikube Ready control-plane,master 2m53s v1.22.2 Access minikube VM using ssh: $ minikube ssh _ _ _ _ ( ) ( ) ___ ___ (_) ___ (_)| |/') _ _ | |_ __ /' _ ` _ `\| |/' _ `\| || , < ( ) ( )| '_`\ /'__`\ | ( ) ( ) || || ( ) || || |\`\ | (_) || |_) )( ___/ (_) (_) (_)(_)(_) (_)(_)(_) (_)`\___/'(_,__/'`\____) $ sudo su - # cat /etc/os-release NAME=Buildroot VERSION=2021.02.4-dirty ID=buildroot VERSION_ID=2021.02.4 PRETTY_NAME="Buildroot 2021.02.4" # exit logout $ exit logout To stop a running local kubernetes cluster, run: $ minikube stop * Stopping "minikube" in kvm2 ... * "minikube" stopped. To start VM, run: $ minikube start * minikube v1.23.2 on CentOS 8.4 * Using the kvm2 driver based on existing profile * Starting control plane node minikube in cluster minikube * Restarting existing kvm2 VM for "minikube" ... * Preparing Kubernetes v1.22.2 on CRI-O 1.22.0 ... * Configuring bridge CNI (Container Networking Interface) ... * Verifying Kubernetes components... - Using image gcr.io/k8s-minikube/storage-provisioner:v5 * Enabled addons: storage-provisioner, default-storageclass * Done! kubectl is now configured to use "minikube" cluster and "default" namespace by default To delete a local kubernetes cluster, use: $ minikube delete Step 7: Enable Kubernetes Dashboard Kubernetes ships with a web dashboard which allows you to manage your cluster without interacting with a command line. The dashboard addon is installed and enabled by default on minikube. $ minikube addons list |-----------------------------|----------|--------------|-----------------------| | ADDON NAME | PROFILE | STATUS | MAINTAINER | |-----------------------------|----------|--------------|-----------------------| | ambassador | minikube | disabled | unknown (third-party) | | auto-pause | minikube | disabled | google | | csi-hostpath-driver | minikube | disabled | kubernetes | | dashboard | minikube | disabled | kubernetes | | default-storageclass | minikube | enabled ✅ | kubernetes | | efk | minikube | disabled | unknown (third-party) | | freshpod | minikube | disabled | google | | gcp-auth | minikube | disabled | google |
| gvisor | minikube | disabled | google | | helm-tiller | minikube | disabled | unknown (third-party) | | ingress | minikube | disabled | unknown (third-party) | | ingress-dns | minikube | disabled | unknown (third-party) | | istio | minikube | disabled | unknown (third-party) | | istio-provisioner | minikube | disabled | unknown (third-party) | | kubevirt | minikube | disabled | unknown (third-party) | | logviewer | minikube | disabled | google | | metallb | minikube | disabled | unknown (third-party) | | metrics-server | minikube | disabled | kubernetes | | nvidia-driver-installer | minikube | disabled | google | | nvidia-gpu-device-plugin | minikube | disabled | unknown (third-party) | | olm | minikube | disabled | unknown (third-party) | | pod-security-policy | minikube | disabled | unknown (third-party) | | portainer | minikube | disabled | portainer.io | | registry | minikube | disabled | google | | registry-aliases | minikube | disabled | unknown (third-party) | | registry-creds | minikube | disabled | unknown (third-party) | | storage-provisioner | minikube | enabled ✅ | kubernetes | | storage-provisioner-gluster | minikube | disabled | unknown (third-party) | | volumesnapshots | minikube | disabled | kubernetes | |-----------------------------|----------|--------------|-----------------------| Enabling plugins: minikube addons enable Example: $ minikube addons enable csi-hostpath-driver ! [WARNING] For full functionality, the 'csi-hostpath-driver' addon requires the 'volumesnapshots' addon to be enabled. You can enable 'volumesnapshots' addon by running: 'minikube addons enable volumesnapshots' - Using image k8s.gcr.io/sig-storage/livenessprobe:v2.2.0 - Using image k8s.gcr.io/sig-storage/csi-provisioner:v2.1.0 - Using image k8s.gcr.io/sig-storage/csi-attacher:v3.1.0 - Using image k8s.gcr.io/sig-storage/csi-external-health-monitor-controller:v0.2.0 - Using image k8s.gcr.io/sig-storage/hostpathplugin:v1.6.0 - Using image k8s.gcr.io/sig-storage/csi-snapshotter:v4.0.0 - Using image k8s.gcr.io/sig-storage/csi-external-health-monitor-agent:v0.2.0 - Using image k8s.gcr.io/sig-storage/csi-node-driver-registrar:v2.0.1 - Using image k8s.gcr.io/sig-storage/csi-resizer:v1.1.0 * Verifying csi-hostpath-driver addon... * The 'csi-hostpath-driver' addon is enabled To open directly on your default browser, use: $ minikube dashboard * Enabling dashboard ... - Using image kubernetesui/metrics-scraper:v1.0.7 - Using image kubernetesui/dashboard:v2.3.1 * Verifying dashboard health ... * Launching proxy ... * Verifying proxy health ... * Opening http://127.0.0.1:39649/api/v1/namespaces/kubernetes-dashboard/services/http:kubernetes-dashboard:/proxy/ in your default browser... http://127.0.0.1:39649/api/v1/namespaces/kubernetes-dashboard/services/http:kubernetes-dashboard:/proxy/ To get the URL of the dashboard $ minikube dashboard --url http://192.168.39.117:30000 Access Kubernetes Dashboard by opening the URL on your favorite browser. For further reading, check: Hello Minikube Series: https://kubernetes.io/docs/tutorials/stateless-application/hello-minikube/ Minikube guides for newbies: https://kubernetes.io/docs/getting-started-guides/minikube/
0 notes
Text
What is Kubernetes
So What is Kubernetes?
Kubernetes is a portable, extensible, open-source platform for managing containerized workloads and services—with a framework to run distributed systems resiliently. It takes care of your scaling requirements, failover, deployment patterns, scaling, load balancing, logging, and monitoring, much like PaaS offerings. However, it operates at the container level rather than at the hardware level.
It was initially built upon a decade and a half of the Google experience running production workloads. Open-sourced in 2014, Kubernetes is now a growing ecosystem that combines best practices for application deployment to run some of the largest software services by scale.
The name Kubernetes is derived from a Greek term meaning ‘helmsman’ or ‘pilot.’ True to this word, Kubernetes provides the guiding force for developer platforms to transition from virtual machines (VMs) to containers and the statically scheduled to the dynamically scheduled. This means no more manual integration and configuration when you move from a testing environment to an actual production environment or from on-premise to the cloud! The Kubernetes logical compute environment offers common services to all the applications in the cluster as part of the ecosystem for the software to run consistently.
Kubernetes: The Container Orchestration Tool
Kubernetes allows you to manage hundreds of containers and clusters of hosts on which containers are executed. When you deploy your containerized applications to a group of computers, Kubernetes automates their distribution and scheduling, working as an orchestration platform to simplify the work of technical teams.
Particularly, in instances when you need to manage applications with hundreds of containers spread across multiple hosts, a container orchestration tool like Kubernetes manages the workloads in a compute cluster, connecting to the outside world for scheduling, load balancing, and distribution.
The Kubernetes DevOps Tool
The container orchestration capability of Kubernetes closes the gap between IT operations and development, making a great collaborative DevOps environment for sharing software and their dependencies seamlessly between different environments.
It facilitates the software lifecycle and the enabler teams in the build-test-deploy timeline:
Developer environment, by helping to run the software in any setting
QA/Testing process, through coordinated pipelines between test and production
Sys-admin, by running anything once configured
Operations, by offering a comprehensive solution for building, shipping, and scaling software
Kubernetes has emerged as a good actor in DevOps as it focuses on features and bugs rather than time-intensive tasks to enable better software to be shipped with a smooth DevOps workflow.
Benefits of Using Kubernetes
Although we have several tools in DevOps that are equally popular like the Docker, Kubernetes wins the votes. This is because of the many benefits that far outweigh other tools.
Among its many attributes, Kubernetes:
Lays the foundations for developing and building cloud-native applications that can run anywhere, independent of cloud requirements
Speeds up the process of building, testing, and releasing software
Has the ability to handle scaling-up of both applications and infrastructure in real-time
Tackles workload scalability on the fly
Controls resource consumption and hardware use
Balances application load across the host infrastructure
Moves an application to another host in the event of resource shortage
Facilitates easy rollbacks
Tests and auto-corrects applications
Delivers the software quickly with better compliance
Increases transparency and collaboration within the teams and pipelines
Effectively minimizes security risk while controlling cost
Increases the efficiency of server usage
Renders health-check of your apps and self-heals with auto-placement, auto-restart, auto-replication, and auto-scaling
Can be combined with other open-source projects to orchestrate all parts of your container infrastructure
Supports better IT security
Helps manage your containerized applications more easily and quickly
Increases developer productivity
Automates patches and updates
Allows visibility for in-process and failed deployments with status query support
Saves time when a deployment is paused at any time, to be quickly resumed later
Allows version control with newer versions of application images or a rollback when the current version is not stable
Supports container balancing as it automatically places containers by computing the best location
Manages your batch and compute-intensive (CI) workloads for efficient batch execution
Reduces the time to onboard new projects and applications
The benefits of Kubernetes extend beyond the development, testing, and production environment to perform mission-critical tasks in large-scale businesses.
Features of Kubernetes
Kubernetes offers the widest range of features required to deploy containerized applications.
Portable and Open-Sourced
As an open-source platform, Kubernetes can run containers on any number of public clouds, virtual machines, or infrastructures. Its compatibility with most platforms makes it highly flexible and usable.
Programming Language and Framework Support
Kubernetes supports most programming languages and frameworks.
Automatic Resource Bin Packing
The application is packaged, and the containers scheduled based on available resources, allowing optimal utilization of unused resources. As Kubernetes enables you to specify the CPU and RAM needs of each container, the containers can be slotted to increase compute efficiency and ultimately lowers costs.
Container Deployment Control
Kubernetes allows complete control over the number of containers you want with deployment and keeps those containers ready with a rollout. Thus, you can automate Kubernetes to create new containers, remove existing containers, or adopt all of their resources to a new container.
DevOps Engineer Master's Program
Bridge between software developers and operationsEXPLORE COURSE
Automated Rollouts and Rollbacks
Versions and updates are automated and running, so you don’t waste time or resources on downtime. Also, the health of the application is screened during rollout to automatically rollback in the case of any glitch or failure.
Health Checks and Self-healing
It checks the health of nodes and containers to ensure than an application doesn’t fail. In case of a pod crash or an error, Kubernetes automatically restarts containers that fail, replaces or kills containers that don’t match user-defined health checks, and doesn’t make them available to clients until they are client-ready.
Secure Configuration Management
You can store and manage user information such as passwords and SSH keys, deploy secrets and application configuration without rebuilding your container images, and do all of this without exposing secrets in your stack configuration.
Service Discovery and Load Balancing
Kubernetes can expose a container using the DNS or IP address. For high traffic to a container, it can automatically balance the loads into the pods and distribute the network traffic for the stable deployment of software.
This supports the distribution of load and auto-balancing of resources instantly during incidental traffic or batch processing.
Storage Orchestration
You can automatically mount a storage system or orchestrate containers on multiple hosts.
Auto-Scaling of Resources and Applications in Real-Time
Kubernetes offers several features for auto-scaling. You can deploy and control the number of containers based on computing resources, workload balance, and scale-out your software or create applications on more containers by grouping containers in pods. Horizontal autoscaling is another feature whereby Kubernetes auto-scalers automatically size a deployment’s number of pods based on the usage of specified resources and at the individual server level.
New servers can be added or removed easily. Kubernetes can thus automatically expose your containers to the internet or other containers in the cluster to automatically load balance traffic across matching containers.
Heterogeneous Clusters
Kubernetes allows you to build your cluster with a mix of virtual machines on the cloud, on-premise, or in your data center, to suit your requirements.
Persistent Storage Support
Kubernetes workflow includes support for Amazon Web Services EBS, Google Cloud Platform persistent disks, and other storage.
Workload Support
Kubernetes supports a variety of workloads: stateless, stateful, data-processing.
Application Type Support
Kubernetes offers complete support for the application types, application frameworks, and language without differentiating between apps and services.
To get a brief understanding of the features, architecture, and working of Kubernetes, check out this Kubernetes Tutorial video -
Takeaway
Kubernetes has emerged as the cornerstone of DevOps. Its many benefits and flexibility make it the preferred choice of companies when they want to develop, test, and deploy their products and services. Thus, more and more companies are investing in the container management system and Kubernetes.
If you’re looking at enhancing your career prospects in DevOps or building in-depth knowledge about containerization and orchestration tools, then you must check out Simplilearn’s Certified Kubernetes Administrator (CKA) Certification Training. Learn how to build applications in containers and deploy and manage a Kubernetes cluster. Master the most trending DevOps tool, Kubernetes, to help facilitate the process of development-to-deployment.[Source]-https://www.simplilearn.com/what-is-kubernetes-article
Basic & Advanced Kubernetes Training Online using cloud computing, AWS, Docker etc. in Mumbai. Advanced Containers Domain is used for 25 hours Kubernetes Training.
0 notes
Text
Using docker-in-docker with ephemeral Jenkins workspaces
I was presented with a challenge a few months ago. -"Create a container based hybrid CI/CD pipeline that includes GKE that we can demo at Google Cloud Next ’19”. Specs are always vague in these requests which suits me quite well as you get a lot of creative freedom to solve the task at hand. After listening to a talk on YouTube by Vic Iglesias I were intrigued by the idea of ephemeral workspaces that are dynamically created for each build job. As we all know, anything idling in the cloud costs money.
Hello World
The workspace is in fact a Kubernetes workload that the Jenkins master boots up for a particular build job. This was fairly easy to setup, I simply followed the setup procedures in the GKE docs and I had my echo "Hello World" up in minutes. The challenge quickly ramped up as I realized I needed to run a Docker daemon that the Jenkins agent could issue docker build against. How would you go about doing this without statically defining a DOCKER_HOST somewhere in your cloud?
Is docker-in-docker a thing for Kubernetes?
Running docker-in-docker I knew from past encounters that you could do and it’s well documented. Cobbling this together with GKE and Jenkins seemed to be a less obvious topic while googling. I realized I was using the stock Kubernetes Plugin for Jenkins to dynamically provision Jenkins agent. The plugin allows you to declare your own Pod specification, hence running a sidecar docker daemon with the Jenkins agent is quite trivial.
For reference, here’s the full pod spec the Jenkins master eventually spawns:
--- apiVersion: v1 kind: Pod metadata: labels: jenkins: slave jenkins/cd-jenkins-slave: "true" name: default-s13mc namespace: cicd spec: containers: - env: - name: JENKINS_SECRET value: 898200a1131e649637edb5c5faa3778c541bba82b9855d139b15cca7bf3e4492 - name: JENKINS_TUNNEL value: cd-jenkins-agent:50000 - name: JENKINS_AGENT_NAME value: default-s13mc - name: JENKINS_NAME value: default-s13mc - name: JENKINS_URL value: http://cd-jenkins:8080/ - name: HOME value: /home/jenkins image: docker:18.09.3-dind imagePullPolicy: IfNotPresent name: dind securityContext: privileged: true terminationMessagePath: /dev/termination-log terminationMessagePolicy: File tty: true volumeMounts: - mountPath: /var/lib/docker name: volume-0 - mountPath: /home/jenkins name: workspace-volume - mountPath: /var/run/secrets/kubernetes.io/serviceaccount name: default-token-w7k5z readOnly: true workingDir: /home/jenkins - args: - 898200a1131e649637edb5c5faa3778c541bba82b9855d139b15cca7bf3e4492 - default-s13mc env: - name: JENKINS_SECRET value: 898200a1131e649637edb5c5faa3778c541bba82b9855d139b15cca7bf3e4492 - name: JENKINS_TUNNEL value: cd-jenkins-agent:50000 - name: JENKINS_AGENT_NAME value: default-s13mc - name: JENKINS_NAME value: default-s13mc - name: JENKINS_URL value: http://cd-jenkins:8080 - name: HOME value: /home/jenkins image: drajen/jnlp-slave:3.27-5 imagePullPolicy: IfNotPresent name: jnlp securityContext: privileged: true terminationMessagePath: /dev/termination-log terminationMessagePolicy: File volumeMounts: - mountPath: /var/lib/docker name: volume-0 - mountPath: /home/jenkins name: workspace-volume - mountPath: /var/run/secrets/kubernetes.io/serviceaccount name: default-token-w7k5z readOnly: true workingDir: /home/jenkins dnsPolicy: ClusterFirst nodeName: gke-standard-cluster-1-default-pool-dcc3e8a4-8jvh priority: 0 restartPolicy: Never schedulerName: default-scheduler serviceAccount: default serviceAccountName: default terminationGracePeriodSeconds: 30 tolerations: - effect: NoExecute key: node.kubernetes.io/not-ready operator: Exists tolerationSeconds: 300 - effect: NoExecute key: node.kubernetes.io/unreachable operator: Exists tolerationSeconds: 300 volumes: - emptyDir: {} name: volume-0 - emptyDir: {} name: workspace-volume - name: default-token-w7k5z secret: defaultMode: 420 secretName: default-token-w7k5z
What we can see here is the fact I can use the stock docker image from Docker, Inc with the -dind tag. In the volumeMounts section we can also see the mapping against /var/lib/docker which in turn allow the Jenkins agent to run the docker command without constraints or configuration to do so. The Jenkins team makes it very easy to build your own custom agent and throwing in the docker binary is not harder than this Dockerfile example (with some other extras sprinkled):
FROM jenkins/jnlp-slave:3.27-1 USER root RUN apt-get update && \ apt-get install -y python-pip \ apt-transport-https \ ca-certificates \ curl \ gnupg2 \ software-properties-common && \ curl -fsSL https://download.docker.com/linux/debian/gpg | apt-key add - && \ add-apt-repository \ "deb [arch=amd64] https://download.docker.com/linux/debian \ $(lsb_release -cs) \ stable" && \ curl -ssSL https://packages.cloud.google.com/apt/doc/apt-key.gpg | apt-key add && \ echo "deb https://apt.kubernetes.io/ kubernetes-xenial main" | tee -a /etc/apt/sources.list.d/kubernetes.list && \ apt-get update && \ apt-get install -y docker-ce-cli kubectl && \ pip install ansible && \ apt-get clean && \ mkdir -p /etc/ansible && \ echo "localhost ansible_connection=local" | tee -a /etc/ansible/hosts USER jenkins ENV PATH /usr/local/sbin:/usr/local/bin:/usr/sbin:/usr/bin:/sbin:/bin:~/.local/bin
Further I used the GKE plugin to apply the new manifest I generate with the Ansible template plugin (there’s some history behind this choice I don’t recall at the moment, but I love Ansible, maybe that’s why).
Output
It’s questionable how common my use case is. I would assume a more natural path for this type of pipeline would be more suitable with a cloud-provided build system, like Google Cloud Build. I was looking for a short path to victory at the time for the demo asset and Jenkins is a known variable in the equation that you can bend to your will for the most part.
The demo I put together for Google Cloud Next ’19 was published to YouTube shortly after, "Using HPE Cloud Volumes with Google Kubernetes Engine with Hybrid Cloud CI/CD pipelines on Jenkins”:
0 notes
Text
Connecting to Mongo with a self signed CA on a JVM in Kubernetes
At $WORK, we're creating an internal platform on top of Kubernetes for developers to deploy their apps. Our Ops people have graciously provided us with Mongo clusters that all use certificates signed by a self-signed certificate authority. So, all our clients need to know about the self-signed CA in order to connect to Mongo. For Node or Python, it's possible to pass the self-signed CA file in the code running in the application.
But, things are a little more complicated for Java or Scala apps, because configuration of certificate authorities is done at the JVM level, not at the code level. And for an extra level of fun, we want to do it in Kubernetes, transparently to our developers, so they don't have to worry about it on their own.
err, wha? telling the JVM about our CA
First off, we had to figure out how to tell the JVM to use our CA. And luckily since all the JVM languages use the same JVM, it's the same steps for Scala, or Clojure, or whatever other JVM language you prefer. The native MongoDB Java driver docs tell us exactly what we need to do: use keytool to import the cert into a keystore that the JVM wants, and then use system properties to tell the JVM to use that keystore. The keytool command in the docs is:
$ keytool -importcert -trustcacerts -file <path to certificate authority file> \ -keystore <path to trust store> -storepass <password>
The path to the existing keystore that the JVM uses by default is $JAVA_HOME/jre/lib/security/cacerts, and its default password is changeit. So if you wanted to add your self signed CA to the existing keystore, it'd be something like
$ keytool -importcert -trustcacerts -file ssca.cer \ -keystore $JAVA_HOME/jre/lib/security/cacerts -storepass changeit
(Even this very first step had complications. Our self signed CA was a Version 1 cert with v3 extensions, and while no other language cared, keytool refused to create a keystore with it. We ended up having to create a new self-signed CA with the appropriate version. Some lucky googling led us to that conclusion, but of particular use was using openssl to examine the CA and check its versions and extensions:)
$ openssl x509 -in ssca.cer -text -noout // Certificate: // Data: // Version: 3 (0x2) // Serial Number: ... // ... // X509v3 extensions: // X509v3 Subject Key Identifier: ... // X509v3 Key Usage: ... // X509v3 Basic Constraints: ...
Another useful command was examining the keystore before and after we imported our self signed CA:
$ keytool -list -keystore /path/to/keystore/file
as you can look for your self-signed CA in there to see if you ran the command correctly.
Anyway, once you've created a keystore for the JVM, the next step is to set the appropriate system properties, again as out lined in the docs:
$ java \ -Djavax.net.ssl.trustStore=/path/to/cacerts \ -Djavax.net.ssl.trustStorePassword=changeit \ -jar whatever.jar
Since the default password is changeit, you may want to change it... but if you don't change it, you wouldn't have to specify the trustStorePassword system property.
handling this in kubernetes
The above steps aren't too complicated on their own. We just need to make sure we add our CA to the existing ones, and point the JVM towards our new and improved file. But, since we'll eventually need to rotate the self-signed CA, we can't just run keytool once and copy it everywhere. So, an initContainer it is! keytool is a java utility, and it's handily available on the openjdk:8u121-alpine image, which means we can make a initContainer that runs keytool for us dynamically, as part of our Deployment.
Since seeing the entire manifest at once doesn't necessarily make it easy to see what's going on, I'm going to show the key bits piece by piece. All of the following chunks of yaml belong to in the spec.template.spec object of a Deployment or Statefulset.
spec: template: spec: volumes: - name: truststore emptyDir: {} - name: self-signed-ca secret: secretName: self-signed-ca
So, first things first, volumes: an empty volume called truststore which we'll put our new and improved keystore-with-our-ssca. Also, we'll need a volume for the self-signed CA itself. Our Ops provided it for us in a secret with a key ca.crt, but you can get it into your containers any way you want.
$ kubectl get secret self-signed-ca -o yaml --export apiVersion: v1 data: ca.crt: ... kind: Secret metadata: name: self-signed-ca type: Opaque
With the volumes in place, we need to set up init containers to do our keytool work. I assume (not actually sure) that we need to add our self-signed CA to the existing CAs, so we use one initContainer to copy the existing default cacerts file into our truststore volume, and another initContainer to run the keytool command. It's totally fine to combine these into one container, but I didn't feel like making a custom docker image with a shell script or having a super long command line. So:
spec: template: spec: initContainers: - name: copy image: openjdk:8u121-alpine command: [ cp, /usr/lib/jvm/java-1.8-openjdk/jre/lib/security/cacerts, /ssca/truststore/cacerts ] volumeMounts: - name: truststore mountPath: /ssca/truststore - name: import image: openjdk:8u121-alpine command: [ keytool, -importcert, -v, -noprompt, -trustcacerts, -file, /ssca/ca/ca.crt, -keystore, /ssca/truststore/cacerts, -storepass, changeit ] volumeMounts: - name: truststore mountPath: /ssca/truststore - name: self-signed-ca mountPath: /ssca/ca
Mount the truststore volume in the copy initContainer, grab the file cacerts file, and put it in our truststore volume. Note that while we'd like to use $JAVA_HOME in the copy initContainer, I couldn't figure out how to use environment variables in the command. Also, since we're using a tagged docker image, there is a pretty good guarantee that the filepath shouldn't change underneath us, even though it's hardcoded.
Next, the import step! We need to mount the self-signed CA into this container as well. Run the keytool command as described above, referencing our copied cacerts file in our truststore volume and passing in our ssCA.
Two things to note here: the -noprompt argument to keytool is mandatory, or else keytool will prompt for interaction, but of course the initContainer isn't running in a shell for someone to hit yes in. Also, the mountPaths for these volumes should be separate folders! I know Kubernetes is happy to overwrite existing directories when a volume mountPath clashes with a directory on the image, and since we have different data in our volumes, they can't be in the same directory. (...probably, I didn't actually check)
The final step is telling the JVM where our new and improved trust store is. My first idea was just to add args to the manifest and set the system property in there, but if the Dockerfile ENTRYPOINT is something like
java -jar whatever.jar
then we'd get a command like
java -jar whatever.jar -Djavax.net.ssl.trustStore=...
which would pass the option to the jar instead of setting a system property. Plus, that wouldn't work at all if the ENTRYPOINT was a shell script or something that wasn't expecting arguments.
After some searching, StackOverflow taught us about the JAVA_OPTS and JAVA_TOOL_OPTIONS environment variables. We can append our trustStore to the existing value of these env vars, and we'd be good to go!
spec: template: spec: containers: - image: your-app-image env: # make sure not to overwrite this when composing the yaml - name: JAVA_OPTS value: -Djavax.net.ssl.trustStore=/ssca/truststore/cacerts volumeMounts: - name: truststore mountPath: /ssca/truststore
In our app that we use to construct the manifests, we check if the developer is already trying to set JAVA_OPTS to something, and make sure that we append to the existing value instead of overwriting it.
a conclusion of sorts
Uh, so that got kind of long, but the overall idea is more or less straightforward. Add our self-signed CA to the existing cacerts file, and tell the JVM to use it as the truststore. (Note that it's the trustStore option you want, not the keyStore!). The entire Deployment manifest all together is also available, if that sounds useful...
0 notes