#kiwis crochet patterns
Explore tagged Tumblr posts
Text
Big Jellyfish Crochet Pattern


The Bell
Magic circle of 12 stitches
-Sl st (my abbreviation for slip stitch)
-chain 2
Hdc (half double crochet) in each stitch (12 total)
-sl st
-Chain 2
2 hdc stitches in each of the 12 stitches (end up with 24 total)
- sl st
- Chain 2
2 hdc in one stitch, 1 hdc in one stitch. Repeat for the whole circle (end with 36 total)
- sl st
- Chain 2
2 hdc in one; 1 hdc in one, twice. Repeat (end with 48 total
- sl st
- Chain 2
2 hdc/1; 1 hdc x 3. (End with 60 total)
- sl st
- Chain 2
2 hdc/1; 1 hdc x 4. (End with 72 total)
- sl st
- Chain 2
2 hdc/1; 1 hdc x 5. (End with 84 total)
- sl st
- Chain 2
Hdc in each stitch
- sl st
- Chain 2
- Repeat for about 19 more rows or until at desired length. If doing a color change, do so halfway (i changec colors after 10 rows of normal hdc stitches)
Once at desired Bell length:
Eyes
Choose a place you want the front to be, then choose where you want the eyes to sit. Eyes can be done at any time before you close it up, but it helps to be able to see the full length for positioning.
Insert crochet hook, pull a good length of yarn through, insert crochet hook into next stitch opening, pull all the yarn through again
Repeat until you have an eye of your desired size and evenness (when looping the yarn, it helps to pause attention to where the eye is lacking and make sure the yarn sits in those spots if that makes any sense 😅)
Once done, cut end of yarn still connected to skein/ball if you haven’t already and make sure both ends are on the inside of the bell. Tie them together tightly but not too tight, keeping in mind how the eye will look. Tie another knot or two for good measure.
Repeat for the other eye
Back to the bell:
- [(Chain 2, insert hook in first loop, yarn over, pull through first loop, yarn over, pull through both)*=double chain stitch
- Insert hook in leftmost hook of previous stitch
- —do a double chain stitch
- Do a total of 6 dch st
- Sl st second stitch of the row]*
- Repeat for whole perimeter
*you can also just do single chain stitches
After sl st into the last stitch, start hdc into the stitches of the perimeter (the same row we did the loops into), no chain stitch increase (i ended up with 76 stitches?)
- Sl st
Decrease one, 1 hdc x 5 (for decrease, insert hook into two stitches at once instead of just one) (61??)
- repeat
- Sl st
Decrease one, 1 hdc x 4 (51)
- repeat
- Sl st
Decrease one, 1 hdc x 3 (40)
- repeat
- Sl st
Decrease one, 1 hdc x 2 (30)
- repeat
- Sl st
Decrease one, hdc one (18)
- repeat
- Sl st
Decrease every stitch until almost closed. Add desired amount of stuffing to the bell, then close it. I wanted this one to be a firm squishiness for maximum hugging comfort, you can decide how firm or soft you want it
Tentacles
- Make sl st, hook through jelly base where you want the tentacle
- Ch 40-60
- Ch 2, you’ll hook through the third loop from hook (its gonna be a half double crochet stitch, two per single chain stitch)
- Yarn over, hook through loop, yarn over, pull through one, yarn over, pull through all three
- Do same thing in same loop
- Repeat for whole tentacle
- Sc into base to stabilize (i do it in the same loop/stitch i single crocheted into to anchor the tentacle), stuff excess yarn into jelly
Repeat until you have the desired tentacle quantities
in the other color, do a sl st and single chain into the base towards rhe edge (i like it to be lined up with the connections/ups of the loopies)
- chain stitch 50-60; choose one length for all, but dont stress too much about inconsistency here. A bit of variety looks natural. A bit shorter than curlies, or what you like best :)
(For pictured one, i did 50 stitches)
Enjoy your new huggable Jellyfish!
I dont follow patterns very often, so this might not be very legible or understandable and i apologize for that lol
For small hand sized jellyfish, only do 6 stitches in the magic circle and use single crochet stitches. For the loopies, use chain stitches, and instead of curly tentacles i usually do a row of chain stitches, then the outside tentacles are just yarn.
It would probably work to do a chain stitch row, then single crochet into each stitch twice though, i may have to try that soon (for the inner tentacles)
Here’s a small handheld jelly as an example, when it was brand new and then after it had been well loved


4 notes
·
View notes
Text


It must be tough being a kiwi bird. Every time you step outside, someone’s bound to mention how tasty you probably are. How rude is that!
Kiwi crochet pattern: available here
#crochet#craft#yarn#amigurumi#plush#plushie#handmade#cute#kawaii#crochet pattern#kiwi#kiwi bird#crocheting#crocheters of tumblr#crochetblr#yarn crafts#fiber art
37 notes
·
View notes
Photo

Harry the kiwi 🧶 PDF pattern available • • • • • • #crochet #pattern #crochetpattern #pdfpattern #kiwi #kiwibird #bird #roxherbe #etsy https://www.instagram.com/p/CnPj3GrOav8/?igshid=NGJjMDIxMWI=
34 notes
·
View notes
Photo

reversible kiwi bird / fruit by kiwi krunchies
Free Crochet Pattern Here
73 notes
·
View notes
Text


Amigurumi Samurai Flamingo and Kiwi Goto, based on @vysperation's incredible original designs (seen on the zipper pouch in the top pic).
Shortly before the pandemic, I started getting back into crochet, and when I saw Red Heart's crochet flamingo kit, I couldn't help myself. Masamingo uses the kit's pattern (free download here), but made double size, with some additions to better approximate Vy's design. For instance, I did two layers of wings to give the impression of bigger, fuller wings (and add the black feathers) , and I'm almost 100% sure the white face was a separate piece I sewed onto the pink base. Kiwi Goto...I just kind of figured out as I went. (He's all simple shapes and pipe cleaner, but I am still proud the hat worked.)
#samurai flamenco#samurai flamingo#hazama masayoshi#goto hidenori#can not recommend enough making tiny amigurumis double size#especially if you maintain tight tension like I do#it will save your hands#I also learned to knit although I haven't made anything SamFlam-themed yet#Vy's stuff is always so amazing
20 notes
·
View notes
Text
I went to the local Japanse market today and tried my hand at a claw machine to get a kiwi fruit/bird keychain
It went exactly as expected

Anyway, I’m sure you can guess what my next crochet pattern will be 😤
0 notes
Text
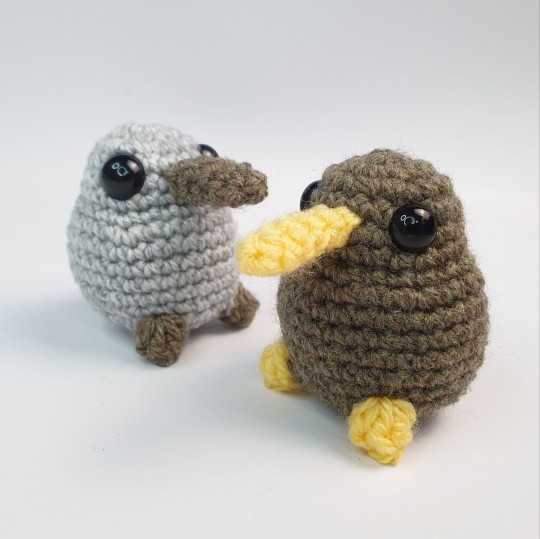
Kiwi birds are the latest critters to join the popcorn stitch mini's gang!
Free pattern is here.
#kiwi#kiwi bird#crochet#amigurumi#free crochet pattern#free amigurumi pattern#crochet pattern#crochet tutorial#free crochet tutorial#crochet crafts#crocheting#yarncrafts
446 notes
·
View notes
Text


pattern available on my Etsy!
#cottagecore#aesthetic#outfit inspiration#crochet pattern#crochet tutorial#crochet bag#crochet backpack#crochet ideas#crochet inspiration#crochet inspo#crochet accessories#cute crochet#groovy crochet#kiwi backpack#kiwi bucket hat
37 notes
·
View notes
Text

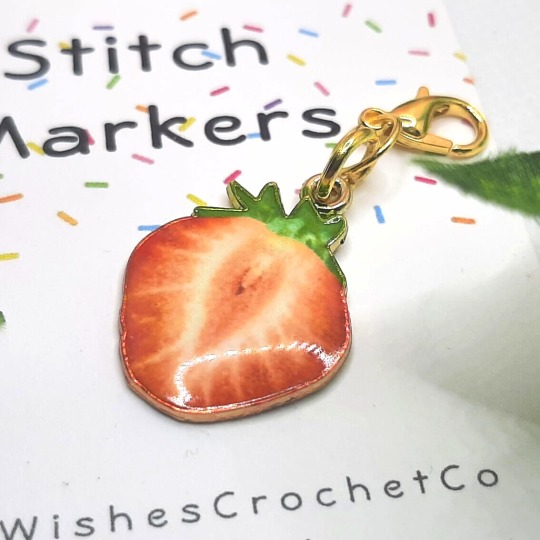
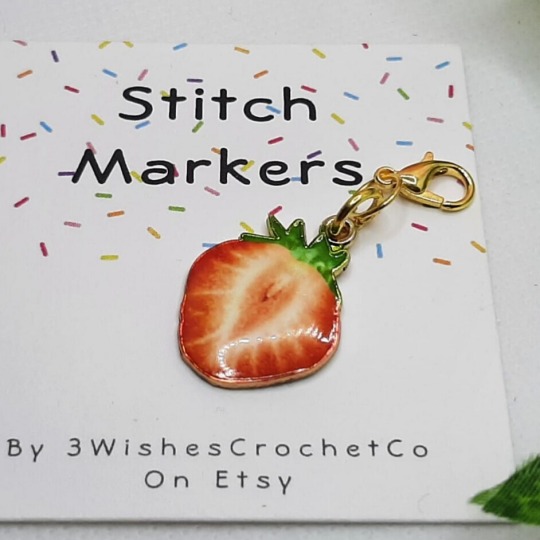
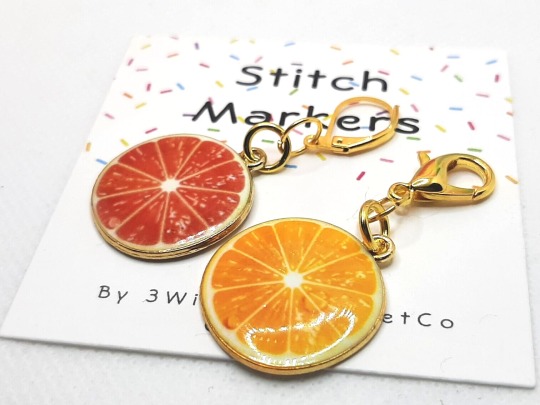

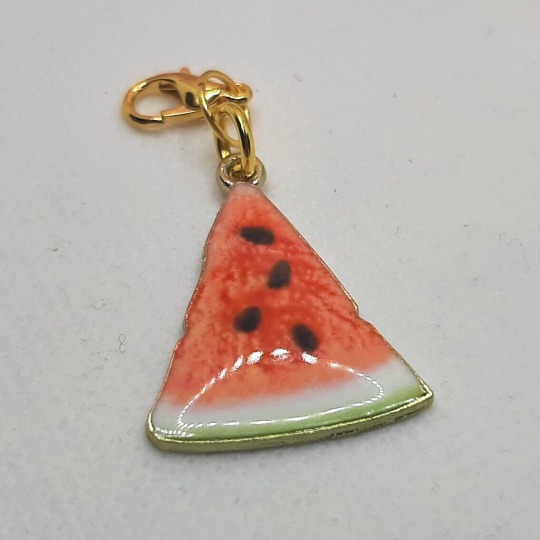

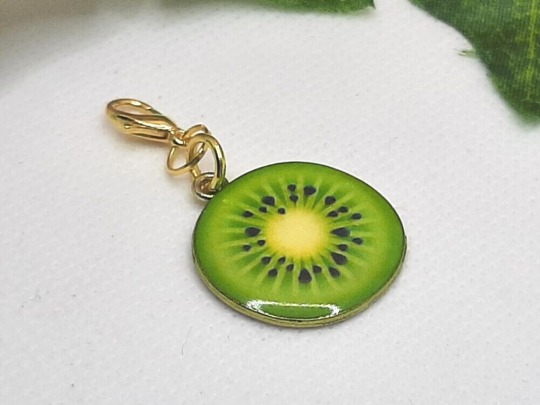
🍉♥️ Don't miss the 25% Discount Sale off these gorgeous fruit StitchMarkers & keyrings at etsy.co.uk/shop/3WishesCrochetCo ! Ends Wednesday! Hurry, while stocks last! ♥️🍉
#etsy#crochet love#3wishescrochetco#crochet#crochet patterns#granny square#Summer Sale#Sale#Crocheting#amigurumi#Stitch Markers#Crafters#I love Amigurumi#Amigurumi Patterns#Fruit#Strawberry#Kiwi#Cucumber#Watermelon#Orange#Grapefruits#Keychains#Keyrings#Keychain inspiration#Discount#Crochet on Tumblr#Knitting#knittersoftheworld#knitters#knitters of tumblr
45 notes
·
View notes
Text
The kiwi bird! He is beauty, he is grace, he’s adorable-ness all up in yo face 😹


I loved making this little birb so much💕 if you want to make one yourself, you can find the pattern here! Stay creative everyone 😸 (pattern isn’t mine, I just used it)
#craft#crochet#handmade#kirby’s krafts#plush#free crochet pattern#yarn#amigurumi#kiwi bird#bird plush#plushie#flower photoshoot#crochet plushie#brown yarn#fox plush#fox
25 notes
·
View notes
Text
Been busy today and keep forgetting to show yall


I finished the purple fairy!


#kiwi crafts#next week’s crochet project is dodoco for aria lol#and then maybe a second for a friend who asked for one upon hearing i was gonna try and make one for aria#maybe#i gave her no promises#especially since im not usinng a pattern im winging it
8 notes
·
View notes
Text
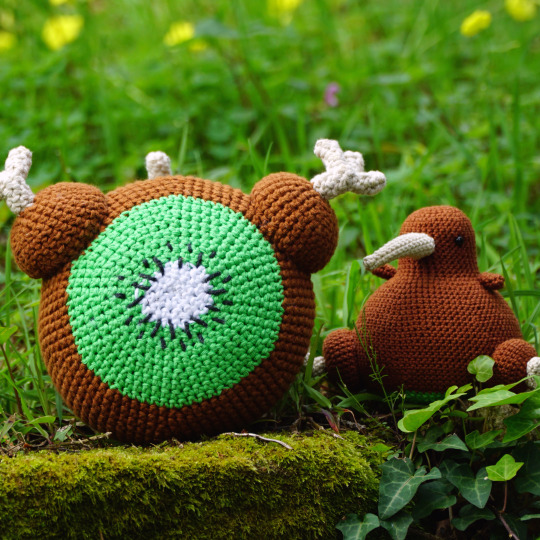
To celebrate the release of my new kiwi pattern I'm having a giveaway over on Instagram for 2 copies of the pattern!
Head on over to Instagram to learn more!
instagram
#crochet#craft#handmade#yarn#amigurumi#plush#plushie#cute#kawaii#crochet pattern#kiwi#bird#birds#bird art#crochetblr#crocheting#crochet patterns#yarn crafts#crocheters of tumblr#Instagram
98 notes
·
View notes
Photo

Harry the kiwi 🥝 PDF pattern • • • • • #roxherbe #pattern #crochetpattern #kiwi #kiwibird #amigurumi #crochet #etsy #etsycanada #cute #kawaii https://www.instagram.com/p/CnQd9q1uoxZ/?igshid=NGJjMDIxMWI=
11 notes
·
View notes
Photo

Kiwi Granny Square by Raffaella Tassoni
Free Crochet Pattern Here
18 notes
·
View notes
Text
22 Chic and Trendy Free Crochet Patterns You'll Actually Wear and Use - The Thrifty Kiwi
22 Chic and Trendy Free Crochet Patterns You’ll Actually Wear and Use – The Thrifty Kiwi
[ad_1]

22 Chic and Trendy Free Crochet Patterns You’ll Actually Wear and Use
[ad_2]

22 Chic and Trendy Free Crochet Patterns You’ll Actually Wear and Use
View On WordPress
0 notes
Text
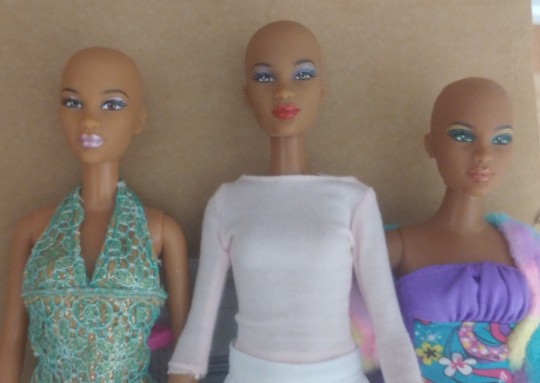

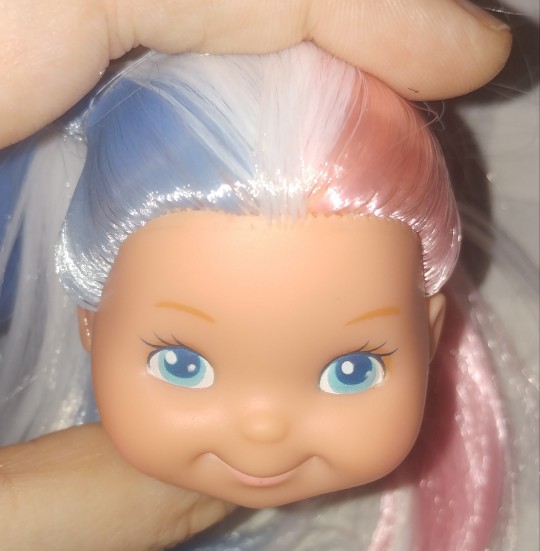
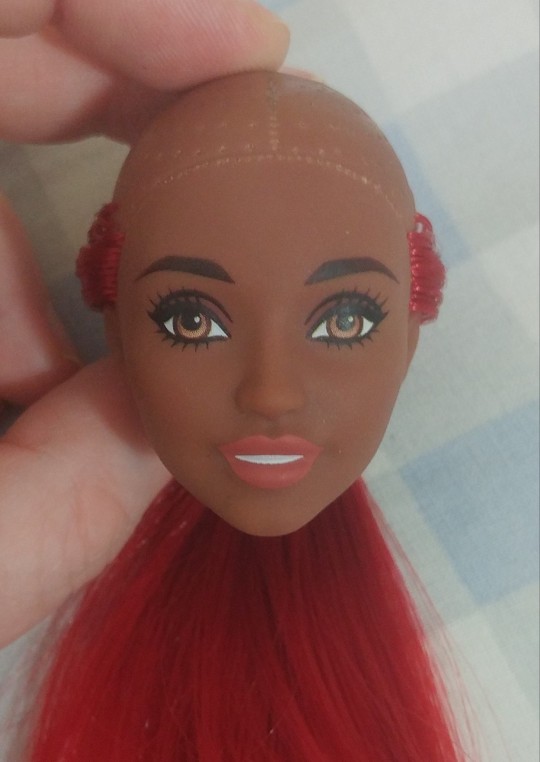
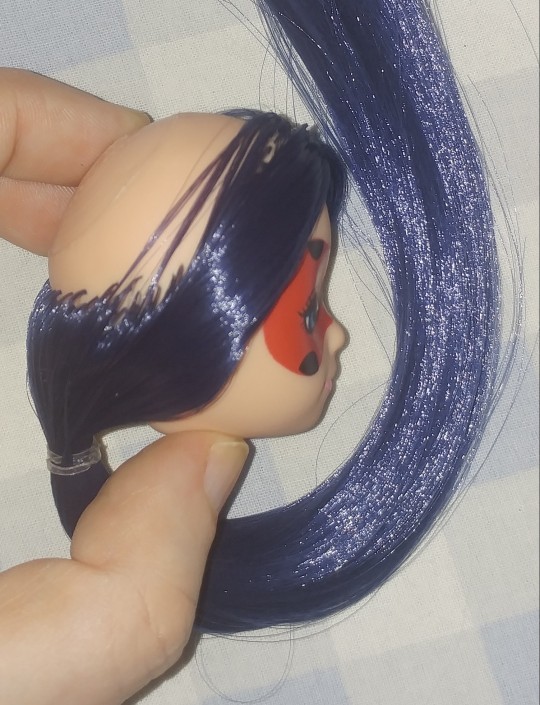

Found a tall afra body for Lena, they have smaller neck holes so it was a struggle until I remembered i have wirecutters and can trim that anchor to be a smaller disc, i'd prefer a curvy but the diversity in sizes makes them look like friends or sisters.
Cherry Merry muffin cracked open: kiwi was not the right choice of fiber for aged vinyl despite the nice pastels. The white is nylon and it's got a teensy bit more grip in each head hole. I'm stuck, my first thought was new hairline but that didn't work out for my last two kiwi headcracks. No idea how to proceed short of finding exact nylon matches later when I have some hobby money for supplies.
Daya is rocking the granddad hairdo as I didn't have the patience tonight to realign the coral nylon that got misaligned during the dyeing and washing process.
So new project it is! Because juggling 20 different projects at once is actually the only way you're going to find one that fits your particular brain mood of the moment, provided you don't have a cascading error message when you attempt to figure which one to go with.😂
Marinette is a clone with thin vinyl, she was only rooted round the edges when she arrived so she gets her front lines first so we can tell if she's going to break before there's a whole head of work.
A lot of people like to start with the front first, it allows you to visualize the final product from early on. I like to start at the second line in back so I can establish a sense of what spacing, plug size and pressure works best in an area that won't be visible if it's a little ugly.
Sometimes a head lends itself well to circle patterning (Licca with a tiny pencil in her neck rotates nicely on your workspace) othertimes the parting first then a front to back series of lines and then detailing for the 'corners' and first line.
There's no right or wrong way to proceed: it's all about finding small victories like in finishing the circle on the back of Barbie's head for example and balancing that with what's a comfortable position to work in while keeping the head in place. If that takes drawing arbitrary pencil lines or a 40min podcast episodes worth as goals for the day and you manage just one: Do It.
Arts and crafts that you can't totally zone out for are all about managing the tedium with made up goals and rewards.
You're not supposed to endure it and if the tedium and focus is too much then it's fine to find a craft that better suits you. I know folks who make amazing stuff from the enjoyment of making one crochet square or circle at a time, one japanese folded silk patch at a time then bringing it all together into a garment or quilt once they've done a large amount.
#dolls#saf#ooak#rerooting#Crafting#Not the hussle crafting for the fun of making a thing#Tutorials#Add an aside about rerooting methods
4 notes
·
View notes