#impulsively redrew this
Explore tagged Tumblr posts
Visit Tumblr Blog
Explore Tumblr blogs with no restrictions, modern design and the best experience.
Last Seen Tumblr Blogs


Fun Fact
Tumblr has been banned in Indonesia for providing people with access to pornographic content.
Text
Happy v day everyone!!!!<33

#impulsively redrew this#nina stop drawing lance challenge failed#lance mcclain#vld#voltron#voltron fanart#vld fanart#valentines day#whatsitz art
46 notes
·
View notes
Text

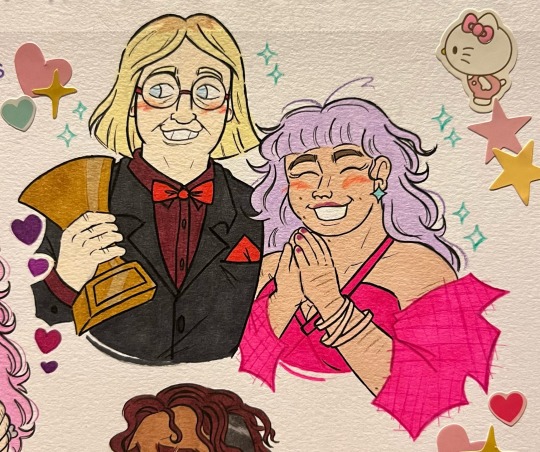
alfred livestreaming his breakdown to the entire us public (as his pr team devolves into chaos)
#hey. fellow americans. how we uh. how we feeling. how we doing. its not going great is it. hence this piece...#hws america#aph america#hetalia#my nyart#i know that canonically he streams silly stuff all the time. but that would Literally Never Be Allowed#his img is very tightly controlled... at least his gov tries LOL. hes too impulsive still!#'do you think alfred would do food reviews' in canon hetalia yeah. in my Mind Palace not really.#mind palace refers to my specific morbid interpretation of hetalia which is more Dark and Gritty /ref and Realistic (hl2 death sound effect#ok enough. gn#i struggled with trying to fix this for so long and yet its so simple.i even redrew it and STILL hated it.#idk maybe i used up all mah juice in that candygo/re piece X) still wanna drawwwwwwwwww mooooooreeee!
839 notes
·
View notes
Text
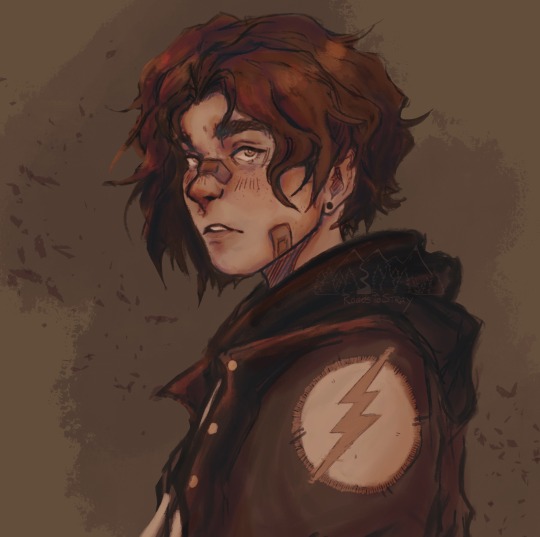
if you run, you'll run right back again
#roadstostray#my art#bart allen#impulse dc#dc impulse#dc#young justice 98#dc comics#FUCKIN... DREW HIM EARLIER AND HE LOOKED ROUGH. SO I REDREW HIM AND AAAA#got possessed by something#please stay#mischief is afoot though in the roadstostray house. big stuff ahead
2K notes
·
View notes
Text
whoopsie daisy ! *drops this intentionally*
#REDREW ONE OF MY FAV KNUB IMAGES. and had to make it .. impulsive ofc#💽 space oddity#idk id have a tag but RAHHH#self ship#self ship community#f/o community#self shipping#self ship art#fictional other community#s/i x canon#self insert x fictional other#s/i x f/o#metalocalypse oc#metalocalypse self insert
40 notes
·
View notes
Text

Emma
Emma
62 notes
·
View notes
Text

oh yeah... redrew my older pines designs + also gideon is here because I like him and will inflict him on everyone. probably in their early 20s here, I didnt think too hard about the specifics. also some headcanons
dipper started testosterone finally so he's got the classic 'shitty little puberty stache' and also hes breaking out w acne bit. wears a lot of denim on denim. him and wendy swap hats every summer its their tradition. he has a bomber jacket with lots of alien and cryptid patches. sometimes he has kind of a mullet going on
mabel regularly chops all her hair off in the mirror with some scissors whenever the impulse hits so at any given point of her life it can be either waist-length or a buzzcut. she got into making kandi and has a bunch of themed cuffs. rhinestones. sparkles. thats a tamagotchi necklace
gideon has embraced his inner cowboy and got some riding chaps ostensibly because he has a motorcycle now but also because he thinks he looks cool. his bolo tie is a replica of his old cursed variant because fiddling with it is a comfort to him. hes got a custom leather jacket with his star embroidered on the back
hes also so tall because. well honestly my headcanon is he has an insane growth spurt in his teens. have you SEEN bud gleeful? he's huge. hes got Big Dude Genes. also honestly i just think its funny if he goes from being knee-high to 6 feet tall in the space of like, 6 months.
(i was gonna add other characters to this but i got distracted so thats for another time)
#alloyart#gravity falls#dipper pines#mabel pines#gideon gleeful#if you're wondering about their relationships at this point in the future basically. gideon has been to some. extensive therapy#and is MUCH less of an asshole. i mean hes still a smug dick his personality aint changing much but. hes more amiable now. less murderous#he wrote an apology letter to the pines as part of his process and became pen-pals with dipper. they'd send each other pics of weird stuff#and he'd keep them updated on stuff going on in gravity falls#theyre not exactly 'friends' in a close sense but i think its fun to imagine a less.. intense dynamic going on there now hes older#... also honestly i forget dipper isnt canonically trans because hes so ubiquitously transmasc to me. but yeah he is here.
354 notes
·
View notes
Note
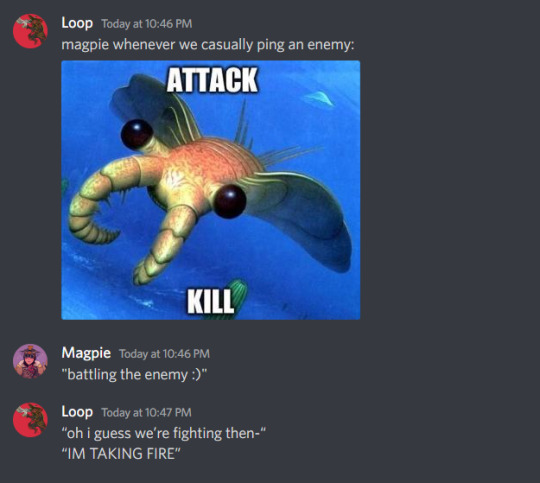
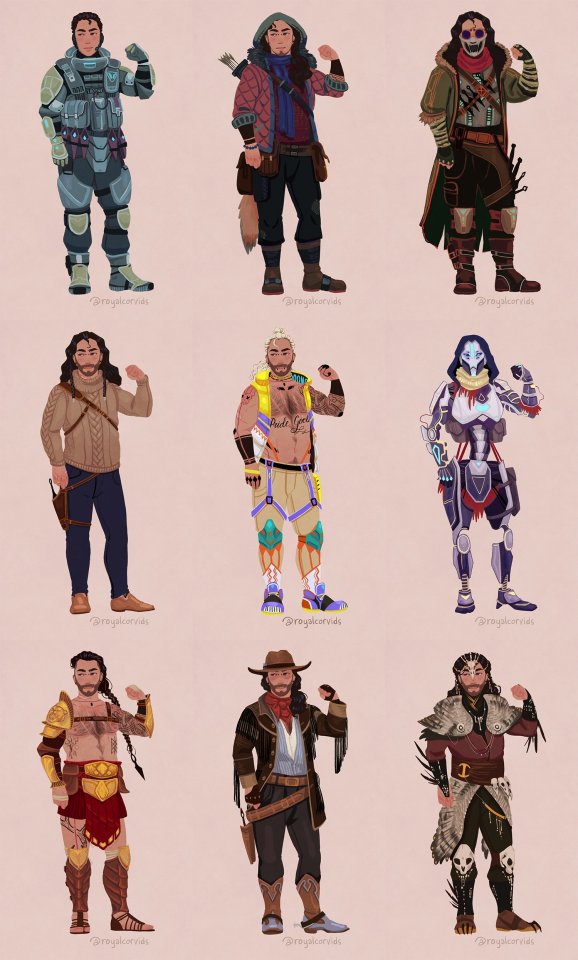
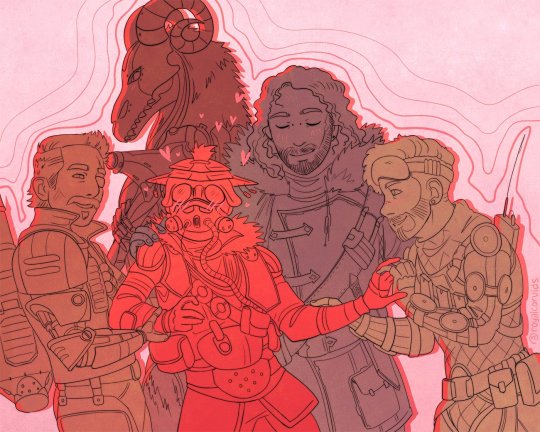
No way! Another person who has spent way too much time on apex! Who's your main? I'm guessing BH but I don't want to assume. How did you feel about the BH/Fuse engagement? Do you have any heirlooms? Sorry, not very many people play apex on here.
Also, do you have any apex art? If not that's totally cool but I would love to see it!
you have activated my trap card!! many drawings ahead
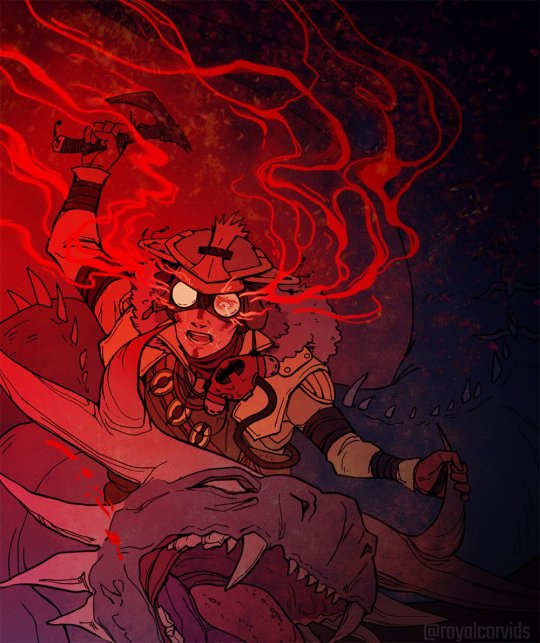
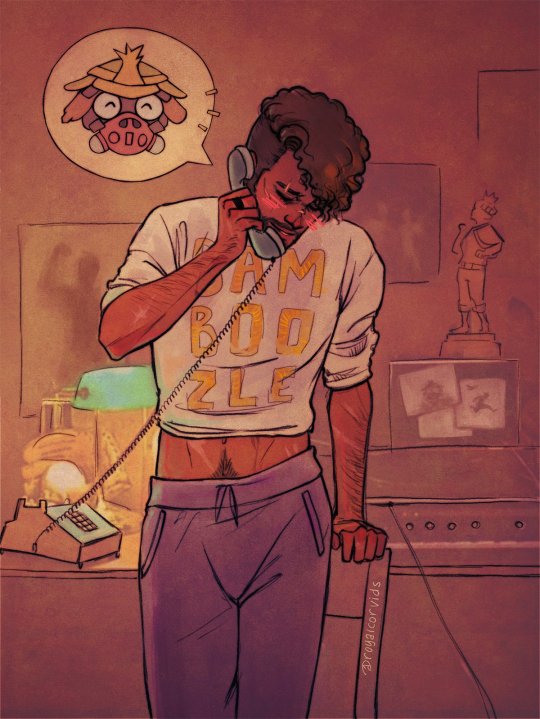
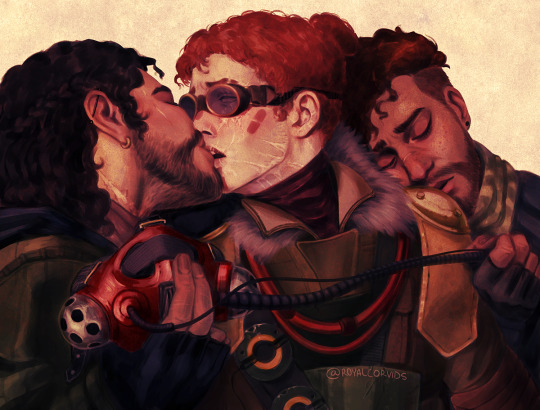
my main is indeed bloodhound. i also whip out fuse, mirage, and to a lesser degree octane, but mostly i'm a one trick bloodhound. they were what got me into the game in the first place back in season 7 when i heard their 'i'm afraid of heights :(' voicelines (a cool hunter nonbinary character voiced by none other than allegra clark? sign me tf up), and even though i am Very Bad At Shooting and don't actually like battle royale-type games apex stayed my brainrot for over two years. the brainrot is definitely over now and these days i play it as a social thing, but that's how i acquired 2k+ hours lmao
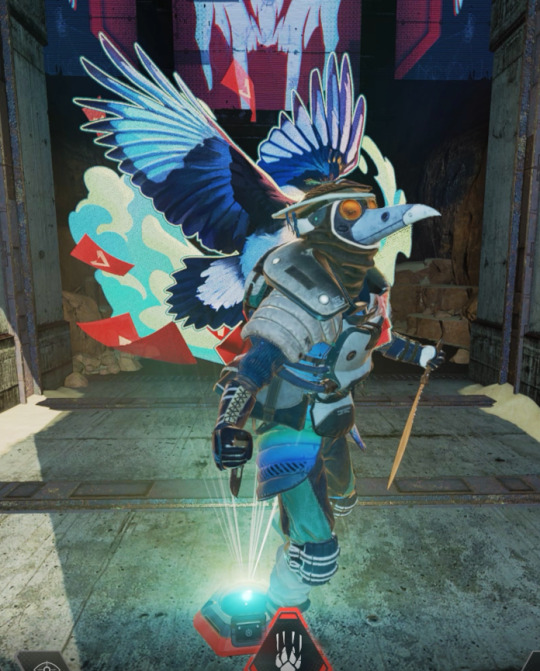
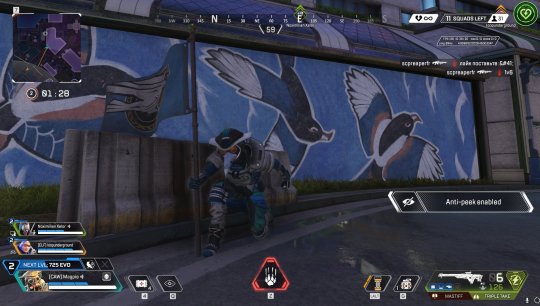
also they released a magpiehound recolor called 'frosthaven' that i gleefully snatched up and have been wearing it ever since (ft the magpie holospray and the magpie mural on their latest map. i think they are catering to me specifically)
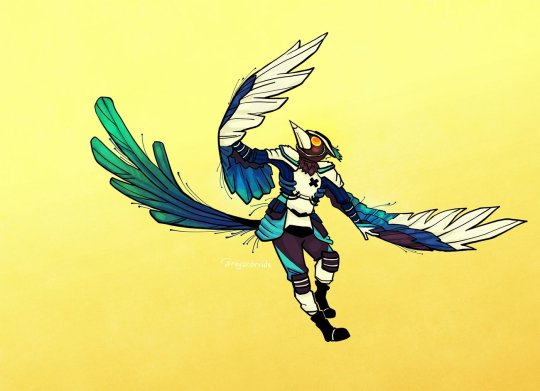
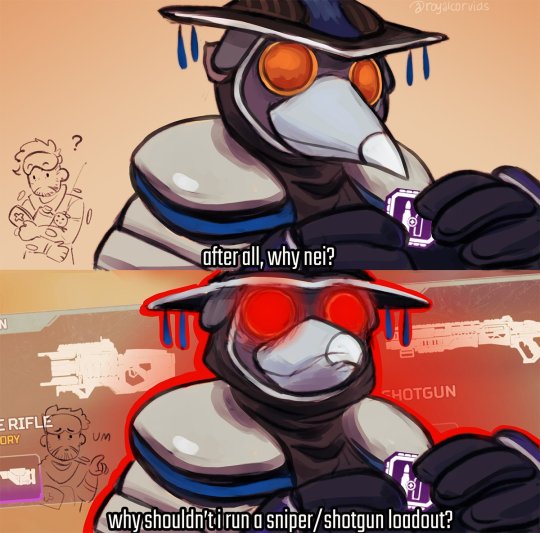
i am. truly Not Good. i am here just to clown and gossip and make poor life choices. my impulse control is too non existent for someone whose best skill is shooting a perfect outline around the enemy and not a bullet within
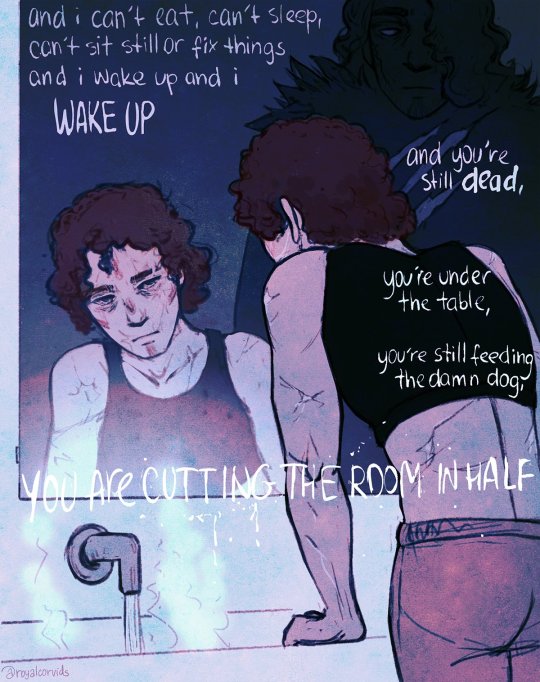
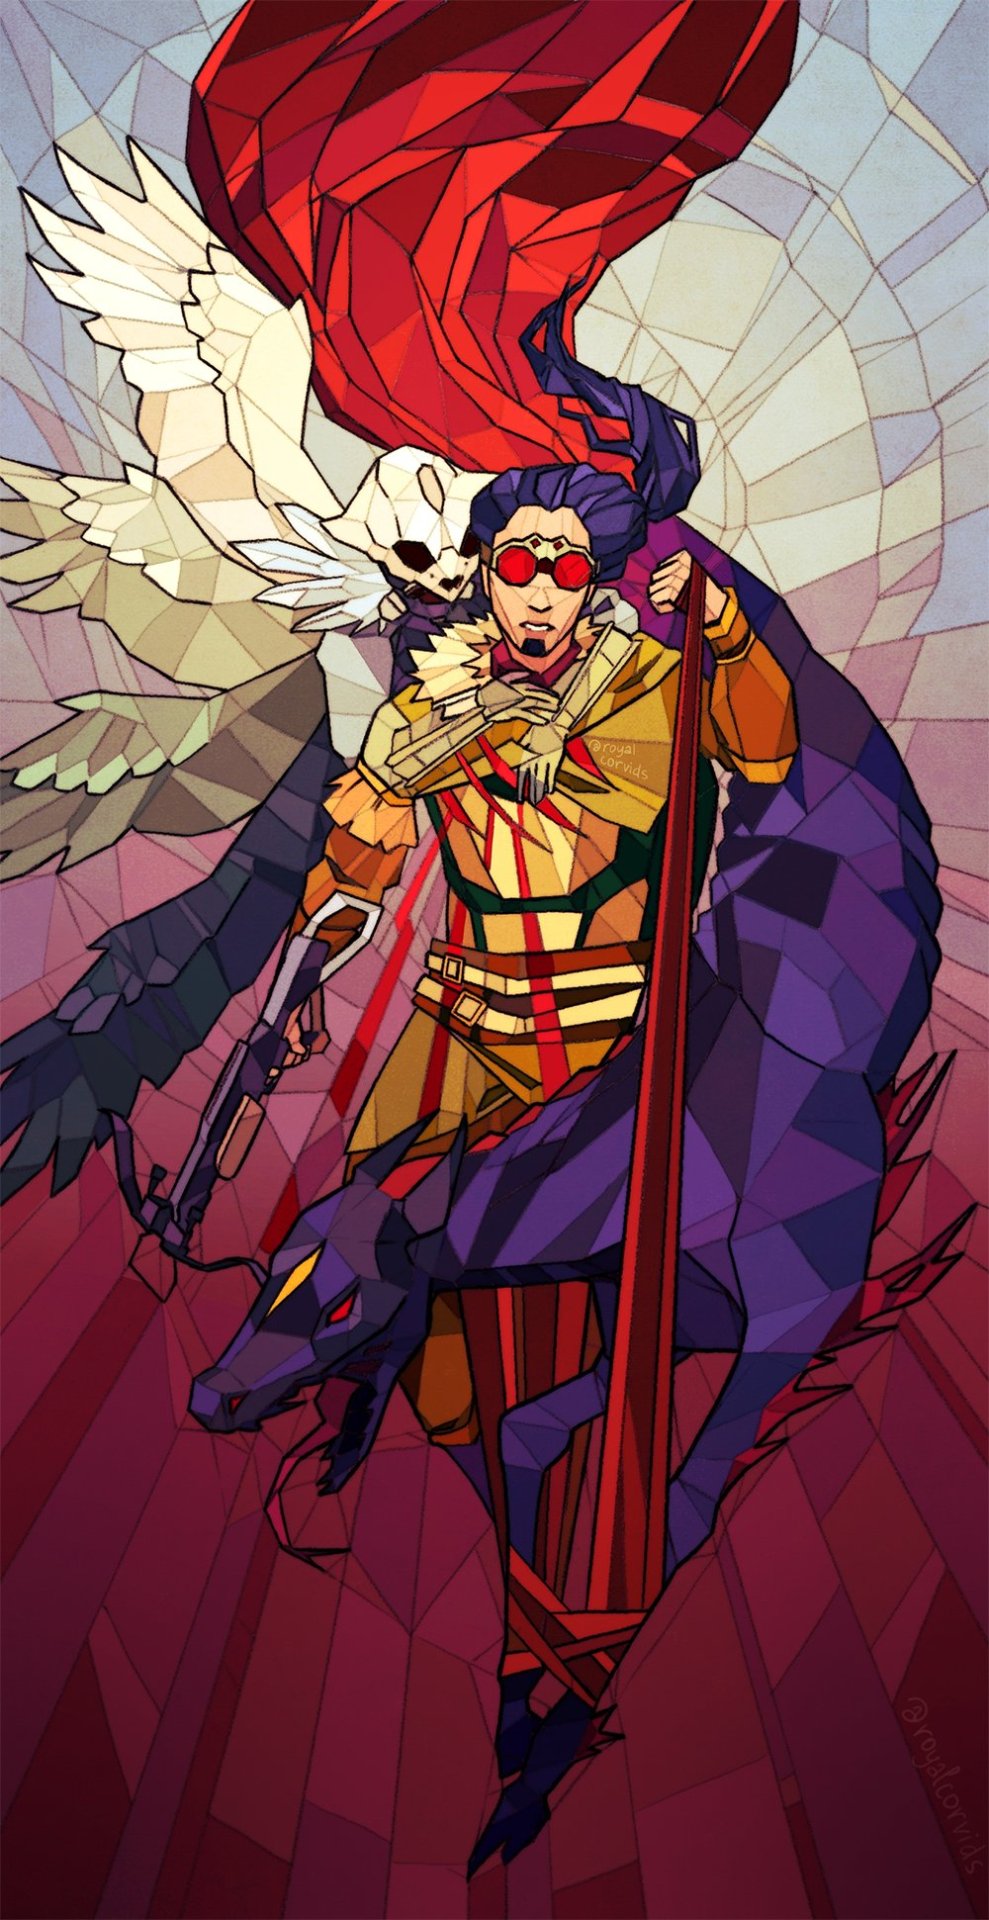
i had SO MUCH bloodhound art over on twitter good god. out of the following two drawings, the first one was bought out by allegra to sell as signed prints, and the second one was reposted onto apex's IG account, and in general this was the one time i genuinely had a blast on twitter interacting with all the devs and vas before everything went downhill both in respawn and on twitter lol. also i have to say, s10 and the whole White Raven thing fed me so. so so. SO well. the existential angst was incredible.
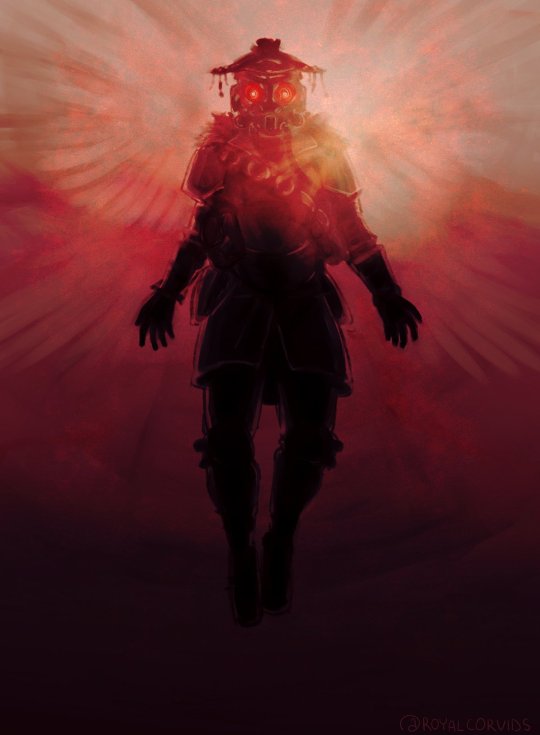
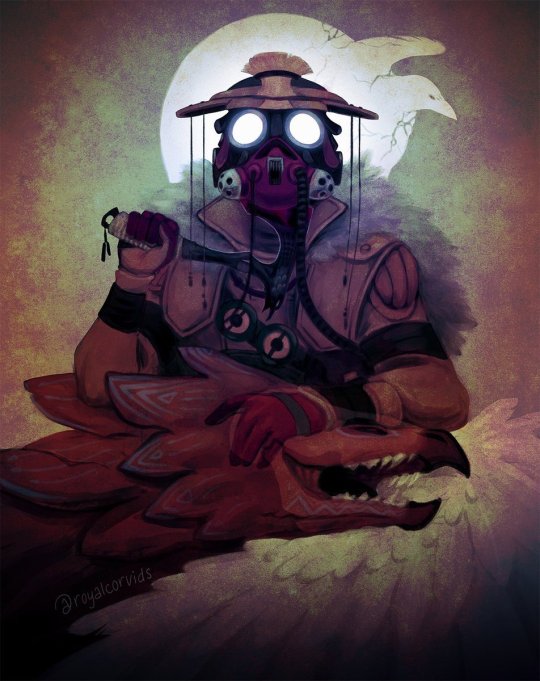
i participated in a couple of zines/projects as well! i have many thoughts about their canonical(!) respawn system and the resulting unimportance of death. adds to the existentialism and to bloodhound's religious themes
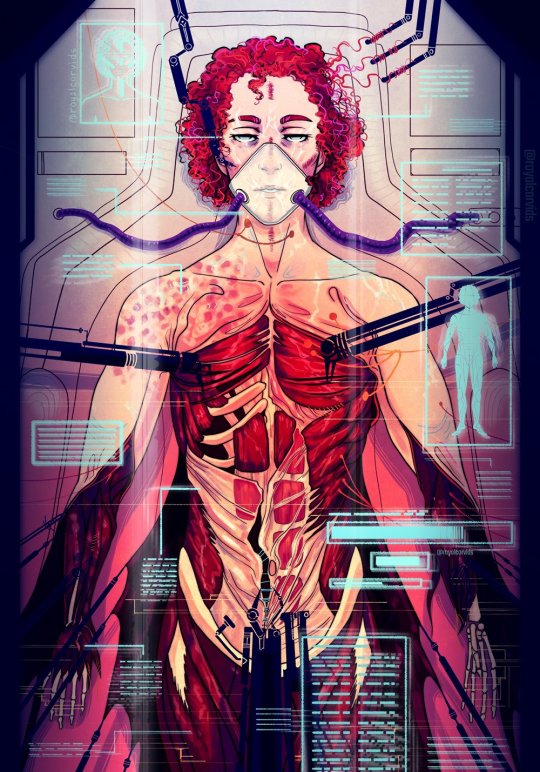
overall it was a very, very prolific period for me, and there are many pieces i'm still very happy with to this day
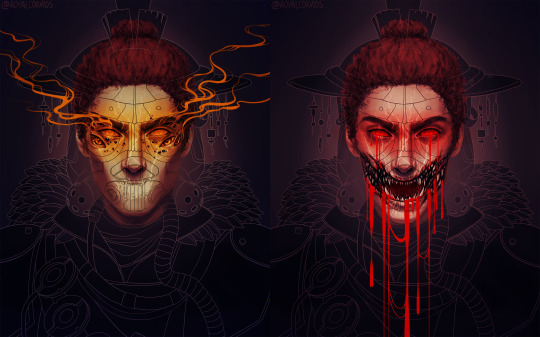
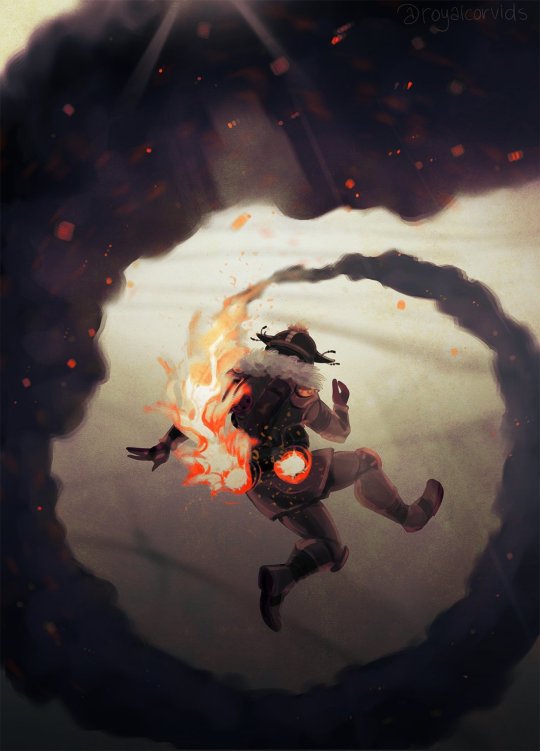
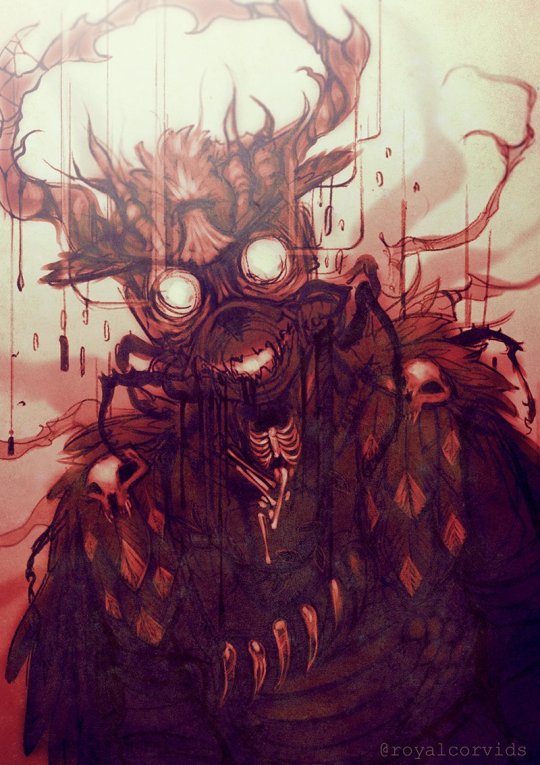
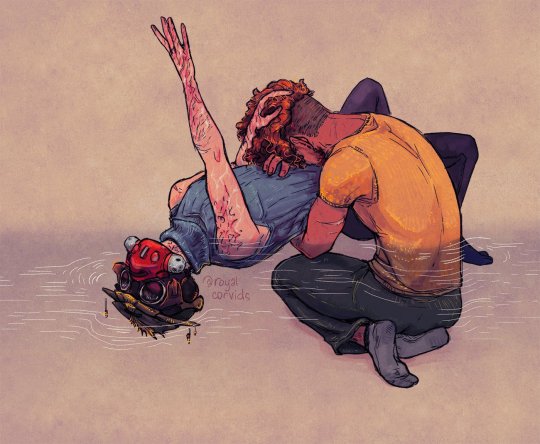
(^ the second to last one is a reference to the fusehound confession scene, and the last one is related to one of my fics, wooden bones (forest deity!bh au))
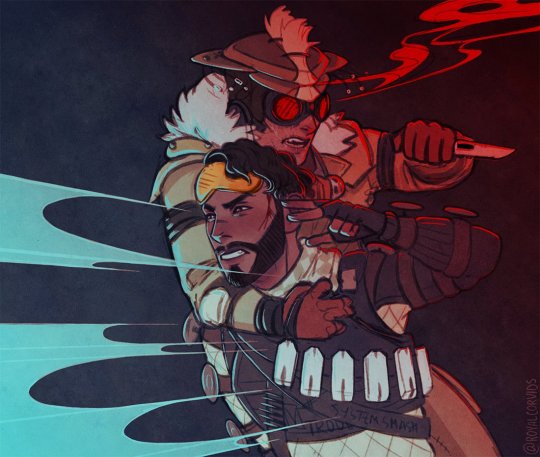
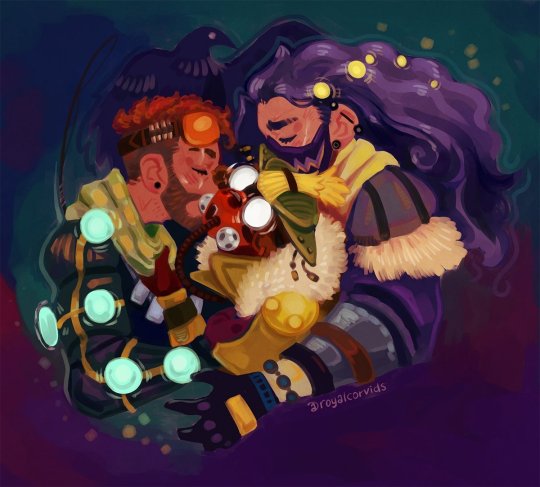
shipping!!! miragehound was my initial and most prominent ship, and i will never forgive respawn for not expanding on their backstory (their mothers worked together COME ON. they might have met as children! COME ON!!!!! i have a whole series exactly about the What Could Have Been)
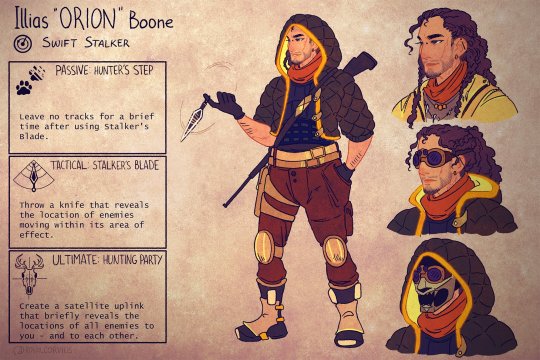
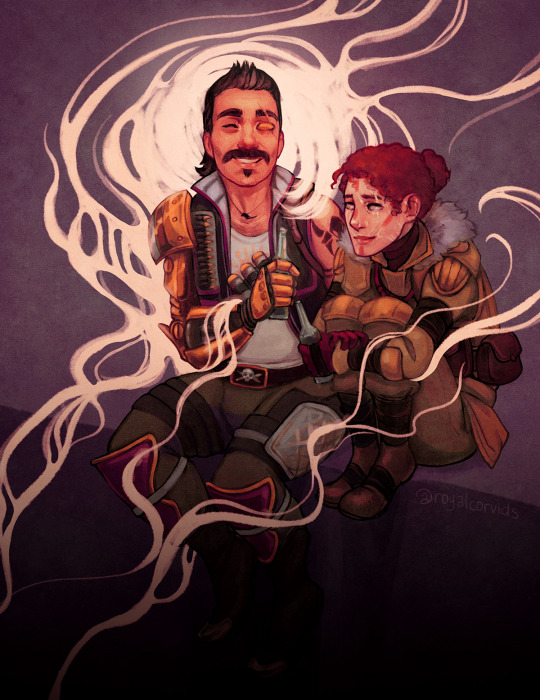
their backstory with boone also fascinated me for a very long time, and my friends and i spent many a yap session dissing the dude until we stopped and thought, hey, what if he really was Just Some Guy who made mistakes, what if he wasn't evil, and that's what pulled me right back into the brainrot when i was already starting to slowly recover from it. boone now has a very elaborate backstory and lore and i hope to god respawn never puts him in the games the way we did because a) they don't GET him and b) i don't trust the fandom with him lmao. i'm super down to blabber about him though just say the word. he's everything to me, my big, sad, hairy man
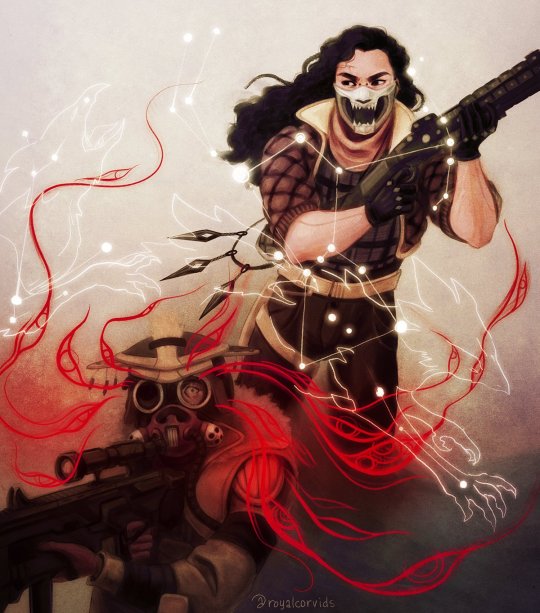
we also invented in-game stuff for him. he had abilities and skins etc etc (the top row of skins is his titan pilot backstory + talos era + 'default' in-game skin)
this diptych still lives rent-free in my head, i think i really won with this one

where miragehound and boonehound flourished, mirageboonehound wasn't far behind! i wrote how it came to be and all. also Рorn. so much Рorn. seriously.
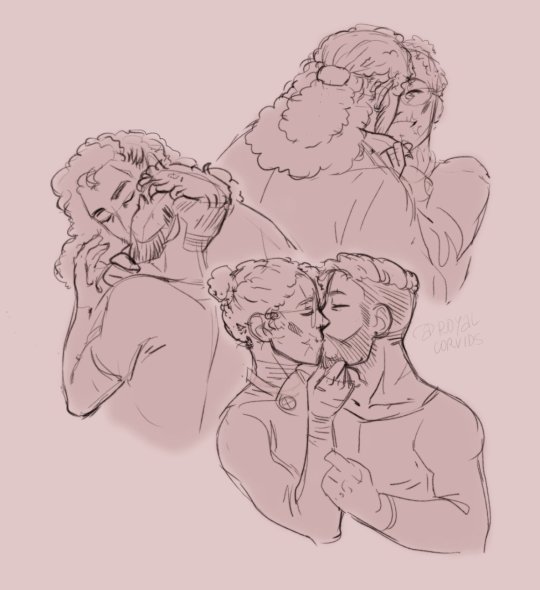
also this was the first time i redrew the twelfth night as my otp. the second one was mouthwashing
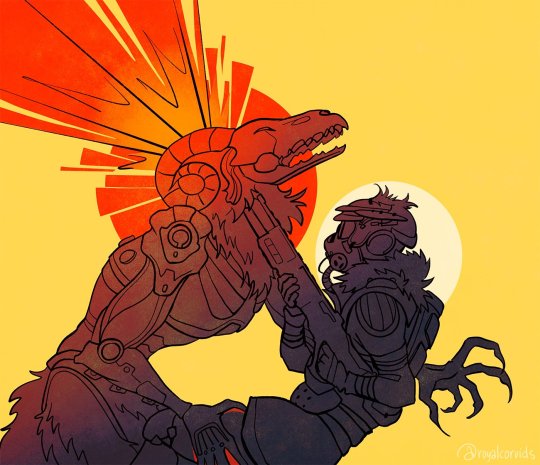
fusehound was an absolute delight to watch blossom, especially since we know it wasn't planned and just Kind Of Happened. i felt that lmao. characters be like that. i'm a bit sadge they shelved the whole talos plotline in favor of romance but at this point i gave up on expecting good lore from apex, especially after they fired herr frozenfroh. i didn't draw fusehound nearly as much, BUT i do have one fic that was basically a dream i had lol
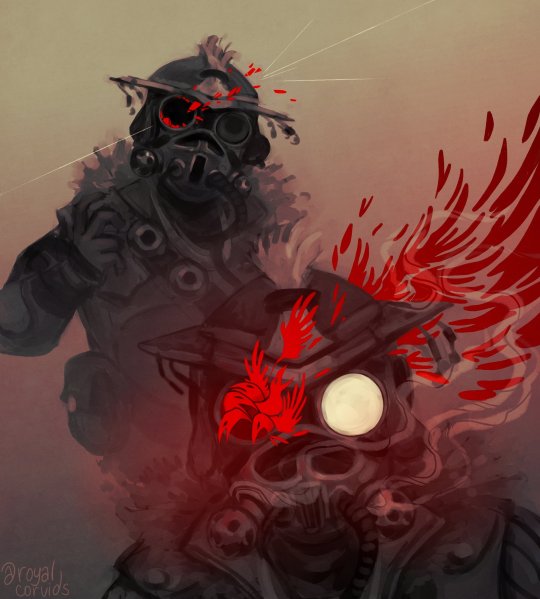
honorable mention goes to revhound!! this is the ship that went really hard with artists and writers. deeply painful, deeply compelling, absolutely incredible. mindblowing angst and just as mindblowing рorn, together or separately. best shit. the one ship i didn't write for because compared to the fandom's behemoths i never felt like i'd be able to contribute anything meaningful lol, i just got to sit back and enjoy
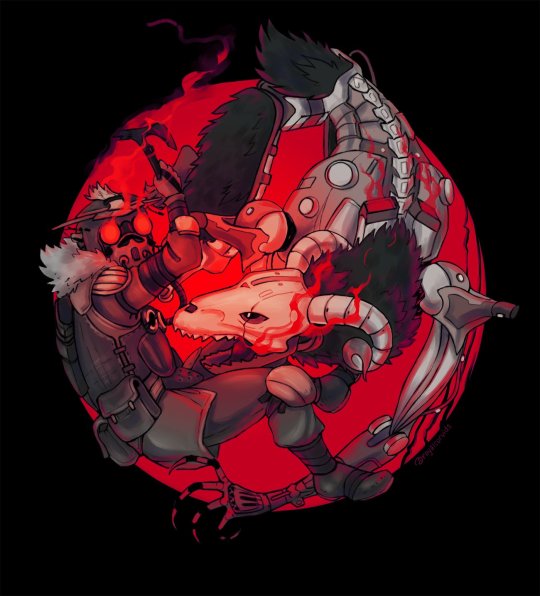
bonus: as one of my friends eloquently put it, bh and their bhitches :)
i was going to put in more pictures but hit the 30 images limit!!! my twitter is now abandoned but if you scroll down just a little you can see all the stuff that didn't make it into this post.
apex and bloodhound also REALLY, REALLY got me writing. i came into the fandom already relatively warmed up after a 170k fire emblem fic, but i ended up writing 200k+ for miragehound, mirageboonehound, and fusehound combined. i was unstoppable. it was insane. i've linked some already but you can peep them all here. bloodhound's pov was especially fun to write for, purple prose my beloved
also you asked me about heirlooms! i'm a lucky motherfucker who managed to get one set of shards from the 500th box and another from just the random 0.4% chance. so i have bloodhound's and fuse's as they are my most played characters :)
57 notes
·
View notes
Text

Day 1
And thus begins an excessive undertaking! Do you like rambling?
Speaking of undertaking the first three days of the project were actually made at least a full year before I did all this.
Y’see I’ve been into Junkan for awhile, like, even back before I came out as trans awhile, in like 2018 or 19. It started as a joke between friends that all the events of DR could have been avoided if Junko and Mikan made out, so it was in my head for awhile even if I never fully engaged. Eventually though I accidentally read a fanfic where the relationship was written in a really adorable way, and that just sold me instantly (this happens more than I’d like to admit i’ll be real). From there I read some fanfics, got hooked, but kept to myself because this was when I was extremely anxious and paranoid about everything.
Cut to I wanna say 2023 (potentially really late 2022) and on an impulse I start reading Junkan fics again, and that’s when I came across one fic by VanadisValentine (Check her out! She’s cool!) which I read in a single night and it gave me insane brainrot. I was so brainrotted that in a night time haze I drew the first three pictures of this project and only showed them to like, 2 people.
Another fun fact! The art presented here isn’t actually the first pic, this is something made at the tale end of the project days before it was even announced. I will be including the original pic for Historical sake, but looking at it makes me irrationally angry and ya’ll deserve better so I redrew it. To briefly explain the art, because of Vanadis’ fanfic “Everything You’ve Ever Dreamed,” (which started all this) I found myself super intrigued by the idea of Junko being terrified of actually falling in love with someone.
For the new version I just tried to do a better job at visualizing the anxiety, that’s about it. Reblogs Appreciated! Stay hydrated!

Hey if you like Junko’s red nails, horrible news! As far as I can tell the original version of Day 1 is the only time I’ve ever drawn them.
Also you can definitely tell with the original that it was made in a “No one will ever see this mindset” given how unpolished it is compared to some of my other sketches. Also i hate how i drew Junko’s hair in these first two pics that’s like the main reason looking at them gives me a headache.
Nother reason you can tell ths is old is because I drew Junko with 2 eyelashes instead of 3 like I normally do
#Danganronpa#Junkan#Junko Enoshima#Mikan Tsumiki#Junko x Mikan#Junkomikan#Enomiki#Shipping#Fanart#Enoshima Junko#Tsumiki Mikan
74 notes
·
View notes
Text
Redrew something from 2022

I think if Sam & Max were swapped for the Devils playhouse (I can’t remember the au name) Max would act more like how he did in a glitch in time. Yes still violent and impulsive but I think the “gotta find Sam, gotta find Sam.” Would be a huge part of how he acts.
How Sam leans more into the noir/bad cop type thing, I think Max would just be absolutely batshit insane. He screams a lot in the short time where he can’t find Sam in the cartoon and I think that would make sense here as well. I also think his mood would probably fluctuate a lot. A part of me also feels like he’d talk to Sam’s brainless body.
#ramble ramble ramble#my art#greens Sam and max art#green’s Sam and Max art#Sam and max#sam & max#sam and max freelance police#sam and max fanart#sam and max the devil's playhouse
38 notes
·
View notes
Text
SKETCH DUMP


1 - Scene where Delz and Harry find William roaming around in Fazbear's Fright, after Delz gives him the new name of Springtrap. Willy tries to gloat, but didn't read the room. 2 - Redraw of the scene in the original comic where Springtrap boasts to Harry about being The Fazbear Killer, although this time, Springtrap isn't bound to let him wriggle away so easily... 3 - Another redraw, featuring the crappy nightmare scene with Nick. Wanted to test drawing my Nightmare Springtrap design since it's been awhile. The dialog is not official, I just got a little goofy.

★ Bonus! Redrew that one disgusting pinkypills page, because I can and wanted to do William justice. Instead of him being a... freak, I decided to showcase William having more of an angry impulse. Perhaps not immediately acting on it, but the intrusive thoughts are definitely getting the best of him; His grief is taking him to an evil place.
#fnaf#fnaf a deceptive calling#fnaf au#springtrap and deliah#redesign#rewrite#william afton#fnaf fanart#springtrap#fnaf 3#digital art
37 notes
·
View notes
Text
I impulsively redrew one of Ms. Accord's sprites! (under cut)


#puyo puyo#puyo puyo fanart#accord puyo puyo#ms accord#ms accord puyo puyo#popoi puyo puyo#popoi#pentacle art
26 notes
·
View notes
Text
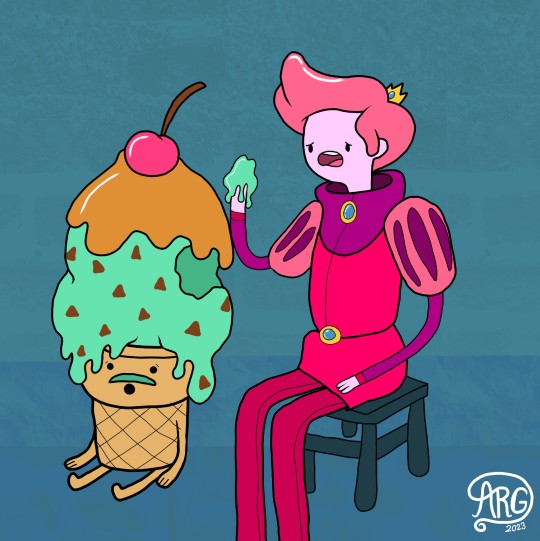

Redrew this scene but gender bent for #drip for #inktober and #impulse for #adventuretober
#inktober#adventure time#adventure time fanart#inktober 2023#fanart#fiona and cake#cartoon#hbo max#argdoodlesfanart#argdoodles2023#argdoodlesadventuretime#argdoodles#adventuretober#adventuretober2023#adventuretober2023impulse#adventuretimefionaandcake#cartoon network fanart#cartoon network#adventuretimegumball#princegumball#gary#fionaandcakegary#candy kingdom#candypeople#mistericecream#inktober drip#inktober2023drip#digitalart#digital illustration#hbomaxfanart
346 notes
·
View notes
Note
Hiii, do you have any tips for drafting out embroidery patterns? I've got one in mind, but drafting it out and color picking is so nerve-wracking!!
[Hi!!!! this got kinda really long so I'm gonna crop it under a read more. And I honestly don't have any real training/instruction in fiber arts so this is just how I do things, and probably others do them very differently!]
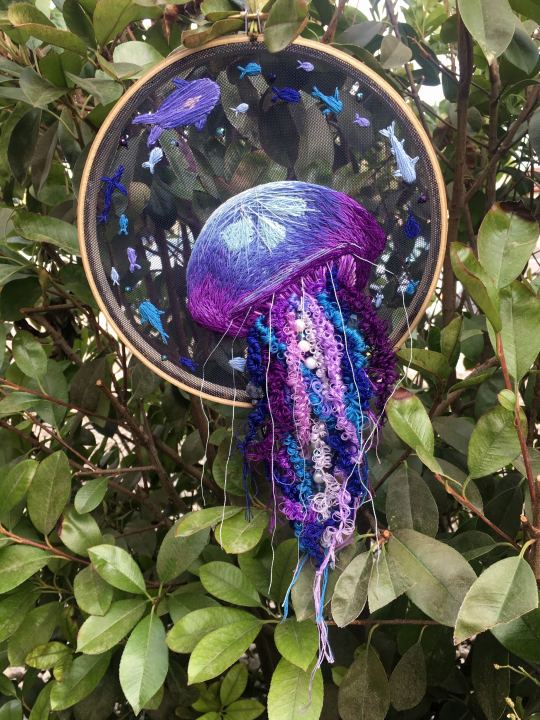
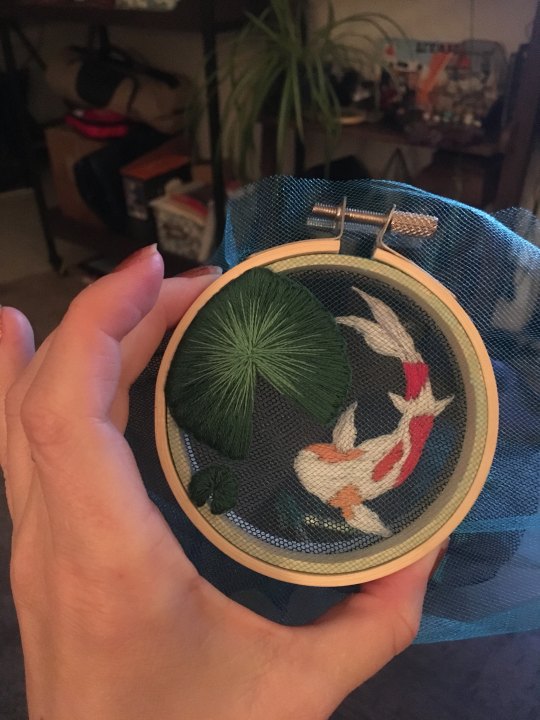
Haha so my fandom embroideries are VERY different from my non-fandom personal pieces in this respect. For non-fandom things i just kind of throw myself in like WAHOO FREEFORM LETS GO and go for a kind of messy colorful approach that ends up as things like this:
Versus my fandom stuff is way more structured and designed to fill space, be very precise, etc. So for those I do go in with a digital mock up of the design I make in photoshop, that I then color in, and then as my last step translate to thread colors.
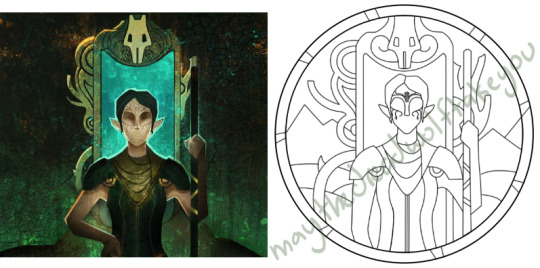
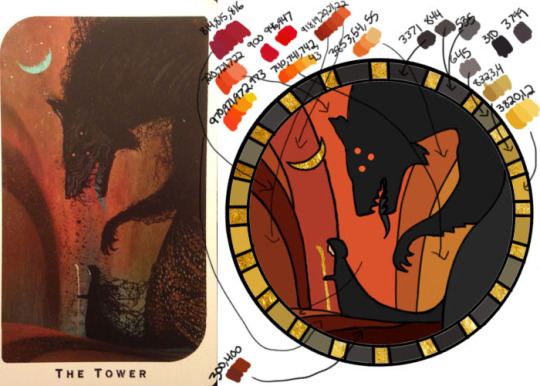
For my Dragon Age series. this has been because I'm specifically trying to mimic the stained-glass style of art you see in parts of the game like the dialogue wheels, some icons, windows, etc. The icons in particular were really easy to copy into embroidery because they already come in handy circles:

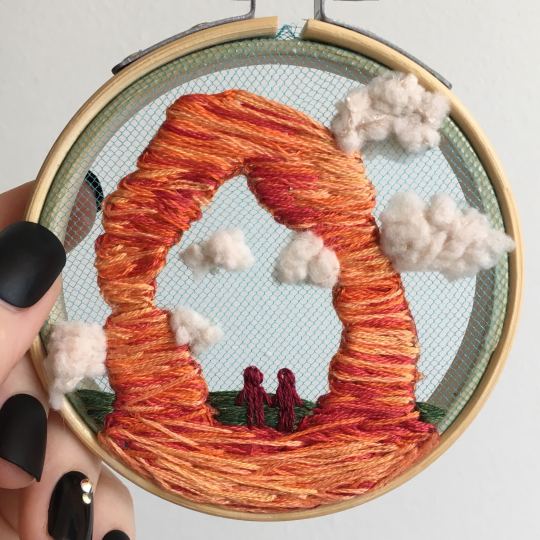
This is mostly because I have desperately wanted to pick up stained glass work as a hobby for like 6 years now. As in once every 3-6 months I put everything I'd need to start doing it into an online shopping cart and look at the price total and then sadly close the window because I just don't actually have any space I could do it in (I live in a 2bed apartment so i have no garage or yard or anywhere it wouldn't make everything else a mess or be a hazard). The day after one of those events I impulse bought and completed a floral embroidery kit from the craft store and kinda was like... ok, well, I did this once how hard can it be to use this medium to mimic the hobby I wish I could be doing? Plus, it's only like 60 cents per color! I can afford that! So I took the first design I wanted to do, the romance icon, and basically redrew it sloppily in photoshop, then freehand-copied the design onto fabric and stitched it the next day:

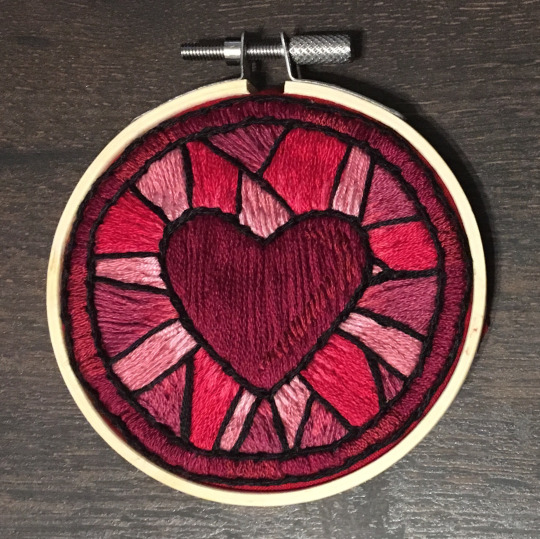
I learned a lot from this piece and changed my approach a little. Here you can see I tried shading in the parallel direction to my thread, which looked messy and added texture, so now I shade horizontally to my thread direction instead.
But it gave me a basic approach for turning the Tarot cards or DA Keep tiles (or any other art!) into embroidery patterns, which I couldn't copy as directly into this really smooth stained-glass style. There's a basic process I follow when doing these conversions that generally follows the same order, which I'll go through below.
STEP 1: SHAPES
The first thing I do is pick the shape of my display frame which is usually a circle, but could be an oval or rectangle too, since I hang the finished pieces on my wall to have nice way to show them off. I like to fill the whole space so knowing the size and shape of what I want the finished project to look like is a good goal for me. Since I am doing fandom pieces I want to be recognizable, I do stick pretty close to the "original" character design/art, but you can absolutely change as much as you want and freehand draw your own interpretation instead. If you're doing original art just substitute the below composition notes with "sketch out roughly what you want it to look like". I personally do my pattern drafting digitally as I find it easier, but you can do this part by hand too.
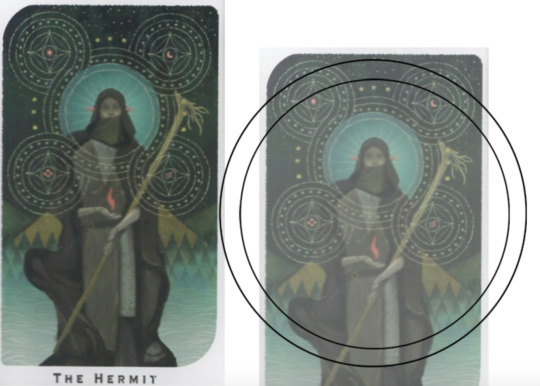
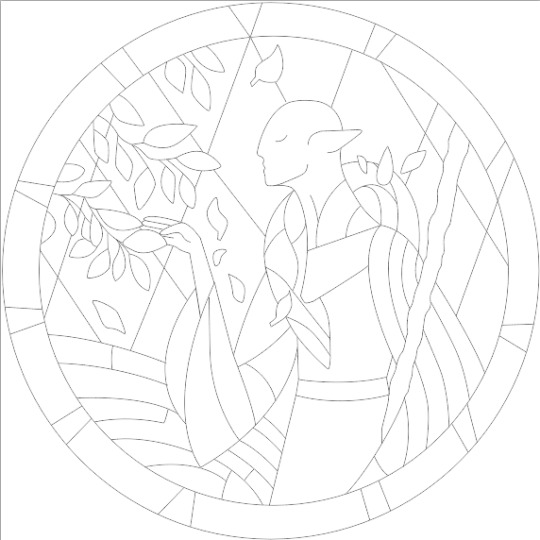
First, I keep the reference image I'm working off of open next to me while I work, and draw in the shape of my frame (here, a circle). If I'm adding in the little border to be fancy, I add a second inner circle. I keep these as their own top layer so I always know I'm working within the final "frame" and don't spend time designing any section that will fall outside it. Then I will take copies of the reference image and knock the layers down to 25-50% opacity, and start moving them around underneath the 'frame' layer until I like the way their positioning looks as a composition. Sometimes elements of a card I want to include don't all fit in, so I'll chop the section out and add an additional layer to throw in (like the background circle things in the Hermit design below). Or I'll just freehand things like adding much bigger diamonds behind Solas in my Hierophant design because I did NOT want to do 1000 tiny ones. Then once I'm satisfied with the general composition, I'll use the plain ol circular brush tool to trace out the major shapes of each element. I try to keep in mind that I can't go too small, and curvy lines are more difficult to fill in than straight ones. I usually do a rough messy version first, make it mostly transparent, and then a cleaner and more precise one over that.


(you can see parts of the rough one on the left and the fully 'cleaned up' on the right for the Hierophant design)
Now: depending on what you are doing next with the pattern, this might be where you stop and start coloring. If you are planning to freehand your design or just trace it onto fabric (or even print it onto fabric here), there's no need to do more than this kind of lineart! However, if you are working digitally and want to create a scalable vector so you can print it at different sizes, you can use the pen tool in photoshop to trace your design and make a "work path" of the lineart. However, another note: THIS PART IS VERY FRUSTRATING AND TEDIOUS BECAUSE THE PEN TOOL WAS CREATED BY THE DEVIL TO TORMENT US. It is so so so easy to accidentally delete a line or even the whole path and not notice later on. Ask me how I know 😭 Anyway I'm not going to include a pen tool tutorial because I don't even know how to use it well and have to google or watch videos every other time I try to use it. But if you can muddle through it gets you some really clean lines that eventually look like this:

With the work path selected, you can select the brush tool/size/color and use the "stroke path" option to create lineart of the vector. Then you can save this as a transparent png file for use at different sizes and for printing and it looks so nice and clean! one of the big benefits to this is that you get really fine lines that are easier to be precise with stitching on. This is extra perfect if you are printing the design directly onto your fabric (which you can do with an at-home inkjet printer for designs under 8inches wide, as long as you stick a piece of stabilizer on the back of your fabric and cut it down to printer sheet size--this is what I do and can make another post about that process if people want haha), or if you are printing onto transfer paper like you can buy at craft stores.
This is where I end the lineart for my designs. After I have this, I move on to the next phase, which is...
STEP 2: COLOR
For interpreting my designs into thread, I start by thinking of it as flat colors first. You can't "shade" as easily with threads as you can with things like paint or brushes in digital art (though you can A Little, which I will get into), so to start color planning I pick the "main" color each section will be in the piece.

For the existing icons this was simple--I kept the same sections as the original designs, so for each I just color picked or eyeballed the color in photoshop and colored it in (but you could do this on paper with pencils, markers, whatever as well--they don't need to match your threads exactly and usually won't, it's just to give you an easy reference to follow as you go). For the tarot cards which were more complicated in coloration, I just did my best and went with what looked good next to each other, even if it was a little off the original art. It will be off more later anyway when you have to pick threads so don't stress it too much honestly. I will often make layers with different color options and turn them on/off for direct comparison to try to determine what I think looks best as well, like below where I was debating between more blue/desaturated for the background or brighter colors.

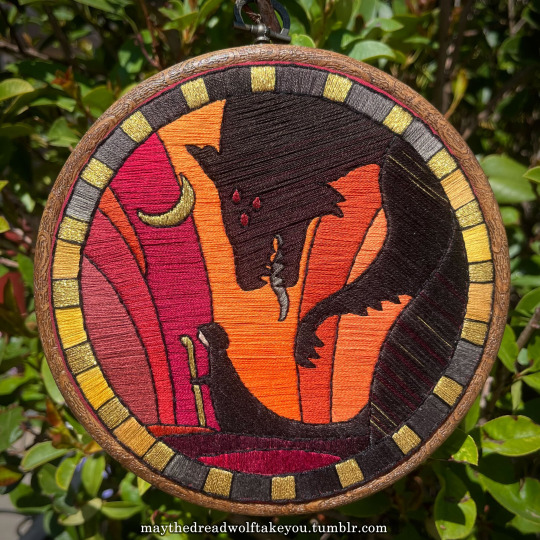
I do wanna note I have regrets about the color selection, shapes, or shading in EVERY SINGLE ONE of my finished pieces. But no one else ever comments or probably even notices! One aspect of this hobby is just learning to be satisfied with what you've made and using what you learned to get closer to your preferences next time. I'm only going back and redoing some of my designs' colors because I want to make it easier for others to choose on the patterns I sell, more than I care for just for myself. Also since I'm doing this lineart/stained glass looking approach where I go over the distinct shapes with black thread at the end, it means I get these clear delineations between sections you might not necessarily have in your own pieces, and that's ok.
Ok right. Now while shading/coloring in detail is hard with thread, you CAN make whats essentially dithered gradients. "Dithering" in the concept of art means using 2 (or more) colors to give the impression of a third color, or to gently scale between the existing binary rather than a hard line. Think of it like blocky pixel art or gameboy game images. If you're doing needlepainting, you use really small stitches close together to get this effect, which translates to "smaller pixes"--if you look at the jellyfish in my first photos that's a very messy casual version of that. If you want a better example, I recommend looking at @ammocharis 's pieces like these in her pinned post, which are truly amazing! I simply do not have the patience myself 😂 For my stained glass style, I work only in very long straight stitches, so I can only shade in one direction and have to be a little more precise with it.
So for shading, I think about in each section which direction my threads might go. Then perpendicular to that direction I pick which side will be the light one and which the darker one. Sometimes I color this in on my pattern mockup, but sometimes I don't! Or I'll only do it for certain sections to make sure I don't forget. Like for my Tower design I only colored it as flats, and waited until I selected threads to decide how the shading would go. I am currently working on a smaller, simplified version of my Hierophant design and I did add shading digitally for that one just for fun. But it's not as important as having the flat color version you can use to quick-reference how you want your design to go while you're stitching. You might also notice I don't actually color my gold--I just throw in a stock image of gold foil for that layer so I can't confuse it with any of my yellow thread sections.


Here's a close up where you can kind of see what I mean by the "dithered" effect between colors--some are more obvious (like the red on the far left or middle orange) and others pretty subtle (dark grey to dark red on the wolf face):
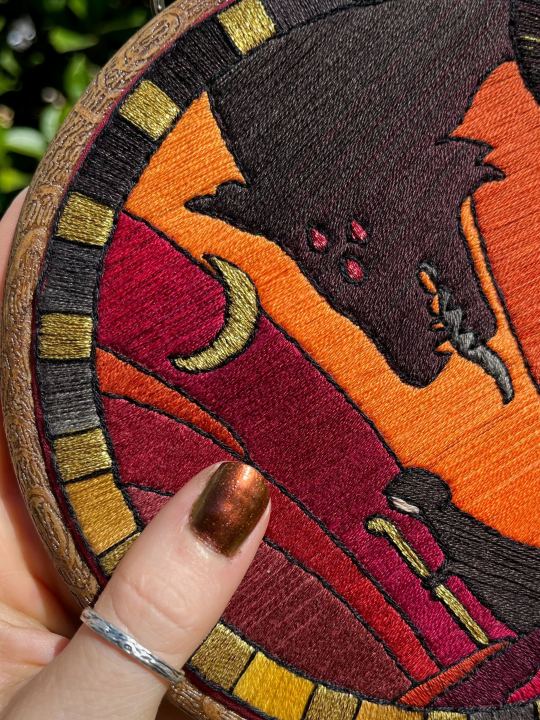
Now, while I use single layers of satin stitches for this, and just alternate thread colors increasing/decreasing as I go, you can accomplish the same thing with short overlapping stitches like with needlepainting, or with clusters of french knots, or whatever else. But in GENERAL you are going to be able to trick people into seeing gradients out of dithering best when you are using the same type of stitch for that whole area. So if I was using multiple stitch types like having french knots, daisy chains, ladder stitching or whatever else for some sections, I would keep those to contrasting areas/colors. A fantastic example of using different layered types of stitching to create more intricate color/texture in an embroidery would be these incredible tarot card depictions by @hattedhedgehog, which I like even better than my own embroideries. Here's his take on the Tower card as well for comparison to mine (I'm so in love with it!!!).
But anyway, at this phase, your design is actually still digital--the above is just to explain how it translates later in the process. The next step is...
STEP 3: THREAD SELECTION
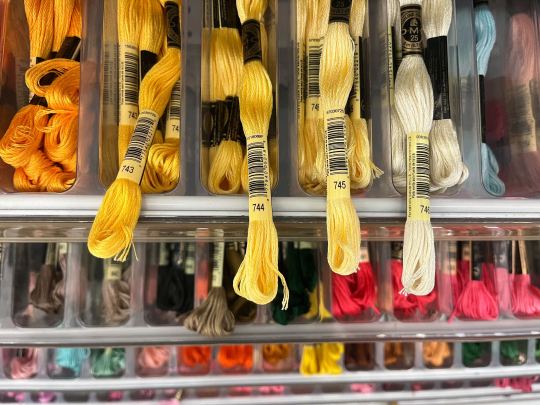
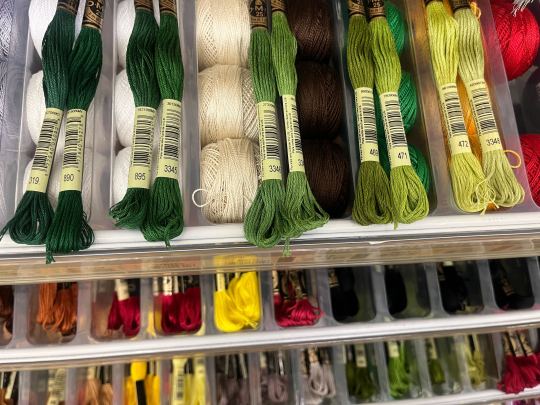
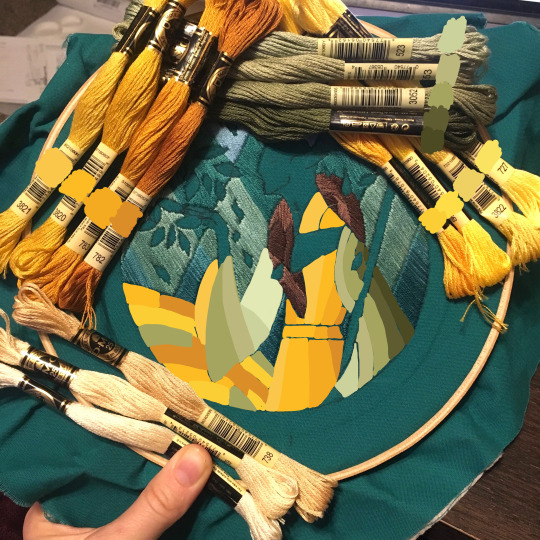
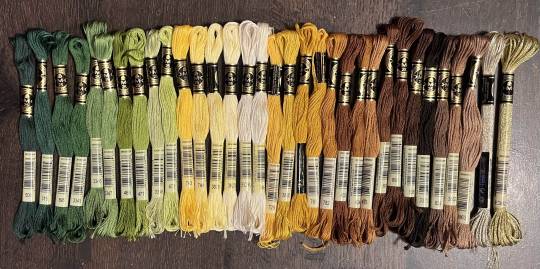
I will admit here I am not great at this part. I am constantly second guessing my thread colors, and can spend over an entire hour in the thread aisle at the craft store agonizing over choices. Really, I think this is just one of those things that takes practice and you get better at it over time. What I have had the best luck with is actually printing out a reference photo of my design/the original artwork and taking it with me. If you already have threads you can do this part at home too, but DMC alone has over 500 colors and I definitely don't even own half that so I like to torture myself by looking at them all together on the thread racks. Plus Anchor and Artiste and whatever other brands there are out there. One approach is to just sit there and pick out what you want for each section and line it all up together on top of your printout. Or in the case of my Tower I laid a bunch of options out on top of my template in the hoop to guess how they'd look in the frame.
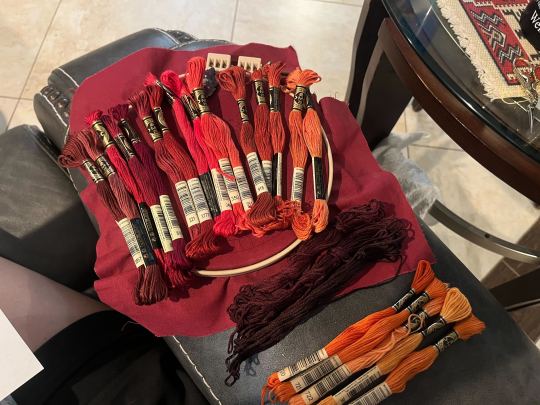
For me since I am also doing this dither shading thing, I also need 2-3 colors per sections depending on its size. Sometimes it's easy and the threads have a color just a little darker or lighter right next to them in the numerical lineup! Other times, there is no good match, or it looks too far away to shade nicely, or I want one to be a warmer or cooler tone than the other... which means a lot of standing and fretting to myself over it. I actually take a lot of photos at this stage because it can be easier to see how they will look in the end from a photo than in person to me? Idk why. Plus then after they get scrambled in my bag I remember wtf order I meant for them to go in later. But as long as you're not preventing other customers from shopping themselves, you can spend as long as you want staring at thread in the embroidery aisle and they won't kick you out unless it's closing time, so take your time.
Now, IN THEORY, you can sort of combine steps 2 and 3 by color-selecting from your threads and using that to color in the design. However I have tried this and it led to mixed success because the photoshop eyedropper brush simply isn't actually that exact (in my experience, it desaturates compared to what we actually see). And because then you have to have the threads on hand while you're coloring... which means you might buy ones you don't end up using if you don't like them. So I prefer to just use this as a refinement step where I pick threads based on the design colors, then will re-color the design a second time to match those threads more closely to be sure I like the effect.
I've even used this as a tool when I needed to adjust my color choices mid-project, by digitally coloring over over my WIP:
Or here's a design (but I haven't posted the finished piece yet bc it's a gift so shhh) I made with certain color tones initially, but after buying thread I re-did the color mockup to be more vibrant, because I liked those threads better in the store:


Once you have your thread, you can make yourself a little reference chart with the colors you intend noted on the sections you want them, like below:
(note: i didn't end up sticking to these colors because I ended up dying my own thread for several sections. And then forgot I made this entirely and picked new ones because I put the project down for a year between design and stitching. Sigh).
Or for my Solas pattern I did this in a really detailed way, which i am sorry but i have redacted because... i have it for sale now and don't wanna just give that away haha. But if you buy the pattern from my shop this is one of the files you'd get with it, for ease of reference. I do also include a text-only list of them as well.

Now I don't go to this much trouble for all my designs, just the ones I put up for sale (or plan to). You can also just make a text list of your color plans if you want. Though for fun I also have been using my scrap thread to make these little "color palette" keyrings for my finished pieces, so if I ever remake them or update their patterns I will know what the original colors were, plus I can compare what i used to other threads if I wanna change part of the design up. This step is absolutely not necessary and I'm just doing it because I'm selling the patterns now, but they are kinda fun to look at.
And don't forget.. if you start a section in a certain color and decide you don't like it, you can just cut the threads and pull them out! I did that with my original hierophant piece actually. I had an entirely different color for one row of diamonds i thought just clashed way too much with the others, so I used photoshop to paint over it with some alternate options until I found one I liked better. Then I cut away all the old threads and put in the new color. It can be a little harder to fill a piece the second time since the fabric will have stretched out a little, but as long as you're using a good stabilizer it usually doesn't move too much.
You can also just make test swatches on spare fabric to test before you add them to your real piece. I wish I'd done this for some color transitions that didn't end up looking the way I wanted, but I am simply too lazy most of the time. My exception is usually for metallic, satin, or sparkly threads, because I want to know how they feel while embroidering. But if you're really worried about a certain color or shade it's a good thing to remember you can just do.

SO yep, that's my general process for drafting patterns. I start with the shapes/design, then do my flat color version, then I pick my threads. Makes it sound easy and short when phrased like that :) But I can honestly spend 8-10 hours just on making the lineart and coloring it in. If I was better at art, probably this would be less, but I'm working with what I've got (not much) 😂 I think all aspects of this are also something that gets easier over time, but it will probably never look as bad as you worry when you start out. I think all my pieces look awkward and rough right up until I do the finishing steps and move them to the display frame sometimes.
I hope this was helpful and answered your questions!! Feel free to post/share your WIPs to ask for feedback or advice ever too :) I've only ever had people in the embroidery community on tumblr be encouraging and helpful to me, and I'm happy to answer any questions myself when I can or if parts of this were confusing
#ramblings#my stuff#my embroidery#embroidery#dragon age embroidery#calicostorms#oh god tumblr changed the alignment of all my images so theyre all huge now great#WELL I keep tryign to rearrage them to be on the same line and it is NOT working so. thats how they will look i geuss#this is gonna annoy me all night... thats what i get for expectign a Functional Website though#embroidery chatter
32 notes
·
View notes
Text

WELP I wasn't going to draw anything that required more than 2 brain cells today but then I let my impulses win and here we are
I redrew this pic before just as a little doodle if ya wanna check it out
#ngl I half of this drawing was me just throwing shit together and going to eh that'll do#I'm trying to learn how to give less of a shit and not over think my art#for the sake of my sanity#what we do in the shadows#wwdits#wwdits fanart#guillermo de la cruz#*funny tag for my art*#bun stuff#I don't wanna see the color red ever again#for like a 2 days at least
24 notes
·
View notes
Text
Impulse in a maid dress as suggested by a person that I can’t remember the user of-
I hope to god that I got his vibe right but he gives me chaotic dad vibes so idk xd

2/22 of the hermitcraft men drawn in dresses so far :3
(Yes I know there’s a ton of mistakes but I already redrew this like twice—)
#hermitblr#hermitcraft#hc s10#hermitcraft season 10#impulsesv#impulse fanart#impulse#hermitcraft impulse#artwork
53 notes
·
View notes
Text
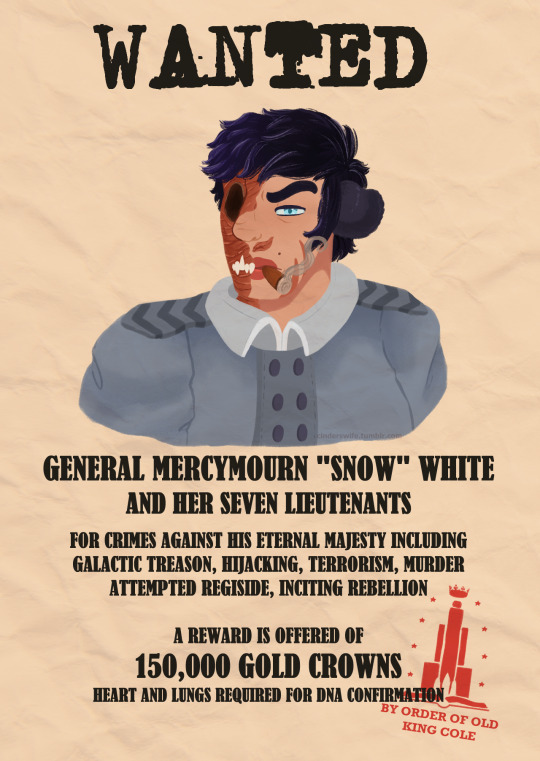
A wanted poster from a backwater moon. Somehow, it is the only piece of speculation ever to hit the nail on your true former identity. You consider briefly going scorched earth on the posters, but that'd prove them right. Instead, you let the rumors circulate and never weigh in. This too shall pass and new gossip will spring up soon enough. Years later, one of your mid-ranked officers asks you about it and you laugh it off. "As if I could ever be as pretty as Snow was."
a recreation of the canon general white wanted poster, featuring my general white design and pieces of my worldbuilding! bit of an impulsive project for the day but man it turned out so good. no idea what the original fonts were, so this is my favorite guess. also i redrew the king's stamp by hand :') worth it though !!! look at her!!!
#the mechanisms#ouatis#once upon a time in space#snow white ouatis#general white ouatis#planet's doodles#i used up so much brain juice on this asdfjklhasf but Look At Her#verse: dog star in ursa major
56 notes
·
View notes