#i just need a nicer printer for the image
Explore tagged Tumblr posts
Text
Partly why I've been inactive is cause I decided to make homemade keychains for my family for Christmas~
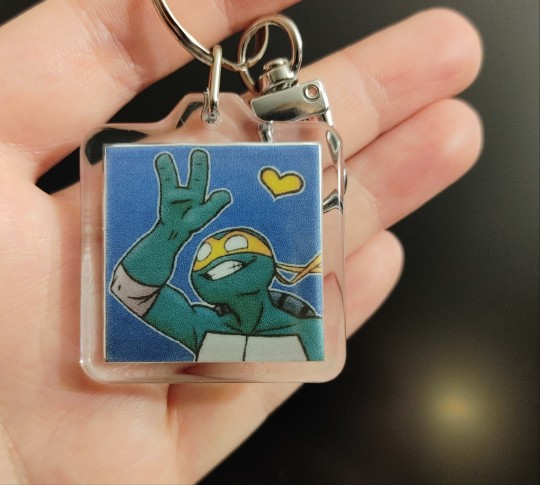
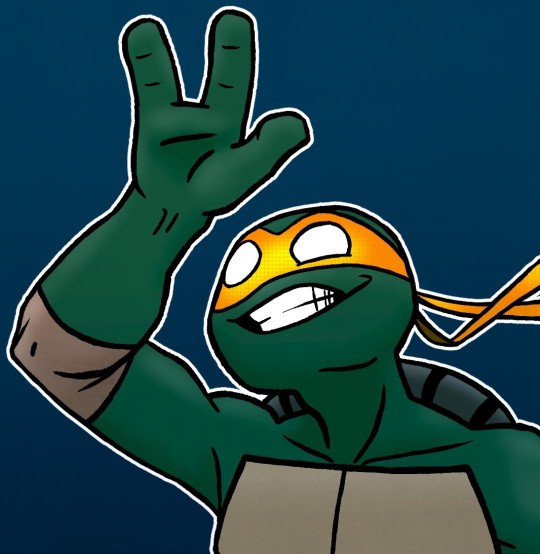
I used the Batman vs TMNT Mikey to test out different ways to make one. Here is the first successful test and it's the only one I can share here cause some of my family follows me.
#michelangelo#batman vs tmnt#batman vs teenage mutant ninja turtles#keychain#its made with acrylic and resin#i just need a nicer printer for the image
96 notes
·
View notes
Text
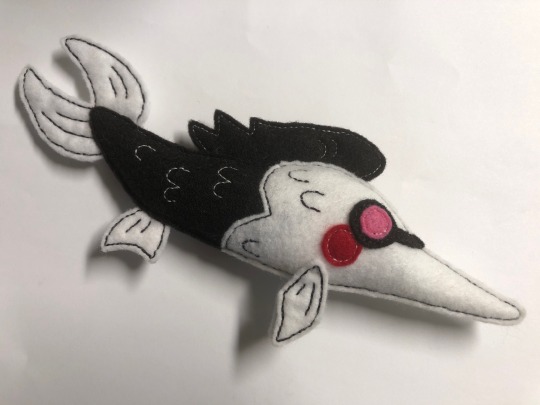
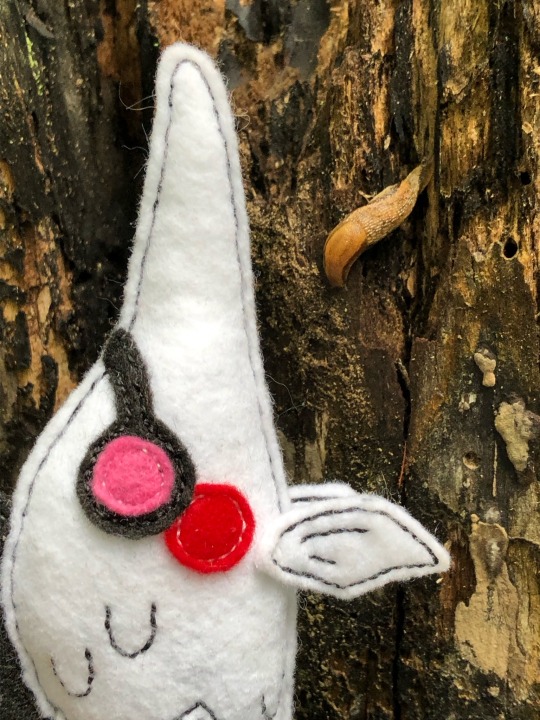

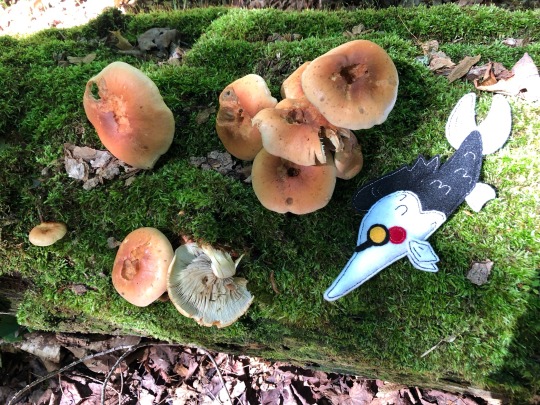
i made a little hand-sewn beast based on everydayspamton's drawing & took it with me on a family roadtrip
if you'd like to make your own, i've included the [[FREE]] pattern & some rough steps below the cut, as well as an Educational Video
EDUCATIONAL VIDEO. THIS IS NATURAL SPAMFISH BEHAVIOR & IT IS NOT SCARED OR IN PAIN.
BEAST CRAFTING INSTRUCTIONS:
disclaimer: i'm an amateur & i've never tried making a pattern before, nor have i ever tried writing directions
materials you'll need:
sewing needle & pins
black thread & white thread
fabric in these colors - black, white, red, yellow, & pink
stuffing
(optional) a squeaker
notes:
for the thread, i suggest something thicker, like whats used for embroidery - i used two different thicknesses on mine, & i think the thicker one; (the black thread); stands out a lot nicer
for the fabric, i used craft felt. its nice because its cheap & malleable, but if you want something that can actually be washed & played with without disintegrating on you, don't use felt. different fabrics will have different results, though, & may not give you a clean-looking edge & lines
you can also just go nuts & use whatever colors of thread/fabric you want, make pattern alterations, whatever
if you make one, feel free to @ me, send an ask or DM me with it, i'd love to see!
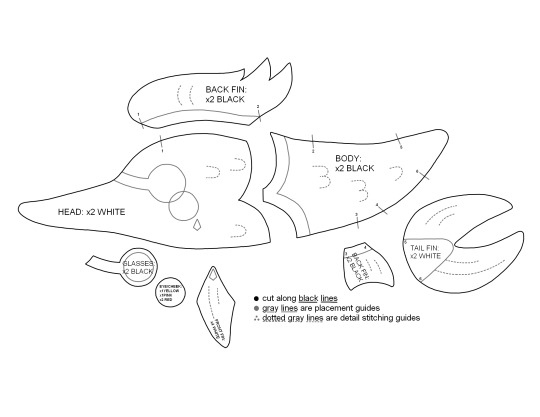
^^^ here's the pattern!
now the actual steps?:
1.) download & print out the pattern - it should(?) fit normally across a regular sheet of printer paper. i don't have exact measurements, i eyeballed this whole thing & then lost the original pattern - (there's only a copy that i scanned & edited left on my computer. woops.)
2.) cut the pieces out. pin the patterns to the fabric color the instructions call for, & cut out the number you need for each
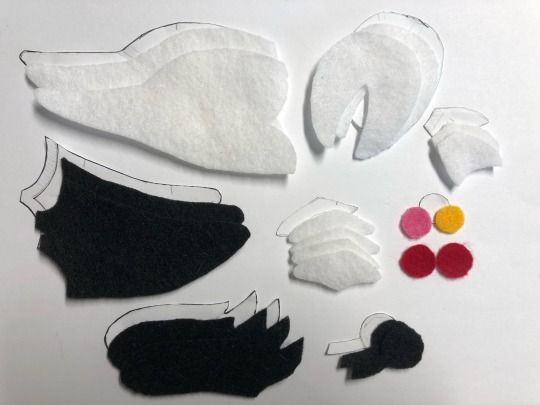
^^^ here's what you should end up with!
now the sewing! for this whole thing i used doubled-up thread & a 'running stitch', then went over it a secondary time with another running stitch to fill in the gaps. you could also try using a 'back stitch' (which i don't know how to do), but that might be tougher. the goal here is to give it an Outlined look, like a drawing
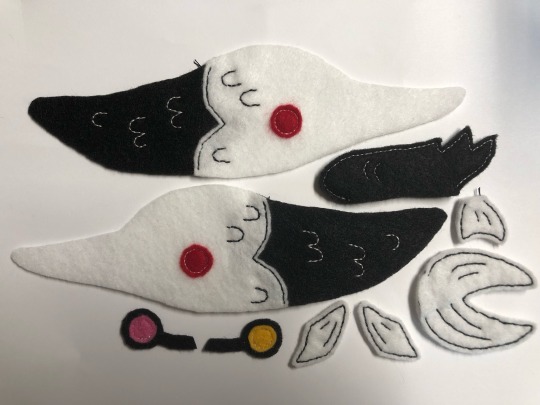
3.) with white thread, sew the pink & yellow eyes onto the glasses - pink is Left, yellow is Right. reference the image above if you're not sure!
4.) sew all the fins pieces together - on the black fin, use white thread; & on the white fins, use black thread. reference the pattern for the detailing. i made my own front fins 'wrong', but you don't really have worry too much about being exact
5.) overlap the Head pieces onto the Body pieces - making sure you have a Left and Right side! pin the heads to the bodies, & compare their lengths by holding them together to make sure you've got it right. sew the heads to the bodies using black thread. detail the head with black thread, & detail the body with white thread
6.) now that you've got the two sides of the body completed, you can hold them together to try to get even placement for the red cheeks. pin each cheek to each side, then sew them on with white thread
7.) using black thread, sew the pink glasses onto the Left side of the body, and the yellow glasses onto the Right side. they'll be slightly overlapping the cheeks
8.) with white thread, sew the front fins on to each side. NOTE: i put mine on wrong, & didn't realize until i was finished. for the 'right' placement on these (closer to the original drawing), reference the pattern, & not the images
you now have all your parts ready for assembly! for me, this is the hardest part. you'll need a bunch of pins - use the guidelines on the pattern and/or reference the below image to get the right placements
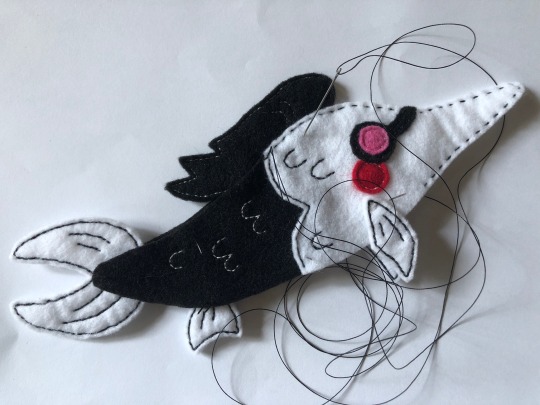
9.) pin in the back fin & the nose. leave some space on the bottom for stuffing when you start, & using black thread, sew together the nose & the fin unto the body - the fin should be sandwiched Between the two body halves
10.) pin in the tail fin. continue sewing down the back with the black thread, & sew the tail fin in - once again, it should be Between the two body halves
11.) pin in the back fin between the halves. continue with the black thread, sew along the tail & sew the back fin in - Stopping once its secured. you should have some good space still open on the belly
12.) time for stuffing. using something thin, but not sharp - like a chopstick or the back of a crochet hook - & push stuffing into the nose & tail portions. stuff the head about halfway. now, if you have a squeaker, put it into the widest part of the head, & stuff a little around it
13.) still using the black thread, sew the belly up a little more so its easier to keep the stuffing in, & then fill up the rest of the body. once fully stuffed, sew the remaining hole together
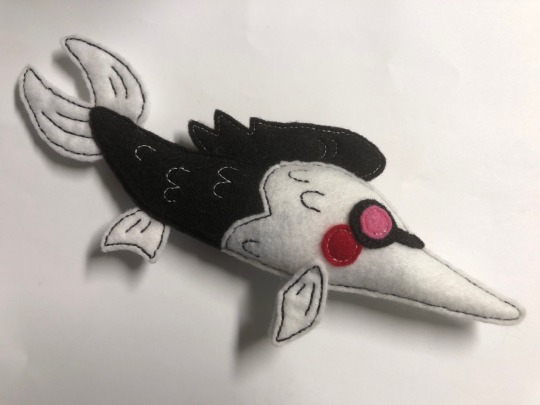
14.) congrats! you now have a spamfish. if you opted for a squeaker, squeak it thoroughly
don't worry if it's not exact, some individual variation is fun & makes your creature unique! mine has upside-down front fins with upside-down detail lines
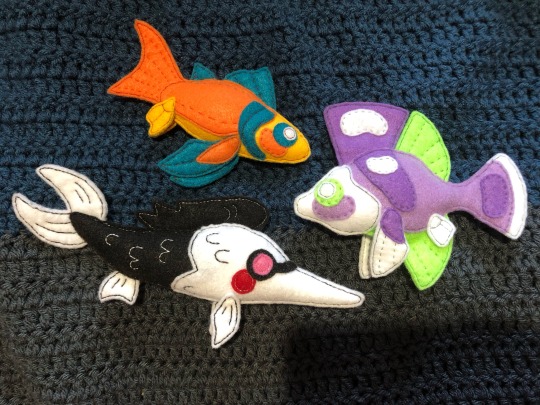
here's the thing with some friends i had made a little bit before him. have fun with your beast!
i am not liable for any damage it causes to you or your property
#spamton#myart#spamfish#i made this thing&took pictures of the process to show my friends a few months back.i finished it a few days after thedailyspamton's post#i had already been making funny little fish&it was just the perfect timing!now i want to share the spamfish with others :)
553 notes
·
View notes
Note
Yello! I want something fluffy but funny so I thought I’d request an aziraphale x crowley x reader where the reader is tech savvy, and by tech savvy I mean just basic knowledge of gadgets and such, but to crowley and aziraphale, tech savvy. Reader introduces them to a lot of gadgets and they’re both so amazed.
Bonus points for nina and maggie confused in the background because it’s literally just basic things but crowley and aziraphale act like it’s fucking magic (also ik crowley has a smartphone, but still!)
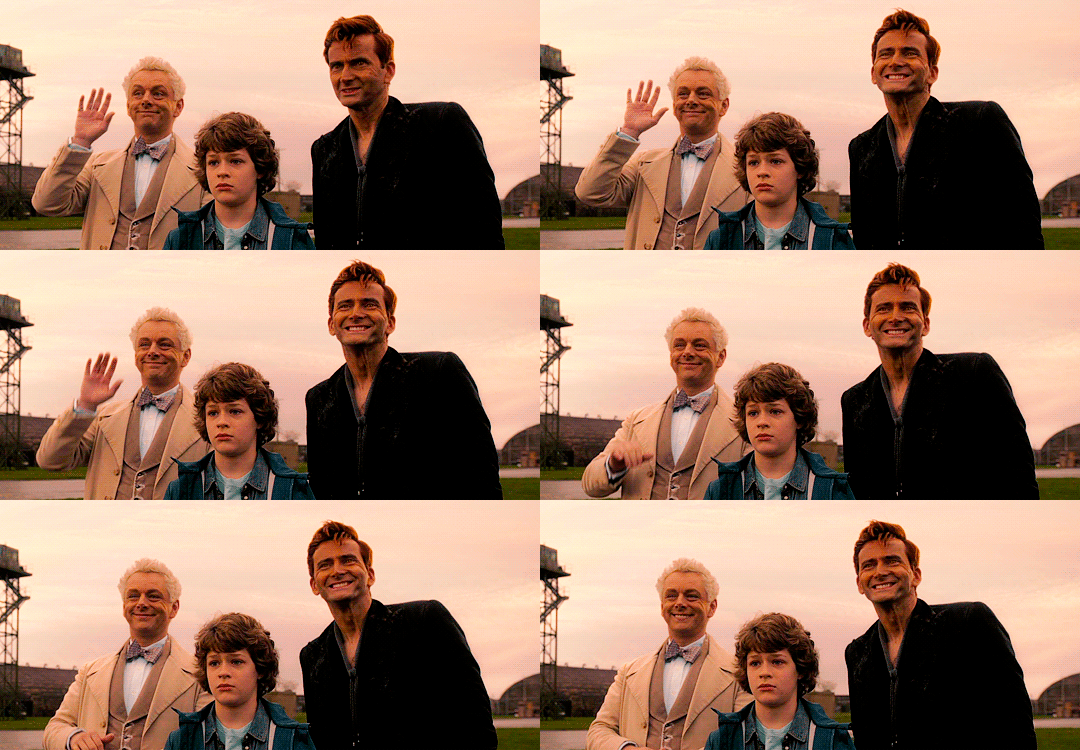
notes: I love this request so much. I really enjoyed writing it! (And don’t worry just because Crowley has a smartphone doesn’t mean he actually knows how to use it, take a look at almost any person above the age of 60)
pairing: aziraphale x gn!reader x crowley
rating: G

“Darling, the printer isn’t working.”
“Have you tried pressing ‘Control + P’, Aziraphale?”
“Yes. It’s not doing anything, devilish thing.”
You sigh, put your book down, and head over to your angel’s desk. He’s trying to print out a screenshot he’s taken of a picture you sent him the other day. It’s a cat meme. He’s rather taken with them, and likes to have copies to look at across the bookshop. You have explained he can just save the image itself but he doesn’t quite seem to understand that.
“Ah you see Aziraphale, the problem is that you haven’t actually turned it on.”
“Oh!” he exclaims as you reach over to the power switch. The printer lights up and begins to spit out a dozen copies of the image Aziraphale has now lined up in its queue. As you try to force it to stop, Crowley saunters up behind you.
“Can you help me get these to connect? They’re not—”
“Yes, one second,” you say, thumping the machine as it makes a sharp noise, and handing a pile of print-outs to Aziraphale. “Headphones again?”
Crowley nods, a little petulantly. You fish out the buds and put them in your ears, waiting until you see they’ve connected on the Bluetooth.
“Here,” you sigh. You wonder if any of this is actually worth it. Yes, it’s nice for the three of you to have a group chat, but having to constantly remind them that most of these devices have to be connected to electricity is grating on you a little.
“Oh, I’ve just got a message from Nina on my mobile telephone!” Aziraphale announces. You see him pause over the passcode screen and you brace for him to ask you what it is, again, but he remembers at the last second. “She asks if you can go over and help with the tills, she says they’re… well, I’m not going to repeat what she’s written here but in nicer terms they seem to have broken.”
“Aziraphale please stop telling her that I’m some sort of tech genius. I’m not. I just know how to press buttons correctly.”
“Come on, believe in yourself,” yells Crowley. You roll your eyes and take out one of his headphones.
“Crowley, I can hear you over your music! You don’t need to shout!”
He sniffs. “It’s a podcast actually.”
“I can tell her that but she might be disappointed,” Aziraphale says, looking at you with Those Eyes. He’ll win, he’ll always win, because you can’t say no to him. You groan.
“Alright. Tell her I’m on my way - but not to get her hopes up!”
Aziraphale beams at you. As you leave the shop, the printer tells him it’s run out of ink, so he goes about ordering an entirely new one off the internet.
-
taglist: @angiestopit @dazed-soul @smile-eywa @staygoldsquatchling02 @underratedboogeyman @specter-soltare @candlewitch-cryptic @cool-ontherun-world @emilynissangtr @willbedecided @cool-iguana @bdffkierenwalker @ilyatan @civil-groupie @foolishprincipalitee
#aziraphale x reader#crowley x reader x aziraphale#crowley x reader#good omens x reader#ineffable husbands x reader#request
319 notes
·
View notes
Note
hi! i was wondering how you decorate those bujo journals in like..the metalocalypse theme? haha i hope you don't mind answering, i think its really cool!
I love this question! Thank you for your message, it really made me smile.
First I take a bunch of screenshots I like from the show. I print them out in a reasonable variety of sizes, usually no smaller than 3 cm (1.18 in) and no larger than 12 cm (4.72 in). I cut them out with an x-acto knife, and glue them to the page with a regular old glue stick.
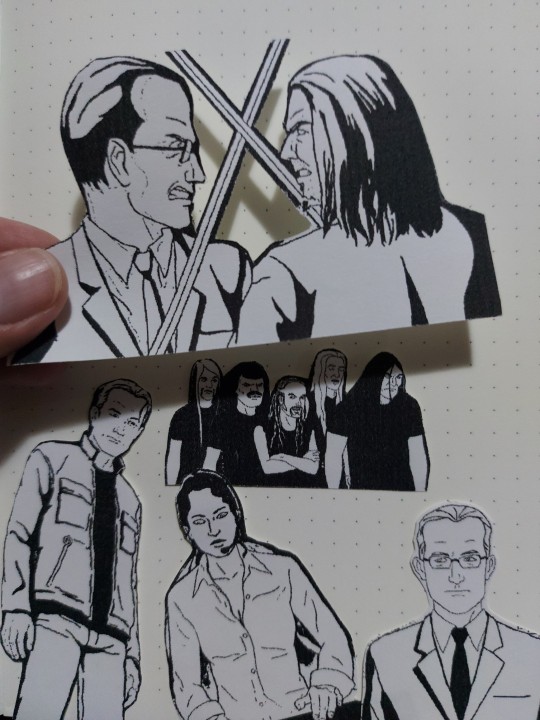
Note that the main reason I print most of these in black and white is that I don't own a color printer. Also I edit the images before printing! I find that simply making them grayscale looks kind of boring, so I just mess around with the brightness/contrast settings until I like them.
I do like to print some of them in color at a copy center whenever I get the chance.
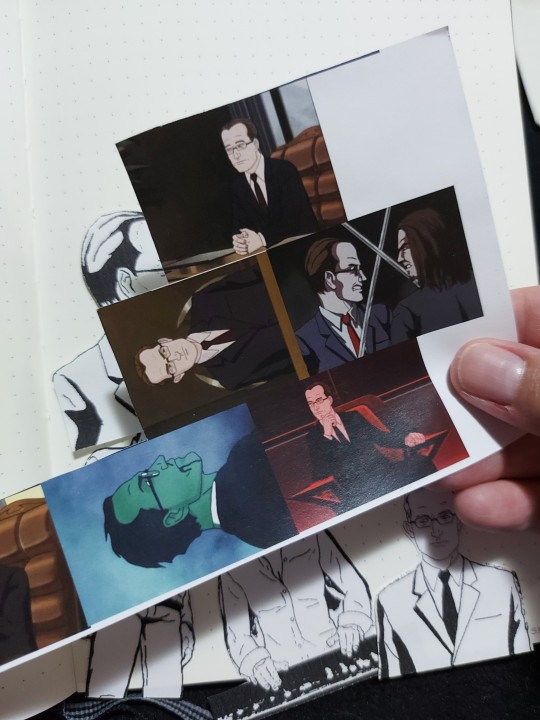
However, I have come to notice that having them in B&W means they'll look fine regardless of the color of the markers I use, whereas I feel the need to be more mindful about harmony when the pics are in color.
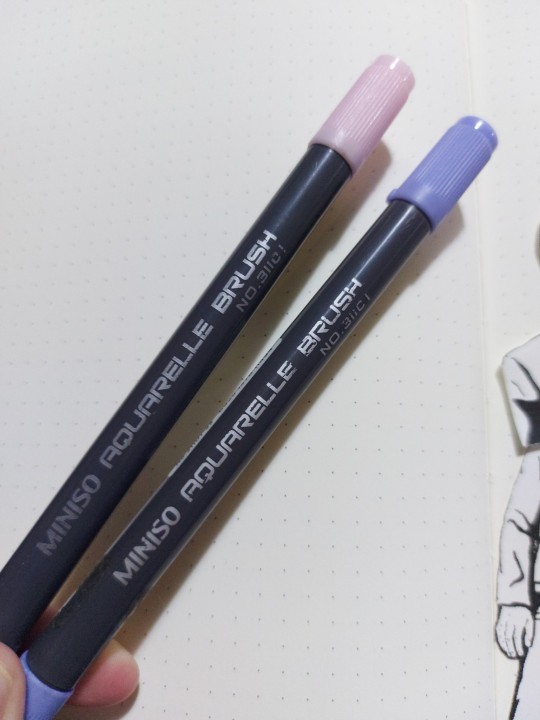
Which brings me to the next point. This is the brand of markers I use, there's nicer ones available all over the place but honestly this is an entirely optional part. Some people use cheap highlighters or color pencils. Some people use no color in their bujos at all. It's all fine, it just comes down to preference. I have a bunch of these markers in different colors and have made a collection of different palettes I can make with 3-4 of them at a time.
I've been wanting to try and make a bujo theme that's more true to the aesthetic of the show but that would involve whipping up a bunch of money for dark/gothic washi tapes, stamps and stickers which are not super easy to get around here (and the few ones available lean more towards the wholesome goofy Halloween-y type than the brutal and macabre) so I'll be sticking to "normie" cutesy color palettes for now lol.
Regarding the page layout itself, there's a million tips and tutorials you can find online for all kinds of bullet journal spreads. Pinterest is great for inspiration. What I like to do myself is choosing a very loose idea of a layout, arranging my Metalocalypse cut-outs on the page and only gluing them and adding text and lines once I'm happy with it.
Thanks again for asking, and please DO send another message if you have any more questions or would like a more in-depth explanation! I'll be more than happy to answer.
#✉️ answered#anon#mtl bujo#herrera.txt#metalocalypse#fandom crafts#charles offdensen#charles foster offdensen
5 notes
·
View notes
Text
First Section Test & Feedback
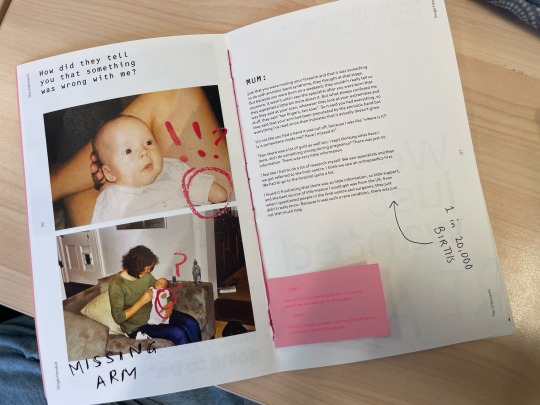
I decided that I wanted to test my first section of my publication on the laser printer and see how the colours looked on nicer paper. I printed on a slight off-white and I'm really happy with the colours of these. The photos feel warmer and somewhat happier in these tones and I definitely prefer this print. The riso is also a lot clunkier in printing small type so printing on a laser printer will give the text more clarity.
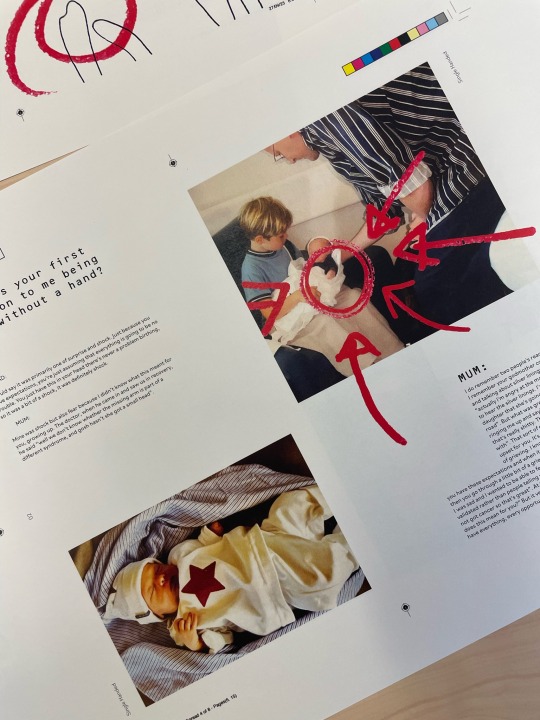
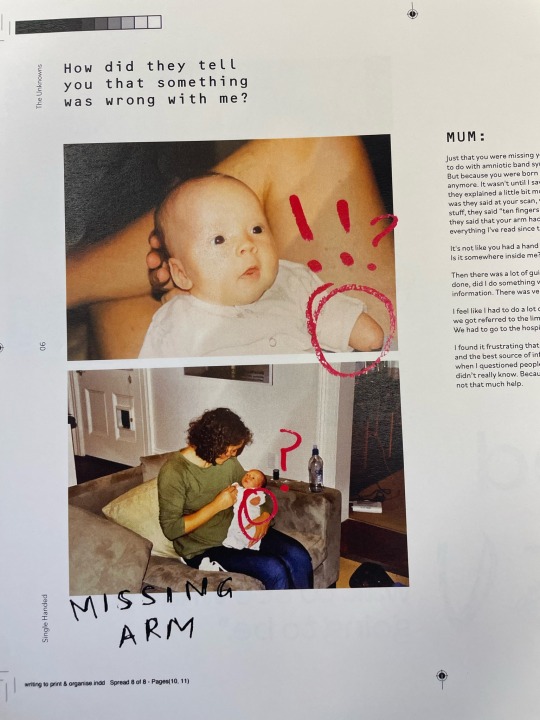
I still wanted to work riso into some parts of my work and I love the fluro pink that the riso can print so I tested the inserts and some graphics on the riso.
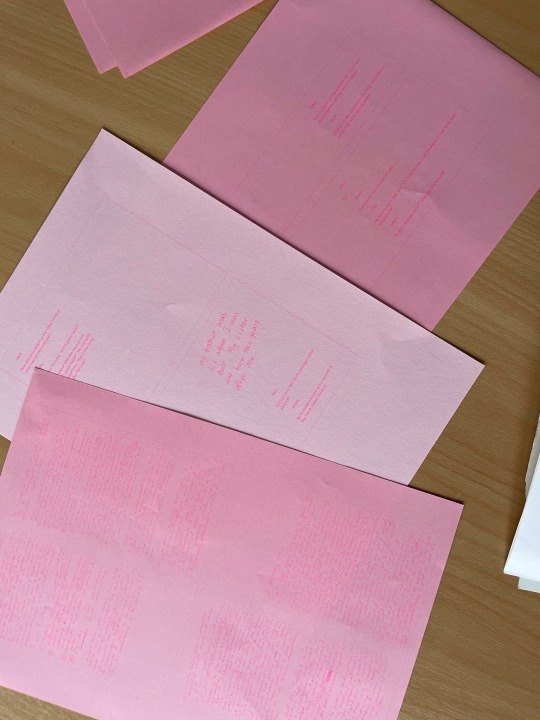
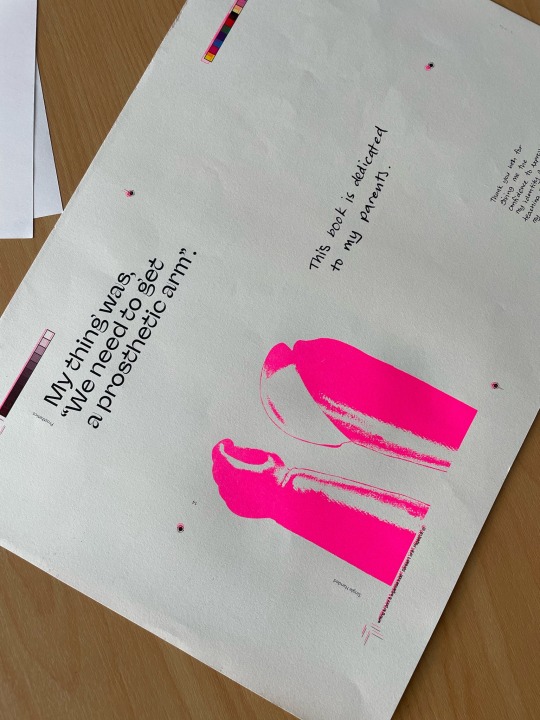
I printed the inserts on pink paper and I really like how these look. I tested some on a darker pink and a lighter pink. The lighter pink paper is a lot easier to read. It makes the text clearer and it stands out more so I'm going to print this on this colour. I want to test blue ink on blue through the riso as well to explore this in other assets in the kit, maybe the notebook.
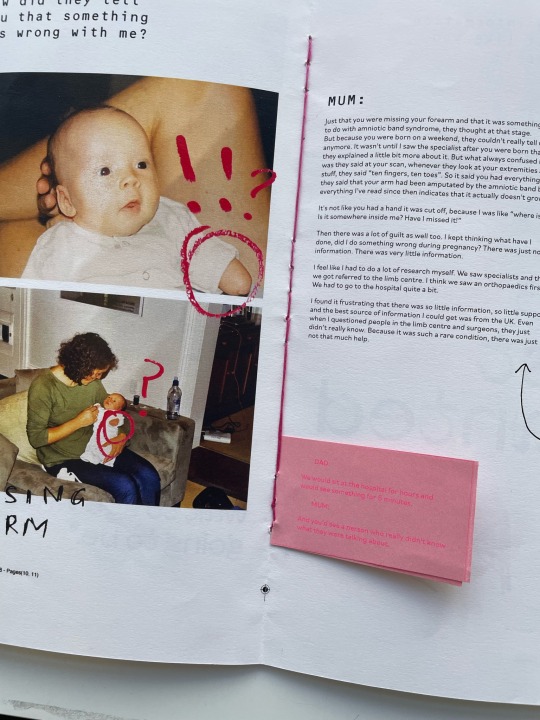
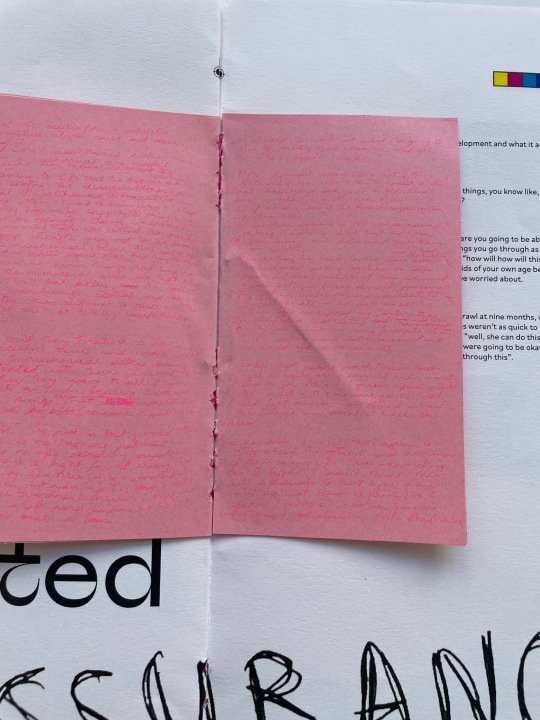
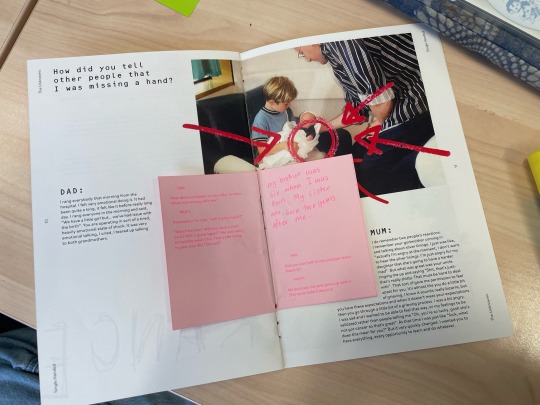
I really love the way that the inserts look when bound in and I'm really happy with the overall direction of the layout and graphic style. I want to test out adding stickers to some of the pages to further push the scrapbook style, which my feedback group suggested was a good idea.
Feedback
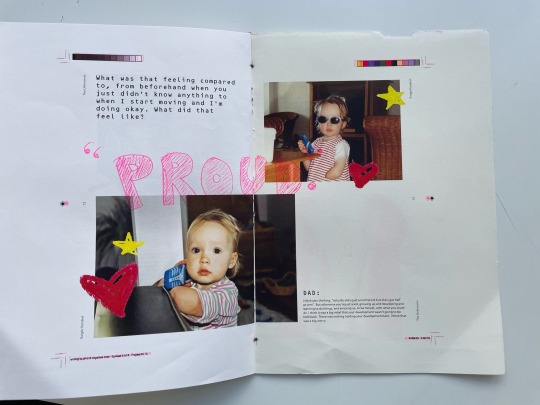
When showing my print to the group for a feedback session I hadn't had a chance to cut the crop marks or borders off. Some people thought that the wide borders actually looked really nice and having the printers marks on it was quite interesting and crafty. I think that this could maybe work for some things but I think it would just make my work look unfinished and I do want it to look somewhat professional. After cutting off the border as well, I'm really happy with the size and I think that it doesn't need the extra white space.
Some other points that were pointed out was
resolution of some of the hand drawn graphics could be improved and some of them need a closer look on photoshop to get out little white pixels
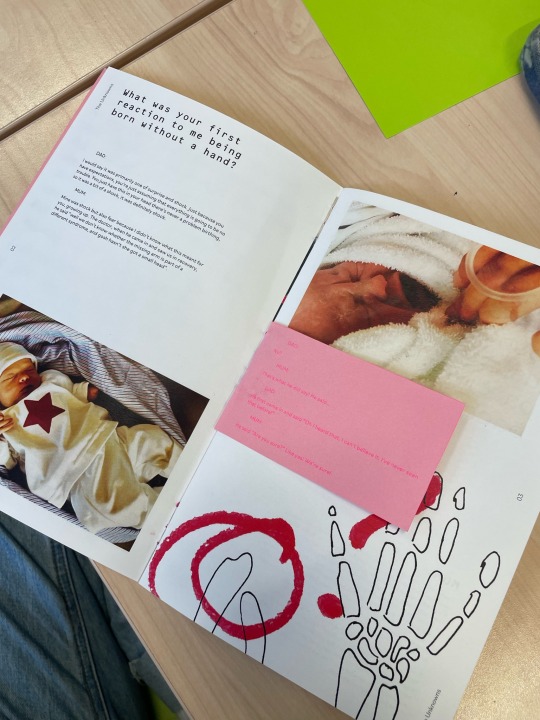
Could add image captions for some of the harder to decipher images, like the large prints of prosthetics
Really like inserts & tags on pink and also the colour of the riso works really well
Nice contrast between the scrapbook/craft feel and the grid of the text, works really well.
0 notes
Note
a friend asked this q this morning and i mentioned i have Tips and Tricks (TM), which they asked me for also, so i figured i would put them here
use the glossy sticker paper. i used up the last of my matte sticker paper and bought the glossy of the same brand and the stickers ive been making are A LOT nicer
2. the printer settings matter a lot
use the print command screen to change settings always always always
you get here by clicking the "print/er properties" or "print command" button (or something similar). it should look like an old school windows screen (greige)
use the "photo paper" setting on "glossy photo paper" paper type on "high" quality AND MAKE SURE THE PAPER SIZE IS CORRECT, it'll likely default to 4x6" and you need 8.5x11" (for standard american copy paper size)
this should select borderless printing by default which will make it a lot easier to deal with print margins. if it doesnt, select borderless printing
3. speaking of margins, spread your designs out on your sheet a leeeetol more than you think you should, itll make cutting them out a lot easier
4. i have not made stickers out of like, raster images yet, but i wager its probably reeeaaalll important to know the difference between raster and vector images. tldr raster images are static in that the size they are made at is the size they look best at, and can thus look funky shrunk or blown up too much. vector images can be scaled or resized basically indefinitely without looking weird. doing stickers as vectors is "better" for a lot of things because its a lot easier to tweak sizes and keep it looking nice, but ymmv. i'm not your mom do what you want
5. idk about other art programs, but affinity's grouping function is baller because i can group and group that group with other groups, until i have groups of all of the things on my sticker sheet, and then i can take that whole group and center it on my page for printing
6. the second layer of holo film i feel is very important, folks have said my stickers are remarkably hardy because of it (waterproofness not withstanding). reviews ive read of holo film that you can print directly on say that the image is easy to scratch off, and ive had similar issues of stickers wearing off when printed just on the (glossy) sticker paper. the addition of the holo film is a pain in the ass but worth it
7. speaking of: tips for applying the holo film
work in chunks. cut your sticker sheet at least in half (hamburger style) tho depending on the size of the sticker i sometimes do down to quarter sheets. this makes the application of the holo film a lot easier and a lot less stressful, cos if you fuck up, you fuck up with fewer stickers, and you WILL fuck up
obvs, cut the holo film in size to match your sticker sheet. i try to do a smidge bigger, especially if i've trimmed down the margins/blank space
also, highly recommend a slicey paper cutter for this part. also highly recommend wiping down both the cut down stickers and the holo film with a dry cloth (or your pant leg) because there WILL be paper dust all over and you dont want that trapped under the holo film
go one cut down section at a time. peel one short edge back about an inch, gently bending the backing paper under. take the holo film by each exposed corner and bend it up just a little bit so the whole thing looks kind of like the aries symbol. line the holo film up with your stickers and attach the exposed end. gently press down as you also gently pull the backing paper away, going bit by bit very slow (VERY SLOW). press as you go, rubbing back and forth, until the backing paper is fully removed and the sticker paper is applied, you should be pressing the backing paper off, if that makes sense
if you have small bubbles, you can usually work them down by rubbing the holo vinyl with your fingers. youlll probably need to apply a fair bit of pressure, but, ykno, be gentle so you dont scratch it
if you have BIG bubbles, sometimes they can be fixed when you cut the stickers out. not always, but sometimes
if the holo vinyl wrinkles, your s-o-l. this is why i recommend cutting the sheets down to apply and to go slowly. TRUST ME and my box of fucked up wrinkly stickers
if you fuck up, people love free stuff. i just let people pick from my box of janky things when they buy at my booths, basically no one ever says no
7. for cutting things out, use sharp scissors and go slow. its a practice thing mostly but!
for curves: turn the sticker, not the scissors
for sharp inward corners: cut to the inner corner point, then back up a bit to cut a curve towards the rest of the cut line. you'll have a small triangle of stuff to cut away still. this is on purpose. once youve cut the whole thing out, youre gonna go back to that triangle. flip your sticker over, trust yourself, and follow the lines of your previous cuts. you should be using the line of the cut leading into the scissors to get to the point where you stopped in the inner corner. use the deeper part of the scissors, not the tips. go slloooooowwww. once you get to where you had previously cut, you'll feel a little thunk. stop and you should have a nice sharp, tight corner.
Hi! How do you make your stickers? They look very nice, especially the holo ones!!!!
i literally just print them out on sticker paper i got on amazon using my printer from like 2016 and slap a holo vinyl film over top, then cut them out by hand. i dont necessarily recommend it (they are not super waterproof, which i think may be because i got matte sticker paper instead of gloss whoops, and cutting them by hand takes a loooong time) but i have gotten good results for just fucking around with things
i eventually want to pivot to using a manufacturer for stickers so i get a more consistent result (and save my jank hands from scissors), but for now being able to print at home and experiment has been GREAT
that said, i would wager it probably helps that i am using affinity designer to make the images. its a vector program like adobe illustrator (but not god awful expensive -- six month free trial baybee) so the images im making are really crisp, even on my decade old printer
besides the cost of the printer (which i appropriated from an ex when he moved out and left a bunch of shit behind) and the cost of ink for said printer, i put down eeeh $40ish in supplies for the sticker paper and the holo vinyl. i have used maybe 1/3 of it making somewhere around 200+ stickers, including all the stickers ive fucked up mislaying the vinyl or cutting out badly. ive made roughly 2.5x that back from the sales of my stickers, even tho i keep giving them out to people Just Because lmao. again, not the hardiest of stickers, but pretty solid for fucking around
this is the sticker paper i got and these are some of the holo films i got (i got three packs from the same listing iirc). im printing on a cannon mp250 using the settings "matte photo paper" and "high" quality. i DO need to recalibrate my printer to better match the colors of my screen, especially when printing vectors. i also cut the sheets of stickers and vinyl into smaller sections so its easier to smoothly apply the film, and have a track slicey paper cutter for scrap booking i use to do that. i havent done it yet, but i wager this technique with the matte paper could also work really well for hand drawing stickers if you have the Skillz but not a printer
if u (or anyone) tries out my method (as it were) please do tag me so i can see! i would lov to share (and perhaps do sticker trades 👀)
5 notes
·
View notes
Text
DIY CD - Part 3
CD Tutorial directory // Part 1 (burning the CD) // Part 2 (designing booklet & cover) // Part 3 (printing & assembly) - here
Printing
Check the options at your local print shop services, but my only option for double-sided prints (I’m pretty sure…) was regular old document copy prints. The quality was way nicer than my printer would've gotten, and they're a little stiff & matte for that nice professional feel.
Also, a good Step 0 would be to order a test print - two pages, double-sided, with a ruler (maybe use an image of a ruler and fit it to measure the 11 inch edge) - to make sure it'll flip on the long edge and not the short edge, and to see if the image will be resized at all before printing. Mine shrunk and my stuff didn't quite fit.
Check the print size (ex. 8.5 by 11 inch) and make a new art document with these dimensions and the same dpi you used for everything else (if you used my templates, that’s 350dpi).
Copy & paste each layer over from your back cover and booklet documents into this new document. Put them all in a folder, and with the folder selected, drag them all to the center (the more bleed you add to the edges, the less centered you have to be, but be a precise as you can).
To create the actual printable document (since I needed a .doc or .pdf to have multiple pages), I exported each page/layer as a .bmp, then inserted them into a Word document (with text that was just . every 30 lines or so to make sure I had enough pages). Right-click on each image, and under Wrap Text, choose In Front of Text, and uncheck Move With Text / choose Fix Position of Image. Move & resize it to take up the entire page, exactly. Make sure they’re in the right order. If you’ll be printing double-sided on the long edge (I think this is usually the case), rotate every other page 180 degrees.
Assembly
Again, Crafter In Training covered this, but I have some notes:
I recommend finding something smooth and round - a dowel, sharpie, or anything rounded - and using that to smooth out the fold in your booklet instead of your fingers. It’s straighter and cleaner that way.
I didn’t end up needing tape? I’m not sure what I did differently from the tutorial but i just stacked them all together and folded it down the middle and I was able to hold it together myself. Maybe this was hubris and I shouldn’t be telling you this but it worked fine for me, so.
If your stapler doesn’t open and can’t reach to the center of your booklet, use the stapler very lightly to mark where the holes would be and punch holes in them with a pin. (Pretend there's the front & back cover showing here, I ended up pasting mine on after because printing problems)
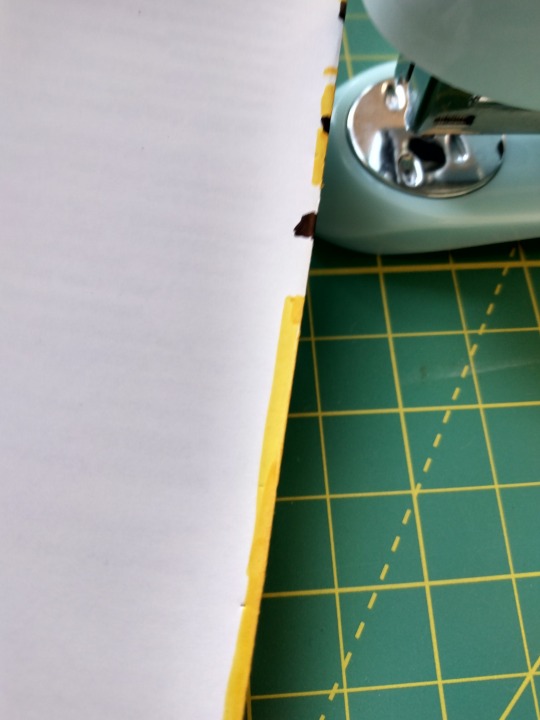
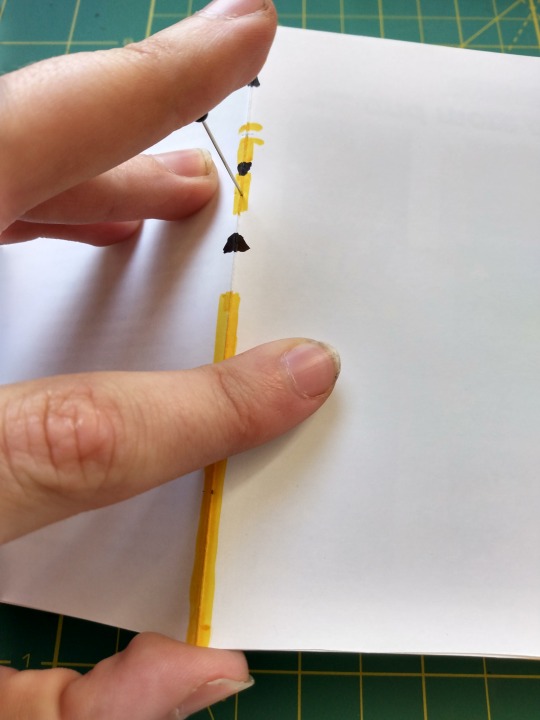
[Alt text: closed booklet with faint dots on the spine from where the stapler was used, then a pin being pushed through the spine center on the front of the booklet]
Then you slide it all together, and you're done! I didn't make a spine cover, but I would have just attached it with double-sided tape (weakened with your arm like in the tutorial video, probably). Also my back cover is off, because I didn't get a test print to check for shrinkage, and I didn't bother trying again lol.
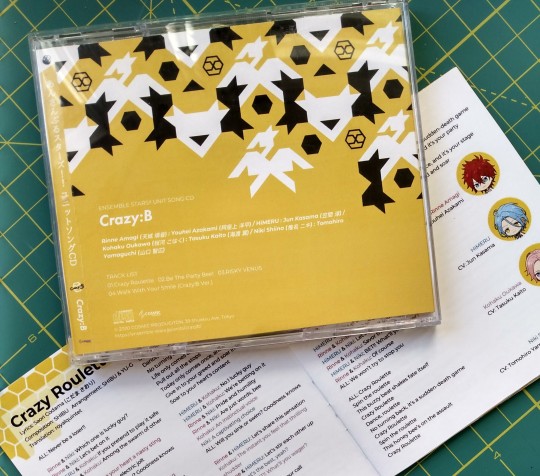
#enstars#diy#diy tutorial#cd tutorial#this was SO fun but i dont want to be doing it anymore so you get my somewhat janky version#when i get around to making other CDs ill update these posts with better pictures
2 notes
·
View notes
Text
After Hours
Bryan Kneef x Reader. NSFW. For holiday bingo: very, very loosely “ugly sweater.” But it’s my bingo, sooo, c’est la vie. Follow-up to “The Trip” and “The Trip, Pt. 2.” Bryan makes good on a promise to reader.
WC: 3010
**
You were surprised when you and Bryan flew back into Chicago that he did not make immediately good on his promise to fuck you in the office. In fact, it seemed that Bryan was done with you – he was all business in the office, no pleasure. You watched with secret jealousy and longing as he flirted and charmed everyone in the office – with the exception of Diane, of course. You even tried to dress a little nicer in the office, in hopes that he would notice. You tried to even bring up a novice mistake Diane had made in court and it was met with a curt smile and raised brows that screamed ‘are we done here?’
That all changed one late evening in the Firm’s copy center. A partner in your own right, you had your own stockpile of paralegals to call on handle whatever you needed. But it was late – and it was the holidays. Unlike other attorneys, it felt cruel to keep them burning the midnight oil. You had worked for asshole bosses like that when you were a paralegal many moons ago and you always vowed to not do that if you ever became an attorney.
You were fiddling around the printer, nary a soul in sight. The overhead lighting was awfully bright and it was emanating a hum. The monstrous printer was jammed and you could not figure out why it was still jammed even though you had removed the stuck paper. Your heels ached and throbbed from the day and with not even an afterthought, you took them off, leaving your feet bare – but still in stockings.
Your frustration was mounting and you decided to kick the machine, which somehow kickstarted the machine back to life, spitting out an obscene amount of pages as if it were confetti. You hit stop and gathered the paper from the floor. Finding some useable pages, you pumped the air victoriously before going back to your office. You remained sans shoes, enjoying how the floor felt against your feet. You spotted a ‘wet floor’ sign ahead and with a weary sigh, you slipped your heels back on, groaning.
Your heels clacked down the hallway to your office, echoing loudly with each step on the marbled floor. You paused in your step, when you realized despite your dim office and surroundings, that Bryan was in your office. He was leaning against the doorway, waiting with a drink in one hand and a cigar in another.
“Bryan? What are you doing here?” You asked, pushing past him. You stood at your desk, and continued to bind your courtesy copies, so it could be picked up by the messenger in the morning and be hand delivered to court.
Bryan cocked his head and swept his eyes over you, taking in your form. Your shirt was untucked from your pencil skirt, but it was not long enough to hide your form, with shapely and curvy hips and thighs. Bryan had been with his share of women – and men – but there was something about a person with curves that he was always a sucker for. There was something about how a bit softer they were, the way a pair of thicker thighs would feel against his hands as his hips crashed against them – something the way a pair of big tits spilled over his hands as his mouth nipped and sucked on them. He loved watching their tits bounce as they rode him or how his fingers sunk into their luscious hips as he took them from behind.
And ever since you and he fucked at the conference, which basically was almost every night until you both flew home, he could not get you out of his mind. He tried to keep things back to business but even weeks later, there you were still, from work meetings to partner votes.
At one meeting in particular, he sat next to you and he had to will himself to not slip his hand up your dress from under the desk. That then led to the image of you under his desk sucking him off. He ended up having to take matters into his own hands and rub one out that afternoon in his office.
He took notice at how you upped your appearance – skirts that hugged your shapely hips and (in his opinion, ugly) sweaters with a v-neck which showed off the swells of your tits. Your lips were always decorated in some kind of bold color and he could imagine those soft pillowy lips around his cock. The promise in Florida haunted him and he decided to make good on those words.
“I was on a settlement call with Tokyo when I noticed your office lights. I never see you here this late.” Bryan replied, his voice low and gravelly. The smell of the cigar burning – which to you smelled like coffee and surprisingly burnt marshmallow filled the air. The combination of that and his cologne sent your senses into overdrive.
“I am finishing up on some courtesy copies and then heading home.” You replied, continuing to work, avoiding his eyes.
“There’s a hundred paralegals in this place – you should offload that to one of them.” Bryan replied, taking a sip of his drink. He shut the door behind him before sitting down in front of your desk and kicking his legs up.
You shot him a look. “It’s fine – it’s humbling at least. You should always know how to do the mundane tasks – it makes you a better manager when you can relate to your subordinates.”
Bryan rolled his eyes and puffed on his cigar. “Sure, whatever you say.”
“Are you here to just antagonize me or…?” You asked, now placing your hands on your hips. You gave him an unyielding glare to which he responded with a dangerous smile. Your glare softened, feeling very much like prey being hunted. You swallowed hard, feeling your stomach knot up.
“What if it’s or?” Bryan asked, his voice laced with lust. He swung his legs off the desk and placed the drink and cigar on your desk before standing and walking over to you. A sound rumbled from his chest and you froze in your spot as he took place behind you.
Your eyes met his. There was palpable tension and you’d wonder who’d crack first. You got your answer quickly as he pressed himself lewdly against your buttocks; you could feel his hard bulge.
Bryan’s large hands gripped the tops of your arms and he nuzzled your neck, his beard tickling your skin and further heightening the feelings of arousal that were beginning to stir. You let out a soft sigh in response, nearly sinking back into him.
“Remember what I said in Florida?” Bryan whispered into your ear. He nipped your ear playfully which caused you to shudder. His mouth found the slope of your neck and he sucked a deep mark on your skin, before using his teeth to nip some more. Your eyes fluttered shut..
“Yes.” You half moaned. You could feel your heartbeat and pulse quicken as Bryan soothed the bruised skin with his warm, wet tongue.
Bryan ran his hands down your arms and then to the curves of your hips trailing down until he got to the hem. Your breathing began to quicken in anticipation of what he’d do next. Bryan let out a growl as he pushed up your skirt and discovered you were wearing stockings with peacock feather lace tops which were held up with blush colored garters. Finishing the look was a matching blush pink thong panty.
“My, my… is this for me?” Bryan murmured against your skin. You slowly turned around and looked down, meeting his eyes, which were blown with lust.
“Yes. It’s all for you.” You admitted, averting your eyes briefly.
Bryan stood and faced you, using his index finger to tilt your face to his. “I fucking knew it.” Bryan whispered. “Your daddy’s little slut Y/N.”
“Yes, daddy.” You replied weakly, dizzy with desire.
Bryan pulled you into a kiss. Your mouths mashed against one another’s, your tongues rolling around and exploring each other’s mouths. You could taste the alcohol and cigar smoke and you moaned as he sucked in your bottom lip. You ran your hands through his thick hair and his hands grabbed at your ass, rolling the fat between his fingers.
“Is this what you want?” Bryan asked as he pressed your body closer to his; you could feel his erection against your stomach.
You ran your hands down to his collar and tugged him down. Bryan followed your lead as you hoisted yourself onto your desk, not caring at all that that objects on your desk fell over to the floor. Bryan made quick work of undoing the buttons of your blouse and spreading it open. His hand ran down your sternum before he reached down to the cups of your bra, your breasts popping out. His mouth immediately latched onto a nipple, rolling his tongue over a hardened bud. He used his free hand to pinch and roll your other nipple. Your head lolled at the sensations, your body was warm with increasing desire. He switched his mouth to your other nipple, sucking and nipping harder than he did to the other one, causing you to whine.
“I need to hear it Y/N. Or this all stops.” Bryan growled against your flesh before using his teeth to graze a nipple.
“Yes.” You finally managed to choke the words to describe your assent. “Fuck me.”
Bryan stood straight, his eyes taking in your appearance. Your hair was fanned out on the desk, your tits exposed, and your skirt pushed up to your waist, legs spread. The garter straps were strained along your skin as the elasticity was pushed to its limits. He undid the hooks and then stretched your legs wider. He felt his some primal urge swell deep inside at the very noticeable wet spot on your panties.
He bent down so that he was on his knees; his breath was warm against your soaking cunt, and you were desperate to relieve the aching in between your legs. He cupped your clothed pussy with his palm. “You’re so wet.” Bryan noted, a pleased lilt in his voice. He slipped a finger in and he let out his own groan of satisfaction at how easily it sunk in. Your cunt gripped his finger tightly and you sighed in relief at the feeling of his finger stroke you.
“Oh fuck,” you groaned, your back arching off the desk at the sensation. Bryan’s tongue lapped one long hard strip from your opening up to your clit, the wet, warm muscle circling your bundle of nerves before his lips closed around it. You groaned, murmuring Bryan’s name with praise. You grabbed at your own flesh, pinching and tugging on your nipples, as you felt your orgasm begin to build.
Now two fingers pressed at your core, slowly sinking inside, curling them and stroking your sweet spot while his thumb rubbed your clit. You couldn’t think straight, all you could focus on was the orgasm that was bubbling in the pit of your stomach and desperate for release. Your chest was heaving, a light sweat breaking out everywhere.
Bryan worked your orgasm alternating with his mouth and fingers. You were on the edge teetering, just about to let go and fall off. He could feel you clenching around his fingers. Bryan’s hot mouth was back to abusing your clit with such vigor.
“Oh god, oh god, I am going to cum!” You sobbed. His fingers curled to your g-spot again, and the feeling was even more intense than usual.
“Come for me like a good girl.” Bryan commanded. Your body obediently obeyed. You wailed his name as you fell apart, this orgasm different from any other you had, practically shooting out. Your pussy clenched over his fingers and a warm, wet liquid emanated from your body.
Bryan groaned, as he buried his face against you before sucking your clit once more, coming off with a wet squelch. You lay there shuddering, completely dazed at what just happened. Bryan pulled you up and kissed you hard. His beard was soaked and you could smell and taste yourself on his beard.
“Never made a woman squirt before. That was fucking hot.” Bryan rumbled, as lecherous grin spread over his bearded mouth.
“Is that what it was?” You asked, reaching up to touch his soaked beard in amazement.
Bryan nodded. “I have watched enough porn to know that was definitely that.” You leaned up to kiss Bryan again. He kissed you softly this time as he undid the buckle of his pants. Bryan’s lips remained on yours as he used his hands to push down his pants and boxers, releasing his hard cock. You moved to bend and return the favor, but Bryan shook his head. He waved his index finger around. “On your back, facing me.”
You gave him a curious look but did as told. Your head was to the edge of the desk and watched near upside down as Bryan pumped his cock. The air was erotically charged; seeing his hard cock – knowing you were the reason it was the way it was – made you feel powerful. Some cum wept out and he used that as lubrication as he pumped his cock. You bit your lip once more to stifle a moan as you snaked your own hand down to rub your clitoris.
Bryan ended with his head near your head; his cock sticking up gloriously straight in the air. It gave him a beautiful if upside-down view of your face and breasts. You leaned your head over the edge and he leaned forward into your mouth. Bryan thrusted in and out your mouth, relishing in the feel of your tongue on his erection. His cock felt heavy and delicious, stretching your mouth. Bryan cupped your breasts again as he continued thrusting in and out of your mouth. You sucked the pre-cum that dripped out from the slit in the head of his cock. The salty taste flooded your mouth. Bryan grunted as your tongue, soft and warm, swiveled over his cock. You licked every ridge and meaty vein before you hollowed your cheeks to suck him harder. You spread your legs wantonly and continued to pump your fingers, in and out and in again.
Bryan grunted as he leaned further to cover your hand, guiding you as you pleasured yourself. You slipped your fingers out and Bryan sucked them clean before slipping his thick fingers in, replacing yours. You moaned against his cock once and the vibrations caused Bryan’s hips to jerk in response. Your hands wrapped against the backs of his thighs. You could feel him getting close - the sinewy muscles in his thighs were twitching and trembling. Bryan stumbled backwards, leaving your mouth and aching pussy empty.
You let out a sound of frustration as Bryan walked over to the other side. You thought he’d might climb the desk and fuck you, but instead, he pulled you down to standing. You felt light-head as the blood rushed back down from your head. He pulled down your panties and he began to stroke himself against your soaked pussy. Over and over he rubbed his cock along your folds and swollen cit. It was rousing and lewd, the filthy act of him using you to get himself off, as if you were his own personal sex doll. You hooked your arms around his neck and began to undulate your hips, rubbing yourself equally on his thick, hard cock. It didn’t take long and Bryan groaned, shuddering against you as he came along your mound and panties in thick, hot, white, creamy ropes.
Bryan took a step back to survey the damage done – there you were, standing with your tits hanging out, your hair askew, and your panties ruined with your release as well as his. Bryan gathered some of his release onto his finger and offered it to you. You sucked in his finger, as if you were mimicking the blow job you had just given him. Your want and desire had grown exponentially and your pussy ached to be filled up and wrecked by his monster cock.
“In due time.” Bryan spoke. “We’ll continue at the New Years party.”
“Excuse me?” You asked. “We’re not…?”
Another grin appeared. Bryan reached and pulled up your panties until they were back on and he rubbed your clothed mound, that was full of his cum and your own messy release.
Bryan stood back and tucked himself. He pressed one last kiss to your lips. “New Year’s. I’ll pick you up at 7.”
You nodded. “Okay.” Seeing your disappointed look, Bryan kissed you once more. “Good girls get rewarded with daddy’s cum. So be good for me. Or else.”
Arousal shot through your body at his promise and threat. “Ok daddy.”
“Good.” Bryan replied with a wink. He turned to leave, with a very certain swag in his walk. You were now alone, in complete disarray of the evening’s events. But you had to admit, having his come in your panties made you feel completely defiled; you could hardly wait for New Year’s Eve.
Soon enough.
TBC.
Tags: @madpanda75 @tropes-and-tales @delia26 @mgarner1227 @beardedmccoy @youreverycolor @neely1177 @the-baby-bookworm @mrsrafaelbarba @skittle479 @ottosuricato @sass-and-suspenders @mommakat32 @dreila03 @beccabarba @garturbo @lovebennycolonmiguelgalindo @imjustreallynosy @sweetsummertime99 @whyissvuruiningmylovelife @annabelleb49 @scarletsoldierrr @cesarofangirl78 @redlipstickandplaid @redlipstickandblacktea @zoeykaytesmom @differentshadesofgray @misssirenlove @esparza-army @bananas-pajamas @mishaissocoolike @thefanficfaerie @theenchantedgalleryofstories @catnip987 @choppedgalaxynerd @pieceofshittytitty @ktiz90 @evee87 @itsjustmyfantasyroom @detective-giggles @rampantmuses @jazzyjoi @caked-crusader @rachelxwayne @prurientpuddlejumper @lv7867 @permanentlydizzy @bisexual-dreamer02 @madamsnape921 @averyhotchner @teamsladsandgents
#thatesqcrush holiday bingo#bryan kneef x reader#bryan kneef smut#bryan kneef imagine#bryan kneef and reader
79 notes
·
View notes
Text
DIY
Create Your Own CD Sleeves Using Microsoft Word 2004
I've said it before, and I'll keep saying it over and over again: I love old computers. I love tinkering with them. I love seeing what, if any, more or less useful work they can still do in the modern world, years after everyone else has moved onto the Next Shiny Thing.
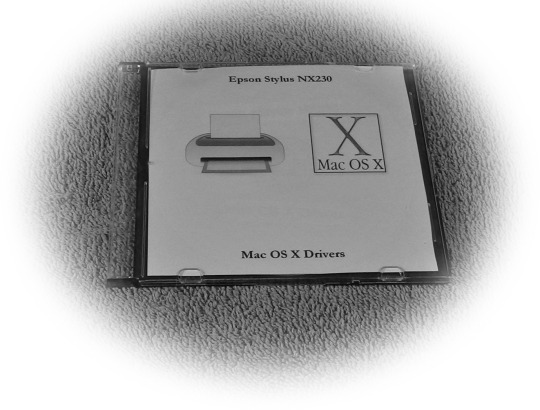
Since I collect old computers, that means I also collect old software - mainly old drivers to power the old computers. I find them on the internet, download them, then burn them to disk to archive them. To keep these disks safe, I store them in CD jewel cases. I like these to look at least a little bit nice. I make my own CD sleeves for them.
Dimensions
In order to create your own cd sleeve, you need to know what size to make them. An internet search states that CD sleeves are typically 4.7 inches by 4.7 inches. The internet deals only in truth. Trust the internet.
Word 2004
Word 2004 is an old version of Microsoft’s word processing software for Mac OS X (10.4 “Tiger”, in this case). As a word processing program, page layout isn’t exactly its focus, but it still has the chops to get this simple task done. Word 2004 is roughly equivalent to the 2003 version for Windows, so the same features should be present in both versions, though they may be accessed a bit differently in each.
Go ahead and fire up Word and open a new document from the file menu. Since what we’re doing here is more of a page layout task than word processing, go ahead and set the view to Page Layout, which can be done from the View menu. While your mucking about in the View menu, you may as well turn on Rulers, (if they’re not already on), and the Drawing toolbar, which can be activated from the toolbars submenu of the View menu. A quick note on the Rulers: we’ll be working in inches here, so if your Rulers are set to some other unit of measurement, you’ll either have to work out the conversion OR change your Ruler’s settings to inches.I hate math, so I changed the measurement units to inches. This can be done in the General section of the Preferences dialog.
With a new document open and Preferences and View set, we can now set the margins. Select Format->Document from the menu to bring up the Document dialog. This dialog contains a Margins tab. This tab contains options for setting the margins. Go figure. For this project I set all margins to zero. Word will gripe a bit about this when you print later on, but I have my reasons.
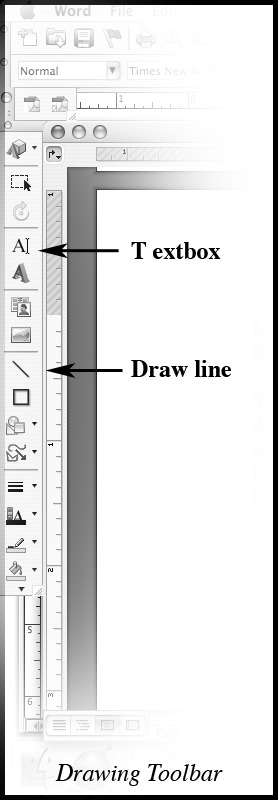
With the margins set, we’re ready to start designing our CD sleeve. Since I’m using plain 8.5 x 11 inch printer paper, I’m going to have to cut my CD sleeve from this. So, the first thing I’m going to do is create a couple of guidelines to show me where to cut. I set the page margins to zero so that these lines would be drawn right up to the edges of the paper. From the Drawing toolbar, select the Line tool. (It’s the button with the picture of the line on it. Pretty clever, those Microsoft folks.) Holding the shift key, click and drag the mouse downward in the document to draw a vertical line. Holding down the shift key tells Word you want a straight line, not a crooked one. Don’t worry too much about getting the size and placement of the line precisely right here. There’s a dialog that will let you adjust these with much more precision. Speaking of which...
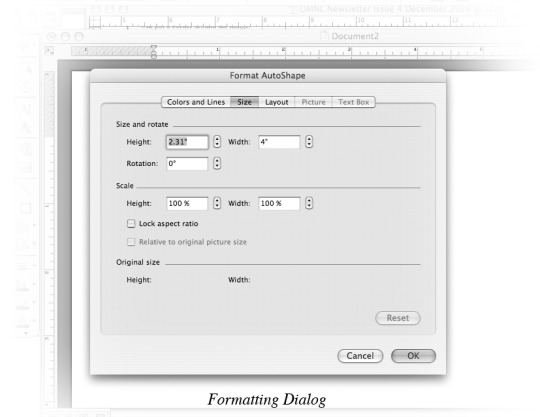
Once you’ve drawn your vertical line, right click it. From the resulting context menu, select “Format AutoShape” to bring up the Format AutoShape dialog. From the dialog’s Size tab, set Height to 4.7 inches. Leave the Width setting at its default. Under the Layout tab, click the Advanced button. Under the Picture Position tab, you can set the horizontal and vertical positions of the line. Set the Absolute Position for horizontal to 4.7 inches. Set vertical to 0. Click OK to dismiss the dialog.
The steps to draw the horizontal line are pretty much the same, except of course you want th draw the line horizontally across the document window instead of down it. Bring up the Format AutoShape dialog as before and set the width th 4.7 inches. (Leave the height set to 0). Set the horizontal position to 0 and the vertical position to 4.7 inches.
You don’t have much of a CD sleeve yet (unless you prefer absolute minimalism), but you do have a simple template for making one. You can save your document now.
You’re now ready to make a CD sleeve specifically for the disk you’re storing. How you proceed depends on what content you want for your sleeve. I usually like a picture with a bit of text describing the content of the CD.
Select Insert->Picture->From File from the menu. Navigate to, select and open the image file you want to use for your sleeve. Word will insert the picture into your document at its full size and, by default, in the upper left corner. If you’re happy with the results, you can move on to the next step. Keep in mind that with the margins set to 0, anything near the edge of the page may get cut off when printing. Odds are, you’ll have to make some adjustements.
There’s a couple of ways to adjust the size of the image. Click on the image in the document window to select it. Word places a border around the image to indicate it’s currently selected. At various points along this border, you’ll see little “boxes.” These are points you can click and drag to adjust the size of the picture. If you work on one of the corner points and drag towards the center (or away from the center, if you’re enlarging the image), Word will resize the image while doing a reasonable job of maintaining the correct aspect ratio. Dragging straight up or down will tend to leave the picture looking stretched or squashed. Another thing to keep in mind: images downloaded off the web are generally low resolution, which means they’re just not going to look very good printed. Enlarging them is just going to make them look worse.
If you want more precise control over the size of the picture, you can right or Control-click the image and select Format Picture from the context menu to open the Format Picture diaog. Under this dialog’s size tab, you can either set the precise height and width of the image, or scale it to a percentage of its original size. You’ll probably also want to make sure “Lock Aspect Ratio” is checked to avoid that stretched out or squished look.
As with size, your picture’s position can be adjusted by either clicking and dragging it or with the Format Picture diaog. (Bet you can guess how to open that...) If the picture won’t move through clicking and dragging, you need to change its text wrapping setting from the Layout tab of the Format Picture dialog. You’ll see a few options under Wrapping Style. Select “Square.”
You can also adjust the picture’s position with more precision from this dialog. This works pretty much the same as adjusting the position of our guidelines did. Under the Layout tab, click the “Advanced” button. From here, you can set the picture’s horizontal and vertical position, just as you did with the guidelines earlier. When you’re happy with your settings, click OK to dismiss the dialog.
In addition to a picture to illustrate the CD sleeve, it’s nice to include some text to describe the contents of the disk. Click the Text Box button on the Drawing toolbar (it’s labeled with the 2D letter A with the cursor bar next to it) and click and drag in the document window to draw your text box. Click inside the text box and enter some text. To adjust the alignment of the text (left, right or center) right or Control-click inside the text box and select Paragraph from the context menu. You can also bring up this dialog by pressing Command-Option-M with the cursor inside the text box. You can set also the text alignment from the Indents and Spacing tab of this dialog. To adjust the font, bring up the Font dialog by pressing Command-D or selecting Font from the context menu (right or Control-click to display).
The size and positioning of the text box can be adjusted very much as before with the picture and guidelines. Right or Control-click on the border of the text box to bring up the context menu and select Format Text Box. Go ahead and make your adjustments. One more thing: by default, Word draws a border around your text box. This is an actual border that will show up when the document is printed and not just a display border to indicate the text box is selected. To get rid of it, open the Format Text Box dialog's Lines and Colors tab. Under Lines, click “Color” and select “No Line.” Once you’re satisfied, click “OK” to dismiss the dialog.
You’re now ready to print and save your CD sleeve. Click “Save As” from the File menu to assign a new file name so you don’t overwrite the original blank CD sleeve document. We’re saving that to reuse as a template. If you're ready to commit your work to paper, go ahead and select Print from the File menu and... print. Cut out your homebrew CD sleeve along the guidelines, insert into the CD jewel case, and you’ve got yourself one professional looking CD. Well, no, you don’t. At least I didn’t end up with one. But it’s still nicer than just some handwriting scribbled along the front of the disk. Happy computing!
1 note
·
View note
Text
Tips and Tricks: Watercolors Edition.
It always surprises me that more current cartoonists don’t use watercolors. I know that Will McPhail and Carolita Johnson use them, but watercolors haven’t really popped up much in the dozens upon dozens of interviews I’ve conducted over the past several years. Of course they show up more in interviews I’ve done with cover illustrators (Barry Blitt, John Cuneo, etc.), but I think a lot more cartoonists would find a whole world of opportunities in watercolor, if they were to experiment with them a bit. I’ve been painting a lot of watercolor pet portraits recently, and thinking of (and using!) some tips and tricks that I have found useful over the years, but that haven’t come up in any of the interviews that I’ve conducted on this blog, so I thought I would take the time to share them!
Here is some of my more recent work:
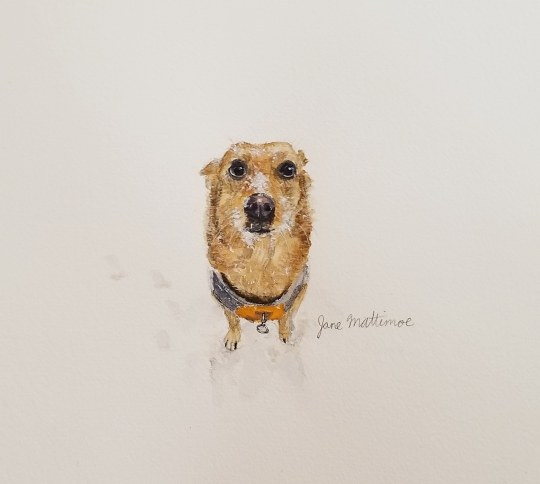
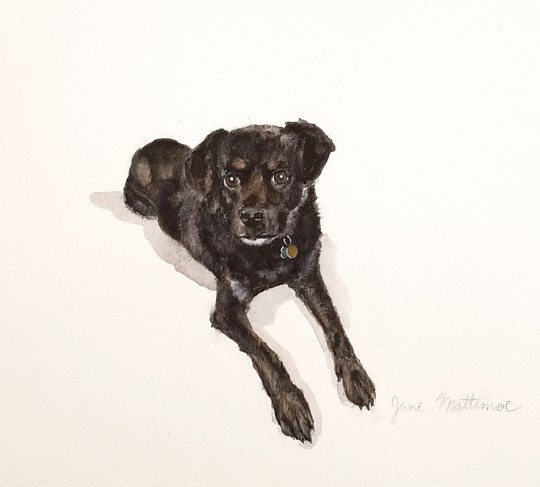
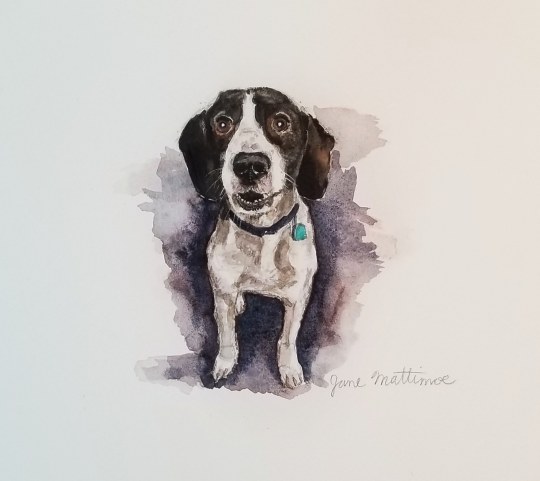
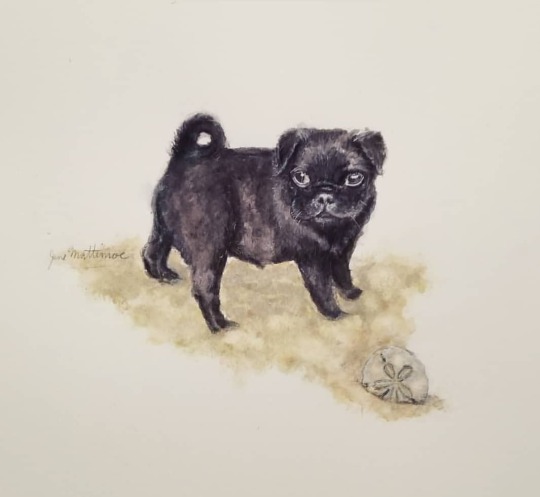
You can find more of my art on my Instagram, here.
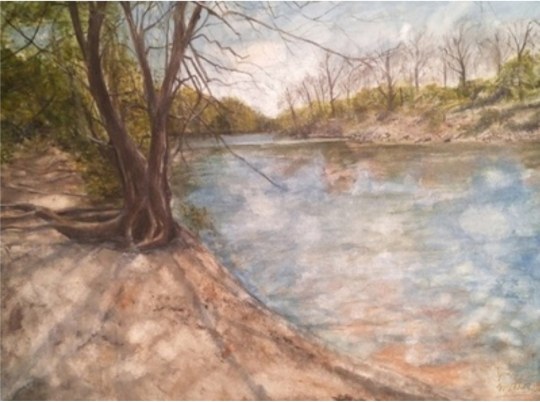
-Watercolor has a similar look to ink wash, but is less permanent. You put down a layer of ink wash and you’re stuck with it. But if you use watercolor, you can take a wet rag and practically erase it! Plus, if you don’t feel confident doing linework with a brush, you can still use ink or a pen for that. Look at this landscape that I did a few years back. The shadowy sand was done by putting down opaque watercolor, letting it dry, and then scrubbing most of it away!
-If you have discovered the joys of lifting up watercolor mistakes, but have gone about it a bit over zealously, and caused your paper to pill up (but haven’t fully dug a hole through the fibers), I have discovered that the Cliceraser, a Japanese tool that Roz Chast recommended in her Case as an ink eraser, is your savior. If your paper is still wet, blast it with a hairdryer until it’s fully dry, and then gently sand off any errant paper fiber until it’s smooth enough to paint on again. Now, this would not work on printer paper (you shouldn’t be using watercolor on there anyways—I generally work on heavy cotton watercolor block), but this has helped me on more occasions than I care to admit. It is basically a grainy eraser. I haven’t tried using sandpaper, but I think the Cliceraser is more gentle, and would allow for more precision.
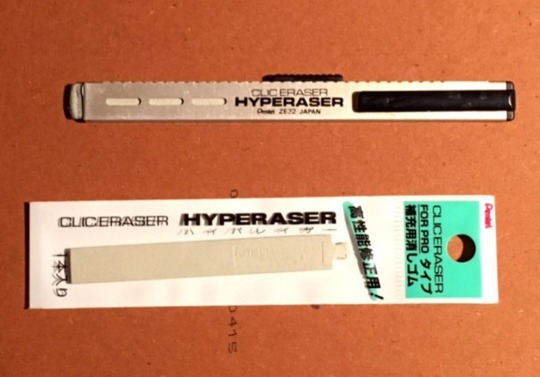
Image from Roz's Case
-Frank Cotham uses water-soluble crayons, which have a very unique look to them, but I’ve discovered that they can sometimes cause an unwanted glow in photographs. Say you spent ages painting a landscape, and thought it would be a great idea to use water-soluble crayons to paint the leaves. Everything looks uniform and tied together, but when you try to capture an image for your portfolio, you discover that your subtle fall foliage is garishly glaring. Devastation. Use water-soluble crayons with caution, especially when you're doing mixed media, and perhaps take photos of your work as you go along, to make sure that what you see through the camera matches what you see in front of you (or at least to ensure that you won’t be faced with any horrifying realizations at the last second).
-Speaking of water solubility, a very versatile tool that hasn’t been mentioned in any Case interview is one of my favorites, and one that I think would make a lot of cartoonists’ lives a lot easier: watercolor pencils. They blend really well with regular watercolor paint, and work great for detail work, for building up an area quickly, and for outlines (though I sometimes like to have graphite peeking through in a painting, using it for initial sketches can be helpful, especially when using light tones, because you can seamlessly blend your lines into your painting).
A lot of cartoonists will use gouache straight out of the tube for highlights, but that can require extreme precision, and sometimes, watercolor paper will eat up the paint! However, if you use a very sharp white watercolor pencil instead, the highlights won’t get absorbed. If you’re feeling fancy (or using grainy paper), you can trace over the watercolor pencil with white gouache.
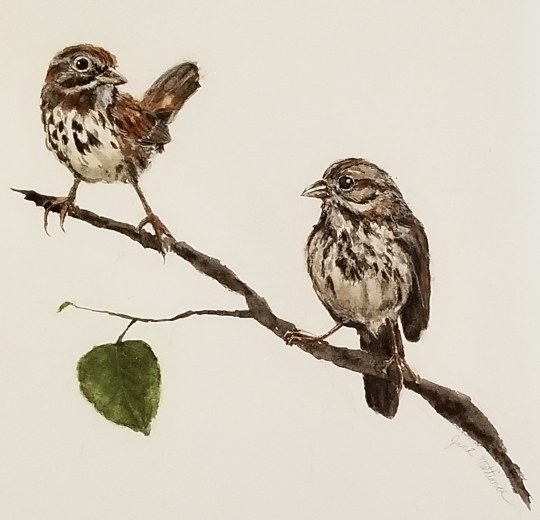
Watercolor pencils can also be used for building up an area quickly. I find that if I’m using a thick cotton paper, it can be hard to get colors dark enough, so sometimes I’ll just lay down some watercolor pencil in whatever color is best suited for the task at hand, and then go over that with watercolor paint, which can lead to some interesting textures. I do that often with rocks.
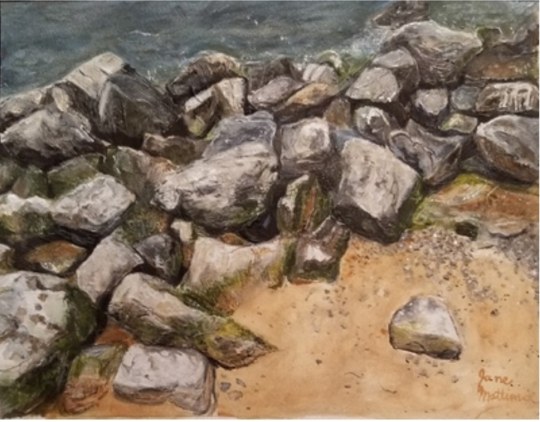
-My rock painting leads me to my next tip, which is if you struggle with drawing something, that’s all the more reason to draw it. I used to struggle with painting rocks, so I sat down and said, “I’m going to paint a very rock-heavy painting,” (well, the painting itself is very light). Did I regret this decision greatly while painting all of those rocks? Yes! But I am now able to paint rocks fairly easily, so it ended up being worth the agony. This applies to many things in life besides watercolors, of course!
-Another tip (which also applies to the above rock painting) is to use the paint’s texture to your advantage. There are some really interesting paints with high levels of mineral separation, that can create beautiful grainy effects. You can do a light wash of a grainy paint over a flat wash of paint, and end up with a fascinating texture with minimal effort. This is an especially great technique for painting dirt.
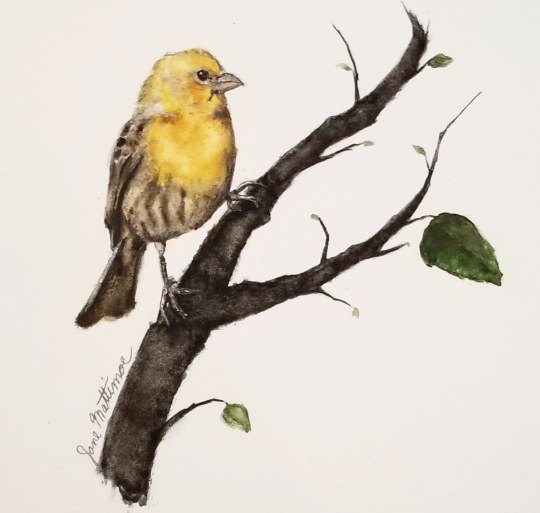
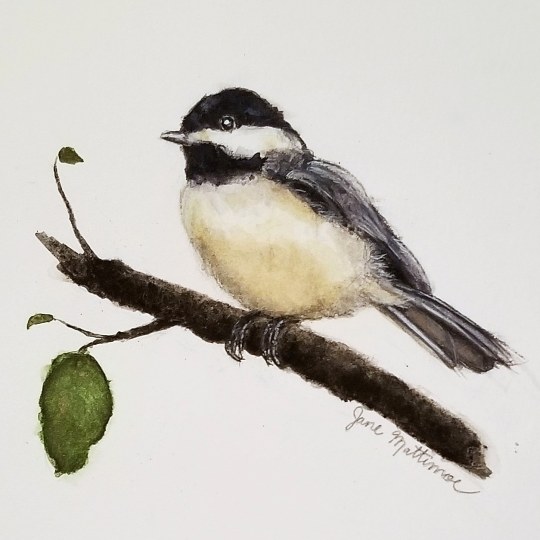
-Try to use shadows effectively rather than accurately. With portraiture, as with cartooning, you are telling a story. Such as writers use various devices (metaphors, etc.) to tell their tales, we do the same thing with how we use tones. If I’m painting a dog, I want all of the information in the image to go towards showing the dog. Part of this can be using background tones. In my average pet painting, I’m not going to try to make a meticulously true to life shadow, but rather use shading to either convey space or make the dog stand out from the background. If I am painting a pet with light fur, I am generally going to paint a more expressive background in darker tones that contrast with their fur. If I’m painting a chocolate lab, I will do a light shadow to convey that they are occupying space of some sort, but that won't cause them to blend into a dark background. I always want to make sure that the darkest (or sometimes lightest, if everything else is rather dark) color on the page is on the part of the painting that I want you to see first. Cartoonists do the same thing, but in a way that leads the viewer’s eye to the joke.
-If buying a whole set of watercolors is cost-prohibitive, I recommend buying a cheap set, and then buying a nicer tube here or there as you are able. That’s what I did. A lot of high quality companies also offer smaller sized tubes, that are often significantly cheaper than the large sizes with scary prices. Coupons are also your best friend. I’ve used a coupon on almost every single tube of paint I have ever bought. Plus if you work mostly in black and white, you only need two tubes!
I hope this was helpful! I know people of many different levels of ability and knowledge read this blog, and it’s fun to be able to have artists share what they know, because the more we help others learn, the more wonderful art we get to enjoy! If anyone else has any tips or tricks, be sure to stick them in the comments! Also, if you’d like to follow my art, I have a fairly new-ish art Instagram here. Oh, and If you’d like to support the blog there is a Patreon and a Ko-Fi (essentially a PayPal account). And if you are hankering for some more art supplies on your social medias, consider following Case on Instagram and Twitter! Have a nice week!
9 notes
·
View notes
Photo
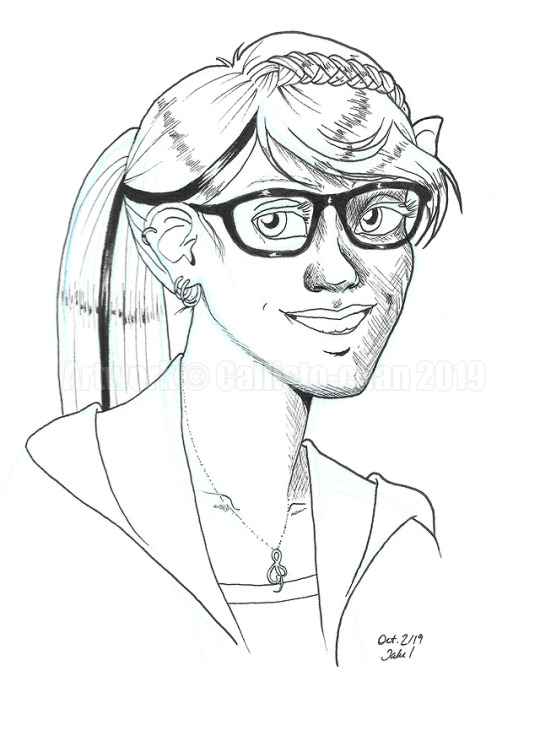
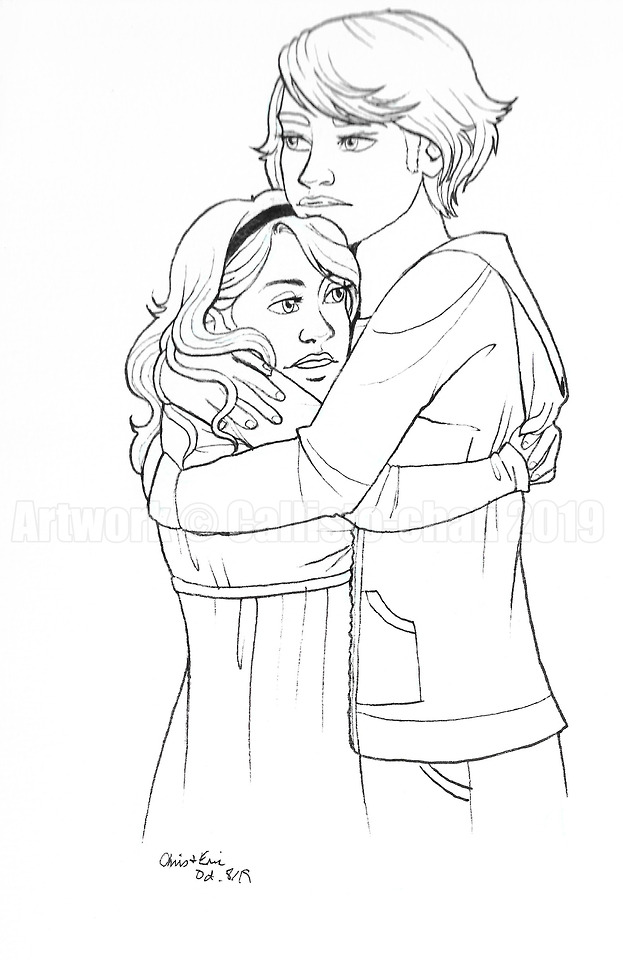
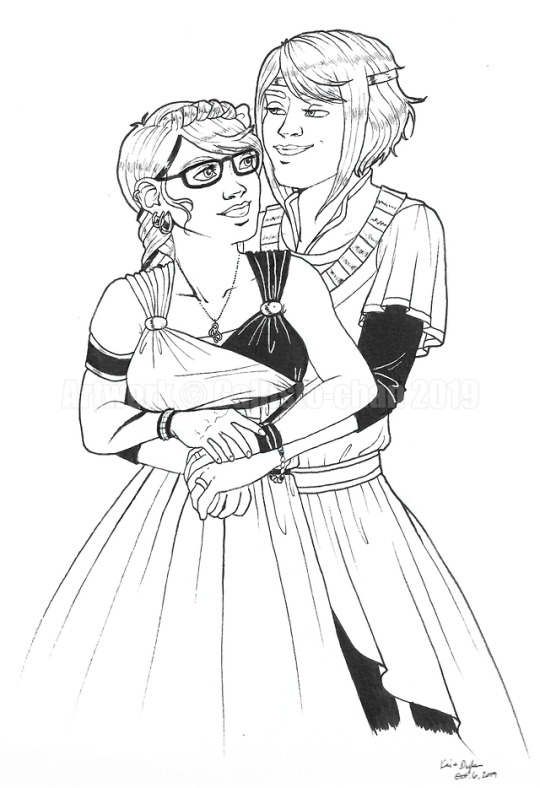
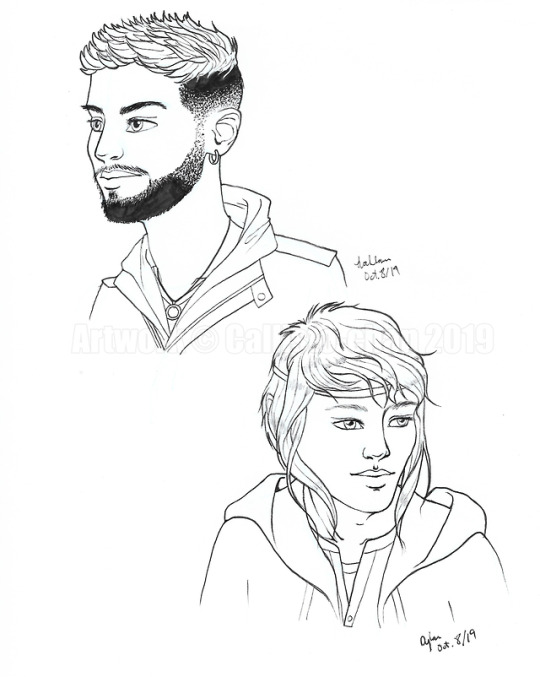
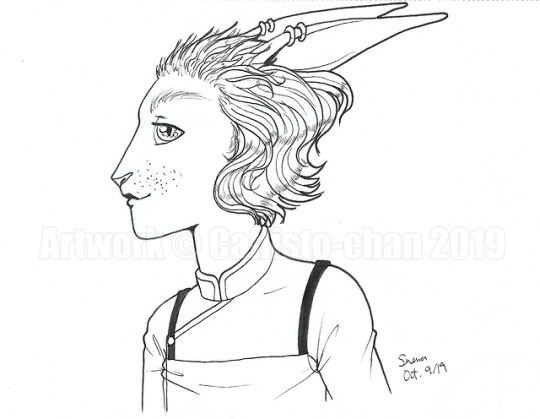
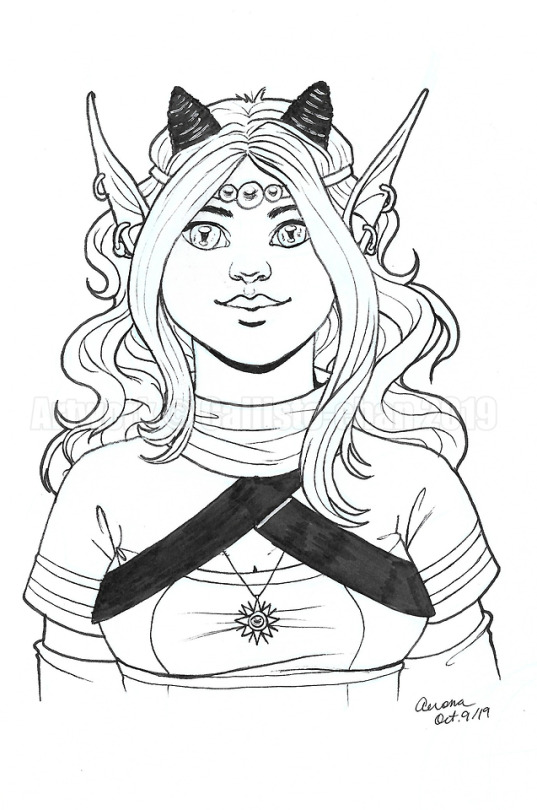
Seeing how much I can write before I have to leave, after days of fighting with my scanner (it assigned itself its own IP address, because that’s the kind of printer it is)
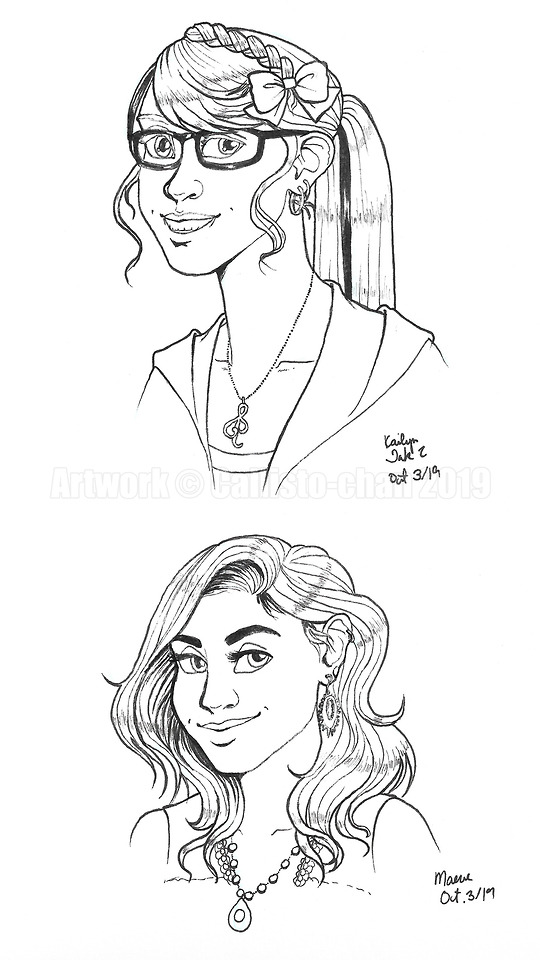
Day 2, Kailyn: Did this once. Tried to add shading and fucked it up. Did it again to make sre I wasn’t giving @erinhime83 complete crap, because she doesn’t deserve that. Her neck in Round 2 is long af but it’s not terrible. I always like seeing redheads with pale eyelashes (like super ginger, chalk-white redheads), so I picture Kai with pale (light brown/blonde) eyelashes even though I never really draw her with those (dark brown at best), which is why I didn’t colour them in. Trying to actually use inks in some fashion like I see other people doing, rather than just...outlining?
Day 3, Maeve: I realize I work better with ref pictures. Literally just use the one Anijel provided. Can barely remember what her hair looks like. Was it wavy? Shit, I think @erinhime83 drew it wavy. Try to stick some wave in there. Does this coy look even fit her personality?????
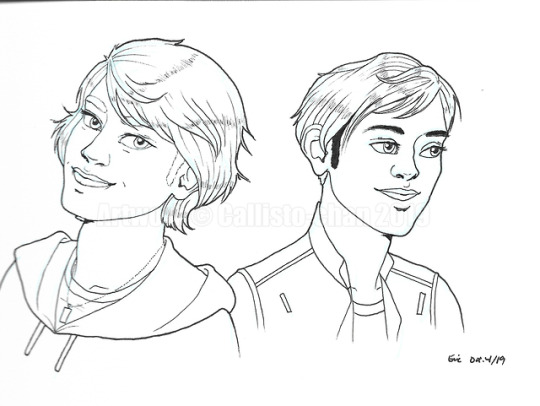
Day 4, Eric: I really liked Sabrina the Teenage Witch when I was younger. I tried watching The Chilling Adventures of Sabrina but really had a hard time getting into it. Long story short, since I tried to use ref images, referenced (sort of) a picture of Harvey from StTW because come on, that was young me’s crush.
Then I remmebered something @erinhime83 had told me about the multiverse concept I had going on in CS, like what if there were “counterparts” to the original cast that weren’t the exact same, because the circumstances were different? (Different spouses and different combination of genetics, but they’re still their parents’ children?) A N Y W A Y what if Eric’s grandfather, in the Delta universe, also had a grandson, who was also, coincidentally, named Eric or something pronounced very similarly? And he bears a very slight (VERY VERY SLIGHT) resemblance to the Eric os the “main” CS-verse? is it Eric Delta or is he his own person? (Spoiler alert, Prime Eric was referenced from 90s sitcom Harvey; Delta Eric was referenced from whoever plays Harvey in the Netflix Sabrina)
Day 5, Christine and Eric: Ironically, this was also referenced from a Chilling Adventures of Sabrina still. Not great. These are doodles at best and I’m not worrying about proper placement or sizing, so it’s...okay but probably falls apart when you look at it. also nice travelling eye Chris’s got going on there
Day 6, Kailyn and Dylan: My original plans for @erinhime83‘s birthday pic were sort of scrapped because of the Inktober stuff, so the least I could do it...something nicer than the other stuff. It’s not bad. I kind of wish the pencil underneath had erased a lot more cleanly, but maybe I can scan and print this (onto some thick cardstock or something), and hope to God that inkjet ink plays well with markers, because it is nice in concept. I don’t like how Dylan turned out because his face looks weird but the concept it nice, and I need to do something
Day 7, Lochlann: Again, just...use the exact same reference picture as @anijeltaventry gave you? Is this even accurate? I have a feeling he doesn’t have that much beard (see above about actually wanting to use inks in a way) but it’s...okay? the hair looks nice. It’s a bit of a struggle when I haven’t drawn him before.
Day 8, Dylan: Look, I don’t know who this even is, I just struggled to think of some media franchise I could Google for decent ref images and for some reason Shadowhunters came to mind. So, this dude, who’s pretty attractive, this dude is Dylan now

I could see Dylan being the Nereid equivalent of a super blond person is all I’m saying. And the waves...well his hair isn’t really wavy but my God how could I say no? He looks nicer here than in the Day 6 picture so I’m happy
Day 9, Serena: I’ve been playing off and on with the Erebian designs for some tinme...in my head...so clothing-wise (Asian-inspired) is fairly accurate, Serena;s actual design not sure about. It’d be more obvious with colour and not inks, but...one step at a time.
Day 10, Aerona: I referenced a rando image on Google. Don’t know why because I already have a decent way of drawing her and this isn’t it, doesn’t really look like her. Not terrible, just not...Aerona in my head? But ink-wise, not bad at all.
1 note
·
View note
Text
Popular Italian Gestures Brought To You Hetalia Axis Powers shirt
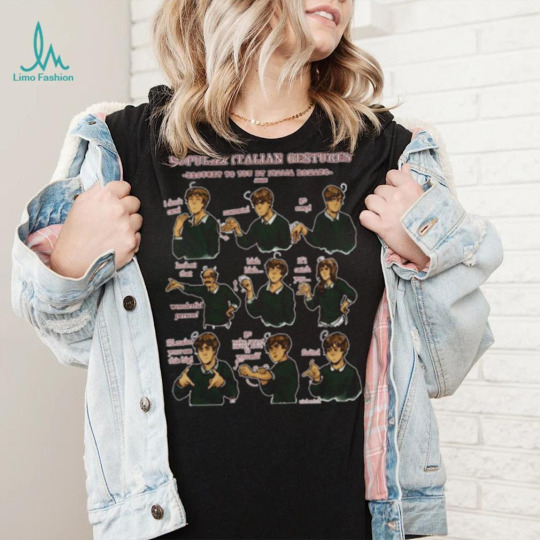
If you go straight from Popular Italian Gestures Brought To You Hetalia Axis Powers shirt just wear your work clothes so you don’t seem fussy. Otherwise, it depends on what you normally wear to work, and the venue. If you wear a suit and tie to work, but the party is at a casual bar or restaurant (a place where on a normal night people would wear jeans) then dress down and wear jeans and a sweater with clean sneakers or leather dress shoes. if you have a casual work place where you wear jeans or a work uniform and the party is at a nicer venue specifically for parties (like a banquet hall) or a nicer bar/restaurant then dress up and wear slacks, a sweater and dress shoes. If you are really really unsure, ask your colleagues what they are wearing. If everyone is unsure wear clean dark black jeans (these could look like dress pants in the dark) a sweater and dress shoes. This outfit would fit in anywhere. In NYC just wear all black and you’ll look chic and appropriate.
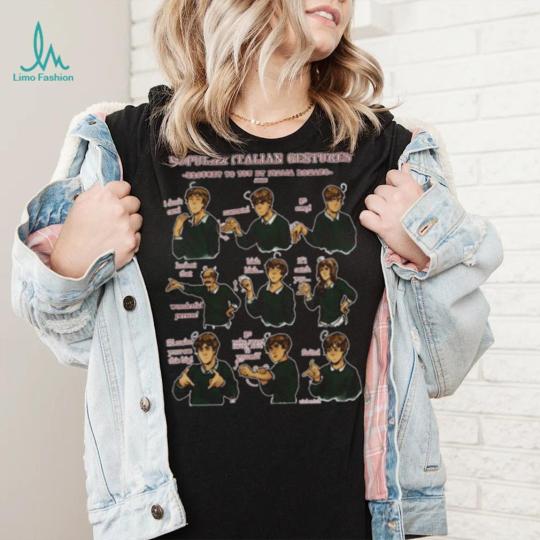
Buy it now: .Popular Italian Gestures Brought To You Hetalia Axis Powers shirt
MLB Jam Philadelphia Phillies Bryce Harper & Rhys Hoskins Shirt
Three 6 Mafia Shirt
Philadelphia Eagles NFC East division champions 2022 shirt
I am 18 with 26 years of experience oh no I am not 44 1979 made in Bear shirt
Homepage: T-shirtsky.com Teeclo
Indiana Hoosiers 122nd Anniversary 1901 2023 Thank You For The Memories Signatures Shirt
ver Molotee
Teejeep is your one-stop online shop for printed t-shirts, hoodies, phone cases, stickers, posters, mugs, and more…High quality original T-shirts. Digital printing in the USA.
Worldwide shipping. No Minimums. 1000s of Unique Designs. Worldwide shipping. Fast Delivery. 100% Quality Guarantee. to cover all your needs.
By contacting directly with suppliers, we are dedicated to provide you with the latest fashion with fair price.We redefine trends, design excellence and bring exceptional quality to satisfy the needs of every aspiring fashionista.
WHAT IS OUR MISSION?
Teeartprint is established with a clear vision: to provide the very latest products with compelling designs, exceptional value and superb customer service for everyone.
We offer a select choice of millions of Unique Designs for T-shirts, Hoodies, Mugs, Posters and more to cover all your needs.
WHY SHOP WITH US?
Why do customers come to TeeJeep.com?
Well we think there are a few reasons:
BEST PRICING
Fashion field involves the best minds to carefully craft the design. The t-shirt industry is a very competitive field and involves many risks. The cost per t-shirt varies proportionally to the total quantity of t-shirts. We are manufacturing exceptional-quality t-shirts at a very competitive price.
PRINT QUALITY DIFFERENCE
We use only the best DTG printers available to produce the finest-quality images possible that won’t wash out of the shirts.
DELIVERY IS VERY FAST
Estimated shipping times:
United States : 1-5 business days
Canada : 3-7 business days
International : from 1-2 weeks depending on proximity to Detroit, MI.
CUSTOM AND PERSONALIZED ORDERS
Custom orders are always welcome. We can customize all of our designs to your needs! Please feel free to contact us if you have any questions.
PAYMENT DO WE ACCEPT?
We currently accept the following forms of payment:
Credit Or Debit Cards: We accept Visa, Mastercard, American Express, Discover, Diners Club, JCB, Union Pay and Apple Pay from customers worldwide.
PayPal: PayPal allows members to have a personal account linked to any bank account or credit card for easy payment at checkout.
0 notes
Text
Never Sometimes Always - Chapter One

Never Sometimes Always - Chapter One
Violet remembers the day she first saw him.
He came into the shop when she was with another customer – Mr. Dively. He was currently telling her all of his plans for his first trip to Disney World. He says the trip is for his daughters but Mr. Dively’s animated voice and flamboyant gestures say otherwise. There was a whole schedule made and he made sure that Violet knew the entire thing, insisting that if anything were to happen in their little village of Cheshire West and Chester, she would know what he’s doing at that moment before she rang him. She’s not sure what he’s expecting to happen, but she listens anyway.
He walks in just as the photos of matching outfits came out. (“Just in case one of the little ones got lost, you know?”).
He’s with Anne, a regular at the shop. He was wearing casual trackie bottoms. They were blue with a red stripe down both sides of the leg. They probably still cost more than all of Violet’s textbooks combined. He has on a plain white t-shirt, something she can likely afford, and some trainers with tall grey socks. There were shades perched high on his head, hidden by the abundance of curls that adorned his head and an annoyed expression on his face. She hopes he’s nicer than he looks at the moment.
Violet shoots Anne a quick smile, just as a bit of acknowledgment before she returned back to Mr. Dively. Violet then assumes that Anne is his mother. It makes the most sense.
“- have my number just in case you should ever need it.” He grabs his camera, universal stick and prints quickly before shuffling out of the way for the next in line. “See you in a week, Violet. Try not to miss me too much.”
Violet chuckles to herself, waving towards Mr. Dively even though he wasn’t looking back.
Next in line was Anne. She came to the till with a large smile on her face, nearly resembling a child whose left lessons early. Anne’s son, on the other hand, continued to stay barricaded by his private security detail. He looked exhausted. If the purple rings under his eyes were anything to go by Violet would reckon it was a couple of days since he’d gotten proper sleep.
“Violet, love, alright?”
Violet gives Anne her best smile as she watched to older woman dig around in her bag for something, presumably her universal hard drive.
“Not quite peachy keen, but I’ll get by.” Unlike other customers, Anne gets the full scoop of Violet’s life. Violet finds some type of comfort in Anne and she reckons Anne finds some in her too.
“Oh no, dear. Why’s that?” At this point, she’s still digging. This is what usually happens. It’s always ‘in the bottom of my purse somewhere’ or ‘hiding from me.’ Violet didn’t mind. It keeps the conversation going, and in a camera and printing shop with only three employees, Violet very much so loves outside conversations.
“Mums been buggering my head in since I came home from University. She pops into my old room at least ten times per hour just to see if I’m still there.”
“Your mother has missed you! Her only child has moved four hours away and hardly ever visits. I reckon she has the right to bugger you.”
Violet just laughs lightly at Anne’s response. Her mother and Anne have never met but she can tell they would get along easily.
Violet then looks at Harry and he’s looking around the shop with a scowl. She wonders what for. Anne must have noticed the silence because she looks up for a second before tucking back into her purse and saying, “Violet, I nearly forgot – my son, Harry. Harry, my dear friend, Violet.”
Harry’s head pops up at his name and Violet is stunned. Of course, she’s seen photos. Media photos and personal photos on Anne’s mobile. But nothing really prepared her for how handsome Harry is now that he’s right in front of her. He takes a step forward, already looking uninterested in the conversation, before shaking Violet’s hand. She glanced at the security detail and he looked around the shop, a bit embarrassed, but he didn’t say anything.
“Would you like me to lock the doors?”
Anne looks at Harry and then back at Violet. “Oh, love, you don’t have to do that.”
When she responds, it’s towards Harry. She can feel her cheeks go a bit hot, but she decides to ignore it. “It’s alright. It’s nearly a quarter to six. We’ll be closing soon.”
Then, he finally speaks. He’s got a smooth voice. It reminds her of warm honey and peanut butter sandwiches in the back garden on a sunny summers day with her dad's famous cup of breakfast tea.
“If you insist, that would be lovely.”
She nods with a smile. The keys are in her hand instantly and she tracks from behind the counter quickly. The security detail is now following her, presumably leaving. When the shop had been locked, and the bulky men had exited, there was almost a breath of fresh air in the atmosphere.
“Ah-ha!” Anne exclaims, holding the stick in the air.
Violet laughs and grabs the stick. “Reckon you should sellotape it to your forehead; you’ll never lose it then.”
The three of them laugh, and then Harry says, “then add your mobile up there – know how you are mum.”
Anne rolls her eyes and turns back to Violet. “It’s the folder that says Jamaica 2017.”
“Oh, lovely. You went on holiday?”
“Oh no. I wish! Harry’s just gotten back from Jamaica. Written a whole album, he has.”
Harry looks at his mom a bit panicked. “Mum, you can just tell people that.”
Anne chuckles as the images print. Violet already knows Anne’s usual size for all types of prints. Portraits are a little larger than landscape and landscapes are a little larger than items. “Violet is not people Harry. And to be frank, Violet knows quite a lot about you. Maybe even things you don’t know.”
Violet blushes at this comment but keeps her head down, labeling the separate photo packaging boxes.
There is a slight awkwardness now. The only real noise in the store is the photo printer buzzing away. The silence was nearly unbearable. Violet wondered what Harry had thought of Anne’s statement because she didn’t give any further explanation. He might think she’s a stalker or some type of mega fan.
Violet takes the first set of photos out and examines them for miss prints. They all looked wonderful. She would love to go on a tropical holiday at least once in the next few years, but with the way it’s looking financially, she’ll be lucky to have a spot at her university in the fall semester.
“I’m gonna browse around.” Violet is grateful that Anne had decided to crack the ice. She was afraid they could hear her thoughts of how silent it was. Anne made a straight shot to the other side of the shop, leaving Harry and Violet alone at the till.
Harry rocks a bit on his feet while Violet continues to sort the photos out on the worktop. She was surprised when Harry decided to break the silence.
“You’re a fan?”
She glances up a little too fast, bits of her hair fell in her line of sight and she scrambled to put them back in place. “No...I mean...I don’t, like, seek your stuff out.”
He nods, makes a surprised face, and scoffs. “Way to humble me, I ‘spose.”
“Oh,” she blushes. “No, I didn’t mean like that. I just never really have t–“
He chuckles. “It’s okay, Violet.”
Her name rolled off his tongue like gooey, melted chocolate. Or a spoonful of Jif’s creamy peanut butter. The way his lips curved around her name made her wonder what they taste like.
It was silent again. Anne had disappeared from sight, the photocopier was buzzing, and Harry was still making Violet’s hands sweat. “Is your music any good?”
Harry’s visibly taken aback by the question. He nods very confidently. “I would like to think so.”
Violet scoffs. Her eyes roll around and she looks up at Harry with something resembling a smirk. “Well, duh, you think so.”
He smiles. “Love, I’d like to think a couple hundred thousand people agree with me.”
“And every single one of them, up your arse.”
He leans against the worktop now, much closer than he was before. In fact, if it were anyone else Violet would’ve claimed it to be too close. “Is that true?”
“Oh, most definitely.” She packs the last set of photos in the package and glances up at Harry.
“Would you give me a second opinion then?”
“Excuse me?”
“Heard me. Want to listen to my album?”
“Or what?”
“Does there have to be one?” He asks.
She shakes her head softly, bits of her hair falling back in her face. She didn’t push it back this time. “No. I’d love to.”
He smiles, dimples and teeth popping out this time. She thinks it’s the most beautiful thing she’s ever seen. “Great. Dinner then. At mums. Surely she’s told you our address.”
Violet laughs at this because yeah, she has. “See you then.”
“See you then.”
They hadn’t realised it but it’s been a while since they looked away from each other. She was studying his face, wondering exactly how he’s gotten it so smooth and symmetrical.
“You’re done!” Anne’s voice startled them both, making the pair pushback from their unusually close proximity. This doesn’t get away from Anne. In fact, nothing has. She’s been watching this whole time. “How much will it be?”
“Nonsense Anne. You know it’s always on the house.”
“And I always pay. Now, how much?”
Harry quickly pulls his wallet from his pocket and hands Violet fifty quid. She began to ring up the change while Harry got scolded by his mum.
“Keep the change,” Harry says.
Violet shoves it further in his direction. “That’s a lot of change.”
“Keep the change,” he repeats. She sighs and sorts the pence back into its place. When she looks back up both of them are watching her. “See you at dinner.”
Ahhhhhh tell me how you feel! Was this good? Did you like it? Please share, reblog, and like. I hope you guys enjoyed it! [Hopefully, there’s no grammatical errors :]. Expect a chapter once a week! Let me know if you want to be on a tag list and get notified every time I upload.
Keep up with the series here!
Masterlist here!
d x
#harry styles#harry#one direction#one direction imagines#one direction imagine#imagine#1d#one direction x ofc#ofc#original female character#violet#cheesier england#London england#enland#anne twist#gemma styles#imperial college#cambridge university#stuent#student!ofc x harry styles#student!ofc x one direction#student!ofc harry styles#pink album#the pink album#pink#hslot#hslot2018#2018#harry styles live on tour#harry styles tour
48 notes
·
View notes
Text
Kite flying sorry I can’t I have plans with my kite shirt
DESCRIPTION
SHIPPING & MANUFACTURING INFO
TEEJEEP
Kite flying sorry I can’t I have plans with my kite shirt
If you go straight from Kite flying sorry I can’t I have plans with my kite shirt just wear your work clothes so you don’t seem fussy. Otherwise, it depends on what you normally wear to work, and the venue. If you wear a suit and tie to work, but the party is at a casual bar or restaurant (a place where on a normal night people would wear jeans) then dress down and wear jeans and a sweater with clean sneakers or leather dress shoes. if you have a casual work place where you wear jeans or a work uniform and the party is at a nicer venue specifically for parties (like a banquet hall) or a nicer bar/restaurant then dress up and wear slacks, a sweater and dress shoes. If you are really really unsure, ask your colleagues what they are wearing. If everyone is unsure wear clean dark black jeans (these could look like dress pants in the dark) a sweater and dress shoes. This outfit would fit in anywhere. In NYC just wear all black and you’ll look chic and appropriate.
buy it now:Kite flying sorry I can’t I have plans with my kite shirt
franco Harris NFL memories shirt
Survivor this challenge is on shirt
I Ain’t Perfect But I Can Still Play Bass Guitar For An Old Man That’s Close Enough Shirt
Owl Christmas tree lights xmas pajama gifts for owl lovers ugly Christmas sweater
LSU Tigers 2022 SEC West Division Football Champions Slanted Knockout T Shirt
DESCRIPTION
Homepage: limotees jeeppremium telotee
Gearbloom is your one-stop online shop for printed t-shirts, hoodies, phone cases, stickers, posters, mugs, and more…High quality original T-shirts. Digital printing in the USA.
Worldwide shipping. No Minimums. 1000s of Unique Designs. Worldwide shipping. Fast Delivery. 100% Quality Guarantee. to cover all your needs.
By contacting directly with suppliers, we are dedicated to provide you with the latest fashion with fair price.We redefine trends, design excellence and bring exceptional quality to satisfy the needs of every aspiring fashionista.
WHAT IS OUR MISSION?
Gearbloom is established with a clear vision: to provide the very latest products with compelling designs, exceptional value and superb customer service for everyone.
We offer a select choice of millions of Unique Designs for T-shirts, Hoodies, Mugs, Posters and more to cover all your needs.
WHY SHOP WITH US?
Why do customers come to
Well we think there are a few reasons:
BEST PRICING
Fashion field involves the best minds to carefully craft the design. The t-shirt industry is a very competitive field and involves many risks. The cost per t-shirt varies proportionally to the total quantity of t-shirts. We are manufacturing exceptional-quality t-shirts at a very competitive price.
PRINT QUALITY DIFFERENCE
We use only the best DTG printers available to produce the finest-quality images possible that won’t wash out of the shirts.
DELIVERY IS VERY FAST
Estimated shipping times:
United States : 1-5 business days
Canada : 3-7 business days
International : from 1-2 weeks depending on proximity to Detroit, MI.
CUSTOM AND PERSONALIZED ORDERS
Custom orders are always welcome. We can customize all of our designs to your needs! Please feel free to contact us if you have any questions.
PAYMENT DO WE ACCEPT?
We currently accept the following forms of payment:
Credit Or Debit Cards: We accept Visa, Mastercard, American Express, Discover, Diners Club, JCB, Union Pay and Apple Pay from customers worldwide.
PayPal: PayPal allows members to have a personal account linked to any bank account or credit card for easy payment at checkout.
0 notes
Text
Riso Printing
I really wanted to try and riso print a full version of my publication that would have all aspects of my prototype so I could get a sense of what everything would look like and how the fold outs would work. I had never printed a book on the riso before so it was a big learning curve, trying to organise the signatures and print everything in the correct way. After taking time to figure this out and printing the first section I realised that I hadn't accounted for the fact that the pages needed to be double sided. I didn't have enough time to go through and reprint the sections in the right way so I just had to glue and tape the pages together. This is not ideal but is a good way to learn what not to do next time. I need to book a time with Greg to properly learn how to print a book on the riso so my next prototype is better crafted.
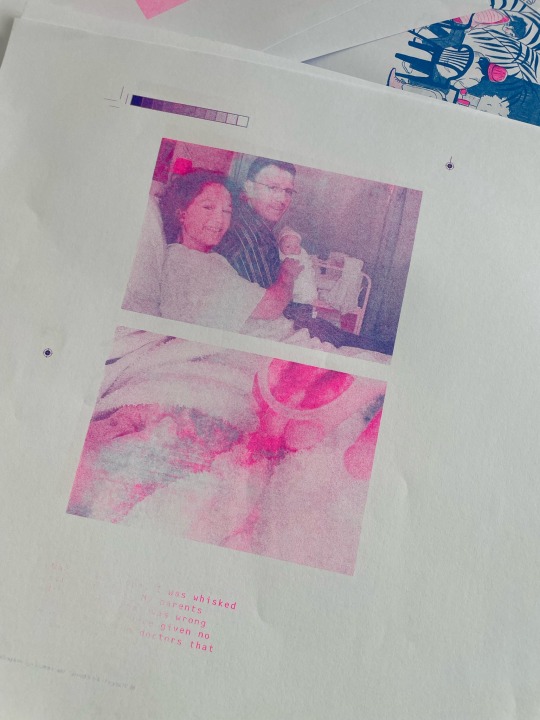
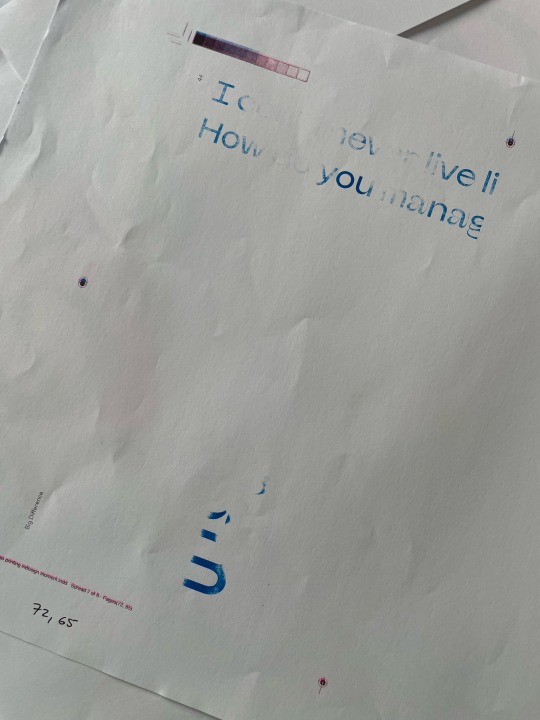
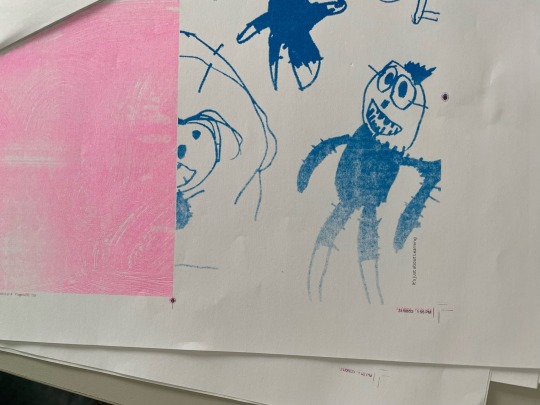
Patchy Prints
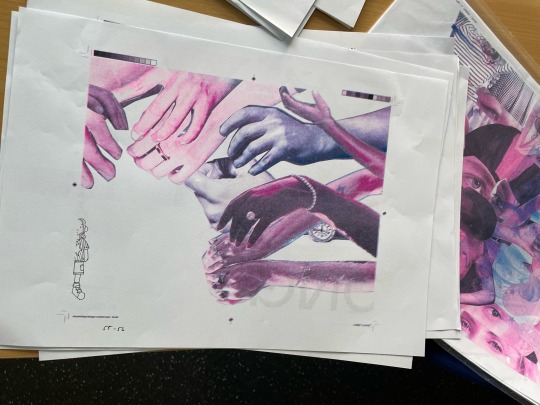
Example of a fold out print which I was able to put more time into and could run up the ink more. This print looks a lot nicer and what I will aim for all the spreads in the next version to look like.
The riso printer was also having problems with picking up the paper. I'm not sure if it was because the paper was too thin or if the pages weren't separated enough, but it meant that the printer would skip pages and often print the wrong thing on the sheet of paper or in the wrong place. It was really frustrating because I have never encountered this issue before (I was using 80gsm paper which I have run through the riso lots of times before) and it meant that I had to scrap quite a lot of pages from the prototype because of this printer error. Although some of the misprints made for some cool visuals of having different things layered over the top of each other.
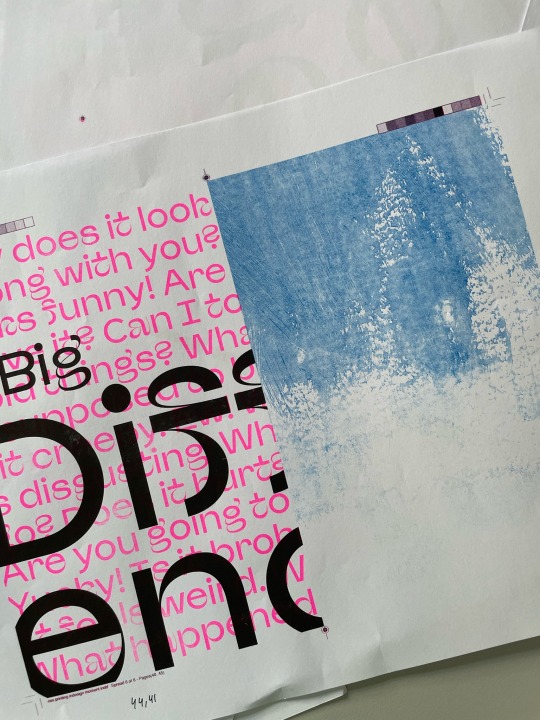
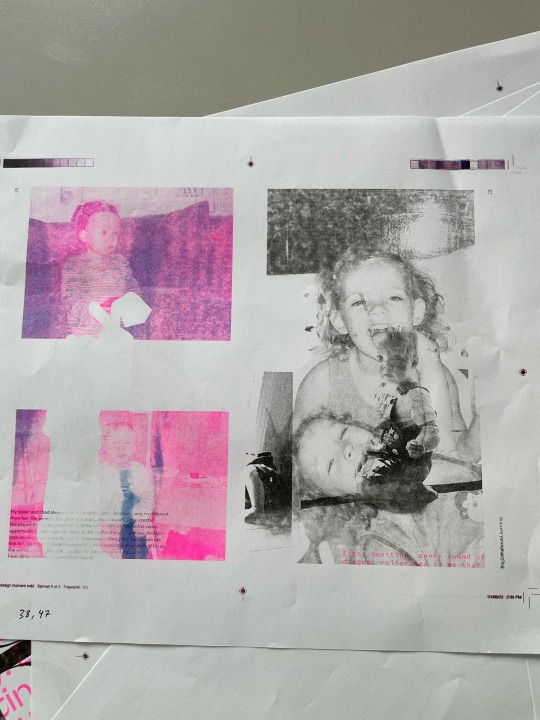
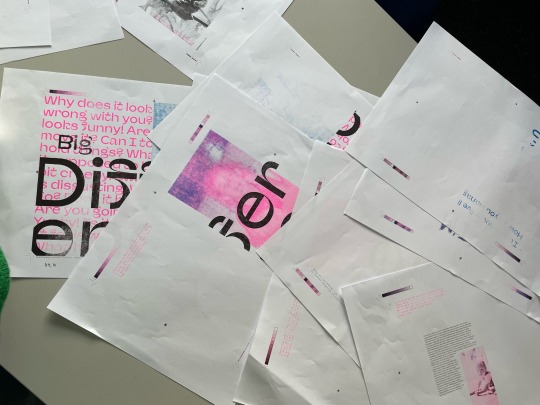
Some of the misprints which resulted in images being printed on the wrong pages.
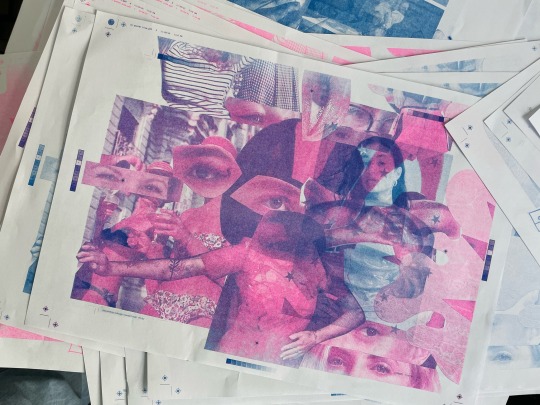
A misprint that I thought turned out looking quite cool, having the mixed and layered images.
The whole process was really difficult and took me almost the entire day to do. It was a really good learning experience though, and I'm glad that I printed the prototype through the riso because it gave me a really good idea on what things I need to work on and improve. I'm pretty happy with how some of the prints turned out, like the collages and I really like the effect they create.
0 notes
Text
Version 464
youtube
windows
zip
exe
macOS
app
linux
tar.gz
I had a good week. Some images get better colour, and the software now deletes files more neatly.
ICC profiles
tl;dr: Some image colours are better now.
Some images come with an 'ICC profile'. A scan of one ICC-heavy client showed that 10% of all images had them. ICCs are basically colour correction data like 'actually, the blue should be this much more intensely blue than is stored' in a variety of sometimes complicated ways. Some nice cameras attach a fast ICC based on lighting conditions or known defects in the camera, and some image editing software does similar. ICCs are also used for broader and more complicated colour conversion tasks like in the migration from sRGB to HDR formats if you have a new tv/monitor.
Hydrus now has basic ICC tech. It recognises when an image has an ICC and will apply it, converting the rendered colour to 'normal'. This happens right on image load, so it should apply in every media viewer and all new thumbnails. Should work for the server, too. With luck, this will be one of those things where you don't really notice any difference, but you should just have some nicer pictures, mostly photos, in your client. Let me know if you have any files that you know are still not rendering right!
This work took a long time to get done, but a user helped me out with some great examples and more background info on how to handle it all properly. The next step will be to add more indication of when an image has an ICC and add the ability to flip it on and off. Another topic is 'display ICCs', where some artists and other enthusiasts will have an ICC calibrated for their particular monitor or for different display conditions (e.g. 'how would this look like under this lighting?' or '...from this printer?'). Since we have the tech now, I think I should be able to support this sort of ICC conversion too.
better file delete
tl;dr: Files delete from your disk better now.
For a long time, actually physically deleting a file that leaves the client's trash has been a bit hacky. To reduce UI lag, the recycle or delete action has to be deferred to the future, but since there was no permanent record of what to delete, the deferred job was always a bit rushed and in a couple of instances (e.g. if you cleared trash and closed the client soon after) it could leave file orphans behind. The system has always been fail safe, never deleting too much, but it could lead to surplus cruft in file storage. Secondly, it turns out the server never got physical file delete tech added! The file repository has never been used much, and it just never came up.
So, this week I overhauled the whole way it works. Now both client and server keep records of the files they should delete, print delete summaries to the log, use neater delete daemons that smooth out the work to be non-interrupting, have sophisticated 'is this an orphan now?' logic to ensure that edge cases are kept in storage until they are truly no longer needed, and correct themselves in odd cases (like if you re-import a file just a couple of seconds after deleting it from the trash). They are also more aware of repository update files, which is another thing neither have been good at clearing out in the past.
So, you don't have to do anything here, but with luck doing things like 'clear trash' and other large forced physical deletes should just work a bit nicer now. Users who run a server may see it clear out a couple of files after booting, and in a few weeks I'd like to roll out a 'clear orphan files' server database action for the admin menu just like the client's so you can clear out legacy files from deleted services.
full list
image icc:
images with embedded icc colour metadata are now normalised (to sRGB) like the rest of media rendering in hydrus. ICC can often mean photos, where a nice camera will apply ICC data to compensate for camera defects or general lighting information, or it can mean normal digital images where the software attached extra colour data when it was saved
the image will now be rendered with 'fixed' colours in the media viewer, and new thumbnails should be good too. it applies early in image load and should work in all cases hereon, on both client and server
images with an ICC will take a little longer to initially load. I'd estimate 10-50ms extra for most. one user with many ICC images discovered 10% of their collection had an ICC. I don't think the delay will be terrible IRL, but see how you get on and let me know! maybe giganto patreon pngs will have a fresh surprise for us
future expansions here will be a database cache of ICC images and system:has icc, perhaps a button to click the ICC application on and off live in the media viewer, and then maybe options to load up and switch an ICC for your display
.
better physical file delete:
both client and server now physically delete files from storage more smoothly and reliably. the 'deferred file delete' list is now saved in the database itself and will survive reboots (and undo itself if a file is re-added before it can be deleted), and the physical delete daemons are able to work at a less spiky pace as a result. physical delete summaries are now logged as well
the server now physically deletes surplus files from its file storage! this never actually came up before jej--servers were just keeping all files forever
on update, all servers will scan to see which files it only has deletion records for and will queue them for a deferred delete
when deleting a service from the server, all its file repository files and/or general repository update files are now queued for deferred deletion if they are now orphaned
some advanced 'pending upload file delete' logical situations are now tidied up better, for instance if you have a file set to upload to a file repository or IPFS and then delete the file from the trash, the file will hang around until the upload is done and then it will be correctly scheduled for physically deletion. same for if you delete the file repository or clear all its pending. previously, this file would never delete and become an orphan
thumbnails for non-downloaded file repository files are now removed promptly from a client if a file repository deletes a file
.
misc:
fixed a typo error in last week's file filtering changes when doing wildcard tag searches in 'all known files' domain
fixed some bad namespace search optimisation also caused by last week's search updates that was making 'system:has x unnamespaced tags' search instead count all tags, not just unnamespaced (issue #1017)
fixed incorrect file type handling in thumbnail loading that was triggering a safe mode for gif file thumbs (which are actually jpeg/png), it should roughly double thumb load speed for gifs (and .ico too lol)
.
boring image stuff:
wrote some methods to check for and pull ICC profile bytes from an image with PIL
wrote ICC application in PIL on image load. we had figured out a way to do it with Qt, but this can happen right at the start of the rendering pipeline and will work for the server too
cleaned up some PIL/OpenCV image load and normalisation code
the decompression bomb check is now quicker for images with rotation
dequantization is now applied to PIL on all image load by default, it doesn't have to be invoked separately
some metadata parsing like 'get duration of gif frames' is now faster for images not in RGB or RGBA color
.
boring delete code cleanup:
wrote a heap of new 'is an orphan' filtering logic for client and server
wrote a daemon job for physical file deletion and plugged it into a new database queue for pending deferred file deletes
client physical file delete now works off the normal lightweight job scheduler, previously it had its own mainloop thread
optimised complex file domain file filtering a little
the 'clear orphan files' job in the client now uses the same updated orphan logic as the new physical delete code. it now won't clear out files in upload limbo
fixed an issue with re-storing a file in a server after one of its file repositories had previously deleted it. this never mattered previously, when files were never physically deleted, but now the code is brushed up to work properly
cleaned up some server db code, including the read command method lookup
moved client 'hash exists?' test down to the master definitions module
next week
Now we have basic ICC support, I want to charge ahead on 'has ICC' and 'pixel dupe' search for the database. I'd also like to find the time to work on some more tag search tech for multiple local file services, but we'll see.
0 notes