#i freehanded this and my art is BALLS
Explore tagged Tumblr posts
Visit Tumblr Blog
Explore Tumblr blogs with no restrictions, modern design and the best experience.
Last Seen Tumblr Blogs


Fun Fact
The “We are the 99%” Tumblr blog became the slogan for the Occupy Wall Street movement.
Text
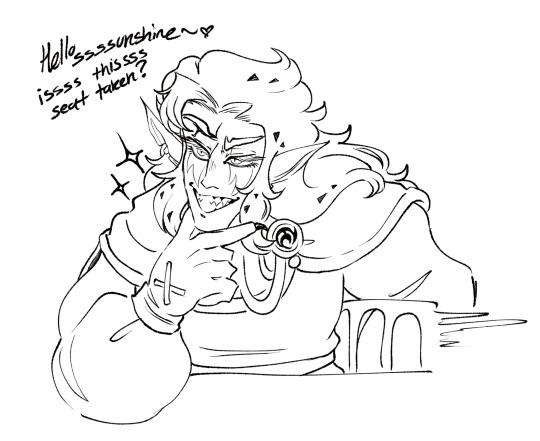


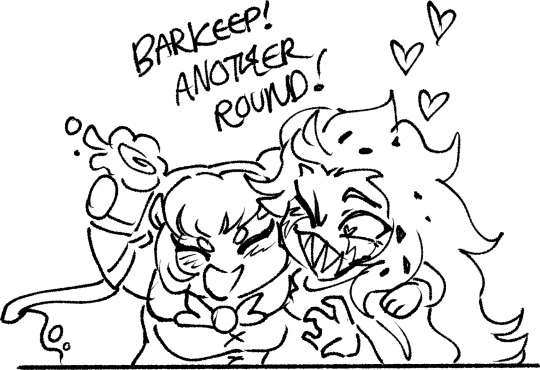
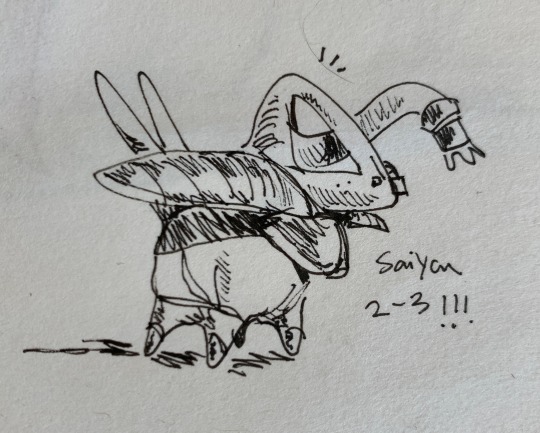
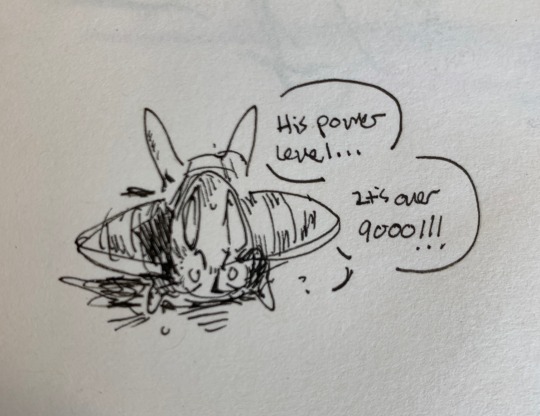
Silly goofy doodles for the hollytaya update i mean the Pitaya update totally. Yeah. The Pitaya update.
Bonus:

#cookie run kingdom#crk#hollyberry cookie#pitaya dragon cookie#pitaya dragon#Hollytaya#sorry if the quality is bad#i freehanded this and my art is BALLS#sketch#also side note#my hc of the great dragons being able to transform into a fully cookie/human form got confirmed and it isn’t only a lychee thing and that#makes me SO HAPPY
2K notes
·
View notes
Text


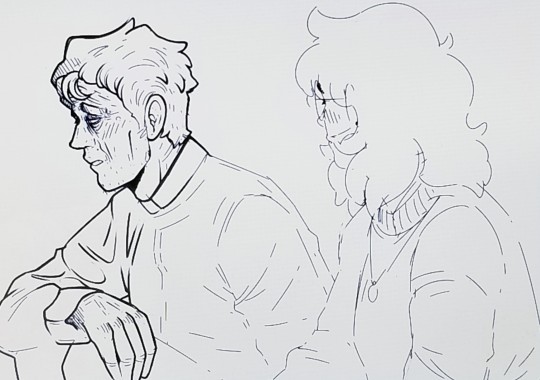
look just
don't ask
#dragon ball#dragon ball z#yamcha#wolf boy yamcha haunts my every thought I'm#💀#my art#deadawake#(also idk how hq these are gonna be on tumblr but just know I worked v hard)#(oh and also I freehanded the pose so if it looks messed up that's why lmao)
21 notes
·
View notes
Text
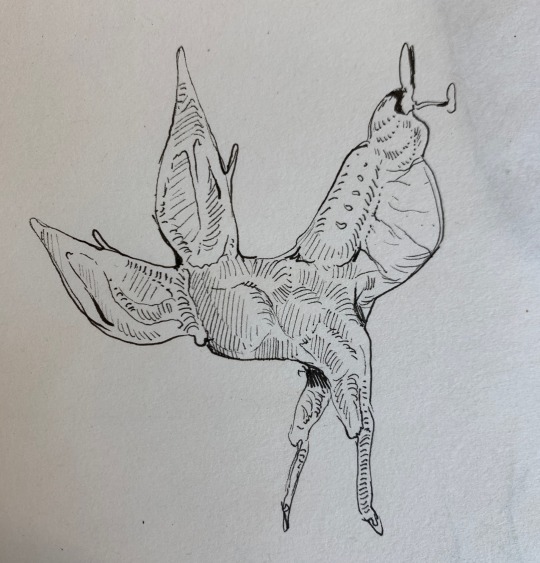


Ink funnies
#I miss you microns#freehanding pen is the best#sketch#art#my art#creature#crescents#dragon ball#dbz#haha yes#cathchicken
34 notes
·
View notes
Text
i really like the look of things people make in adobe illustrator but unfortunately i dont want to give adobe money. so sad i'm going to complain about this on the website that also hates giving adobe money
#.communications array#i dont know if its even practical to learn a new program within two days to do about 30-40 images#WHICH FOR THE RECORD I AM NOT FREEHANDING ITS GOING TO BE SHIFT-CLICK ART#EVEN IF I COULD I JUST GOT DONE MOVING MY LEFT HAND STILL HASNT STOPPED BEING WEIRD. I'D INJURE MYSELF#laying dead on the floor though i forgot to take my caffeine pills. im going to have to (skee)ball this entry so bad.
3 notes
·
View notes
Text

✏ WIP Wednesday ✏
thank you for the tag @darkfire1177 💖💕
oh ya'knowwww here's a lil shot of what I was workin on last night but I'm probably gonna be messing with it for a good while until I'm satisfied. love love loooove making my baby look so sad and wet and pathetic <3
open tag to anyone who wants to jump in!
#fuck it we ball (said thru gritted teeth)#since for SOME reason SOMEhow mister desoto here decided it would be funny to merge ALL HIS LINE WEIGHT LAYERS#I am very pissed BUT STILL we SPARKLE ON. RIGHT MAXIMILLIAN#I'm going to eat the fucking drywall#like it's literally fine this drawing isn't ruined in any way but also WOULD BE NICE TO HAVE MY LAYERS#rip my sketch tho it's all freehand now#my art#faith and max
19 notes
·
View notes
Note
geckoooooooo I have an art question
so uh I’ve been doing more human drawings right. like all the things finding references drawin the shapes but I keep gettin stuck because like
I draw the shapes. like the circles and the stuff. and they aren’t. the right shapes???? like it just doesn’t look right
can you. perhaps explain what I might be doing wrong. if you have an image of how you usually sketch the hoomans it would help but u dont gotta im just. seeing if you can help ._.
okay bye
Uhhhhhhhhh hmmmmmmmm
If you'd be willing to provide some examples of what you're running into that I can analyze, that would be good, cuz then I can be more specific, but I think I know what you're getting at.
The immediate thought I have is this: are you drawing the shape of what you see, or of what you think the shape should be? Cuz I know something I was really bad about at first when using references was drawing what I thought the shape ought to be, rather than squinting at the reference and drawing what was actually there.
Another thing that might help is adding perspective lines or "meshing" - grid-style lines that show the form of the shape. Like so:

This exercise sorta wireframes the shape and helps you get an idea of perspective and depth.
I'm just gonna run through construction using the first stock photo of a dude standing. This is the process I used starting out. Interestingly, I don't actually use the first step as much anymore, but it was a good place to start.
Stick figure and Joints:

On the left we have a sketch-over - boxes for the main areas on the torso, the keys of which are the chest and the hips. Then we have a ball and socket stick figure for where the joints go. Proportions are hard, but the wrist, when hanging, is usually level with the crotch, and the upper arm is often the same length or slightly longer than the forearm.
On the right is a recreation of the same thing but freehanded. I started with the head and spine, because the spine in particular will tell you where everything else lands. I will also often start with the ribcage placement instead, depending on what I'm doing.
Using just basic circles and lines and boxes (you can switch the boxes for circles, but I find boxes helpful for not overthinking) helps you find a loose skeleton for the figure, and gives you an assembly rig to start putting shapes on.
Form:

This is the next step for me. With the tracing over, I'm just using cylinders and boxes at various angles to get an idea for shape. Looking at the red, I'm mostly playing connect the dots.

Then, for the freehand, I start by rounding out the chest and hips - everything else is connect the dots. I will even just do straight lines between the sides of the joints, then fleshing them out. Looking at a muscle diagram helps with this step too, just to get a feel for where the bumps are. Note that on the calves, those will push out from the rigid line of the actual shin. On the forearms, you get that little pair of bumps out because the radius and the ulna create some space where they join at the elbow. Even on this sketch, it's not perfect - the head is too small here, because in translation I made the body too big. But that's something you can mess with during this phase.
Don't hesitate to check your sketches with someone else - they can often put their finger on what looks wrong, and then you can fix it. The unfortunate reality with art is that you improve by people pointing out your mistakes, and develop a feel for it. It takes time and lots of practice.
I hope that at least sorta helps? It's a tricky thing to work with, especially because different techniques work for different people. Not to mention that drawing from imagination and drawing from life are two different sets of skills. I have friends who envy my ability to draw from my own head, and I envy their ability to realistically recreate what they see in a reference. Each skill set takes a lot of time to build, and will build with practice.
By way of additional bolstering, here's some resources I've used:
Winged Canvas: these guys have a lot of tutorials, broad and specific, and I've often consulted them for stuff. I think I tend to use them more for background work and details, but they have stuff for figures too I believe.
I don't actually know if he does tutorials, but he has speedpaints of his work, and you can see how he constructs the figure from the ground up in those. I picked up a good deal of technique by osmosis just observing him. It's stylized, so bear that in mind. Also, as a general note, speedpaints are so helpful, because they show you ground-up construction of figures.
I don't know as much about his YouTube, but Christopher Hart's book "Figure It Out" was the book I originally learned to draw figures from. It's not perfect, and it only goes so far, but as a starting place to learn figures, it was great.
I hope this helps! Happy drawing and good luck!
#sqarlettalks#ask box shenanigans#art tips#artists on tumblr#if anyone else has advice here then by all means pitch in
13 notes
·
View notes
Text
Totally Nailed It
Legend didn’t remember it was his birthday until he came downstairs. Ravio had once again moved all the furniture against the walls without his permission, although he couldn’t find it in himself to be mad considering the displays of gifts and cake that replaced them. He could see all the gifts the Chain left. They were going to celebrate tomorrow. The day of his birthday, Ravio shooed them all out of the house so Legend didn’t have to worry about hosting.
“Oh, you’re awake Link! Perfect, I was just about done. Are you ready for a Ravio patented Birthday Luxury Retreat?” The merchant wiggled his eyebrows,
“How much of a retreat is it when we’re not leaving the house?” Legend jabbed.
Ravio waved him away, bouncing on the balls of his feet. “The verbage doesn’t matter, just sit down! I wanna start on your first present! Wild taught me this, so I hope I can do it right!” Legend was wary as he sat down. Wild taught him? Wild had a variety of skills, and he really hoped Ravio wasn’t about to burst into some Goron dance performance Wild had taken up from Death Mountain.
“Wild said Gerudo ladies pride themselves on body artistry, and the most delicate of all is..” Ravio left room for a dramatic pause, and his hands popped up with little glass jars of varying colors. “Nail art! Wild taught me a lot of cool designs I can do. I learned how to draw the symbols of your golden three, and Wild actually had a stencil for the Hyrule crest! I can try freehanding something else if that’s what you want, or we can do solid colors. It’s your day, so your wish is my command!” Ravio’s eyes sparkled in excitement.
A manicure? That certainly wasn’t what he was expecting. But if Ravi was going to offer to pamper him, who was he to say no?
“Can you alternate red, green, and blue, with Din, Farore, and Nayru on each color respectively?” It was a complicated request, but Ravio was already nodding in agreement and grinning ear to ear as he set out the colors and took Legend’s hands in his own.
Ravio was adorable as he focused, tongue poking out from his lips as he squinted at Legend’s nails. He wasn’t even anywhere close to the hard part yet, starting with a base coat to prime all the nails.
“Wild said if you go straight for a color coat, it's more likely to chip! He’s fine with that for flat colors because it's easy enough to add another coat, but all the designs should be protected to preserve the effort that went into them!”
Legend already knew proper nail procedure from his time in Hytopia, but it was a special kind of blessing to watch Ravio gush about something excitedly. The merchant would smile wide, showing off the hint of buck teeth as he bounced in place, hands gesticulating wildly as he talked.
As he pulled the brushes from the colored ink bottles, Legend took stock of the products. Based on the fact the glass was completely filled, and the brushes were completely black the first time Ravio dipped them in, these must be all new polishes. From the intricate designs and swirly Gerudo script on the bottles, he can only assume these were luxury products from the heart of Gerudo Town. A gift from Wild, then along with whatever he had left on the table in a blue package. He was going to have to thank the Champion when all this was said and done.
“Is there a reason you picked those goddesses?” Ravio started small talk as he was drawing the symbols in white paint with the smallest brush.
“Oh, there’s a saying about them. Din to give me the strength to challenge the day, Nayru to give me the wisdom to learn from my struggles, and Farore to give me the courage to step forward. Legend wasn’t particularly irreverent of the divine, but the saying wasn’t literally about asking for help. Fable had taught it to him after his first adventure, saying she liked to use it as a phrase of comfort when starting her day. He had just picked up the habit from her. It was a nice routine, something positive to latch onto. He figured it would be nice to have the saying on his nails, as a little reminder.
“Oh, that’s interesting.” Ravio paused between one nail and the next, humming in contemplation. “When our triforce was destroyed, so were the records of the goddesses that made it. Even when you and Zelda wished it back into existence, none of the history or religious practices magically could come back.”
“There’s nothing wrong with you taking some of ours,” Legend offered. “Who knows, maybe the same ones made your triforce originally.”
“Hmm, maybe I will. Lolia knows I could use your Goddess of Courage’s help.” Ravio laughed in self-deprecation, but it was light-hearted enough that Legend knew not to make a big deal out of it. He’d already told Ravio he was courageous enough on his own, and the merchant said he’d do his best to believe it. Legend trusted that to still be true.
“Done!” Ravio finished with a flourish.
“No you aren’t, you haven’t done a top coat!” Legend couldn’t help himself, looking at the full bottle of glossy finish sitting right next to them.
“Well yeah, ok, but,” Ravio huffed, cheeks puffing up, “I finished all the art. C’mon, take a look!”
Legend rolled his eyes, but did as asked. Ravio’s handiwork was impressive. The symbols were intricate, and difficult enough to draw on a flat surface with a lot of room. Ravio had done an excellent job making the shapes recognizable and clean. They were clearly hand-drawn, each repeat symbol a little different from the previous, but that added to their charm. It was clearly a work of love.
Careful not to move his hand too much for fear of the paint running, Legend looked over the patterns. Farore appeared four times, on the pinkie and index finger of both his hands. While that was just a reality from having three goddesses and ten fingers, it felt right. If he hadn’t had Courage, he never would have met all the people he did. Never would have welcomed Ravio into his home, or met the Chain on their whirlwind tour across time and space.
“Happy Birthday, Link.”
Legend smiled, sending a silent prayer of thanks.
#lu legend#lu ravio#ravio x link#linked universe#muse writes#muse's ravioli week#raviolink#ravio#ravioli#loz ravio#fanfic#albw ravio#ravio zelda
53 notes
·
View notes
Note
do you have any tips on drawing hands and talons? i can never get either of them to look right!!
im a hater of those "art tutorials" that are like ✅❌ so i tried to avoid doing that. i struggled to come up with any kind of simple tips because im at a point i freehand (lol) most of my hands and its largely second nature. with complex objects my tip is always break it down into parts and simplify it. i didnt realize i tend to minimize the joints i give my fingers until just now lol. otherwise i think of the fingertips as like.....bean shapes? and the knuckles as balls? i also think of the index finger and thumb as a single entity, they usually guide where i position the rest of the fingers and tend to evoke the most character.

for talons its a lot of the same thing, mostly second nature for me, but i do use balls/circles to help me block out the fingertips. i do this for paws too. the ends of the talons are very plump and have claws coming off them. these are all separate parts in my mind: the fingers, the fingertips, the claws.

10 notes
·
View notes
Text
I mentioned earlier that I’m doing traditional art for art class. watercolor specifically
Usually my watercolor process involves the often fraught initial stage of drawing with pencil then an equally perilous period of graphite transfer (that is when I’m not just completely balls out freehanding it)
So when my instructor suggested digital lineart then printing on watercolor paper I was like: that’s allowed?!
I didn’t say that but I was thinking it
my printer is not wide format, so technically the final size I wanted to do would still have to be hand transferred, but practice and planning can go much faster and more accurately with printing and I’ve gone through enough iterations that I may not have to go larger for the result I want.
All that to say trad run is going better than expected and while I have painted this same painting 20 times badly, each time with a few disastrous exceptions was better. The final is near or maybe nigh to strike a more ominous tone.
6 notes
·
View notes
Note
Hello! Wanted to ask if you've got some trick you use to stop feeling discouraged and joyless from drawing when stuff isn't looking the way you want it to?
Much love love, appreciate the answer!
never rawdog a piece you plan on taking seriously!!!
the way my art brain works (disclaimer that this is my process and may not be applicable to other ppl) is that my hand needs to remember how to draw so i always work on something that im fine with turning out shitty before i approach a bigger work
(for spam acc followers this is sort of why i always start with a doodle of my sona: a character im used to, that contains most of the things ill need before tackling more serious things like muscles hands and gesture, or is flexible enough to freehand shapes that get the ball rolling)
a guide i follow as well to help avoid that frustration is this and this by trisketched!! thumbnailing and reference Will save you a lot of wasted effort and will usually show what it was that wasnt working with the drawing
if im at a point where im deep into a piece and still hate how its turning out, its either time to set it aside and work on something else, or put it away completely and either pick it back up or start over the next day
#if you mean with the direction your art is headed in general uhhhhh pick a new vibe#look at a bunch of new artists and play with new brushes#anonymous
36 notes
·
View notes
Text
Week 8
W/C Monday 29th April -
In this week it was really about finalising and planning for the final hand in. We gathered some final visuals that lace realised she needed for the map, as well as adding to the spatial and the final powerpoint. We also had Niamh continuing with the multiplayer mechanism and lace began finalising the movement of each of the characters.
I worked on the extra few visuals that Lace needed, I did a birds-eye view of the playground so that on the map the perspective was more accurate. I used a combination of games that people had commonly mentioned in the questionnaire. Some of these being hula hooping, ball games and hopscotch. I again used photoshop for the larger features of the illustration and then transferred this simple drawing into procreate and using the iPad, filled in the smaller details, like the games and the textures. I found that procreate allows for finer details as there is a wider range of paintbrush tools that you can use, such as regular paintbrush shapes, spray paints, chalk effects, and even more natural shaped brushes like leaf shapes, and grass prints. I used the circle accuracy to make hole hoops to lay on the floor and the chalk brushes to paint on the hopscotch, this was a personal choice as I remember using chalk on the ground to created hopscotch tracks when I was younger. I added textures to the ground with the spray paint brushes to give the floor a rougher, gravel like texture and I trimmed the outside of the play area with grass and textured greenery. I liked this visual best out of all of the drawing so far, I can definitely say that my confidence in using digital software to produce hand drawings has increased. It is something I was really unfamiliar with before started this course as I came from a more traditional fine art background, so it is nice that I can see certain skills improving, especially with creative technologies.
I also needed to do visuals for the actual school building and the library, Liz ended up doing the main school building, using the school of art outline that Niamh had previously created. She used lots of colour which created a really nice and positive kind of energy to the design. I created quite a simple building design, taking inspiration from the school of art building in Birmingham,, I wanted it to look quite traditional with the cartoon like art style that, I think, keeps th game quite fun and playful. The building that I had created we decided could be the library, it made sense that this building was more traditional, I think, as it seems a more studious. I again used a mixture of Adobe Photoshop and procreate for this task. I was able to do most of it on photoshop as this allowed for some cleaner lines and shapes, whereas sometime with procreate, because it is like drawing freehand, it can look slightly rough. I instead just used procreate for smaller sketch lines that added some texture and depth to the drawings, as well as the greenery around the buildings. This again is where the larger variety of brush types becomes useful.
The final visual I made this week was the games section. I had obviously made the playground concept art to begin with which then developed further into the birds-eye view drawing with more detail. I then had to create a home page for the actual game play. We had created a poll on the figma for the kind of game that we should have in the playground. It had to be multiplayer so that we could have each of us play it against another player. We listed a few of the games that people mention in the questionnaire and left the poll on the figma for quite a few weeks prior, so that we could get as many answers as possible and therefore more accurate feedback. The game that we decided on was noughts and crosses. This is a two player game that we would have run while on the "playground" part of the map. We were working it in so that it could be played with two players at the same time. The whole world acting as a portal to one another via the game structure. There is many opportunities for contact through the game, and we though that this actual two player game feature would be a perfect fit for both the brief but also the theme of the game.


This week we also discussed spatial with the students in Kyiv. We each have our own portal which is like our virtual gallery space, and so we just wanted to introduce them to it and discuss how it works and the kinds of things that we are going to uploading in there. Me and Niamh spoke from our group, just discussing what we think we will upload. I think it'd be nice for the Ukrainian students if we can upload the work that they sent to us too se they can see that we have used their design ideas and visuals. We though that the structure for our portal would be, inspiration art, concept art, development and then potentially a video tour of the game playing in the spatial portal, with a communal link to the actual game itself.
As well as introducing them to spatial, we also mentioned possible run throughs of the game and when we were hoping we could actually trial it. Now all of the artwork had been done for cut scenes, the map and the locations, it was just a case of coding the movement mechanisms, transitions and the multiplayer function. We asked when the students would be free and if they'd be interested, to which we got a few responses via the telegram group chat, with a few Ukrainian students that said they'd be happy to take part in the first dry run of the game.
0 notes
Text


Howzitgoin humans,
So... summer's arrived and I was HOPING to work on JOoR, but subsciptions have thrown me a curb ball and my usual workspace won't be available again until the fall.
THAT SAID, I'M NOT GIVING UP!
I've got a few ideas for solutions:
option 1: I draw the beans traditionally. They're gonna look a little rounder, but that'll also let me have more control of their expressions.

Option 2: My art style for this comic lends itself to being ~*a d a p t e d*~ to other mediums pretty well. I could go full paper mode (still gotta fix a few things) for the summer.

Option 3: I find another program and try my best to freehand the characters without their original models.
I have the start of the next update, it just wasn't ready in time to post (seriously, I just had to finish animating the panels, it would have been so pog).
1 note
·
View note
Note
<33
hey that's awesome!!!
aw thanks lol! i picked up knitting during quarantine and added crochet like a year later :) if you ever feel like it, i'd def recommend trying one or the other!! i got my first pair of knitting needles and a ball of yarn for like 3 bucks at the thrift store, pulled up some youtube videos, and started a really terrible headband. and now, four years later, i'm freehanding my own clothes!!!! it's been amazing :)
do you do any arts/crafts like that? (sry idk how to phrase that lmao)
OFC LOVE <33
hi venus!!!!
how's it going hon?
hi, sorry i forgot to respond to your last ask :(
it’s a lot right now. im not really talking to my boyfriend, and just i kind of feel like shit. i just want to sleep.
how’s it with you?
18 notes
·
View notes
Text
he. is. so. cute. i. want. to. give. him. the. world.

#art#sketch#freehand#fanart#black ink#ink#bnha fanart#bnha#mha fanart#mha#my hero academia amajiki#amajiki tamaki#tamaki fanart#suneater#suneater fanart#give this boy love and appreciation he deserves#the prettiest the cutest little ball of anxiety#i just want people to love him so much
44 notes
·
View notes
Photo

Anything I want for StarStabber Zirc that I can’t find a public domain source for, I can just freehand it with some pixel art. Good video games should always have spiked balls, but after exhausting everything I could find for morning-stars, naval mines, and Ernst Haeckel’s illustrations of diatoms, it doesn’t look like I can find anything simple but sharp enough, so here’s my imitation of the classic Sonic 1 Orbinaut spikeball in a variety of colors
75 notes
·
View notes
Text
I've been fighting to find time to crochet in the past 9 months (and incredibly, it's only getting harder!) I've also noticed that since having a baby, my crafting interests have definitely shifted! It's so much harder to find the bandwidth for amigurumi, but can you believe a baby hat can be whipped up in like half an hour!? Here's a little snapshot of my crafting postpartum!

"Milestone blanket" letters/numbers:
I didn't even realize I wanted to do these until Solly was born, and thought if I did some crochet it would add a more personal twist! I am glad I did because the time really does fly by and it's nice to look back month by month and compare how he grows! I used the amazing free patterns from HappyBerry Crochet, following along on her youtube videos is a delight! I then used this really helpful tutorial on stiffening with cornstarch from Heart Hook Home to keep them in shape, which is helpful now that Solly has very grabby hands!
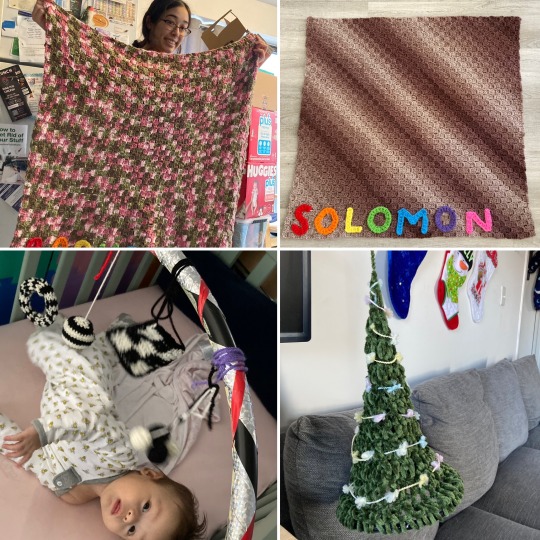
Baby blankets:
I actually made two blankets after baby came! One for little Solly and one for his slightly older cousin! I used this super helpful tutorial by Em's Fiber Arts and of course the letter tutorials from HappyBerry again! I've always wanted to use an Ombre yarn, but of course with amigurumi that doesn't make a lot of sense - a baby blanket was the perfect opportunity!
High contrast mobile:
This was actually mostly done pre-baby! I freehanded the striped sphere around a cat toy, the ring has a little shaker of pellets, the tiny balls have a bell in them, and the checkerboard that I made with this pattern from Dream A Little Bigger has some crinkly plastic in it! I didn't have the idea to put them on a hula hoop over the crib until it was necessary, but they really helped reset the brain an angry little baby for the first few months!
Christmas tree:
Our little New York apartment never had room for a Christmas tree, but I thought it would be fun to have a little decoration! I actually crocheted around a circle of plastic cut from a grocery store cake box and freehanded a cone shape - I used some weird fat yarn for the tree and some weird pompom yarn for the garland - sometimes you just have to dig around in your stash to see what you have!
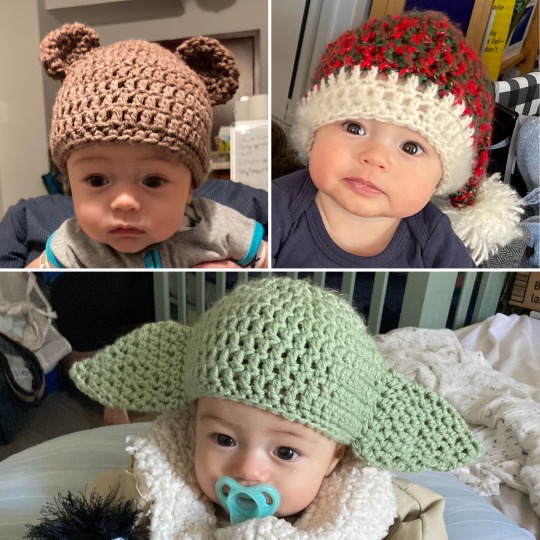
Hats:
Once again I used RepeatCrafterMe's owl hat pattern as the base. I made a little bear hat with the leftover yarn from Solly's blanket, a little Christmas hat, and of course the Grogu hat/ears for Halloween! I free-handed the ears for the two ear hats and just kinda winged it on making the longer tail of the Santa-style hat!
#crochet#diy#yarn#babyblanket#happyberrycrochet#emsfiberarts#dreamalittlebigger#repeatcrafterme#babyhat#babymobile#milestoneblanket#bearhat#babyyodahat#groguhat#santahat
26 notes
·
View notes