#html & css
Explore tagged Tumblr posts
Visit Tumblr Blog
Explore Tumblr blogs with no restrictions, modern design and the best experience.
Last Seen Tumblr Blogs


Fun Fact
The “We are the 99%” Tumblr blog became the slogan for the Occupy Wall Street movement.
Text
coding got me saying shit like “target the child” “assign its class” “override its inheritance” like the third wife of a dying oil baron discovering his of-age son born out of wedlock
51K notes
·
View notes
Text
Going to put all this in its own post too by popular request: here's how you make your own website with no understanding of HTML code at all, no software, no backend, absolutely nothing but a text file and image files! First get website server space of your own, like at NEOCITIES. The free version has enough room to host a whole fan page, your art, a simple comic series, whatever! The link I've provided goes to a silly comic that will tell you how to save the page as an html file and make it into a page for your own site. The bare minimum of all you need to do with it is JUST THIS:

Change the titles, text, and image url's to whatever you want them to be, upload your image files and the html file together to your free website (or the same subfolder in that website), and now you have a webpage with those pictures on it. That's it!!!!! .....But if you want to change some more super basic things about it, here's additional tips from the same terrible little guy:

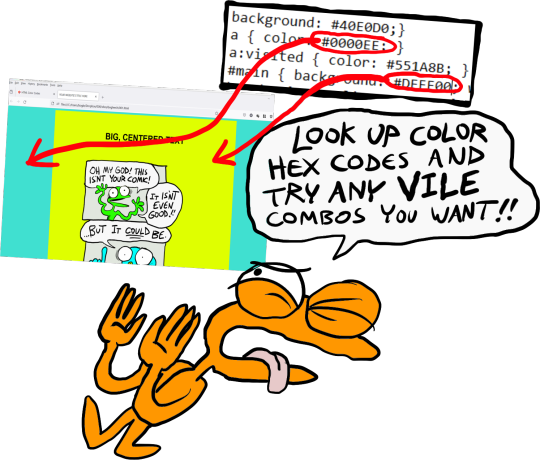
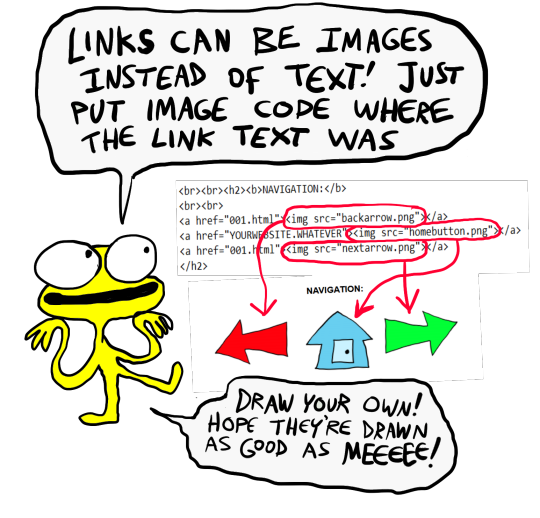
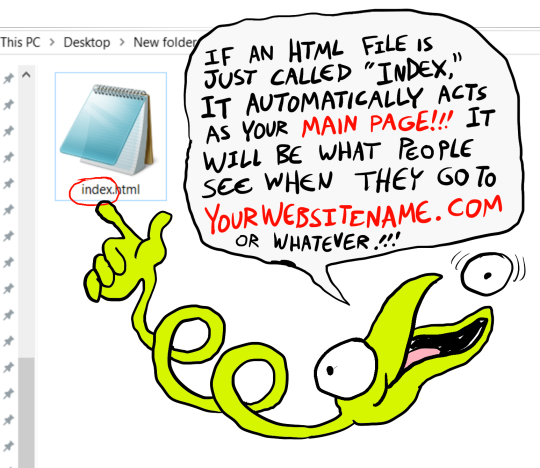

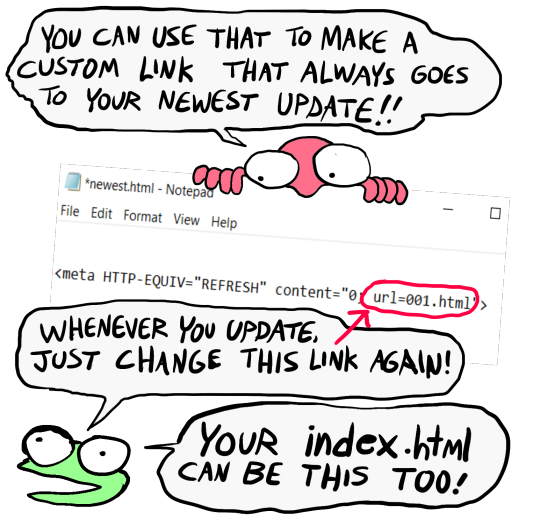
That last code by itself is: <meta HTTP-EQUIV="REFRESH" content="0; url=001.html"> Change "001.html" to wherever you want that link to take people. THIS IS THE REASON WHY when you go to bogleech.com/pokemon/ you are taken instantly to the newest Pokemon review, because the /pokemon/ directory of my website has an "index.html" page with this single line of code. Every pokemon review has its own permanent link, but I change that single line in the index file so it points to the newest page whenever I need it to! While I catered these instructions to updating a webcomic, you can use the same template to make blog type posts, articles or just image galleries. Anything you want! You can delete the navigational links entirely, you can make your site's index.html into a simple list of text links OR fun little image links to your different content, whatever! Your website can be nothing but a big ugly deep fried JPEG of goku with a recipe for potato salad on it, no other content ever, who cares! We did that kind of nonsense all the time in the 1990's and thought it was the pinnacle of comedy!! Maybe it still can be?!?! Or maybe you just want a place to put some artwork and thoughts of yours that doesn't come with the same baggage as big social media? Make a webpage this way and it will look the same in any browser, any operating system for years and years to come, because it's the same kind of basic raw code most of the internet depends upon!
#art#website#websites#resource#resources#webcomics#html#html css#css#neocities#webhosting#old internet#as soon as I drew this shitty scribble guy I uncontrollably interpreted him with Weird Al's voice if you wondered
9K notes
·
View notes
Text


misc coding stamps graphics
#carrd#carrd resources#carrd stuff#neocities resources#webcore#neocities#website#stamps#neocities stamps#2000s#old web graphics#web graphics#web resources#software#coding#javascript#c++#python#html css#rentry decor#rentry#rentry graphics#old web
4K notes
·
View notes
Text


☆ resources to make your own rentry/bundlrs border!
sources from da-lace.com f2u, like + reblog appreciated!
i forgot da-lace existed and then i remembered.. anyway have fun with these! no need to credit since i didn't make them
#☆ ◟ my resources !#rentry#rentry resources#rentry inspo#rentry metadata#rentry border#bundlrs border#bundlrs#rentry decor#bundlrs resources#html css#rentry stuff#editblr
2K notes
·
View notes
Text
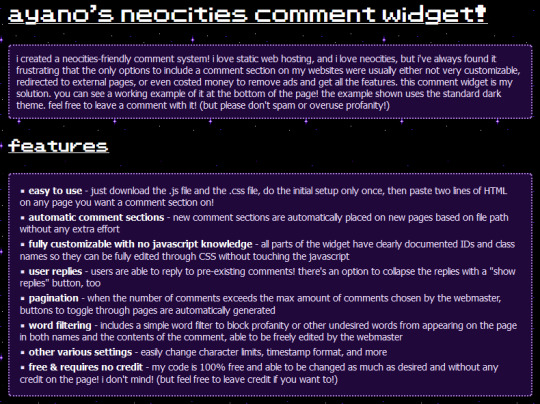
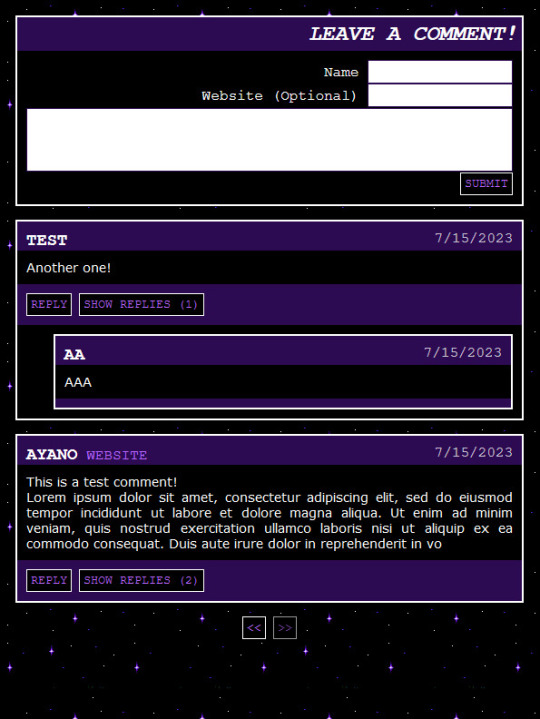
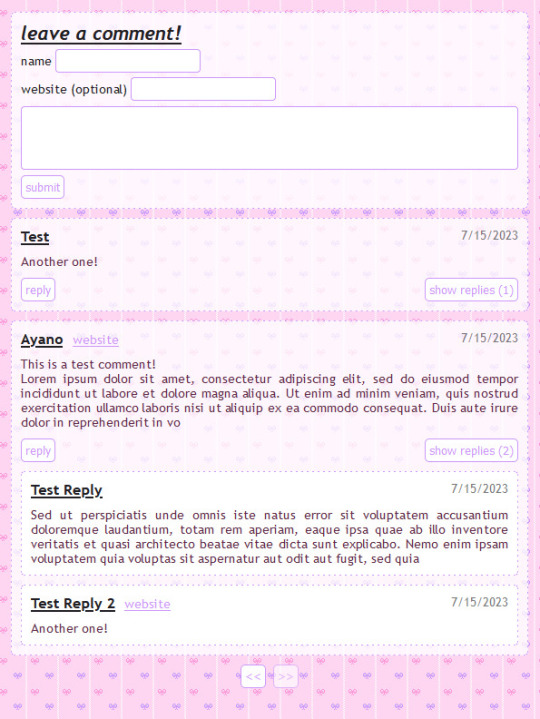
i made a free to use, 100% customizable comment widget for neocities users! it's really easy to install and add comment sections to any page. no more boring cbox or external guestbooks if you don't want them! and it comes with two themes to get you started!! please enjoy! you can find it here on my personal site!
#neocities#indie web#old web#webdev#geocities#javascript#html css#ayano was here#ayano.txt#i'm so proud of this!! yayy
6K notes
·
View notes
Text
hello kitty ao3 skin
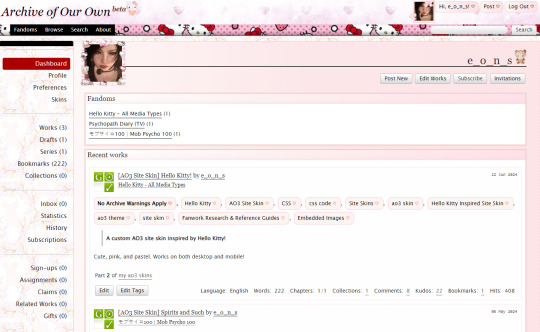
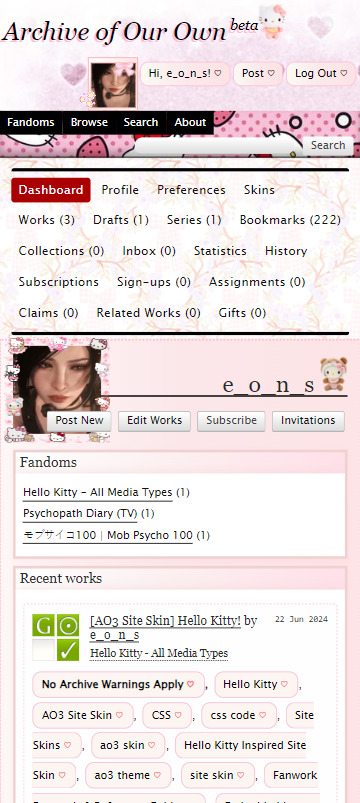

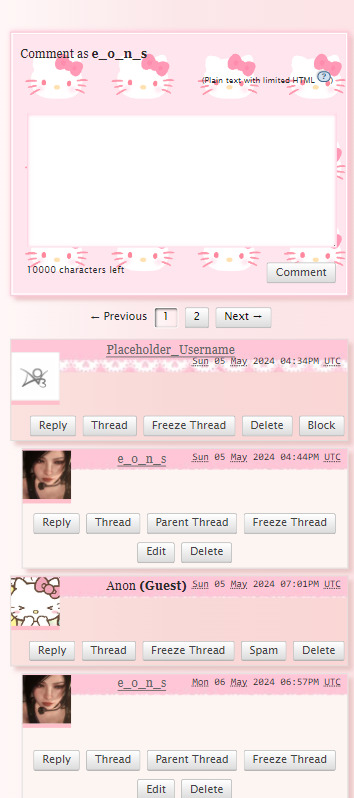
get the skin and learn how to install it HERE :)
#hello kitty#ao3#ao3 site skin#ao3 skin#html#css#html css#cute#sanrio#pink#aesthetic#archive of our own#sanriocore#pink aesthetic#coquette#web design#pink coquette
519 notes
·
View notes
Text
Essentials You Need to Become a Web Developer
HTML, CSS, and JavaScript Mastery
Text Editor/Integrated Development Environment (IDE): Popular choices include Visual Studio Code, Sublime Text.
Version Control/Git: Platforms like GitHub, GitLab, and Bitbucket allow you to track changes, collaborate with others, and contribute to open-source projects.
Responsive Web Design Skills: Learn CSS frameworks like Bootstrap or Flexbox and master media queries
Understanding of Web Browsers: Familiarize yourself with browser developer tools for debugging and testing your code.
Front-End Frameworks: for example : React, Angular, or Vue.js are powerful tools for building dynamic and interactive web applications.
Back-End Development Skills: Understanding server-side programming languages (e.g., Node.js, Python, Ruby , php) and databases (e.g., MySQL, MongoDB)
Web Hosting and Deployment Knowledge: Platforms like Heroku, Vercel , Netlify, or AWS can help simplify this process.
Basic DevOps and CI/CD Understanding
Soft Skills and Problem-Solving: Effective communication, teamwork, and problem-solving skills
Confidence in Yourself: Confidence is a powerful asset. Believe in your abilities, and don't be afraid to take on challenging projects. The more you trust yourself, the more you'll be able to tackle complex coding tasks and overcome obstacles with determination.
#code#codeblr#css#html#javascript#java development company#python#studyblr#progblr#programming#comp sci#web design#web developers#web development#website design#webdev#website#tech#html css#learn to code
2K notes
·
View notes
Text
I updated my site again! Let me know what you think ★~(◡﹏◕✿)
#old web#oldweb#webcore#neocities#nostalgiacore#early internet#oc#websites#html css#animecore#weebcore#2000s nostalgia#2000s internet#otakucore#pixel aesthetic#pixel graphics#web design#web graphics
2K notes
·
View notes
Text
I might not be a programming language but at least I'm hot as fuck. You ever seen web pages without me? Fucking black and white times new roman? Talk about drab. javascript always gets all the hype but I'm definitely the pretty one in the family.
383 notes
·
View notes
Text


Here’s all the borders I’ve made! Feel free to use them, credit is appreciated!
#art#f2u#stamps#f2u graphics#pixel art#artists on tumblr#graphics#stamp#artist#2010s#pixels#web graphics#nostalgia#template#stamp template#borders#html css#neocities#rentry decor#web decor
277 notes
·
View notes
Text
Neocities Websites for Decor (& Other Resources)
9/4 2:10pm
i've been working on my neocities website and wanted to compile a bunch of places where one can find decor. this is not an extensive list, but rather a bunch of places where you can start finding resources.
please note that various pages could strain the eyes, including flashing lights or colors. pages called 'blinkies' usually have flashing colors throughout. [* = prominent flashing lights]
all websites, resources, and thoughts are beneath the cut
decor
effects for mouse cursors, text, and sites - https://www.mf2fm.com/rv/
assorted decor, images, and more - https://shishka.neocities.org/shishka/toybox
* random gifs from the internet archive - https://gifcities.org
https://pinkukingdom.neocities.org/toybox
http://whimsical.heartette.net/material [has tos you need to follow]
https://cinni.net/?z=/toybox/ [love this website so much]
* assorted early internet graphics - https://www.glitter-graphics.com
https://graphic.neocities.org
https://strawberry-gashes.gensoukai.net/v2/
archived images - https://web.archive.org/web/20100211160439/http://neskaya.net/pixels.php
* https://kawaiiness.net/home.php [potential eye strain]
https://www.asterism-m.com/item/ [japanese site]
https://pixelsafari.neocities.org
https://foollovers.com/mat/index.html [japanese site. has tos]
* https://gothiclolita.neocities.org/materials
https://sozai.pooftie.me [pastels. very low contrast, hard to read warning]
https://scripted.neocities.org
https://arunyi.art/#goodies
https://nonkiru.art/resources
* https://animatedglittergraphics-n-more.tumblr.com / @animatedglittergraphics-n-more
https://drive.google.com/drive/folders/1eQx_UiPvEvI4ZZECoPOuRrLhIE_6XbBy [content guide here... 4k+ gifs and graphics by @topadie]
* https://cutewebgraphics.tumblr.com/directory / @cutewebgraphics
https://pngfarm.tumblr.com / @pngfarm
https://lostsozai.tumblr.com / @lostsozai
decor directories
https://directory.cinni.net/sozai/
https://pixelsafari.neocities.org/links/directory/
https://www.tumblr.com/gender444/680981849679511552/favorite-sozaiblog-materials-sites-fool-lovers
definitions
(for those who don't know and/or are just getting into website creation)
webmaster: person who coded/created the website
favicons: small icons or graphics, usually 16x16 pixels.
pixels: graphics either custom-made or found. i've seen this term used for favicons, adoptables, and other graphics.
emoticons: old term for emojis. typically custom emoji expressions
* blinkies: thin flashing or sparkling banners, usually with text, an image, and flashing lights. collectible.
toybox: collections of favicons, stamps, blinkies, buttons, and more. all up to the webmaster's discretion and preferences
* glitters: glittering or shimmering text or images
stamps: collectible rectangular images, usually 99x56px
buttons: images that are hyperlinked to other websites. often custom-made for one particular webmaster or site.
avatars: typically 100x100 pixel images
other websites
beginner's guide to html and css - https://webguide.neocities.org
dnd style character generator - https://harlekine.neocities.org
templates/themes - https://neothemes.neocities.org
photo editor - https://photomosh.com
rainbow text maker - https://www.glitter-graphics.com/generators/rainbow.php
various other resources - https://scripted.neocities.org
learn more about websites & neocities - https://sadgrl.online
assorted resources - https://www.tumblr.com/punkwasp/725206601551773696/neocitiesindie-webmastery-resources
get started with website creation - https://www.tumblr.com/oddmerit/685644129978499072/note-cause-im-getting-sick-and-tired-of-terfs
all types of resources - https://punkwasp.leprd.space/resources/
* = prominent flashing lights/colors

i suggest not linking back (aka hotlinking) to the resources on the website. instead upload it yourself onto either neocities or an image hosting site and include credit. this way, if the person hosting the image deletes their page or loses the image somehow, your website will still be fine. (i didn't do this and had to find everything all over again... )
i have found that the best websites to use as companions to neocities are w3schools, pinterest, tumblr, and any image hosting site. w3schools for coding tutorials. pinterest for inspiration or for graphics. tumblr for any type of decor and advice. to edit my code and have a live preview, i use codepen.io.
since you read through all this, maybe take a look at my neocities site and follow me! <3
#neocities#html#css#html css#neocity#favicon#web graphics#web design#web decor#pixel art#pixels#banners#webcore#read later#resources#website#carrd resources#indie website#indiedev#webdeveloper#2000s web#old web#geocities#geocity#neopets#neo y2k#y2k aesthetic
1K notes
·
View notes
Text
index (I hope to follow this tag system lol)
#blinkies #stamps #gifs #favicons
edit: thx for the love on this post. im going to try and continually update this!
⇩ ⠀websites that are FULL of other web graphics below ⇩ ⇩ (+ some html tools!) ⇩
Graphics: blinkie maker : make your own blinkies! DOLLZ REVIVAL : a revival of pixel dolls where you can create and share your own. very cute! GlowTxt : create glowing transparent text gifs that say whatever u want HOARDER'S PILE : contains blinkies, buttons, stamps, and teddies plasticdino.neocities.org : blinkies Glitter Graphics : contains gifs, blinkies, dividers, and just sooo many web graphics Cute Kawaii Resources : contains gifs, blinkies, stamps, favicons, dividers, buttons, fonts, literally everything you need. its an insane resource Adrian's blinkie collection : collection of blinkies, stamps, and buttons ☆ (supplies.ju.mp) : blinkies, stamps, buttons, & favicons twigbranch.carrd.co : blinkies lallys.carrd.co : blinkies, stamps, dividers, and other resources Bugleeblinkie.carrd.co : blinkies, and 3 very special gifs at the end ;) unshinesblinkies.carrd.co : blinkies The 88x31 GIF Collection : buttons. there are 5 parts! huge collection! Bonnibel's Graphic Collection : blinkies WELCOME TO GIFCITY : blinkies, dividers, favicons, stamps cass-tastrophe.carrd.co : blinkies, stamps kotatsuOS : blinkies Cute web graphics : blinkies, stamps, dividers, and a LOT of other graphics, all very cute
HTMLS/neocities Stuff: MDN (mozilla.org) : if you're just starting out like me this is super helpful HTML Tutorial (w3schools.com): same here! (offers other programming languages as well!) Accessibility Checker(Free Scan) : a site you can use to check accessibility/ADA compliance when making your website! it will point out what needs to be changed. it is free, but they also offer paid services if you need more help imagecolorpicker.com : hex code picker. i use this one because you can upload an image, paste clipboard, OR type in the website and it'll grab a screenshot for you! something simple that was made really well. cssgradient.io : helps you make css gradients for backgrounds or whatever else you need them for smartgb.com : a free guestbook service FC2 Counter! : free "site visits" and "online now" counters. fully customizable Unclosed Tag Checker by Alicia Ramirez : does as it says, checks for unclosed tags (although I recommend using a program that does this as you write anyways. I use Visual Studio Code. Status Cafe : an updateable and embeddable status that you can stick anywhere on your site! it is mostly customizable with CSS but I have noticed a few small quirks with it
e10's web (neocities.org) <- shameless site plug. show it some love :P
#blinkies#stamps#favicons#gifs#old web graphics#old web aesthetic#old web stamps#old internet#old web#old webcore#2000s web#90s web#html#html css#html5#css#htmlcoding#web design#web resources#early web#early internet#neocities graphics#neocities#geocities#gifcities#web graphics#webcore
390 notes
·
View notes
Text
For everyone who wants this beautiful AO3 site skin by tealtiam but just slightly altered, here is the code in the form of a Google doc.
I didn't know what else to use as an example so I just used my own fic 😅
✨ Original:
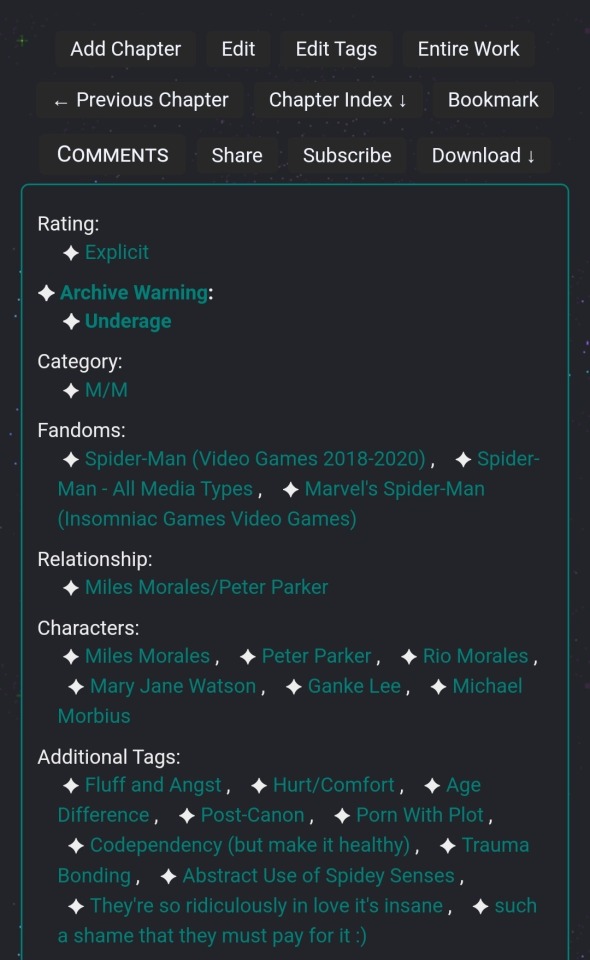
🌙 My slight alterations: the font for all the buttons at the top are now exactly the same. The stats icons have been changed into minimalist designs from @ao3skin's skin.
The body text has been scaled down to fit smaller screens by instead following the font size you already have set up on your own device (for the ".userstuff p { font-size" on the second line of the google doc, 100% on the body text didn't work for me in getting it back to the default font size of my device so I changed it to 10pt. However, this might be too small for you so I suggest playing around with the font size until you're happy with it or just reverting it back to 100%).
And lastly, the font for the title/chapter titles of fics have been reverted back to the original formatting instead of being in all caps lock— everything else in the site skin has remained unaltered. The different colored tags for archive warnings, relationships, characters, and tags will still be there when searching for fics. Though I personally love it, you might not, so take that into account!!!! 🥰
532 notes
·
View notes
Text

TERMINUS OS- DEEP WEB HIDDEN SERVICE THEMED NEOCITIES TEMPLATE
FEATURES: -LOADING SCREEN -GLITCHING TEXT -SUBTLE ANIMATIONS -SMOOTH TRANSITIONS
MADE BY NUMBPILLED ON KO-FI
LIVE PREVIEW
DOWNLOAD HERE
#neocities template#cybercore#css#html#html css#htmlcoding#old web graphics#neocities#matrix#template#websites#neocities theme#neocities themes#html theme#htmltutorial#javascript#landingpage#deep web#hacker terminal#glitch#glitching#retrowave#web resources#download#psicodelia#template download#neocities resources#old web#web graphics#neocities graphics
128 notes
·
View notes
Text
So i was talking to my friends about how sad it is that art and media is seen as content these days, and not as art. mostly just to consume adn then scroll past, and i was thinking hey wouldn't it be cool if people had their own little websites? people used to do this but now everything is done on big platforms. and i had this cool idea of a website that hosts little websites that you can customize and instead of having a feed, you'd share websites YOU like on your own website so people look around!!!!
and then my friend told me THIS ACTUALLY EXCISTS
ITS CALLED NEOCITIES
ITS A FREE WEBSITE, ITS OPEN SOURCE, NO ADS BECAUSE ITS 100% DONATION FUNDED AND ITS BEAUTIFULL

ITS ALL I EVER WANTED, its a perfect space to set up all you're creative endevours and art! to make galleries or to just have your own website!!!
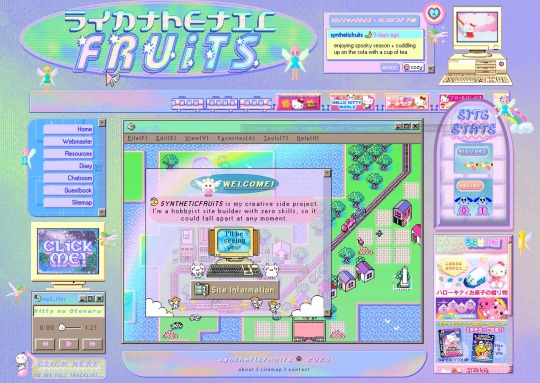
but some people do INSANELY cool things on here!! like
They made a beautifull and unique website thats fun to explore! just messing around clicking on stuff brings you to unique and interesting places!!!!

it is perfection, look at how interesting it is!!!!! there is even more that i couldnt fit into 1 screenshot.
compare this to the boring websites you scroll on daily, wouldnt you much rather find and explore websites like these? i feel it would be much more rewarding to "explore" artists, then to scroll past them. you genuinely have to DO something to enjoy it and thats amazing.
the only thing that is holding Neocities back is the fact you have to know a bit of html and css to make a website BUT THATS SUPER EASY TO LEARN!!!!
SO GO NOW, MAKE YOUR OWN CUTE AND COOL AND INTERESTING WEBSITE PLEASE, LETS GO BACK TO A TIME WHERE WEBSITES LOOKED COOL AND INTERESTING
ALSO FOLLOW MY WEBSITE I ONLY JUST STARTED SO ITS SHIT BUT THATS THE BEAUTY OF IT
TO REPEAT ONE LAST TIME, A FREE, ADLESS, OPEN SOURCE, WEBSITE HOSTING PLATFORM, THAT LETS YOU MAKE AND HOST YOUR OWN WEBSITE FOR FREE, WITH A COOL AND UNIQUE COMMUNITY
#art#artwork#pixel art#pixel artist#digital art#artists on tumblr#neocities#old internet#old web#website#html css#code#coding#html#htmlcoding#open source#social media#social networks#digital artist#small artist
109 notes
·
View notes