#gaussian blur tool my beloved
Explore tagged Tumblr posts
Text
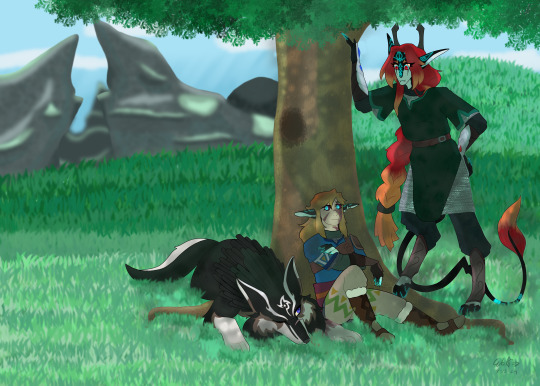
Tumblr has Crunched my boys so click for higher quality (hopefully)
@foooxobsessedperson our little guys are Too Powerful for tumblr smh
#my art#digital art#legend of zelda#breath of the wild#Link#linksonas#legend of zelda au#twili#wolf link#Mild#Dire#Rinka#so um. the original file was almost 30 mb and nearly crashed my laptop when i tried to save it#made a little Oopsie#but i got it down to 15 mb so hopefully the quality isnt complete ass#gaussian blur tool my beloved#experimented with brushes and lineart and had fun but i am Never lining with this brush ever again#my ocs#legend of zelda oc
36 notes
·
View notes
Text
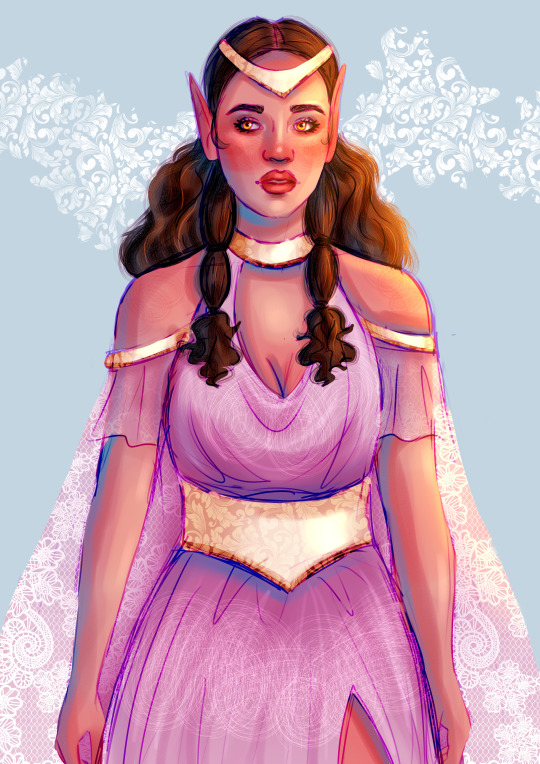
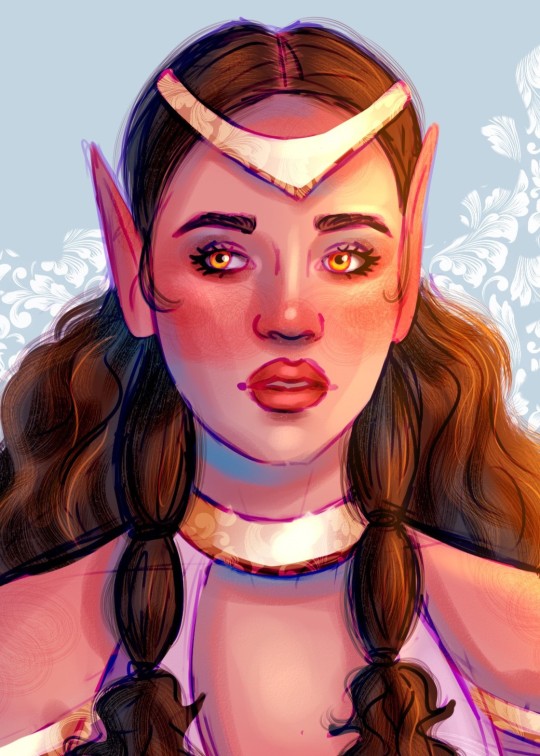
Finally upgraded to SAI2.0, years too late. Very excited to play around with all the new features!
#foliage and lace brushes my beloved#text boxes my beloved#gaussian blur my beloved#art#taraart#my art#sai#sai paint tool#digital art#character design
3 notes
·
View notes
Text


A couple of practice renders
5 notes
·
View notes
Text

Oc art time! Don’t know if I’ve posted art of her before, but this is Ember
anyway procreate Gaussian blur and bokeh light tools my absolute beloved
#Digital art#oc art#fantasy art#fantasy#procreate drawing#procreate#dragons#dragon art#dragon drawing#digital drawing#digital illustration#original character art#dragon character#dragon oc#enchanted563 art#*fucking dies on the spot*
3 notes
·
View notes
Note
how do you normally make gradients in. Ppppppppppprrrrrrroooocreaaaateee sssssssssinnnceeeeeeee it doesn’t have a gradient tool? I normally just put my colors in a row however I need a Gaussian blur it? if I have to do it in a specific area and not just over the whole canvas I use a clipping layer
Yeah i do pretty much that. Sometimes i try to use the blend tool instead but it depends how many colours or how much of a gradient i need. The guassian blur doesnt even work well half the time tho just gotta make the best of what you got :/
The guassian blur thing is good for when i just want a bit of a gradient on part of the background but if i want a bigger one or one with more colours then it kinda falls flat for me at least
Sometimes alternatively i like to use i think its the water colour brush on a slightly lower opacity. It takes more effort but depending on the vibe or how much effort ur willing to put in it can look better than using the guassian blur.
I do still wish it had a built-in gradient tool it would be so cool i think. I love gradients my beloved <3
#gradients mmmmmmmmmmmmmmmmm#i love putting little gradients in the background or on parts of characters#probably how i started doing the brush one#it can be a bit fiddly and annoying but its fun#petition to procreate update and give me a gradient tool plz#i like the drawn out part of this question also#Tree Man Posts#asks#procreate
1 note
·
View note
Note
Hi Meg! Hope you're doing well (and happy New Year!) I was wondering if you could give any tips on layers when it comes to digital art? I'm slowly learning digital and slowly getting the hang of it, as I'm more of a traditional artist rather than digital, but it's the layers that gets me and that confuses me the most and I was wondering if I could get some tips or advice from the master?😅 I've been in love with your style for a long time and was I've always wanted to know how you do it
Hey there!
First of all thank you so much! 💕
My coloring and shading style especially have gone through quite some changes since I first started digital art - shading with black and the airbrush tool, which doesn't equal art being bad, but most of the time soft shading (like with the airbrush) in black looks dull and takes the colorful out of your drawings. If it is part of your style or intention, obviously you can share with black too. If done right, like in many superhero comics for example, it looks incredibly impressive. (The shading in those are sharp though most of the time, not soft)
I got carried away, sorry. Just wanted to say that my technique/style changed and so will yours with time!
Second, I am by far no master. I've been drawing digitally for almost 6 years now but I'm still learning a lot.
However, I always try to help people and when directly asked to, how could I refuse.
I'm going to show how I draw simpler pieces like the current Madrigal family portraits with the help of Luisa, our beloved, and will mainly talk about the way I use layers.
Disclaimer: my way is not the only way and if you use layers differently that's fine, there are multiple ways to use layers and the tools connected to them. I'm NOT trying to tell you how to use those but am simply, by request, trying to explain how I use them
✧・゚: *✧・:*✧・゚: *✧・
Program used: Medibang Paint Pro
Media: Samsung Galaxy Tab S6 Lite (this is not sponsored by Samsung lmao I wish)
I start out with a blank canvas and sketch my intended motif
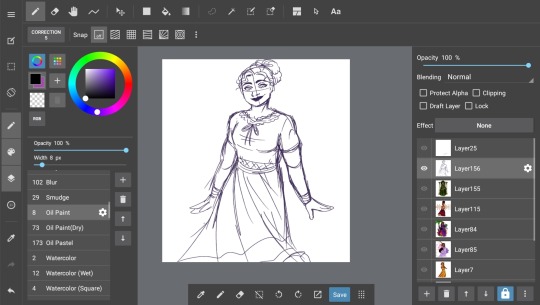
Luisa doing a little spin (indicated by the skirt) ♡
Now I do the lineart. It's not gonna be ideal in this case because that's the style I'm going for in this series but that's secondary.
I add a layer. Most of the time it should be a button with a plus.
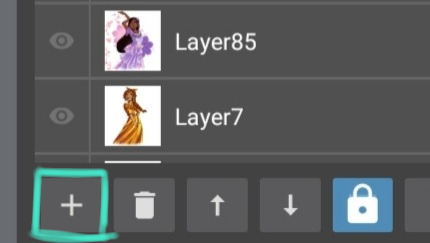
The plus let's me add layers, the bin delete layers, the arrow up is to move a layer up and the arrow down is to move a layer down (though I do that more by just directly holding down my S pen on the layer and move it as far up or far down as I want), ignore the lock, the 3 dots are other features like duplication of a layer, gaussian blur etc.
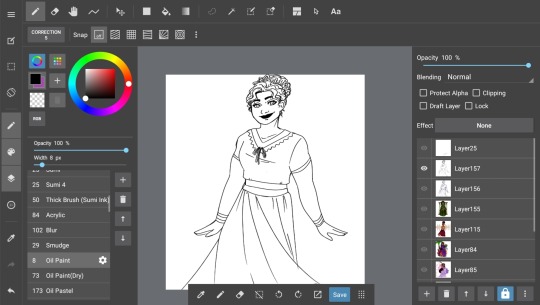
After the lineart comes coloring. I start with skin (eyes etc. included sometimeson separate layers sometimeson the same lol), then hair, then upper clothing, bottom clothing, and lastly accessories - though I also tend to just put them on the same layer as one of the clothing layers.
The thing with layers is that when you fill an area with color, add a layer underneath it and draw over - or rather under - the previously colored area it will be on the layer but it will be covered up by the layer above it.
I'm bad at explaining but basically we artists are inpatient a lot especially in coloring and in traditional art drawing out of the line or accidentally drawing over already colored skin or anything else so with traditional art you have to take care of that.
Layers make your life so much easier. Just draw the area out. If it's underneath another layer f.e. skin, it is covered by that layer.
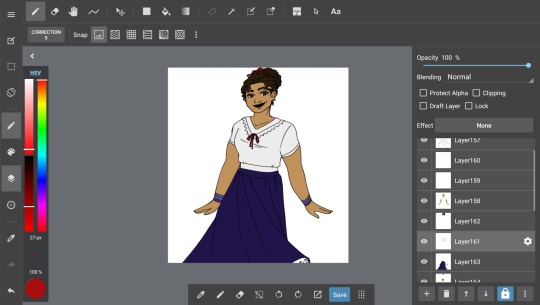
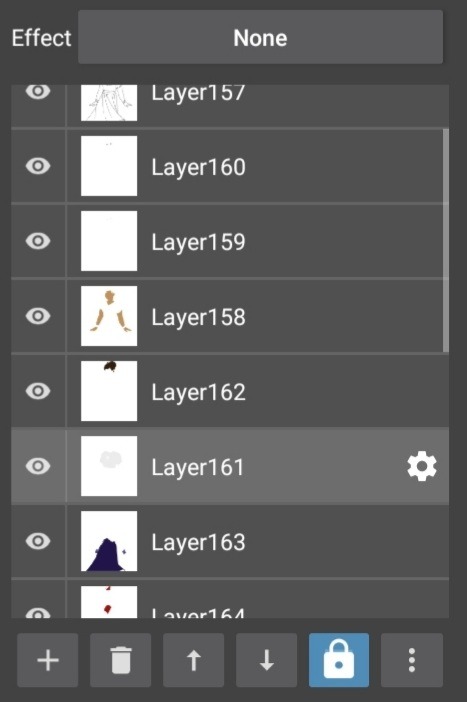
You can see this here with the red in the bows (layer 164). They obviously are drawn over their actual lines but because they are layered underneath the layer for the blouse and hair, that doesn't fill the area of the bows (because if it would there'd be no red there as it's covered up), the red does not actually draw over the intended line. I hope that makes sense- 😭😭
Another cool feature digital art gives you is ✨clipping✨ that also saves you sanity you'd spend on not drawing over.
I use it for shading a lot.
I add another layer, tick the box saying "Clipping" and everything I draw on that layer will only be on the layer I clipped it to. For example, if I clip a layer to shade skin, I can only draw on the skin. Not the hair, the blouse or anything else. It's literally clipped to the skin layer.
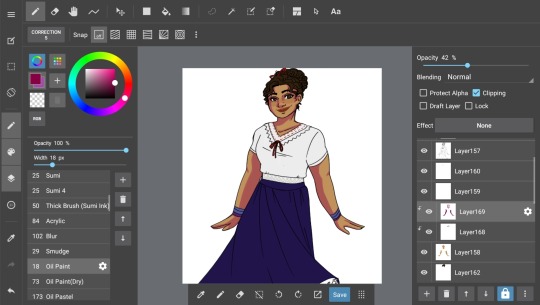
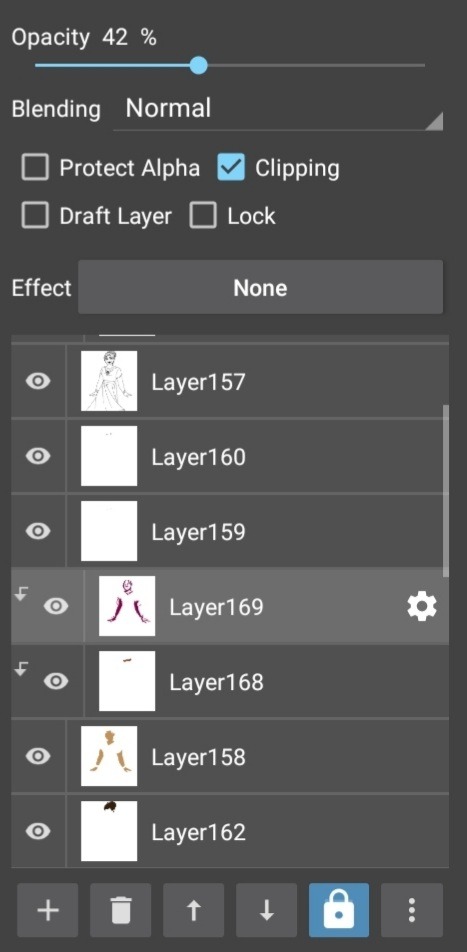
The great thing: You can clip as many layers on top as you want. Clipped layers can't be clipped to another clipped layer. It'll always be the skin layer.
(Used the clipping tool on the lineart, specifically the lips as you maybe noticed. This means you can change the color of the lineart or any desired colored area with the clipping tool)
("Protect Alpha" works similar but I haven't exactly used it a lot lol)
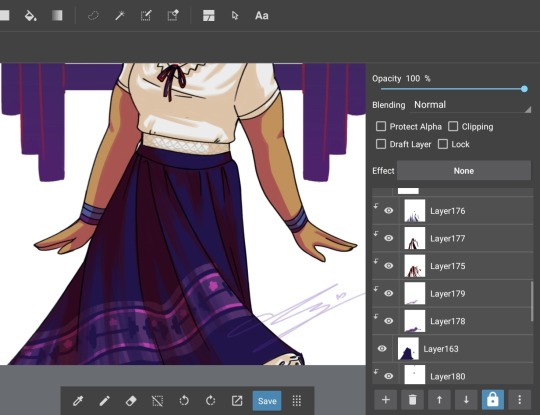
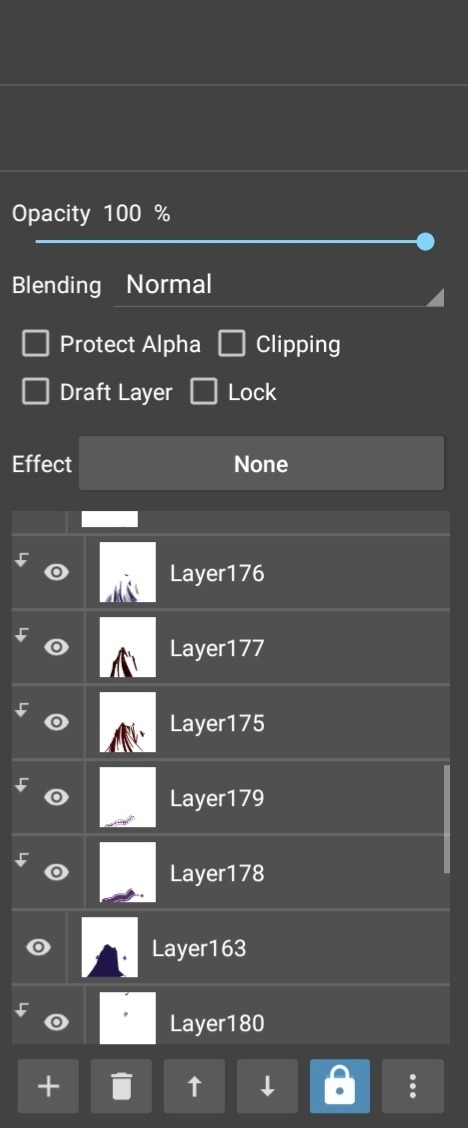
(A not clipped layer is selected in this screenshot thus Clipping is not shown as activated)
And that's basically it.
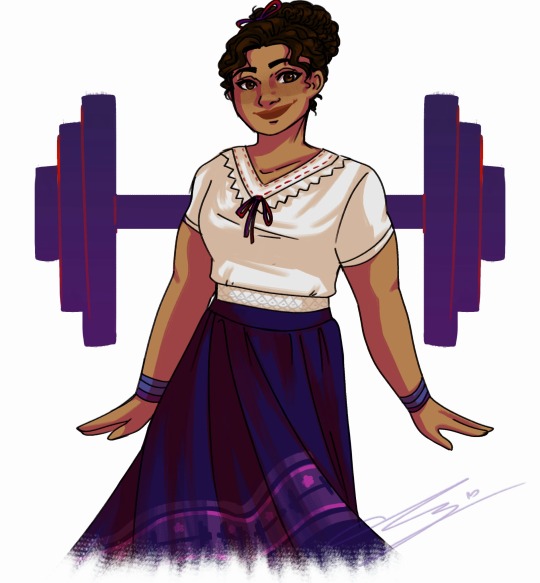
It's worth mentioning the "Blending" application. Experiment with it. Try out different blendings like "Add" (makes color on the layer lighter/ almost glow) or "Multiply" (makes color on the layer darker) and many others. Go wild.
✧・゚: *✧・:*✧・゚: *✧・
Someody make a counter for the term "layer" and "layered" 🗿😭
Hope this was somewhat helpful I'm seriously terrible at explaining especially in a language that is not native to me so uh if something's unclear please tell me -
Happy drawing!~
#long post#meg trying to teach art again#medibang#art tutorial ig???#there's probably so many grammer mistakes and violation of the English language here im so sorry 😭
22 notes
·
View notes
Note
not sure if you’ve answered this before, but what’s your process look like when you make an amv? i’m just curious and in constant awe of ppl who can make videos like you do :)

hello all!!! i have answered this before and i have a vid help tag with other asks i’ve gotten about stuff like this! but i’ve gotten several more messages along these lines so i’m just going to answer a bunch of them together (under a cut since i love to ramble about editing lol). i do just wanna say i’m definitely not the authority on video editing and obv everyone has their own techniques!
edit: i just finished typing all this up and it’s SO long so sorry in advance LMAO god bless anyone who reads this entire thing
so i work in news tv and we have a very specific workflow for writing scripts, sourcing video, producing, and editing. i’ve just applied that to making amvs! for every video i make, i copy the song lyrics into a google doc and adjust them to match the song i’ve cut (i often will trim songs for time and/or content purposes). then i start planning! i’ll mark down what clip i want to use for each lyric next to that line, and any sound bites i want to use (with episode numbers!). i’ll color code between video and sound bites and lyrics, so my scripts end up looking something like this (for my honeybee amv):

doing the planning ahead of time makes everything much easier when it’s a video that spans the whole show or involves a lot of sourcing, like honeybee or sports analogies. that way when i get to the actual editing process, i already know what i’m going to do and have a game plan. for videos like happy ending or believe it or not, where i’m mainly just pulling from a few episodes, i can just plan it in my head as opposed to writing it all down, and produce as i edit. obviously i do make in-the-moment decisions while editing—sometimes a shot doesn’t work the way i thought it would, or i go where the video takes me—but planning ahead definitely helps. i know some people use spreadsheets as well, with columns for lyrics, video clips, and sound bites if applicable. once you find a system that works, it actually goes pretty quickly.
as for sourcing clips themselves/finding clips within episodes, i talked about that here and kind of here. the short version is that transcripts are a must, and the supernatural wiki is hugely helpful by cataloguing all the hugs, prayers, phone calls, etc. in the show. gifmakers that tag episode numbers on their posts are your friends. it gets easier the more video you make—that’s another huge reason i make the google docs for each video (even the ones i plan in my head, i end up going back and making a loose script with episode notes just for reference). if i can’t remember where something is but i know i used it in another video, i can easily reference past scripts!
i also cut all my videos in the same project in premiere pro, so i can flip between them easily. instead of checking a past script, i can just go to the video sequence itself and copy the clip i’m looking for! this was especially helpful when i match cut together the 5x18 and 4x22 wall slam shots for my bestie video, and then stole it from myself for honeybee hahaha. at any given time i have at least 8 sequences open:

because of the sheer volume of videos i make, it’s worth it for me to download the entire show—i have all 327 episodes in HD, plus deleted scenes. if you think you’re only going to make a few videos, i’d start with scene packs. you can usually just google “destiel [or whatever ship/character you’re looking for] scene packs” and there will be any number of ones you can download. if you need other specific scenes, you can always download/torrent individual episodes or screen record netflix (that’s what i did before i got HD download links). i’m happy to share my links if you DM, but be warned it’s a lot of disk space (about 500GB on my hard drive). someone also compiled every destiel scene, downloadable here.
having every episode already loaded in premiere for all my projects also makes it a lot easier to source clips. once i use a clip in a video, i’ll put a marker on the episode file, so that after a while i have most of the important scenes/lines marked to easily find them. to give you an idea, this is my episode file in premiere for 12x10 lily sunder has some regrets (markers at destiel scenes, the car fight, hot girl cas, etc.). markers are the green tabs along the bottom:
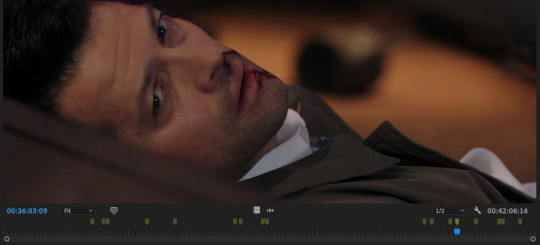
premiere also lets you color code and name markers, so ONE DAY i will go back and color code them all. the ones above are all the same color, but in a perfect world, i’d have a myraid—for destiel shots like hugs, touches, looks; for important pieces of dialogue; for action shots; etc. but for now this works ok for me, so that’s a project for another time!
between detailed scripts, one giant premiere project, markers, the wiki, and my own memory, i have so many points of reference that i can usually find any clip i need in about 2 minutes max. sound bites are often harder to start out, or tiny specific shots i haven’t used before, and that’s when i turn to tumblr gifsets or beloved mutuals to crowdsource. but if you’re as obsessive about marking/keeping neat scripts as i am, it gets easier and easier with every video you make. that’s part of why i’m able to cut videos together so quickly. (also i want to stress i do this for a living and have to produce/edit a new piece for my show every day so i’m used to it. and compared to constantly updating content/sources and news that changes every day, 327 highly documented episodes that never change are much easier to handle hahaha)
this is all great for me since i make so many videos and plan to continue doing so, but if you’re only making a few, this level of work isn’t worth it imo. really it’s all about developing a system that works for you. whatever you do with episodes/sourcing, though, i cannot recommend planning things out in a script ahead of time enough.
everything i just mentioned is producing, though. for the editing process, i usually do it in this order:
music first. any parts i want to cut, i make sure it all sounds smooth
then soundbites. i usually try to weave them into the lyrics—i have characters talk in breaks between lines or instrumental sections as much as possible. i’ll sometimes go so far as looped/extending an intsrumental part to make room for the soundbite i want there lol. if i do have dialogue over a line, i do the sound mixing/levels at this point as well to make sure everything is audible/one doesn’t overpower the other. (also i always include the video that goes with these bites when i drop them in, and decide later if i want to show the character speaking or have other clips cover the dialogue)
once i have all the audio locked in, then i bring in all my other video clips. sometimes i edit completely chronologically, sometimes jumping from section to section—it depends on the song or how i’m feeling
double check sound mixing. i usually listen to my videos through a few times, with headphones and without to make sure it’ll sound good no matter how people watch it
once i have picture and audio lock, i go through and color correct my clips. i’m basic and just use lumetri color in premiere, and usually just play with brightness, saturation, temperature, and tint until i like it
render and export! :)
i always have several audio tracks, but i try to keep my video tracks condensed. i’ll drop clips on a V2 level, and edit a section there, and drop the whole chunk down to V1 so i know it’s finished. that way when i leave and come back i can know where i left off/what’s done/etc. to give you an idea, this is the timeline for my what the hell video:

i always render as H.264 with high bitrate, and make sure to check “render at maximum depth” and “use maximum render quality” for the best quality. i’m sorry, but i don’t know what the equivalent options are in final cut, imovie, kdenlive, etc. i post on youtube mostly so i don’t have to sacrifice quality, but usually just using a lower bitrate will get you under the tumblr file size limit and it’ll still look good.
as for the anon who asked about “polishing”: first of all, thank you!! second of all, it’s in the details. all of this is a matter of taste and my own insanity, but here are some little things i always try to do:
after i color correct, i blur out any credits from the starts of episodes. i use gaussian blur for this, but really any blur tool works
as much as possible, i avoid clips where we see a character’s mouth move but don’t hear the words. in tv/film we call it “lip flap” and i just think it looks messy. also i’m trained to avoid it at all costs at work hahaha. it’s more for serious videos that this matters a lot to me (e.g. i think i did a really good job eliminating lip flap in my happy ending amv)—for comedy videos i don’t sweat it as much
i put audio fades on the start and end of every single audio clip i use, even if i don’t think i need it, to make sure everything sounds smooth
i use markers for timing, especially in action-y videos like what the hell. i’ll put a marker on the clip i’m using at the exact moment a punch lands, and in the song on the beat. if i have the magnet/snap in timeline tool on i can just easily snap them together instead of having to spend time finagling it
this is such a small thing but i dip/cut to black for a tiny bit at the start and end of every video. this way if i post with tumblr video player, there’s black between the loops, and it gives you a beat before the video restarts. i do this even on videos i post on youtube, just because i think it looks nicer/more professional
this is 1,500 words so i’m going to stop myself before i pull something. if you have follow-up questions feel free to ask and i’ll continue to add them to the vid help tag, but any more questions about sourcing clips or my process in general i’ll just link this post going forward. anyone who made it this far, i am sending to a telepathic kiss. thank you for reading and happy editing!
76 notes
·
View notes
Text

Lasso tool and Gaussian blur, my beloved
9 notes
·
View notes
Note
Hi! I’m a big fan 🥺 Just out of curiosity, do you happen to use PS for your (amazing) artwork? Thanks!
hi! :>
Well yes, but actually no. I mostly use Paint tool sai and only go to Photoshop for the fancy effects(gaussian blur my beloved), buut I am on my way to learn to use that program for more stuff in th future
4 notes
·
View notes