#fingerboard obstacles
Explore tagged Tumblr posts
Visit Tumblr Blog
Explore Tumblr blogs with no restrictions, modern design and the best experience.
Last Seen Tumblr Blogs


Fun Fact
Total funding amounts to $125.3M.
Text
Exploring the Sweet World of Caramel Fingerboards: A Beginner's Guide
Introduction
Are you ready to embark on an exciting journey into the world of fingerboarding? If you're new to this thrilling hobby, you're in for a sweet treat! In this beginner's guide, we will delve into the delightful universe of caramel fingerboards and everything you need to know to get started. From choosing the perfect fingerboard to mastering your skills on ramps and obstacles, we've got you covered. So, let's roll our sleeves up and explore the fascinating world of caramel fingerboarding!
What Are Caramel Fingerboards?
Before we get into the intricate details, let's begin with the fundamentals. Caramel fingerboards are miniature skateboards designed for finger use. They replicate the look and feel of full-sized skateboards, allowing enthusiasts to perform tricks and maneuvers using their fingers.
These tiny boards are crafted with precision, featuring realistic graphics, and they're perfect for honing your skateboarding skills without needing a skatepark. Caramel fingerboards are an excellent way to have fun indoors, improve your finger dexterity, and unleash your creativity.
Choosing the Right Fingerboard
Selecting the right caramel fingerboard is crucial to ensure an enjoyable and rewarding experience. Consider these aspects when deciding:
Fingerboard Decks
The deck is the heart of any fingerboard, and it's where you'll place your fingers for tricks and stunts. When choosing a deck, pay attention to its size, shape, and concave. A concave deck allows for better control and maneuverability.
Fingerboard Wheels
Wheels play a significant role in how your fingerboard performs. Consider the size, material, and hardness of the wheels. Softer wheels offer improved traction, whereas firmer wheels are well-suited for even and smooth surfaces.
Fingerboard Trucks
Trucks are the metal components that hold the wheels in place. Opt for trucks that are durable and offer a good balance between stability and maneuverability.
Fingerboard Ramps and Obstacles
To take your fingerboarding skills to the next level, you'll want to invest in ramps and obstacles. These accessories provide endless opportunities for creativity and challenge. Whether you're grinding a rail, sliding down a mini staircase, or launching off a ramp, fingerboard ramps and obstacles add excitement to your sessions.

Getting Started with Caramel Fingerboarding
Now that you have your caramel fingerboard and essential components, it's time to start practicing. Here is a detailed, step-by-step guide to help you begin:
Familiarize Yourself with Your Fingerboard: Spend some time getting to know your fingerboard. Experiment with finger placement and discover how it responds to different tricks.
Learn Basic Tricks: Start with the fundamentals, such as ollies and kickflips. These tricks will form the foundation of your fingerboarding skills.
Practice Regularly: Like any skill, fingerboarding improves with practice. Dedicate time each day to hone your skills and try new tricks.
Watch Tutorials: There are numerous tutorials available online that can help you learn new tricks and techniques. Learning from experienced fingerboarders can be incredibly beneficial.
Join the Fingerboarding Community: Connect with other fingerboard enthusiasts through online forums or social media groups. Sharing your progress and experiences with others can be motivating and fun.
Maintaining Your Caramel Fingerboard
To ensure your caramel fingerboard stays in tip-top shape, follow these maintenance tips:
Keep It Clean: Regularly wipe down your fingerboard to remove dirt and debris that can affect its performance.
Tighten Screws: Check and tighten the screws and nuts on your fingerboard regularly to prevent any loose components.
Replace Parts When Needed: If any parts, such as wheels or trucks, become damaged or worn out, don't hesitate to replace them to maintain optimal performance.
Store Properly: When not in use, store your fingerboard in a cool, dry place to prevent warping or damage.
Conclusion
In conclusion, exploring the sweet world of caramel fingerboards is an exciting journey filled with endless possibilities. Whether you're a beginner or an experienced fingerboarder, there's always something new to learn and master. Remember to choose the right fingerboard, invest in quality components, and practice regularly to unlock your full fingerboarding potential. So, grab your caramel fingerboard, hit the ramps, and let the good times roll!
#Fingerboard#Fingerboard Ramps#Fingerboard Obstacles#Fingerboard Decks#Fingerboard Wheels#Fingerboard Trucks
2 notes
·
View notes
Text
🐾 FINGERJAM GOES FULL PURR-SESSION 🛹🍕 This Saturday, May 10th — Blade Fingerboard Park unleashes pure chaos at CalStreets / BoarderLabs 😼🎉
🎸 FREE Pizza from Pizza Hut 🎁 Sticker packs to the first 25 humans (sorry, no paws allowed) 🏆 Fresh Blackriver gear & new obstacles just dropped 💀 One legendary FingerJam showdown, nine lives not required
The cat’s outta the bag... and he’s ripping! 🐱💨 Don’t miss the most fur-ocious fingerboarding throwdown of the year!
0 notes
Text
The Ultimate Guide to Indoor Rock Climbing and Bouldering: Mastering Grip Strength and Climbing Techniques

Indoor rock climbing and bouldering have gained tremendous popularity as thrilling and challenging sports. Whether you're a complete beginner or an experienced climber, this comprehensive guide will help you conquer the vertical world by focusing on improving grip strength and mastering climbing techniques. Get ready to push your limits and harness the power within! Section 1: Understanding Indoor Rock Climbing Indoor rock climbing offers a safe and controlled environment for climbers of all levels. Climbing gyms provide diverse routes of varying difficulty levels, allowing beginners to start on beginner-friendly paths and progress at their own pace. Whether you're aiming for recreational fun or pursuing a more competitive edge, indoor rock climbing is the perfect activity to hone your skills. Section 2: The Importance of Grip Strength Grip strength is the foundation of rock climbing. Without proper grip strength, it's difficult to hold onto climbing holds or navigate through challenging routes. Develop your grip strength through specific exercises such as fingerboard hangs, rice bucket training, and using grip trainers. By strengthening your fingers, wrists, and forearms, you'll have a better chance of successfully completing any climb. Section 3: Essential Climbing Techniques 3.1 Footwork: Proper footwork is crucial for efficient climbing. Practice foot placements, edging, smearing, and heel hooks to maximize your stability and balance while climbing. Remember, your legs are stronger than your arms, so let them do the work whenever possible. 3.2 Body Positioning: Understanding and maintaining the correct body positioning is key to efficient climbing. Improve your technique by focusing on body tension, keeping your weight centered, and using your core muscles to engage your entire body during climbs. 3.3 Dynamic Movement: Dynamic movements involve powerful and explosive actions like dynos (dynamic leaps), jumps, and dyno lurches. Mastering dynamic movement techniques will allow you to reach holds that seemed out of reach and progress to more challenging routes. 3.4 Route Reading: Before attempting any climb, always spend time analyzing the routes. Look for the most efficient path, identify potential hand and foot holds, and plan out your moves in advance. Visualizing the climb beforehand will help you conserve energy and make progress more fluid. Section 4: Bouldering: A Skill Within Indoor Climbing Bouldering is a style of climbing that focuses on shorter, more intense routes performed without the use of ropes or harnesses. This form of climbing helps improve grip strength, balance, and technique. Bouldering walls are typically padded to ensure safety during falls, making it a beginner-friendly activity. Embrace the challenge, push your limits, and strengthen your climbing skills through bouldering. Section 5: Overcoming Common Challenges 5.1 Fear and Mental Blocks: Fear is natural when facing heights or challenging routes. Developing mental resilience through positive self-talk, focusing on breathing, and embracing a growth mindset will help you overcome obstacles and overcome mental blocks. 5.2 Training Plateaus: Plateaus are common in any physical activity. To break through training plateaus, consider cross-training activities, incorporating finger strength exercises, and continuously challenging yourself with new and diverse climbing routes. Conclusion: Indoor rock climbing and bouldering offer a unique blend of physical endurance, problem-solving, and adrenaline-pumping fun. By focusing on improving grip strength and mastering climbing techniques, you'll take your climbing skills to new heights. Embrace the challenge, push your boundaries, and embark on an exciting journey towards becoming a skilled and confident indoor climber! 1. indoor rock climbing 2. bouldering 3. grip strength 4. climbing technique Revitalize your diet with Puravive's Superfood Blend. Packed with essential nutrients, our blend is the perfect addition to your daily meals, supporting your diet and overall health. Experience the power of superfoods with Puravive. Check out the Puravive Superfood Blend Product Page. Read the full article
0 notes
Photo
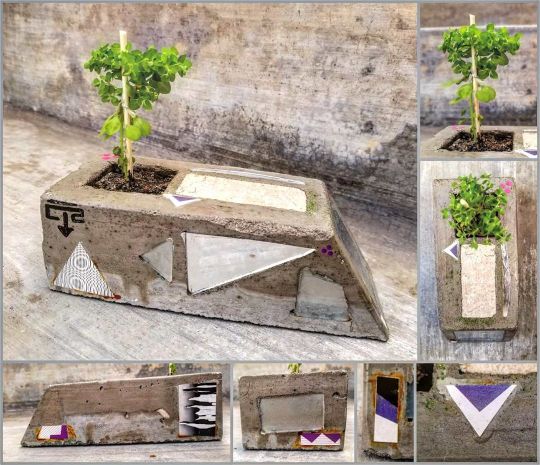
#Planter #Ledge / Steep #Kicker #Fingerboard #Obstacle. If you are interested in buying direct message me. . I want to add real #Plants to #Fingerboarding #Obstacles. So this was my first attempt and it came out amazing. It is made from #Concrete mixed with green paint and glitter. I added #Tiles, #Glass, & #Mirror for added effects. #Miniature #Graffiti & #GraffitiStickers were added as well for realism. The planter is made for a small #Plant. Succulents would be perfect. The side has a steep incline that can be used as a #Ramp as well. . . . . #Fingerboards #Fingerboarder #Fingerboarders #FingerboardRamps #FingerboardLedge #FingerboardObstacle #FingerboardObstacles #ConcreteArt #Miniatures #FBObstacles #FBObstacle #FingerboardingRamps #FingerboardingRamp https://www.instagram.com/p/B7malibnLxP/?igshid=rwcgzpk5o38n
#planter#ledge#kicker#fingerboard#obstacle#plants#fingerboarding#obstacles#concrete#tiles#glass#mirror#miniature#graffiti#graffitistickers#plant#ramp#fingerboards#fingerboarder#fingerboarders#fingerboardramps#fingerboardledge#fingerboardobstacle#fingerboardobstacles#concreteart#miniatures#fbobstacles#fbobstacle#fingerboardingramps#fingerboardingramp
1 note
·
View note
Video
instagram
The ALLinONE-curb is soon available at the shop! LINK IN BIO❗️ #popdecks#popdecksofficial#handmade#handcrafted#wooden#fingerboards#concrete#obstacle#allinone#curb#connectable#miniature#skateboarding#skateobstacle#upcurb#manualpad#lowcurb#highcurb#scaled#skate#pop#follow https://www.instagram.com/p/Bo3o0sUCs35/?utm_source=ig_tumblr_share&igshid=hx9e3lckn071
#popdecks#popdecksofficial#handmade#handcrafted#wooden#fingerboards#concrete#obstacle#allinone#curb#connectable#miniature#skateboarding#skateobstacle#upcurb#manualpad#lowcurb#highcurb#scaled#skate#pop#follow
2 notes
·
View notes
Photo

Do yourself a favor and get these sick obstacle couches while they last, or anything else on the site from @reignyfuckingdaze his work is legit! Don’t pass up this deal!!!! #fingerboardspot #fingerboardobstacles #fingerboarding https://www.instagram.com/p/CALjEYmDjlb/?igshid=h04ere9galk5
1 note
·
View note
Text
Moving in the Right Circles: a few thoughts.
Hello, hi, good afternoon (or a very early good morning if you’re reading from home, I hope O Week is treating you well and you’re remembering to rehydrate). Last night, I went to the first in a series of seminars hosted by the Edinburgh Political Union and Common Weal at a cute little student bar down in the Old Town. Common Weal is a policy “think and do tank” based in Glasgow. Their Policy Head, Craig Dalzell, took us through the Resources and Trade chapter of their fully-costed Green New Deal for Scotland. I recently finished reading Novacene and have finally come to grips with the Gaia Theory... I think. In light of all this new info that I’m processing, and news that Bezos is injecting $10bn into the climate effort, I wanted to share a few thoughts...
A Circular Economy
Common Weal’s Green New Deal is so low-bullshit it’s made me run circles around my own brain trying to come up with a joke about lowering methane emissions (to no avail). It reads that “...waste is really just a way of describing failures in resource use” in reference to the current linear economic model.

Met this dude in Sligachan!
The linear model can be described as such: procure resource ---> use it between 0 and 2 times ---> dispose of resource ---> repeat for infinite economic growth.The goal of a circular economy is to keep goods in circulation at the highest value possible. To do so, we need to considering redesigning, reusing, repairing and remanufacturing goods before we recycle them. If we could do that, we wouldn’t have to procure as many resources in the first place, nor waste as much in the end. Craig put recycling to the test last night too, discussing whether down-cycling (i.e. putting your Amazon cardboard box in the correct bin) should even be considered a success (it shouldn’t IMO). Side-cycling and up-cycling are still crucial to a circular economy, though.
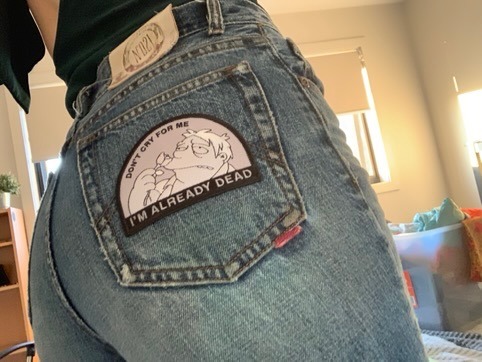
***Cue thirst trap that also shows off thrifted jeans***
Ooh, and I found out that Edinburgh has tool libraries, which gives me the means to cause devastation in a public space as I make and fix things, as per my 2020 goal to learn more practical skills, but with less waste!
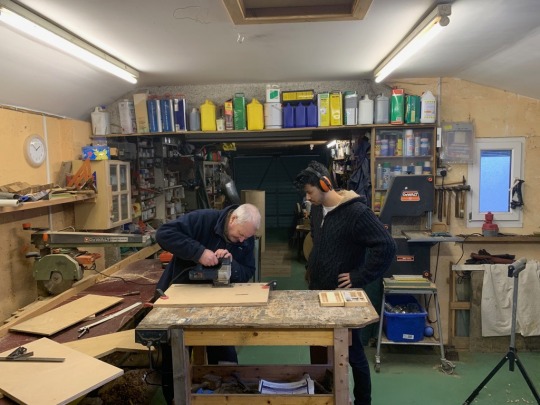
Not the tool library, but close enough...making fingerboards in Granda’s shed over Christmas.
Debating in Circles
When we talk about the climate action effort, we often split society into those who see the need for climate action and those who choose to oppose it. Last night’s discussion highlighted another important group: climate delayers.
What is a climate delayer?
Those who acknowledge climate emergency but declare that they/we as a society are doing enough
Those who acknowledge climate change but oppose declaration of an emergency
Those who acknowledge climate change and/or emergency on a public level but benefit heavily from/contribute heavily to the industries that continue to emit fossil fuels
Those who acknowledge the climate emergency but propose only lofty goals with no substantive plan to achieve them
Any other person whose behaviours slow down the climate action effort without necessarily denying its validity.
It’s interesting to consider that, perhaps even more so than deniers, the behaviours of climate delayers work to preserve the status quo by focussing on how hard it might be to structure a society in a way that places less stress on the earth’s systems. They may also choose to support weaker policy reactions to emerging climate science.
I know what you’re thinking. Of course, anybody (sane) would tell you that they’d rather do nothing than do something that might take effort. Even if a proposed policy has noble goals such as emissions reduction, people won’t give up their time to act unless it has a realistic plan behind it. The cool thing about Common Weal’s GND is that it’s actually costed, it’s clear (even to somebody without a science or economics background like me) and it actually feels like something that might work... No wonder major parties are starting to jump at it.
There will always be a threat from climate delayers though. Especially when they are people with excessive power or influence. I guess this is the source of worry that some are harbouring when it comes to the enormous amount of money Jeff Bezos (Amazon CEO, tax escape artist, richest person in the world) has committed to set up his Earth Fund this week.
Attempting to Square the Circle
A Guardian article I digested with my morning coffee collates the opinions of a few leading scientists on how he could best spend this money. Some of these included setting up opposition to oil and gas lobby in the US, forest protection, indigenous land rights and practice programs, supporting emerging tech, carbon pricing research and implementation and solutions with no financial market e.g. removing carbon dioxide from the air, restoring and re-wilding habitats or research into how we can overcome the sociopolitical obstacles to achieving low-emissions (and hopefully zero-emissions) societies.

Inverleith House, Royal Botanic Gardens Edinburgh.
A quick survey of people in my Twitter bubble, including nell, didn’t give me a lot of hope. We, for good reason, are quick to distrust billionaires who run unfathomably large corporations that underpay and overwork employees, don’t pay taxes and do contribute heavily to waste and carbon emissions. You can’t really fault Bezos’ critics for being pessimistic when it comes to this donation. Billionaires donating billions of dollars cannot be expected to completely set aside their self-interest.
We can’t ignore the fact that $10bn (US) could fucking change the movement. Bezos said on Instagram that the money will be given out as grants, so theoretically he could contribute to all of the efforts mentioned above. We exist in a web of systems that is reaching a tipping point: one that could easily set off a bunch more, even ones yet unconsidered. Without cooperation on a large-scale, we mightn’t be able to prevent the worst from happening. This money could allow this type of collaborative effort.
Unfortunately, I have to live in reality. It’s probable that this money won’t be used to disrupt the balance of power in the US that has always tipped in the favour of fossil fuels industries. It is unlikely to be invested into solutions that won’t reap significant financial return.

Waters of Leith, Stockbridge.
Whilst it is vitally important that this investment doesn’t work to delay climate action by preserving the status quo, it’s a real possibility.
My guess is that it will be invested into new tech that obviously has the potential to make people excited about responding to climate change but that Cornell refers to as “putting a bandaid on a an open fire”. It could delay real action, as funding for new ideas might outweigh support for the solutions that are ready right now. I only hope that stakeholders consider that we are running out of time for research and pilot studies and shit needs to start changing now.
To sum up and get on with the chores I see stacking up around me: a $10bn investment into the climate movement can’t be a wholly good or wholly bad thing. Activists, Amazon Employees for Climate Justice and other organisations have already convinced the richest man in the world to pledge 7% of his net worth to the planet, so maybe we can help to keep him accountable for the way he spends it too!?
That’ll do for now,
GS xx
P.S. buttons are still falling off, but I really am making slow progress with learning to sew! I will post some photos when there’s anything exciting to photograph.

#climate change#economics#blog#amazon#Jeff bezos#climate action#James lovelock#novacene#gaia#common weal#Green New Deal#notes#thoughts
1 note
·
View note
Text
Top 10 Best tech deck [2022]
Top 10 Best tech deck [2022]
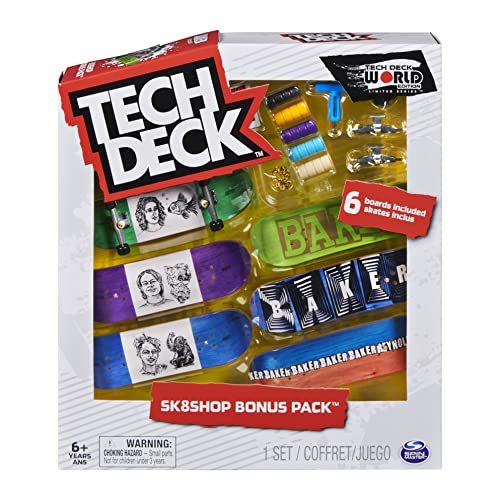
1. TECH DECK – Sk8shop Bonus Pack (Styles Vary) Buy On Amazon Great product! 2. Tech Deck VS Series Santa Cruz Skateboards Fingerboard, Obstacle and Challenge Card Set Buy On Amazon Tech Deck VS Series 2-Pack Includes 2 Assembled Tech Deck Fingerboards, 1 obstacle, 4 Challenge Cards Deck is approximately 96mm long For 6 and up 3. Tech Deck, DLX Pro 10-Pack of Collectible Fingerboards, For…
View On WordPress
0 notes
Text
The Best Beginner Tunes for Irish Tenor Banjo and Mandolin
Every musician wants to start out with the best tunes for their instrument. But how do you know which tunes work best?
No one wants to waste their time struggling to learn the wrong tunes when the right repertoire can be learned far more easily in half the time. Nothing will curb your motivation faster than starting with a tune that’s too difficult.
So, to help all our budding banjo and mandolin players out there, I’ve put together this handy guide. These tunes are specially tailored for the Irish tenor banjo and will happily set any beginner musician on the right path.
With these simple session tunes under your belt, you’ll be session ready in no time. So what are you waiting for? Let’s get started.
Contents
What Makes the Ideal Beginner Banjo or Mandolin Tune?
Jim Ward’s Jig
The Lilting Banshee
The Leitrim Fancy
What Next?
What Makes the Ideal Beginner Banjo or Mandolin Tune?
While the banjo has the same strings, tuning and fingering as the fiddle, it has a distinct advantage. Banjos don’t require the use of a bow. Mastering the bow can be one of the biggest obstacles beginner fiddles face when trying to master their instrument.
As a result, banjo players usually find themselves ready to tackle slightly more complex tunes at any earlier stage. I’ve included three brilliant jigs below that will work well for any beginner banjo player. Jimmy Ward’s, The Leitrim Fancy and The Lilting Banshee.
These are three great session tunes. So once you’ve mastered them and are feeling confident, you can head off to a session and play along with your fellow trad musicians, to hear the music in its true glory.
Jim Ward’s Jig
Jim Ward’s, also known as Jimmy Ward’s or The Clare Jig (and not to be confused with Jim Ward’s Downfall) is a great tune for beginner banjo players. It requires a straightforward hand position and limited movement of the fingers. It’s also played using only the D and G string.
The long Gs at the beginning of the phrases can also be strummed as three separate notes, as you can see below. There are plenty of options to either simplify or develop the tune according to your ability.
Have a look at the video below to see how limited the hand movement is. It might be a little fast to play along to just yet, but don’t worry about that for now. Take your time and move at your own pace.
Here it is at a livelier pace again to give you a feel for how it would sound in a real trad session:
The Lilting Banshee
The Lilting Banshee is the perfect tune for beginner banjo players as it makes plenty of use of the open A and E strings – open strings are the strings of any stringed instrument with no fingers pressing down on the fingerboard. It also provides a nice little challenge in the stretch required to reach the high A.
This is a mighty popular session tune and one well worth learning:
The Leitrim Fancy
This tune requires a little more movement and finger action than the previous one but it will teach you useful patterns that you’ll encounter again and again in other tunes. So, it’s well worth the challenge.
Many tunes in the world of traditional Irish music share similar melodies. The opening bar’s GBG FAF pattern is one worth wrapping your head (and fingers) around, as you’ll come across it in more complex tunes. So, while it might be a little tricky right now, it’s worth spending some time on it. Once you’ve committed it to muscle memory, your fingers will automatically do the work for you the next time you encounter it, without even having to think about it.
Have a listen to this handy recording that plays the tune first at session speed, and then again at a slower, learner-friendly pace:
What Next?
If you’ve mastered every tune included in this post, then you’re well on your way to being session ready!
To learn more about the Irish Tenor Banjo, I highly recommend Enda Scahill’s brilliant book Learn Irish Banjo Volume 1. You can find an extract from it int our Beginner’s Guide to Holding and Tuning the Banjo. Once you’ve mastered everything Enda has to teach you (and it’s a lot!) you can move on to Volume 2.
Alternatively, if you’re looking to get your hands on a new beginner banjo, why not have a look at our Online Banjo Store or Online Mandolin Store. You can browse our full range of beginner banjos and mandolins – each designed to cater for the needs of beginner musicians.
For beginner banjo players I usually recommend our 17 Fret Celt Banjo. Beginner Mandolin players would be very happy with our McNeela Mandolin – the perfect little stater instrument.
0 notes
Text
#complete skateboard#fingerboard obstacles#fingerboard#fingerboard ramps#fingerboard trucks#fingerboard wheels#tech deck skateboards#skateboard decks#handboard#fingerboard decks
2 notes
·
View notes
Text
🔥 BLADE PARK SESSION IN FULL SEND MODE 🔥

Skaters shredding. Tricks dropping. Energy 🔥 off the rails! 🎯 Don't miss the PIZZAJAM May 10, 2025 🍕 🕛 12:00 PM – 5:00 PM | Blade Fingerboard Park 🎁 Prizes, pizza, and the biggest Blackriver drop EVER!
🎉 Bring the stoke — and maybe some cat food 🐾😼 🎬 Tag your crew. It's gonna be WILD.
0 notes
Video
instagram
My #Fingerboarding Edit from the @SocalG8Sessions back in #September. Check out the full video at Youtube.com/CizreK. . My first couple #Fingerboard events I just filmed other people. This is where I decided I should make a edit myself. All of these clips were taken the day of the #SocalG8Sessions event. #Fingerboarder events are cool because you get to use #Obstacles, #Rails, and #Ramps you never have before. Makes you #FingerSkate differently and levels you up. Shout out to @irie_1 for hosting the event and letting everyone #FingerTrash his many #FingerboardParks. . . #Skilltoys #Skilltoy #Dexterity #HandEye #ObjectManipulation #FingerboardingRuinedMyLife #BlackRiver #Fingerskating #Toys #Toy #Playing #BlackRiverFingerboards #FingerboardingPark #FingerboardingTricks #Fingerboarders #IviBleeder #IviMusic #ToysOfInstagram #FingerSkateboarding https://www.instagram.com/p/B4--8faDfDq/?igshid=l26nm26mm6cx
#fingerboarding#september#fingerboard#socalg8sessions#fingerboarder#obstacles#rails#ramps#fingerskate#fingertrash#fingerboardparks#skilltoys#skilltoy#dexterity#handeye#objectmanipulation#fingerboardingruinedmylife#blackriver#fingerskating#toys#toy#playing#blackriverfingerboards#fingerboardingpark#fingerboardingtricks#fingerboarders#ivibleeder#ivimusic#toysofinstagram#fingerskateboarding
1 note
·
View note
Photo
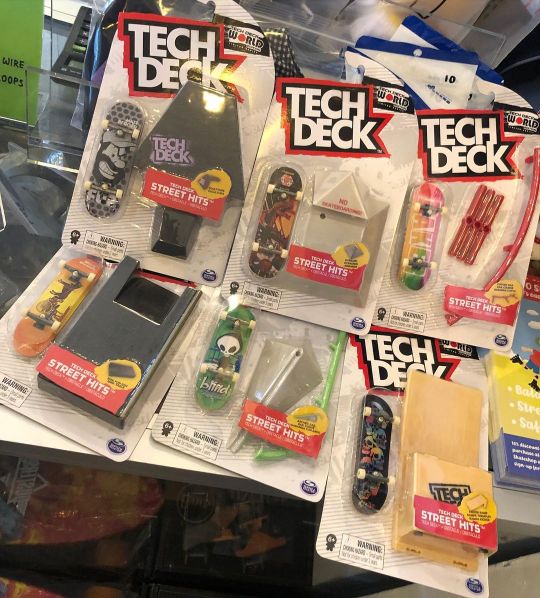
Stuck at home? Time to crack out the @techdeck Street Hits #fingerboard + obstacles sets. RM40 per set on WL33.COM. (at Wheel Love Skateshop) https://www.instagram.com/p/CGYrwRBpWUQ/?igshid=1a4v4sxgko20h
0 notes
Text
Guitar Fundamentals - Beginner’s Guide

Introduction To Learning Guitar
This article is meant to be a guide. There are a lot of component that you must learn with your guitar before you sit down with the family in front the camp fire. This article is jammed packed with information so it’s okay if you begin to feel overwhelmed. Bookmark this page and come back to it over and over again. On the other hand, if you’re a visual learner you can get access to this same information in video format by going here.
When the game "Guitar Hero" hit the market, every teenager and adult alike went into a frenzy and before too long, they were strumming out the chords to some of the most popular tunes from the last few decades.
And just as predicted, that game was responsible for a sudden interest in guitar, and music teachers all across the nation were booked solid with new students eager to take their digital hobby, and turn it into a real life instrumental skill.
In truth, while the "Guitar Hero" game renewed interest in this classic musical instrument, the guitar remains one of the most popular of all instruments, and with good reason.
Regardless of how little experience you have, learning to play the guitar is not only enjoyable, but it's also one of the easiest musical instruments to learn. But like all musical instruments, if you want to learn to play the guitar you will need plenty of practice, perseverance and patience.
When new musicians begin to learn the guitar, one of the biggest obstacles is learning chords and proper finger placement.
If you stick to practicing and can overcome the entry learning curve, you'll find it gets much easier the more you play.
If you have never played guitar before, you'll want to start with a basic 6-string acoustic guitar that is suitable for beginners.
Along with a guitar pick and a copy of this guide, you'll have everything you need to start learning chords and before you know it, you'll be strumming along to your favorite tunes!
One thing to keep in mind is that it's much easier to play the guitar with your fingernails trimmed down. You should also realize that your fingers may get sore when just starting out, but as they become slightly calloused, you'll find it easier to strum for long periods of time without having to stop.
And finally, move at a pace that you're comfortable with! I always recommend that beginners start with one basic lesson at a time and stick to that lesson until they've completely mastered it.
Then, move on to the next lesson. Not only will this ensure that you truly understand what you've just learned but the more you practice each lesson, the easier it will be to retain that information so you always remember it!
And don't feel bad if you struggle to remember placement and chords when you're just starting to learn guitar.
It's natural to have to refresh your memory for the first few weeks, but again, the more you practice chords and learn proper placement, correcting yourself as you go, the easier it will be.
When it comes to mastering guitar, practice certainly does make perfect!
Guitar Structure & Terminology
Before you begin to learn how to play guitar, it's important that you understand the anatomy of your guitar, so that you can identify different parts, while understanding guitar terminology referenced throughout this guide.
Guitars usually have six strings but you can find guitars with seven, ten or even twelve strings.
The top of the guitar consists of a slim neck and the “headstock”. The headstock’s main function is to hold the guitar strings. The headstock is placed at the end of the guitar and is furthest from your body.
The headstock consists of tuners that allow you to change the pitch of your guitar strings. At the bottom of the headstock is the “nut”. A nut is a piece of material where there are grooves carved out. These grooves guide the strings to the tuners.
The nut is usually made of plastic, bone, brass, stainless steel, graphite or other material. The nut is found where the fret board meets the headstock. A fret board or fingerboard is wood that is embedded with the metal ��frets” that make up the top of the neck.
Let's talk for a minute about the tuning pegs at the top of the guitar on the headstock. This is where the stings end. Before you ever change strings, pay particular attention to which peg each string ends up.
Here is a helpful hint for remembering how the strings are placed into the tuning pegs. If you are holding your guitar in posture (which will be discussed a little later) there will be three pegs pointing toward the ceiling (upright) and three pointing toward the ground (downward).
If you are looking at the guitar as the diagram indicates, there will be three pegs on the left and three pegs on the right.
Let's work with the latter example. Low E (biggest string) goes into bottom left peg, A goes to middle left peg, D goes to top left peg, G does to top right peg, B goes to middle right peg, high E (smallest string) goes to bottom right peg
The guitar neck will be the focal point as you begin to learn how to play the instrument. The neck joint or “heel” is where the neck is glued or bolted to the guitar body.
On the neck of your guitar you should notice two things. One, there are going to be a series of metal lines that extend from one end of the neck to the other. These are called frets.
Two, if you look down the side of the neck of your guitar you will see dots. The dots are located at frets 3, 5, 7, 9, 12, 15, and 17. Fret 12 has a double dot for which I will explain further once we get to that portion of these lessons.
The majority of acoustic guitars have necks that are glued while the majority of electric guitars have glued and bolted necks.
Your fingers will be placed on different parts of the neck and this will create various notes. Solid body electric guitars have a neck through body construction. These types of necks are built so the head down through the bridge is on the same piece of wood.
Next there is the body of the guitar. The body of a guitar will be different depending on what type of guitar you use. In an acoustic guitar the body of the instrument determines the quality of the sound.
The vibration of the strings is passed through the bridge and saddle through a sound board. A soundboard is usually made of spruce or cedar and is about 3mm thick.
There is a sound hole in the body of the acoustic guitar. The sound hole is designed to project the sound of the instrument. The sound hole is typically a round hole on the front of the guitar, under the strings.
The sound of the guitar is projected through the sound hole. The air inside the body of the guitar vibrates as the guitar body and top is vibrated by the instrument’s strings.
The bridge is where your stings will be changed. There are round pegs at the end of every string. These will need to be pulled out and new stings inserted. You will need to learn the string names.
Beginning from the top (biggest) string to the bottom string (smallest): EADGBE. The top and bottom strings are the same note, just different octaves.
The bodies of most electric guitars are typically made of wood. It is rare to find a piece of hardwood that is wide enough to create the entire guitar so it is hard to find a guitar made of one piece of wood.
Most guitars are created with two pieces of wood and have a seam going down the center of the body.
Maple, ash, mahogany, basswood, alder, and poplar wood are commonly used to create the body of an electric guitar.
Many guitar bodies consist of cheap wood such as ash glued on top of a wood such as maple. Guitars that are made in this way are called “flame tops”.
Some electric guitars are made of such materials as carbon composites, aluminum alloys, or a plastic material such as polycarbonate.
The majority of electric guitars have bodies that are solid and do not have a sound hole. Electric guitars instead have “pickups”.
Pick-ups are basically small microphones that capture the sound of the strings and then the sound is amplified.
Guitar strings go from the pegs on the headstock and over the nut. They then go down the neck and over the body and then over the sound hole or pickups.
The strings are then anchored to a “bridge”. A normal guitar has six strings. These strings are all different sizes and represent different notes.
The bottom string is usually the skinniest and has the highest sound. It is an E note. The bottom string is also known as the first string. The second string is a little thicker than the first string and is the B note.
The third string is B, the fourth string is D, the fifth string is A, and the final, sixth string is an E, just like the first string.
This sixth string is the thickest string of the set. It has the lowest sound and is the one that is closest to you.
If the guitar is tuned correctly, the first string and the sixth string should give you the same note but in different pitches.
If you want to memorize the string position and values you can use a mnemonic device such as Eat All Day Get Big Easy.
Frets are strips of metal that cut the guitar in sections from top to bottom. The combination of strings and frets form a grid.
This grid covers the guitar neck. If you put your finger in between two frets, this allows you to play a note. The higher you place your finger on the fret; the notes will have a higher sound.
Proper Positioning And Placement
Now that you have learned a little bit about the guitar, you are now about to learn about how to position a guitar and tune it.
First you will learn about positioning a guitar. Begin by finding an armless chair that has good support for your back. You should sit comfortably with your back against the chair. Slouching is not good because you will develop bad guitar habits and a sore back.
When sitting in an armless chair, be sure that there is a lot of room on both sides of you so you can hold your guitar properly and move your arms.
Once you are seated in the chair, you should place the guitar on your lap and have the rear of the guitar facing your chest. The guitar body should be on the leg that is farthest from the headstock.
If you are right handed, the guitar should lay on your right leg. The majority of acoustic guitars will have curved indentations that are great for playing the guitar on your leg.
If you are holding the guitar properly than the sixth string should be close to your chest and the first string should be close to your feet.
Your fret hand will have to be placed on the left if you are right handed and on the right if you are left handed.
You should grip the neck of the guitar gently with your fretting hand. You thumb should be placed behind the guitar’s neck. The other fingers should be floating on top of the strings, slightly curled. It is very important to curl the fingers at the knuckles unless an instructor tells you not too.
Next we are going to discuss picking. When beginning to play the guitar, you should purchase a set of guitar picks. A guitar pick is a small flat tool that you used to strum the guitar. You should purchase a minimum of ten guitar picks and they are relatively cheap.
There are different types of guitar picks but it is best to start with one that is not too hard or too flimsy. Picks are made of rubber, wood, stone, plastic, tortoiseshell, and metal. They are usually in the shape of a triangle but other shapes are available from manufacturers.
Once you have a guitar pick and are seated in the proper position, you can begin strumming the guitar. Your picking hand will be nearest the bridge of your guitar.
You should open up the hand you will be picking or “strumming” the guitar with. The palm should face you. Then make sure the thumb is next to the index finger. Make sure that you rotate the hand so the knuckle of the thumb is facing toward you.
With your free hand you should slide in the guitar pick between your index finger and thumb. That way, the pick is secure. The pick should end up behind the thumb’s knuckle.
You should hold the pick firmly and the pointed portion of the pick should be pointing away from your fist and should be sticking out about ½ inch. The hand you are strumming with should be over the sound hole if you are using an acoustic guitar or over the guitar body if you are using an electric guitar. Your strumming hand should be placed above the strings.
Your picking hand should not sit on the body or stings of the guitar. Using your wrist, not your arm, strum the lowest string downward. If the string rattles too much, do not use a lot of the pick surface or strum softer.
Then pick the lowest string upwards. Try this a few times. Try to lower the motion of your picking hand by doing a short pick downwards and a short pick upwards.
Now repeat the process with the rest of the strings.
Remember that holding the pick will feel strange at first. You will have to concentrate on your picking hand when you begin practicing the guitar. Your down strokes and your upstrokes should sound the same. Also remember you will sound bad at first but this will change with practice. It takes time to become the next guitar hero!
Tuning Your Guitar
It is very important to tune your guitar. You need to tune your guitar on a regular basis if you want it to sound good and make practice enjoyable. At first tuning a guitar will be difficult but this will change over time.
There are different methods of tuning a guitar. All of the different methods are appropriate but some are more convenient than others. This is especially important if you are just beginning to learn the guitar.
Tuning a guitar involves adjusting the strings so that they play the right note. You loosen or tighten the strings by using the tuning pegs.
If you tighten the pegs on the headstock, this will make the pitch of the string higher, while making the pegs loose will make the pitch lower.
Beginning guitar players may want to purchase an inexpensive electric “guitar tuner”. This is a great choice for beginning guitar players.
Electronic tuners can pick up the sound of a string and let you know through a display that the note is either too low (flat) or too high (sharp).
Beginning guitar player have difficulty telling when a string is not in tune by just listening so buying an electric tuner can assist in making tuning faster and more precise.
A starting guitarist who is practicing by themselves, easy and convenient tuning methods are best. However, as you become pickier or begin playing with other people, utilizing alternative tuning methods will become increasingly important.
If you cannot afford or do not want to buy an electric tuner, there are a variety of ways to manually tune your instrument.
This includes relative tuning, tuning with a piano, pitch pipes, keyboards, tuning forks, intervals and harmonics. We will go into these types of tuning in the next chapter.
Tuning Methods Made Easy
The easiest way to tune your guitar is by relative tuning. Relative tuning is comparing the sound and pitch of adjacent strings. The string with the higher pitch is tuned to match the sound of the lower string.
In this method, there is the assumption that the lower string is tuned properly. If you use this method, you will have to tune the sixth string with a tuning fork or piano. More details on this will be provided later.
The process starts with the tuning of the sixth string. When the sixth string has been tuned, you need to press the sixth string at the fifth fret and pick the string. Next, tune the fifth string so that it matches that sound. The sound of the fifth string should match the sixth string’s, fifth fret.
If you find that the sound does not match, turn the tuning peg for that fifth string and change the pitch. Don’t do anything to the sixth string.
If the sound of the string is too low, tighten the string. If the sound of the string is too low, loosen the string.
Be sure that the fifth string is tuned in comparison to the sixth string because the fifth string has to be properly tuned in order to tune the fourth string.
After that, the fourth string needs to be in tune in order to tune the third string and it continues from there. If there is a tuning mistake on any of the strings, the sound of the whole instrument will be thrown off.
If you have a piano at your disposal and you are familiar with the notes, you can tune your instrument by matching the sound of the strings with the matching notes on the piano.
To begin, find the E note of the piano and then play the sixth string or E note on your guitar. Turn the tuning peg so that the sixth string on your guitar sounds like the E on the keyboard. Do this with all the stings on the guitar.
An electronic keyboard can help tune your guitar as well. Keyboards give you clear, precise, and loud pitch that makes it easy to tune your instrument.
This method of tuning is a great choice for beginning guitarists who have access to a keyboard or for guitar players who will be working with someone who plays the keyboard.
You can also tune your guitar by using pitch pipes. You should be able to find these at your local music store. These pitch pipes will give you the pitches of all strings. All you need to do is match the sound of each string to the proper pipe.
Pitch pipes do not cost a lot and even very young guitar players can use them. They are small and easy to carry.
Some more advanced guitar players would not be satisfied with pitch pipes because they do not have a clear pitch like an electronic tuner, tuning fork or piano.
Using a tuning fork is a popular way to tune a guitar and other instruments. A tuning fork is a two-prong device that has a stem and is shaped like a U.
They are usually made of steel. The tuning fork gives off a certain pitch when it is struck against a surface, causing it to vibrate. The sound that comes from the tuning fork depends on the length the two prongs are.
The standard tuning fork used has the pitch of an A note. Tuning forks that emit this sound can be found easily. Tuning forks with the sound of the E note can be found easily as well and they are very useful for guitars. Tuning forks are cheap and easy to bring along with you.
When using a tuning fork, hold the fork by the stem so that the prongs can vibrate freely. Strike the prongs hard enough so that they begin to vibrate.
Be sure not to strike them on anything that will dent. It is best to strike the fork against your knee. Not too hard of course! After that and without touching the prongs, place the stem lightly on the guitar body. Now tune the string to match the sound that comes from the guitar.
In order to use a tuning fork properly you will need to practice. It may be hard for a young player and a guitar player with experience will not want to carry around different tuning forks.
The preferred method of tuning a guitar is intervals. The advantage of tuning this way is that the guitar ends up having a pleasant sound that is in tune. Intervals involve tuning strings in conjunction to other strings. This is very easy when you have practiced this method for a little while.
To tune by interval, begin with the sixth string and have something such as a tuning fork or pitch pipe handy.
To find the A note, press down the sixth string at the fifth fret, then tune the A string. Next tune the D or fourth string to the D and the fifth string at the fifth fret. Repeat this process with the G, B, and E strings.
To check your tuning, play the E and B chords and listen carefully. Make any adjustments you need to.
Next we have harmonic tuning. Advanced guitarists prefer using harmonics when it comes to tuning their instrument. Harmonic tuning is a bit more advanced, but once you have your ear trained and have a good idea of how to touch the strings, this is an incredibly accurate method for tuning.
Simple Tuning
From the top to the bottom, lightly touch your E string at the fret line with your fretting hand, do not press the string, and pluck the string at the same time.
You must release the touch with your fretting finger so that the note will continue to play.
Play 5th fret E string and 7th fret A string, they should be the same pitch. Play 5th fret A and 7th fret D. Play 5th fret D and 7th fret G. Play 7th fret low E and pluck open B. Last, play 5th fret B and 7th fret E.
Instead of holding a string down, below the fret, you touch the string very lightly at the fret. This is harmonics. This is not the best tuning methods for beginners but it is mentioned here to give you a complete overview of guitar tuning.
There are many other ways to tune a guitar. Slack key tuning is tuning some strings lower than other types of tuning. The result is a major chord when all strings are played.
A tuning method used in rock and classical guitar is D tuning. This involves tuning the D string instead of the E string.
No matter what type of tuning you use, it is best to tune your guitar frequently. Strings get out of tune over time especially if you play your guitar a lot and practice a lot.
Hand And Finger Placement
When playing the guitar, you have one fretting hand, which is the hand responsible for creating chords or single notes, and you will have your picking or strumming hand.
Both hands are equally important, but the real magic happens with your picking hand, as there are so many different ways to create melodic sounds from your strings.
Here is a diagram of your fretting hand and how to refer to your fingers. This will be a great visual aid for correct chord placement. It will be tempting to cheat with finger placement on some of the chords, but there are specific reasons for using specific fingers for constructing the chords.
There is a correct way and an incorrect way to hold a pick with your strumming hand. You'll want to lightly rest the pick between your thumb and forefinger.
Your forefinger needs to be arced so that it forms a semi-circle. The pick will rest between the first and second knuckles on the forefinger.
Each finger consists of three knuckles, one right above the fingernail, one half way up the finger and the last where the finger meets with the hand. The first and second are referring to the ones right above the fingernail and half way up the finger.
From here you will place your thumb on the pick creating a loose yet stable pressure.
As you become more advanced in your guitar playing, you will learn that there are several ways to hold a pick and all of which will be held between the thumb and forefinger.
Do not let yourself fall into the trap of holding the pick with the tips of your thumb, forefinger and middle finger. This is incorrect and is a very bad habit to break. It will not allow for your remaining fingers to have any dexterity.
Learning Chords
Now for the fun part, actually playing the guitar! It is essential to practice playing the guitar. It is not that difficult to make sounds on the guitar but if you want to make these sounds pleasing to the ear, you have to practice.
Let's begin with open chords. Open chords are basic chord formations that all guitar players learn how to play first.
Major Open Chords
Solid dots represent finger positions. Diamonds represent played notes. X represents a string or note not played (muted).
Each of these major chords are built from a corresponding major scale.
Each of these major chords also consists of a triad in notation.
The formula for a major triad consists of R-3-5.
This means that if your C major scale is: C D E F G A B C, Root = C, 3rd = E, & 5th = G.
When you play your C major chord, the only notes strummed are C E G. I suspect this will be kind of confusing but will make sense once you really get to know your fret board and scales.
Here are some of the common ways that these chords and notes will be referred to. CM, DM, EM, FM, GM, AM, BM, C, D, E, F, G, A, B.
Minor Open Chords
Each of the major chords are built from a corresponding minor scale. Each of the minor chords consists of a triad in notation. The formula for a minor triad is as follows: R- (flatted) 3- 5.
This means if your C minor scale is: C D Eb F G Ab Bb C, Root = C, 3rd = Eb, 5th = G. Notice that it is exactly the same as a minor triad except for the flatted (b) 3rd.
Also, the only notes played will be the R-3-5.
Here are some of the common ways that these chords and notes will be referred to. Cm, Dm, Em, Fm, Gm, Am, Bm, Cmin, Dmin, Emin, Fmin, Gmin, Amin, Bmin.
Dominant 7th Major Open Chords
Dominant 7th chord formations are a little different. The principles are still the same as a standard major chord formation but the 7th note is added in.
The 7th note played in a dominant 7th chord will be lowered ½ step. If a C major scale is: C D E F G A B C, Root = C, 3rd = E, 5th = G, and 7th = Bb.
The formula for this chord formation is R-3-5-7. If we have a four note construct, a triad will still be the basic form in notation with an additional tone, the 7th.
This is incredibly useful information as there are several larger chords that are used frequently in music.
Here are some of the common ways that these chords and notes will be referred to.
C7, D7, E7, F7, G7, A7, B7, Cdom7, Ddom7, Edom7, Fdom7, Gdom7, Adom7, Bdom7. Dom = Dominant.
Major 7th Open Chords
The Bmaj chord is actually Bmaj7. I have checked several references and this is the correct fingering for this chord.
Major 7th chords are again very similar to dominant 7th. The difference here is that the major 7th follows the major scale identically.
If a C major scale is: C D E F G A B C, Root = C, 3rd = E, 5th = G, 7th = B.
Minor 7th Open Chords
A minor 7th chord is just like the major 7th only with the minor chord formation formula. Let's take a look at what this looks like.
A C minor scale is C D Eb F G Ab Bb C, Root = C, 3rd = Eb, 5th = G, and 7th = Bb.
The formula for this chord construct is R-3b-5-7. Just like the major 7th chord, a standard triad is built out of the R-3b-5 and the 7th tone is added in.
Here are some of the common ways that these chords and notes will be referred to. Cm7, Dm7, Em7, Fm7, Gm7, Am7, Bm7, Cmin7, Dmin7, Emin7, Fmin7, Gmin7, Amin7, Bmin7.
Begin by plucking the sixth string. Do not use your fretting hand. You will hear an E note. If you play a string without using the fret, you are playing the note “open”.
The next thing to do is to move downward and play the strings “open”. You will hear the A, D, G, B, and E notes, in that order. Each note will sound higher than the one preceding it.
After you have done this, return to the sixth string and take your index finger and place it on the first fret.
The first fret is the space between the nut and the first fret. You should be using the index finger on your fretting hand. Now press down the note with the tip of your index finger instead of the joint.
As you hold the index finger down on the initial fret, use the hand with the pick in it and pluck the sixth string. If you have done this right, the sound that you hear should be a little higher than when you first plucked the string without holding down the fret.
Next move the index finger up to the second fret. This is the space between the second and first frets. Pluck the sixth string once more. You should hear a higher sound than the previous one.
Repeat these steps with every string. Play the string open, place your finger on the first fret, and then place your finger on the next fret. If you hear notes that are bad, muffled or off-key, make sure that you are firmly pressing down on the note and that your finger is on the center of the fret.
Continue to practice until you are comfortable making each note.
After you have practiced playing notes, you can move on to playing chords. A chord is two notes that are played at the same time. Chords create a richer sound than what you would hear if you played each note by itself.
Most chords are three notes that are played together. Some chords include more than three notes. Chords involved playing multiple strings together.
This is “strumming”.
The most common chords are “Major” chords and these are the chords that beginning guitarists usually learn first. The major chords are C Major, A Major, G Major, E Major, and D Major.
These chords are a combination of different sets of notes. When theses notes are played together they create a sound that is unique.
Many of your all-time favorite songs are played by using three or more chords. Let’s discuss fingering positions, exact notes and patterns of strumming that are used in “Major” chords.
To play a C Major chord, place your ring finger on the third fret and fifth string. Then place your middle finger on the second fret and fourth string. Last, place your index finger on the first fret, second string.
Now, starting on the fifth string, strum the 3 string quickly. Don’t play the sixth string.
The C Major chord should look like a staircase. The index finger forms the lowest step.
It will feel odd when you begin to work on chords in this way but the more you practice chords and as your fingers become stronger, you will not have a problem forming chord structures with your hands.
Don’t worry if when you begin practicing chords that sound horrible and the notes sound strange. As they say “practice makes perfect.”
To play the a Major chord
Put the index finger on the second fret and fourth string.
Put the middle finger on the second fret and third string.
Put the ring finger on the second fret and second string.
Now, beginning with the fifth string, strum the strings quickly. Don’t play the sixth string.
Put the index finger on the second fret and fourth string.
Put the middle finger on the second fret and third string.
Put the ring finger on the second fret and second string.
Now, beginning with the fifth string, strum the strings quickly. Don’t play the sixth string.
The A Major chord is harder to play than the C Major chord because three fingers are crunched together on the second fret.
Play the chord a couple of times so you can see how it sounds and feels. If you continue to have problems or your fingers are big and cannot fit together on the second fret, you may want to try other fingerings.
One solution is to use the middle finger instead of the ring finger to press down the second and third strings together.
To play the G Major Chord
Put the middle finger on the third fret, sixth string.
Put the index finger on the second fret, and fifth string.
Put the finger on the third fret and first string.
Now strum the strings quickly.
Put the middle finger on the third fret, sixth string
Put the index finger on the second fret, and fifth string
Put the finger on the third fret and first string.
Now strum the strings quickly.
To play the G Major chord you can use a number of different fingerings, though the one described above is simplest for beginning guitar players.
To play the C Major chord
Put the third finger on the fifth string and the third fret.
Put the second finger on the fourth string and the second fret.
Put the first finger on the second string and first fret. Make sure you do NOT strum the sixth string and strum the bottom.
Put the third finger on the fifth string and the third fret.
Put the second finger on the fourth string and the second fret.
Put the first finger on the second string and first fret. Make sure you do NOT strum the sixth string and strum the bottom.
To play the E Major Chord
1. Put the middle finger on the second fret and fifth string
2. Put the ring finger on the second fret and fourth string
3. Put the index finger on the first fret and third string.
4. Now strum the string quickly.
E Major is the best known of the chords because it is found in the most memorable rock and blues songs.
Remember not to worry if the notes don’t sound right or if they sound muffled. If you practice, you will be able to press down the right notes on the right strings.
To play the D Major chord:
1. Put the index finger on the second fret and third string
2. Put the ring finger on third fret and second string.
3. Put the middle finger on the second fret and first string.
4. Begin with the fourth string and play the notes quickly. You will not play the fifth of sixth strings.
The D chord is the hardest for beginning guitarists. This chord is that hardest one to make sound correctly. But again, with practice you should not have any problems.
When just learning to play the guitar, changing chords quickly can be very difficult. I recommend that you work with A chords first, followed by the E chords.
Practice moving from A to Am to A7, it's simply the removal of a finger or placing a finger in the same string set but different fret. Work through all of your chords this way.
Then, practice moving from a C to an Am to an E.
Close your eyes and feel where the chords are and learn to trust your hands.
Very rarely do you see musicians stare at their guitars while they play. Practice for accuracy then speed. Give yourself the freedom to make mistakes, because EVERYONE does! But the more often you practice and self-correct as you are learning, the easier it will get it!
Learning Scales
If you happen to know anything about playing the piano, you know that a “scale” is a group of notes that are played in succession in ascending or descending order. There are a number of different scales.
Each scale has unique characteristics, musical qualities, and note patterns. We will talk a little bit about scales and how to use them to improve your guitar playing.
Practicing and playing scales can be unexciting and tiresome but you can do it. Scales can help make your fingers stronger, improve your ability to learn advanced techniques such as guitar solos and improve hand-eye coordination.
The most basic scale is the chromatic scale.
To begin playing the chromatic scale:
1. Start by playing the sixth string “open”
2. Take your index finger on the hand you will fret with and press down the first fret on the number six string. Pluck it again.
3. Using the middle finger, press down the sixth string at the second fret and play the sixth string again.
4. Utilize the ring finger to press down the third fret and play the sixth string.
5. Utilize the pinkie finger to press down the fourth fret and play the sixth string again.
6. Continue with these steps with the rest of the strings.
You have now played your first scale! ☺
Other scales are the Major Scale and the Minor Pentatonic Scale. You will learn these scales as you continue practicing the guitar.
After you have learned notes, scales and chords, you are now ready to play songs. Many people have their personal favorites whether it is their favorite songs, favorite bands, or favorite pieces of music.
Most everyone knows their favorite songs by heart and they are anxious to play them. This is great. However, it is best to slow down and learn a few basic songs that can assist you in getting the feel for the structure of songs and the feel for timing. You will also get your first opportunity to sing along with your instrument.
There are a few songs that are good for beginners
- Blowin’ in the Wind by Bob Dylan
- Leaving On A Jet Plane by John Denver
- For What It’s Worth by Buffalo Springfield
These songs can assist you in practicing chords:
1. The Gambler by Kenny Rogers
2. Brown Eyed Girl by Van Morrison.
Let’s start with the basic notes and symbols that you should learn, when starting to play the guitar. It’s best that you learn to read music in notation, however if you prefer to learn ‘tabs’, you’ll need to understand other symbols in order to successfully understand tablature music sheets.
Getting Down To Basics
Staff: This is the set of lines upon which notes are placed. Beginning from the bottom line and continuing to the top, notes read E G B D F (rhyme to help remember, Every Good Boy Does Fine). The notes in between are F A C E.
Bar Line: Bar lines are used to separate measures in a musical piece.
Double Bar Line: A double bar line is used to separate to major sections of music inside a piece. They may be used at a temp change or key change.
Accolade: Used to connect two or more lines of music that are played at the same time.
Treble Clef: A treble clef, also known as a G clef, is the most common clef used in music. G clef is derived from the stylized G shape of the clef and the inside spiral circles the G line on the staff.
Key Signatures: Flat key signatures will indicate which note will be flatted. Sharp key signatures will indicate which notes will be sharp.
Specific Time: The bottom number (4) refers to quarter notes. The top number (3) indicates how many quarter notes you will find in a measure. In this case there will be 3 quarter notes per measure.
Also referred to as Three Four time.
This will vary from piece to piece as there are numerous specific times.
Common Time: Common time is used today to represent 4/4 time. Also referred to as Four Four time. If it is used as specific time it would indicate that there are 4 quarter notes per measure.
Cut Time: Cut time is just like it sounds. It represents 2/4 time. Also referred to as Two Four time. The same is true here also where there would be 2 quarter notes per measure.
Whole Note: A whole note gets four beats. In 4/4 time it would count an entire measure.
Half Note: A half note gets two beats. In 4/4 time two half notes would be played.
Quarter Note: A quarter note gets one beat. In 4/4 time four notes would be played.
Eighth Note: An eighth note receives a half beat. In 4/4 time you would play eight notes per measure.
Sixteenth Note: A sixteenth note receives a quarter of one beat. In 4/4 time you would play sixteen notes per measure.
Thirty-second Note: A thirty-second note receives a sixteenth of one beat. In 4/4 time you would play thirty-two notes per measure.
Sixty-fourth Note: A sixty-fourth note receives a thirty-second of one beat. In 4/4 time you would play sixty-four notes per measure.
In a typical measure you will find a variety of notes and will very rarely contain all of one note.
Whole Rest: A whole rest gets 4 counts. In 4/4 time it would receive 4 counts per measure and in 2/4 time it would receive 2 counts per measure.
Half Rest: A half rest gets 2 counts. In 4/4 time it would receive 2 counts per measure and in 2/4 time it would receive 1 count per measure.
Quarter Rest: A quarter rest gets 1 count. In 4/4 time it would receive 1 count per measure and in 2/4 time it would receive ½ count per measure.
Eighth Rest: An eighth rest gets ½ of one count. In 4/4 time it would receive ½ count per measure and in 2/4 time it would receive ¼ count per measure
Sixteenth Rest: A sixteenth rest get ¼ of one count. In 4/4 time it would receive ¼ of a count per measure and in 2/4 time it would receive 1/8 of a count per measure.
Thirty-second Rest: A thirty-second rest gets 1/16 of one count. In 4/4 time it would receive 1/16 of a count per measure and in 2/4 time it would receive 1/32 of a count per measure.
Sixty-fourth Rest: A sixty-fourth rest gets 1/32 of one count. In 4/4 time it would receive 1/32 of a count per measure and in 2/4 time it would receive 1/64 of a count per measure.
Dotted Note: Placing a dot to the right of any note value lengthens the value by one half its value. A dot can also be placed to the right of a rest causing the same to happen, increased value.
Beats per Minute: This indicates how many quarter notes will occur in one minute. You should really have a metronome so that you understand tempo and you can set the beats per minute. A metronome is a piece of equipment that keeps time. You can buy this at a music store.
Extended Rest: An extended rest will cover more than just a specific amount of time inside a measure. It will be for the indicated number of measures. In this case it is 10 measures of rest.
Learning Tablature
Tablature, tab for short, is a form of musical notation with an emphasis on fingerings rather than traditional notation. Tablature is commonly used for fretted instruments.
The problem with tablature is that it doesn't indicate note length or duration. This is where understanding note values will help as most tablature is written below standard notation.
Tablature is a closer visual representation of your guitar fretboard, thereby making it easier to interpret music. It virtually doesn't require any training to become quite good at reading it.
Tablature takes the guesswork out of which fret to play chords or notes.
Standard notation has often left this a gray area but in some cases will indicate frets by placing roman numerals below the staff.
Below is a sample of what guitar tablature looks like and how to read it. Some key points to remember are that tablature will be read upside down in comparison to how the strings are on your guitar.
If you remember, your strings read from top to bottom EADGBE.
Tablature reads from top to bottom EBGDAE.
Each of the single columns represents a chord fingering. The G string is pressed in the 1st fret and the D and A strings are pressed in the 2nd fret.
One problem with tablature is that it doesn't indicate correct finger positions for the chords.
Correct finger positions are essential as we move into barre chords, commonly known as power chords used in most music.
If you begin reading tablature instead of notation, you'll find yourself able to get through a piece more quickly, but limited in many other ways as tablature lacks musical structure that makes a song beautiful and dynamic.
Guitar Theory
It is crucial that you learn the fundamentals of music so that you can start programming your brain to think in terms of how different chords blend together, and what the different scales are.
Music theory will give you a greater understanding of what you are playing and why. Even though it’s not the most enjoyable part of learning guitar, it’s the “homework” you need to do in order to improve your playing style, and to genuinely understand the technical aspects of playing, so that you can develop the skills needed to play like a pro! Let’s begin with major scales: First, you should understand there are only twelve notes in existence.
C C#/Db, D, D#/ Eb, E, F, F#/Gb, G, G#/Ab, A, A#/Bb, B, C.
This is called a chromatic scale which includes every note used when playing guitar. A chromatic scale consists entirely of half steps. Take special note that there isn't an E# or Fb, B# or Cb.
Example: In ascending order, C to C# is a half step, C# to D is a half step, D to D# is a half step, etc. In descending order, C to B is a half step (note that there isn't a Cb or B#), B to Bb is a half step, Bb to A is a half step, etc.
A scale is comprised of 8 steps, which can be either whole or half steps.
Example: C D E F G A B C. C to D is a whole step, D to E is a whole step, E to F is a half step, F to G is a whole step, G to A is a whole step, A to B is a whole step, B to C is a half step.
Notice that the half steps occur where the notes don't exist (E#, Fb, B#, and Cb).
The major scale formula is this: WWHWWWH. You’ll want to make sure to learn this!
Major Scales:
C Major Scale: C D E F G A B C ( 0 sharp, 0 flat)
G Major Scale: G A B C D E F# G ( 1 sharp, f#)
D Major Scale: D E F# G A B C# D ( 2 sharp, f#, g#)
A Major Scale: A B C# D E F# G# A ( 3 sharp, f#, g#, c#)
E Major Scale: E F# G# A B C# D# E ( 4 sharp, f#, g#, c#, d#)
B Major Scale: B C# D# E F# G# A# B ( 5 sharp, f#, g#, c#, d#, a#)
F# Major Scale: F# G# A# B C# D# E# F# ( 6 sharp, f#, g#, c#, d#, a#, e#)
C# Major Scale: C# D# E# F# G# A# B# C#) ( All sharp)
F Major Scale: F G A Bb C D E F ( 1 flab, Bb)
Bb Major Scale: Bb C D Eb F G A Bb ( 2 flat, Bb, Eb)
Eb Major Scale: Eb F G Ab Bb C D Eb ( 3 flat, Bb, Eb, Ab)
Ab Major Scale: Ab Bb C Db Eb F G Ab ( 4 flat, Bb, Eb, Ab, Db)
Db Major Scale: Db Eb F Gb Ab Bb C Db ( 5 flat, Bb, Eb, Ab, Db, Gb)
Gb Major Scale: Gb Ab Bb Cb Db Eb F Gb ( 6 flat, Bb, Eb, Ab, Db, Gb, Cb)
Cb Major Scale: Cb Db Eb Fb Gb Ab Bb Cb ( All flat)
You should also learn the ‘circle of fifths’, which is a wheel of information that helps you learn scale construction, note names and references, as well as key signatures.
When you are trying to figure out which note will be sharp, look to the previous note on the wheel beginning with F (F C G A E B). A Gmaj. Scale has 1 # which is F#, etc.
When you are trying to figure out which note will be flatted next, look to the next note beginning with B (B E A D G Cb). An F maj. Scale has 1 b which is Bb, etc.
You will also need to learn the notes contained on a fretboard.
Each string will contain a chromatic scale, which is the 12 notes.
Your open string note will be the same as your note at the 12th fret and that is the case for every string.
Here is an exercise for you to learn: Keep in mind that when you ascend (climb) the fretboard, practice the notes in sharps.
When you descend the fretboard, practice the notes in flats.
Repeat this with every string. Practice first for accuracy, then for speed.
Minor Scales
A minor scale is going to have some of the same principles as a major scale. It still consists of 8 steps, some whole steps and some half step.
The formula for a minor scale is: WHWWHWW.
C minor scale: C D Eb F G Ab Bb C
D minor scale: D E F G A Bb C D
E minor scale: E F# G A B C D E
F minor scale: F G Ab Bb C Db Eb F
G minor scale: G A Bb C D Eb F G
A minor scale: A B C D E F G A
B minor scale: B C# D E F# G A B
C# minor scale: C# D# E F# G# A B C#
Eb minor scale: Eb F Gb Ab Bb Cb Db Eb
F# minor scale: F# G# A B C# D E F#
G# minor scale: G# A# B C# D# E F# G#
Bb minor scale: Bb C Db Eb F Gb Ab Bb
Harmonic Minor Scales
A harmonic minor scale builds off a natural minor scale.
To play a harmonic minor, you raise the 7th step of the scale by a 1/2 step. The formula for this scale is: WHWWHWH.
Example:
Natural Minor Scale: C D Eb F G Ab Bb C
Melodic Minor Scale: C D Eb F G Ab B C
Your harmonic minor scales will look like this:
C harmonic minor scale: C D Eb F G Ab B C
G harmonic minor scale: G A Bb C D Eb F# G
D harmonic minor scale: D E F G A Bb C# D
A harmonic minor scale: A B C D E F G# A
E harmonic minor scale: E F# G A B C D# E
B harmonic minor scale: B C# D E F# G A# B
F# harmonic minor scale: F# G# A B C# D E# F#
C# harmonic minor scale: C# D# E F# G# A B# C#
G# harmonic minor scale: G# A# B C# D# E F##(G) G#
Eb harmonic minor scale: Eb F Gb Ab Bb Cb D Eb
Bb harmonic minor scale: Bb C Db Eb F Gb A Bb
F harmonic minor scale: F G Ab Bb C Db E F
Analyze and learn this! You have probably noticed the double sharp in the G# harmonic scale. A double sharp essentially means you raise the note a whole step instead of a 1/2 step.
As indicated above an F## is the same as a G. The same principle applies to a double flat.
You would lower a note a whole step. A Bbb would be the same as an A. Again it's the same as math, if you increase by 2 half steps, you have a whole step.
If you lower by 2 half steps, you have a whole step. 2 halves equal a whole.
Melodic Minor Scales
A melodic minor scale builds off of both the natural and harmonic minor scales. This is accomplished by raising the 6th step 1/2 step.
Example:
C Natural Minor Scale: C D Eb F G Ab Bb C
C Harmonic Minor Scale: C D Eb F G Ab B C
C Melodic Minor Scale: C D Eb F G A B C
Here's the trick with a melodic minor scale! In classical music theory, a melodic minor scale is only used while ascending.
When you go to descend, it switches back to a natural minor scale.
Here's what that looks like: C D Eb F G A B C C Bb Ab G F Eb D C.
Choosing Your First Guitar
When you are just beginning to learn the guitar you may wonder which is a better learning guitar, an acoustic guitar or an electric guitar. It is best to consider a variety of things when making your decision.
Maybe one of the most important things to consider when picking a guitar is the type of music you want to play on it. If you like rock music and want to play like the great rock guitar heroes, you should obviously pick an electric guitar.
However, if you enjoy acoustic music you should choose an acoustic guitar.
It is important to consider these things because if you purchase a guitar that is not right for you, then you will not be motivated to play it on a regular basis.
Your personality may be a factor in choosing what guitar to start with or it might not matter at all. There are some people who want to see results right away but if they don’t they get frustrated; lose interest and stop playing the guitar.
If you think you are this type of person, consider an electric guitar. These are smaller than acoustic guitars and have smaller necks.
It is much easier to press the strings so you will have the ability to play your guitar basics faster and easier. Even so, there are some buttons on an electric guitar that may make playing music more complicated.
Be sure to consider your budget when purchasing your first guitar. Of course you do not want to pay a lot of money on your very first guitar.
It is also unwise to pay a lot if you don’t think you will continue to play it over time. Because of the expense, acoustic guitars are the preferred first instrument. An electric guitar is more expensive because you need to buy an amplifier and a guitar cable along with the guitar.
If you still feel like you want to buy an electric guitar, check your local music store to see if they offer start-up guitar and amplifier packages at a price you can handle.
Something else to consider is purchasing a guitar stand. This is a wise investment because if you have your guitar on the stand at all times, you will probably find yourself practicing and playing on it a lot more.
There are various guitars that are recommended for the beginning guitarist. If you have an electric guitar you may want to keep it plugged into the amplifier, that way when it’s time to practice all you need to do is turn the amplifier on and get started.
If you want to sing along with your guitar and have the patience, you may want to purchase an acoustic guitar. There are a few acoustic guitars that are great for beginners.
The Seagull S6 is an instrument made in Canada and is highly recommended by guitarists. The Seagull produces beautiful sound and has a lot of value. This guitar has a cedar top and mahogany on the sides and on the back.
The price of the Seagull is about $350. This may be a little more than what you want to spend on a first guitar but it is a good investment. It is not easy to find the Seagull S6 but if you call around or search the internet you may be able to find one.
The Yamaha F310 is not as highly regarded as the Seagull but it is still a good instrument for a beginning guitarist. These guitars normally cost $250 or you can find them even cheaper if you look online. There are other Yamaha acoustic guitars available but they may cost a little more.
The Takamine G-340 is a beginner model that has a spruce top that is laminated. In general, it is not as good as some of the higher end models of the Takamine but you still get good value for your money.
The Fender CD110E is cheaper than other models of the fender. The CD110E has a nato back, sides and neck along with a spruce top. The cheaper model may not always have the best workmanship but the price makes it attractive to beginner guitarists.
The Epiphone DR-100 is a good starter guitar. The DR-100 has mahogany sides and back and a spruce top. You can buy this guitar cheaply. Most individuals consider this an instrument for beginners only so you may quickly want to buy a better guitar.
There are a number of good guitars available if you want to start with an electric guitar.
The Squier Fat Stratocaster is one of many Squier models available at a good and low price. You may need to be wary of the hardware and pickups but this really depends on how the guitar is made. This is a great beginner guitar. The appearance is appealing.
The Epiphone G-312 SG is not expensive and a decent choice for beginners. The G-312 SG is built with cheaper hardware and pickups of low quality. The body of the instrument is alder. The neck is mahogany and the fingerboard is rosewood. It is a good value according to experts.
The Yamaha Pacifica 112 has a rosewood fret board, maple neck and alder body along with two coil pick-ups. The guitar is well made and the craftsmanship is high. It is a great value and those who want to become serious guitarists may want to upgrade the electronics of this guitar.
The Danelectro 56-U2 is a low cost and cheap instrument but guitarists like its distinct look and sound. It is a guitar with a hollow body and feature dual stacked volume controls and lipstick pickups.
The Epiphone Les Paul Special II is modeled after one of the most famous guitars known, the Les Paul. This low cost guitar has a mahogany neck, rosewood fingerboard, and a laminated alder/maple body. The guitar is marketed toward those that are just beginning to learn the guitar.
If you are a new guitarist, trying out a guitar in the music store may be intimidating. There may very well be other guitarists in the store who think they need to show off their skills. They have a need to impress others with their great guitar licks and chords. This can be intimidating; of course you’d like to be able to show off like this as well. However, stay focused. Your goal is to find the best instrument for you for the least amount of money.
When you enter the store, look around until you find an instrument to your liking. The store employees should give you a sturdy stool. They should also give you a pick but it is probably best to bring one of your own. If you are trying out an electric guitar, it should be plugged into an amplifier that is similar to the one you are going to use.
To hear the sound quality of a guitar, don’t be afraid to strum the strings hard. Listen to the guitar’s sustain and listen for problems such as buzzing strings. If you cannot hear the guitar well, ask to be put in another room or to be moved to a part of the store that is quieter.
If you come up against music store owners that frown on you tuning up the guitar or vigorously strumming, politely hand the guitar back to the owner and take your business elsewhere. It is important to know how a guitar sounds before spending your hard earned money on it.
You should also keep in mind that when trying out a guitar you don’t need to play something complicated. Play something you are used to playing. Concentrate on how the guitar sounds and feels.
Do not pay attention to the people who may be listening to you. Play every fret on the neck of the guitar and be sure that you don’t hear any buzzing. Be sure that if you are playing an electric guitar try various pick-ups and listen for any pick up noise you don’t want.
Try out many different guitars in the music store. Ask a lot of questions and take notes on each guitar you try out. You should jot down the make, model and price of the guitar.
Find out what kind of wood the guitar is made from. Make a note of anything you like or dislike about each guitar you try. After trying out a few guitars head home and consider what you discovered that day.
After you have played a number of guitars and found some that suit your taste. Research the companies who make the guitar you are considering purchasing. There are websites available that can help you familiarize yourself with the companies and their instruments.
The majority of guitar company websites provide specifications for each of their guitars. You may also find additional information on the guitar you want to buy. Check the guitar company website for warranty information as well.
The websites will most likely have contact information so you can e-mail or call them with any other questions.
Of course it goes without saying that a guitar company website will be biased so you will need to discover what other guitarists think of various guitars. The web has many, many sites that have user reviews of guitars.
When looking at these reviews take note of the amount others have paid for their instruments and seriously look at any criticisms. You should be careful of those who give their own guitar a perfect ten. A lot of reviewers will not offer constructive criticism.
Look in your yellow pages to find music stores near you. Think about visiting each store and trying the guitars they have for sale. Call the music stores and inquire to see if they carry the type of guitar you are looking for.
If they do have it in stock, have the store quote you a price. Sometimes you may run into a store employee who does not want to give you a quote over the phone.
If you say that you are about to purchase a guitar somewhere else, they will most likely change their mind. Note any differences in prices when calling music stores.
If after your initial research you are still not sure of what guitar is right for you, go to FretBoard, an online bulletin board that helps guitarists. Someone should be able to assist you.
After you have acquired enough knowledge about the guitar you want to buy, make another trip to the music store. Wait until the next day because your head will be clearer and you will have a better perspective.
Once you return to the music store and know what guitar you want to purchase, you will want to get the guitar at a good price. Many individuals assume that if a guitar costs $600, they will have to buy it for that amount.
This is not true. Those who own music stores make a profit on what they sell in their store so they are able to drop the price of the item. You just have to get them to do that.
You will have to be savvy if you want a bargain. The music store employees want you to spend your money and you want to hold on to as much of your money as possible. As mentioned earlier, you are the one that is in control.
Since the music store wants your business there is nothing wrong with making them earn it.
Keep a few things in mind when you go back to the music store. Like in any sales transaction, do not let the salesperson know just how much you want the product their selling.
Do not let the sales person know just how badly you want a particular guitar. If they approach you and want to assist you, just tell them that you have noticed some nice guitars as you have been shopping around.
Before you get down to bargaining for the guitar you should ask if a guitar case is included. Ask if the guitar case is softshell or hardshell. A softshell guitar case costs less than a hardshell guitar case.
Try a few guitars when you return to the music store. If you feel like it, pretend you want to buy a cheaper guitar than the one you are really interested in.
If a salesperson sells you a cheap guitar, they will get a small commission. Because of this, they will be more eager to give you a bargain on a guitar that is more expensive.
Don’t make it seem that you are in a rush. Take your time and think about whether the guitar you researched is really the guitar you want.
Remember to never pay the list price for the guitar you want. In general, list prices are inflated. A lot of people find it difficult to bargain with a salesperson for a discount. It is not as difficult as it may seem. You can start by asking for the entire price, including the guitar, tax and the case.
When they tell you, think for a moment and ask them what they can do to make the price a little cheaper. Have in mind, a price that you want to pay.
It may be a good idea to try and get a 15 percent discount. If you know of a store where you know they are offering a lower price on the same guitar you want, let the salesperson know this. You may have to apply pressure to get your bargain but you can get used to doing this.
If the guitar you want is on sale or if it is already a low priced instrument, it will be hard to convince the salesperson to drop the price even more. If this is the case, you might want to ask if they could throw in some guitar accessories at no charge or at a steep discount.
This may include items such as guitar strings, guitar polish, picks, or string winders. This may not be the discount that you want but it will be good to know you bargained successfully.
Final Words & Tips
Since you now know the basics on how to play the guitar, it is now your job to get better at everything you have learned. To perfect your skills you should practice regularly.
Practicing the guitar can be aggravating and tiresome but if you get better at playing the instrument then you will end up having more fun. You will begin enjoying practice more and more.
To improve your guitar playing, you will have to set aside time to practice.
It is important to set aside time every day to practice.
Spend at least fifteen minutes a day practicing what you have learned. This will help you a great deal. In the beginning you will have sore fingers but if you play every day, your fingers will get tougher and after a time they will not hurt anymore.
There are a few things that you can do to get into the habit of practicing your guitar. Be sure to put aside between fifteen and twenty minutes a day to practice. Practice in an environment that is quiet and you can put your complete concentration on practicing your guitar.
Be sure to stretch your arms hands and fingers before you begin to play. If you are playing an electric guitar remember to turn off the distortion so that you can clearly hear your mistakes. Know what you are going to practice ahead of time because this makes your practice a whole lot easier.
Be sure your guitar is in tune. Be sure that you are sitting properly, holding the guitar properly and using the pick in the right way. Then play the chromatic scales a couple of times.
Practice chord changes and progressions till you know them like the back of your hand. Once you have a good feel for your 5 basic chord forms, start learning the ‘caged’ system.
Strumming Tips:
1. Be sure to hold your pick correctly.
2. Be sure you don't hold the pick too tightly.
3. In a downward motion, lightly glide the pick over your strings.
4. Don't try and strum to fast. Go for accuracy then speed!
5. Practice strumming whole notes, half notes, quarter notes, eighth notes, and sixteenth notes.
6. Practice note values using a downward strum first.
7. Practice note values using a down/up pattern (go for accuracy!).
8. Integrate down down up up using note values.
9. Strum with your wrist, not your arm
Don't limit yourself to one genre (style) of music. You should really diversify. You will learn so much more by listening to rock, jazz, blues, bluegrass, classical, and Spanish styles of guitar.
Be sure that as you learn that you spend time with people that are musicians. Learn from their experience and expertise.
Remember to be patient. Playing the guitar is difficult in the beginning but keep in mind that everyone has problems when they learn an instrument for the first time.
Just put in daily practice and don’t concern yourself with how you did until you have another practice session.
Most importantly, relax when you play and have a good time!
To your strumming success,
~ Learn With Motive
0 notes
Text
Electronic Music History and Today's Best Modern Proponents!
Electronic music history pre-dates the rock and roll years by decades. Most of us were not even on this areas when it began its often obscure, under-appreciated and misunderstood development. Today, this 'other worldly' herdsman of sound which began close to a century ago, may no longer appear strange and unique as new appointment have accepted much of it as mainstream, but it's had a bumpy rising and, in prognosis mob designation acceptance, a slow one.

Many musicians - the modern backer of electronic singing - developed a luster for analogue synthesizers in the late 1970's and early 1980's with signature songs like Gary Numan's breakthrough, 'Are Friends Electric?'. It was in this age that these pole became smaller, more accessible, more exploiter friendly and more affordable for loads of us. In this article I will tests to phantom this history in easily digestible endings and withdrawal model of today's best modern proponents.
To my mind, this was the beginning of a new epoch. To create electronic music, it was no longer necessary to have entrees to a roomful of technology in a senate or live. Hitherto, this was solely the crew of artists the ambition of Kraftwerk, whose daybook of electronic instruments and cocaine built gadgetry the extent of us could only have dreamed of, even if we could understand the logistics of their functioning. Having said this, at the time I was maturing up in the 60's & 70's, I nevertheless had little uptake of the experience of handling that had synopsis a predecessor in previous decades to arrive at this point.
The history of electronic music owes much to Karlheinz Stockhausen (1928-2007). Stockhausen was a German Avante Garde copier and a pioneering figurehead in electronic singing from the 1950's onwards, influencing a occurrences that would eventually have a powerful look upon nickname such as Kraftwerk, Tangerine Dream, Brain Eno, Cabaret Voltaire, Depeche Mode, not to remark the experimental crannies of the Beatles' and others in the 1960's. His cover-up is seen on the lid of "Sgt. Pepper's Lonely Hearts Club Band", the Beatles' 1967 expert Opus. Let's start, however, by traveling a little further back in time.
The Turn of the 20th Century
Time stood still for this stargazer when I originally discovered that the first documented, exclusively electronic, observance were not in the 1970's or 1980's but in the 1920's!
The first purely electronic instrument, the Theremin, which is played without touch, was invented by Russian scientists and cellist, Lev Termen (1896-1993), circa 1919.
In 1924, the Theremin made its concert debut with the Leningrad Philharmonic. Interest generated by the theremin drew appointee to exactness staged across Europe and Britain. In 1930, the prestigious Carnegie Hall in New York, experienced a possession of classical singing using nothing but a plan of ten theremins. Watching a amounts of skilled musicians playing this eerie sounding medium by glimmering their hands around its feeler must have been so exhilarating, surreal and group for a pre-tech audience!
For those interested, team out the recordings of Theremin virtuoso Clara Rockmore (1911-1998). Lithuanian born Rockmore (Reisenberg) worked with its researcher in New York to perfect the hindrance during its early era and became its herdsman acclaimed, brilliant and recognized comedian and spout throughout her life.
In retrospect Clara, was the first celebrated 'star' of genuine electronic music. You are unlikely to discovery more eerie, yet beautiful aspect of classical singing on the Theremin. She's definitely a longing of mine!
Electronic Music in Sci-Fi, Cinema and Television
Unfortunately, and due mainly to problem in aptitude mastering, the Theremin's future as a musical stipulation was shot lived. Eventually, it found a nook in 1950's Sci-Fi films. The 1951 cinema classic "The Day the Earth Stood Still", with a soundtrack by influential American film music copier Bernard Hermann (known for Alfred Hitchcock's "Psycho", etc.), is rich with an 'extraterrestrial' score using two Theremins and other electronic flight melded with acoustic instrumentation.
Using the vacuum-tube oscillator technology of the Theremin, French cellist and radio telegraphist, Maurice Martenot (1898-1980), began composition the Ondes Martenot (in French, known as the Martenot Wave) in 1928.
Employing a order and familiar fingerboard which could be more easily mastered by a musician, Martenot's obstacle succeeded where the Theremin failed in beings user-friendly. In fact, it became the first successful electronic medium to be used by copier and orchestras of its energy until the gift day.
It is featured on the topic to the original 1960's TV cell "Star Trek", and can be heard on contemporary recordings by the say of Radiohead and Brian Ferry.
The expressive multi-timbral Ondes Martenot, although monophonic, is the closest medium of its legislature I have heard which approaches the sound of modern synthesis.
"Forbidden Planet", released in 1956, was the first major commercial section cinema to feature an exclusively electronic soundtrack... aside from introducing Robbie the Robot and the stunning Anne Francis! The ground-breaking score was produced by husband and spouses squad Louis and Bebe Barron who, in the late 1940's, established the first privately owned booking boldness in the USA booking electronic experimental artists such as the iconic John Cage (whose own Avante Garde boldness challenged the definition of singing itself!).
The Barrons are generally credited for owning telegram the retreat of electronic singing in cinema. A soldering iron in one hand, Louis built circuitry which he manipulated to create a excess of bizarre, 'unearthly' artfulness and motifs for the movie. Once performed, these sounds could not be replicated as the mouseover would purposely overload, smoke and burn out to exponent the desired sound result.
Consequently, they were all recorded to tape and Bebe sifted through hours of reels edited what was deemed usable, then re-manipulated these with subordination and reverberation and creatively dubbed the endings role using multiple tape decks.
In supplements to this laborious money method, I sense compelled to include that which is, arguably, the record enduring and influential electronic Television signature ever: the topic to the long jogging 1963 British Sci-Fi look series, "Dr. Who". It was the first time a Television design featured a solely electronic theme. The themes to "Dr. Who" was created at the legendary BBC Radiophonic Workshop using tape loops and tests pendulum to run through effects, entrance these to tape, then were re-manipulated and edited by another Electro pioneer, Delia Derbyshire, interpreting the order of Ron Grainer.
As you can see, electronic music's prevalent custom in vintage Sci-Fi was the odds source of the general public's opinion of this music as beings 'other worldly' and 'alien-bizarre sounding'. This remained the proceedings till at least 1968 with the sovereignty of the bins scrapbook "Switched-On Bach" performed entirely on a Moog modular synthesizer by Walter Carlos (who, with a few surgical nips and tucks, subsequently became Wendy Carlos).
The 1970's expanded electronic music's silhouette with the pause through of bands like Kraftwerk and Tangerine Dream, and especially the 1980's when it found more mainstream acceptance.
The Mid 1900's: Musique Concrete
In its segment through the 1900's, electronic music was not solely confined to electronic circuitry creature manipulated to group sound. Back in the 1940's, a relatively new German concoction - the reel-to-reel tape salesperson developed in the 1930's - became the subject of interest to a amounts of Avante Garde European composers, pack notably the French radio broadcaster and copier Pierre Schaeffer (1910-1995) who developed a montage medium he called Musique Concrete.
Musique Concrete (meaning 'real world' existing sounds as opposed to artificial or acoustic ones produced by musical instruments) broadly involved the splicing together of recorded segment of tape containing 'found' sounds - natural, environmental, industrial and human - and manipulating these with kingdom such as delay, reverb, distortion, speeding up or slowing down of tape-speed (varispeed), reversing, etc.
Stockhausen actually held symmetry convention his Musique Concrete happenings as promoting tapes (by this platform electronic as well as 'real world' sounds were used on the recordings) on apex of which live instruments would be performed by classical player responding to the understanding and motifs they were hearing!
Musique Concrete had a wide impressing not only on Avante Garde and composition libraries, but also on the contemporary music of the 1960's and 1970's. Important proceedings to summary are the Beatles' use of this senate in ground-breaking tracks like 'Tomorrow Never Knows', 'Revolution No. 9' and 'Being for the Benefit of Mr. Kite', as well as Pink Floyd albums "Umma Gumma", "Dark Side of the Moon" and Frank Zappa's "Lumpy Gravy". All used tape cut-ups and home-made tape loops often fed live into the main mixdown.
Today this can be performed with guiltlessness using digital sampling, but yesterday's heroes labored hours, age and even weeks to perhaps complete a four minute piece! For those of ourselves who are contemporary musicians, understanding the history of electronic singing helps in appreciating the portion leap technology has taken in the recent period. But these early innovators, these pioneers - of which there are many more down the queue - and the important figure they influenced that came before us, created the revolutionary foundation that has become our electronic musical legacy today and for this I pay them homage!
1950's: The First Computer and Synth Play Music
Moving striker a few years to 1957 and enter the first computer into the electronic mix. As you can imagine, it wasn't exactly a portable laptop escape but consumed a whole room and user friendly wasn't even a concept. Nonetheless creative fly kept pushing the boundaries. One of these was Max Mathews (1926 -) from Bell Telephone Laboratories, New Jersey, who developed Music 1, the original singing program for computers upon which all subsequent digital synthesis has its roots based. Mathews, dubbed the 'Father of Computer Music', using a digital IBM Mainframe, was the first to synthesize singing on a computer.
In the peak of Stanley Kubrik's 1968 cinema '2001: A Space Odyssey', utility is made of a 1961 Mathews' electronic stall of the late 1800's poetry 'Daisy Bell'. Here the musical accompaniment is performed by his programmed mainframe together with a computer-synthesized human 'singing' voice section pioneered in the early 60's. In the movie, as HAL the computer regresses, 'he' reverts to this song, an cheerfulness to 'his' own origins.
1957 also witnessed the first advanced synth, the RCA Mk II Sound Synthesizer (an enhancement on the 1955 original). It also featured an electronic sequencer to program music property playback. This massive RCA Synth was installed, and still remains, at the Columbia-Princeton Electronic Music Center, New York, where the legendary Robert Moog worked for a while. Universities and Tech laboratories were the main outcome for synth and computer singing trying in that early era.
1960's: The Dawning of The Age of Moog
The logistics and experience of composing and even owning entrees to what were, until then, comedian unfriendly synthesizers, led to a occurrences for more portable playable instruments. One of the first to respond, and definitely the prince successful, was Robert Moog (1934-2005). His playable synth employed the familiar piano loci keyboard.
Moog's bulky telephone-operators' profile plug-in makes of modular synth was not one to be transported and design up with any prince of instinct or speed! But it received an enormous boost in commonness with the fate of Walter Carlos, as previously mentioned, in 1968. His LP (Long Player) best merchant entryways "Switched-On Bach" was unprecedented because it was the first time an albums appeared of fully synthesized music, as opposed to experimental sound pieces.
The albums was a complex classical music lineup with various multi-tracks and overdubs necessary, as the synthesizer was only monophonic! Carlos also created the electronic score for "A Clockwork Orange", Stanley Kubrik's confusion 1972 futuristic film.
From this point, the Moog synth is prevalent on a sum of late 1960's contemporary albums. In 1967 the Monkees' "Pisces, Aquarius, Capricorn & Jones Ltd" became the first commercial pop scrapbook self-rule to feature the modular Moog. In fact, singer/drummer Mickey Dolenz purchased one of the very first conveyance sold.
It wasn't until the early 1970's, however, when the first Minimoog appeared that interest seriously developed amongst musicians. This portable little group with a fat sound had a significant gradations becoming fragments of live music outline for dozens touring musicians for years to come. Other firm such as Sequential Circuits, Roland and Korg began producing their own synths, assigning onset to a music subculture.
I cannot close the intensity on the 1960's, however, without caution to the Mellotron. This electronic-mechanical medium is often viewed as the primitive announcer to the modern digital sampler.
Developed in early 1960's Britain and based on the Chamberlin (a cumbersome US-designed media from the previous decade), the Mellotron keyboard triggered pre-recorded tapes, each key corresponding to the equivalent recollection and endings of the pre-loaded acoustic instrument.
The Mellotron is legendary for its use on the Beatles' 1966 ballad 'Strawberry Fields Forever'. A flute tape-bank is used on the haunting introduction played by Paul McCartney.
The instrument's popularity burgeoned and was used on dozens recordings of the age such as the immensely successful Moody Blues epic 'Nights in White Satin'. The 1970's saw it adopted more and more by progressive rock bands. Electronic pioneers Tangerine Dream featured it on their early albums.
With time and further overtures in microchip technology though, this charming medium became a relics of its period.
1970's: The Birth of Vintage Electronic Bands
The early fluid scrapbook of Tangerine Dream such as "Phaedra" from 1974 and Brian Eno's currency with his self-coined 'ambient music' and on David Bowie's "Heroes" album, further drew interest in the synthesizer from both musicians and audience.
Kraftwerk, whose 1974 seminal albums "Autobahn" achieved international commercial success, took the medium even further adding precision, pulsating electronic beats and meter and noble synth melodies. Their minimalism suggested a cold, industrial and computerized-urban world. They often utilized vocoders and conversations synthesis device such as the gorgeously robotic 'Speak and Spell' voice emulator, the latter creature a children's education aid!
While inspired by the experimental electronic subroutine of Stockhausen, as artists, Kraftwerk were the first to successfully combine all the elements of electronically generated singing and noise and group an easily recognizable ballad format. The supplements of vocals in dozens of their songs, both in their native German tongue and English, helped earn them universal acclaim getting one of the hordes influential contemporary singing pioneers and actor of the past half-century.
Kraftwerk's 1978 gem 'Das Modell' punch the UK sum one loci with a reissued English language version, 'The Model', in February 1982, structure it one of the earliest Electro sketch toppers!
Ironically, though, it took a impression that had no association with EM (Electronic Music) to facilitate its broader mainstream acceptance. The mid 1970's hoods movement, primarily in Britain, brought with it a unique new attitude: one that gave impulse to self-expression rather than performance dexterity and formal training, as embodied by contemporary progressive rock musicians. The initial offensive of metallic neighborhood transformed into a less abrasive word during the late 1970's: New Wave. This, mixed with the comparative affordability of lots small, easy to utility synthesizers, led to the commercial synth detonation of the early 1980's.
A new adeptness of cub flight began to explore the potential of these instruments and began to create soundscapes challenging the prevailing spotter of contemporary music. This didn't arrive without batalla scars though. The singing trade establishment, especially in its media, often derided this new example of word and accomplishment and was anxious to consign it to the dustbin of history.
1980's: The First Golden Era of Electronic Music for the Masses
Gary Numan became arguably the first commercial synth megastar with the 1979 "Tubeway Army" handcuffs 'Are Friends Electric?'. The Sci-Fi ingredient is not too far away once again. Some of the imagery is drawn from the Science Fiction classic, "Do Androids Dream of Electric Sheep?". The 1982 box cinema "Blade Runner" was also based on the same book.
Although 'Are Friends Electric?' featured conventional drum and bass backing, its dominant use of Polymoogs gives the songs its very distinctive sound. The booking was the first synth-based self-sufficiency to achieve quantity one unit office in the UK during the post-punk years and helped manager in a new genre. No longer was electronic and/or synthesizer singing consigned to the mainstream sidelines. Exciting!
Further development in affordable electronic technology placed electronic squarely in the fins of pups researcher and began to transform professional studios.
Designed in Australia in 1978, the Fairlight Sampler CMI became the first commercially available polyphonic digital sampling barricade but its prohibitive betrayal saw it solely in use by the fondness of Trevor Horn, Stevie Wonder and Peter Gabriel. By mid-decade, however, smaller, cheaper instruments entered the market such as the ubiquitous Akai and Emulator Samplers often used by musicians live to replicate their studio-recorded sounds. The Sampler revolutionized the stipulation of music from this sequences on.
In sum major markets, with the qualified zone of the US, the early 1980's was commercially drawn to electro-influenced artists. This was an exciting years for dozens of us, myself included. I know I wasn't alone in closeting the distorted guitar and amps and immersing myself into a new kind of musical manifestation - a sound shore of the conscription and non traditional.
At home, Australian synth based bands Real Life ('Send Me An Angel', "Heartland" album), Icehouse ('Hey Little Girl') and Pseudo Echo ('Funky Town') began to schemes internationally, and more experimental electronic design like Severed Heads and SPK also developed cult followings overseas.
But by mid-decade the first global electronic succession missing its boldness amidst appeal fomented by an unrelenting old seminary singing media. Most of the artists that began the decade as predominantly electro-based either disintegrated or heavily hybrids their sound with traditional rock instrumentation.
The USA, the largest ore market in every sense, remained in the conservative music wings for scads of the 1980's. Although synth-based records did box the American charts, the first being Human League's 1982 US design topper 'Don't You Want Me Baby?', on the whole it was to be a few more era before the American mainstream embraced electronic music, at which spunk it consolidated itself as a dominant last for musicians and officer alike, worldwide.
1988 was somewhat of a watershed year for electronic music in the US. Often maligned in the press in their early years, it was Depeche Mode that unintentionally - and mostly unaware - spearheaded this new assault. From cult period in America for much of the decade, their new high-play revolution on what was now termed Modern Rock radio resulted in mega stadium performances. An Electro accomplishment playing sold out dock was not common fare in the USA at that time!
In 1990, Quaker chaos in New York to greet the fraction at a central entrance firm made TV news, and their "Violator" albums outselling Madonna and Prince in the same year made them a US household name. Electronic music was here to stay, without a doubt!
1990's Onward: The Second Golden Era of Electronic Music for the Masses
Before our 'star music' secured its hold on the US mainstream, and while it was losing commercial lands elsewhere throughout much of the mid 1980's, Detroit and Chicago became unassuming laboratories for an outburst of Electronic Music which would see out much of the 1990's and onwards. Enter Techno and House.
Detroit in the 1980's, a post-Fordism US industrial wasteland, produced the harder European influenced Techno. In the early to mid 80's, Detroiter Juan Atkins, an obsessive Kraftwerk fan, together with Derrick May and Kevin Saunderson - using primitive, often borrowed appointments - formed the flock of what would become, together with House, the predominant singing club-culture throughout the world. Heavily referenced artists that informed early Techno clause were European pioneers such as the aforementioned Kraftwerk, as well as Yello and British Electro acts the yearning of Depeche Mode, Human League, Heaven 17, New Order and Cabaret Voltaire.
Chicago, a four-hour cultivation away, simultaneously saw the section of House. The name is generally considered to be derived from "The Warehouse" where various DJ-Producers featured this new singing amalgam. House has its roots in 1970's disco and, unlike Techno, usually has some making of vocal. I think Giorgio Moroder's undertaking in the mid 70's with Donna Summer, especially the poetry 'I Feel Love', is pivotal in appreciating the 70's disco influences upon burgeoning Chicago House.
A many of variants and sub troop have developed since - crossing the Atlantic, reworked and back again - but in many spirit the popular success of these two soul forms revitalized the entire Electronic landscapes and its associated social culture. Techno and House helped to profoundly challenge mainstream and Alternative Rock as the preferred listening variety for a new generation: a meeting who has grown up with electronic singing and accepts it as a given. For them, it is music that has always been.
The history of electronic music continues to be written as technology advances and people's anticipation of where singing can go continues to push it forward, increasing its vocabularies and lexicon. https://kokania.com/product-category/electronics/
0 notes
Text
Day 134 (26 July 2017)
This morning I watched a very brave doe walk around my camp. She was skiddish of everything but me. I stood, drank my coffee, and watched her prance around. As I watched her I realized that I had made another mistake in my visit to Greenwood Lake. I hadn't bought any more food. I decided to resolve that today. I hiked 8 miles and then took an Uber to the local Walmart in Harriman. After a good resupply and a delicious subway sandwich I ubered back to the trail. My trip took me about 1.5 hours total. It was time well spent. I then encountered an obstacle called the "Lemon squeezer". It was a daunting test, and I had to actually climb up the wall in order to get through it. I have seen a plethora of deer lately, to include a very large buck. I hope that my luck continues on into hunting season. Another 12.5 miles down today. I am tenting at the Fingerboard Shelter tonight. I'm starting to like New York. CNB
4 notes
·
View notes