#feyknits
Explore tagged Tumblr posts
Visit Tumblr Blog
Explore Tumblr blogs with no restrictions, modern design and the best experience.
Last Seen Tumblr Blogs


Fun Fact
Tumblr has 411 employees.
Text

Nooooooooo my sleeves are different lengths *crying screaming banging my fist on the wall*. I have to frog it and redo the one ): Woe is me! I hate sleeves. I was almost done too! and it came out exactly like I was envisioning! Despair ):
Pattern: Rattlesnake by Jamie Hoffman
Yarn: Knitpicks swish (amethyst heather) and wool of the andes (caution and paloma) and Knitpicks Hawthorne (jupiter speckle)
Other progress pics:


56 notes
·
View notes
Text


Started this while I was sad about the dye lots for my current sweater lying to me. I like it!!! the yarn is super luxurious, it’ll be perfect for summer. I messed up the neck I know that. Following the pattern it ended up WAY small like 12”… I prefer my necklines at least 18” but more like 22”. I’m worried about this honestly, that I needed to be knitting a size up. I suppose I should try it on at some point. But if I have to redo all of this colorwork, I might just die instead. I also could NOT do the cast on the pattern suggested. I kept messing it up and working it hurt my hand joints. It was… not a great start at all.
Pattern: Annabelle Crop
Yarn: KnitPicks Samia in Moonflower, Abalone, and Taro (silk/cupro blend)
146 notes
·
View notes
Text


I ran out of yarn for my other one, until I acquire a new ball winder, so new project!! This is my ✨first✨ time knitting with my own handspun!! I'm so excited!!! It's been super fun so far, even if the colors are uhh... they sure are something else. It's so soft and cozy though.
Pattern: Spring Sorrel, with modifications since this is worsted and the pattern calls for sport? I think? I"m also making it with positive ease bc I dislike negative ease sweaters.
I had to redo all the math for dividing the sleeves and body because I skipped the last increase or two on the yoke because it was already too big. Turns out! My gauge for the yoke part was much looser than my gauge for the body (just stockinette).
Also added short rows which was... not fun. The pattern didn't tell you how to or even where the center back is. So I had no idea where to center the short rows and had to do a bunch of math to figure that out as well. I was not happy about that. But I need short rows for things to fit ok.
I did a lot of sketching and math also to figure out how to fade in the two colors. I didn't want to just alternate rows, I wanted it to be fibonacci type blending. But.. I also had to make sure I was using the right color for the dip stitches. So it's not perfect and I hope it looks alright.
Yarn: Knit Picks Wool of the Andes in Oyster Heather and my own handspun (the colorway Sugar Coated from YarnHero in polwarth) (see my posts about it here on the niddy noddy and hank and here for the single + the braid.)
31 notes
·
View notes
Text

not a great picture but I am excited for this project!!! It’s the Rattlesnake Sweater by Jamie Hoffman and I am LOVING my color choices! I was inspired by desert sunset vibes. There’s going to be cacti too. I’ve had this planned since the very beginning of the year- I even did a sketch for it:

I'm using knitpicks Swish (amethyst heather), Wool of the Andes (palomo and caution), and Hawthorn (jupiter speckle).
I got SO excited when I saw the colors that I forgot to check if they were superwash or not and turns out two are and two aren't 😭 I did a gauge swatch of a superwash and not-superwash to see if it would stretch bad in colorwork, but those were different yarn lines. So I am anxious about it :S I plan on never machine washing (or drying) this, so I'm really really really hoping it doesn't distort. Knitpicks didn't have other colors I was going for in the other superwash lines so I had to knit with the yarn I had or have it not match my vision. Eep.
—————————
I ended up having to frog the colorwork and redo it ): the one spot was too tight and it wasn’t going to block out. I had to size up a needle just for those few rows, which is something I don’t usually do?


45 notes
·
View notes
Text
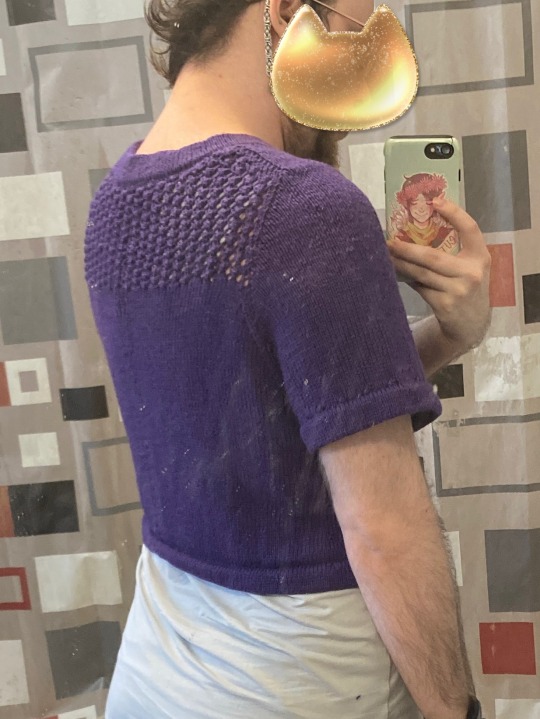
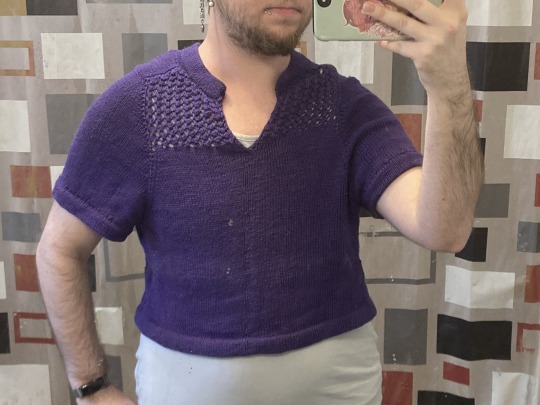
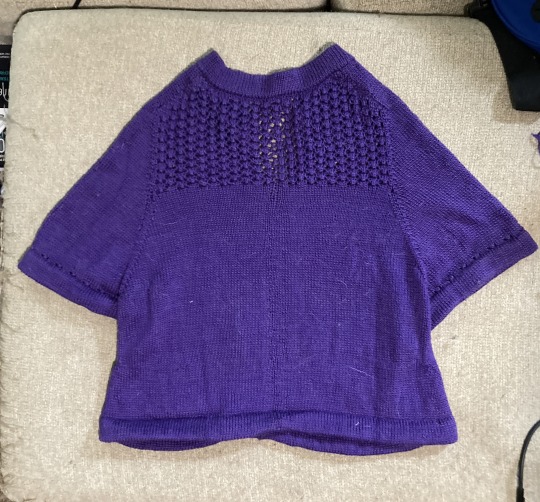
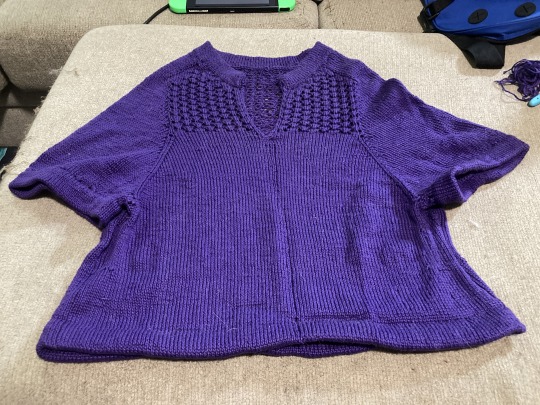
These are objectively really bad pics, but I can’t seem to take any that look nice ): So here’s the final shirt with that super weird construction method (which I talked about with diagrams! here). (previous post about it here). I think I messed up the underarm shape a bit, it looks wonky. I think the straight part should have been longer and the diagonal part shorter. The collar also looks odd on me. I'm worried I gained weight in between writing the pattern and finishing it. But omggg the fit at the shoulder is dreamy. I can't wait to make another sweater like this.
Pattern: something I whipped up inspired by some obscure russian pics I found on pinterest
Yarn: K+C Pearl, it’s a lyocell and viscose blend
58 notes
·
View notes
Text


Got a yarn winder!!! it makes cakes!! so I made a gauge swatch. I plan on making a second Annabelle crop at some point with this yarn. I accidentally bought superwash and non-superwash for it because I wasn’t playing enough attention. (I saw the pretty colors and blacked out I guess). Blocking the swatch seems ok. It might turn out slightly wonky but I’m optimistic. I plan on only ever hand washing it anyway so fingers crossed the superwash won’t stretch.
Pattern: Annabelle Crop
Yarn: Knitpicks Muse (in Delight Speckle) and Knitpicks Palette (in Wonderland Heather and Oyster Heather)
37 notes
·
View notes
Text


my parents went to Alaska over the summer and brought back some musk ox fiber! This is something my mom wanted me to knit for her- a smoke ring/cowl. I used up as much fiber as I had. It's still a little small, but I'm hoping it will be warm and cozy. Genuinely sad I forgot to take a picture of the before winding it into a ball. The colors are so much more subtle, and I was having a hard time capturing that with my phone camera. I think the striping means the lace pattern is obscured, but my mom specifically asked for lace.
Pattern: Rivendell Smoke Ring by Susan Pandorf
Yarn: blend of wool and qiviut (musk ox) fiber from Musk Ox Farm, Alaska
15 notes
·
View notes
Text


All my other knitting projects hit a snag, so I cast this on. I first tried to do in linen stitch, but my gauge was wayyyy off and I didn't like how stiff the fabric was. So I played around with stitch textures and found this one. I'm still not sold on it, but I'm too far along to try anything else ¯\_(��)_/¯ It also has a little cable to add more structure to the shoulder.
Yarn: Lucky Brand Bamboo in Blues
Pattern: I am winging a sideways knit shirt
10 notes
·
View notes
Text


I’ll take better pictures when it’s completely finished, but here’s the first trying on! Next is sleeve hell! I was thinking about doing bishop sleeves which means doing a bunch more math and I haven’t decided how much poof I want. I hate knitting sleeves honestly.
I added a side view so you can see how I edited the hem. Going just by the pattern, the end result was not going to fit over my hips. So I had to frog the last few inches and do a split hem. It’s done all in one go with short rows so I didn’t have another end to weave in. I’m still not sure this is flattering, but it’s better (less work) than any alternative.
previous post about it here (showing how the dye lots lied to me) and here (the yoke, includes my thoughts on the pattern itself (bad))
Pattern: Once and Floral sweater
Yarn: K+C Essential Cotton in Rainforest, Rose Garden, and Cream
30 notes
·
View notes
Text

making good progress on that desert sunset sweater! This project has been put on a moratorium though as I race to finish an impulse purchase by christmas. I saw some “australian shepherd” colored yarn by round mountain fibers and knew I needed to make a gift for my parents with it.
This sweater has been so fun to knit so far though! I love the pattern (the texture in the cacti!!!) and the colors I picked are really vivid.
Pattern: Rattlesnake by Jamie Hoffman
Yarn: Knitpicks swish (amethyst heather) and wool of the andes (caution and paloma)
16 notes
·
View notes
Text


New project! Finally finished the desert sunset sweater (I'll post pics once I weave in all the many many ends) so I cast this on. It has a really fun and unique construction that's been a fun change of pace. You make two triangles for the hips and then work in the round for a bit before splitting and knitting the front and back separately. The original is designed for stripes, but I thought this yarn would be self-stripy enough. Honestly, I can't decide if I like the color pooling (I am alternating skeins even if you can't really tell...), but it is lightweight and fun to knit.
My only complaint is how much gauge actually truly matters here. For the hip triangles- the width across is actually the *height* of the triangle, not the length of any of its sides. You can't just add more rows necessarily like if you were knitting a normal sweater. Adding more rows changes a bunch of the dimensions. It was a nightmare trying to figure out if my gauge was ok or not. I couldn't meet gauge no matter what I did (going up yet another needle size would have made the fabric so sheer!) so I had to hope for the best. Ugh. Honestly I wonder if the pattern was mismarked as needing fingering weight and not light fingering weight or maybe having it be wool truly matters? I don't know. I can't imagine I knit that much tighter- I generally knit with an even tension!
Pattern: Luminos Tee by Yamagara
Yarn: K+C Hand-dyed Cotton (I got it at Joanns (before the liquidation sale) for ~$4 a hank!) (I actually grabbed a few others too but they're all single skeins of colors so that will be fun figuring out projects for them...) in Vanilla Swirl
4 notes
·
View notes
Text


finally got around to blocking this! I was really hyped for it but it… looks bad. The neckline is not fitting at all, it’s like the ugliest turtleneck you’ve ever seen. Maybe the bust is too small and it can’t fall down far enough? Maybe I needed to knit a size up? Maybe I needed to have kept using the small needles between the neckband and the colorwork? I can’t decide if I want to rip the whole top off and reknit it? Or just like fold down the ribbing to hide it completely? I was so excited for this ): not happy about having to put in extra effort
Pattern: Soldotna Crop
Yarn: Lion Brand Local Yarn in Lilac, Quail, Liberty, and Blue Jeans
previous post here
14 notes
·
View notes
Text
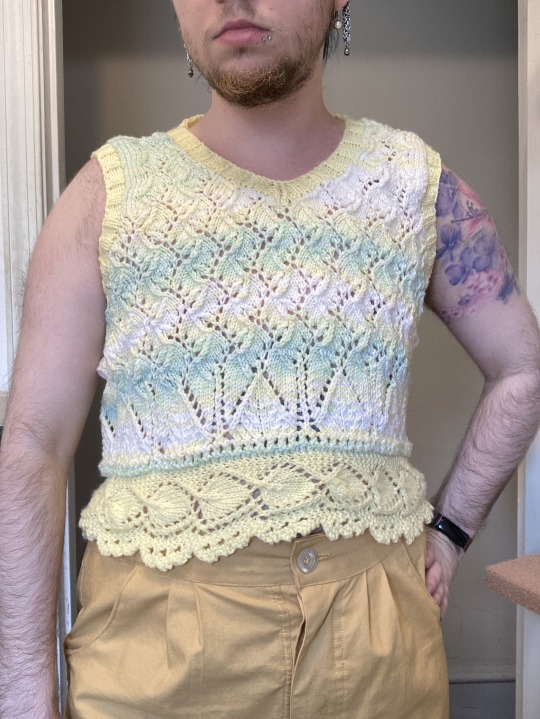
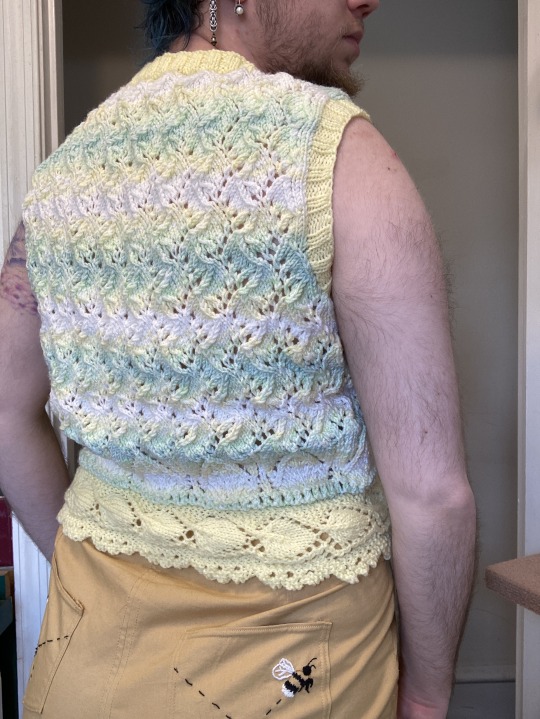
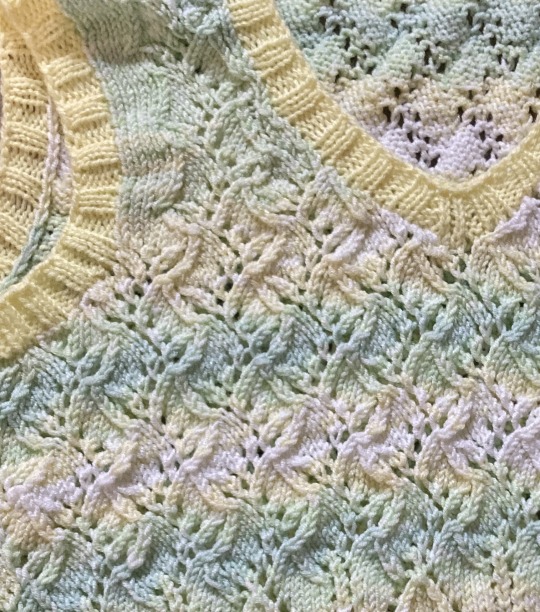
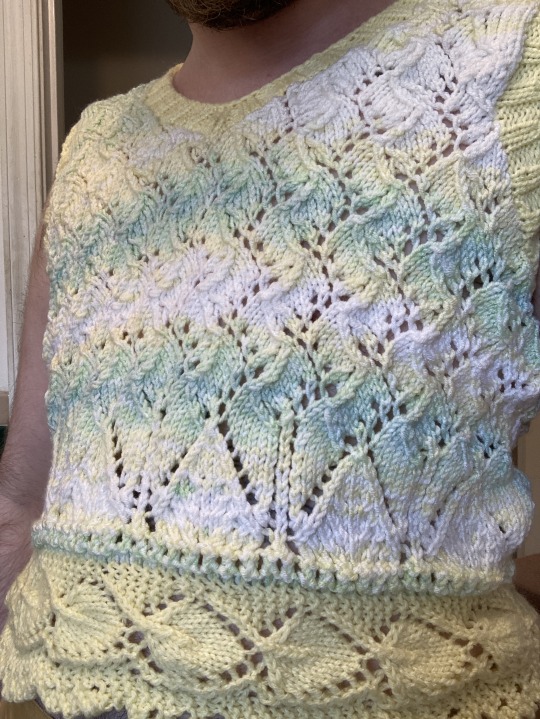
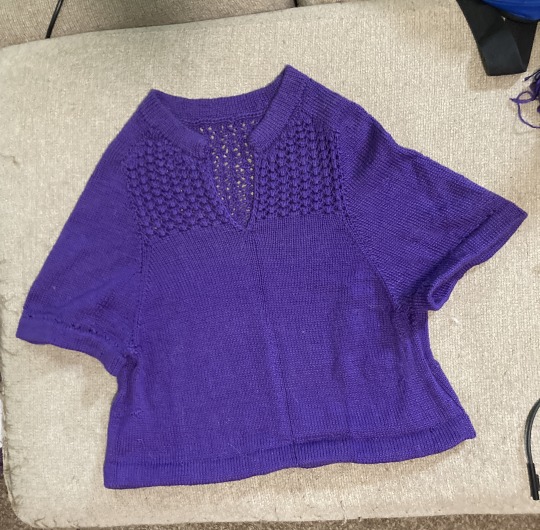
the final version of this sweater vest! (previous post here)
Yarn: Lion Brand Ice Cream Smoothies in Lime (it’s so soft but it’s acrylic so I’m not sure how breathable it is?) The yellow is Bernat Baby Sport, also acrylic.
Pattern: same as all the others, a classic 1940s vintage pattern (Sleeveless Pullover Pattern #S-113 printed in Spool Cotton #198 Knit for Victory). Except I added a lace strip to the bottom instead of ribbing and am using an altered version of the Trailing Vines stitch pattern plus a bit that I charted up myself (it was way too much math and stitch counting). The front panel is one size and the back is the next size up because the lace needed to be added in even numbers (couldn’t split the difference). Honestly I should just write my own pattern for this instead of referring to the vintage one bc it’s so different lol. Still thinking about actually producing/selling my patterns, I don’t know the first thing about that.
70 notes
·
View notes
Text


working on a Soldotna Crop with this Lion Brand Local Wool I got for like half off at Joanns ($9 a skein of pure wool was too good to pass up). I ran out of the light blue though so I have to hem it in the dark blue (or the grey but that wouldn’t look good. I'm definitely not buying more of this at full price just to finish this!). I’ve been not feeling well esp since catching covid for the first time so I wanted a project I could just work on without having to do an awful ton of math. BUT of course I made it difficult for myself- the yarn I picked is too bulky so the gauge is very off and I have to do math anyway. I think it looks nice though; I'm excited to wear it.
(ignore my messy workspace >.<)
11 notes
·
View notes
Text

you ever get most of the way through a project only to realize the dye lot LIED to you?? The skeins were printed with the exact same dye lot but now there’s a giant ugly stripe across the midsection of my sweater. Genuinely upset and disheartened. This is so much work to do, and it’s dozens of hours of my least favorite part about knitting- miles of stockinette. I don’t want to frog it but I know I will never wear it like this, so there’s no point in finishing it. Genuinely want to cry.
prev post here
yarn: K+C Essentials (cotton) in Rainforest
pattern: Once and Floral sweater
#knitting#fiber arts#send help#feyknits#as per my previous post i don’t know if i recommend this pattern#but i definitely do not plan on knitting this again#the laddering is bc I am knitting this on DPNs dont mind it#it will surely block out#i did my best to avoid laddering but there's only so much you can do in cotton
8 notes
·
View notes
Text


update on this shirt: I'm making the yoke with a bunch of short rows so it’s contiguous (less ends to weave in). Gonna post the russian pics below and try to explain what I’m doing. It's going to be long and very picture heavy so it's going under a cut. But if you're interested in funky construction methods check this out! The project above is made with a category 2 yarn (plant based) knit on size 4 needles.
Here's the inspiration picture-

The pattern is only in russian, for children, and not available on ravelry anymore so I decided to try to reconstruct it in my own way.
So the basis for this method is a different kind of raglan- instead of steadily increasing on both sides of the diagonal, you alternate where the increases are. I haven't seen any website talk about this in english. It's similar to the saddle shoulder construction but the shoulder is more naturally shaped here.

For this version, you first increase only on the outside of the shoulder straps, a set number of stitches, until the length reaches about your collarbones (not the end of your shoulder). This forms the yoke- you can do this in short rows, knitting back and forth, if you want to make the back longer than the front. Then, knitting in the round, you start to increase only on the inside of the shoulder straps to start forming the sleeve. When you get to just above the crook of your armpit, you start increasing on both sides of the sleeves. The increases are done every other row. (I
Here's another picture:

The problem with this method is that you're limited in the size of the shoulder straps. The size of it and the yoke, how many increases you can make to create the width of the front, are all interconnected. The number of rows in the yoke of the body will always be equal to the number of rows in the shoulder straps.
So the alternative (and what I did) is short rows. You knit out the shoulder straps first and then go around and fill in the yoke with short rows. (I did shadow wraps.) You can do the shoulders and cut the yarn each time as you move around or you can do it contiguously (what I did). This allows you infinite customization in the size of the shoulder straps and the body of the yoke.

I don't speak russian so I used google translate so please correct me if I'm wrong at all. The top of the diagram marked Спинка is "back". MHP is "series start marker", so where the shoulders begin. The red arrows mark right side rows and the blue arrows mark wrong side rows. The blue dots are точка поворота укороченных рядов which is "rotation point of short rows". So take the width of your shoulder straps (for me that was 15 stitches (13+2 for the slipped edges)) and divide it by three. Starting from the center front and moving counter clockwise, knit across all the stitches for the left shoulder. Then (wrap and) turn. Knit one third of the stitches then (wrap and) turn. Knit to where you turned before but don't pick up the wrapped stitch. Turn and slip the first stitch. Knit to another third of stitches past where the wrapped stitch was (two thirds of the shoulder stitches). Then (wrap and) turn. Repeat but this time knit across all the stitches. (wrap and) Turn here. Next time at the front, don't pick up the wrapped stitch, then when you turn, slip the first stitch. Knit this small strip for as long you want it. Finish on a right side row. Then knit around the corner, picking up and knitting the slipped stitches along the edge. Pick up that wrapped stitch and knit across the back. The next shoulder is done similarly except you start here in the back. Finish on a right side row and pick up and knit the stitches around the corner toward the center front.
Next is the short rows for the front right.

The blue arrow is the right side row and the yellow/gold arrow is the wrong side row. So after you pick up and knit the edge stitches, knit one of the front stitches then (wrap and) turn. Knit one of the edge stitches then (wrap and) turn. Keep doing this, increasing one stitch each time you turn until you've wrapped the last stitch of the shoulder straps. Then knit across all the stitches to the center front. I didn't work in the round for the yoke so here is where I turned to the wrong side. If you're working in the round you might want to continue across the front to do the short rows for the left front.
I redrew the above for myself, but I ended up doing the short rows for the back instead of continuing all the way to the left front. The purple dots are for the icord edging.

The back is done in a similar way.

I didn't draw a picture for this, but I started on the back doing a wrong side row. Knit back across the right front, across the shoulder strap, pick up and knit the stitches along the back of the shoulder strap, and then knit one stitch along the back before (wrapping and) turning (that's point 6 in the above diagram). Then do the same as for the front- increase the number of stitches knit by one each time, until you've picked up half the stitches along the shoulder strip. Then, on a wrong side row, knit all the way across the back to the left shoulder strap and knit one stitch on the shoulder strap. Then work back and forth just like before until you've picked up half the stitches on the left shoulder strap. Then knit all the way across the back to the wrapped stitch on the right shoulder strap. Pick that up then (wrap and) turn. Continue to knit across the back, picking up one stitch along the shoulder strap at the end of the row each time. Finish on the last stitch of the left shoulder strap. Then knit around to the front. And repeat like you did for the right side.
The yoke is finally done! If you've been paying attention, the shoulder straps have more slipped stitches along the back than along the front. (it should be exactly 4 more stitches). From here you can continue as normal for the fancy raglan- start increases only on the inside of the shoulder to create the sleeves. Then do increases on both sides.
The websites (in russian) are here if you speak russian and want to get a better idea of what's going on: zen .yandex . ru /media/sibknitting/reglanpogon-kak-pristupit-k-viazaniiu-legko-60ebddeab56ded7a70ef26a0 AND li . ru /interface/pda/?jid=4669494&pid=487453928&redirected=1&page=0&backurl=/users/4669494/post487453928/
#knitblr#knitting#sweater knitting#guide#hand knitted#feyknits#idk how to tag this for people to see it#but i hope some people on knitblr see this#how to
16 notes
·
View notes