#embroiding
Explore tagged Tumblr posts
Visit Tumblr Blog
Explore Tumblr blogs with no restrictions, modern design and the best experience.
Last Seen Tumblr Blogs


Fun Fact
Users from the US are the majority of Tumblr visitors.
Text


oh my god. og my god. the symbolism of it all
#EMBROIDERING WITH YOUR HAIR ENTWINED......#I DIE WHERE I CLING????? OH MY GOD#fuck dude#ignore me#notes#1k#5k#10k#15k
18K notes
·
View notes
Text
A teeny tiny embroidered bead* lizard for my jacket!
*no actual beads were used but I figure if I can crochet a bead lizard I can embroider one
#handmade#embroidery#bead lizard#embroidered bead lizard#it’s all six strands of embroidery floss#and two stitches per bead
19K notes
·
View notes
Text

I made a scarf ☺️
4K notes
·
View notes
Text


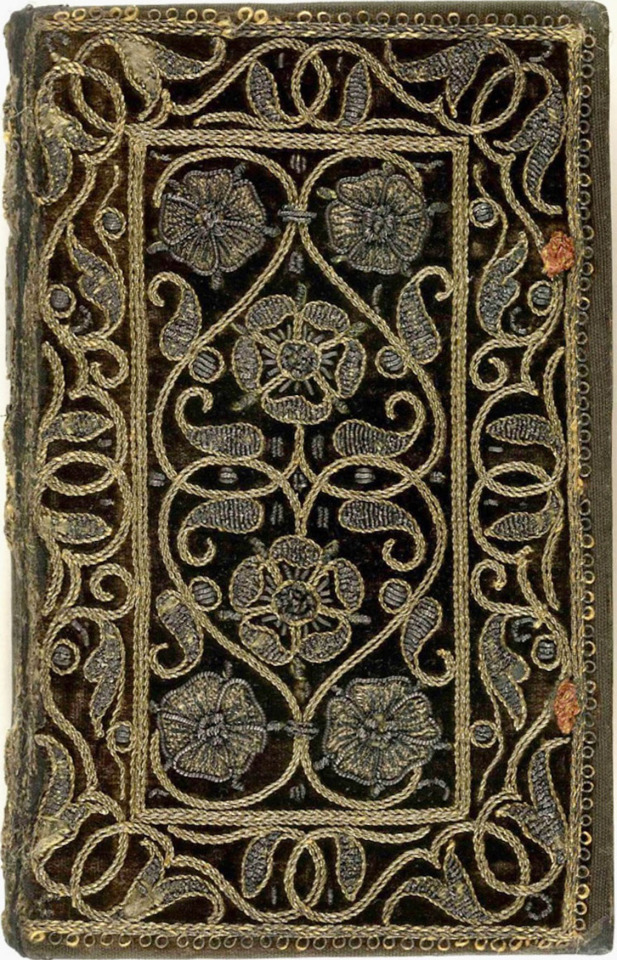
Embroidered book covers
#beautiful books#book blog#books books books#book cover#books#rare books#embroidered#embroidery#book design#book binding
8K notes
·
View notes
Text

im whuh??
#2023#embroidery#cats#kittens#Referencing the beautiful Im Huh Im Whuh Im Bwuh - the ???? siblings picture#embroidered on black velvet for a pettably soft finish
6K notes
·
View notes
Text
8K notes
·
View notes
Text
Had a few folks interested in how I made the patches I posted for Solarpunk Aesthetic Week, so I thought I'd give y'all my step-by-step process for making hand-embroidered patches!

First, choose your fabric and draw on your design. You can use basically any fabric for this - for this project I'm using some felt I've had lying around in my stash for ages.

Next, choose your embroidery floss. For my patches I split my embroidery floss into two threads with 3 strands each, as pictured. You can use as many strands in your thread as you prefer, but for the main body of my patches I prefer 3 strands.
Next you're going to start filling your design using a back stitch.

First, put in a single stitch where you want your row to start.

Poke your needle up through the fabric 1 stitch-length away from your first stitch.

Poke your needle back down the same hole your last stitch went into so they line up end-to-end.
Repeat until you have a row of your desired length (usually the length of that colour section from one end to the other). Once you have your first row, you're going to do your next row slightly offset from your first row so that your stitches lay together in a brick pattern like this:

Make sure your rows of stitches are tight together, or you'll get gaps where the fabric shows through.
Rinse and repeat with rows of back stitch to fill in your patch design.

When you're almost to the end of your thread, poke your needle through to the back of the fabric and pull the thread under the back part of the stitching to tuck in the end. Don't worry if it looks messy - no one's gonna see the back anyway.
This next step is fully optional, but I think it makes the patch design really pop. Once your patch is filled in, you can use black embroidery floss to outline your design (or whatever colour you want to outline with - it's your patch, do what you want). I use the full thread (6 strands, not split) of embroidery floss to make a thicker outline.

I use the same back stitch I used to fill the piece to make an outline that adds some separation and detail. You could use most any 'outlining' stitch for this, but I just use back stitch because it's just easier for me to do.
Once you're finished embroidering your patch, it's time to cut it out!

Make sure to leave a little border around the edge to use for sewing your patch on your jacket/bag/blanket/whatever, and be careful not to accidentally cut through the stitches on the back of the patch.
If you have a sturdy enough fabric that isn't going to fray, you can just leave it like this. If not, I recommend using a whip stitch/satin stitch to seal in the exposed edges (I find that splitting your embroidery floss into 3-strand threads works best for this).

And then you're done! At this point you can put on iron-on backing if you want, or just sew it on whatever you wanna put it on. Making patches this way does take a long time, but I feel that the results are worth it.
Thanks for reading this tutorial! I hope it was helpful. If anyone makes patches using this method, I'd love to see them! 😁
#solarpunk aesthetic week#sewing#tutorial#sew on patch#punk diy#diy punk#punk aesthetic#handmade#solarpunk#handcrafted#embroidery#embroidered patch#how to#how to make a patch
18K notes
·
View notes
Text
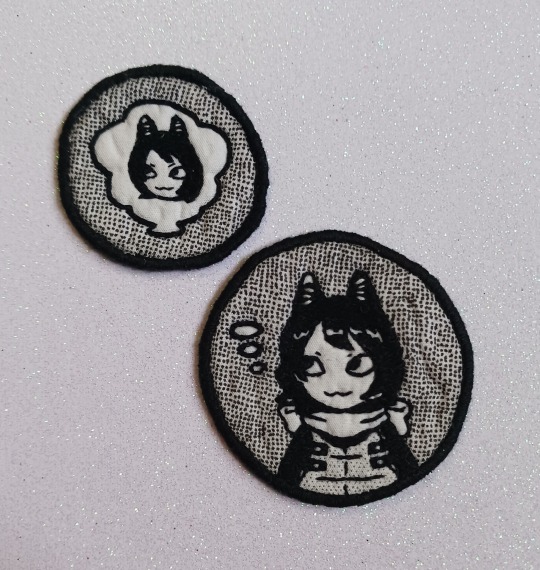
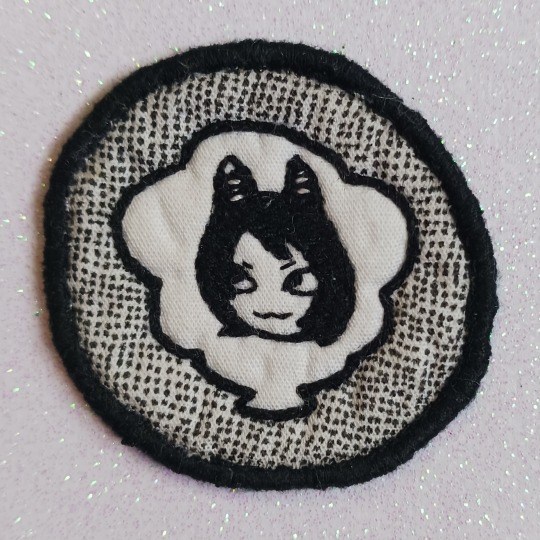
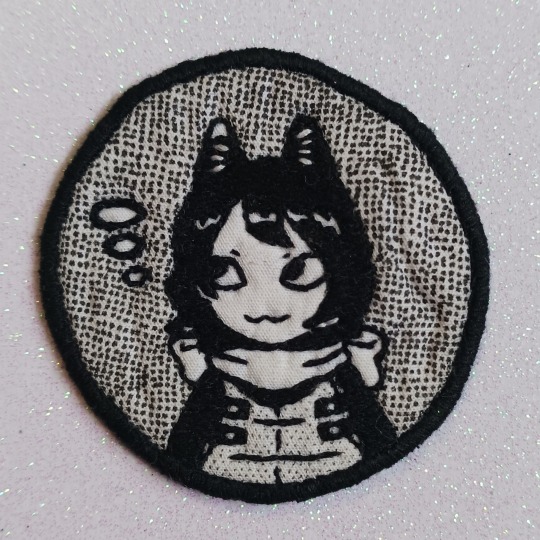
i dont go here but i made this into patches
my skill with applique grows but my patience does not
#i made the fabric patterns separately#like a dumbass#dungeon meshi#dunmeshi#izutsumi#izutsumi (izutsumi)#embroidery#embroidered patch#patches#my art
3K notes
·
View notes
Text


welcome to the fish market 🐟
#these came out SO so cute I love them#teeny felt embroidered fishes!#these will probably turn up in the shop soon!#strawberrum art#felt#embroidery#fiber art#fiber craft#handmade#handmade earrings#handmade fashion#slow fashion#blue aesthetic#kitsch#maximalist#maximalism#cute art#kitschy#kitsch art#pastelcore#kawaii#fish#fishblr
4K notes
·
View notes
Text
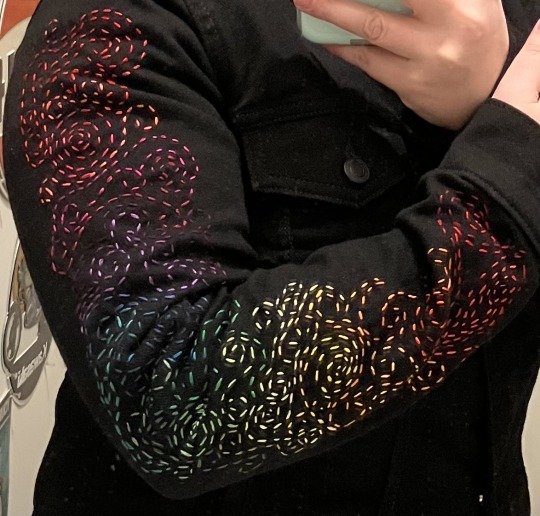

The first sleeve of my rainbow swirls jacket is done (for now)!
I’ll probably go back later and make the rainbow wider, possibly going all the way around the sleeve, but for now it’s complete
#handmade#embroidery#rainbow swirl embroidered jacket#I do want to add more shades of each color later#but for now it’s good#I also want to expand it across the shoulders of the jacket#and down the other sleeve#but that’s a project for another day
3K notes
·
View notes
Text

Cherry Blossom Dress by Oscar De La Renta ❀໋༘ࣧ
#oscar de la renta#cherry blossom#cherry blossoms#flower#pink flower#embroidered#sequined#sequins#pink sequins#pink#fashion#dress#pink dress#mini dress#pink mini dress#designer#designer fashion#pink aesthetic#pinkcore
2K notes
·
View notes
Text

happy fengqing new year 2025 !!!
i post this late because i started drawing it after new years 😂
do you like their new outfits? i think that mq would insist to wear something nice for those occasions and would make fx matchy with him 😚🩷
they will go back home after this to eat something warm together and kiss...hehe
i hope this year will have looots more cute fengqings and also nice treats for everyone 🩷🎇 and donghua season 3 please
#moko art#fengqing#tgcf#me when i want to crumble but mq would not wear something plain so i have to carry on#fulfilling my dreams of seeing fx wearing mandarin ducks embroidered by qing-er himself btw 😔✋#me when i suck it up and made a real bg bc i spent too long on their outfits to slap on a shape in the bg#general xuan zhen would be mad at me
1K notes
·
View notes
Note
NEW BIRTHDAY THEME IS OUT!!!!!!!!!!!
BIRTHDAY SLUMBER PARTY, HERE WE COME
I think the theme is more loungewear than straight-up pajamas, but hey, I'm not complaining! (and -- look, we still have the groovies, I'm not giving up hope for animal kigurumi until I gotta)

#art#twisted wonderland spoilers#kutsurogi my room#put on the onesie jamil#man i am absolutely LIVING for jamil's adorable embroidered throw pillows#just offscreen is the wall decal that says 'bless this mess'#gosh though i am ready for a year of COMFY BOYS#does this mean we're going to get some kind of canon confirmation about whether or not malleus needs special pillows to sleep#yes PLEASE#god. i can't decide which would be funnier: mal in sweatpants and a vintage gargoyles (1994) t-shirt#or mal in a full victorian-style striped sleep set complete with nightcap that has a pompom on the end#that jiggles up and down with every HONK mimimimi#(this is probably also what riddle sleeps in tbh)#(ace can't even make fun of him because it's just too on the nose)#and hey twst as long as i have your ear APPARENTLY#i want that halloween event to be real and i want a lilia for it please and thank you 🙏#i know it's not his turn for a halloween card but c'mon. pretty please.#i am asking so nicely
1K notes
·
View notes
Text

Stardew Valley Chicken Embroidered Overalls by BeeTreat
769 notes
·
View notes
Text
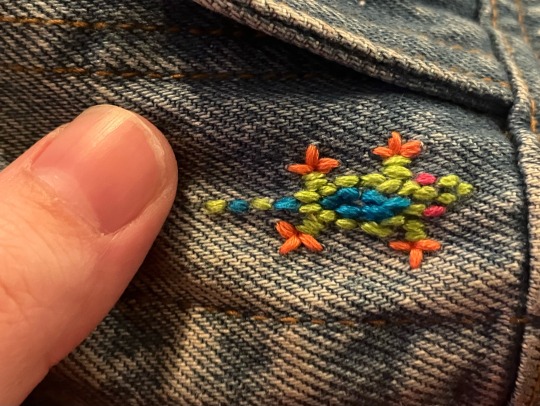
oh yeah btw i made this
#it's my first time doing hand embroidery#my partner has taken up sewing so i embroidered this on their project#it was fun#now i gotta figure out what i'm gonna do next#embroidery#fiber art#textile art
3K notes
·
View notes