#easy diy wood projects
Explore tagged Tumblr posts
Visit Tumblr Blog
Explore Tumblr blogs with no restrictions, modern design and the best experience.
Last Seen Tumblr Blogs


Fun Fact
The “We are the 99%” Tumblr blog became the slogan for the Occupy Wall Street movement.
Text
#handcrafted#crafting#small woodworking projects#woodworking tips#woodart#free wooden projects#woodworking#woodworking projects free#free pdf guide#woodcraft#easy diy wood projects#easy woodworking projects#easy wood crafts#easy wood crafts to sell
0 notes
Text
5 Quick Easy Wood Projects for Beginners
Introduction As someone deeply passionate about woodworking, I know the thrill of crafting something from start to finish in a short time. For beginners or anyone looking for unique project ideas, I’ve picked out some quick easy wood projects that are not only doable but also bring joy and functionality into your daily life. These projects are tailored to teach you the basics while providing you…
#easy diy projects for beginners#easy wood projects#easy wood projects for beginners#quick easy wood projects
0 notes
Text
DIY Pride Flag Craft!
In this (waves at the entire USA) time, I know a lot of people are wanting to show LGBTQ+ pride or support for members of this community.
However, Rainbow Capitalism being out of vogue at the moment, ethical sources of pride wear often being expensive (because that's part of the package), and some flags just being straight-up harder to find than others, just gonna toss up my personal favorite work-around to this situation:
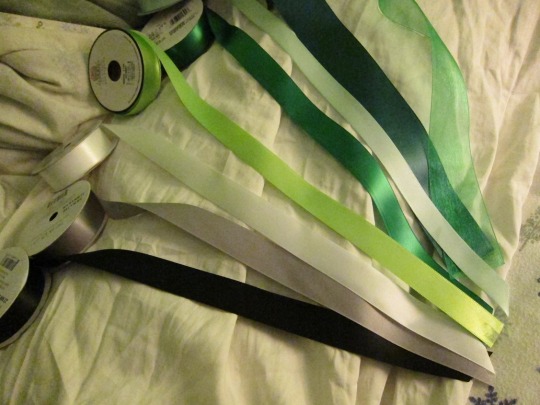
[Image ID: eight strands of ribbon lying on a messy white sheet, with the ribbons arranged from left to right in the colours black, medium grey, white, lime green, forest green, pale green, dark emerald green, and a translucent grass green.]
Pretty much every craft or fabric store I've ever visited has a decent selection of ribbons in a decent selection of colours, and they generally go on sale every now and then. This makes it easy not only to get the colours of your flag[s] specifically, but to add a little custom flair to them if you want. I personally grabbed the colours for the Aromantic flag ('cause I couldn't afford seven rolls of ribbon and I like the aro flag better than the bi one). (I already had a number of spools of green ribbon, I like the shiny flap-flap streamers) I now posses enough ribbon for seven feet/six point four meters of Aromantic pride flag material. Things than can now be done with that include:
Cut a length of each colour, stack them in order, tie them to a hair tie. This can now be put on anything you can feasibly put a hair tie on, naturally, or, if you put a reasonable number of ribbons on it of a decent length, looks and feels great to wave around in the air at a parade. Or as a stim toy. (Completely serious on the stim toy bit, can confirm a trial run made the ADHD brain go brrrrrrrrr!)
Tie bows from individual lengths of ribbon along something straight in the appropriate order for your flag - a desk leg, a suitcase handle, your own arm, whatever. (Also works with knots if you don't want to do bows.)
For a larger project, get a long dowel (technical name for a round wooden rod) or spare broom handle from a hardware store, and probably a hot glue gun or some gorilla glue. Cut nice long stripes of ribbon, tie them along your wooden rod at the intervals you deem appropriate, and put a dab of glue on each of them to help keep it all in place. Congrats, you just made a big, waveable pride flag entirely out of ribbons!
For a smaller version of the ribbon flag (aka, a ribbon wand), by using a smaller, wand-sized dowel (or a really nice stick you find somewhere or happen to have handy) and either doing a small version of the flag down the top, or tying all the colours at the top so they dance around together when you shake it. Again, use a bit of glue to hold them all in place. Alternatively, use the ribbon hair-tie from the top of this list, and put that on top of your wand instead (rubber bands can be substituted for hair ties for this use, and will probably cling better to the wood to boot.)
Braid the ribbons together, then use them as bracelets/anklets. (This will be easiest with the three/four coloured flags, but I remember the friendship bracelets girls used to weave in the 90s, and I believe in your ability to replicate that with ribbon, should this be the direction your heart leads you.)
Literally anything you can think of, go crazy!
My final pro tip for all this: cutting the end of a ribbon at an angle not only looks nice, it makes it much, much harder for the fabric of the ribbon to unravel or get all ratty and unpleasant/likely to tangle.
Beyond that, if this seems like a you thing to do and you are able, then get some ribbons and go be proud!
#lgbtq#lgbtqia#lgbtq+#pride flag#craft project#yes I know all this and these ideas are very simple#but hey. they're fun and I cannot guarantee that everyone has thought to do this#so I am spreading the crafting fun
48 notes
·
View notes
Text
49 Clever DIY Organization Ideas for Your Home
Talking DIY organization ideas (for your home) today!

Over the break, I did a lot of organizing and reorganizing, and honestly it really cleared my mind. Sometimes you just need a clean slate to make the same old day-to-day feel new again. Or at least fresh…and clutter-free! So, I put together a whole lot of DIY organization ideas to get you started, if you need a little inspo for the season. Whether you’re on some deeper quest to gain control OR you really just want to organize your craft room, bedroom, bathroom, etc – this list has TONS of DIY organizing ideas! 49 of them to be exact. Bonus: Many of the projects (like most of them actually) utilize items you might already have in your home (or garage) that can be repurposed as something new. Creating more sustainable organizational systems, rather having to go out and buy a ton of bins, baskets, and storage things. Anyway, here are 49 home organization ideas that you can totally DIY – from clothing racks to hanging wall organizers, trays, decorative boxes, and jewelry stands!
49 DIY Organization Ideas for your Home
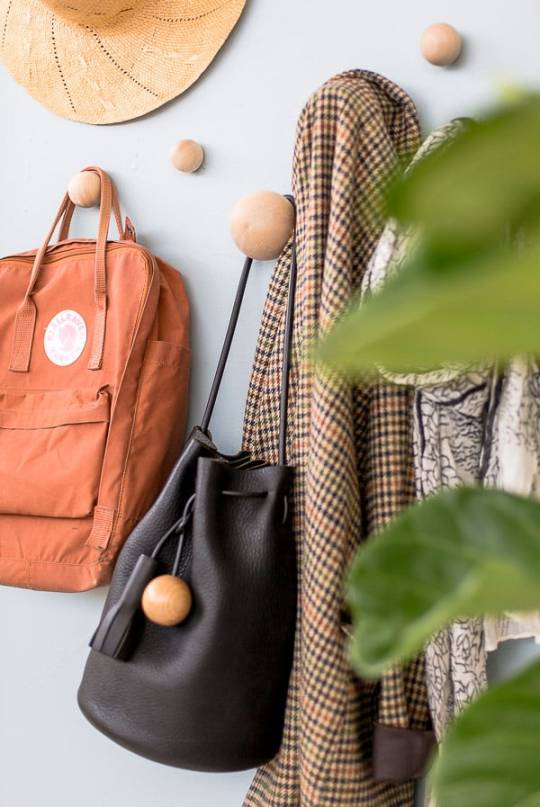
1. DIY wall hooks to organize your entryway (that don’t look like wall hooks). I love that these wall hooks just look like wood baubles on the wall when nothing is hanging on them. Kind of like jewelry for your walls. Plus, they’re great for tight spaces, since they don’t stick out very far.
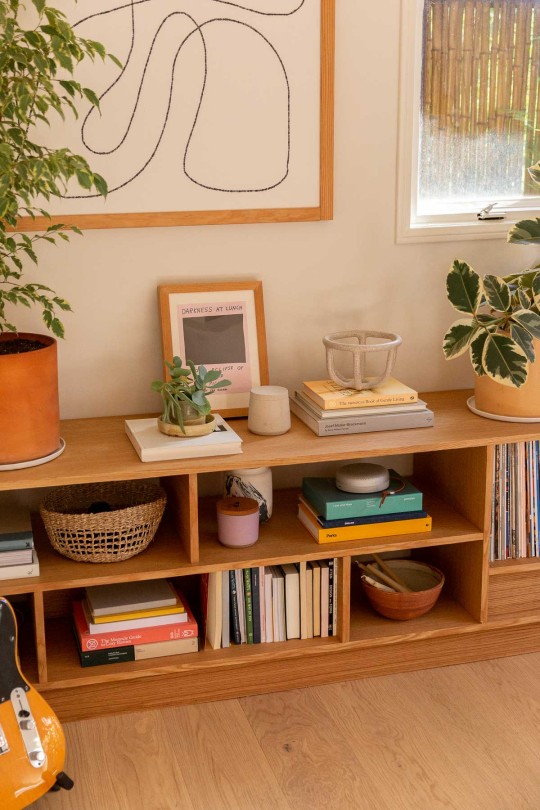
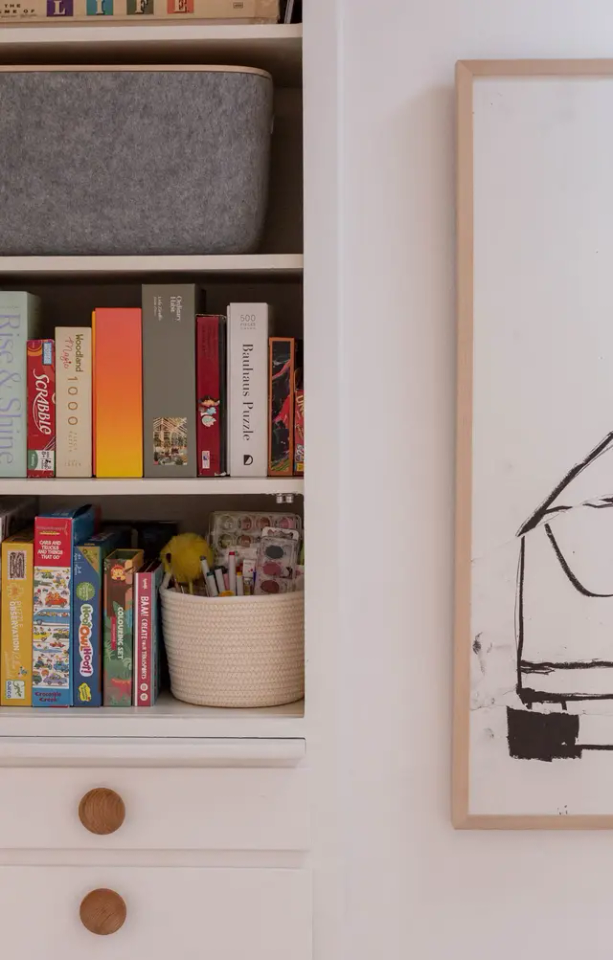
2. When it comes to organizing, there’s nothing better than a built in bookcase, for storing all of your extra housewares. This bookcase completely transformed this room. And helped us find a home for so many things that were previously in storage (or on the floor).
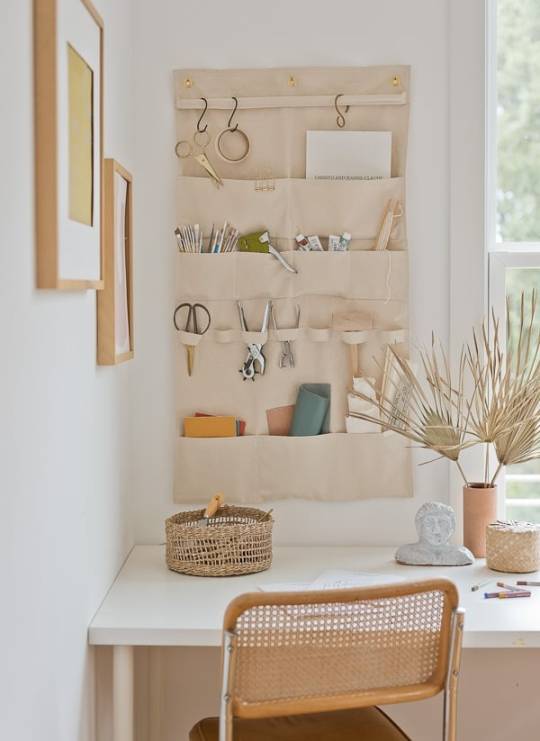
3. Need office organization? This DIY hanging wall organizer looks good AND keeps things organized – which can be a challenge in a craft room or office space. The thing I love most about this canvas organizer though is that you use it for so many other things too – from sorting mail to hanging hammers. I feel like this could work as a DIY closet organizer with a few modifications as well. Most recently, I started using mine in my son’s room as toy and book storage and it looks so cute! Bonus: You can customize the size of this wall organizer to suit your needs in any room of the house.
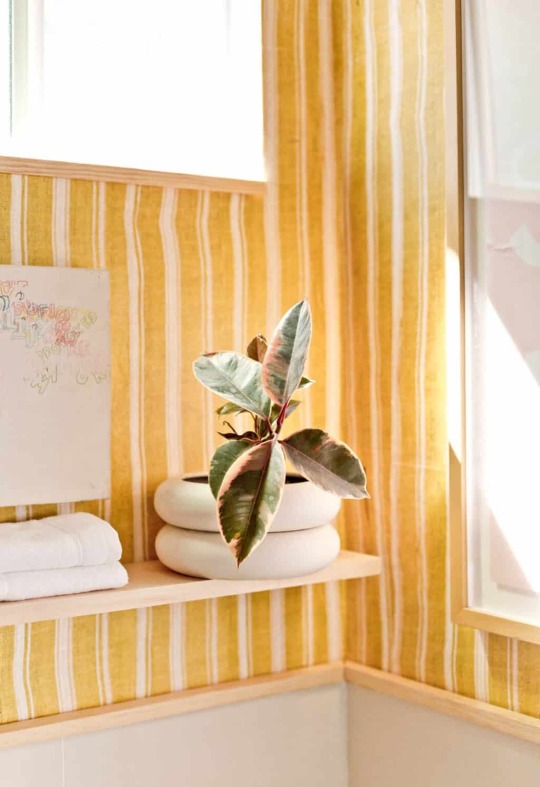
4. My yellow bathroom makeover has some clever little hacks for small spaces, including a way to make your own floating shelf in minutes!
5. If you’re looking for hall closet organization, I broke down exactly how I organized my entire hall closet in one hour. You gotta see the before. It was not pretty.
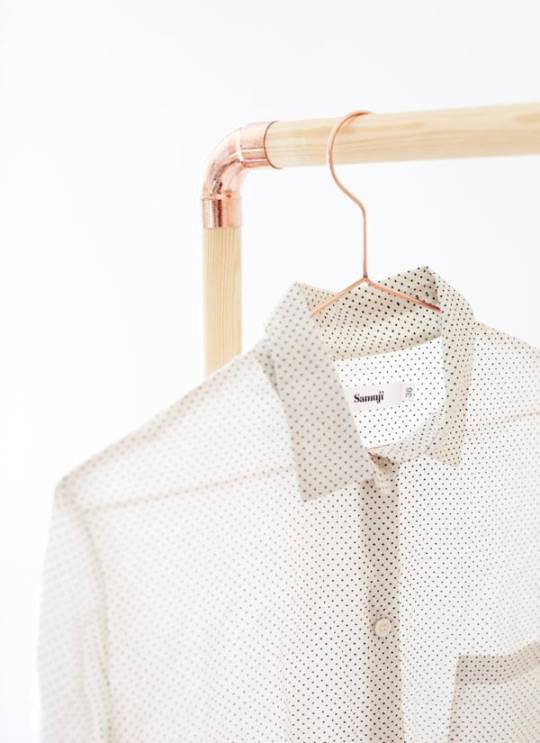
6. And speaking of a closet organizer… This clothing rack DIY from Weekday Carnival is great for extra clothes that don’t fit in the closet. And it would be a good option for a guest bedroom without a closet as well.
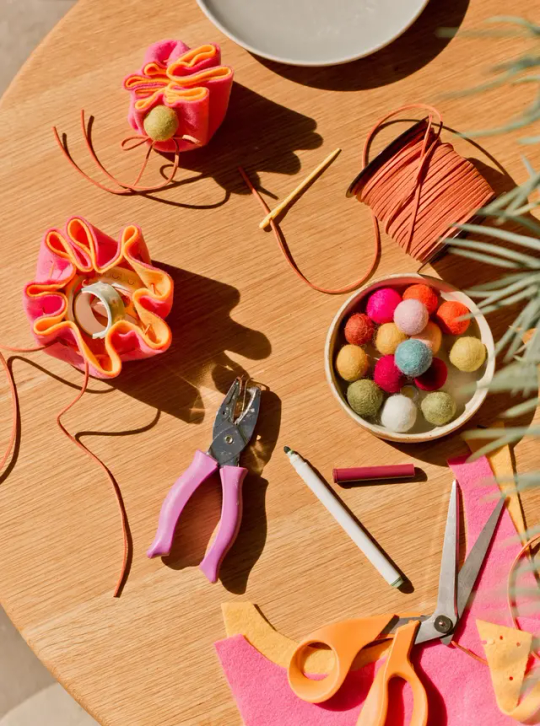
7. A drawstring pouch is perfect for storing / organizing small items, like jewelry and craft supplies. I have a tutorial for it, if you wanna make your own.
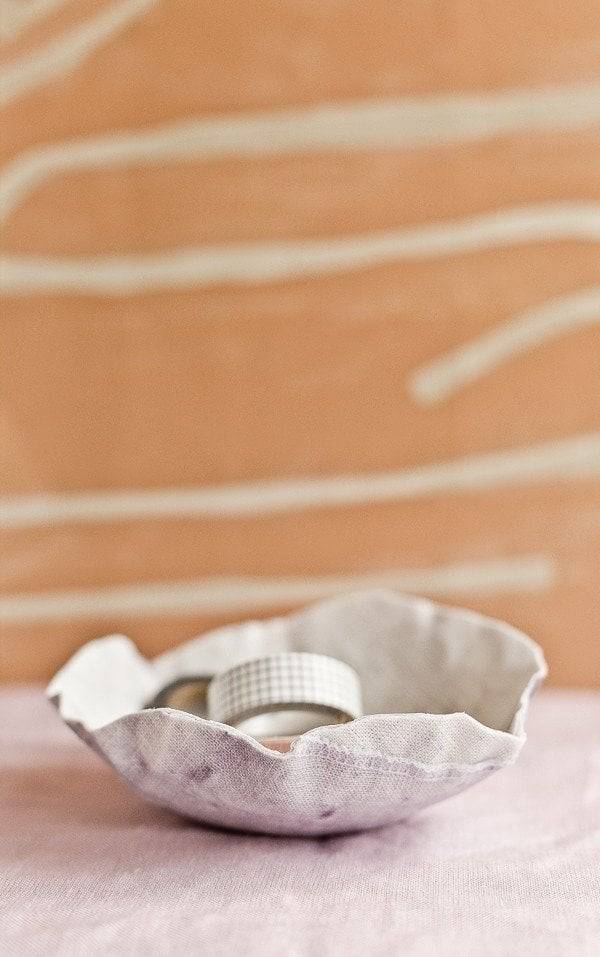
8. Will always include my DIY fabric paper mache bowls when talking about organizational ideas because they’re very easy to make, surprisingly very sturdy, and pretty unique.
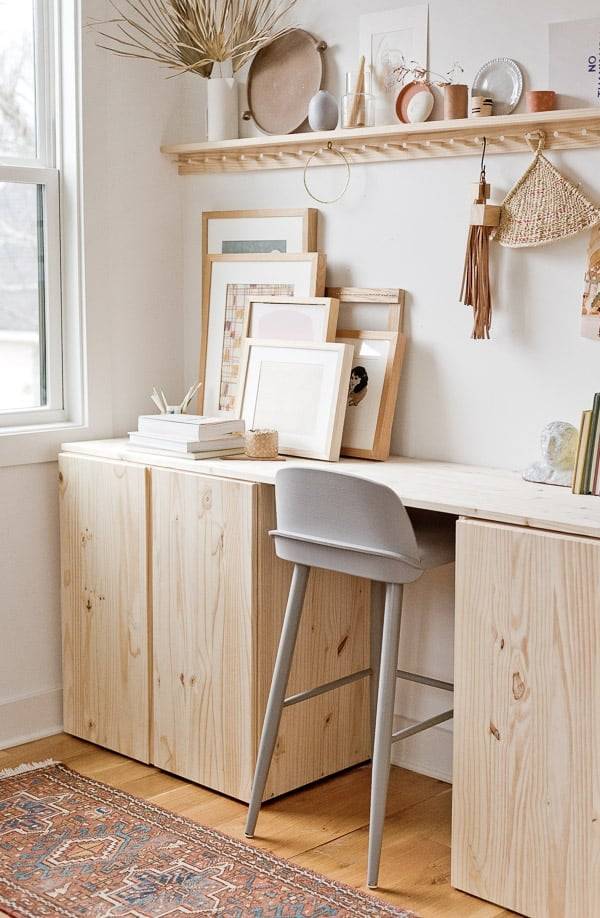
9. Maybe a DIY standing desk, with lots of storage, is more your thing? What I love most about this Ikea hack is the fact that the storage is closed, so you can be as messy as you want inside and no one will know. BUT of course, you’re not going to be messy….your going to be organized because that’s what this whole post in about. Right? Wink, wink!
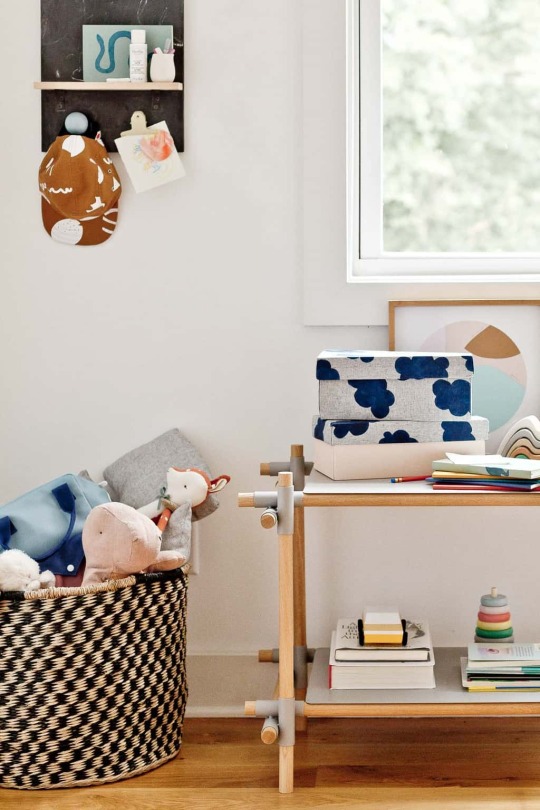
10. And speaking of keeping those cabinets organized, you can turn old shoe boxes into really cute fabric organizer boxes. I use these exact ones in my desk cabinets and they work so well for receipts, scissors, markers, and other small(ish) items.

11. Reusable produce bags (these are another DIY idea) are handy for the grocery store, but you can also use that at home for pantry staples, closet organization, and more. Read the full article
11 notes
·
View notes
Text
Do You Need Planning for a Patio?
So, you're thinking about adding a patio? Maybe you've been eyeing that open backyard space, imagining a cozy seating area for morning coffee or a full-blown outdoor entertainment hub. Sounds great—but do you need planning for it?
The short answer: it depends. The long answer? Well, that’s what we’re getting into.
What Kind of Patio Are You Thinking About?
First things first—what does "patio" mean to you?
A simple slab of concrete with a few chairs?
A screened-in outdoor space with bug protection?
A fully covered, weatherproof area with fans, heaters, and maybe even a built-in grill?
Each of these setups comes with different considerations, and that’s where planning (or permits) may come into play.
Do You Need a Permit for Your Patio?
South Bend has zoning laws and building codes that determine whether you need a permit for your project. Generally, here’s how it breaks down:
No permit needed: If you're installing a ground-level patio made of pavers, bricks, or concrete (as long as it doesn’t affect drainage).
Permit might be required: If your patio includes permanent structures, like a roof, walls, or electrical work.
Definitely need a permit: If you're building a patio that’s attached to your house, significantly elevated, or includes plumbing and electrical installations.
Why Does This Matter?
If you skip the permitting process when it’s required, you could run into problems down the road. Unpermitted work might affect your home’s resale value or create headaches if a city inspector gets involved.
Not sure what applies to your situation? It’s always a good idea to check with your local building department.
What Do You Want From Your Patio?
Now, let’s talk function. A patio isn't just about laying down some stone and calling it a day. It should fit your lifestyle. So ask yourself:
How do you plan to use it? Will it be a quiet space for relaxation, a gathering spot for family, or something else?
Do you want it enclosed? A screened-in patio keeps bugs away, but it’s more of an investment.
What’s the weather like in South Bend? A shaded or covered patio can make a big difference in comfort, especially in summer.
How much maintenance do you want? Pavers and wood decks need more upkeep than stamped concrete or composite materials.
Are you planning to live in your home long-term, or are you thinking about resale value? A well-designed patio can boost property appeal, especially for homebuyers looking for extra living space.
Choosing the Right Materials
The materials you pick determine not just the look but also the longevity of your patio. Here’s a quick rundown:
Concrete: Affordable, durable, and can be stamped for a decorative finish.
Pavers: Flexible, aesthetically pleasing, and easy to repair, but installation can be pricey.
Natural stone: Elegant and timeless, but one of the most expensive choices.
Brick: Classic look with good durability, but it requires occasional maintenance.
Wood or composite decking: More common for decks than patios, but a great choice if you want a raised look.
No matter what you choose, make sure it complements your home’s style.
What About a Screened-In Patio?
A screened-in patio is like an outdoor room—a game changer for people who love fresh air but hate mosquitoes. It also extends the usability of your space, letting you enjoy it even when the weather isn’t perfect.
But here’s the thing: if you’re adding screens, a roof, or enclosing your patio, you’ll probably need a permit.
Bonus Perks of a Screened Patio
Keeps out bugs and debris
Adds privacy
Protects furniture from the elements
Can be customized with fans, lighting, and even heating for year-round comfort
For families with kids or pets, a screened-in space is especially handy. No more chasing the dog down the street when it bolts after a squirrel!
DIY vs. Hiring a Pro: What’s the Right Move?
If you're a DIY enthusiast, you might be tempted to build your patio yourself. And for basic ground-level patios, that’s totally doable. But when it comes to more complex builds—especially those requiring permits, electrical work, or roofing—it’s usually best to bring in a pro.
Why?
Time-saving: A professional team can complete the project faster and more efficiently.
Quality: Proper grading, drainage, and installation ensure your patio lasts.
Code compliance: No worries about whether your project meets local regulations.
Final Thoughts
At the end of the day, planning your patio isn’t just about paperwork—it’s about making sure you end up with a space you’ll actually use and enjoy. A little thought up front can save you from headaches later.
So whether you’re dreaming of a simple backyard hangout spot or a fully enclosed sunroom, take a step back and ask yourself:
Do I need a permit? Check with your local building department.
What will I use the patio for? Plan with your lifestyle in mind.
What materials work best? Choose for durability and aesthetics.
Should I DIY or hire a pro? Be realistic about your skills and time.
And if you’re considering a screened-in patio, reach out to Screenmobile of South Bend—they’ll help you design a space that fits your home, style, and budget.
Because let’s be honest—who doesn’t want an outdoor space that’s both beautiful and functional?
7 notes
·
View notes
Text
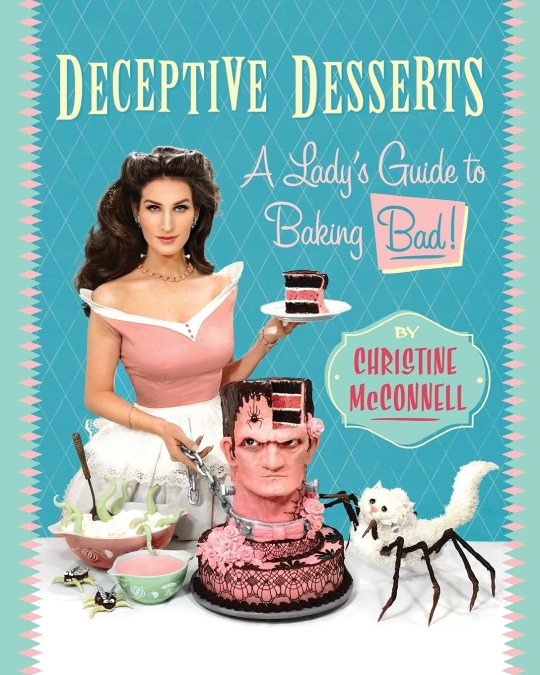
Photographer and stylist Christine McConnell transforms the ordinary into the extraordinary—from everyday dinners, to desserts for all occasions, to the walls of your kitchen, and even some over-the-top creations just for fun.
Taking inspiration from the likes of Tim Burton, Wes Craven, Alfred Hitchcock, and Vincent Price and mixing in a dash of Stepford Wife, McConnell’s baking and home DIY projects are a league above and beyond anything you've seen before. In Deceptive Desserts, each dessert is a work of art—some a little twisted, others magical—but every recipe inspires readers to create their own rules without spending a fortune. Why can’t crab cakes be a delicious pink-frosted dessert? And if you’re stuck hosting a bridal shower, why not create an actual Bridezilla cake to match the bride’s ego? Nothing is sacrosanct in the wonderfully weird world of Christine McConnell and nothing is what it appears to be—even a classic dinner can be transformed into something decadent, with doughnuts that look like chicken drumsticks, green beans made of candy, and ice cream mashed potatoes. A master of illusions in baking, McConnell shows readers how to create their own secret hidden gems in the kitchen.
In her follow-up book, McConnell will go outside the kitchen to show readers how to incorporate magic and fantasy into their home decor and personal style without breaking the bank. Using the renovations of her own house as a guide, McConnell walks readers through easy DIY projects such as hand-painted wallpaper, refinishing wood and tile floors, and adding storage space, along with inexpensive decorating tips.
A dazzling collection of photographs, stories revealing her one-of-a-kind character, and helpful tricks for doing it all yourself, McConnell’s book will inspire readers to be more playful, and just a little bit wicked, with the food they create and the space they inhabit.
https://amzn.to/4d7Lxus
13 notes
·
View notes
Text
Wollefest Leipzig
What a wonderful day yesterday!!
tl;dr: I need more glass jars X'D
And I'm glad there aren's too many festivals a year XD The way to Leipzig was easy, I left waaay too early so I had time to look around! There was an apple (?) orchard on my way and it looked like a sea of white in the morning sun! It was soo beautiful! (No pictures since I went by car)
Then I met my dear friend at the train station and we walked over to the glass hall of the Neue Messe. The nostalgia. And since the book faire was a few weeks ago the glass panels were already cleaned xD

It was nice and spacious. so it was possible to look at everything. And to leave money *coughs* much money! and to talk to the two people from my spinning group who were there at the booth of the German hand spinning guild.
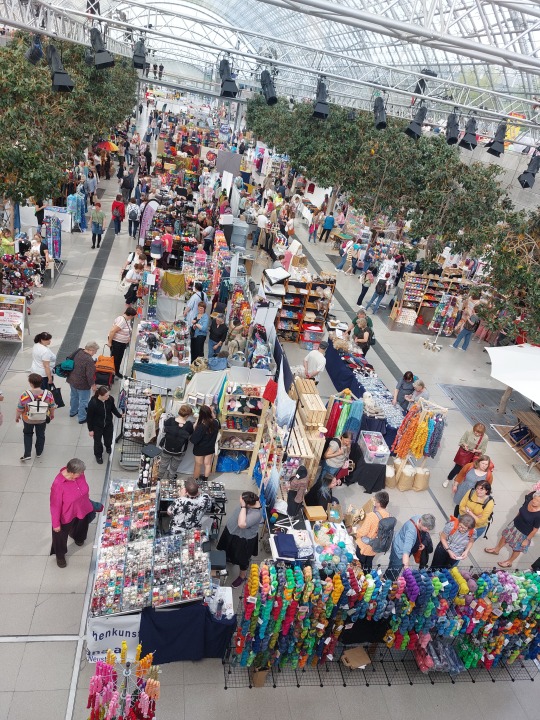
Soo many colours! Soo much beautiful stuff! *.* I could have spent at least another 100€
And the loot:
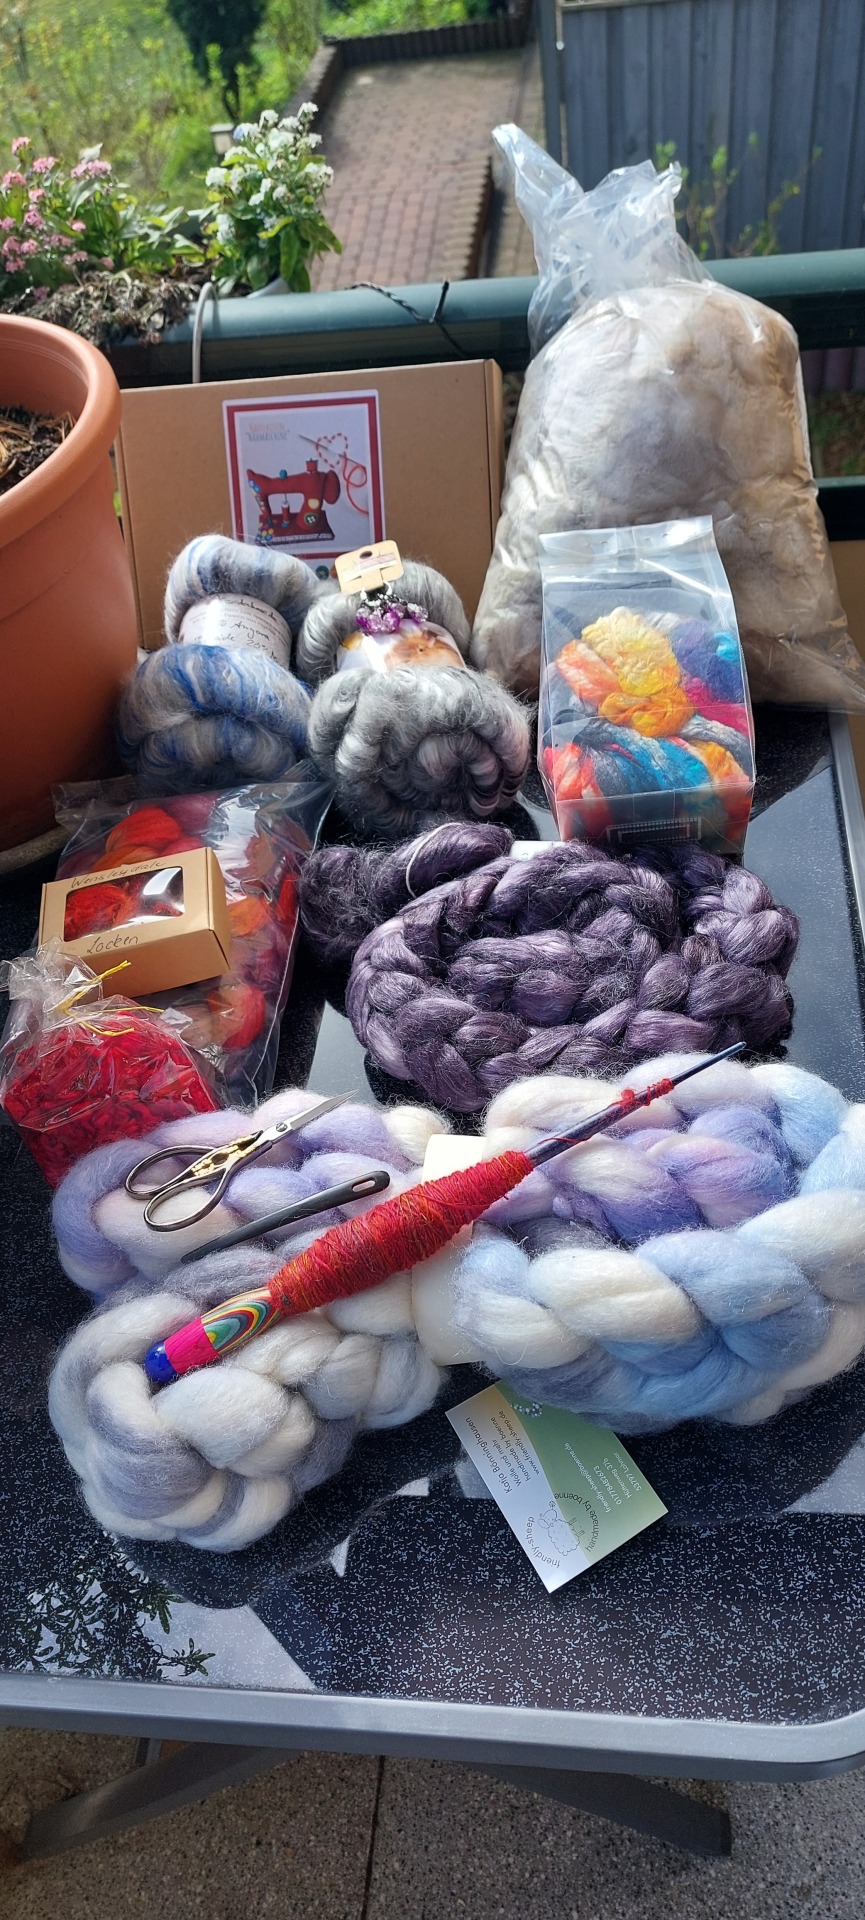
front: 70% polwarth/15% Tencel/15% silk from friendly sheep
Spindle: suppoted, maple/coloured wood from the same shop
Nalbinding needle made of horn and scissors from die Garnspinnerin
red Wensleydale locks from... idk anymore
below the locks: 40% wool (Falkland, Merino)/20% llama/20%Eri silk/20% baby camel from frau wöllfchen
violet: 25% Suri Alpaca/25% royal baby alpaca/25% Ramie/25% tussah silk, the colourful bag is 100% tussah silk, and a pair of hand carders *.* (not in picture) from stefis wolle
blue batt: 40% angora/40% silk/20% merino, grey batt: 35% angora/35% silk/25% Merino/5% alpaca from Seidenhase
the bag in the back: 100% baby alpaca raw fleece. So now I know my first scouring project xD also can't reconstruct the booth I got this
the cardboard box: DIY kit for a sewing machine pincushion in grey from Hühnerstall kreativ! was alrady considering to get one last year but I ran out of money.
Not in picture: two stitch markers, a brooch in the form of a black sewing machine and a knitting pattern for wrist warmers.
I only wanted to get 500g of fibres bc of space reasons... well... I failed.
When we were done at the festival, we went to the city to get some ramen for lunch/early dinner which was also very delicious. and after that I returned home (Or almost home. There were traffic problems on my way for which I was waaay too tired so I decided to stop at my dad's and tackle the rest of the way this morning.
Now I'm home and can rest a bit before work.
24 notes
·
View notes
Text
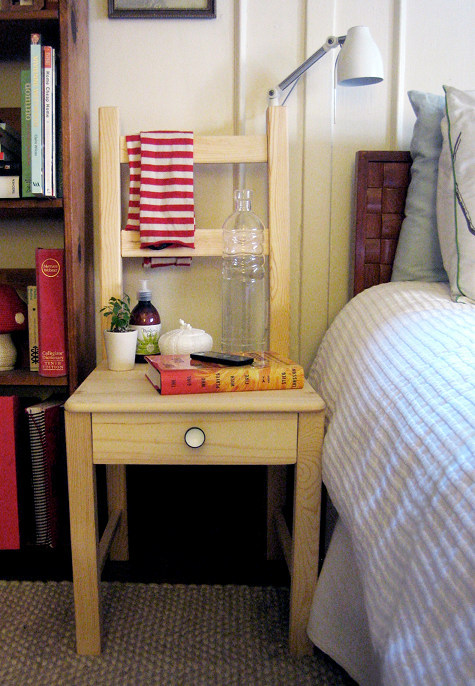
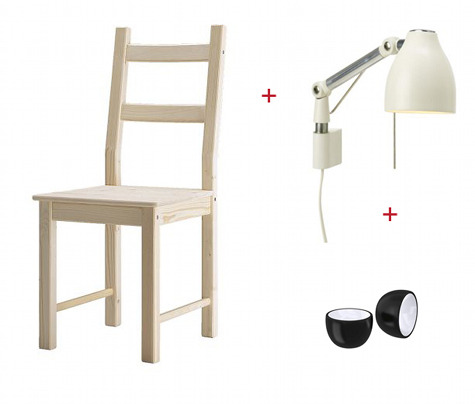
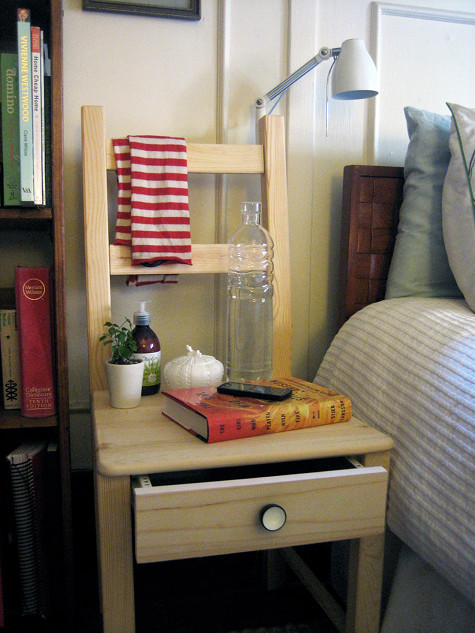
DIY IKEA Bedside Chair
Project by Kate Pruitt:
when we decided to move our bedroom to a different room in the house, we no longer had the space for our old bedside tables. i decided to use an old chair because it was narrow enough and it looked pretty good. unfortunately, i lost two important things in the switch: a place for private things (my ‘goody’ drawer, so to speak, although mine just has a journal and some nail clippers…saucy!!) and surface space – even with a smaller bedside lamp i didn’t have much room. i loved the quirkiness of using a chair (i’ve seen in many home tours and it is always very charming), but i needed these problems solved. ikea to the rescue!!
i am majorly inspired by “odd” furniture designs, like this “tamp and lable” by florian kallus, so i decided to work over a simple pine chair to create a multi-purpose bedside table, complete with a drawer and swivel lamp! i splurged a bit on the new trål wall sconce ($16.99) because it looked so good with the chair, and i like that it rotates so i can change the angle when i am reading in bed. if you aren’t into the industrial look of this piece (my boyfriend called this franken-furniture, which i love), i hope you will at least take away the knowledge that adding a drawer to a chair (or anything) is remarkably easy, and cheap! the great thing about this design is that you can still use the chair for seating if you need to, you can even have a little light over your shoulder! i hope you like this one, i had a lot of fun making it. have fun!! –kate
materials: 1. ikea ivar chair 2. ikea trål sconce 3. ikea snodd knobs (or any knob you like) 3. wood box or crate or old drawer (must be 12″ wide and under 12″ long. i used this wood craft boxfrom michael’s craft store) 4. drill (with a 3/8″ thick drill bit) 5. drawer slides 10″ long (these come in packs of two and are available at most hardware stores. they come in many lengths) 6. 1″ wood screws (x2)
cost: ikea materials: $41 wood crate, box: free on hand, or $5 (at craft store) drawer slides: $5
time: 2-3 hours
instructions: 1. take the chair out of the box and connect the two side pieces with the back slats of the chair, according to the instructions. lay the seat on top, but do not attach.
2. take your drawer/box and slide under the seat in front to check the fit. the box from michael’s fit perfectly with the 12″ side as the front of the drawer.
3. take the drawer slides apart and attach the slides to the drawer according to the instructions that come with the drawer slides. you should have small screws included with the drawer slides that you can use. it’s okay if your drawer does not go the full length of the slides (my box was just 8″ wide, so 2″ of slide were extending on the back of the drawer). make the drawer slides flush with the front of your drawer, and screw in a couple places on each side to secure. you might want to add a piece of wood to the back for weight. i used the extra front panel piece of the chair that was left over.
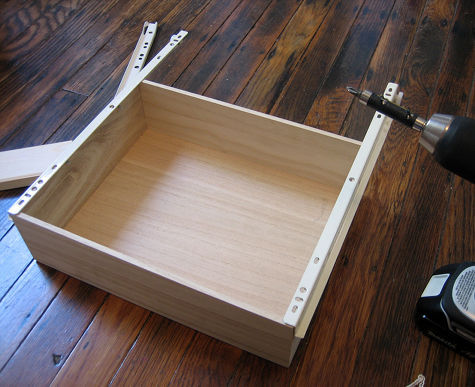
4. now that your drawer has the slides attached, take the seat off the chair so the interior of the sides of the chair are exposed. attach the other two pieces of the drawer slides to the left and right side of the chair. make them flush with the top edge of the sides, so that they seat will be right on top of them and the drawer. you can put your drawer in while holding the sides to make sure you have them in the right place. a second person is useful here for this purpose.
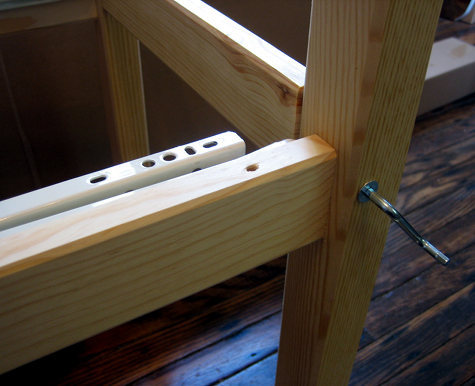
5. screw the front of the drawer slides into the chair legs with one screw on each side. then screw in the back of each drawer slide with the 1″ screws (to account for the gap between the slide and the wood of the chair).
6. now that your drawer slides are in, your drawer should slide into them easily. you will notice that the front of the chair is adjustable in width, because the seat hasn’t been attached yet. adjust their width so that the drawer is sliding in without any friction.
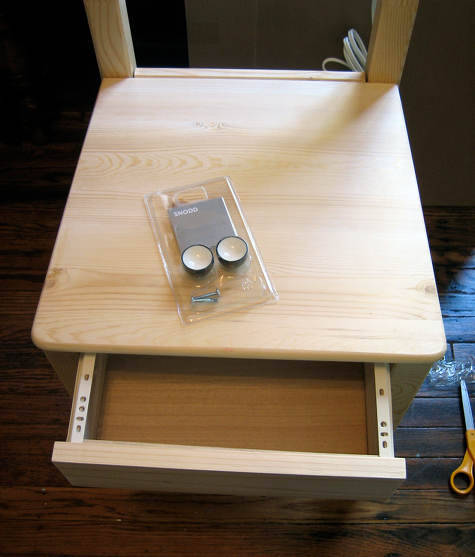
7. when you have the drawer in the right place and sliding properly, put the seat back on and screw in place using the screws that came with the chair. make sure the drawer still slides nicely when the seat is put in place.
8. drill a hole in the center of the front of the drawer and add the snodd knob. super cute! slide drawer back in place.

9. unwrap the sconce and read the directions for installation. it’s WAY too easy.
10. take the metal piece that attaches to the “wall” and screw it into the back of the top of the chair on the left side (or right, depending on which side of the bed your chair is going on)
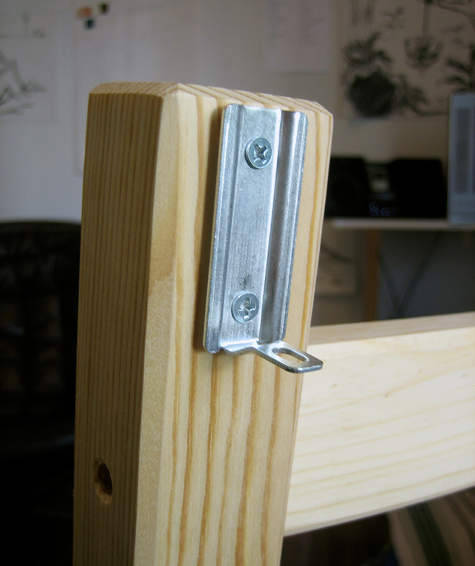
11. slide the sconce piece onto the metal piece and add the pin to secure. add light bulb. if you want, you can staple the cord down the back of the chair to keep it neat, but it’s pretty easy to hide and tuck away also.
12. put next the bed and plug it in. hide goodies in drawer.
YOU’RE DONE!!
28 notes
·
View notes
Text
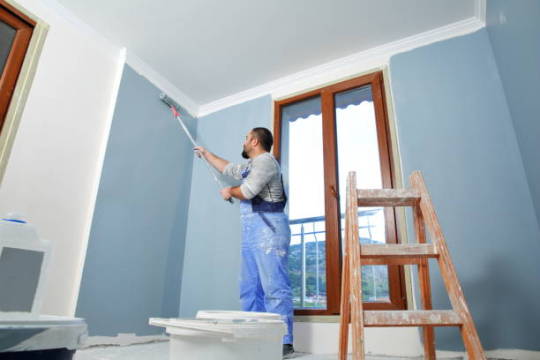
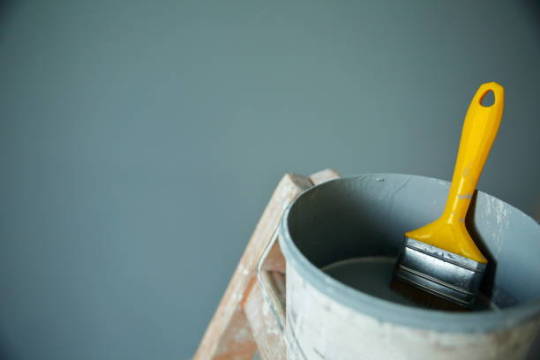
Wood Painting Services Near Me: Transforming Your Wooden Surfaces
When it comes to maintaining the charm and durability of wooden surfaces in your home or office, professional wood painting services are essential. Whether it's your outdoor deck, interior furniture, or wooden fences, a fresh coat of paint can work wonders. This article explores the benefits of hiring experts, what to expect from these services, and frequently asked questions to help you make an informed decision.
Why Choose Professional Wood Painting Services?
While painting wood might seem like a DIY-friendly task, it often requires expertise to achieve flawless and long-lasting results. Professionals understand the intricacies of surface preparation, such as sanding, cleaning, and priming. They use high-quality paints and finishes to ensure your wood is protected against moisture, UV rays, and wear and tear. By choosing local wood painting services, you also benefit from their knowledge of the climate and conditions in your area, ensuring your wooden surfaces remain vibrant and durable for years.
The Process of Wood Painting Services
When you hire experts for wood painting, they typically follow a detailed process:
Surface Assessment: Professionals inspect the wood to determine its condition and recommend the best approach.
Preparation: Old paint removal, sanding, and filling cracks or gaps ensure a smooth surface for painting.
Priming: Applying a primer enhances paint adhesion and provides a protective base layer.
Painting: Professionals use specialized brushes, sprayers, or rollers for an even application.
Finishing Touches: Once painted, a sealant or protective finish is applied for added durability and shine.
This meticulous process ensures your wooden surfaces are not only visually appealing but also resistant to environmental elements.
Benefits of Hiring Local Wood Painting Services Near Me
Opting for nearby wood painting services has distinct advantages:
Quick Response Time: Local professionals can often accommodate your schedule more efficiently.
Familiarity with Local Conditions: They understand how regional weather patterns impact wood and can recommend the best paints and finishes.
Cost-Effective: Reduced travel costs and the ability to source materials locally often make hiring nearby services more budget-friendly.
Community Reputation: Local businesses thrive on word-of-mouth referrals, so you can trust their commitment to quality.
When searching for “wood painting services near me,” check online reviews and ask for recommendations to find reliable providers.
Types of Wood Painting Projects
Professional wood painting services cover a wide range of projects, including:
Interior Woodwork: Doors, window frames, cabinets, and furniture.
Exterior Woodwork: Decks, fences, and siding.
Custom Projects: Artistic finishes, textured paints, or staining for unique aesthetics.
Restoration: Bringing old or weathered wooden pieces back to life with a fresh coat of paint or stain.
Regardless of the project, experts can tailor their services to meet your specific needs and preferences.
Frequently Asked Questions (FAQs)
Q1: How much do wood painting services cost?The cost varies based on the project size, type of wood, paint quality, and labor involved. On average, expect to pay $2-$5 per square foot for most wood painting projects.
Q2: How often should I repaint wooden surfaces?Interior wooden surfaces typically need repainting every 5-7 years, while exterior wood may require touch-ups every 2-3 years due to exposure to weather.
Q3: Can wood painting services repair damaged wood?Yes, most professionals offer minor repair services, such as filling cracks, replacing rotted sections, or smoothing uneven surfaces, before painting.
Q4: What type of paint is best for wood?Latex-based paints are durable and easy to clean, while oil-based paints offer a smooth finish. Your painter will recommend the best option based on your wood type and project location.
Q5: How do I maintain painted wooden surfaces?Regular cleaning with a damp cloth, avoiding harsh chemicals, and applying protective coatings every few years can extend the life of painted wood.
Conclusion: Enhance Your Wooden Surfaces Today
Investing in professional wood painting services ensures your wooden surfaces remain beautiful and durable for years to come. Whether you need to refresh your deck or add character to your furniture, hiring skilled painters near you guarantees quality results. Begin your search for “Exterior painting services near me” today and discover how local experts can transform your space.
2 notes
·
View notes
Text
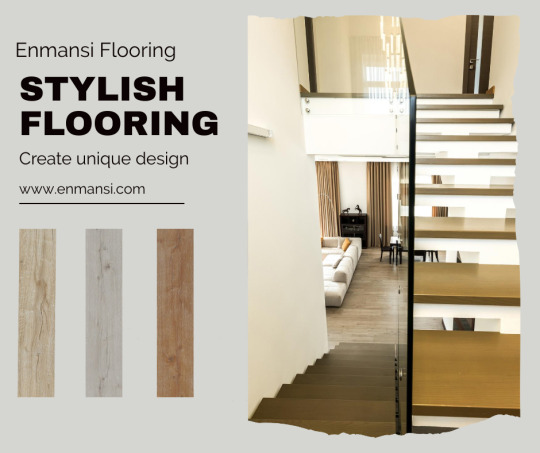
Looking for stylish, durable flooring that fits your home?
Choose SPC (Stone Plastic Composite) flooring! With its realistic wood and stone designs, SPC adds a modern touch to any room. It’s not only beautiful but also highly durable—resistant to water, scratches, and daily wear.
SPC flooring is easy to install with its click-lock system, making it a great DIY project. Plus, it's eco-friendly and low-maintenance, giving you peace of mind while enhancing your home’s aesthetic.
Upgrade your space with SPC flooring—where style meets durability!
Enmansi Flooring offer you the Spc flooring, LVT flooring, Lamnate flooring, more information, contact us:
Web:https://www.enmansi.com/ Email: [email protected] Tel: 136 6618 6069
#HomeRenovation #SPCFlooring #interiordesign #vinylflooring #flooringforhome #homedecor #HomeImprovement #homedecoration #homedecorideas #homeflooring #LVTflooring #LVT #lvtplanks #vinylplankflooring #vinylplank #laminateflooring #laminatefloor #lvtfloors #spcclickflooring #StylishFlooring #enmansiflooring
#homerenovation#stylish flooring#interiordesign#interior inspiration#interior decorating#vinyl flooring#PVC flooring#flooring for home#home decor#home improvement#home design#home upgrades#home decoartion#lvt flooring#spc flooring#vinyl plank flooring#laminate flooring#enmansi flooring#home decor ideas#home decor inspiration
4 notes
·
View notes
Text
#crafting#handcrafted#small woodworking projects#woodworking tips#woodcraft#woodart#free pdf guide#free wooden projects#woodworking#woodworking projects free#beginner woodworking projects#simple woodworking projects#woodworking for beginners#easy DIY wood projects#woodworking ideas for beginners.
0 notes
Text
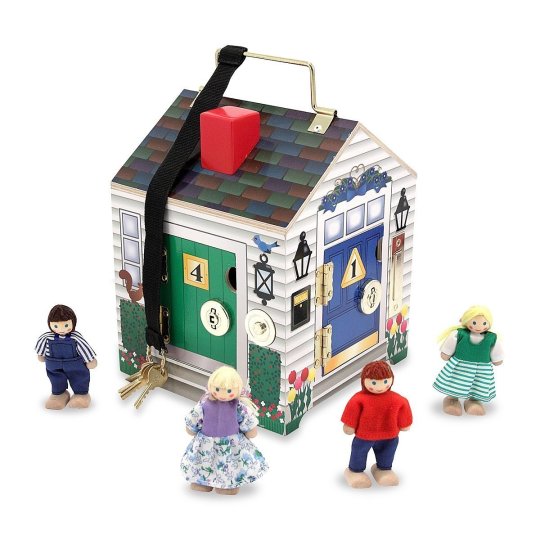
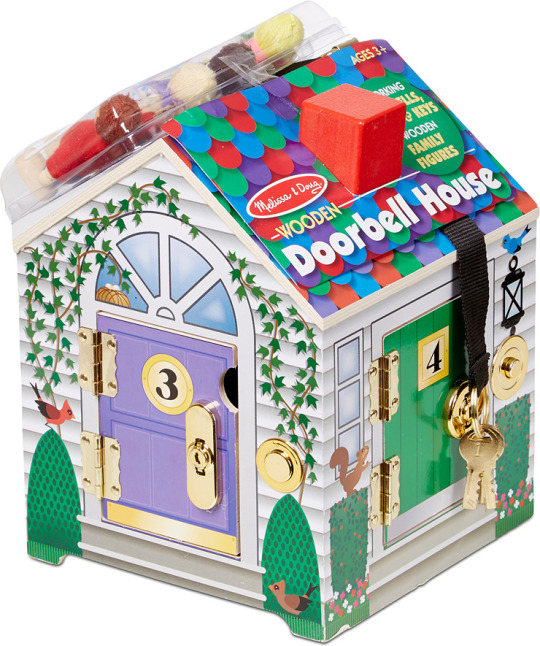
ugh I remember I used to have this dollhouse 😭😭😭
my dad got it for me for Christmas and I loved it so much, I played with it all the time and I loved the little dolls
but of course depression caused me to become uninterested and eventually I gave it away... I regret it so so so much
not only was it a gift from my dad, but the little dolls were so cute and I loved that you could lock the doors!
luckily for me it's on Amazon for $50!
maybe once I get paid tomorrow I will get it :)


I also want to have more dolls with different hair colours, eye colours and skin colours
I'm thinking of removing the blonde hairs and replacing them with black hair just because all the other family members have black hair, I'm also planning to paint their eyes brown

I also saw these blank dolls with the same head, feet, and arms as the ones above
thinking of creating my own doll family. maybe some mestizos like me?? :3
I have seen these shapes of wooden parts at the dollar store, maybe I could even make them from scratch? but I would need a corded wire to attach the feet and hands to the body or, I guess a pipe cleaner?
I think my mom actually has twin wrapped wires
my dad is pretty handy with tools, he could drill holes into the wood so I could create the limbs
and I'm pretty sure I have wooden blocks stored away somewhere for the torsos
this actually sounds pretty easy lolol
maybe I will pick up some supplies tomorrow when I go with my mom to her doctor's appointment, there is a dollar store right next to the clinic 👀
lol I have a lot of diy projects to do 🤣🤣
#dollblr#doll collector#dolls#my dolls#post#doll#wooden doll#melissa and doug#doorbell dollhouse#diy doll#diy craft#diy projects#diy
2 notes
·
View notes
Text
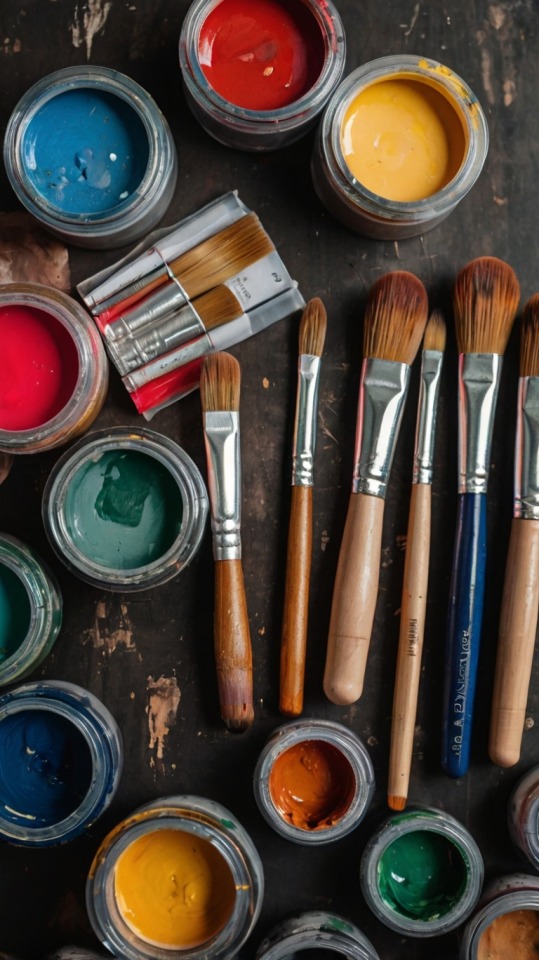

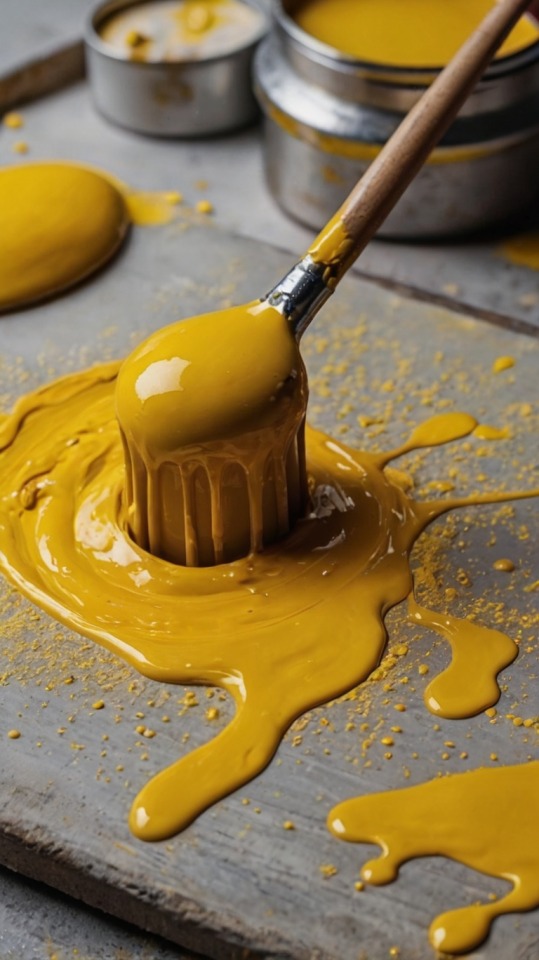
Brighten Up Your DIY Projects with Apple Barrel Acrylic Paint in Bright Yellow! 🌟🎨
Add a splash of vibrant color to your next craft project with Apple Barrel Acrylic Paint! This 2 oz bottle in Bright Yellow is perfect for all your creative endeavors—from painting canvases to decorating wood, plastic, and even fabric. The paint dries to a beautiful matte finish and is easy to clean up with just soap and water, making it perfect for beginners and pros alike. Whether you're working on DIY home décor, kids’ crafts, or personal art projects, this versatile, non-toxic acrylic paint is your go-to for bold, bright results.
Why You’ll Love It:
Rich, bright yellow color that pops! Quick-drying, matte finish perfect for crafts Easy cleanup with soap and water Suitable for various surfaces like wood, canvas, and more Non-toxic, perfect for all ages and skill levels Let your creativity shine with this vibrant paint! 🎨✨
BUY NOW ON AMAZON
Affiliate Disclosure: This post contains affiliate links. If you purchase through these links, we may earn a small commission at no extra cost to you.
#arts and crafts#nyc#tumblrcrafts#usa#AppleBarrelPaint#BrightYellowPaint#Acrylic Paint DIY#craft supplies#CreativeColors
2 notes
·
View notes
Text
My OCs as Influencers
inspired by @solmints-messyocdiary
The Todd Siblings
Darrell
mainly YouTube
has Insta, reddit, and tumblr but uses those mostly to lurk
content is mostly helmet cam footage of him driving through Devil's Peak and the surrounding highways
trail cam footage of the wild hogs, many of it grainy, black and white, and mildly unsettling
educational stuff about the hogs, shows off Jeb like a subway sandwich for views
"close encounters" videos with "supernatural beings" in the woods
DIY home repair and gardening tutorials
unintentional thirst traps, especially when he films himself changing clothes at a rest stop
Susannah
Instagram and tiktok
content is Southern Belle/cottagecore realness
posts the most beautiful pictures you've ever seen
selfies are always stunning
seamstress by trade and probably has an etsy shop
models all the clothes she makes
GRWM videos with the most soothing voice-over
gets loads of hate but is genuinely super nice
Nathan
YouTube vlogger
cinematic vids showcasing farm life
day in a life vids
informational vids about the crops, etc.
gained lots of attention because he's cute and looks hot in overalls
not above making thirst traps, unlike Darrell, he claims they were unintentional.
Judah
tiktok, insta and YouTube
dark academia content
posts playlists, book and fashion recs, and study with me/study tips
sometimes posts his poetry with accompanying music and visuals
very highbrow stuff
Salome
tiktok
videos about thrifting, plushie hauls, and art
sketchbook tours
draws strangers and random farm animals
reviews art supplies
does art giveaways
just does her thing and has one of the most wholesome comment sections
super easy to befriend
Darcellen
Youtube for her covers and original songs
a private insta for keeping in touch
not really an influencer, just someone who wants an outlet for her talent
Rex Hoskins
this old man? social media? Pfft
"influence? Influece what?"
too busy rounding up cattle
Stephanie
tiktok
mostly shows off outfits and gives styling tips
style is gurokawa ("creepy cute") and/or pastel goth
positive pov videos (like "if you're sad watch this")
probably collects monster high dolls and sanrio merch
Cheryl Catacutan
Cheryl Fear on YouTube
video essayist and aspiring filmmaker
focuses on horror, film analysis, real-life and internet mysteries, and urban legends
has an ongoing found footage horror series shot in first person
actually really good at acting and sound design
collaborates with "Clancy" for her soundtracks
has other socials that are completely empty except for when she uses them to promote her projects
goes on pinterest a lot for inspo
"Clancy"/"Pay Phone"
manages his band's youtube channel aside from being the lead singer
also has a bandcamp
heavy metal/doom metal
some of his band's music videos are directed by Cheryl
#influencer au#todd siblings#darrell todd#nathan todd#susannah todd#judah todd#salome todd#rex hoskins#stephanie#zombie oc#cheryl#pay phone#slasher oc#orignal characters#bluecoolr.txt
35 notes
·
View notes
Text

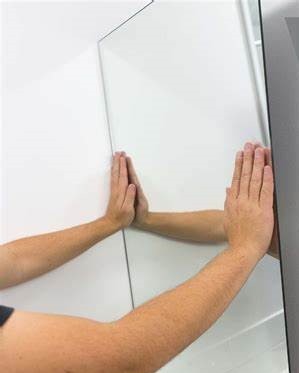
Introduction: Using Mirror mounting tape is a creative method to swiftly and effortlessly transform your space without the need for screws or nails.
Advantages of Using Mirror Mounting Tape Easy Installation The days of intricate mounting hardware causing trouble are long gone. The installation process is easy and hassle-free with mirror mounting adhesive. You can connect your mirror securely to any surface in a matter of minutes, which will save you time and effort.
Damage-Free Mounting: Traditionally, mirrors are frequently installed by drilling into walls, which may result in unattractive damage. Instead of worrying about breaking your walls, mirror mounting tape offers a damage-free option that lets you appreciate the beauty of your mirror.

Versatility in Use: Mirror mounting tape is useful for mounting mirrors in a variety of spaces, such as hallways, bedrooms, and bathrooms. It works well on walls, tile, and wood surfaces thanks to its powerful adhesive qualities.
Choosing the Right Mirror Mounting Tape: Weight capacity, surface compatibility, and weather resistance are important considerations when choosing mirror mounting tape.
Weight Capacity: To make sure your mirror can handle the weight, find out its weight before buying mirror mounting tape. Make sure the tape you purchase can withstand the weight of the mirror, as most tapes have a weight capacity listed.
Surface Compatibility: Not every surface can accommodate every type of mounting tape. Certain materials, like glass or tile, may be easier for some to stick to, whereas textured or porous surfaces may be more difficult for others. Make sure the tape you select works with the surface that you want to mount your mirror on.
Weather Resistance Select weather-resistant mirror mounting adhesive if you’re installing a mirror in a bathroom or other damp outdoor area. In humid situations, this will assist guarantee a strong adhesion between the tape and the surface.
Step-by-Step Guide to Mounting Mirrors with Mirror Mounting Tape Clean the Surface: First, make sure the area where the mirror will be mounted is very clean. Clear away any debris, dirt, or dust that might impede the tape’s adherence.
Cut the Tape: Cut the mirror mounting tape to the required length with scissors or a utility knife. To guarantee a snug fit, make sure to measure precisely.
Apply the Tape to the Mirror: Remove the tape’s backside and carefully affix it to the mirror’s back. To guarantee that the tape makes good contact with the mirror, apply pressure.
Position and Press: Place the mirror carefully where you want it to hang on the wall or other surface. Once in place, firmly squeeze the mirror to ensure it stays in that position.
Let it Cure: Hanging weight on the mirror should be delayed until the mirror mounting tape has had time to cure. By doing this, the tape and the surface will be guaranteed to cling firmly and securely.
Creative Ways to Use Mirror Mounting Tape Decorating Walls: Create a gallery wall of mirrors in your living room or bedroom by using mirror mounting tape. Combine various sizes and shapes to create a distinctive and fashionable effect.
Organizing Spaces: Put mirrors in your closet or entrance to make a useful area for glancing in before leaving the house. Mirrors are another useful tool for visually enlarging tiny areas and giving them a feeling of more openness.
DIY Projects: Use mirror mounting tape creatively by making mirrored accent pieces or furniture as part of your do-it-yourself projects. Mirror mounting tape offers endless opportunities for incorporating mirrors into your home’s design thanks to its powerful adhesive qualities.

Maintenance Tips for Mirrors Mounted with Mirror Mounting Tape To ensure your mirrors stay securely mounted and looking their best, follow these maintenance tips:
Regular Cleaning: Regularly wipe off your mirrors with a soft, moist cloth to keep them spotless and clear of smudges and grime.
Avoiding Heavy Impacts :Avoid shoving or bumping into tape-mounted mirrors since this can eventually erode the glue.
Checking Tape Integrity: Periodically inspect the mirror mounting tape for any signs of wear or damage, and replace it if necessary to maintain a secure hold.
Safety Considerations While mirror mounting tape offers a convenient and secure way to hang mirrors, it’s essential to observe safety precautions to prevent accidents or damage.
Weight Limitations: Mirror mounting tape should always be used in accordance with the weight restrictions listed by the manufacturer. The mirror may fall if the weight capacity is exceeded, compromising the tape’s security.
Avoiding Placement in High-Traffic Areas: Avoid mounting mirrors with tape in high-traffic areas where they may be bumped or knocked into frequently, as this can weaken the adhesive bond.
Checking for Loose Ends Regularly: Regularly look for any indications of loosening or peeling around the attached mirror’s edges. Reapply the tape as necessary to provide a tight hold if you see any problems.
Conclusion Mirror mounting tape makes it easier than ever to use mirrors to transform your area. Mirrors provide elegance and practicality to any area in your house, and they are simple to install, damage-free to mount, and incredibly useful. Mirror mounting tape provides an easy-to-use and efficient way to install mirrors securely without using screws or nails, whether you’re doing DIY projects, organizing areas, or decorating walls.
#mirror mounting tape#damage-free mounting#easy installation#versatile adhesive#wall mounting#mirror installation#DIY home decor#adhesive tape#home improvement#mounting solutions
2 notes
·
View notes
Text
7 Cricut Maker 3 Leather Projects to Enhance Your Style

Hey, are you looking for some unique Cricut Maker 3 leather projects? Look no further than this guide! In this post, I am going to tell you the best DIY projects that you can create with leather. About 3 weeks ago, I finished my Cricut leather projects. I have aimed to make a few projects so that I could write this blog diligently. But do you know what was the most difficult part of this project? Cutting intricate designs on leather. Yes, it might not be easy to cut, but they require patience during both cutting and weeding such designs.
Without any further delay, let’s get straight into this blog to find out the most amazing ideas for creating leather Cricut projects.
1. Bracelets
Do you love bracelets? If so, you must give it a shot! When I was looking for ideas for Cricut Maker 3 leather projects, it had been on my mind for a long time. Finally, I gave it a try and saw how beautiful it looked. If you have any friends you want to give this bracelet to, it would be great!
2. Hair Accessories
Do you want something for your hair? You might wonder what I can make for my hair or other beauty stuff. Well, this leather accessory is also made with leather. As you can see, it might look a little tedious, but it is a piece of cake. Start diving into your Crafting journey and create what you need the most.
I gave it a flower shape, and if you are a little bit familiar with Cricut Maker 3 Setup, then it is a breeze for Maker 3 to cut such designs.
3. Earrings
I love leather earrings, as they enhance my beauty and are easy to create. Beginners who are looking for the best Cricut Maker 3 leather projects should try them out! Why? Because they are really easy to make. I also wanted to make them a little unique, so I added some glittery effects. This is what I needed, and hence, I made them.
4. Keychains
If you want personalized keychains, then here I have something for you! Whether you are a novice crafter or a pro, this keychain is easy to make. All I did was add some texts with different font styles to my Design Space.
Finally, after finishing my design, I started my Cricut Maker 3 and cut all the words Daddy and Daniel to make keychains. I handed it to my dad, my brother, and my dinner.
5. Crossbody Bag
Today, everyone wants to use a body bag, and what if you have a personalized one? Sounds like a great idea, no? I created this simple bag for myself as I am not much into personalized stuff. But you can have one if you want. The process of making this bag is easier, and you will need iron-on vinyl to make such a beautiful crossbody bag.
6. Monogram Keyring
Looking for super easy-to-make Cricut Maker 3 leather projects? Here is the monogram keyring that is most widely useful, and it would be great if you could give it a shot! This is a great beginner project, and any beginner should try to make something unique. I also used paint to color it to make it look stunning! Lastly, you can see the result in the picture, like how elegant it looks.
7. Cord Organizers
Every one of us uses earphones or a charger, but sometimes managing those clumsy wires is boring and tedious. So, I decided to create something that could organize my cords or wires. Here, you go with leather cord organizers, which I created using my Cricut. There are many cuts that I had to make, and I preferred my Cricut Maker to cut them as they are faster and provide precise cuts, making them look professional rather than handmade.
FAQs
Can I cut leather with Cricut Maker 3?
Yes, leather can be easily cut with Cricut Maker 3. It can also cut other materials such as fabric, paper, and balsa wood without any problem. In order to cut the leather, you have to use a knife blade, and the thickness of the leather should be up to 2.4 mm or 3/32 mm thick. However, you have to use a clean cutting mat with a sharp blue edge for better results.
What are the essential Cricut tools for cutting leather?
There are some common tools that you can use to cut leather. They are as follows:
Utility knife: This sharp knife is considered a versatile tool for cutting your leather.
Rotary cutter: This is a tool that comes with a wheel-shaped blade. Ideal for long and straight cuts.
Leather shears: A kind of specialized scissors idea for cutting thick and tough leather.
Round knife: It is a popular tool that is most widely used for cutting leather.
How thick can I cut leather with Cricut Maker 3?
If you want to cut the leather on Cricut Maker 3, you can cut up to 7 oz thick. The best thing about the Maker 3 machine is that it cuts anything precisely. In addition, cutting the leather is a breeze. You will also have to use a knife blade for all these leather Cricut projects.
Wrapping Up
As you went through the 7 Cricut Maker 3 leather projects, you might have found them easy to make. The best thing about these leather projects is that they are beginner-friendly. So, you will not need to worry about the complexity of the projects; just turn on the Cricut Maker 3 and prepare the leather that you want to cut. After cutting, the result will be fantastic and will stand out!
For more information and visit: www.cricut.com/setup login cricut.com/create Cricut Design Space App
Source: Cricut Maker 3 Leather Projects
#Cricut Maker 3 leather projects#leather Cricut projects#cricut design space download#Cricut maker setup#cricut maker 3 setup#Cricut Design Space Login#Cricut Design Space App#Cricut New Machine Setup
2 notes
·
View notes