#doll pattern making
Explore tagged Tumblr posts
Text
Drafting the Jacket Pattern (Dec 2022 from my TT)
The easiest way to make custom fitted patterns for dolls.
Quick Tutorial Below 👇
Materials: Cling wrap, Painter's Tape, Sharpie, Nail Scissors or Blunted Tip scissors (to protect the doll), muslin fabric
1. Wrap doll torso in at least two layers of clingwrap. Make sure it's flat and even.
2. Put painters tape on top of clingwrap. Make sure it's smoothly applied, but not too tight. If it's too tight you could risk scratching your doll when it's removed.
3. Draw a straight solid or dotted line down the spine and sternum of the doll on the painters tape.
4. Draw the seams of your pattern. You don't have to be even. I only use half the pattern to make the garment symmetrical anyway.
5. Carefully cut the tape and clingwrap off the doll. Cut out the pattern pieces on your sharpie lines. Remove any extra clingwrap.
6. Use the pieces as pattern parts and trace them on paper or muslin. Make a test garment out of muslin before committing yourself.
63 notes
·
View notes
Text
knitting hot take: patterns that are written to be knit flat and seamed to make them more “beginner friendly” are a crock. seaming is also a skill that needs to be learned and practiced and honestly takes more work to learn to do well than just learning to knit in the round
#knitting#knitblr#there are plenty of good reasons a pattern might be seamed#making it easier is not one of them#this post brought to you by the doll jacket pattern that was entirely pieced and seamed for NO GOOD REASON
502 notes
·
View notes
Text


I crocheted a small Chopper! :>
I put all my crochet toys and patterns in here and here ♥️
#Im currently making this chopper pattern so please stay tuned#tony tony chopper#chopper#one piece fandom#one piece#crochet design#crochet animals#amigurumi#crochet pattern#crochet doll#crochet
413 notes
·
View notes
Text
another update on the DCA paper doll! Moon this time!

(don't mind the fact he has no legs, i just wanted to test out the hat and his torso and save ink and the hand cramps)
a silly long hat you can fold! (or leave as is, he likes to be tol and all)


or, for friends who don't feel like folding, there's also a regular hat design:

(so Moon and Eclipse will have 2 hat designs to choose from)
and a back view to show off the neck piece and loop

#fnaf moon#fnaf dca#dca fandom#crab crafts#crab art#DCA paper dolls#the designs are almost done#just need to add the patterns#and make a coloured version#there are some other design ideas i want to try out#but i'll save them for a future iteration maybe if they work out
164 notes
·
View notes
Text
... peace on planet bottom, then there's whatever this is

#i am wondering about the chocolate roses#was the first half of the crew working on those roses on valentines day#and now the second half of the crew is making them on white day?#no... that's not logical... maybe they were all working on them around the same time#but the images of their activities is only released to us on these specific holidays#did eiden pull a 'when i worked briefly as a cake decorator they taught me how to make these cool choco roses'?#and everyone in the clan got a Aha! moment and wanted to make their own roses. in some grand cake for eiden??#they are all doing edible arts and crafts. idk how they were separated by sex position but sometimes things work out that way. i guess.#[side eyes the strange dimensional portal that segregates them.] this portal can only induce pain (in me)#but maybe... the rose dante is holding away from blade is his PERFECTED sample?#and he's seen how blade has been steadily adding things to the roses. glitter. inedible things. strange divots and patterns#blade has the ABILITY to make perfect identical roses like a production line. but will he do it? no. not cute#every rose should have some personality. a little flair. a little lumpy petal here and there#and dante is all NO . you may perceive this lesser specimen (Rose B) as a distraction. but my true aim is preserve the integrity of Rose A#the bottoms were making their roses in the daytime. the tops are partying at night. what does this mean#will they all welcome eiden home at midnight (he was out on some bland social gathering with aster and huffy nobles?)???? WITH ROSE CAKE?#but quincy has meat. why he got meat? to keep morale high? because he's not a fan of sweets? because his creature friends preFER meat?#well. meat and cake. not a bad way to party the night away#but the... wine? champagne? pls dont tell me theyve been drinking. do not give the tops alcohol. BAD things will happen#so many stressed eiden dolls.... i wish him peace... maybe one day he can lie peacefully on a bed of roses and not be set on fire#he would have to risk it during a daytime bottoms outing. apparently (and even then the risk is still not nonexistent)#(mostly because edmond+food creates an uncharacteristic uptick in disasters. plus the puppy exuberance. plus rei . just rei)#(once again i feel sorry for oli. is he the only one with a metaphorical eiden doll fire extinguisher? we should do a plot twist.#make OLI the one to accidentally set eiden doll on fire. and garu extinguishes it. enrich their experiences with novelty and unlikely stats#this image was brought to my attention by a puppy hellbent on showing me yakumo's distressed expression#can't say i'm displeased with it
57 notes
·
View notes
Text


something a little different today! my one day mini project!
her name is Samantha but her friends call her Sammy <3
#idk how to tag art like this#uhh#plush#plushie#art doll#artdoll#cat#catgirl#she could technically be used as a stop-motion puppet since she has a wire skeleton and is semi-posable#but again. I did her in one day and didn't have a bigger plan or pattern so she's not perfect! I still love her she's my baby#my art#my crafts#I AM planning on making an actual handpuppet in a few weeks we'll see how that goes
58 notes
·
View notes
Text

he needs pussy surgery :(
#was trying to copy his pattern to make another doll but accidentally put a few holes in him in the process#sorry garak :(((#he's all fixed now don't worry#narcissus's echoes
102 notes
·
View notes
Text
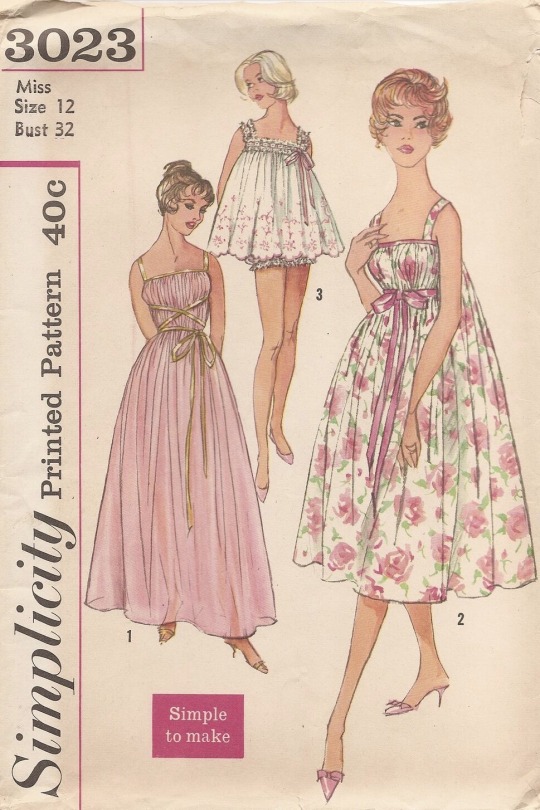
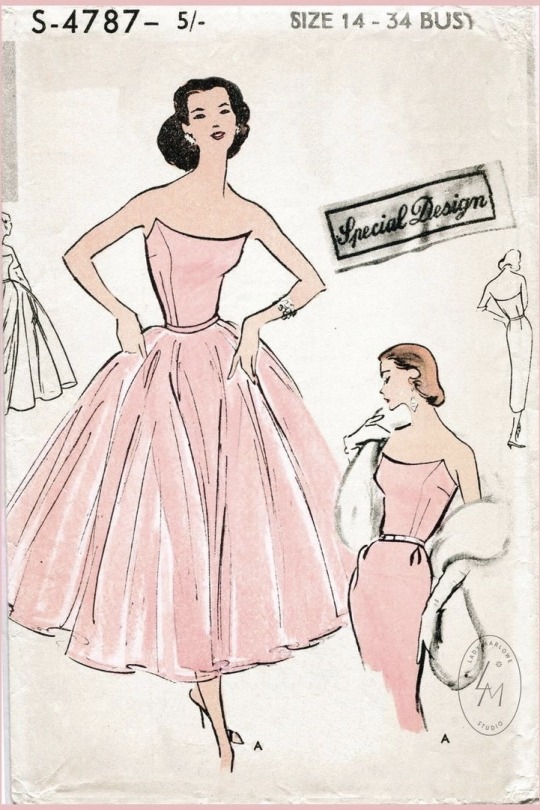

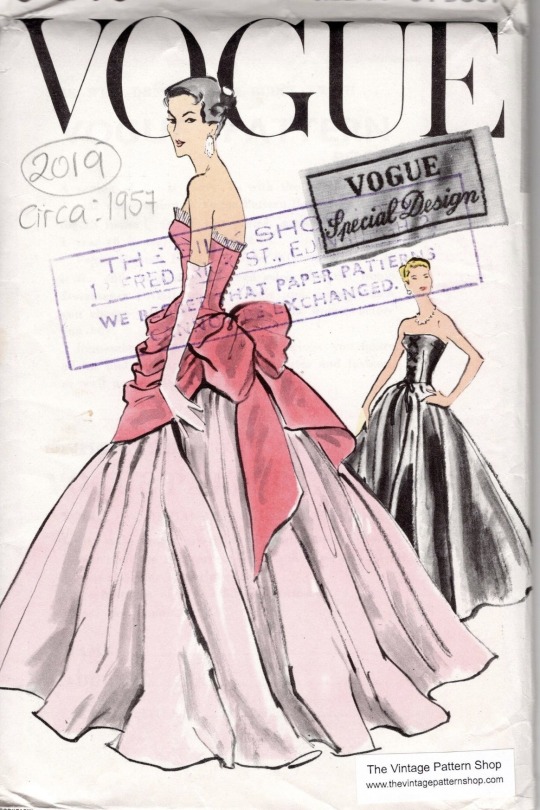
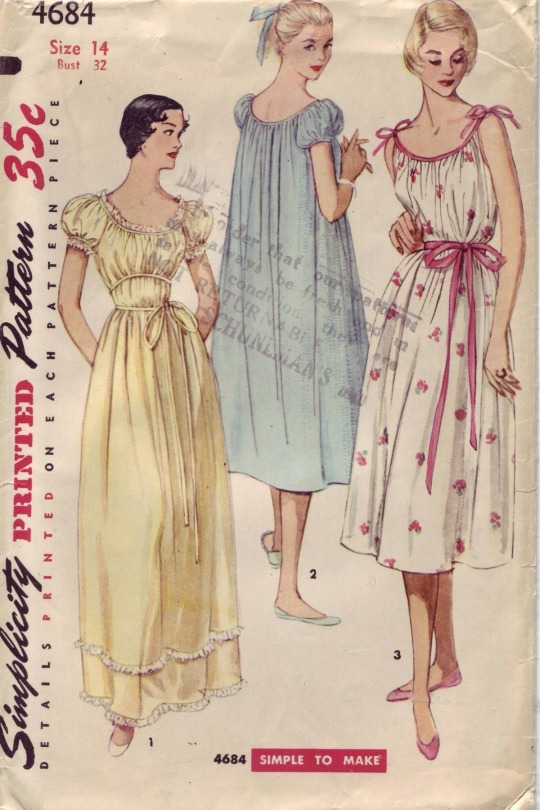
vintage sewing patterns 🪡 ₊˚⊹♡
#vintage sewing pattern#sewing patterns#coquette#dollette#this is a girlblog#girl blogging#lana del rey#lizzy grant#50s fashion#fifties#50s aesthetic#pink coquette#baby pink#pastel colours#this is what makes us girls#the virgin suicides#libson sisters#baby doll dress#vintage fashion#ocean blvd
356 notes
·
View notes
Text

finally brainstorming...........
#all my pre-designed mianmian dolls are very fantasy-themed so naturally.... my first impulse was to make a little emo dog gsdfgs#I don't know how to do anything in moderation so my first bjd custom will involve a nearly full body paint job#and clothes I'll have to measure and pattern all on my own for its bizarre little proportions
32 notes
·
View notes
Text


他可能没那么爱我… 我要清醒过来!勇敢放手,昂首向前…
相信自己,熬过去就好了!
46 notes
·
View notes
Text

Trying to practice my embroidery on the doll I'm making for my nephew
#i dont have “patterns” or “fusible wen”#just crayolas and determination#sewing#embroidery#doll making#shit gettin old
33 notes
·
View notes
Text
Last Night's Progress.


Sleeves today.
#the band ghost#cardinal copia#bjd sewing#my wips#current wip#doll pattern making#ghost fanart#resin popia
27 notes
·
View notes
Text
Hello! This was asked for by @kananarchiste and I've finally gotten around to writing it up-- my pattern for my crochet doll of Commander Cody-- and I'm giving it away for free! (If anyone does make this, please tag me-- I'd love to see it!!)
Commander Cody crochet doll pattern
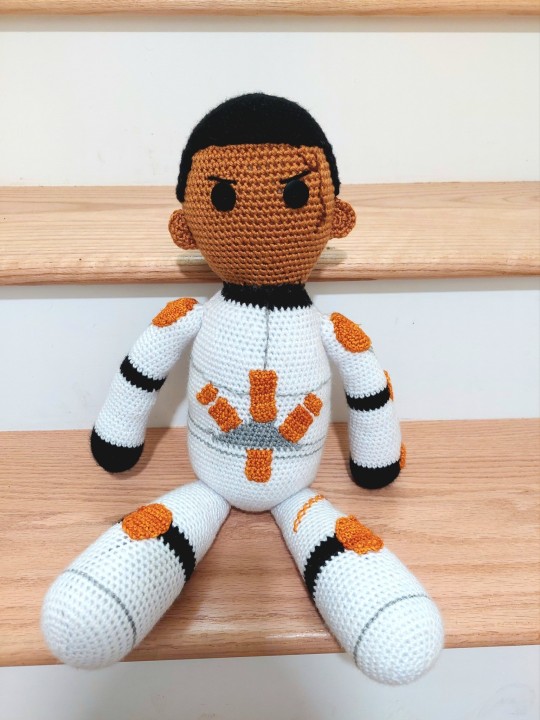
I've never written up a proper pattern before, so I apologize for any confusing bits or mistakes in advance. If you get stuck on something or if something is unclear, please shoot me an ask or DM and I'll do my best to help out.
Additional Pictures:
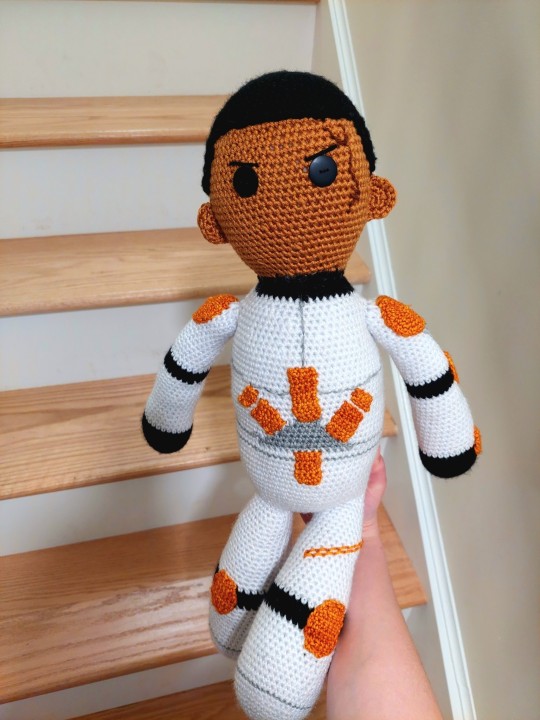

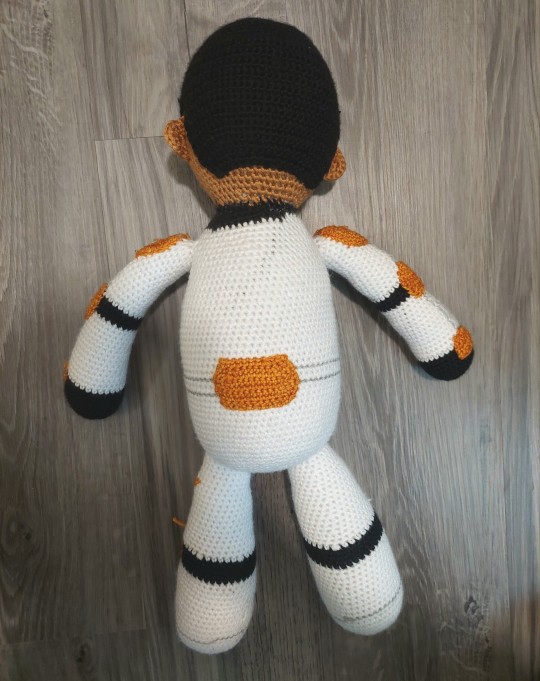
Yarn Weight: 4
Hook: 4 mm
Colors:
White
Yarn in Jango’s skin tone (I used Lion Brand Yarn’s Skein Tones yarn in adobe)
Black
Dark brown (for scar; contrasts with skin tone)
212th gold/orange (this can be hard to find. I got mine at a local independent store)
Grey
Extra materials:
Buttons and thread OR safety eyes (I used buttons because I like the look of them better)
Stitch markers
Yarn needle
Abbreviations Key:
Ch – chain
Dec – decrease
FO – fasten off
Inc – increase
Rep from * – repeat from *
Sc – single crochet
Sc2tog – single crochet two stitches together
Ss – slip stitch
St – stitch
Additional Notes:
All parts save for some embellishments are worked in the round. It is recommended that the crocheter mark each round for clarity.
Entire doll is worked in single US crochet.
Magic circle is NOT used.
I’m not sure what the gauge is, but mine is quite tight. Use a smaller hook if you feel as though your gauge is too loose.
BODY AND HAIR
Head– in adobe
1. Chain 2. Into the first st, sc 6 and mark with a stitch marker. (6) 2. Sc2 into each sc around. Mark. (12) 3-6. Increase by 6 each round to 48. (48) 7. Sc around. (48) 8. Inc by 6 (54) 9. Sc around. (54) 10. Inc by 6. (60) 11-12. Sc around. (60) 13. Inc by 6. (66) 14-15. Sc around. (66) 16. Inc by 6. (72) 17-18. Sc around. (72) 19. Dec by 6. (66) 20-21. Sc around. (66) 22-34. Dec by 6 in same pattern as increases. FO after crocheting 12 at row 34. Stuff firmly.
Body– in white, grey, black
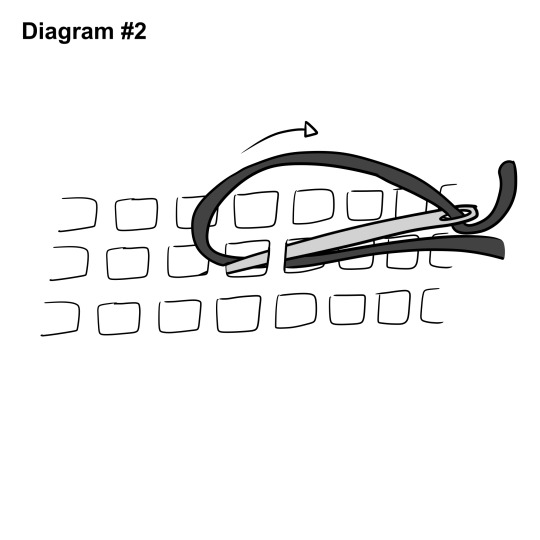
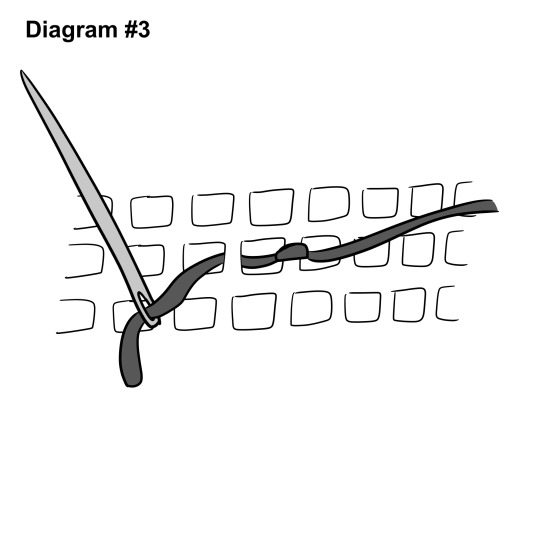
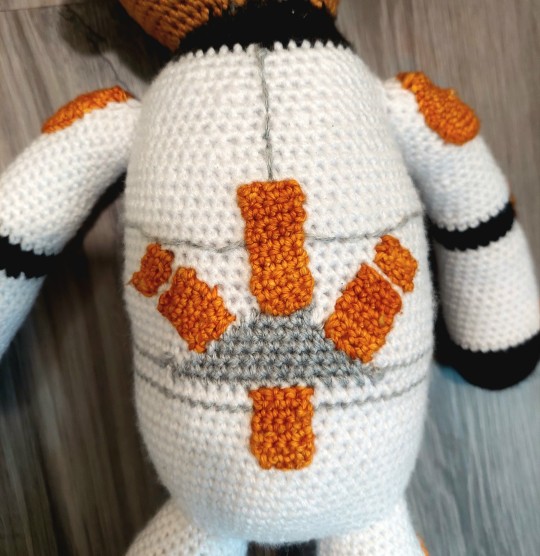
1. In white, ch2 and sc6 into second st from the hook. Mark. 2-12. Inc by 6 each round to 72. (72) 13-23. Sc around. (72) 24. Sc29 and FO. Ss in with grey and sc14. FO. Ss in with white and finish round. (72) 25. Sc30 and FO. Ss in with grey and sc12. FO. Ss in with white and finish round. (72) 26. Sc31 and FO. Ss in with grey and sc10. FO. Ss in with white and finish round. (72) 27. Sc32 and FO. Ss in with grey and sc8. FO. Ss in with white and finish round. (72) 28. Sc33 and FO. Ss in with grey and sc6. FO. Ss in with white and finish round. (72) 29. Sc34 and FO. Ss in with grey and sc4. FO. Ss in with white and finish round. (72). 30-41. Sc around in white. (72) 42. Dec by 6. (66) 43. Sc around. (66) 44. Dec by 6. (60) 45. Sc around. (60). 46. Dec by 6. (54) 47. Sc around. (54) 48. Dec by 6. (48) 49. Sc around and FO. (48) 50. In black, ss in and dec by 6. (42) 51. Dec by 6. (36) 52. Dec by 6. (30) 53. Dec by 6. (24) At this point, stuff the body firmly. 54. Dec by 6. (18) 55. Dec by 6. (12) 56. Sc around and FO, leaving a long tail, enough to sew the head on. (12) Using grey yarn and a yarn needle, stitch a trooper’s upper chest plate shape (from beginning of black area to about round 45, 5 rows above the grey shape). Center it above the grey shape. Also stitch a belt shape below the shape, shifting to a row below in the middle of the back. For chest plate pattern, see diagram #4. For how to stitch a pattern in, see diagrams #1-3.
Arms– in white, black (make 2)
1. In black, ch2 and sc6 in second ch from hook. Mark. (6) 2. Sc2 in each st around. (12) 3. Inc by 6. (18) 4. Inc by 6. (24) 5. Inc by 6. (30) 6-9. Sc around. (30) 10. Dec by 2. (28) 11. Sc3 and FO. Ss in white and finish the round. (28) 12-14. Sc around. (28) 15. Dec by 2. (26) 16-19. Sc around. (26) 20. Dec by 2. (24) 21-24. Sc around. (24) 25. Dec by 1 and sc3. FO. Ss in black and dec by 1, finishing the round. (22) 26-27. Sc around. (22) 28. Sc3 and FO. Ss in white and finish the round. (22) 29. Sc around. (22) 30. Dec by 2. (20) 31-34. Sc around. (20) 35. Dec by 2. (18) 36-39. Sc around. (18) 40. Dec by 2. (16) 41-44. Sc around. (16) At this point, stuff the arm. 45. Sc2tog around. FO, leaving a long tail. (8)
Legs– in white, black (make 2)
1. In white, ch2 and sc6 into the second ch from hook. Mark. (6) 2-7. Inc by 6 to 42. (42) 8-13. Sc around. (42) 14. Dec by 2. (40) 15-16. Sc around. (40) 17. Dec by 2. (38) 18-19. Sc around. (38) 20. Dec by 2. (36) 21. Sc around. (36) 22. Sc3 and FO. Ss in black and finish round. (36) 23. Dec by 2. (34) 24-25. Sc around. (34) 26. Dec by 1, sc2 and FO. Ss in white, sc10, and dec by 1. Finish round. (32) 27-28. Sc around. (32) 29. Dec by 2. (30) 30-31. Sc around. (30) 32. Dec by 2. (28) 33-34. Sc around. (28) 35. Dec by 2. (26) 36-37. Sc around. (26) 38. Dec by 2. (24) 39-40. Sc around. (24) 41. Dec by 2. (22) 42-43. Sc around. (22) 44. Dec by 2. (20) 45-46. Sc around and FO, leaving a long tail. (20) Stuff firmly. Using the yarn needle and grey yarn, stitch in a grey line about 10-11 rows above the starting circle. This is meant to delineate feet.
Hair– in black
1. In black, ch2 and sc6 into the second ch from hook. Mark. (6) 2-9. Inc by 6 to 54. (54) 10. Sc around. (54) 11. Inc by 6. (60) 12. Sc around. (60) 13. Inc by 6. (66) 14. Sc around. (66) 15. Inc by 6. FO. (66) Turn the dome inside out, so the backs of the stitches are facing out. Ss into the last st made. 16. Working right back along the last row, (sc48 and ch1)*, turn. (48) 17-23. Rep from *, turning each time. FO. (48) 24. Ss in at 7 sc in from the end of the last row and sc to the same on the other side, turn. (36) 25-26. Sc36, turn. (36) 27. Dec by 2 across row, turn. (34) 28-29. Sc across, turn. (34) 30. Dec by 2 across row, turn. (32) 31-32. Sc across, turn. (32) 33. Dec by 6 across row, turn. (26) 34. Sc across, turn. (26) 35. Dec by 6 across row, turn. (20) 36. Sc across and FO. (20) Turn right-side-out again. At this point, attach all limbs and the head to the body with the tails from the body and limbs. Don’t attach the hair until the ears are done. Attach with the seams from white-black transitions on limbs facing up and out for the legs and to the back for the arms. These will be covered with armor embellishments.
EMBELLISHMENTS
Pauldrons– in 212th gold/orange (make 2)
1. In 212th gold/orange, ch2 and sc6 into the second ch from hook. Mark. (6) 2-5. Inc by 6 to 30 and FO, leaving a long tail. (30) Attach to the tops of the arms in the shoulder area. Tuck in ends.
Leg pads– in 212th gold/orange (make 2)
1. In 212th gold/orange, ch3 + 1 for turning. Turn. (3) 2. Inc by 1, sc1, inc by 1, turn. (5) 3. Sc across, turn. (5) 4. Inc by 1, sc3, inc by 1, turn. (7) 5-7. Sc across and turn. (7) 8. Dec by 1, sc3, dec by 1, turn. (5) 9. Sc across and turn. (5) 10. Dec by 1, sc1, dec by 1, FO, leaving a long tail. (3) Attach to the legs where the black meets white and vice-versa. Tuck in ends.
Handguards– in 212th gold/orange (make 2)
1. In 212th gold/orange, ch5 + 1 for turning. Turn. (5) 2. Sc across, turn. (5) 3. Inc by 1, sc3, inc by 1, turn. (7) 4. Sc across and turn. (7) 5. Sc across and FO, leaving a long tail. (7) Attach over the backs of the hands where black meets white. Tuck in ends.
Back panel– in 212th gold/orange (make 1)
1. In 212th gold/orange, sc10 + 1 to turn. Turn. (10) 2. Inc by 1, sc8, inc by 1, turn. (12) 3. Inc by 1, sc10, inc by 1, turn. (14) 4-8. Sc across and turn. (14) 9. Dec by 1, sc10, dec by 1, turn. (12) 10. Dec by 1, sc8, dec by 1, turn. FO, leaving a long tail. (10) Attach to the back where the belt stitching jumps a row. Tuck in ends.
Elbow pads– in 212th gold/orange (make 2)
1. In 212th gold/orange, sc2 + 1 for turning. Turn. (2) 2. Inc by 1, inc by 1, turn. (4) 3. Sc across and turn. (4) 4. Inc by 1, sc2, inc by 1, turn. (6) 5. Sc across and turn. (6) 6. Dec by 1, sc2, dec by 1, turn. (4) 7. Sc across and turn. (4) 8. Dec by 1, dec by 1 and FO, leaving a long tail. (2) Attach to the backs of the elbows where white meets black and vice-versa. Tuck in ends.
Ears– in adobe (make 2) – You want to make a half-circle
1. In adobe, ch2 and sc6 into the second ch from hook. Mark. (6) 2. Sc2 into the first 3 st of the round to make 6 st and ch1 to turn. Turn. (6) 3. (Inc by 1 + 1 sc) 3 times and FO, leaving a long tail. (9) Using the yarn needle, sew each ear onto either side of the lower half of the head, leaving room for the hair to go on. At this point, attach the hair. Using the yarn needle and grey yarn, stitch in grey stripes on Cody’s arms.
SUNBURST
Central ray– in 212th gold/orange (make 1)
1. Sc4 + 1 for tuning. (4) 2-10. Sc across, turn. FO, leaving a long tail. (4) Attach to the top of the grey shape on the chest, pointing up. Tuck in ends.
Side and bottom rays– in 212th gold/orange (make 3)
1. Sc4 + 1 for tuning. (4) 2-7. Sc across, turn. FO, leaving a long tail. (4) Attach to the sides and bottom of the grey shape. Tuck in ends.
Ray tops, for side rays– in 212th gold/orange (make 2)
1. Sc4 + 1 for tuning. (4) 2-3. Sc across, turn. FO, leaving a long tail. (4) Attach to the tops of the side rays, leaving a small white space between the top of the rays and the ray tops. Tuck in ends.
FACE
Eyes
Buttons: using a sewing needle, attach the buttons to the yarn stitches so that they form eyes.
Safety Eyes: if using safety eyes, attach as normal in the desired position.
Eyebrows
Using the yarn needle with black yarn, form the eyebrows. Cut the yarn and tie the ends together. Pull the yarn so that the knot in on the inside of the crochet and not facing out.
Scar
Using the yarn needle with dark brown yarn, stitch Cody’s scar in.
DIAGRAMS/PICTURES
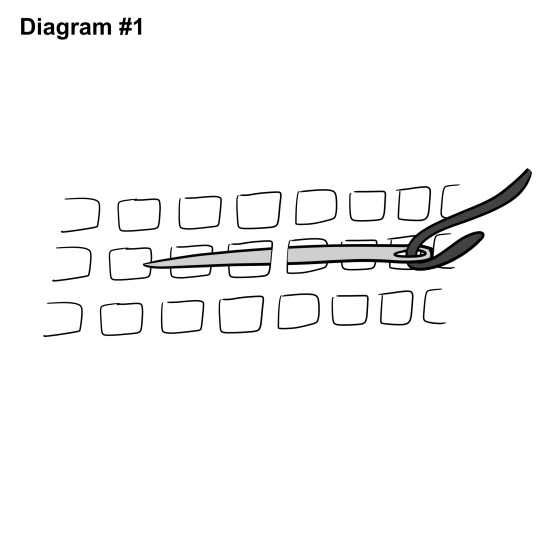
#star wars#commander cody#marshal commander cody#cc 2224#star wars the clone wars#the clone wars#swtcw#tcw#crochet#amigurumi#crochet doll#crochet pattern#beans art#considering making smaller trooper dolls but im likely to sell those patterns#this one is free though :)
71 notes
·
View notes
Text


I finally finished the crochet pumpkin jar, Mr. Jacko!! I’m going to fill him up with candies even if I don’t eat candies. 🎃🎃🎃
Pattern here! (30% discount, 5.6 dollars instead of 8 dollars until 31st, Oct)
Discount code: BLACKDRESS
#behold: you can hide candies in the holder too so no one can eat all your candies#seasonal items are so much fun to make!!#considering making my wizard frog next week if I have time#crochet design#amigurumi#crochet#crochet doll#crochet pattern#pumpkin#halloween#pumpkin jack#halloween 2024
129 notes
·
View notes
Text
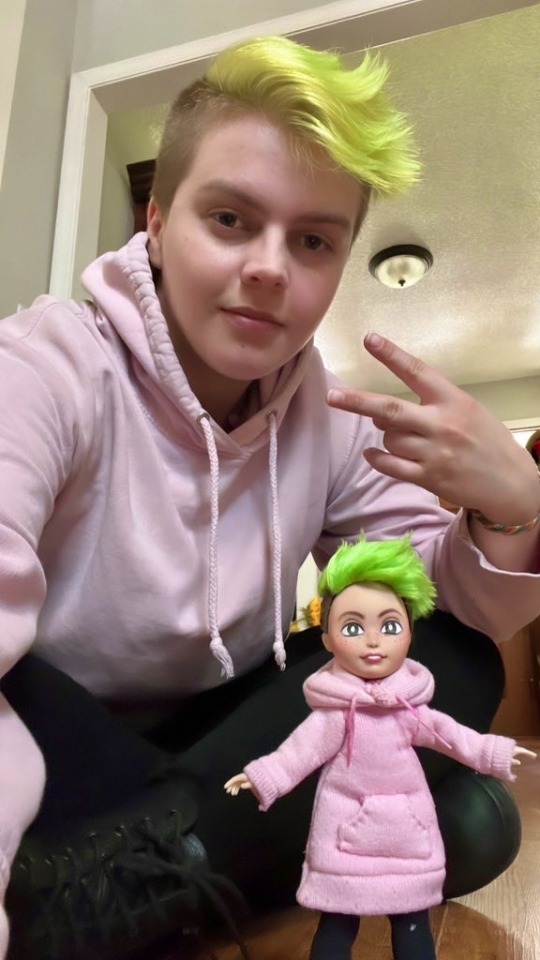


got inspired by the doll artists who make mini-me's and made one of my own ✌🏻 i used a boxy girls body and a shrunken ever after high head!
#i used the fabric from an old hoodie to make the mini one and it was my first time making a clothing pattern like that from scratch!#i think i did a decent job and it was fun creating all the little details for the doll#custom doll#doll repaint#ooak#mini me#ever after high#boxy girls#it me#my face#dolls#my art
487 notes
·
View notes
Text
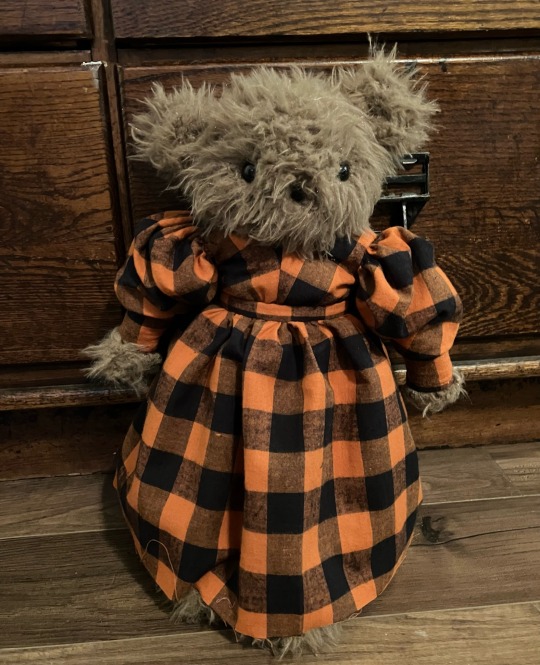
Miss Beatrice Bear’s new dress is almost done! I just need to hem the bottom
#sewing#handmade#sewing wip#miss beatrice bear#historical doll clothing#sort of! idk that the fabric is but the pattern I used for it is#Miss Beatrice doesn’t look like it but she’s the same size as an American Girl Doll#well. plus some fluff#I am going to make a black cat to wear this dress!
172 notes
·
View notes