#dehumidifier for swimming pool
Explore tagged Tumblr posts
Visit Tumblr Blog
Explore Tumblr blogs with no restrictions, modern design and the best experience.
Last Seen Tumblr Blogs


Fun Fact
Celebrities use Tumblr as well.
Text
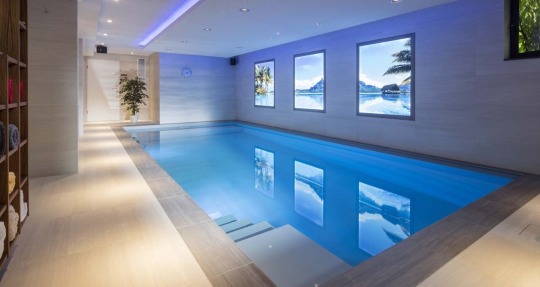
Perfect Air, Perfect Swim: Dehumidifiers for Indoor Pool Rooms.
Ensure a comfortable and healthy environment with our Indoor Pool Dehumidification Unit, specially designed for swimming pool room dehumidification. This advanced system provides effective pool moisture control, preventing mold, condensation, and structural damage. Featuring options like ducted dehumidifiers, our units are perfect for seamless integration into your HVAC system. Trust our reliable pool room dehumidifiers to maintain ideal conditions with consistent and efficient pool room dehumidification. Call us in Dubai, Riyadh, Muscat, Manama, Jeddah, Doha, Salalah, Yerevan, Baghdad, Erbil, Amman, and Niarobi. #IndoorPoolDehumidification #PoolRoomDehumidifier #MoistureControl #DuctedDehumidifier #Dehumidifier https://www.dehumidifier.ae/dehumidifiers.php
Pool Room Dehumidifier: Essential for Indoor Pool Humidity Control
A pool room dehumidifier is crucial for maintaining proper indoor pool humidity control, ensuring a comfortable and safe environment. High humidity levels in indoor pool areas can lead to condensation, mold growth, unpleasant odors, and damage to building structures and pool equipment. A reliable pool dehumidification system removes excess moisture, protecting your indoor space from these issues while improving air quality.
An indoor pool dehumidifier is specifically designed to handle the unique challenges posed by high humidity around pools. Whether it’s for a residential or commercial facility, these systems provide efficient indoor pool dehumidification, preventing moisture-related damage and ensuring a pleasant swimming environment. With options tailored to different pool sizes, investing in a dehumidifier for swimming pool areas is essential for long-term comfort and maintenance.
Protect your indoor pool with efficient humidity control. Discover our advanced pool dehumidification systems today!
#pool room dehumidifier#pool dehumidification#indoor pool dehumidifier#dehumidifier for swimming pool
0 notes
Text
Swimming Pool Dehumidifiers
Swimming pools are a great source of fun and relaxation, but they can also be a breeding ground for mold and mildew if the humidity levels are not managed properly. That's where swimming pool dehumidifiers come in. In this blog post, we'll discuss what swimming pool dehumidifiers are, how they work, and why they are important for maintaining a healthy and comfortable pool environment.
What are swimming pool dehumidifiers?
Swimming pool dehumidifiers are devices that are designed to remove excess moisture from the air in an indoor swimming pool area. Excessive humidity levels can cause a range of problems, such as foggy windows, musty odors, and the growth of mold and mildew. A dehumidifier works by pulling moisture from the air, condensing it into water, and draining it away.
How do swimming pool dehumidifiers work?
Swimming pool dehumidifiers come in a variety of sizes and types, but they all work in a similar way. They use a fan to draw in humid air from the pool area, which is then passed over a set of refrigerated coils. The coils cool the air, causing the moisture to condense into water droplets. The dry air is then blown back into the pool area, while the water droplets are drained away.
Some dehumidifiers also use a desiccant material, such as silica gel, to absorb moisture from the air. These types of dehumidifiers are often used in commercial swimming pool environments, where there is a higher volume of air to be processed.
Why are swimming pool dehumidifiers important?
Swimming pool dehumidifiers are important for several reasons. Firstly, they help to maintain a comfortable and healthy pool environment. High humidity levels can make the air feel heavy and damp, which can be uncomfortable for swimmers. They can also lead to the growth of mold and mildew, which can cause respiratory problems and aggravate allergies.
Secondly, swimming pool dehumidifiers can help to protect the structure of the building. High humidity levels can cause damage to walls, floors, and ceilings, as well as to any equipment or furniture in the pool area.
Finally, swimming pool dehumidifiers can help to reduce energy costs. Excessive humidity can make it more difficult to heat or cool a pool area, as the excess moisture in the air can act as a barrier to temperature control. By removing the moisture from the air, a dehumidifier can help to make the pool area more energy-efficient.
In conclusion, swimming pool dehumidifiers are an important tool for maintaining a healthy and comfortable pool environment. They work by removing excess moisture from the air, which helps to prevent the growth of mold and mildew, protect the structure of the building, and reduce energy costs. If you have an indoor swimming pool, a dehumidifier is an essential investment that will help to ensure that your pool area is always clean, dry, and comfortable.
0 notes
Text
i can suspend my disbelief for junko's animatronica execution dungeon theater basement but i draw the line at bad plumbing
why the fuck does hope's peak academy have the swimming pool on the SECOND floor of the building.........
#danganronpa#the swimming pool would be RIGHT over the gymnasium which means that all that hardwood is at risk!!!!#also if the clas boarded up all the windows and doors. that means the ventilation is fucked up#how do you not have black mold??#was monokuma supposed to be white to begin with but he's just half moldy#is all of thh just a spore-induced hallucination#that giant air purifier in the science lab is just a massive dehumidifier
28 notes
·
View notes
Text
0 notes
Text
New FishTank Spin Off on Adult Swim, It’s Called Versus and it’s hour long showdowns between Air Conditioner Heater, Humidifier vs Dehumidifier, Mop vs Broom. It’s fairly easy to produce, you could make it on almost no budget. Points are randomly awarded. No sideline reporting. Feature segments, weather reports including temperature. Height weight chart. Keep cutting back to the stuff, it’s just sitting there. There’s a clock obviously.
Not enough competition.
Gene pool issue.
There’s not enough competition, like there’s not enough of any other adjective. It’s an option at a time a place. There are already shows for that. It’s not melodrama either. It’s a show 30 minutes.
Compete was complete, their not diametrically opposed ideas. Or even operating on the same spectrum. Now we got homonyms issues.
Budget is almost nothing, you’ve already got the stuff.
This is why people like golf your just out there playing with…
This is why people prefer team sports…
It’s a game of inches, it’s a game of yards.
It’s not a game.
Be a good sport.
So it’s a 30 minute show it’s innocuous, pretty much background music.
That’s what the senses are for.
It costs almost nothing to make.
Pitch it as a Terrence Malick movie.
To the wonder. I love doing something dumb, taking a deep breath and saying to the wonder.
And to my own amazement
Lo are you for bringing existential heat to competition on this the day of the Super Bowl
It’s conffeit plane as day.
It’s comfy
Concular vision and a seat
It’s company
Life’s not a competition
Don’t pet that one
0 notes
Text
0 notes
Text
Your Hearing Aid’s Best Friend: Expert Tips for Care and Cleaning
Your hearing aid is not just a gadget; it’s your gateway to experiencing the vibrant world of sound. Proper care and cleaning ensure it functions flawlessly, offering you crystal-clear hearing and uninterrupted joy. With a little effort and attention, your hearing aid can remain your steadfast companion for years to come. Read on for expert tips to keep your hearing aid in top shape.
1. Keep Hearing Aid Dry – Because Water and Electronics Don’t Mix
Think of your hearing aid as a miniature smartphone for your ears—it doesn’t like water! Moisture can damage its delicate components, leading to malfunctions. Whether you’re caught in a drizzle or enjoying a day at the pool, ensure your hearing aid stays dry.
Live in a humid area? Invest in a hearing aid dehumidifier. It acts as a tiny spa retreat for your device, keeping it moisture-free and functioning optimally.
Pro Tip:
“If it’s wet, it’s upset.” Always remove your hearing aid before activities like swimming, showering, or steam baths.
2. Battery Care: Power It Right
Your hearing aid’s battery is its lifeblood. Neglecting it can lead to poor performance or even damage. Follow these tips to ensure your device stays powered up and ready to go:
Replace the battery as soon as you hear low-battery alerts. Think of them as your device whispering, “Feed me!”
If you’re not using your hearing aid for an extended period, remove the battery to prevent leakage and corrosion.
Keep spare batteries handy for unexpected power outages.
Quick Insight:
“A fresh battery means a fresh start.” Always opt for high-quality batteries for consistent performance.
3. Handle with Care – Because It’s More Fragile Than It Looks
Your hearing aid may be small, but it’s packed with advanced technology. Treat it like fine jewellry to ensure its longevity:
Avoid dropping it or exposing it to scratches.
Always wash your hands before handling your hearing aid to prevent grease or dirt from transferring.
Store it in a protective case when not in use.
4. Make Cleaning a Daily Ritual
Cleaning your hearing aid is essential for maintaining its performance and preventing issues caused by earwax or dust buildup. Here’s how to make cleaning a part of your daily routine:
Materials You’ll Need:
A soft, dry cloth
A cleaning brush and wax guard (usually included with your device)
A blower bulb (optional, but great for removing dust from hard-to-reach places)
Step-by-Step Cleaning Guide:
Disassemble Like a Pro
For behind-the-ear (BTE) devices, remove the earmould and tubing.
For in-the-ear (ITE) models, clean the outer surface without taking it apart.
Wipe the Surface Clean
Use a soft cloth to gently clean the outer surface of your hearing aid.
Say Goodbye to Wax
Use the cleaning brush to remove any wax deposits and replace the wax guard if necessary.
Earmould and Tubing TLC
Wash these parts with mild soapy water, let them dry completely, and reattach them carefully.
Dust-Free Vents and Ports
Clean these areas with a small brush and use a blower bulb for added precision.
Final Check
Ensure all parts are clean, dry, and securely reassembled.
Advanced Tips for the Perfectionist
Professional Cleaning: The Spa Day for Your Device
Schedule a professional cleaning session with your audiologist every six months or annually. They use specialized tools to reach areas you can’t access.
Replace the Wax Guard Regularly
A clogged wax guard can obstruct sound quality. Replace it frequently to maintain optimal performance.
Keep a Backup Device
Having a spare hearing aid ensures you’re never without sound in case of emergencies.
Store It Like a Treasure
At the end of the day, place your hearing aid in a safe, dry container. Consider using a dehumidifier case for added protection.
Avoid These Common Pitfalls
Never wear your hearing aid while swimming or in the shower—it’s not waterproof.
Don’t store your hearing aid with the battery inside if you’re not using it for a long time—this can lead to leakage.
Avoid using unauthorized cleaning products; stick to tools recommended by your audiologist.
Think Long-Term: A Little Care Goes a Long Way
Your hearing aid is more than just a device; it’s your connection to the world’s sounds—from the laughter of loved ones to the rustling of leaves. By investing a few minutes each day in its care, you’re ensuring it continues to deliver the sounds that matter most.
Need expert advice or have questions about your hearing aid? Contact us today for personalized guidance. Let’s work together to ensure your device stays in perfect working order!
Finding a Hearing Care Professional
Don’t have a hearing care professional? No problem. Our dedicated team at Perfect Hearing and Speech clinic is here to help. Simply fill out the form, and one of our experienced hearing specialists will reach out to you. We offer comprehensive hearing evaluations and personalized hearing aid solutions tailored to your needs.
Take the first step towards better hearing and improved quality of life by contacting us today. Let Perfect Hearing and Speech Clinic be your trusted partner in your journey to clearer, more vibrant hearing.
0 notes
Text
Should an indoor pool have ventilation?
Yes, sufficient ventilation is required for indoor swimming pools. Without it, the moisture and humidity generated by the pool water can cause a variety of problems, including mold growth, structural damage, and poor air quality. Effective ventilation systems help to regulate humidity levels, avoid condensation on windows and walls, and provide a comfortable environment for swimmers.
A proper ventilation system also helps to manage the odor of pool chemicals such as chlorine, making the indoor pool environment more comfortable. It works by extracting damp, stagnant air and replacing it with fresh, clean air. This not only safeguards the pool structure, but also improves the entire user experience.
Modern ventilation systems are designed to be energy-efficient and work in tandem with dehumidifiers to maintain the optimal indoor climate. Installing vents or exhaust fans around the pool can also help increase air circulation.
If you intend to create or upgrade an indoor swimming pool, make effective ventilation a major concern. A well-designed system extends the life of your pool while also maintaining a healthy and inviting atmosphere. For experienced assistance and top-notch solutions, visit Binz & Boris, which is known for their inventive and efficient pool installations.
#hydrotherapy hot spa#pets spa#inground pools#kids swimming pool#above ground pools#above ground swimming pool#petspa#hydrotherapy pools#kids pools#readymade swimming pools
0 notes
Text
35 Liter Dehumidifier (SD-35L) Price in BD
35 Liter Dehumidifier (SD-35L) is an electrical appliance that reduces and maintains the level of humidity in the air. Dehumidifier 35 Liter plays an important role in maintaining product quality in factories and go downs. Using the SUJA GLOBAL Dehumidifier 35 Liter SD-35L can be controlled Humidity of 300 square feet.
35 Liter Dehumidifier (SD-35L) can be used for household, commercial, or industrial applications. Large dehumidifiers are used in commercial buildings such as indoor ice rinks and swimming pools, as well as manufacturing plants or storage warehouses.
FEATURES OF 35 LITTER DEHUMIDIFIER (SD-35L)
Moisture Removal 35L/D(30 °C 90%RH).
Nominal Dehumidification 16.8L/D(27 °C 60%RH).
Maximum Input Power 285W.
working area 300 square feet.
Input Power 190W.
Refrigerant R290, 0.050kg.
Waterproofing Grade IPXO.
Weight 8kg.
Suction 0.6Mpa.
Discharge 2.0MPa.
Maximum Allowable Pressure 4.0MPa.
Dimension (WxDxH) 290W X 240D x 414H.
Applicable Temperature 5°C-35°C.
Water tank capacity 2.4 liter.

1 note
·
View note
Text
How to Handle Flood Clean Up Like a Pro
Dealing with water damage can feel like an absolute nightmare. Whether it’s a flooded basement after a heavy storm or a burst pipe that turns your home into a mini swimming pool, the chaos can be overwhelming. But don’t worry—help is available. In this guide, we’ll walk you through everything you need to know about flood clean up, water damage restoration, and how to get your life back on track. Let’s dive in!

What is Water Damage Restoration?
Water damage restoration is the process of cleaning, drying, repairing, and restoring your property back to its pre-damage condition after a water-related incident. This could include anything from minor leaks to full-scale Utah disaster cleanup following severe flooding. The key to effective restoration lies in acting quickly to minimize damage, mold growth, and structural issues.
Why Quick Flood Clean Up is Crucial
When it comes to water damage, time is your worst enemy. The longer you wait, the more extensive and costly the damage will be. Within just a few hours, water can soak into drywall, carpets, and furniture, leading to swelling, warping, and staining. If left untreated for more than 24-48 hours, mold can start to grow, creating additional health hazards and complicating the cleanup process.
Signs You Need Water Damage Restoration Services
How do you know when it's time to call in the pros? Here are some signs that indicate you need water damage restoration:
Pooling Water: If you find standing water anywhere in your home, that’s a big red flag.
Musty Odor: A lingering, musty smell is often a sign of mold or mildew, which can develop quickly in damp areas.
Discoloration and Stains: Water spots on walls or ceilings are clear indicators of damage.
Warped Flooring or Walls: If your floorboards are curling or walls feel soft to the touch, water has already done some damage.
Handling a Flooded Basement: What to Do First
Finding a flooded basement is every homeowner's nightmare. Not only is it a hassle to clean up, but it also poses safety risks like electrical shocks and structural damage. So, what should you do if you discover your basement is filled with water?
Turn Off the Power: Water and electricity don’t mix. If it’s safe to do so, turn off the power to your basement to avoid any accidents.
Stop the Source of Water: Identify where the water is coming from and try to stop it. This could mean turning off your home's main water supply or using sandbags to block incoming floodwaters.
Start Pumping Out the Water: If the water level is high, use a pump to remove it. Smaller amounts of water can be mopped or sponged up.
Ventilate the Area: Open windows and use fans to help dry out the space as quickly as possible. Moisture is your enemy!
Utah Disaster Cleanup: How Professional Services Make a Difference
If you live in Utah and are dealing with a water-related disaster, Utah disaster cleanup services can be your lifesaver. These services specialize in comprehensive water damage restoration and can handle everything from initial water removal to complete structural drying and repair. But what sets professional disaster cleanup services apart from DIY efforts?
Expert Assessment: Trained professionals can assess the extent of the damage, which helps in creating an effective restoration plan.
Advanced Equipment: They use specialized equipment like industrial-grade dehumidifiers, water extraction units, and moisture meters for thorough cleaning and drying.
Mold Prevention: Pros know how to prevent mold from forming, which is a common complication after water damage.
Insurance Liaison: Professional services often assist with insurance claims, making the process smoother for you.
The Step-by-Step Process of Water Damage Restoration
Understanding the steps involved in water damage restoration can help you navigate the situation with more confidence.
Step 1: Inspection and Assessment
The first step is to inspect the affected area and assess the level of damage. Restoration experts will use moisture detectors, hygrometers, and other tools to understand how deeply the water has infiltrated the property.
Step 2: Water Removal
This phase involves removing the bulk of the water. Depending on the amount, this could involve using pumps, wet vacuums, or even absorbent cloths for smaller areas.
Step 3: Drying and Dehumidification
After the water is removed, the drying process begins. Professionals use industrial fans and dehumidifiers to speed up the process, ensuring all hidden moisture is removed.
Step 4: Cleaning and Sanitizing
To prevent mold growth and eliminate odors, all affected areas are cleaned and sanitized. This may include carpets, walls, and personal belongings.
Step 5: Restoration and Repair
The final step is to restore the home to its pre-damage condition. This could involve minor repairs such as drywall replacement or major renovations like reconstructing entire rooms.
Common Mistakes People Make During Flood Clean Up
When dealing with water damage, there are some common mistakes you’ll want to avoid:
Waiting Too Long to Act: Delaying the cleanup process allows water to cause more damage.
Not Addressing the Source of Water: Simply cleaning up the mess without fixing the source will lead to recurring issues.
Ignoring Hidden Moisture: Even if the surface appears dry, moisture can hide in walls and floors.
Using Inadequate Equipment: Household fans and vacuums aren’t powerful enough to tackle major water damage.
DIY vs. Professional Water Damage Restoration
You might be tempted to save some money by handling flood clean up yourself, but is it the best option?
DIY Cleanup: When Is It Appropriate?
If the water damage is minor (think small leaks or spills), DIY cleanup might be sufficient. In this case, you’ll need some basic equipment like a wet/dry vacuum, fans, and cleaning agents.
Professional Restoration: When Is It Necessary?
If the damage is extensive, the water is contaminated, or you have a flooded basement, it's best to call in professional cleanup services. Experts can handle the problem efficiently and ensure there are no lingering issues like hidden moisture or mold growth.
Utah Disaster Cleanup Companies: What to Look For
Choosing the right disaster cleanup company is crucial for effective water damage restoration. Here are some factors to consider:
Reputation: Look for companies with a solid track record in the industry.
Certifications: Make sure they are certified by the Institute of Inspection, Cleaning and Restoration Certification (IICRC) or similar organizations.
Availability: Water damage doesn’t wait. Choose a company that offers 24/7 emergency services.
Insurance Assistance: Opt for companies that can help you navigate the insurance claims process.
How to Prevent Future Water Damage
Prevention is always better than cure. Here are some steps to keep your home safe from future water damage:
Install a Sump Pump: If you live in a flood-prone area, a sump pump can help prevent a flooded basement.
Regularly Clean Your Gutters: Blocked gutters can cause water to overflow, leading to damage.
Seal Cracks in Your Foundation: This can help prevent water from seeping into your basement.
Install Water Alarms: These devices can detect leaks early, allowing you to take action before the problem worsens.
How to Choose the Right Cleanup Services
Selecting the right cleanup services is essential for effective water damage restoration. Here’s how you can make the best choice:
Compare Multiple Quotes: Don’t settle for the first company you come across. Compare quotes to find the best value for your money.
Read Customer Reviews: Online reviews can provide insights into the company’s reliability and quality of work.
Ask About Their Process: A reputable company will walk you through their cleanup process and answer any questions you may have.
Check for Guarantees or Warranties: The best companies stand behind their work with satisfaction guarantees.
Mold Remediation: An Essential Part of Water Damage Restoration
After a water-related disaster, mold can start growing within 24-48 hours. Mold remediation is an important step in the restoration process to ensure your home remains safe and healthy.
The Dangers of Mold
Mold can cause various health problems, including respiratory issues, headaches, and allergies. It can also compromise the structural integrity of your home.
Steps for Mold Remediation
Inspection and Assessment: Identifying the type and extent of mold.
Containment: Preventing the spread of mold spores.
Air Filtration: Using air scrubbers and filters to remove mold spores from the air.
Removing Mold-Infested Materials: Disposing of materials that can’t be salvaged.
Cleaning and Sanitizing: Thoroughly cleaning all affected areas.
Water Damage Restoration: Is It Covered by Insurance?
Most homeowners’ insurance policies cover water damage, but there are some exceptions. For instance, if the damage is due to negligence, it might not be covered. Always read the fine print of your policy to understand what’s covered.
Conclusion
Water damage is a serious issue that requires prompt action. Whether you’re dealing with a flooded basement, minor leaks, or full-scale Utah disaster cleanup, understanding the ins and outs of water damage restoration can help you act quickly and minimize the damage. When in doubt, don’t hesitate to call professional cleanup services to handle the job and restore your home to its former glory.
FAQs
1. How soon should I start flood clean up after water damage? It’s best to start as soon as possible, ideally within 24-48 hours, to minimize damage and prevent mold growth.
2. Is it safe to stay in my home during the cleanup process? If the water damage is minor and doesn’t affect the structural integrity of your home, it may be safe to stay. However, if there’s extensive damage, it’s better to relocate temporarily.
3. Can I handle mold remediation on my own? Small mold patches can be handled with DIY methods, but extensive mold growth should be dealt with by professionals.
4. How long does it take to complete water damage restoration? The timeline can range from a few days to several weeks, depending on the extent of the damage.
5. Does homeowners insurance cover the cost of professional cleanup services? In most cases, homeowners insurance covers water damage restoration, but it’s important to check your specific policy.
0 notes
Text
Proven Moisture Control: Ducted Dehumidifiers for Indoor Pools!
Trust CtrlTech, the leader in pool dehumidification systems, offers a comprehensive range of solutions, including duct mount, wall mount, and portable dehumidifiers. Our advanced systems efficiently manage humidity levels in indoor pool areas, preventing mold growth and structural damage while ensuring a comfortable swimming environment. Choose CtrlTech for reliable and effective moisture control tailored to your needs. Call us in Dubai, UAE, Oman, Qatar, Saudi Arabia, Bahrain, Kuwait, Iraq, and Armenia. #Dehumidifier #SwimmingPools #CtrlTechDehumidifiers #PoolHumidityControl #CtrlTech4u https://www.dehumidifier-uae.com/dehumidifiers
A duct dehumidifier for indoor swimming pools is crucial for managing moisture levels and ensuring a healthy and comfortable environment. High humidity can lead to mold and mildew growth, posing health risks and damaging the infrastructure. These pool dehumidification systems protect the pool area and its users by efficiently removing excess moisture. Additionally, maintaining optimal humidity levels reduces the strain on air conditioning systems, leading to lower electricity bills. This system integrates seamlessly with existing HVAC setups, providing consistent dehumidification throughout the pool area, enhancing air quality, and prolonging the lifespan of building materials.
Protect health and infrastructure and cut energy costs with our efficient ducted dehumidifiers for indoor swimming pools.
0 notes
Text
Indoor Outdoor Pool Designs: Creating a Seamless Swimming Experience
Swimming pools have always been a symbol of luxury and relaxation. However, in today's architectural landscape, the concept of indoor outdoor pool designs is gaining immense popularity. These innovative designs provide a seamless transition between indoor and outdoor spaces, offering a unique swimming experience that can be enjoyed year-round. In this article, we explore various aspects of indoor outdoor pool designs, from their benefits to design considerations, and provide inspiration for creating your own seamless swimming experience.

Benefits of Indoor Outdoor Pool Designs
Year-Round Usability
One of the most significant advantages of indoor-outdoor pools is their year-round usability. Traditional outdoor pools are often limited by seasonal weather conditions, making them unusable during colder months. Indoor-outdoor pools, however, allow for swimming in any weather, thanks to their integrated design that combines the protection of an indoor environment with the openness of an outdoor setting.
Enhanced Aesthetic Appeal
Indoor outdoor pool designs create a visually stunning space that enhances the overall aesthetic appeal of a property. The seamless integration of indoor and outdoor areas can make the pool appear larger and more inviting. Utilizing glass walls, retractable roofs, and sliding doors further accentuates the connection between the two spaces, providing unobstructed views and natural light.
Increased Property Value
A well-designed indoor-outdoor pool can significantly increase the value of a property. Prospective buyers often view these pools as a luxurious feature, adding to the overall attractiveness of the home. Investing in such a design can yield a high return on investment, both in terms of monetary value and quality of life.
Design Considerations for Indoor-Outdoor Pools
Choosing the Right Location
The location of your indoor-outdoor pool is crucial for maximizing its benefits. Ideally, the pool should be situated in an area that receives ample sunlight while being sheltered from harsh weather conditions. Positioning the pool near living spaces such as the kitchen or living room can enhance accessibility and encourage frequent use.
Materials and Finishes
Selecting the right materials and finishes is essential for creating a cohesive indoor-outdoor pool design. Natural stone, glass, and wood are popular choices that blend well with both indoor and outdoor environments. These materials not only provide durability but also contribute to the aesthetic continuity of the space.
Climate Control
Maintaining a comfortable temperature is vital for an indoor-outdoor pool. Incorporating climate control features such as heating systems, dehumidifiers, and ventilation can ensure a pleasant swimming environment regardless of the weather outside. Advanced climate control systems can be seamlessly integrated into the design to maintain the desired temperature and humidity levels.
Lighting and Ambiance
Lighting plays a crucial role in setting the ambiance of an indoor-outdoor pool. LED lighting, underwater lights, and strategically placed outdoor fixtures can create a magical atmosphere during evening swims. Additionally, natural lighting through skylights or large windows enhances the overall experience by providing a connection to the outdoors.
Innovative Features to Consider
Retractable Roofs and Walls
One of the standout features of modern indoor-outdoor pools is the retractable roof or wall. This feature allows you to open up the pool area completely to the outdoors or enclose it as needed. Retractable roofs provide flexibility, enabling you to enjoy the pool in any weather while also protecting it from debris and maintaining water quality.
Infinity Edges
Infinity edges, also known as vanishing edges, create a visual effect where the water appears to extend indefinitely into the horizon. This feature is particularly striking in indoor-outdoor pools, as it enhances the seamless transition between the indoor and outdoor spaces. Infinity edges can be designed to blend with natural landscapes, offering breathtaking views and a luxurious feel.
Waterfalls and Fountains
Incorporating waterfalls and fountains into your indoor-outdoor pool design can elevate the aesthetic and auditory experience. The soothing sound of flowing water adds to the tranquility of the space, while the visual appeal of waterfalls and fountains enhances the overall design. These features can be customized to suit the style of your pool, from modern and minimalist to natural and rustic.
Integrated Spas and Hot Tubs
For an added touch of luxury, consider integrating a spa or hot tub into your indoor-outdoor pool design. Spas and hot tubs provide a relaxing retreat and can be used year-round, offering therapeutic benefits such as muscle relaxation and improved circulation. The integration of these features allows for a cohesive design and maximizes the functionality of the pool area.
Inspiration for Indoor Outdoor Pool Designs
Modern Minimalist Designs
Modern minimalist indoor-outdoor pools focus on clean lines, neutral colors, and a clutter-free aesthetic. These designs often incorporate large glass walls, sleek materials, and minimalistic furnishings to create a sophisticated and contemporary look. The emphasis is on simplicity and functionality, providing a serene environment for relaxation and recreation.
Natural and Rustic Designs
For those who prefer a more natural and rustic look, incorporating elements such as natural stone, wood, and lush greenery can create a harmonious indoor-outdoor pool design. These designs blend seamlessly with the surrounding landscape, offering a tranquil and organic feel. Features such as rock waterfalls, stone pathways, and wooden decks enhance the connection to nature.
Tropical Paradise Designs
Creating a tropical paradise with your indoor-outdoor pool can transport you to a luxurious resort-like setting. Tropical plants, vibrant colors, and exotic materials such as bamboo and thatch can be used to achieve this look. Incorporating features like a swim-up bar, thatched cabanas, and lush landscaping adds to the tropical ambiance, making your pool area a true oasis.
Urban Chic Designs
Urban chic indoor outdoor pool designs are perfect for city dwellers looking to create a stylish retreat. These designs often feature modern materials, bold colors, and innovative lighting to create a dynamic and trendy space. Rooftop pools with panoramic city views, sleek outdoor furniture, and contemporary art installations are common elements in urban chic designs.
Conclusion
Indoor outdoor pool designs offer a unique and luxurious swimming experience that can be enjoyed year-round. By carefully considering the location, materials, climate control, and innovative features, you can create a seamless transition between your indoor and outdoor spaces. Whether you prefer a modern minimalist, natural rustic, tropical paradise, or urban chic design, the possibilities are endless for creating a stunning indoor-outdoor pool. Embrace the beauty and functionality of these designs to enhance your property and lifestyle.
Go to Check - https://pacificpools.co.nz/
0 notes
Text
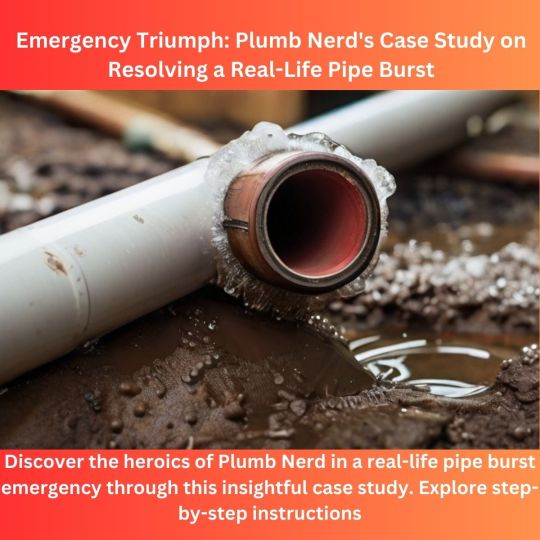
Real-Life Pipe Burst Emergency Resolution: Plumb Nerd's Case Study
Introduction
Hey, DIY warriors! Jack Thompson here, your Plumb Nerd from Denver, and today I want to take you through a real-life emergency – a burst pipe. Facing a pipe burst can be a homeowner's nightmare, but fear not – in this case study, I'll share the steps I took to swiftly resolve the situation and prevent a watery disaster. So, grab your tool belt, and let's dive into this pipe burst emergency resolution together!
The Watery Crisis
It was a typical evening when I heard an ominous sound – the sudden rush of water where it shouldn't be. Racing to investigate, I discovered a burst pipe in the basement, unleashing a steady stream of water and threatening to turn the space into a mini swimming pool. Immediate action was paramount. Step 1 - Water Shut-off Sprint Without hesitation, I made a beeline for the main water shut-off valve. Every homeowner's superhero cape is a familiarity with this valve's location. In my case, it was a brisk sprint to the basement where, armed with a wrench, I shut off the water supply to halt the flooding. Step 2 - Electricity Evacuation Water and electricity don't mix well, so the next move was to ensure electrical safety. I swiftly turned off the power in the affected area, minimizing the risk of electrical hazards and focusing on a safe working environment. Step 3 - Pipe Exploration With the water flow arrested and safety measures in place, I turned my attention to the burst pipe. I inspected the damage, identifying a section that had succumbed to age and wear. The rupture was clear, and the extent of the water damage was evident. Step 4 - DIY Pipe Repair Armed with a pipe cutter, new pipe section, and pipe fittings, I set out to repair the damaged section. I cut out the compromised portion, carefully measured and installed the replacement, securing it in place with the fittings. A watertight seal was crucial, and I ensured each connection was snug and secure. Step 5 - Water Supply Restoration With the repair complete, it was time to cautiously restore the water supply. Turning the main valve back on, I monitored the repaired section for any signs of leaks. A slow and deliberate approach ensured that the fix held, and water flowed through the pipes without incident. Step 6 - Drying and Cleanup While the pipe repair was a success, the aftermath required attention. I deployed towels, mops, and a wet-dry vacuum to remove excess water. Adequate ventilation and dehumidifiers aided in drying the affected area, preventing potential mold growth. Step 7 - Post-Emergency Evaluation Once the immediate crisis was averted, I conducted a thorough evaluation of the plumbing system. Inspecting other pipes for signs of wear and vulnerabilities became a priority, allowing for preemptive repairs to avoid future emergencies. Lessons Learned This real-life pipe burst emergency left me with some crucial lessons: - Know Your Shut-Off Valve: Awareness of the location and operation of the main water shut-off valve is your first line of defense in a pipe burst emergency. - Safety First: Shutting off electricity in water-affected areas ensures a safe working environment during emergency repairs. - Swift Action Matters: Acting promptly to shut off water and assess the damage minimizes the extent of the emergency. - DIY Repairs Can Save the Day: Basic DIY plumbing skills and a well-stocked toolbox can be invaluable in resolving a burst pipe emergency.
Conclusion
And there you have it, DIY champs – a real-life case study of resolving a pipe burst emergency, delivered by Jack Thompson, your Plumb Nerd. Remember, emergencies happen, but with quick thinking, basic plumbing skills, and the right tools, you can be the hero of your home. Happy plumbing! Read the full article
0 notes
Text
Discover the Magic: 10 Gadgets You Didn't Know Were Waterproof!
Waterproofing is a crucial part of home maintenance, protecting structures from moisture damage. Moisture-related deterioration is expensive to repair, poses health hazards and increases energy costs. Waterproofing can be done on exterior walls, interior surfaces, basements, roofs and swimming pools. It includes directing drainage away from the home, preparing the substrate and applying negative-side waterproofing membranes.
Basement Waterproofing
Waterproofing a basement prevents mold, rot and other structural damage that can lead to collapsed walls. It also adds value to a property, creates more livable space and reduces energy costs as your furnace and AC system do not have to work as hard to keep the area warm or cool.
The first step in waterproofing a basement is to remove any accumulated debris from the area, then clean and dry the walls. After the walls are dry, any cracks should be plugged with hydraulic cement such as DRYLOK(r) Extreme Masonry Waterproofer. The product is easy to use and dries to the color of concrete. Once the walls are dry, it is important to enclose the window wells to prevent moisture from entering the basement walls.
Once the walls are waterproofed, it is important to install a drainage track and sump pump. The track is installed along the wall, into the basement floor and leads to a sump pump that drains the water outside. Another popular exterior solution is a French drain, which is a trench with a perforated pipe and weed-block fabric that collects water from the surrounding yard and directs it away from the foundation and basement walls.
If the water is coming in through the basement walls from outside, it will be best to waterproof them from the outside with an exterior application of sodium bentonite or a liquid membrane. This typically costs $6.50 per square foot, materials and labor.
For interior moisture that does not originate from outside, equalizing water and air temperatures to prevent condensation, running dehumidifiers and repairing or replacing leaky pipes will help eliminate moisture that causes dampness in the basement. For active leaks, DRYLOK(r) Fast Plug will stop the problem in three to five minutes and can be used for masonry repairs as well.
Roof Waterproofing
When it comes to tech gadgets, some are so unique and unusual that they catch the eye. They simplify tasks and enhance experiences, making them a must-have for anyone who is looking to stand out from the crowd. Whether it’s a TikTok-viral shower head that purifies water or a waterproof speaker, these cool inventions can make your life easier and more convenient. Plus, they are simply impossibly cool. So, which ones would you add to your collection?
Waterproof Cement
Waterproof cement is used for preventing moisture in building. It is mixed with sand, lime and optionally gravel to create mortar, grout or concrete. Cement is not waterproof, but when it is used in conjunction with additional measures, such as waterproofing membranes and coatings, it will become water-resistant. PermaBASE WP is UL GREENGUARD Gold certified which indicates it has low chemical emissions, making it safe for indoor use.
0 notes
Text
Your Dream Home Awaits: Tata Serein on Pokhran Road 2, Thane

Are you in search of your dream home in the bustling city of Thane? Look no further than Tata Serein, a new and exciting residential project that promises an unmatched living experience. Situated on the coveted Pokhran Road 2 in Thane, Tata Serein offers a range of 3, and 3.5 BHK flats that redefine luxury and comfort in the world of real estate.
The Enchanting Location
Tata Serein is strategically located on Pokhran Road 2, one of the most sought-after areas in Thane. Its prime location offers the perfect blend of urban convenience and natural beauty.
The flats at Tata Serein Thane are designed to provide the ultimate in luxury and comfort. Whether you choose 3, or 3.5 BHK apartment, you can expect spacious and well-ventilated living spaces. The modern architecture and thoughtful design ensure that every inch of your home is utilized efficiently, making it a haven of tranquility amidst the city's hustle and bustle.
Amenities Galore
Tata Serein takes luxury living to the next level with a plethora of amenities that cater to every member of the family. From a state-of-the-art fitness center and swimming pool to lush gardens and play areas for children, there's something for everyone here. The clubhouse is perfect for social gatherings, while the jogging track and yoga deck offer opportunities for relaxation and rejuvenation.
Project Highlights:
• India’s First Wellness Homes
• IGBC PRE CERTIFIED GOLD Rated Project
• SEREIN is spread over 7.5 acres
• 5 Residential Towers of 28 stories with over 18000 sq. ft of 2 Levels Clubhouse.
• 3BHK & 3.5BHK Residences.
• Engineered Glass Façade Residential Towers
• Maximum Natural Sunlight and Ventilation
• Rainwater Harvesting and Solar Energy
• Vitamin C Induced Showers
• Dehumidifier
• Water Efficient Features and Centralized waste management system
• Solar Panels for efficient use of electricity.
Investment Highlights:
• Thane falls under SMART CITY
• Well Developed Social Infrastructure
• Pokhran Road No 2: Well known and most coveted neighborhood of thane.
• Easy Payment Plans.
• Neighborhood surrounded by TCS / BLUE STAR / VOLTAS and Many more.
Location Highlights:
• Pokhran Road No.2 referred to as Malabar Hill of Thane and has the finest Infrastructure.
• Surrounded by Lush Greenery and Thick green cover of Yeoor Hills.
• Panoramic views of the Yeoor Hills and is in close proximity to Upvan Lake.
• Close vicinity to Singhania School, Vasant Vihar School, Kashinath Natyagruha Drama Theatre, Big Bazaar, Viviana Mall, and Bethany Hospital.
• Socially developed neighborhood like Hiranandani Meadows, Vasant Vihar, Pokhran Road No. 1, Majiwada, Cadbury Junction, etc. are less than 10 min drive from Serein Project.
• Eastern Express Highway is 1.5 kms from Serein project.
• Thane Station is also located just a few kilometers away from Pokhran Road No 2.
• Known for Annual Upvan Cultural Fest
• Easy access to proposed Metro Rail Project
In conclusion, Tata Serein is a premium residential project that offers an exquisite range of 3BHK flats in Thane. With its exceptional design, luxurious amenities, and prime location, Tata Serein redefines modern living in Thane, offering residents the opportunity to experience comfort.
For more details visit our website :- https://www.propmart.co/properties/tata-serein-new-launch/
For More Details Contact Us: +91 9130519571
0 notes