#cc mixer
Explore tagged Tumblr posts
Text
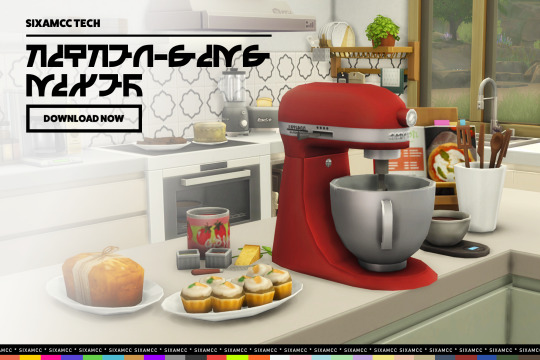
Because you asked for it and because I had sincerely dreamed of having a functional mixer based on the one I have in real life 😊
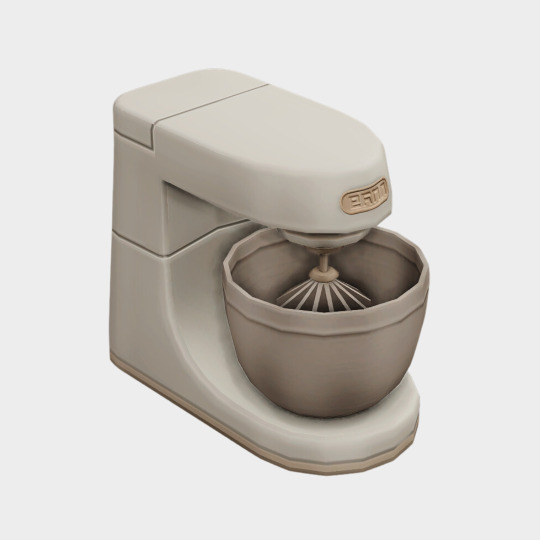
In 2021 I made this mixer to replace the giant cupcake maker, but now it's fully functional thanks to the one @TheSims team made for #HomeChefHustle 💜
I also added a little more detail to the textures and added many new colors, available in 26 color swatches.
FREE DOWNLOAD HERE
#sims 4#the sims 4#sims#maxis match cc#maxis match#sims 4 maxis cc#the sims#sims 4 cc#sims cc#ts4#sixamcc#furniture by sixam cc#cc by sixam cc#furniture sixam cc#sixam#my cc#home chef hustle#cc mixer#stand mixer#mixer#mixer sims#mixer for sims 4#kitchen appliances#home appliances#functional mixer#animated mixer#cc finds#the sims cc#ts4 cc#cc
2K notes
·
View notes
Text
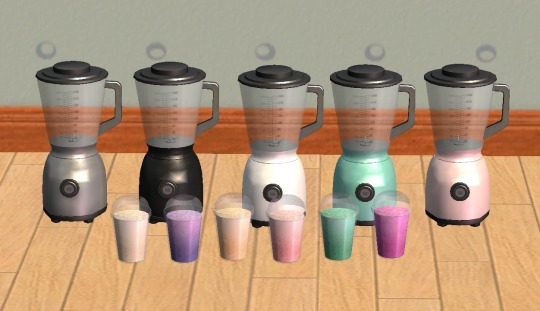
Protein Shakes Blender Functional for The Sims 2
This is a 4to2 conversion from Somik&Severinka, low poly. It's a functional blender, your sims can make and drink 6 types of shake with it. Found in small kitchen appliances.
DOWNLOAD HERE
#sims 2 cc#the sims 2#sims 2 download#ts2#the sims 2 cc#ts2 download#4to2#4to2 conversion#cute#sims 2 food#sims 2 objects#functional#buy mode#kitchen appliances#blender#mixer#shake#fruit juice#healthy
306 notes
·
View notes
Text


Japandi | Living Room CC Pack |Early
Suprise, Suprise Simmers! I'm back with brand new CC pack for The Sims 4!
🌿✨ Discover the serene beauty of Japandi design in this Sims 4 living room setup, featuring 44 unique elements. This space blends Japanese minimalism and Scandinavian functionality with natural materials and a calming color palette. Highlights include a low-profile sofa with green cushions, a woven coffee table, a traditional shoji screen, and elegant wall art. The room exudes tranquility with its harmonious design and thoughtful decor. Perfect for creating a cozy and stylish home in your Sims 4 game! 🌱🪑
With this set you can create your own shelving system, open doors, closed doors, open space with doors, or closed closet, the choice is yours :) I'm continue my Japandi Collection with another room that is Living Room. In future I create more inspired Japnadi rooms so be sure to follow me on Instagram where I upload my progress on current projects.
Set contains:
Sofa
Arm chair
Loveseat
Coffee Table
End Table
Japandi poster
Single Shelf 1x1 ( Short/Medium )
Double Shelf 2x1 ( Short/Medium )
Double Shelf 2 2x1 ( Short/Medium )
Media Cabinet
Long Shelf
Short Shelf
Open Pillar ( Short/Medium/Tall )
Closed Pillar ( Short/Medium/Tall )
Closed Doors ( Short/Medium/Tall )
Open Doors Right ( Short/Medium/Tall )
Open Doors Left ( Short/Medium/ Tall )
Stereo System
CD Player
Mixer
Collection of Books ( 4 diffrent versions )
Book Organizer
Tea Pot
Ink Tray
Ceilling Lamp ( Short/Medium )
Little Weave Frame
THINGS YOU NEED TO KNOW!
All items are Base Game compatibile
All of the textures and meshes are made by me, if you like to use them please mention me
Some of the objects are high poly so be careful
If you see any issues let me KNOW!
NOW AVAILABLE ON EARLY ACCESS!
Public realse June 27th!
You can find objects by typing "Japandi" or "S-im" in search bar in game!
#mycc#ts4cc#sims4cc#thesims4#ts4#sims maxis match#maxismatch#maxis match#ts4 custom content#ts4 maxis match#ts4 maxis cc#ts4 download#ts4 simblr#maxis match cc#sims4#sims 4 maxis match#sims 4 maxis cc
9K notes
·
View notes
Text
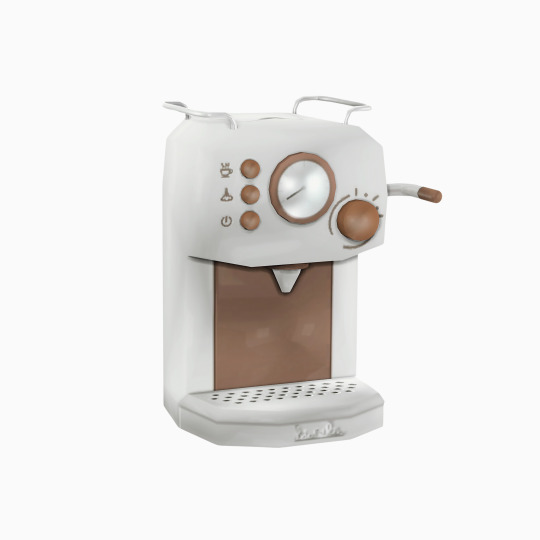


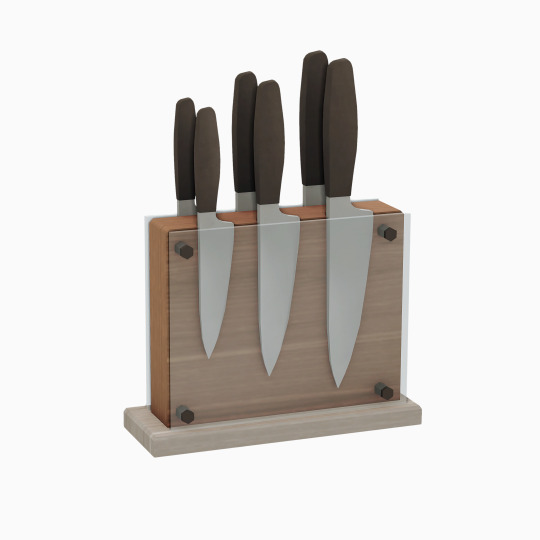

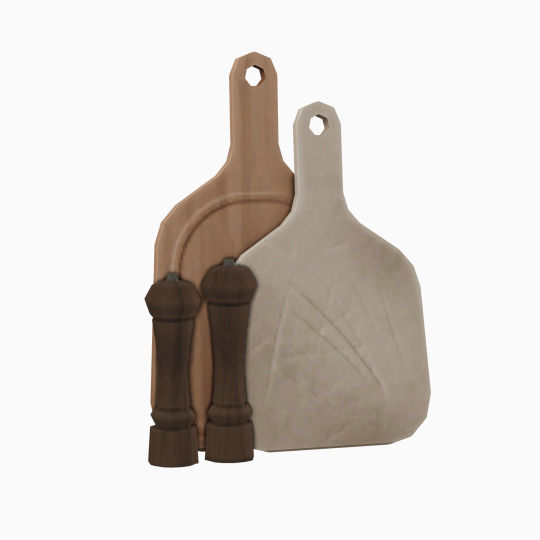
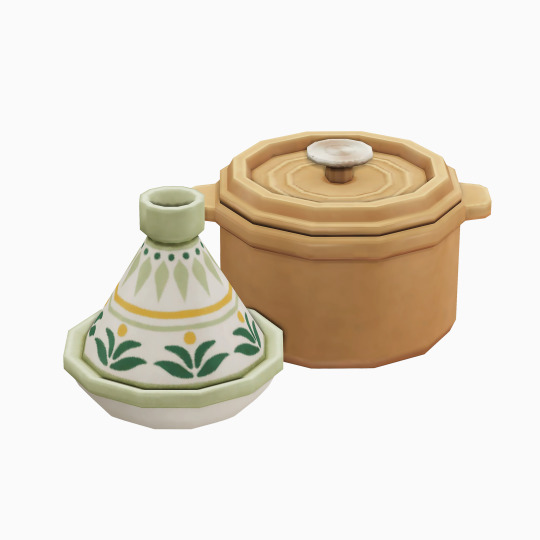
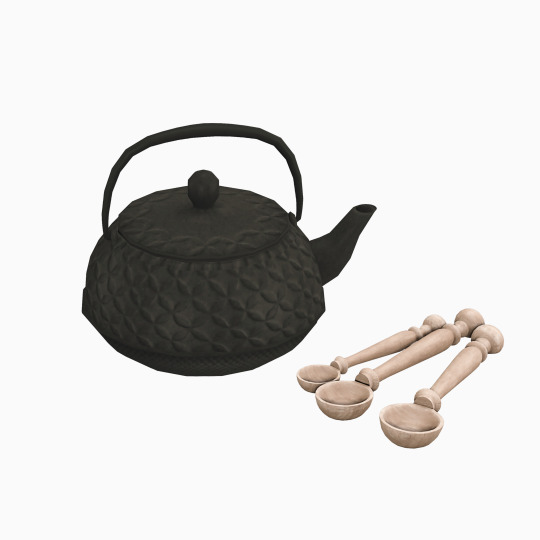
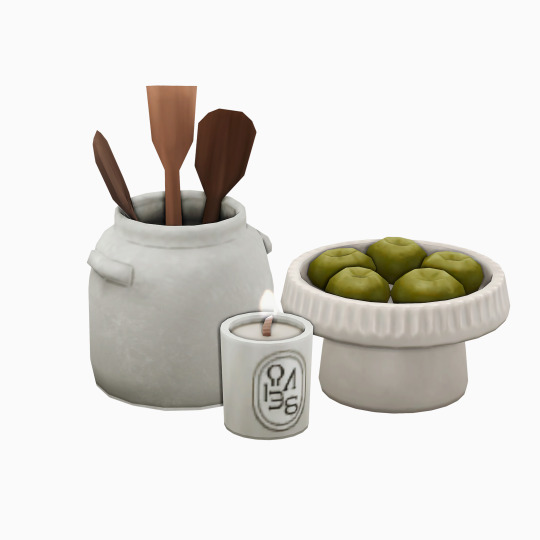
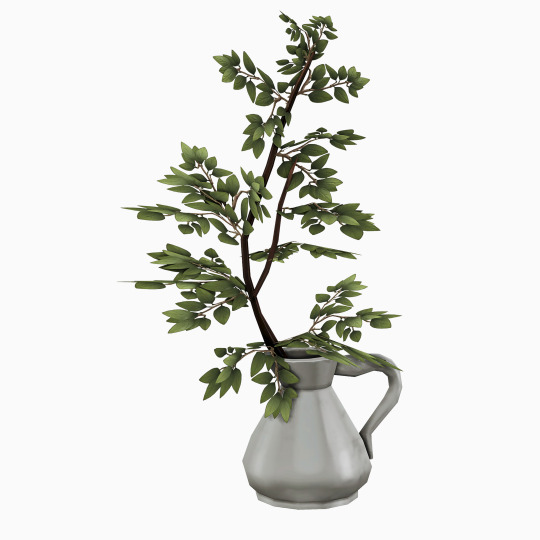
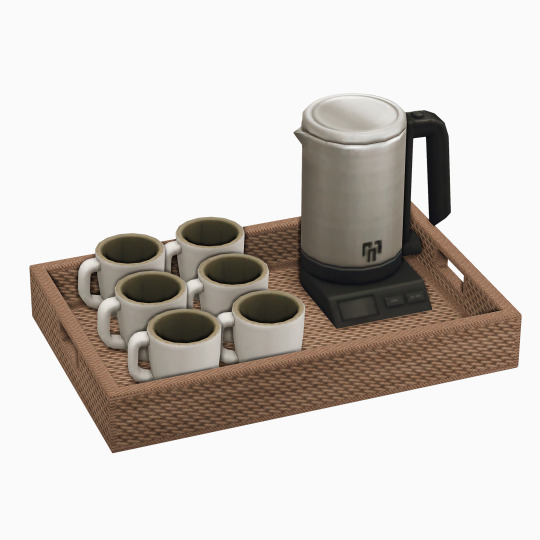
Farfalla's Favorite Kitchen Clutter 🍳
Coffee Machine | Plant & Artichokes | Paper Towels, Cutting Boards & Mixer Blender & Glass Cups | Knives | Wine & Wine Glasses Cutting Boards & Pepper Grinders | Tajine & Dutch Oven | Teapot & Teaspoons Utensils, Vegetable Bowl & Candle | Plant in Pitcher | Tray, Mugs & Kettle
Massive thank you to all the CC Creators! @tudtuds @pinkbox-anye @littledica @lilaccreative @harrie-cc & others!
#farfallasims#cc finds#ccfinds#cc recs#the sims#sims 4#the sims 4#sims#sims 4 maxis match#ts4 simblr#sims 4 screenshots#the sims community#thesims4#sims4#the sims4#sims 4 simblr#simblr#ts4 screenshots
4K notes
·
View notes
Text

a girls first apartment.. 𐙚 ❀ -`♡´-
ᰔ mixer | albums | wicker ottoman
ᰔ clothes | cookbook | decor
ᰔ books | cutting board, plates & spoons | flowers
thank you cc creators! @myshunosun @syboubou ♡
#cc recs#ccfinds#cc finds#sims cc#the sims cc#sims4#sims#sims 4 maxis match#sims 4 simblr#sims 4 aesthetic#sims aesthetic#the sims community#the sims 4#boujeesimss#ts4 cc#ts4 simblr#ts4cc
3K notes
·
View notes
Text
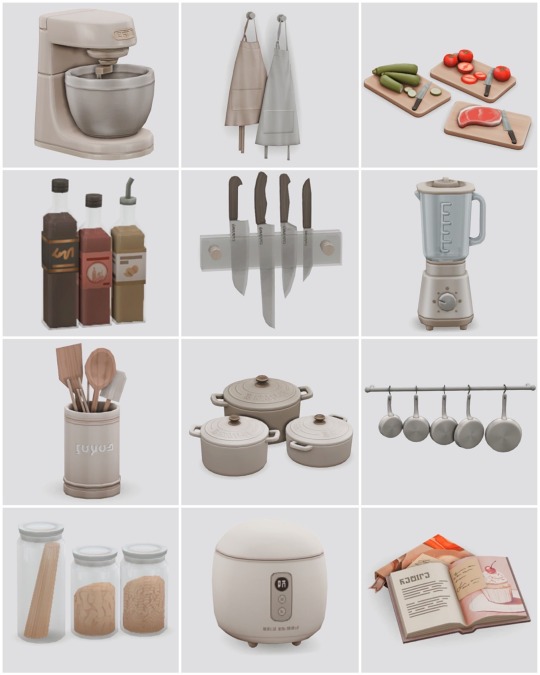
Chef's Essentials. by marilynjeansims
ꨄ︎ stand mixer (functional) | aprons | chopping boards ꨄ︎
ꨄ︎ cooking oils | knife set | blender ꨄ︎
ꨄ︎ utensils | pots | pans ꨄ︎
ꨄ︎ pasta jars | rice cooker (functional) | cookbook (functional) ꨄ︎
Thank you, as always, to the incredible cc creators! @myshunosun @joyceisfox @pierisim @ravasheencc @maxsus @felixandresims @aira-cc
#the sims 4 cc finds#sims4cc finds#ts4 cc finds#sims 4 cc recs#sims4 cc recs#ts4 cc recs#the sims 4#the sims#sims 4#ts4#sims 4 cc#ts4 cc#sims 4 maxis match#sims 4 simblr#ts4 simblr#simblr#the sims community#sims 4 aesthetic#home chef hustle
3K notes
·
View notes
Text
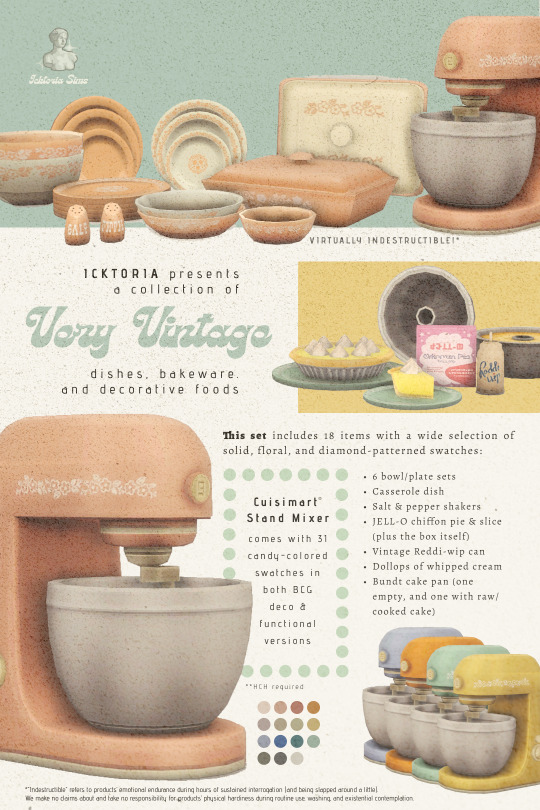
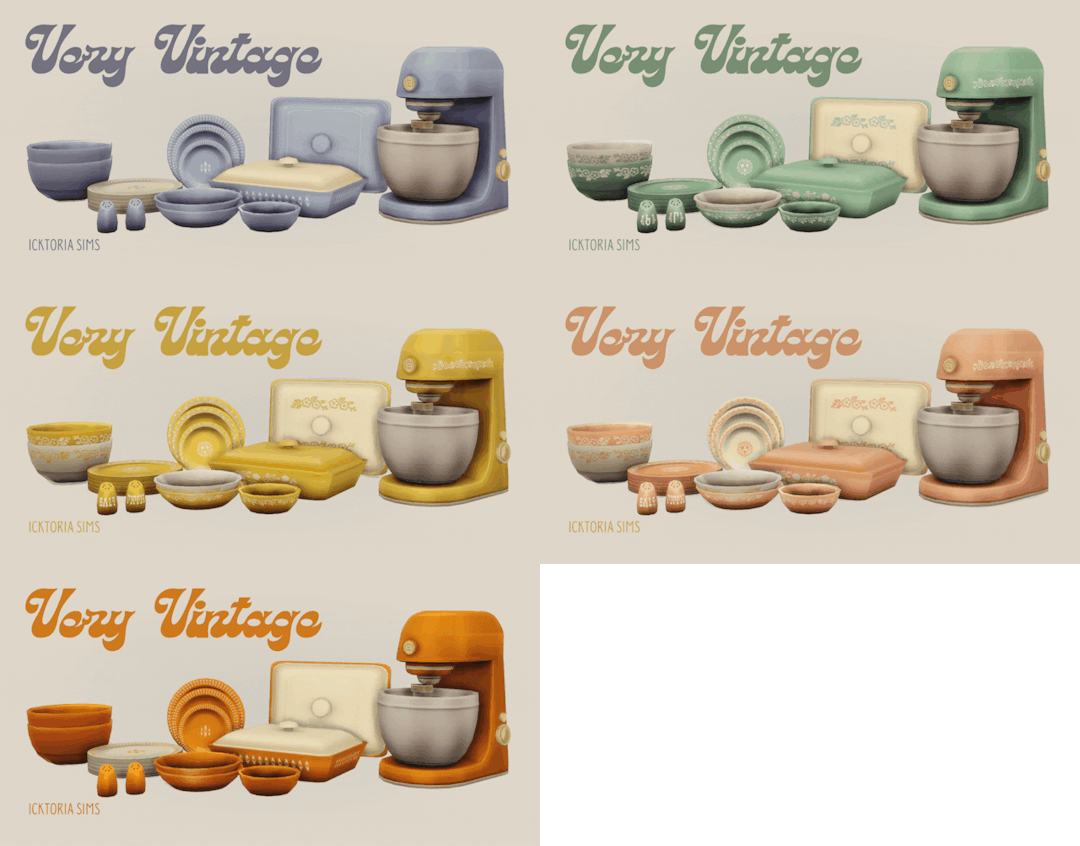
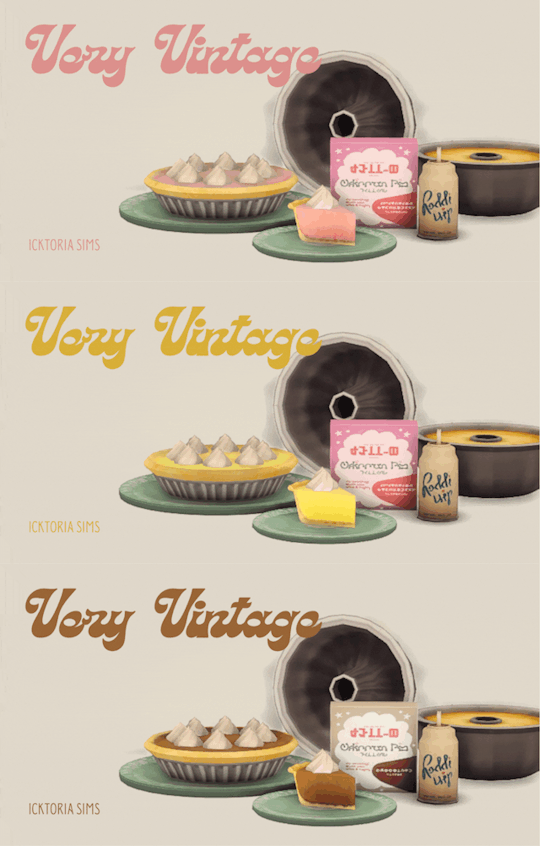
✨ Very Vintage ✨
A set of vintage-inspired stand mixers, tableware, and deco food!

I originally meant for this to be a Thanksgiving set, but after the OVERWHELMING response to my first CC set (seriously, thank you SO MUCH for all the love!), I became a bit… perfectionistic. Lots and lots of checking items in-game, then making tiny mesh and texture tweaks over and over. I still don’t exactly get how spec maps work, but I’m learning. 🥲
I'll likely expand on this set in the future (Crockpots, anyone?!), but for now, the elves and I are hard at work on a retro-inspired Christmas set!🎄✨
Includes 18 items with lots of solid, floral, and diamond-patterned swatches:
✦ 6 bowl/plate sets ✦ Casserole dish ✦ Salt & pepper shakers ✦ JELL-O chiffon pie & slice (plus the box itself) ✦ Vintage Reddi-wip can ✦ Dollops of whipped cream ✦ Bundt cake pan (one empty, and one with raw batter/cooked cake)
Find by searching “icktoria” or “very vintage” in-game
TOU | DOWNLOADS
MORE INFO & FREE DOWNLOAD (Patreon)
CREDITS
✦ Myshunosun for OG mixer mesh and plate side textures ✦ Tuds for bowl overlay/shine ✦ Franzilla and ajaysims for Simlish fonts ✦ Procreate for hand-drawn textures ✦ Sims4Studio for giving my life purpose
#my cc#sims 4 cc#ts4 maxis match#simblr#thesims4#ts4 custom content#sims 4 custom content#sims 4 maxis match#ts4 download#ts4mm#ts4cc
2K notes
·
View notes
Note
Hihi! Can I maybe request a CC fic. Where reader and CC are just relaxing day in after a celebration with family and friends for xmas. Basically just relaxing with each other and enjoying each others presence/cuddling. Ooo you can throw in an activity like baking cookies or sth. Just generally very fluffy.
Thank you!
Haiiiii first post of my drop today!! Also my first last fic of 2024 🌚
Under the covers


Pairing: Caitlin clark x reader
Rating: Fluff!!
Summary: as the request saidd
No spell check sorry chat
౨ৎ ˙⋆.˚ ᡣ𐭩 ౨ৎ ˙⋆.˚ ᡣ𐭩 ౨ৎ ˙⋆.˚ ᡣ𐭩 ౨ৎ ˙⋆.˚ ᡣ𐭩 ౨ৎ ˙⋆.˚ ᡣ𐭩.
It was the day after a Christmas party with Caitlin’s side of the family, usually being the calmer side of parties during the holidays.
Yet of course it was one to drain Caitlin’s social battery.
Of course with being a know known celebrity you would expect her social skills to be a bit higher than before, but to your surprise it seems as if they have went down after her renowned fame.
If she wasn’t at practice or a game the only other place you could find her was in your shared apartment.
But you didn’t mind, it just meant more caitlin for you.
You let an eye slip open seeing the morning sun shine through the windows of your bedroom shining softly on your face.
Turning to face Caitlin you placed a light kiss on her cheek in an attempt to wake her up.
You saw a soft smile play onto her face as she draped her arms over your body trapping you with her.
“You’re not going anywhere” she murmured into your hair as she rested her face on top of your head tightening her grip on you making you giggle.
You both laid there for a little cuddling, and giving soft kisses to each other as caitlin made cheesy jokes in an attempt to keep you from getting up for the day.
After a long bit of stalling you finally wiggled your way out of her grasp and went to your drawer to grab new clothes.
As you were grabbing a new t-shirt and some shorts out of your drawer, Caitlin’s hands snaked around your waist, head resting on your shoulder.
“Caityy c’mon i have to get dressed and than you have me for the rest of the day” with that her hand let go of your waist lingering momentarily
“Fineeee” she dragged out dramatically leading herself to her own closet to get dressed.
10 minutes later it was the same thing again, as you were walking out of your room to the kitchen caitlin caught you from behind hugging you.
“Why are you sooo clingyy” you said laughing as she placed a kiss on your neck.
“I don’t know you said i could have you after you got dressed and to me it looks like your dressed?” she said with a smug tone of voice
Removing her arms from her waist you grabbed her hand “okay i did say that but how about i propose a new thing to you” you said pulling her to the kitchen.
“How about a little baking??” You said looking at her as a smile grew on her face.
“Fineee” she said as she thanked went through the cabinets looking for ingredients for something.
Finally you both had gathered ingredients for cookies, both agreeing on it you both got to work.
You ended up getting all the measurements while caitlin mixed.
In the middle of it she added “we really need stand mixer” as she limped her arm.
After about 2 hours and 4 failed cookie dough attempts, you both finally got a cookie dough you were happy with.
As you shaped caitlin clinged to you again arms around your waist from behind as you shaped the cookie dough onto the metal baking sheets.
“Babe you gotta let go for a second i need to put the cookies in the oven” you said but still she didn’t give up forcing you to waddle your way to the oven with her holding onto you to put the cookies into the oven.
As you closed the oven she turned you around pulling you up as she picked you up holding you from underneath your thighs.
“Caitlin i swear” you couldn’t lie tho you were happy about her clinginess rarely did you get this much time with her now that she was in the wnba.
She kissed you on the lips softly before placing you on the counter letting go of the kiss she said “you know you love me” before she rested her head on your shoulder placing pecks on your neck every now and than.
You both stayed there moving to the living room eventually chatting and making your time together of use.
Before you knew it the cookies were done, you sat on the couch as caitlin got the cookies on a plate for the two of you placing them onto your guys small coffee table.
You both ended the night watching a show and eating the cookies you both made, making the day memorable for the both of you.
187 notes
·
View notes
Text


Thanksgiving Essentials ꨄ it’s the perfect time to get prepared and set the mood for a cozy gathering. Light some autumn-scented candles, bring out your favorite seasonal recipes, and set a beautiful table to welcome family and friends.
⟡ Pedestal & Caramel Cake | Plate Setting | Pie & Pumpkin ⟡ Cocktail Mixer & Plates | Wreath | Candle & Food Platter ⟡ Pumpkin Basket, Coffee & Plant | Cozy Fall Mug | Throw & Pillow ⟡ Coffee Pot & Leaf Cookies | Bread & Leaf Bowl | Autumn Gift & Autumnal Deco
A big thank you to all the cc creators @pinkbox-anye, @9sims, @aggressivekitty, @cowbuild & @herasims4 x
⟡ More CC Recommendations here
#ts4#sims 4#simblr#the sims 4#sims#cc recs#cc finds#ts4 cc#sims 4 cc#maxis mix#ts4 cc recs#ts4 cc finds#ccrecs#sims 4 aesthetic#the sims community#ts4 screenshots#passifinds#passiberri
370 notes
·
View notes
Text


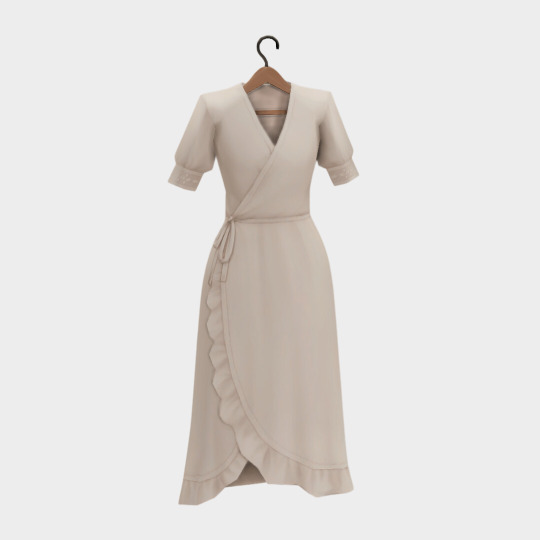
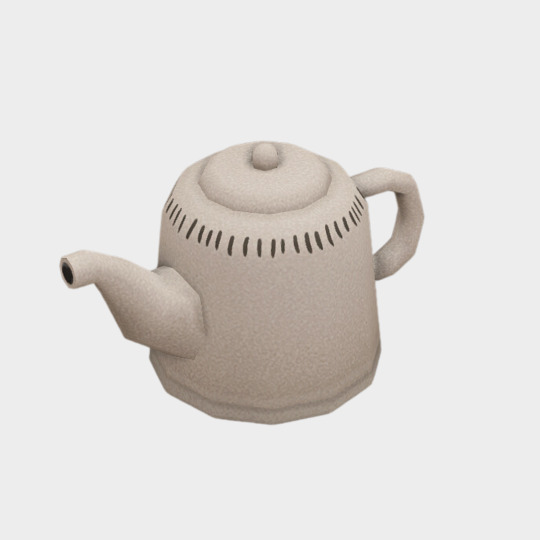
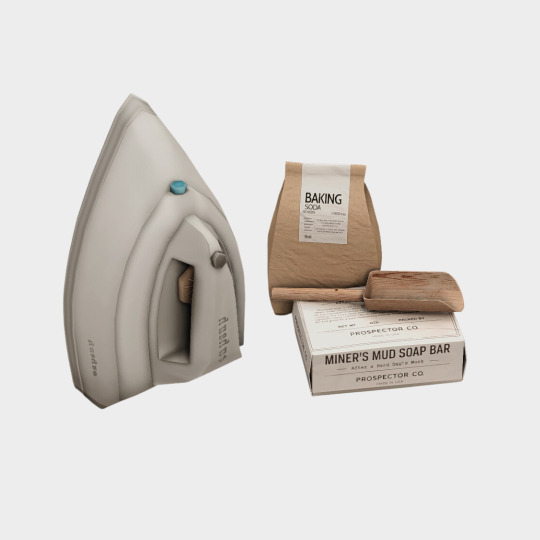
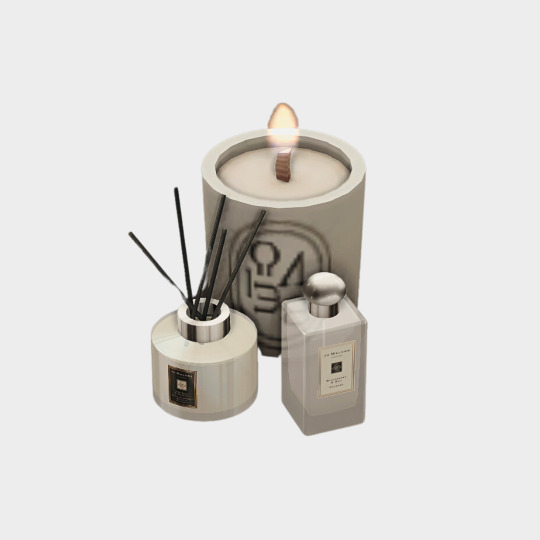
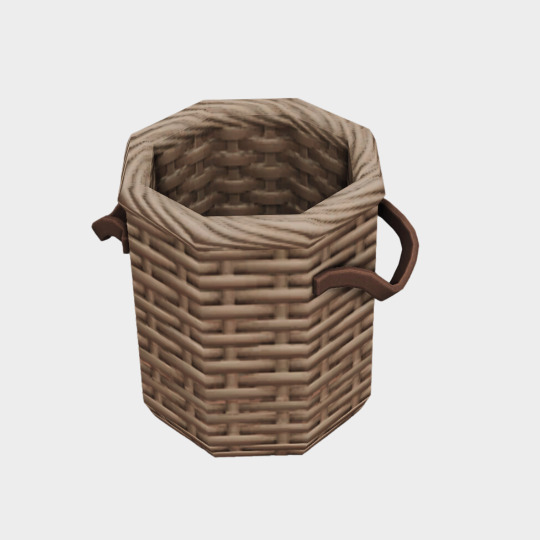
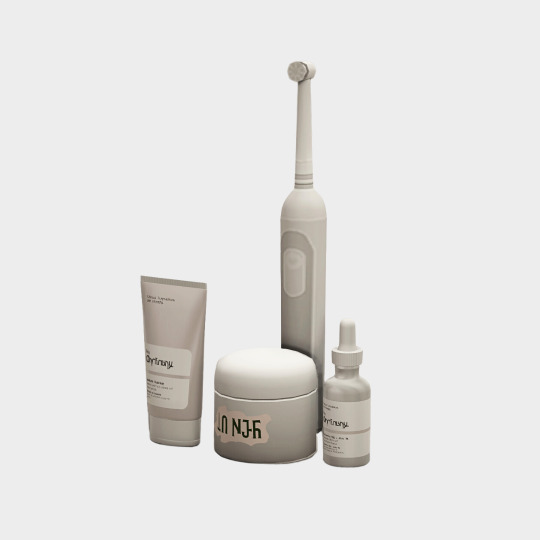

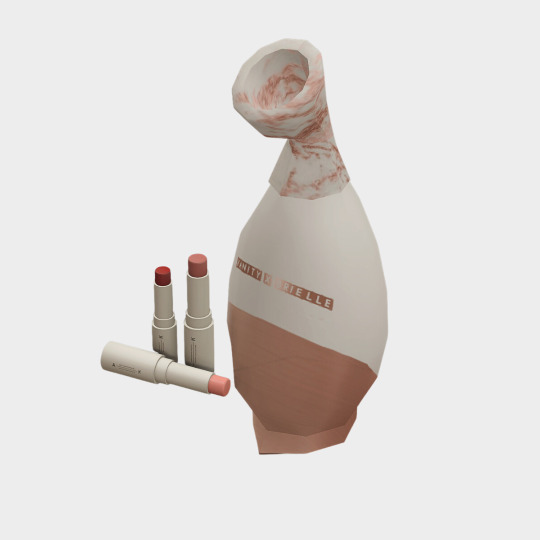
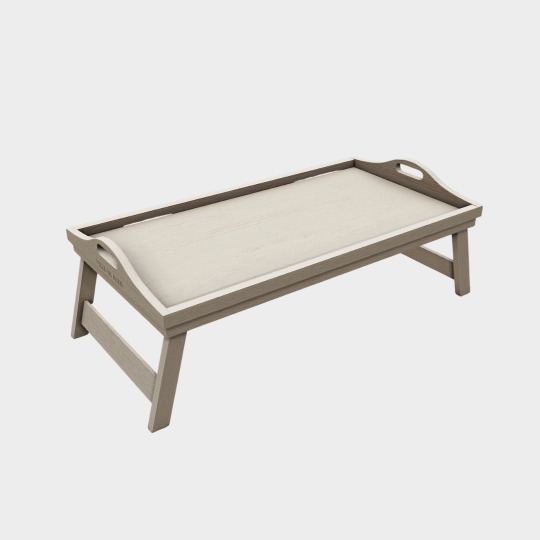
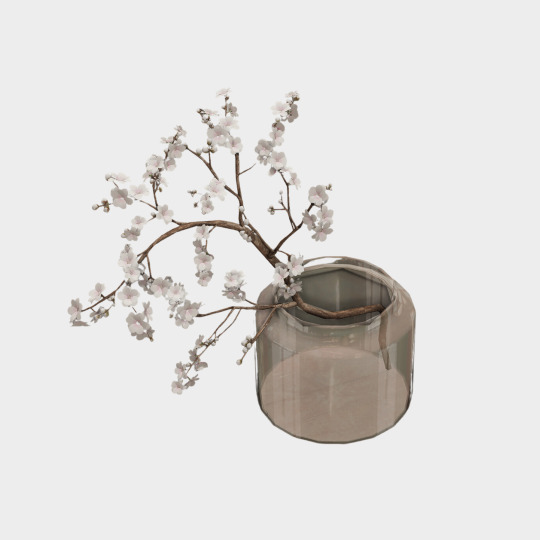

pixelglam's amazon storefront by Amelie
my picks in skincare, kitchen & home decor essentials straight from my amazon storefront! 🤍
bag | tiered cake stand | dress
tea pot | iron & baking soda | candle, incense & perfume
rattan basket | toothbrush, night cream & the ordinary products | pots
lipstick & facial steamer | bed tray | spring blossoms
hair straightener | stand mixer | coffee bag
credit @myshunosun @trendingsims @pinkbox-anye @dscombobulate @pierisim @syboubou @pixelette-cc @lilaccreative @peacemaker-ic @charlypancakes @kkbsmm @morgan-moss @harrie-cc @felixandresims
#pixelglam#ts4#ccfinds#the sims community#ts4cc#ts4cc finds#ts4mm#ts4 simblr#the sims 4#sims 4#the sims 4 simblr
2K notes
·
View notes
Text
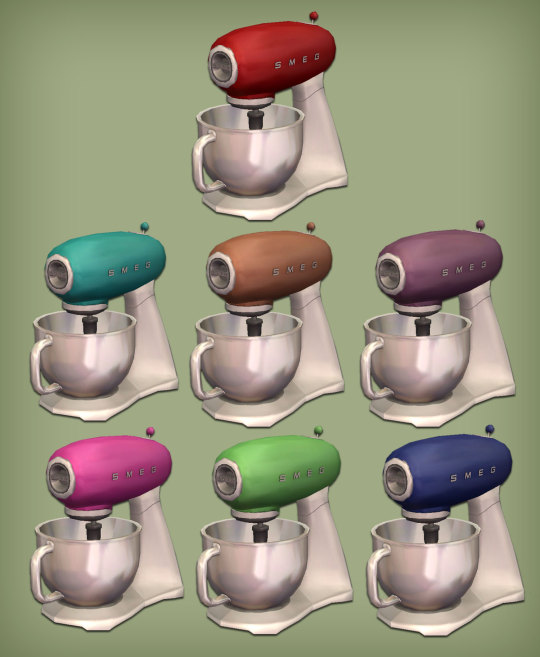
Kitchen Industry Food Processor for The Sims 2
This is a 4to2 conversion from BuffSumm, low poly. It's functional.
DOWNLOAD HERE
#sims 2 cc#the sims 2#sims 2 download#ts2#the sims 2 cc#ts2 download#4to2#4to2 conversion#sims 2 objects#kitchen appliances#food processor#mixer#buy mode#functional
231 notes
·
View notes
Text


୨୧ home bar essentials cc recommendations 🍸🧊🍾 ୨୧
little bit of a personal one because i worked as a bartender for 5 years 🤍
୨୧ carafe & glasses l syrup l bar clutter ୨୧
୨୧ mixer 1 & 2 l bottles l paintings ୨୧
୨୧ cocktails l ice tray 1 & 2 l bottles ୨୧
୨୧ thanks to all the amazing cc creators! 🤍 ୨୧
#sims 4 cc#sims 4 maxis match#sims 4 mods#sims 4 screenshots#sims 4 simblr#sims 4#sims 4 custom content#my sims#custom content#the sims cc#ts4 cc#simblr#ts4#cc#ccfinds*#the sims community#the sims 4#sims
318 notes
·
View notes
Text
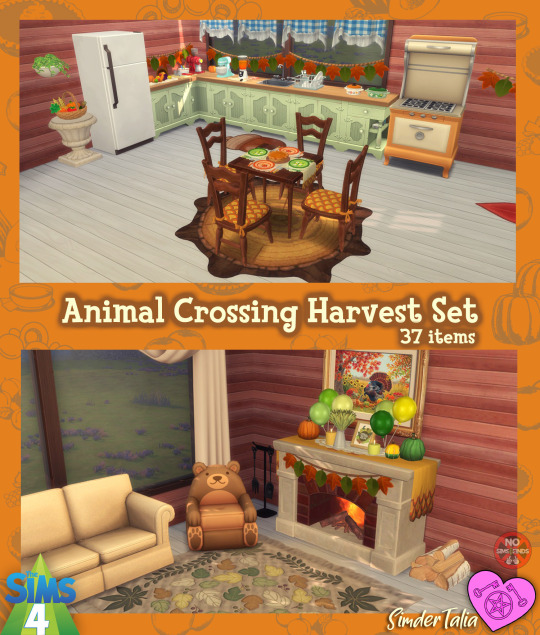


🍁 🍂 ACNH Harvest Set 🍂 🍁
Sims 4, Most items are base game compatible (see notes below) 37 items
It's harvest time! & Thanksgiving is coming up soon the United States (sorry, Canadians, that I didn't have it done in time for yours!) So I wanted to get this set made asap. I didn't make swatch previews this time, as most of the items follow the same orange, brown, and green color scheme. Some items have extra swatches added by me, all info below.
Always suggested: bb.objects ON, it makes placing items much easier. For further placement tweaking, check out the TOOL mod.
Contains: -Arch | 2 swatches | 3600 poly -Autumn Treasures (made by me!) | 2 swatches | 1163 poly -Baking Dish 1 | 2 swatches | 1200 poly -Baking Dish 2 | 2 swatches | 1200 poly -Baking Supplies | 2 swatches | 1202 poly -Chair | 4 swatches | 1226 poly -Cornucopia | 1 swatch | 2362 poly -Cutting Board | 4 swatches | 700 poly -Dish Drying Rack | 6 swatches | 1190 poly -Dish Towel | 4 swatches | 496 poly -Extra Candle | 5 swatches | 137 poly -Festive Table Decor | 2 swatches| 2268 poly -Fireplace (functional) | 4 swatches | 2414 poly -Folded Cloth | 2 swatches | 418 poly -Kitchen Blender | 9 swatches | 906 poly -Large Freezer (slots on top) | 4 swatches | 1210 poly -Leaf Pile | 3 swatches | 412 poly -Leaf Table Decor | 4 swatches | 82 poly -Leaf Wall Decor | 3 swatches | 962 poly -Pro Coffee Grinder | 7 swatches | 1196 poly -Pumpkins 1 & 2 (2 items) | 2 swatches each | 342 poly -Rug: Acorn | 1 swatch | 817 poly -Rug Maple Leaf | 7 swatches | 1020 poly -Rug Square | 2 swatches | 996 poly -Rug Wood | 1 swatch | 481 poly -Stand (end table) | 2 swatches | 1226 poly -Stand Mixer | 6 swatches | 1148 poly -Table | 6 swatches | 2158 poly -Table Setting | 2 swatches | 862 poly -Takumi Mug | 6 swatches | 782 poly -Takumi Mug Full (has steam, animation requires Cats & Dogs) | 6 swatches | 818 poly -Toasty Radiator (Requires Seasons, has slots) | 7 swatches | 1164 poly -Turkey Decoration | 1 swatch | 908 poly -Vegetable Basket | 1 swatch | 1190 poly -Wall Ivy Pot | 4 swatches | 1150 poly -Wheat Decor | 2 swatches | 1181 poly
Type “acnh harvest" into the search query in build mode to find quickly. You can always find items like this, just begin typing the title and it will appear.
📁 Download (SFS, No Ads): HERE
📁 Alt Download (still no ads): HERE
As always, please let me know if you have any issues! Happy Simming!
✨ If you like my work, please consider supporting me
★ Patreon 🎉 ❤️ |★ Ko-Fi ☕️ ❤️ ★ Instagram����
Thank you for reblogging ❤️ ❤️ ❤️
@sssvitlans @maxismatchccworld @mmoutfitters @coffee-cc-finds @itsjessicaccfinds @gamommypeach @stargazer-sims-finds @khelga68 @suricringe @vaporwavesims @mystictrance15 @public-ccfinds
🦃 More Thanksgiving & Harvest CC
The rest of my CC
#s4cc#ts4cc#sims 4 thanksgiving#sims 4 holiday#sims 4 cc#ts4mmcc#sims 4 maxis match#sims 4 turkey day#sims 4 animal crossing#ts4 acnh#sims 4 furniture#sims 4 table#sims 4 chair#sims 4 dining#sims 4 fireplace#sims 4 object#sims 4 functional object#sims 4 food#sims 4 nature decor#sims 4 leaves#sims 4 rug#sims 4 rugs#sims 4 towel#sims 4 kitchen#sims 4 living room#sims 4 den#sims 4 store supplies#sims 4 garland#sims 4 wall decor#sims 4 wall object
734 notes
·
View notes
Text


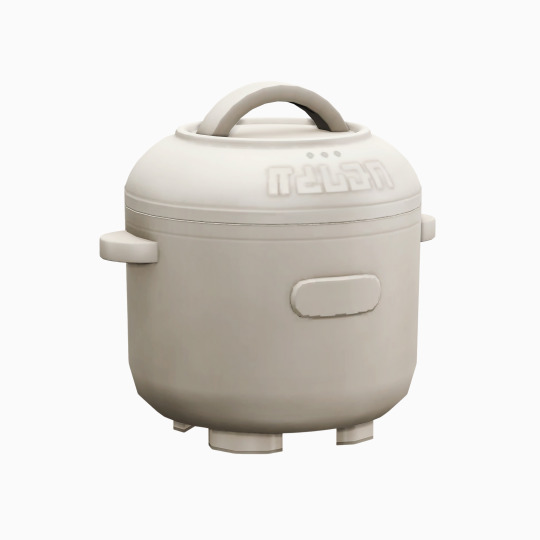

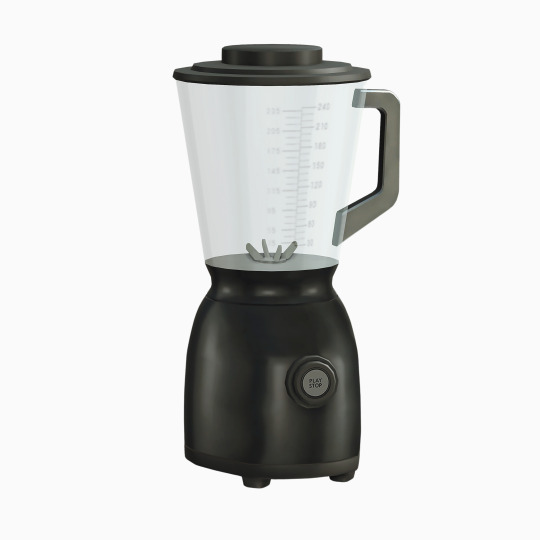


Farfalla's Favorite Functional Kitchen Appliances 👩🏻🍳
Air Fryer | Teapot | Pot Microwave | Stand Mixer | Slow Cooker Teapot | Blender | Microwave Kettle | Stand Mixer | Coffee Machine
Massive thank you to all the CC Creators! @aroundthesims @icemunmun-spicy-scalpel @joyceisfox @littledica & others!
#farfallasims#cc finds#ccfinds#cc recs#the sims#sims 4#the sims community#sims#the sims 4#sims 4 screenshots#ts4 simblr#sims 4 maxis match#simblr#sims 4 simblr#thesims4#sims4#the sims4#ts4 screenshots
2K notes
·
View notes
Text

modern kitchen essentials | sims 4 cc finds 🍽️
01. tray & salt and pepper | pan (1)(2), plant | cookbook, baking items
02. soap, dish items, calendar | mixer | cutting boards, cupcake & candle
03. dish rack & glasses | plant & tray | sink
thank you cc creators! <3 @lilaccreative @valiasims @pierisim @taurusdesign @felixandresims @myshunosun @gua-cc
#cc recs#ccrecs#sims cc#sims 4 cc#ts4 cc#sims#sims 4 simblr#sims 4 aesthetic#the sims community#the sims 4
941 notes
·
View notes
Text
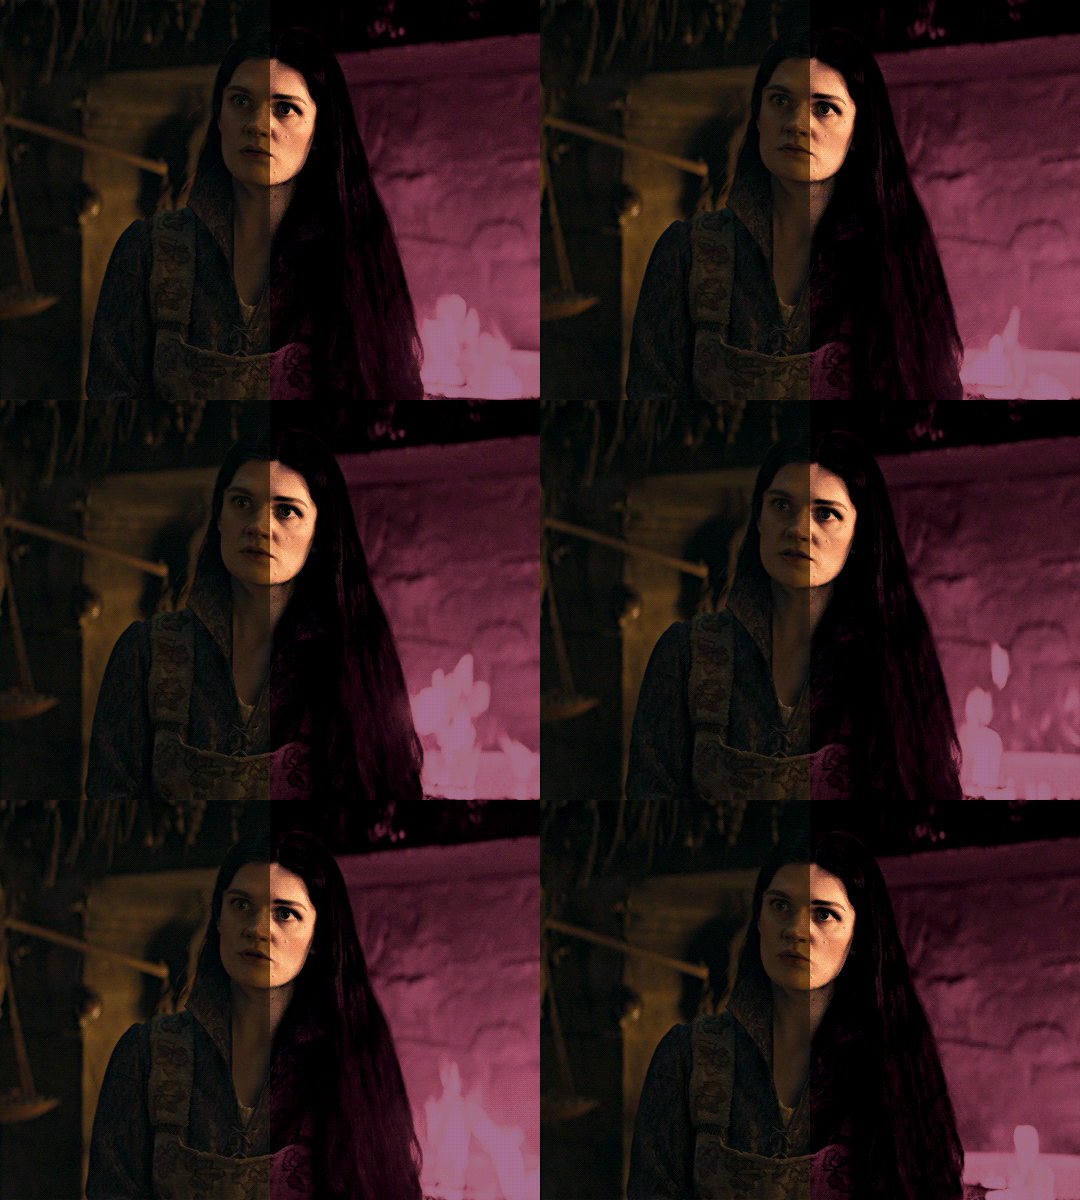
i was asked by @matthew-macfadyens for a colouring tutorial, so here we go ! i've been making gifs for almost 4 years now and finally feel comfortable and confident in my skills to make a full tutorial on my colouring process. there are so many different ways people colour gifs, and there's no wrong way, this is just how i do it ! i learned to gif by reading so many tutorials and picking and choosing what works for me, so hopefully this can help someone out !
if this tutorial helps you, please considering supporting me ! buy me coffee ♡

TUTORIAL UNDER THE CUT
what you'll need: - photoshop ( i use ps cc 2023 & frame timeline ) - basic ps knowledge ( how to make gifs, how to sharpen gifs, general understanding of adjustment layers, layer masks and blending modes ) - a whole lot of patience
helpful resources:
the beginner's guide to channel mixer by @aubrey-plaza
giffing 101 by @cillianmurphy
gif making for beginners by @hayaosmiyazaki
colouring yellow-tinted shots by @ajusnice
becca's mega colouring tutorial by @nataliescatorccio
@usergif

PART ONE: BASE COLOURING
- step 1: curves - step 2: exposure - step 3: colour balance - step 4: selective colour - step 5: levels - step 6: brightness / contrast - step 7: gradient map
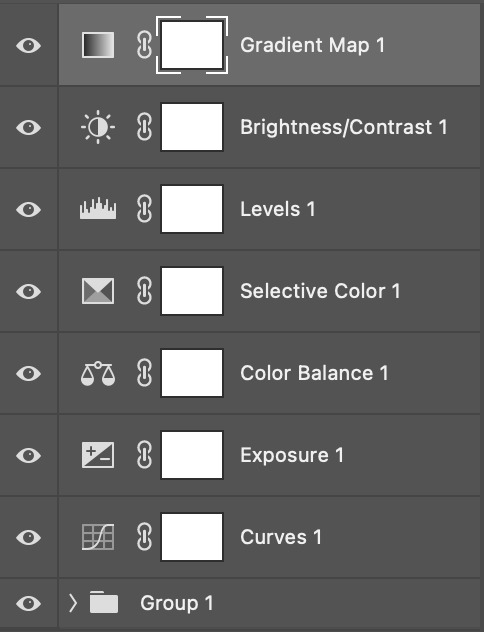
okay so, before we get started, this tutorial is for colouring only. at this point, i've already gotten my screencaps, imported them into photoshop, made the actual gif & sharpened the gif. the above image includes what my typical adjustment layer stack looks like !
STEP ONE: CURVES
a lot of people do the majority of their heavy lifting in curves...i'm not one of those people. i've never gotten the hang of curves and haven't been able to fully taken advantage of everything it can offer. i use curves to mainly brighten up my gif and to start my process.
i use the "auto" button in the curves function - this automatically corrects the curves for your gif ( mainly the brightness / contrast )
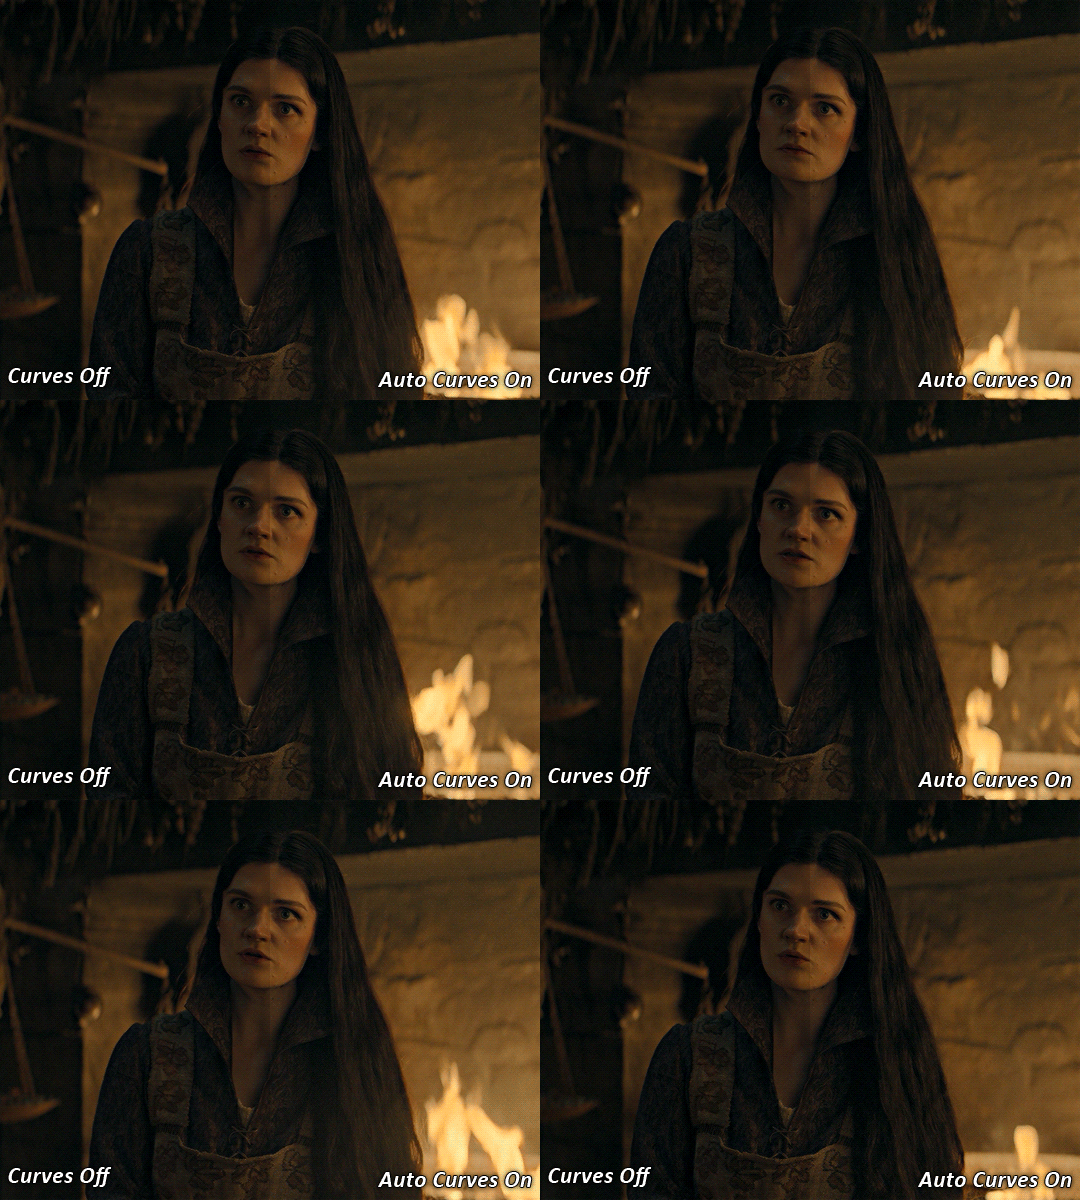
you can see that the auto curves has brightened up the gif and evened out the brightness/contrast. i just find this gives a better starting point for the colouring process.
STEP TWO: EXPOSURE
this step is for, you guessed it, brightening the gif more and evening out the contrast and blacks. i don't have any real rules for doing this, the amount i highten the exposure and contrast is different based on the scene and the show, however, i tend to stay around +1 on both exposure and gamma correction.
exposure effects the brightness of the gif and gamma correction effects the blacks and contrast. this step also effects the saturation of the gif, so it's important not to go too crazy. i often end up coming back to this step every now and again to adjust and fiddle with it.
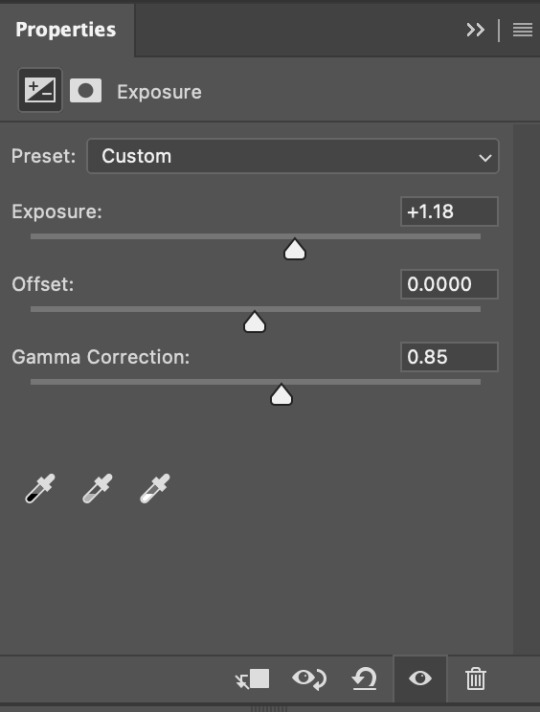
for this gif, i put the exposure at +1.18 and the gamma correction at 0.85
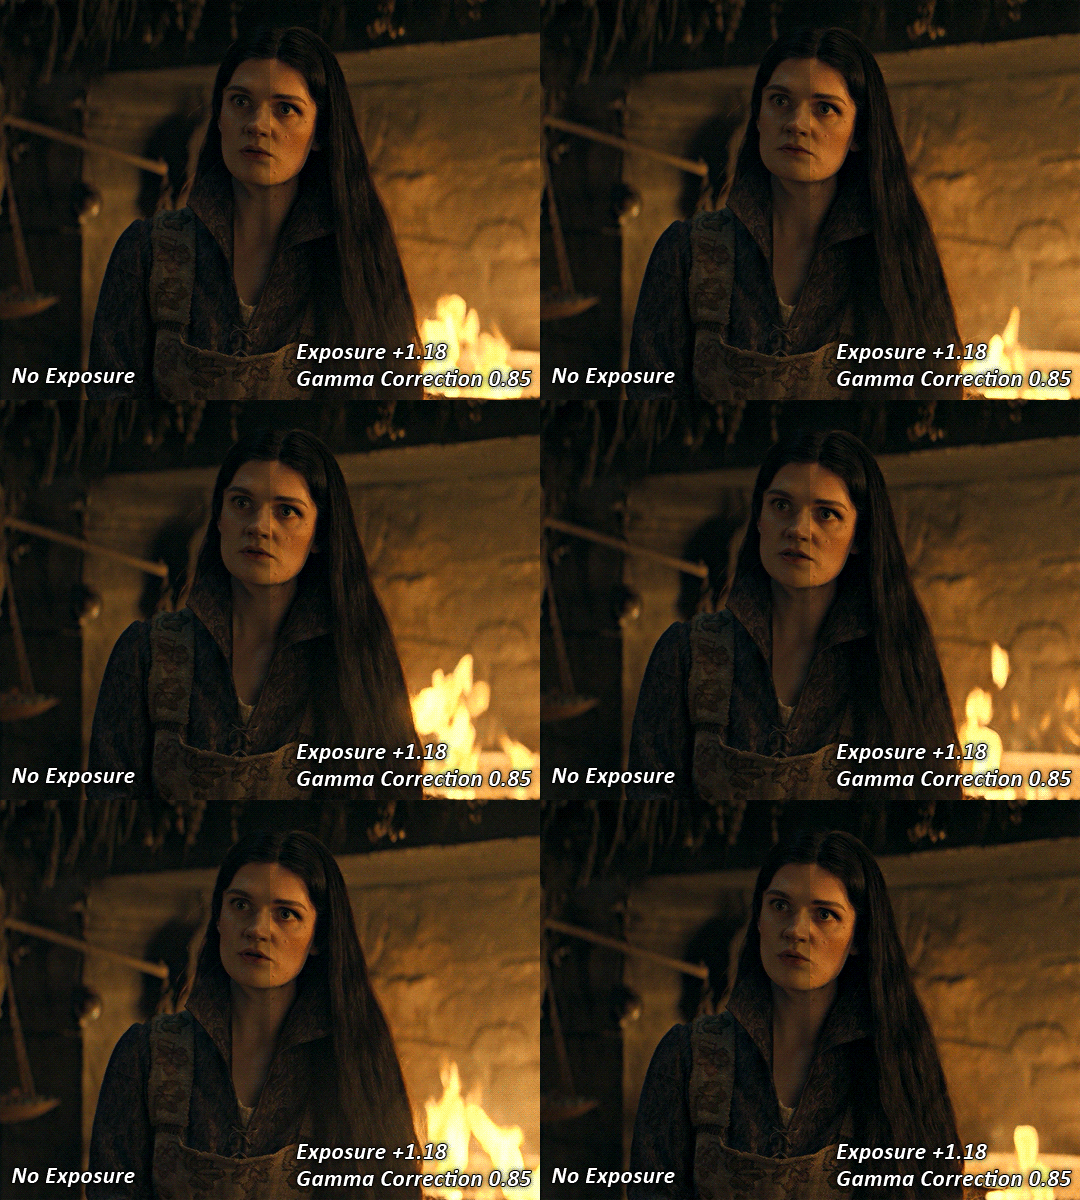
you can see this step serves to add some more brightness and contrast - it also adds some more saturation, that we don't always want, but don't worry, that's what the next steps are for !
STEP THREE: COLOUR BALANCE
i use this step to do a lot of my heavy lifting - i'm a whore for colour balance. this serves to even out the colours and help neutralize the colours for an easier canvas. it's important to understand the basics of colour theory for this, i recommend checking out the channel mixer tutorial i listed above, because a lot of those steps applies to colour balance.
essentially, there's three separate profiles to edit on - highlights, midtones and shadows. in each profile, you have 3 colour sliders. the top one is your cyan to red, middle is magenta to green, and bottom is yellow to blue. the colouring of the scene will decide where to move your sliders.
for example: if your original scene has a cyan tint to it, you'll want to pull your slider to the right, towards the red to help neutralize the cyan. if your scene has a green tint, you'll want to pull it left towards the magenta. as you move the sliders, you'll notice that sometimes it brings out other colours you don't necessarily need, you can adjust the other sliders to help neutralize further.
i always do my main correction in the midtones profile.
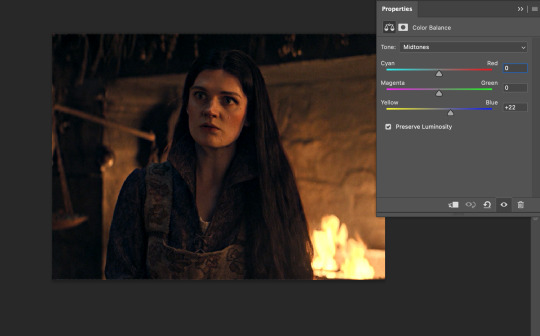
since this scene has a heavy yellow tint, my first step was to adjust the bottom slider. i pulled the slider to the right towards blue at +22. you can see this helped get rid of a lot of the yellow, but adding in the blue warmed up the reds and made it more saturated.
to help with this, i pulled the top slider left towards cyan to help neutralize that red.
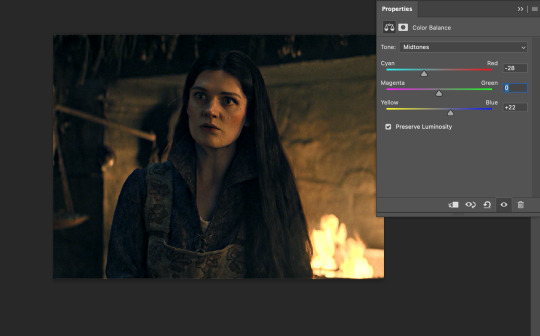
i pulled the top slider to -28 and you can see this cut out that heavy saturation and redness. it's looking a lot better, but now it's a little too green for my liking. this is where that middle slider comes in!
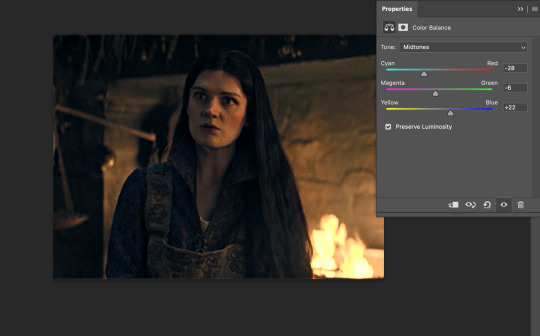
i pulled the middle slider to -6 towards the magenta to help counteract the green that came in. ( i ended up going back in and adjusting the bottom slider to +10 instead, as it was a little to blue )
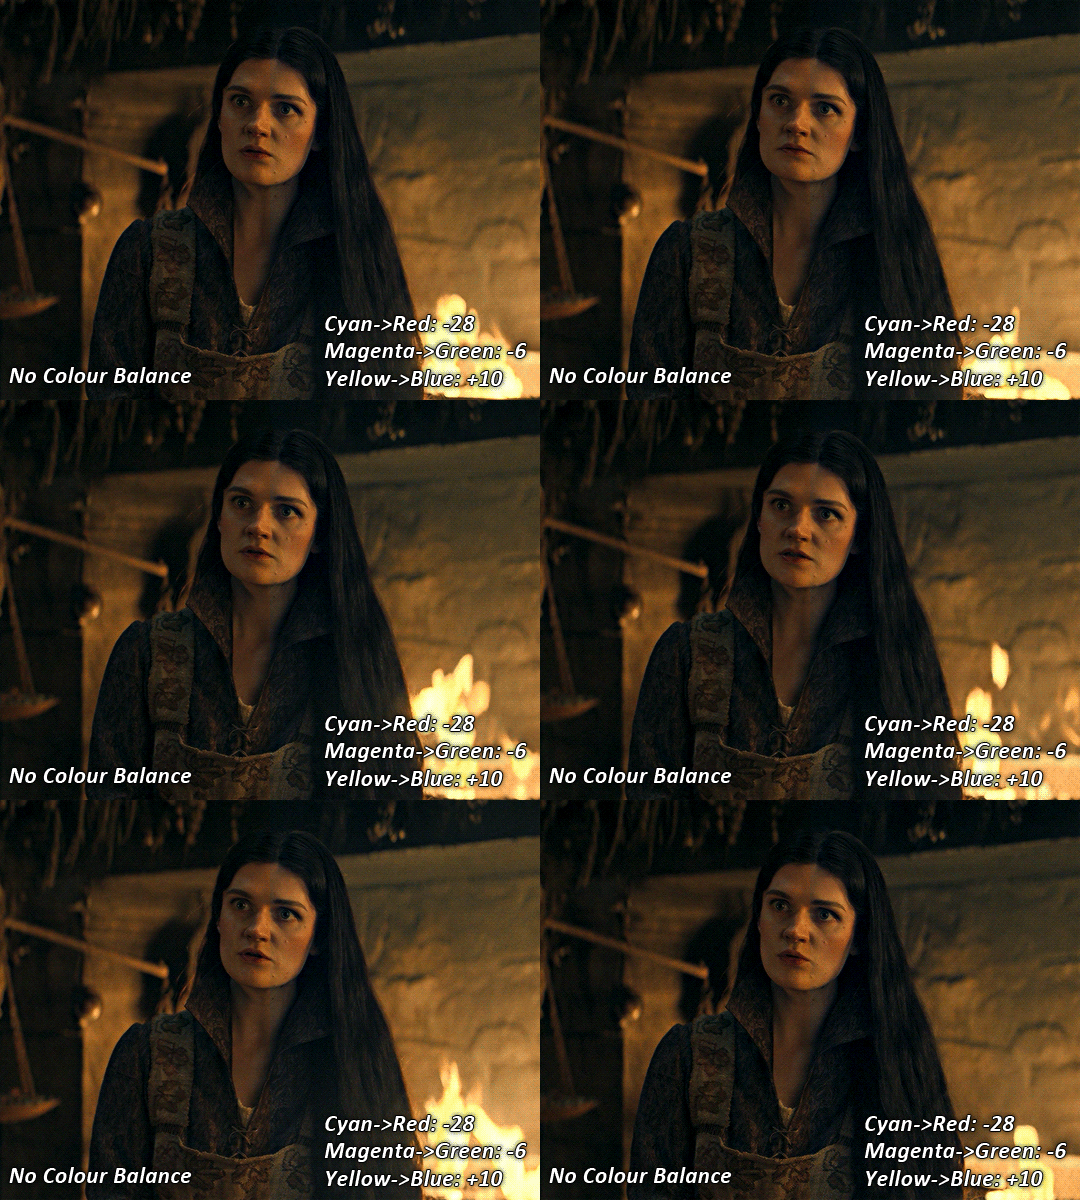
you can see this step really did the heavy lifting, helping to neutralize the canvas so that it's easier to work with...but it's not quite perfect yet!
STEP FOUR: SELECTIVE COLOUR
a lot of the same principles around colour theory apply to selective colour! this is where i go to adjust the colours according to what my colour palette is. for this gif, the overall colour is going to be purple, so i'll adjust the individual colours with that in mind.
i only ever adjust my red, yellow, white and black profiles! sometimes i'll do the other colours, but that's only for tweaking the final colour. i normally don't touch them at all.
ps: you'll notice i prefer a cooler toned gif, and almost always go for a more magenta looking red/yellow.
i always start with my yellows:
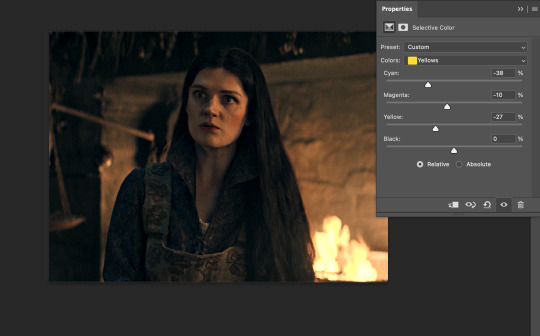
in the yellow profile, i pull my cyan towards the left to -38 (this helps eliminate the green in the yellows) and my yellow slider to the left to -27 (this cools down the yellows. i top it off by adjusting my magenta slider to -10, to help lower the saturation of the yellows.
you'll notice this step got rid of most of the green undertones - that's because the green was nested inside the yellows, so by taking out a lot of the cyan and yellow, you're left with a warmer yellow as opposed to a cooler yellow.
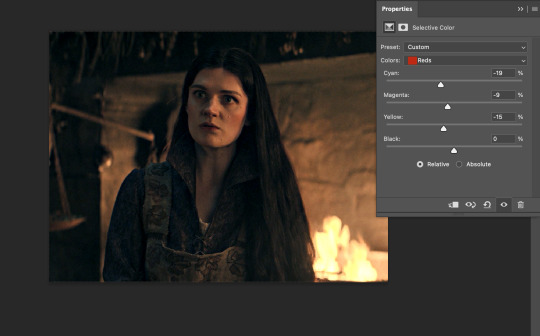
next i go on to my reds. this step will mainly effect the alys's skin tone, but i'm going to do pretty much the same as above but with much less dramatic of a change. lowering your colours in your red profile too much can lead to a very saturated gif, which is not what i'm going for.
i pulled my cyan slider to -19, magenta to -9 and yellow to -15. you can see this helped add some more cooler tones to the reds.
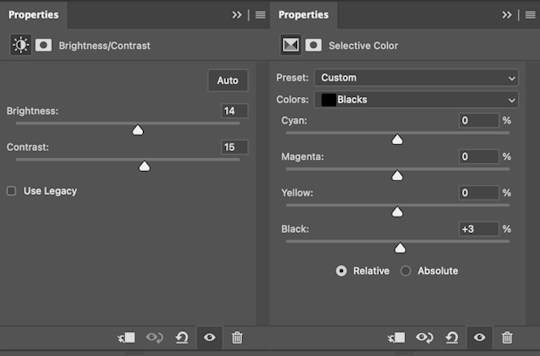
the next profiles are your white and black profiles. i use white to brighten the lightest parts of the gif. no rhyme or reason here, i just pull the black slider towards the left...usually around -25. for the black profile, i always move the black slider towards the right. anywhere from +3 to +8, depending on the gif. for this gif, i did +8. this darkens the blacks and, in my opinion, helps the gif pop!
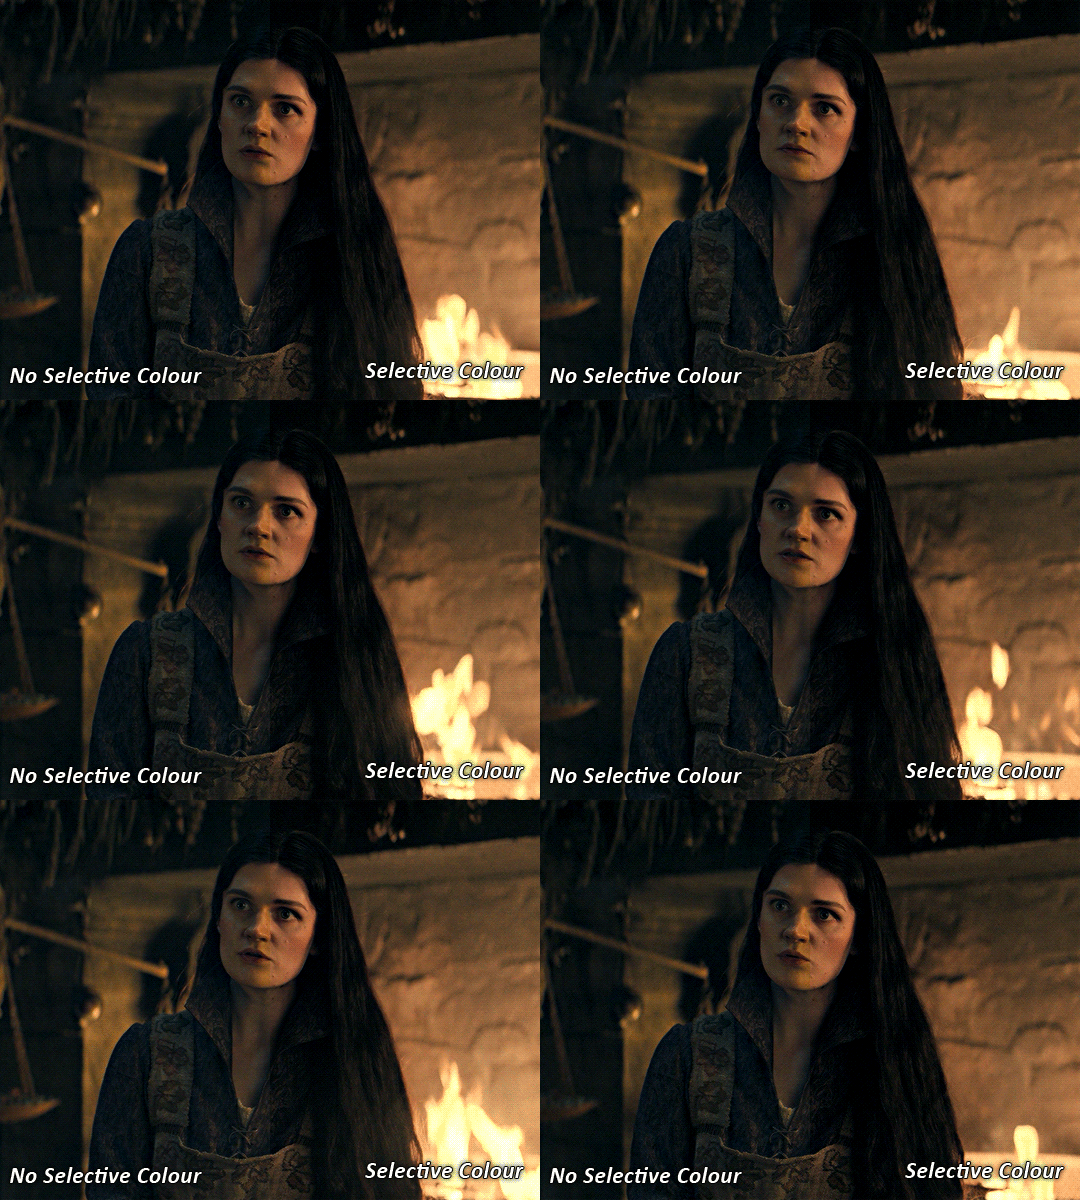
you can see this step got rid of the yellow tint, gave the gif a more neutral look and adjusted the reds to better compliment a purple colour scheme !
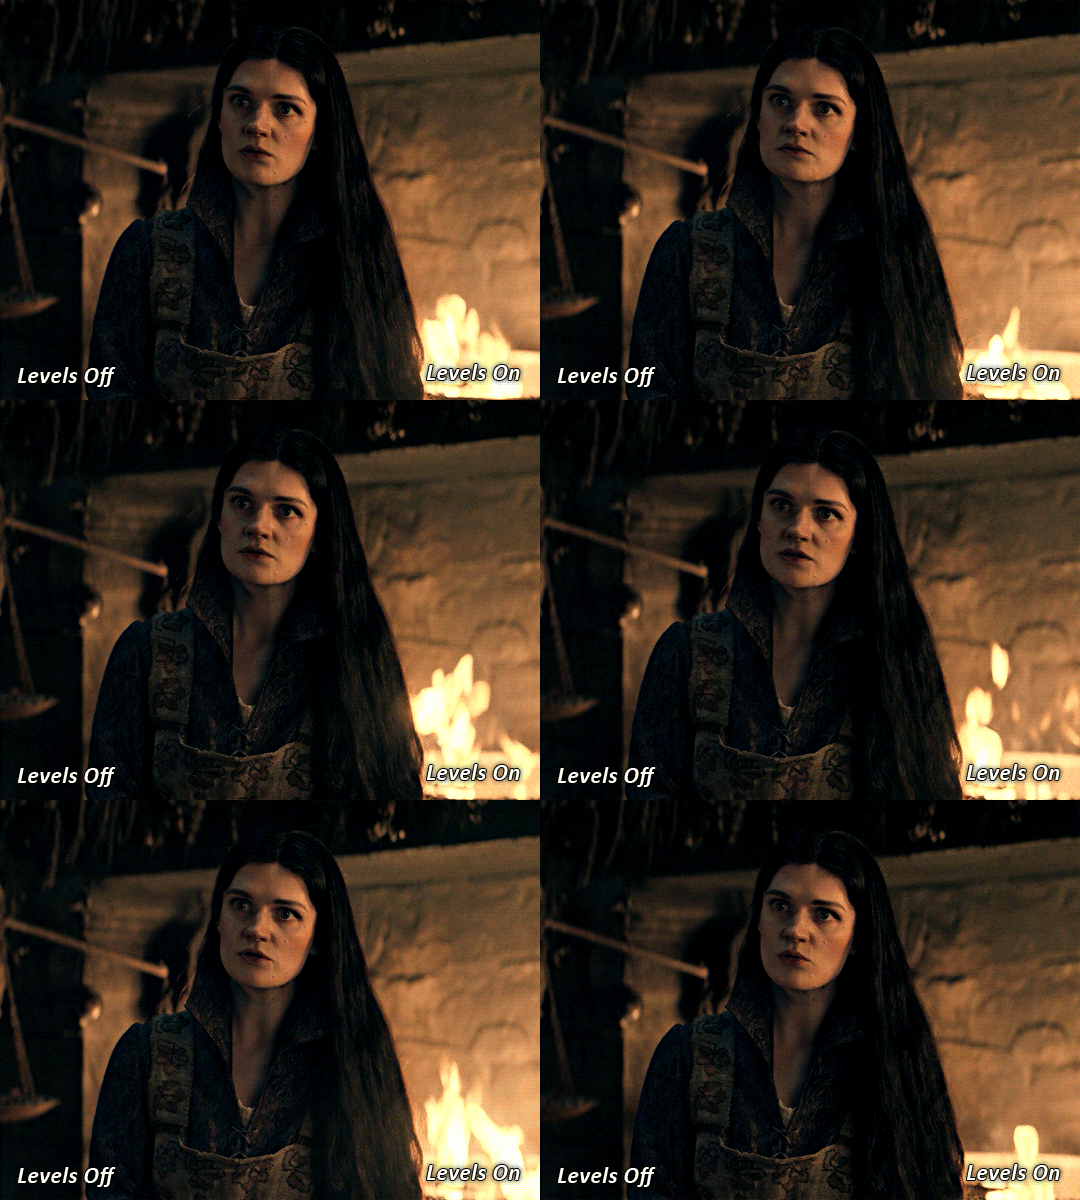
STEP FIVE: LEVELS
this adjustment has three toggles - i'm not 100% sure what each toggle really does, i just know that by pulling the leftmost toggle to the right, it darkens your gif, and pulling the rightmost toggle to the left brightens your gif.

this step is so hard to explain, but really i just pull the toggles around until it looks good...sorry !
STEP SIX: BRIGHTNESS / CONTRAST
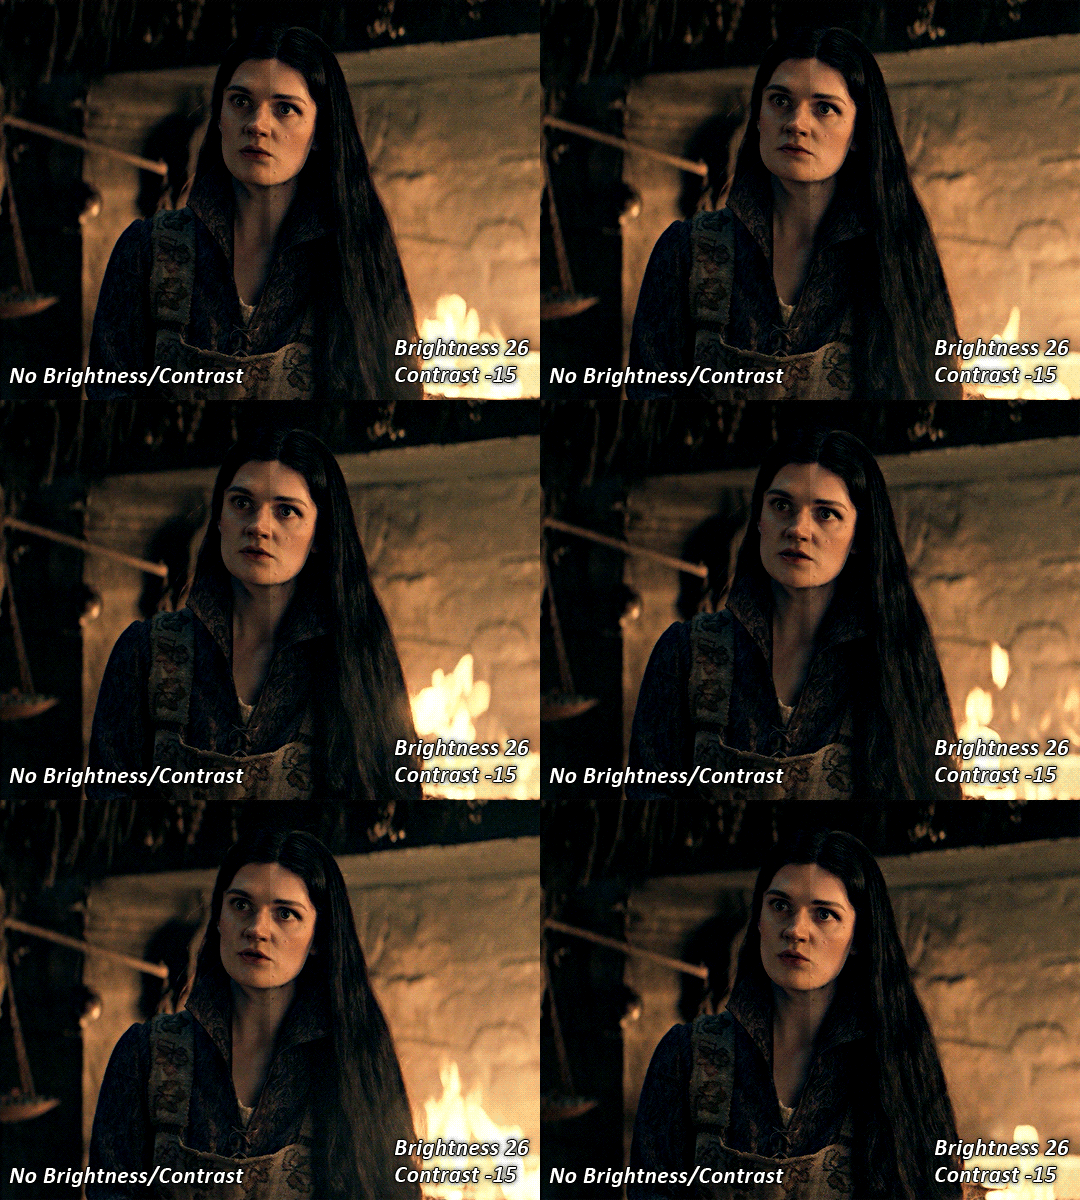
this step is exactly what it says on the tin...it brightens your gif. this step is based on your scene and personal preference, there's no real guide to it.
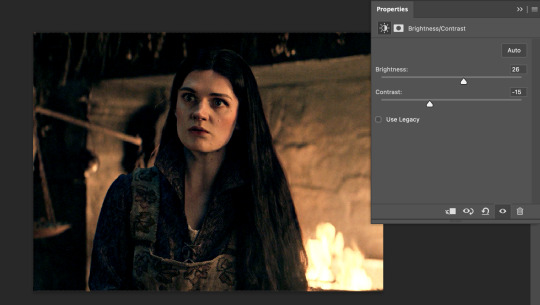
i always pull my brightness slider to the right ( brighter ) and my contrast slider to the left ( less contrast ).
STEP SEVEN: GRADIENT MAP
this last step is something i learned from @nataliescatorccio ! i add a gradient map to the top of my stack, and choose a lighter colour of what i want my overall gif to be. in this case, i used a very light purple!
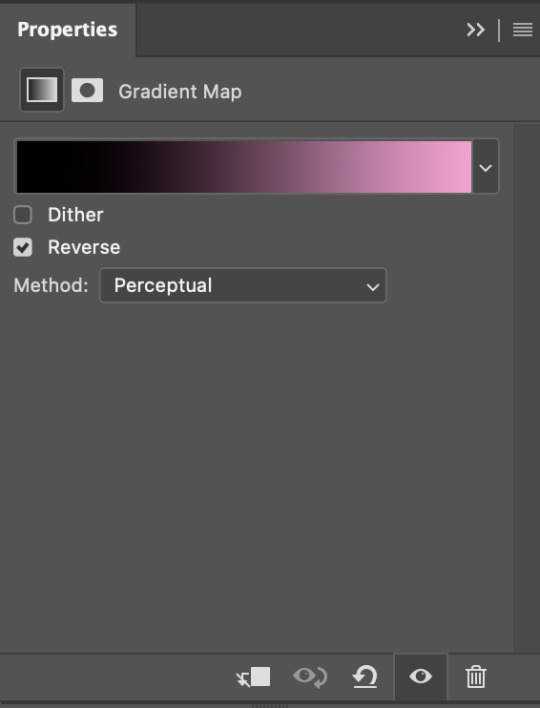
i then set the blending mode to "soft light" and lower the opacity to anywhere from 20-30%. for this gif, i did 30%
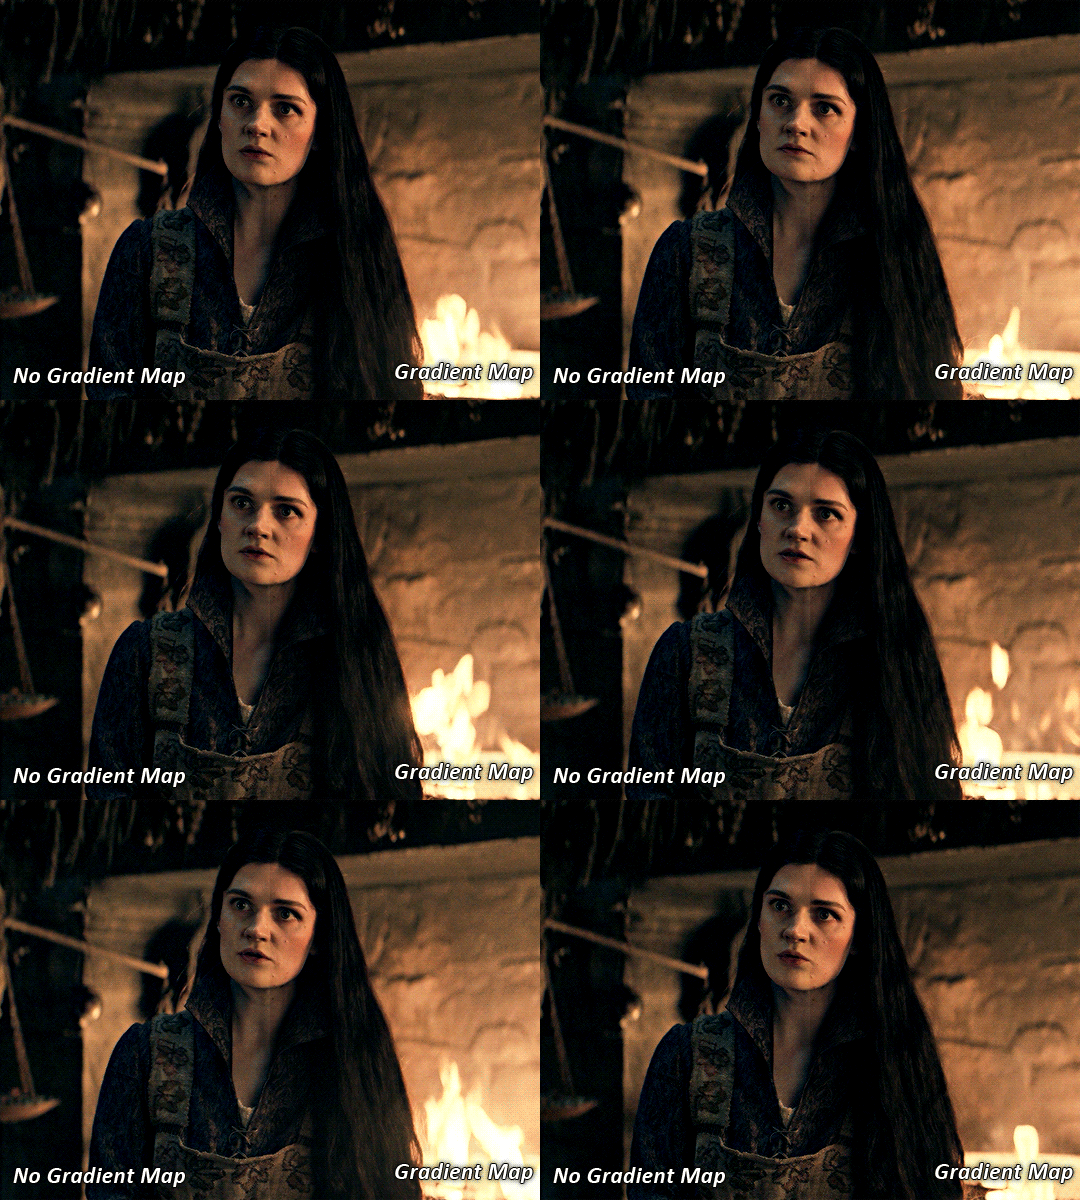
this step will help make your colour pop once you do your main colouring!

PART TWO: PAINTING & COLOURING
- step 1: layer 1 - step 2: layer 2 - step 3: layer 3 - step 4: final touches
okay, so my actual colouring process is based in 3 layers. for this gif, i'm using a deep purple/mauve colour !
STEP ONE: LAYER ONE
between your brightness/contrast and gradient map layers, add another blank layer. change the blending mode of this layer to "colour" and set the opacity to 40%.
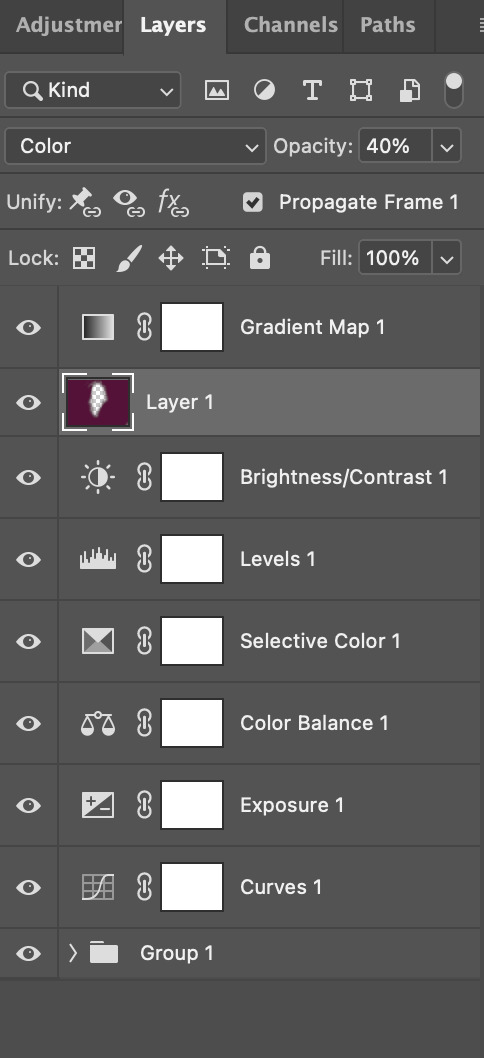
then, using a soft round brush with an opacity of 100% ( size of the brush is your preference, i typically use around 108 ), colour the parts of the gif you want coloured !

you can see this helps us get the canvas to a more uniform purple colour!
STEP TWO: LAYER TWO
for layer two we're going to do the exact same thing. add a layer above your previous, set to "colour" at 40%. we're going to go over the same areas!
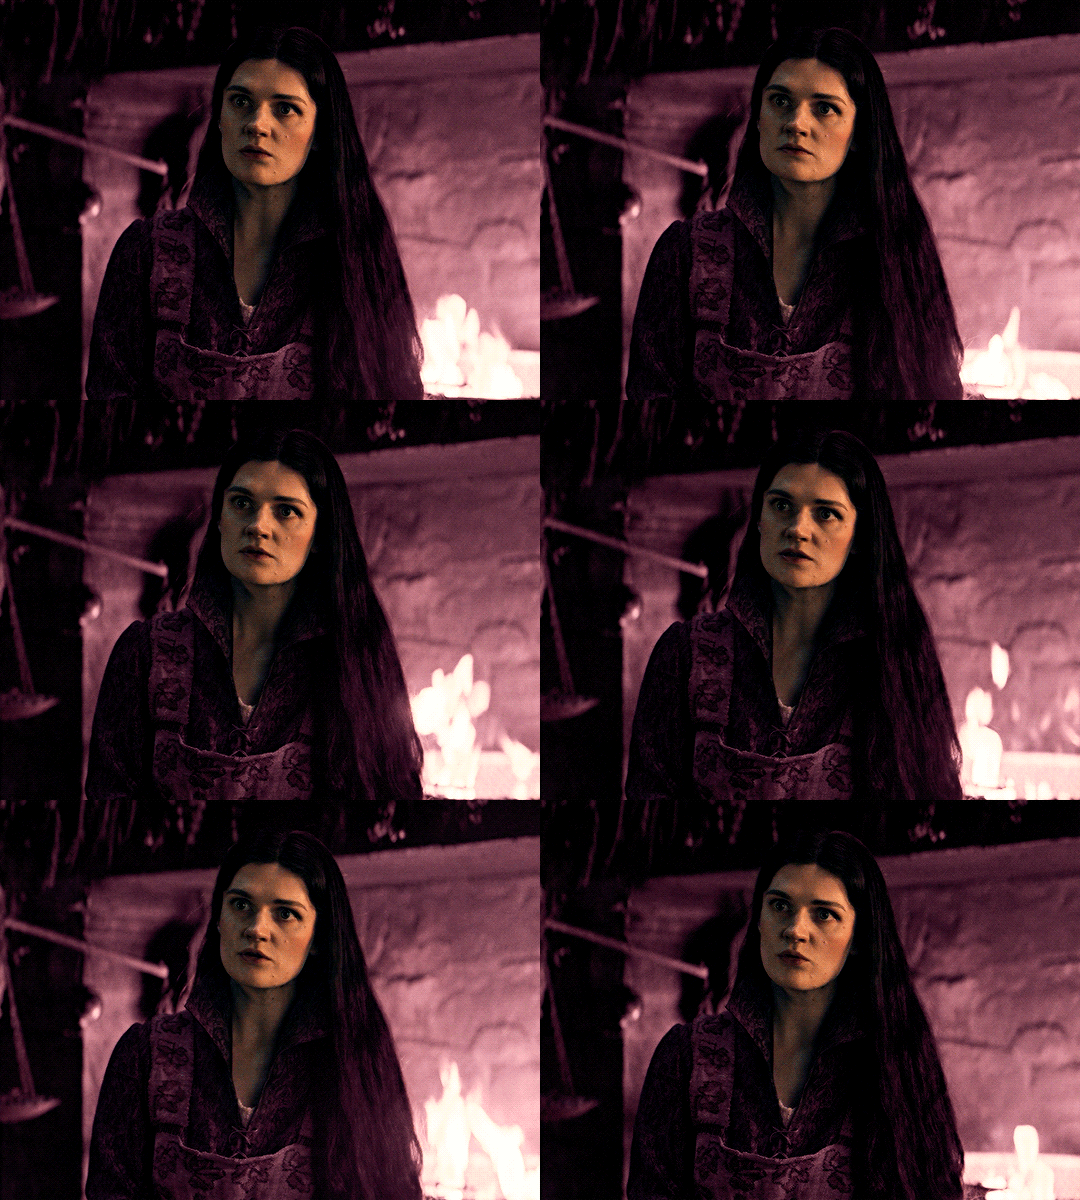
you can see this helped get the purple so much more vibrant and closer to what our final colour is going to be!
STEP THREE: LAYER THREE
for our final layer, add another layer above the previous 2, set your blending mode to "multiply" and your opacity to anything from 60%-100%. for this gif, i did 60% !
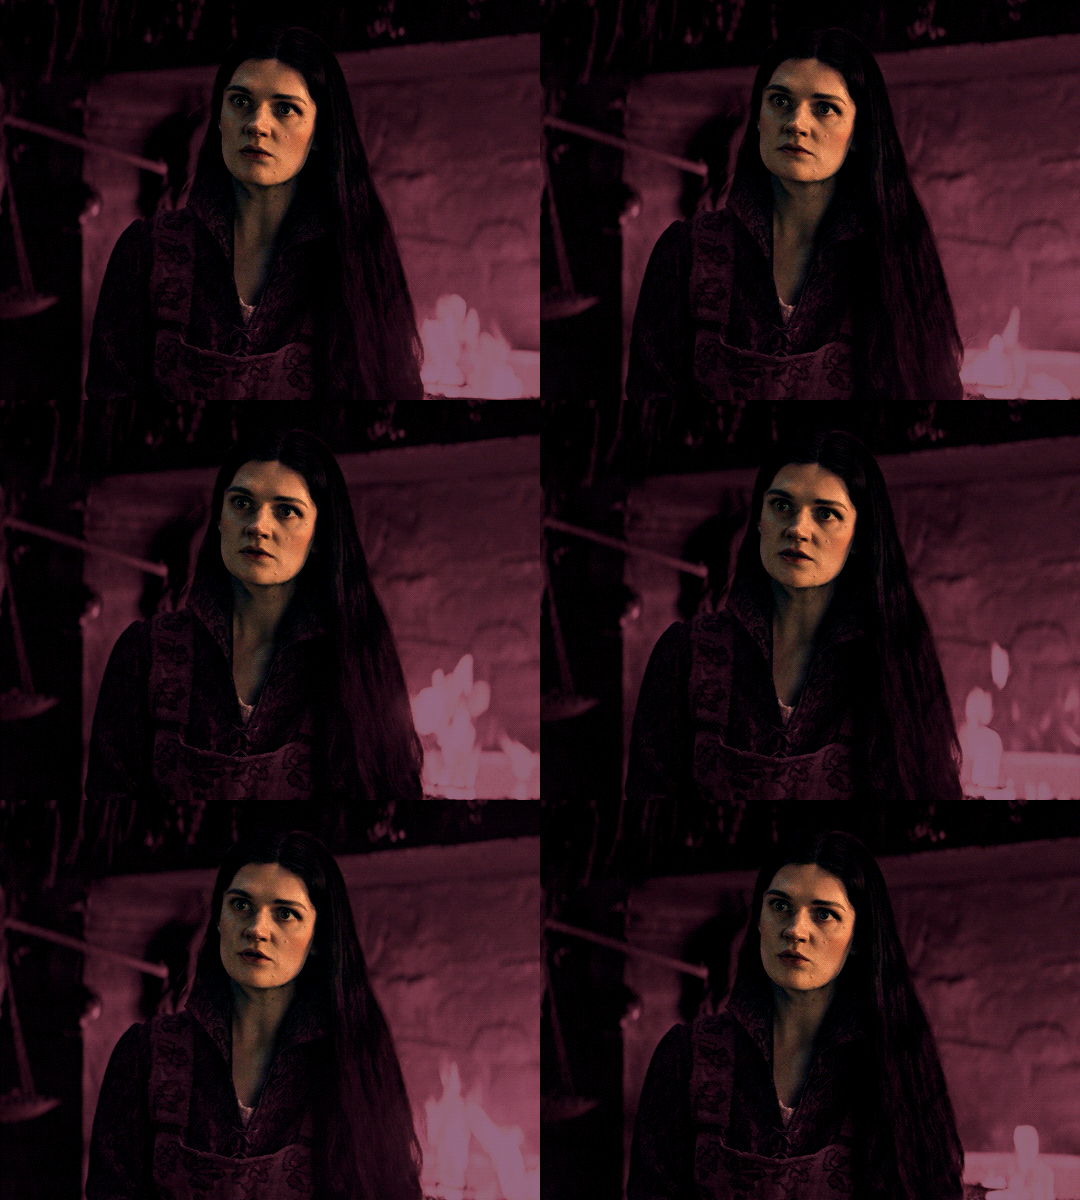
now, our colouring is pretty much done but you can see that, now that our colour is down, alys's face is still a little too blue/green/yellow for the background purple. the next step, we're going to adjust and add final touches!
STEP FOUR: FINAL TOUCHES
at this point, i went back into my selective colour layer and adjusted my yellows & reds and went back into my colour balance layer to adjust everything overall.
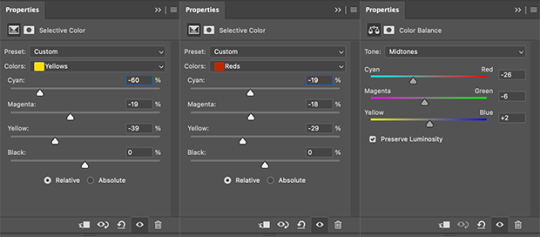
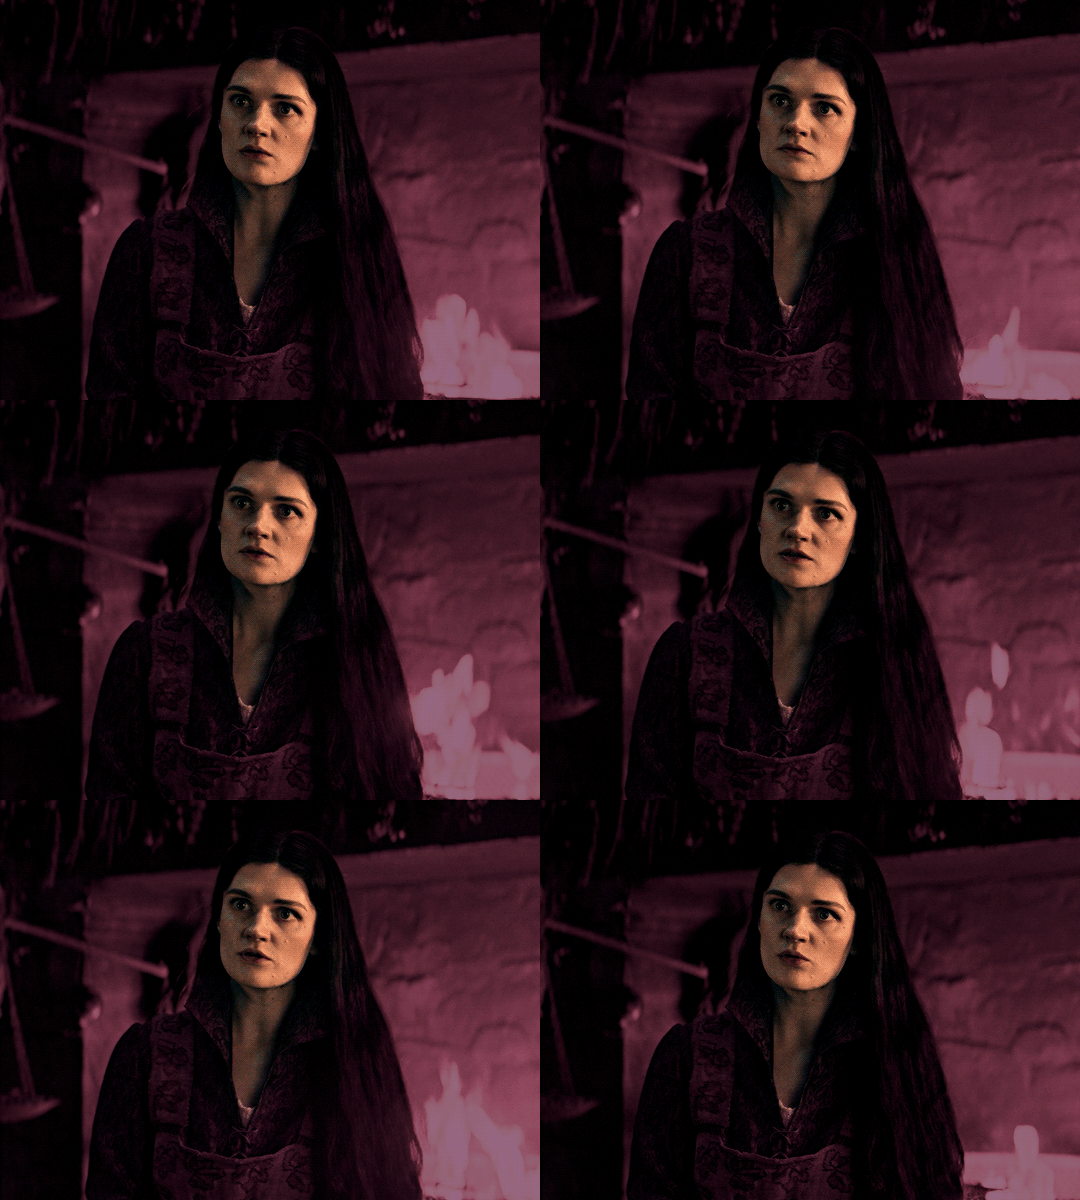
at this point, i'm going to go in and add some adjustments layers above everything - i usually add some brightness/contrast, and a selective colour layer to darken the blacks.
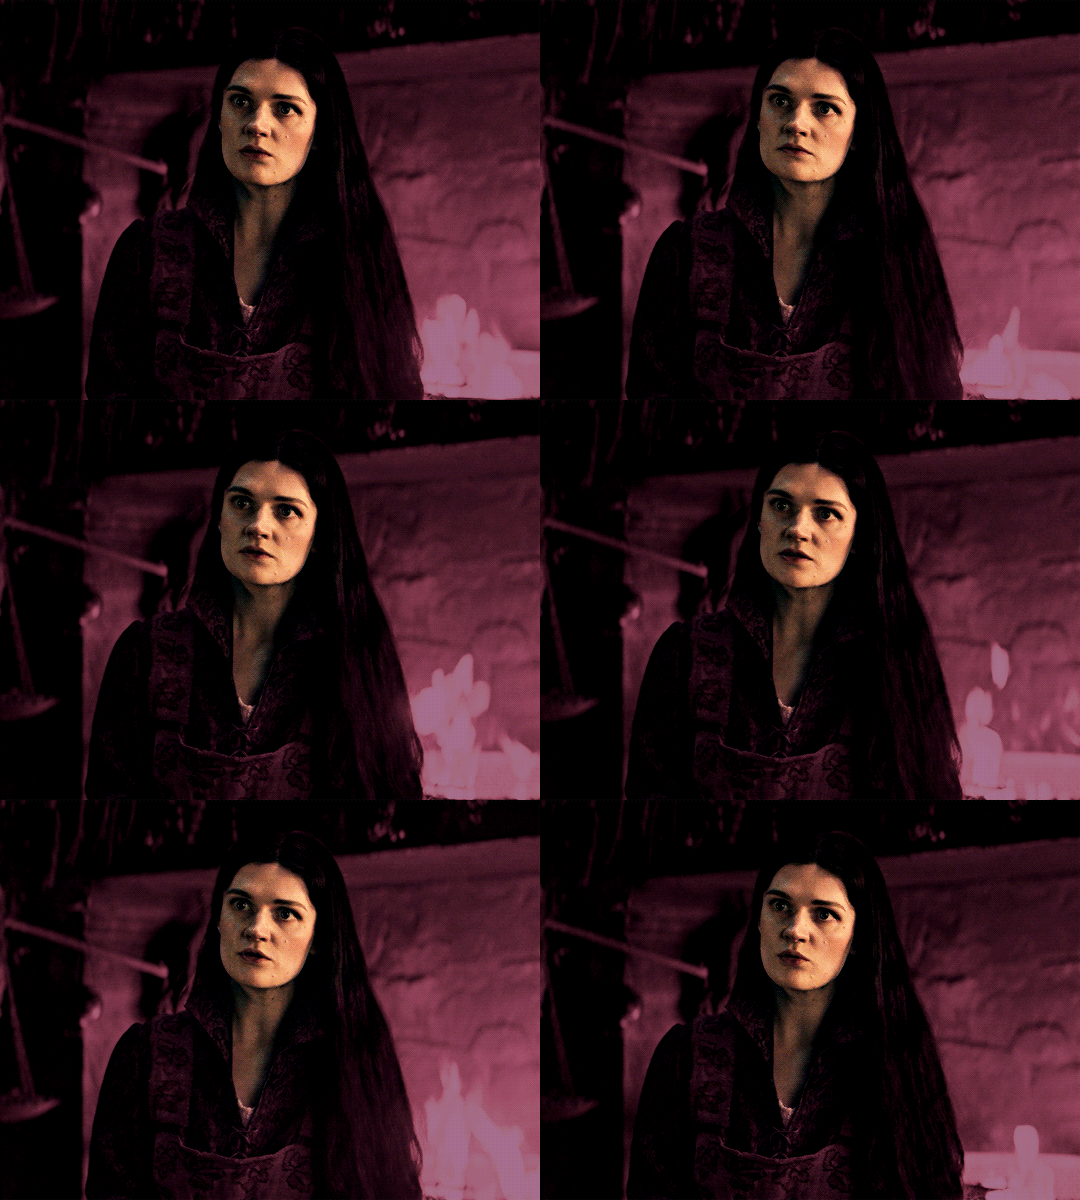
which brings us to our final result:
#usergif#dailyresources#pscentral#ps tutorial#tutorial#coloring tutorial#allresources#userbecca#tusermich#userjoelle#ughmerlin#mialook#*tutorial#**
201 notes
·
View notes