#but the originals were done in inkscape
Explore tagged Tumblr posts
Visit Tumblr Blog
Explore Tumblr blogs with no restrictions, modern design and the best experience.
Last Seen Tumblr Blogs


Fun Fact
If you dial 1-866-584-6757, you can leave an audio post for your followers.
Text
Not to be all final-final-v3 on everyone but I think that actually is it. Having now accounted for a sudden last-minute extra scene in the last fic, I believe that's now a section break icon for every individual point of view in Wishing on Space Hardware.
Some of these won't actually end up being used, since the POVs only occur at the start of chapters, but I like to be thorough. There are still two POVs not covered here: the omnipresent narrator who shows up occasionally to address the reader directly (which is *technically* another character POV, because the narrator has a definite voice, but that'll remain my little secret); and one you'll find out about in the very last fic in the series, which has an icon prepared already, but isn't a singular point of view, exactly.
So yes. Hah! Done.
Now I just need to finish writing that last fic.
Key to the characters represented below this cut:
Eugene | Kudelia | Elion | Almiria | Azee
Shino | Atra | Julieta | Asher | Eco
Yamagi | Akatsuki | Toka | Embi | Argi
Chad | Yukinojo | Gallus | Lin | Liarina
Dante | Merribit | Gaelio | Reuben | Volco
Derma | Dexter | Iverson | Isurugi | Ilyana
Zack | Takaki | Ordsley | Carta | McMurdro
Dane | Sri | Mackenzie | the pluma | Cricthlow
Ride | Sakura | Ahmed | Gargin | The Chief
Hirume | Cucubita | Iznario | Nobliss | Greyling
Pel | Victor | Deira | Dominic | Ms Phiri
#my fic#my art#gundam ibo#gundam iron blooded orphans#g tekketsu#tekketsu no orphans#vector art#I mean not this image#but the originals were done in inkscape
7 notes
·
View notes
Note
The map you did for the interior of Pr is really really good - how did you make it, if you don't mind me asking?
Thank you! I make all my maps using GIMP and Inkscape. For Pr, I drew a heightmap by hand, then applied a gradient to it using the Color > Map > Gradient Map function, and then used the original heightmap with the Filter > Map > Bump Map function to show the relief more clearly. The lakes were done in a separate layer so I could add them over the top last. The names and cities were done in Inkscape, because positioning curved text is a lot easier in Inkscape.
I only recently learned that you can adjust the modes of individual layers in GIMP to do thinks like additive or subtractive composition, which when you're working with grayscale heightmaps is really helpful for topography--you can, for instance, do a topography layer, then create a noise layer and just add that to the topography layer to give a little more texture to the whole thing. You can also make features in different layers overlap nicely by using the "Luma/Luminance Lighten Only" mode, for instance.
My favorite tools for making heightmaps in GIMP are the airbrush and smudge tools--I like to rough out terrain using the airbrush, and then use the smudge to shape it in more detail, and add like erosion and stuff. You can rough out large terrain areas like that and then go back over them later to add more detail when you're happy with the large-scale features. I still haven't found a tool or program I like to add very fine detail, like small-scale erosion or very intense cratering, though. You could do that stuff by hand, but it would be pretty exhausting.
7 notes
·
View notes
Note
I promised a question after the hihi-GRANDFEST premiere, so here it is!


So like you may already know, I am in love with the new editing style, and I would really love to know what kind of things you used to make something like this! It's so Y2K now and it fits your aesthetic definitely :D

If you're asking what software, it was mostly done within Davinci Resolve. Some stuff like the end card and particular shapes like the stage graphic were done in Inkscape.
What really makes it y2k is the graphics themselves and their inspirations. Here's some images and stuff that I worked off of:

Techno Drive, a driving simulator arcade game. Took the thin line around all the graphics and the header above.

CROSSNIQ+, a neo-y2k puzzle game. Got the idea to have the art in the middle and being able to display a moving background behind. Though I have yet to use different videos due to time constraints.

The PS Vita music player. Needed a look for the music graphic, this made me go harder into the music player look. Originally wanted the album art to be a rounded square. But I changed it to a circle to better fit the other graphics.

Super Mario Sunshine. Really only took this curved text box look.

GetMadz's Wii-styled animations. Honestly need to do more to compare to this guy's work, even if I'm not going fully into the Wii type of look.
Then there's stuff like the bubble-like graphics, the use of white, the scanline pattern. Then there's some more modern flair like the halftones for the background and transitions.
#neo y2k#y2k aesthetic#y2k art#speedpaint#youtube#ask#thanks for the ask!#ask me stuff#ask me questions#ask me anything
5 notes
·
View notes
Note
I'm curious about your rebuilding process - I had never played a Lovestruck game before but I did follow some people who were quite into those games when Voltage shut down. I know there was a ton of Lovestruck/Voltage games so I was still sad to see that all go, hats off to you for recreating all of this and sharing this with the internet. Do you recreate all the art yourself? How do you go about getting the writing for all these stories - is it a lot of scouring the internet, or did you have files of the games to reference? I'm genuinely just curious about your process, not trying to be nosy, so if you feel like talking about it I'd love to hear it :)
Sorry for the slightly long post but this is how I made my Love & Legends remake.
So first of all, I need a copy of all of the game assets to remake the entire game. (This means backgrounds, character sprites, music etc...) Without a copy of the original game assets, remaking this game would be next to impossible. Luckily, a couple of Lovestruck archive groups have managed to recover and archive the game assets from the Lovestruck app before it shut down, so I just had to download the game assets from their archives so I can use them for my remake. I was missing some VFX assets for the game but fortunately someone here on Tumblr was kind enough to remake those for me.
Next, I needed to start building the foundations of the game and make sure that the game assets shows up in game correctly before starting work on remaking the game. For the game engine, I'm using Ren'Py and for creating and modifying assets like menu buttons and making small adjustments to character sprites, I've used both GIMP and Inkscape.
Once the foundations of the game is in place and some of the character sprites is built, I started to rebuild each route from the ground up starting with Helena. To help me achieve this, I found some route transcriptions from a Lovestruck discord server and found multiple recordings of each route from Love & Legends from a bunch of different sources from YouTube, Tumblr and Discord. I then used these recordings to rebuild each episode as accurately as possible.
And that's pretty much it. Just remake episodes from each route and upload them onto Itch.io once I'm done.
9 notes
·
View notes
Text
Regarding More Shapes + Raves + the blog's future
So you might be wondering why I mostly moved on to making Kirby fan art and other interests, from making the S3RL Trilogy. This sudden loss of interest in making MSPR wasn't explained very well by me, but given the current state of things right now, I should say it.
Right now, the old iteration of More Shapes + Raves has been considered "canceled". This is mainly because of the comic's development being hit by major scope creep coming from suggestions made by my friends and myself. With a scope so huge, the comic's ideas became disorganized and very arbitrary, unnecessarily causing too much growth and less motivation to make the comic.
A plan I have been considering for a long while is to reboot MSPR. The core concepts (such as Raver Dimension, Neko Nation, Rave Six, etc.) will be retained, however I'd need to change up some things to prevent a potential case of scope creep coming for the reboot, such as the addition of unnecessary ideas and songs. Given the return of activity on the Interdimensional Library Discord, MSPR's reboot might be one more chance to spring the comic back in action.
Some things to keep in mind for the MSPR reboot:
All panels will be remade in a 1920x1080 resolution to match the highest screen resolution rendered in Just Shapes & Beats. They will also all be made in Inkscape, in comparison to past S3RL Trilogy panels, which mainly made use of MediBang Paint.
The musical aspect of MSPR may be potentially toned down. I haven't been in the mood lately to make musical songs for stuff like lore, backstories, etc. Instead, MSPR will continue the traditional storytelling and dialogue that the previous stories (Hexagon's Adventure and Fiveside Force) have.
The playable flashback acts will be completely removed. Think that's way too much from the original scope. These will be relegated back into regular cutscenes.
The intro act may be completely changed. I think there has to be a more coherent reason why Fresh rediscovered the Ravortexia in the first place, not just by finding some random book on the ground.
Some songs will be retained, but there might be some new ones too. Additional fights that were introduced in my Mixtape concepts (like Endless Summer) may be re-incorporated into MSPR.
The Rave Six, as of now, is based on guest characters that represent the vocalists of various S3RL music, and other celebrities and friends in real life. To lessen the connection to the real deals, some names of the characters will be changed. I've done a few ideas with HexaCryonic about this.
Most importantly, the skeletal structure of the lore and backstories used in MSPR will be kept, but they will be refined over time for a more coherent storytelling. This includes the backstory of Raver Dimension, Fresh, etc. while also coherently tying it in with aspects of JSAB Story Mode including the Lost Chapter.
Teasers will be handled better, as I might include things like more song hints, WIP art teasers (in the Interdimensional Library server), and more.
Regarding where the MSPR reboot will be posted, they'll be posted to any Just Shapes & Beats servers that I'm in, but these will be the most active places where you can find the S3RL Trilogy and MSPR:
This blog (obviously). @pentriahex
Interdimensional Library (JSAB Comic Server, where S3RL Trilogy also gained popularity there)
Berzerk Studio Official Discord
r/kirby Discord
These are just some of the basic plans I had in mind for a potential MSPR reboot, and there might be more in the making as the reboot plans are still developing. However, this is not all what I have in mind:
Raverian Encore: MSPR & S3RL Trilogy Extra Mixtapes & More
If you have been following my works in the Berzerk Studio official Discord server, you might have noticed I've been developing some "extra levels" that still have ties to the MSPR theming. Most of the time, these are levels that have very arbitrary song picks.
If you don't know what extra levels are, these are levels in Just Shapes & Beats that do not have any ties to the main story, and must be unlocked by other means (eg. collecting Beatpoints, performing certain actions, etc.) There are already obvious examples such as Tokyo Skies, Paper Dolls, and even tracks like Deadlocked and the Strike the Earth (Shovel Knight) remix by Danimal Cannon, but I'm sure you'd already know that by now.
The songs revealed for Raverian Encore were:
Caleb Hyles & Ironmouse - Omae Wa Mou (Silva Hound Remix)
Crispy & KungFuFurby - Electrospire (from SMW Central Production 2)
Shirobon - Counter Format
S3RL ft. Lexi - Heart Thief (Promoted from EleCyon Mixtape)
I'll be eventually posting these later on the S3RL Trilogy blog, but this is not important right now. I want to discuss more about how I'll be handling extra content going forward:
Scrapped levels and arbitrary level concepts will most likely end up in these so-called "extra mixtapes". Notably, there will be three mixtapes, each containing new levels that are tied to the theming of the three stories in the S3RL Trilogy.
There are three colors of mixtape: purple, green, and yellow, corresponding to Hexagon's Adventure, FIveside Force, and MSPR.
The purple mixtape is called "Extragon-N-On", and is obtained after completing the OctoChaos boss battle in Hexagon's Adventure.
The green mixtape is called the "Side Five", obtained after liberating Planet No. 5 in Fiveside Force.
The yellow mixtape is "Raverian Encore". I planned this to be given by the Rave Master after Triangle begins his quest to reassemble the Rave Six in Act 1 of MSPR, and I'll keep that too for the reboot.
The old iteration of More Shapes + Raves will be archived as a separate thing when I make the S3RL Trilogy downloadable in the future.
Some scrapped levels and even mixtape levels may be subject to being added in the MSPR reboot, but this is purely based on my decisions.
Concept art and the MSPR plan documents may be shared in a separate download if I do decide on doing that.
The future of the blog
Right now, More Shapes + Raves is still being re-developed as a reboot, so I can't say I'd be posting much of the comic here. However, since this blog is designed for the S3RL Trilogy in general, I'd want to clarify some things:
I originally planned on reblogging most of my old comic posts from Hexagon's Adventure and Fiveside Force on my main, which also used to be the S3RL Trilogy blog before rebranding as my main Tumblr account in general (which also has a main focus on Kirby fan art). However, I decided that I'll be just making new posts on this blog for Hexagon's Adventure and Fiveside Force, as I do plan on rewriting most of the comic captions and dialogue.
The state of the comics will be kept as is, with some exceptions. I really should note once again that Fiveside Force admittedly took way too much from Decagon's JSAB comics (which are sadly cancelled as of now), and as a result I'd need to remake some of the panels.
In regards to the above, the worst offenders I've seen were that one PentaBoss scene in the Perfect Rave battle and the meet-up of Lord Apeirogon with Marga in the introduction of Act 4, and I'm not sure if the entirety of Act 1 and the Monsta boss battle in Act 2 counts. In this regard, such quality does not match up with my current standards, as I've now strived to push for more original content nowadays, and as a consequence I'll just be remaking some panels in Inkscape.
There will be now unique tags for the blog's posts, which I will explain in the following section.
If ever the S3RL Trilogy has concluded, there are plans for the blog to switch over to just being a comic blog for my Just Shapes & Beats universe in general. I also plan to repost some of my old Tumblr ask art for posterity purposes, and also revive an old JSAB Flower OC I've adopted from the Bountiful Blossoms JSAB adoptable blog (thank you once again).
Anyways, next part is least important but is something I'd want to talk about in the event I do plan on posting comics to the blog:
Blog Tags
I'd want to promote the use of blog tags to make it easier for people who want to navigate my comics. The planned tags would be:
#hexagon's adventure - This is for posting comics related to Just Shapes & Beats: Hexagon's Adventure.
#fiveside force - This is for posting comics related to Pentagon & The Fiveside Force.
#more shapes plus raves - This is for posting comics related to More Shapes + Raves
#the s3rl trilogy / #s3rl trilogy / #s3rltrilogy - These are the main tags of the blog in general.
You may also use these tags in fan art, just be sure to tag this blog or send me an ask for posterity purposes. I'd like to see what you've made.
Anyways, that's pretty much it then. I hope you are still patient enough to look forward to the eventual revival of MSPR and to the blog in general. Thank you for the patience and the long read, and I hope to see you again soon.
If you also want other non-JSAB content, you are free to check out @cyonofgaia, which is more dedicated to all my passion projects in general.
#s3rltrilogy#the s3rl trilogy#s3rl trilogy#just shapes and beats#jsab#fancomic announcement#hexagon's adventure#fiveside force#more shapes + raves#mspr
3 notes
·
View notes
Text
Thanks @duskffyart for this Melo design, here's my try to draw them on Inkscape

I've decided to call it Seloetta because I have friends called Jeloetta and Neloetta so I wanted to keep the tradition ╹▽╹
If you haven't, throw some follows and commissions (unlimited slots) to them since they is unemployed and need all the help possible
You can watch the original drawing + ref here!!!↓↓↓
0 notes
Note
AI generated art is theft, do you have to have an AI Art Profile picture?? It really bums me out ):
Yes, I was using an AI profile portrait. It was one of those early photo style edits from before the AI art stuff really blew up. The photo it was based on was of me and taken by me. Still, I recognize that it is inexcusable laziness and complicit in theft almost certainly committed when the AI was trained. It was a placeholder which is overdue for replacement. This new vaguely heart shaped icon is one I created myself with a freeware vector art program called Inkscape for use in my book. It is based on a heart shape which I think is old enough that no one is quite sure where it's use started. It's also meant to resemble a pen nib. Pen nib shapes are largely functional and whether you would judge their origin in Roman ruled Britain in the 40s AD, or Egyptian reed pens far before then, those are both a bit past the copyright cutoff Mickey is staring down. I don't think I can get any more theft-free than that and still use a standardized web image format. I could be wrong. Posting publicly on the internet is an efficient way to be corrected and learn. I think I'll add some genderqueer colors to it after I'm done writing this. While the genderqueer flag was designed by Marilyn Roxie, it's covered by Creative Commons Attribution 4.0 International License so I think I can use it without taking food from the mouths of creators. I also own commissioned cover art, which I did not draw, but I own the reproduction and modification rights. If I wanted to use that for a bit more color, do I credit Angrboda in my profile, or a pinned post? Do I post the artist's legal name to avoid confusion with the norse goddess? Is it enough that tineye will reveal its origin? I haven't seen anyone else posting citations for their avatars, so I do not know the appropriate convention. I'm not sure what is enough. I also love the art of simz, but I have not commissioned a piece from them. Is there a way to use their art in an avatar without bumming you or other folks out? Is it enough if I'm a contributor to their patreon?
In addition, I've probably used one or two Felix Argyles in my few 'original' content posts which were not illustrated by Shin'ichirō Ōtsuka, and some backgrounds which may not have been either stock, meme template, or from recognizable intellectual properties. (I made a few of them while drunk-posting on a friend's couch, and probably didn't click through my google image search to check.) I'm not sure if they represent fair use, but I don't think you were raising a legal complaint, just feeling bummed about art friends struggling to commoditize their creativity in a capitalist society that is predatory toward small business, so I'm not sure what to do to cheer you up. ☺
0 notes
Photo


repainted my kitchen cabinets 🍋 🍊
progress steps w photos below:
first I found a wallpaper pattern to use as my inspiration/reference (I went with this one). then I took screenshots of the different design elements I wanted and imported them into inkscape (a free alternative to adobe illustrator) and made simple vector outlines to use as stencils
ex:

in terms of designing the stencils, they weren’t perfect, but I mostly focused on trying to maintain the major shapes of each piece of fruit that I would have the toughest time replicating on my own
once I had all my stencils, I roughly figured out how large I wanted the oranges to be on the cupboard and then sized the stencils accordingly in InDesign on to as few sheets of paper as possible. I did two versions of everything — one with the oranges at about 4″ diameter and one at 5″ diameter with everything else scaled accordingly. then I printed them out on printer paper and roughly cut them out:

to actually make the stencils was a little bit of trial and error. I went to michaels looking for sheets of acrylic but couldn’t find what I was looking for, so picked up a sheet of corrugated plastic. used mod podge to adhere the paper cut out to the plastic and then cut out the shapes, but the cut-outs were a little rougher than I’d hoped and actually applying paint turned out a little less clean than I wanted. I also picked up a sheet of thicker acrylic from home depot intended for replacement picture frames, but that was too thick and totally unworkable, so finally I caved and ordered some mylar sheets intended for making stencils off amazon. i do hate ordering from amazon but the mylar was pretty perfect

once i’d used mod podge to adhere the paper outlines to the mylar, I used an xacto knife to cut out the shapes which was pretty painless. now it was time for painting!
I had an interior semi-gloss paint picked out that I wanted to use for the border so first mixed it with white to lighten it for the background

once the background had dried, I started with the stencils. I used simple acrylic paint from michaels — I bought larger bottles of orange, yellow, green, white, and black, and then a sample pack with a variety of colors to use for mixing. I started with the leaves in the background and then just kept layering colors on and slowly adding the citrus stencils on top:


for the oranges and greens (but particularly the yellow) it took quite a few layers of paint to build up until they were opaque and I could start doing the details on top. as I learned too late in the process, adding titanium white to the yellow helps strengthen the opacity.
once I had all my base colors done, I went back over to add some shading, and then finally did another pass just with white paint to add the highlights. I wanted it to have a somewhat stylized look so I wasn’t stressing too much about everything looking perfect


from the first to the second, I ended up going over the flowers because I wasn’t that happy with how they’d turned out and also added more fruit to fill in some of the blue.
next, I took my original paint color and added in the border, then used a semi-gloss water-based polyurethane to cover the acrylics to give them some protection and give everything the same sheen:

and that’s it! I definitely could’ve kept tweaking the acrylics forever but overall I’m very happy with how it turned out
#they're so cheerful and make my kitchen feel so bright I love them a lot#i don't do much art these days but it was really fun having an excuse to hang out and paint for a few days#diy#crafting#home decor#art
23 notes
·
View notes
Text
Isis flag

“I seem to be the only person that’s spotted this, and nobody seems to be raising any questions or pointing it out,” said CNN reporter Lucy Pawle. The Secret Service says it is 'aware' of a photo that appeared to show an image of an ISIS (also known as ISIL or Islamic State) flag in front of the White House. So CNN, as is its wont, blasted the headline “ISIS FLAG SPOTTED AT GAY PRIDE PARADE” for a rollicking seven-minute segment, even going so far as to pat itself on the back for the “scoop.” Indeed, during the network’s live coverage of Saturday’s gay pride parade in London, an intrepid CNN reporter claimed that she’d spotted an ISIS flag among the rainbows. “The award for greatest moment in global Pride celebrations actually had nothing to do with gay marriage, and everything to do with the idiocy of CNN,” said Oliver. Explore 'Isis-flag profile at Times of India for photos, videos and latest news of 'Isis-flag. And the outrageous screw-up served as perfect comedy fodder for satirist John Oliver on his excellent HBO program Last Week Tonight. 'Isis-flag News: Latest and Breaking News on 'Isis-flag. Saipov, who was shot in the stomach by police, was. One of the biggest foot-in-mouth moments came-of course-from CNN during its coverage of London’s gay pride parade on Saturday. Saipov requested to display ISIS’s flag in his hospital room and stated that he felt good about what he had done, the complaint states. The words ISIS is COMI had been spray-painted on a wall on the school’s east side, KUTV reported. It was the day the Supreme Court, in a landmark 5-4 ruling, legalized gay marriage for all Americans-including the 13 states where same-sex marriages had been banned.There were mostly positive reactions to the SCOTUS ruling, as well as some strongly worded dissents from Supreme Court justices Antonin Scalia and Clarence Thomas. The American flag was left shredded at the scene.
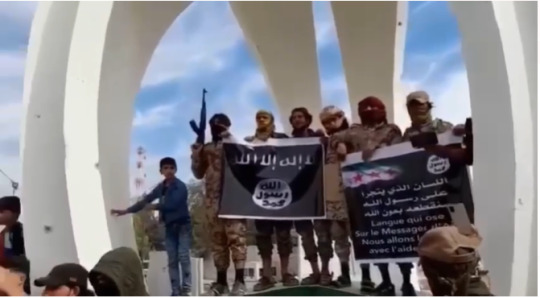
No other changes.Friday was a historic day for America. But the video of the flag being raised appears to show younger children chanting Isis slogans, which may suggest that indoctrination is being led by women in the camp, according to one expert. The flag contains two parts of the shahada, an Arabic declaration of Islamic faith which asserts that Allah is the one true God and that Muhammad is his prophet. The graphic image depicts the 23-year-old Egyptian feminist, artist, and social activist Aliaa Magda Elmahdy facing the camera, nude and menstruating over the Islamic State flag, IS painted in. This is a flag known by some as the Black Banner. Higher svg resolution from same file: resized by "Inkscape". This Dildo Flag Was Mistaken For An 'ISIS Flag' By CNN. Svg image based on press photographs (original 2007 upload apparently based on a picture of the "Official website of Islamic State of Iraq" which can not now be traced press photographs showing this flag first appear in early 2006).Ĭlick on a date/time to view the file as it appeared at that time.Īligned "svg" image scale (1000x1000) to page size (1000x1000). (more precisely, the "seal" design is based on a 1980s facsimile of Ottoman era copies of letters written and sealed by Muhammad, in which the copyists had manually inked the seal impression the jihadist flags seen in press photographs do not show the seal as circular but in a slightly irregular shape that faithfully mimicks one particular such specimen see w:seal of Muhammad for details).Īlso note that the representation of this seal formerly uploaded to commons but since deleted is merely a graphist's "fictionalisation" of what the seal might have looked like the actual artefact on exhibit as the "seal of Muhammad" in Istanbul is rectangular) It shows the shahada in an arrangement that includes the image of the historical "seal of Muhammad" This particular version is used by the "Islamic State of Iraq" and by al-Shabaab in Somalia.
Description Flag of Islamic State of Iraq.svg
0 notes
Text
The Making of Insectoid (Part 1)
Several weeks ago, @whistlingwindtree complimented me on my icon, prompting me to talk a little bit about it. But it also reminded me that, back when it was new, I had planned to write a page covering how I made the thing, and post it on my website. Obviously, that never happened (because social media, fanfic, and everything that goes with it crept in and took over my life), but now that I'm out of school till August, I have more than enough time to tell this story properly.
Tagging those who expressed interest: @raksha-the-demon @frozenartscapes @shardsofarendelle @carrieasagiri @grrlgeek72 and @above-d-clouds. Wall of text and pictures below the cut!
Disclaimer: I would really appreciate that these images do not wind up anywhere else, on Tumblr or otherwise. I trust most of you to do the right thing, but this is Tumblr, you know.
The Name of the Bug.
I suppose I should begin at the beginning, and explain the origin of my screen name. Now, I was a fairly avid Lego builder when I was young; it's lesser now, because of Real Life and Social Media Distractions, but a significant portion of my closet is filled with it. 😂 Anyway, about 20 years ago, Lego's newest building system was the Insectoids, which look like this:

[That's my own scan, BTW, of the #6907 instruction manual. No point in hoarding Legos (and instruction manuals) if I don't show them off sometimes . . .]

Now kid-me, being an avid builder, and seeing that these sets were TOTALLY WICKED looking (and since I'd always liked the space sets in general), wanted every single set. (We didn't accomplish that for many years, but some deals on eBay finished the collection eventually.)
Around the same time (late 1999 or 2000), my dad discovered a computer game for Linux that had been around for several years, called XPilot. XPilot is a arcade shooter sort of game, largely influenced by Atari's Gravitar (which my dad also enjoyed), and a game inspired by it, Thrust. As such, the game has fairly simple graphics, but has endless potential for customization, both in the server program (which runs the "map" or world you play in) and in the client program. Most importantly, it is a multiplayer network game, gathering users from around the world, with a "meta server" that shows you what XPilot servers are running and who is playing, and allows you to join them. (Despite the game's decline in popularity, by the way, the meta server is still running.)
Because it's open source, XPilot was soon ported to other OS's, including Windows. My dad, brother, uncle, and I started playing around what I would guess was the peak of interest in the game; it wasn't too many years before human players started becoming scarce. Here's an example of what XPilot looks like, captured from a game I played in 2016, using the teamplay-optimized fork of the original XPilot client:

[Full-res image is HERE. That's my ship in the middle; the heads-up display shows who I'm targeting and what items I have, while the list at the left shows the players in the game, which on this map are mostly robots (R).]
Anyway, back to my story. (If I carried on explaining the game, you might be stuck here reading all day.) The short of it is: when we started playing XPilot, I needed a suitable nickname, and my latest Lego obsession fit the bill. (As a side note, at the same time, I gave my brother a nick that complements this one: Arachnoid (or just Spider). This earned us the collective nickname "oids" from a few players. 😂)
The Ship(s) of the Bug.
The spaceship that you fly around in XPilot, or "shipshape", can be whatever you choose or draw yourself, as long as it follows the predetermined rules. Anything from a simple triangle—

[This is the default ship, if you have no other ship set.]
—up to a custom-drawn polygon of 24 vertices:

[Insectoid XII, 2012.]
The Insectoid ship here, "XII" or "Mk 12", is the twelfth iteration of its design going back to 2000:

[Twelve years of artistic tweaking. Note that "I" is not here; it was lost long ago, but looked similar to "II". "IV" and "VIIIB" were seldom-used prototypes.]
These are, of course, not the only ships I've designed. Being artistically-inclined, I have, to this day, drawn 350 different ships. (The bulk of these can be seen on my website.) Now, because XPilot ships are simple polygons, it's fairly easy to make a graphic of one to use as an avatar online. For a while, I did use a screenshot of my ship, hand edited in MS Paint and filtered in IrfanView to look more flashy:

[Insectoid VII, 2007, firing missiles.]
I used that method to make avatars until about 2011. With Insectoid XI being more hexagonal in shape than its predecessors, I added an extra background feature to the drawing:

[Insectoid XI, 2011, with honeycomb background.]
In 2012, I discovered Inkscape, and eventually started using it to make vector graphics for my webpage. The first thing I did, though, was convert my entire XPilot ship file at the time to a PDF, and thence to individual SVG images. From there, I improved on my previous avatar-making process to present my newest ship, "XII", with the clean lines and filter effects only a vector graphics program like Inkscape could produce:

[Insectoid XII, 2012, with honeycomb background. The engine exhaust was done using a "film grain" filter, and glows with multi-layer opacity tricks.]
I was content with that for almost two years. In 2014, I decided to try something a little more ambitious: a 3D model.
Next: from vector image to 3D model . . . and back again.
[Continue to part 2]
#bug musings#bug tells a story#the making of insectoid#xpilot#bug does art#bug knows inkscape#(or at least I do now XD)#precisely on schedule#(edited to add link)
17 notes
·
View notes
Text
Okay I’m bad at drawing but lord if I don’t know my tools.
So, digital art is a very, very wide field. If I were to break it up arbitrarily, I’d list these rough categories:
Digital drawing - this is where you use the brush tool on your Photoshop or GIMP or Krita (I'm partial to Krita for this) and you take your mouse or tablet pen or finger and you just. draw. like on paper. Once you get the drawing done you can go in on coloring - I generally do flat tones first, then fiddle about with trying to shade and tint after the fact. Make use of your layers here - try and keep each step of the process separated on different layers. This makes it much easier to change one specific bit without messing up a lot of other stuff you have going on. (Also if you're doing coloring and shading/tinting/etc, try out the different layer blending modes. I really like using 'multiply' for both my original color and shade layer, and 'screen' for my tint layer - and if you don't know what that means yet, don't worry about it too much for now).
Image manipulation uses much of the same toolkit as digital drawing, but it's much more about taking an existing image/images and modifying it. These are your 'photoshops' as both a noun and verb. Stock and original photos as well as Creative Commons/Royalty Free artworks are the best to use for this, because most often other types of art require permission that can range from 'somewhat difficult' to 'the artist considers it insulting that you asked'. Image manipulation skills, such as applying filters and creating good masks (like a black-and-white layer that affects what parts of the actual image are affected by something) are also really good to get familiar with if you like digital drawing. Also this is good for making memes.
Pixel art (obligatory 'but it's all pixels' aside) involves zooming really far in on a small image and working on individual pixels. This is really just like, a lo-fi version of digital drawing, but the space you're working in is much smaller so it's easy to feel like you have more control over the final image. The techniques for producing certain effects are also different from your standard pen-tool drawing, but they're also really well discussed and documented if you go looking for them. Pixel art also often uses a reduced color palette, if the artist is trying to (for instance) emulate the look of a certain video game system - whether it's the SNES's palette or the Gameboy's four-shades-of-green/gray or even the 1-Bit full-black-or-full-white style, limiting your color choices can help reduce the feeling of being overwhelmed by choices if that's a problem you have. There are dedicated pixel-art editors that also have good tools if you decide to branch into animation - Asesprite is the most commonly used one, but I'm personally partial to Piskel myself.
Vector art is a completely different workflow and set of skills than all of the aforementioned types of art ("raster art", if you were curious). Vector art involves, essentially, defining the lines and curves that make up an image. This can result in much cleaner and more precise lines than digital drawing, but it comes with a lot of trade-offs until you get really used to it. The central tool that you're likely to be using is Inkscape (or like, Adobe Illustrator, but come on are you really gonna fork over to them?). Vector art is also the primary basis for most modern digital 2D animation, as anyone working in the lineage of Adobe Flash could attest (and before you say, 'doesn't flash animation Look Bad', I'd like to point you to most 2d-animated cartoons from the last decade [which have often been made with Flash and its successors] and say, 'yeah, sometimes, but you can also produce stuff that Looks Good'). One thing to note is that it is much more difficult to produce good looking color blending with vector art - it's doable, but flat colors are much easier.
3D Modeling - this is very much like vector art in many ways, except most of the time you don't really work with 'curves' so much as 'a bunch of really short lines that, when looked at from afar, look mostly like a curve.' The jump into 3D is intimidating, and the toolsets provided by programs such as Blender only make it moreso, but once you've made a few things you really start to get the hang of it. 3D modeling also requires at least cursory knowledge in a few of the above-mentioned fields, because once you have your model you're going to want to give it a coat of paint (or else it'll just look like, flat white). Part of the reason why Blender's interface is so complicated is that it's trying to function as an all-in-one tool - it does the modeling, but also animation, but also the texture drawing, but also everything necessary to make those all work, but also like, game logic and shit. I swear by it, but there may be simpler tools out there that I don't know about for getting your feet wet.
A lot of things can be made easier if you have like, a drawing tablet or smth - cheap ones go for like, I want to say around ~$40 US online, and they're plenty good enough for starting out. I'd just recommend getting one of a reasonable size, bc it does map to like, your whole screen by default.
Also, I assumed you meant like, 'visual art' bc you talked about colors, but like, music is art too and I have a whole different set of tools for that if you're interested.
someone teach me literally everything about digital art but like i have never even heard of what a color is
#long post#also like if you're bored sometime take a look at the 'tools' section on itch.io#there are some neat things there that range from 'highly useful' to 'neat toy' and it can help w/ creative inspiration#also can you tell that i've written basically this same spiel like a half dozen times before?
4 notes
·
View notes
Photo

Project #1
Introduction and Learning Outcome
I want my final project to encompass some of the interesting artifacts related to how information institutions have evolved, ie libraries, archives, and museums. These changes have been to keep up with the changes in technology, interests, the economic challenges, and the current added parameters of the pandemic.
This first graphic looks at the technology changes.
Learning Outcome: "Librarians will be able to recognize how technology has changed in information organizations to better perform in their field."
Original Files and Licensing
Cuneiform- https://www.google.com/url?sa=i&url=https%3A%2F%2Fwww.britannica.com%2Ftopic%2Fcuneiform&psig=AOvVaw1XvOBP9WfTEiRBTfYgSNI8&ust=
1604376172414000&source=images&cd=vfe&ved=0CAIQjRxqFwoTCIjFuJL94uwCFQAAAAAdAAAAABAD
MP3 Player –
https://images.unsplash.com/photo-1421757350652-9f65a35effc7?ixlib=rb-1.2.1&ixid=eyJhcHBfaWQiOjEyMDd9&auto=format&fit=crop&w=500&q=60
E-reader –
https://images.unsplash.com/photo-1594498257673-9f36b767286c?ixlib=rb-1.2.1&ixid=eyJhcHBfaWQiOjEyMDd9&auto=format&fit=crop&w=500&q=60
Captured Images:
+Bookcase
+CD Stack
Used Gimp and Inkscape
Techniques
Raster -
Basic = Change image sizes, rotate, adjust brightness/contrast, adjust color vibrancy, adjust hue/saturation, subtracted from the selection
Advanced = Add objects by cloning, remove a large object, add texture, create a graphic shape
Vector -
Basic = Cut and erase, add a line of text, format text, draw simple shapes
Advanced = Reshape text, use paths, and recolor artwork
Design Elements
Contrast: Used darker bookcases with white text and lighter, brighter backgrounds
Repetition: Used clone stamp tool on the bookcase to make it look like a uniform set, used the same bullet points and font through out
Alignment: Lined up the text elements to the image and their rectangular surrounds
Proximity: Had the descriptions close to the elements they were defining/describing
Reflection
I learned more about vectors in this process, I only ever took one illustrator course. When it came to raster images, I had previously done a lot with gimp and photoshop. I relearned some techniques I had not used in a while. The critiques helped me to clean up the images and make them clearer to see.
I like the element choices I ended up working with.
0 notes
Photo

Part of how I got into creating infinitely-scalable show-styled ponies was from how off-putting little things like this were (and still are) to me.
Short answer: Z-order blues.

Long answer:
Well, even though this only concerns the goggles and ears, let’s start by reconstructing Soarin in his entirety, just because we can 😜:

Aaaand take a closer look at that head:

Just looking at it, the layering probably would’ve looked something like this on the Soarin puppet used in the show by DHX:

The goggle strap needs to be above the ear, yet, also under his mane and the goggle itself, which is already layered underneath the ear.
Now, because one of the general principles of vectoring something to reproduce means it’ll be a still image as opposed to something that can look nice in-motion or be animated easily, any defects will be preserved or frozen to be seen by anyone unless they are fixed. And that’s basically what we’re going to do, by making his strap appear to go over his ear, but also tuck under the goggle and through his mane (however way it seems to work in the latter):

All that really needs to be done is to duplicate the goggle strap so that even in pieces it’s indistinguishable, and cut it so it’s away from the objects it’s supposed to be layered under (the new object is labeled as “Goggles 1″ and colored green here; it’ll be colored the same shade of yellow normally).
...Unfortunately, while Inkscape is proficient with many things, the filtering or antialiasing of different objects on top of each other is one that it is not. It’s especially noticeable when the colors are different, even at a small, less zoomed-in scale, like the lightning rings around the sleeves of the Wonderbolt suit. Specifically the thin bit of blue filtering on the edges of his legs where the lightning rings are:

Using the goggle strap as an example, we’ll duplicate the object again, and cut the duplicate and the original in a way where there’s little overlap (but not too little, or a sub-pixel thin gap between the two objects will be noticeable for the same reason the filtering overlap is visible):

...And on the legs, we’ll clip/mask them into two pieces so there’s little overlap with the lightning rings; the opacity of the lightning rings was reduced to show the gap in this comparison. While the result isn’t that the antialiasing is necessarily completely unnoticeable, the effect is ideally “satisfiably less” noticeable:


(This supposedly wouldn’t be an issue on Adobe Illustrator.)
...And for the last thing, like a previous Soarin vector, I wanted to swap that goggle model so it’s no longer a rip-off of the female Wonderbolt one, since at least on the Season 1-5 models they were distinct (and looked more-three dimensional, at least with a slight modification in position):


Aaaand the end result:

Not that I’d know, but something like this would probably still be more-difficult to animate in the same fashion. Just a little disclaimer that as “easy” or “simple” a fix like this might be, that I don’t claim to animate as good as the DHX animators do.
In any case that’s just a little pony vector mini-demo of sorts for you, since I can’t say I’ve done anything of the sort on this tumblr yet. 😊
#not art or vectors#or is it#secrets and pies#pinkie pie#soarin#inkscape#my little pony#mlp#mlp season 7#vector demo#vector refurbishment
14 notes
·
View notes
Text
Week Eleven
This week I focused on doing more token designs as well as figuring out the hex layout for the board. Originally, we were going to have 53 hexes, which with how they were laid out, looked able to fit in a perfect square. But, after putting the hexes into Inkscape and placing it inside a square, it turned out to be longer one way. So, I added two new rows of seven hexes, making the total hex count 67.
I also cleaned up the police force token, giving him a high-tech visor over one eye. It may end up looking a bit too similar to our eventual cyborg token, though it wouldn’t be much of a problem because of how in a cyberpunk world, everyone is geared with cybernetics and robot parts. At one point I asked the group if we should backtrack and draw the designs, rather than doing them in the simple shape vector drawings I’ve already done, but decided to keep rolling with the style already in place.

For next week I want to be prepared to continue making a demo for our game, and to further brainstorm our Black Market card effects. I’ll also be doing more token designs and may start gang leader card designs, as well. The board design also should begin soon, which I will probably task one of my group members with.
0 notes
Text
This Oldest Map is a Beauty
The oldest surviving Latin diagram of the world was rediscovered by accident in the Vatican Library in the 1920s. Youssouf Kamal (1882-1965), an Egyptian prince and aesthete, had financed a huge undertaking to publish a collection of ancient maps depicting Africa fully or obliquely. While combing through the Vatican, the scholars stumbled on a lavish, full-page colored spread, folios 64v-65r in Vat.lat.6108, which had been completely overlooked in all previous historical research. A few weeks ago I digitally plotted a simpler diagram of similar age which is now held by the archives of Albi, France and has been recognized as a UNESCO world heritage treasure. The Vatican Mappamundi was drawn in about 760 or 770 CE and has been a good deal more difficult to plot, since the photographic images compress the central part into the gutter of the book binding.
This is the first-ever color plot to be published. Zoom in and you will see that the diagram has south at the top and therefore Europe at bottom right. The scribe evidently turned the parchment and wrote place names from every side. Six cities are represented by star-shaped symbols: Constantinople, Rome, Alexandria, Carthage, Jerusalem and Babylon. The big island at left is Sri Lanka and at lower right are the British Isles. The meaning of the "fourth continent" at top right has been much debated. The crescenty things on the rim are thought to represent sun and moon. The current received wisdom is that this is a Christian adaptation of a diagram which had been used to teach (secular) geographical knowledge in late antique schools in the Latin West. The Vatican Mappamundi is probably contemporary with the original of the 12th-century Tabula Peutingeriana, a Latin diagram in roll form which shows the whole known world as a very long strip. My view is that abstract diagrams (of which both are fine examples) are an invention of late antiquity, not earlier. For this digital plot I used the Vatican Library's scans, uncurling the center part with the lattice deformation tool in Inkscape. The transcriptions are mostly Glorie's, while a black and white engraving by Menéndez Pidal helped decode some of the ambiguities. The color adaptation is my own. Now, back to the discoverer. Prince Youssouf belonged to a dynasty of Albanian origin who ruled Egypt until the army-led revolution of 1952. Through polygamy it was a large family and Youssouf held back from the jostling for leadership, instead founding seats of learning and cultivating the arts. Such was his wealth that he built three palaces and financed culture. He seems to have been interested in two major topics: the depiction of North Africa in ancient cartography and the contributions of Islamic learning to cartography. That is why he financed the Monumenta cartographica Africae et Aegypti, a catalogue of facsimile images of manuscript maps. He is listed as author, but the research and compilation of was done by Frederik Caspar Wieder (1874-1943) of the Netherlands. Only 100 copies of the 16-part series published in Cairo between 1926 and 1951 were printed, with a few sold to collectors and most distributed to libraries and institutions.
Chekin, L. S. (1999). Easter tables and the Pseudo-Isidorean Vatican map. Imago Mundi, 51(1), 13–23. DOI 10.1080/03085699908592900.
Edson, E. (1998). Mapping Time and Space: How Medieval Mapmakers Viewed Their World. London: British Library.
Englisch, B. (2002). Ordo Orbis Terrae: Die Weltsicht in den Mappae mundi des frühen und hohen Mittelalters. Akademie Verlag.
Glorie, F. (1965). Mappa Mvndi (Vat. lat. 6108). In P. Geyer, O. Cuntz, A. Francheschini, R. Weber, L. Bieler, J. Fraipont, & F. Glorie (Eds.), Itineraria et alia geographica (pp. 456–466). Brepols.
Menéndez Pidal, G. (1954). Mozárabes y asturianos en la cultura de la Alta Edad Media, en relación especial con la Historia de los conocimientos geográficos. Boletín de La Real Academia de La Historia, 134, 137–292.
Uhden, R. (1935). Die Weltkarte des Isidorus von Sevilla. Mnemosyne, 3rd series, 3, 1–28
via Blogger https://ift.tt/2JZdyqP
0 notes
Text
How You Can Use SVG Files in Silhouette Studio Free Version
Don’t wish to upgrade to the Designer Edition of Silhouette Studio but still want to enjoy using SVG Silhouettes files? Well, there’s a simple (and FREE) trick to do so. You can convert SVG files to other formats that are available under the free version of this software.
Using SVG files along with your Silhouettes studio files will make things easier and you can do it in many ways. Generally, if you have a JPG or PNG image and you open it in Silhouette Studio, you would be required to use the tracing feature in order to get it converted into a cut file. If not, the software won’t understand where to cut file. People who have already used the software must know how challenging and time-consuming the trace feature can feel.
With SVG files on your side, the software automatically identifies all lines in the image as cut lines. In short, all you need to do is download original SVG files and then convert it into other formats. Such file is usually known as a DXF file. You have three methods to do this. Let’s have a look at two most used ones.
Adobe Illustrator
If you have been using Adobe Illustrator for a while, you will find it easy to convert SVG files into DXF using the Export feature in the software. First open the SVG file in the program and ensure you’ve clicked on it. Now go to File>Export.
You will see a dialog box, where you can rename the image. In the dropdown menu of ‘Save As type,’ choose ‘AutoCAD Interchange File (*.DXF), and next click on Export button.
You will see a new dialog box showing DXF options. You can leave it as it is and click on OK.
And you’re done!
Inkscape
Adobe Illustrator is great but it comes with its own downsides. Also, you need an active internet connection to work with it. So what do you do to access Silhouettes designs with SVG? Well, here’s a free and offline way to do so - Inkscape. The software works with both Windows and Mac, making it easier to convert SVG files to DXF ones.
Just open the software and click File> Save As and choose DXF from the dropdown menu. Mac users might find trouble using Inkscape at times. This can be resolved by making sure you’ve installed XQuartz and restarted your machine. If it doesn’t work yet, simply head to System>Preferences>Security & Privacy>General>Allow app downloaded from and ensure that you’ve kept it Anywhere.
So these were two easy ways to use SVG files in Silhouettes Studio without paying anything. Silhouettes Studio files are great when used with SVG. follow the steps above and you will be ready for some fun at no price.
0 notes