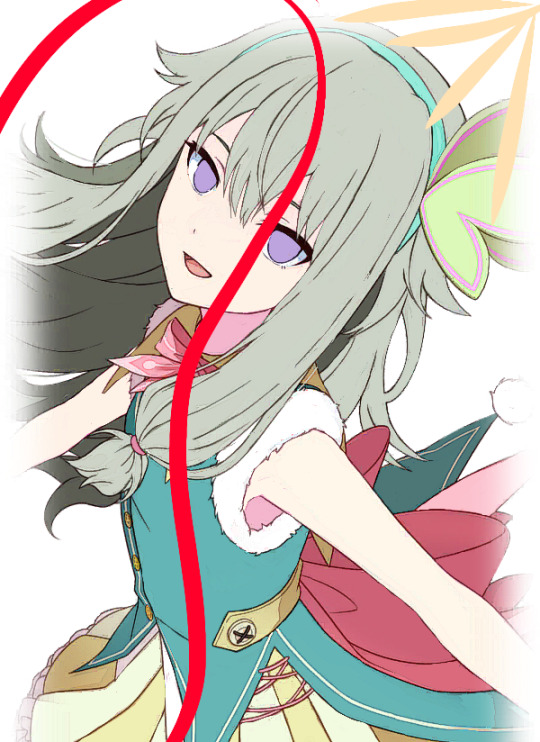
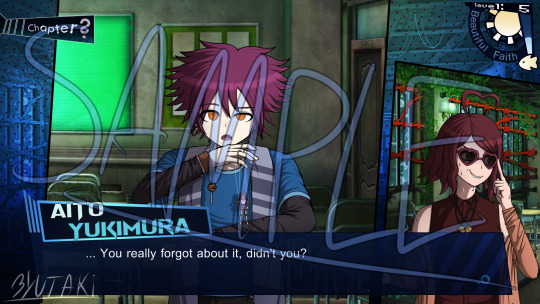
#but also it's limited by what they can do with the live2d models and i just love seeing the expressiveness of the manga art
Explore tagged Tumblr posts
Visit Tumblr Blog
Explore Tumblr blogs with no restrictions, modern design and the best experience.
Last Seen Tumblr Blogs


Fun Fact
69% of Tumblr users are millennials.
Text
and the manga does another extremely cool thing with riddle's overblot after his flashback ends!!
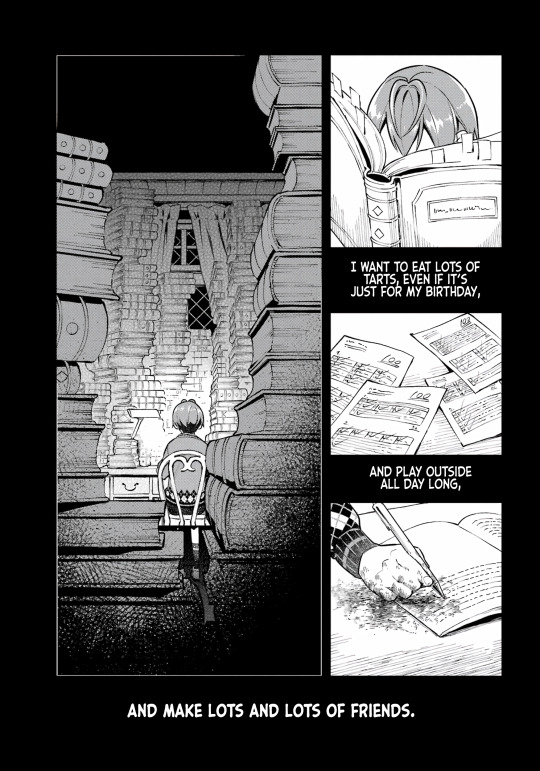


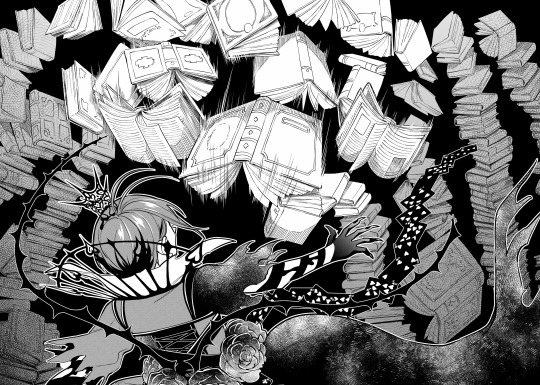
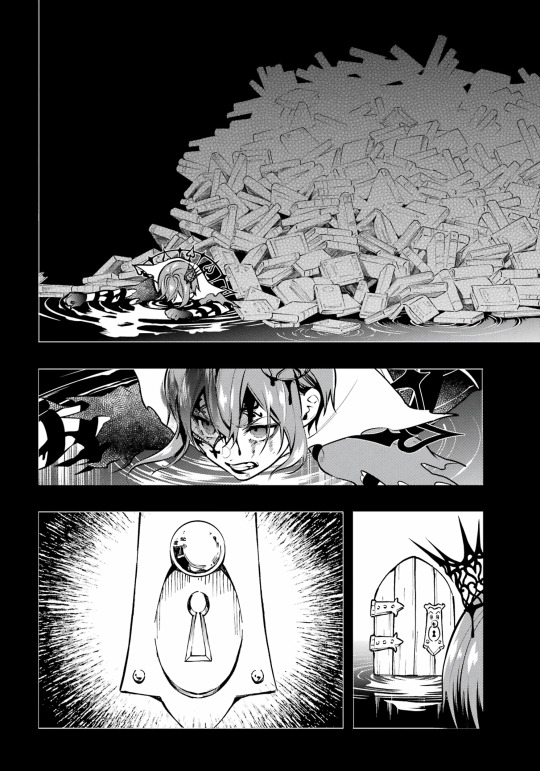
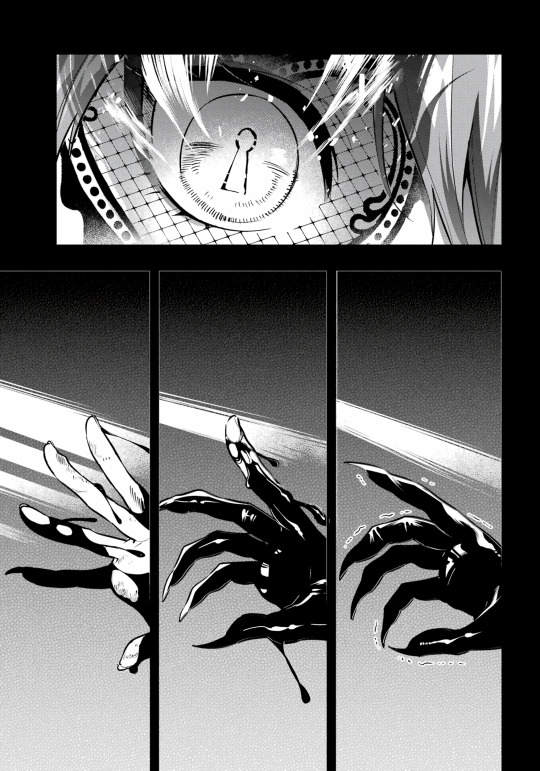

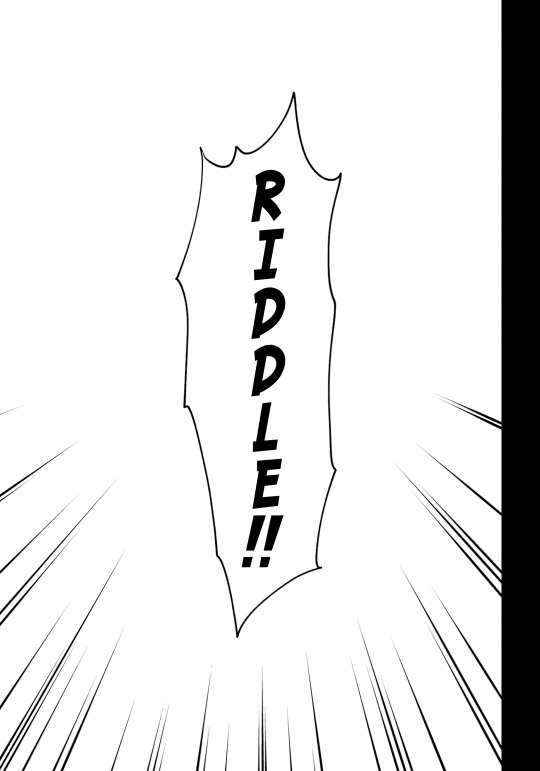
i wish i had the brain cells to properly analyze what i love about this. i think i just absoutely love the imagery of seeing baby riddle all alone surrounded by nothing but books as he talks about dreaming of eating sweets and playing outside, and then him in his overblot form still surrounded by the books but stumbling over them, getting trapped by them, like the innocent child that he once was being utterly lost and destroyed by the pressure he's under. and then the way that we see him reaching for not just any door, but the same door from alice in wonderland, it being the only light that remains. and the way that when he wakes up...
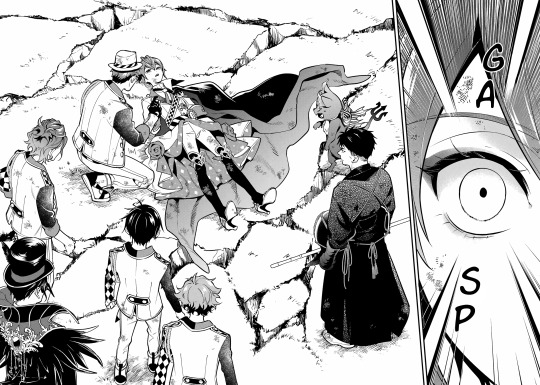

we get to see how the one who pulled him out of the darkness was trey, his childhood friend calling his name and gripping his hand. i mean, yes, trey calls his name in the game too, but actually seeing how the manga chose to portray this has got me so emotional what the fuck.
#ugh i love the manga i'm so glad i finally got around to reading it#so far the story of heartslabyul was like 95% the same i think#which is fine because the game already told a wonderful story#but also it's limited by what they can do with the live2d models and i just love seeing the expressiveness of the manga art#riddle rosehearts#trey clover#twisted wonderland#twisted wonderland manga#twst manga
264 notes
·
View notes
Text
Made Marion: Small Patch and Holiday Devlog

Version 2.1 EA Release
We have released a small bugfix/update patch. Here are the notes, which you can also find on Steam and Itch.io.
Uploaded the final version of Will's final CG (Spontaneous Ending). If you unlocked the in-progress version, you can see the final version in your Art Gallery in Extras.
Misc. typo fixes and editing pass over the Love Interest PoV Scenes.
Will's Sunjati name has been changed to Iyiola as we were informed that his previous Sunjati name was unintentionally funny/awkward for modern West African readers.
Altered "you can leave your hat on" joke/reference because due to sprite limitations he literally can't.
Small blocking issue solved: Will's route was blocked at the end of Sherwood Chapter 2 if you first asked about Layton. This has been fixed.
Made Marion Holiday Devlog
Our first patch was originally meant to expand Robin's love scenes to match the length of Will's (and the length that they will be from here on out), but a hard drive burp ate my writing and I'll have to redo it all. That'll show me not to forget to back up to Github. Since I want to get going with John ASAP, Robin's updated love scenes will be released along with John's route.
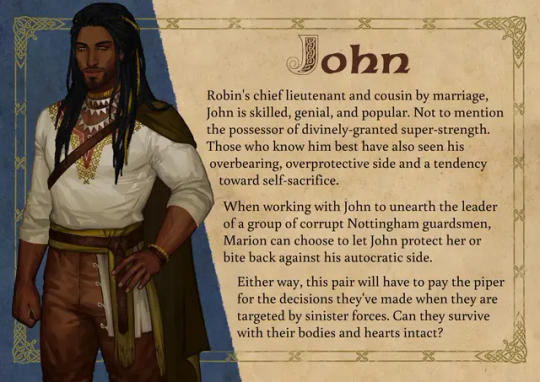
I'm now outlining and idea boarding John's route. It's going to be quite the contrast from Will's, in which two young scions yearning to have control over their own destinies came together. In John's route we have the meeting of two responsible young people who were forced by circumstance to grow up before they were ready.
John is kind, protective, and can be stubborn in his own way. Despite technically being Robin's second, he's used to being the captain that steers the ship. So is Marion. When they meet, will she take it as an opportunity to let go and be protected for once, or will she challenge John's need to always act as the bulwark between the world's dangers and the people he loves?
Your choices will lead to different kinds of love and different kinds of struggles as you work toward the Challenge or Compromise Ending.
Art Team Priorities
Here's what our artists are up to:
Arrapso (Sprites, CGs) is creating some sprite models that are not wearing their trousers, for when I have sprites zoomed in during love scenes in which they're supposed to be naked. We still won't be showing anything below the waist, but some of our gents have some fairly high waists on their trousers and the visible belts were bugging me.
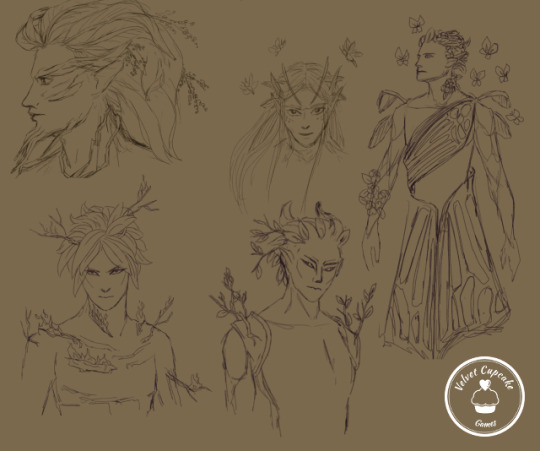
Lawrichai (cut-ins, lore intro) is concentrating on the animated lore intro. We've decided to make it a full animated movie instead of doing smaller animations in-engine, so Lawri has picked up Live2D and is animating away! I'm excited to see what she puts together!
Here we have some cool, possible Fae Lord sketches for the intro:
Sandra (backgrounds, creatures, cut-in assist) has finished all the backgrounds I currently need, and with FIFTY BGs plus many variations, I'm doing my level best not to need any more! We only have one more creature to design (Lord Geoffrey's favorite hunting hound), so she has graciously agreed to help us with cut-ins so that Lawrichai can focus on the lore intro and love scene illustrations.
Happy Holidays!
We will be taking December off from updates, so I should have some nice John route news to share when we return mid-January, 2025. I hope you all have a lovely holiday season, or if the holiday season is not lovely for you, that you persevere and are able to take time for yourself.
26 notes
·
View notes
Text
lesson O1: cel shading and how to achieve it.
Project SEKAI uses a unique shading method, which is a cross between rendering techniques and what is commonly referred to as "Cel Shading." Cel Shading was a term coined by animators before computer animation, who worked in "cels" or hand-drawn scenes. Because of the limitations of the time, the animators had to find a cheap and simple way to shade, resulting in the shading we see usually in modern animation.
Project SEKAI uses this style in combination with rendering tactics to create their iconic art style.
In this lesson, I'll be going over how Project SEKAI achieves that look by breaking down their Live2d models and card cutouts.
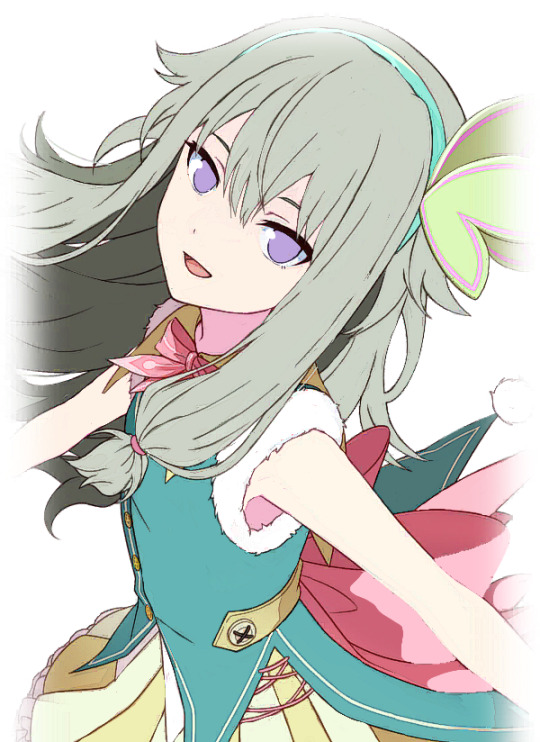
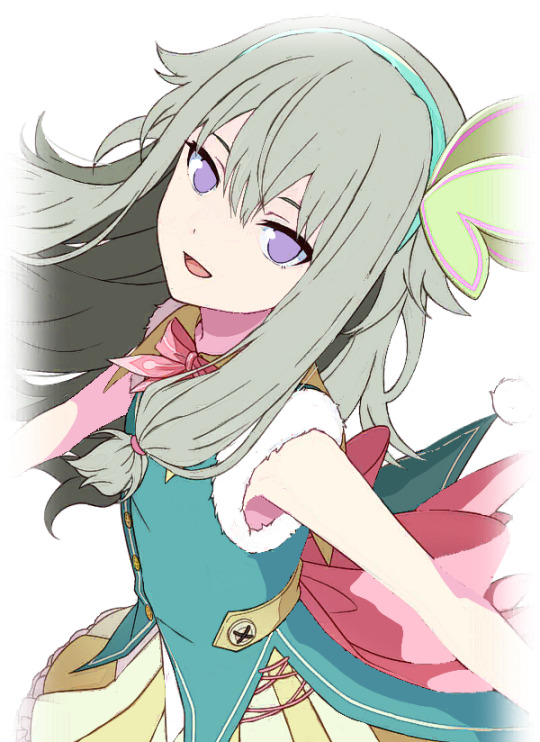
Cel Shading is the basis upon which everything in Project SEKAI is shaded. Commonly, this is seen in: Live2d models and card trims. Here are some examples.
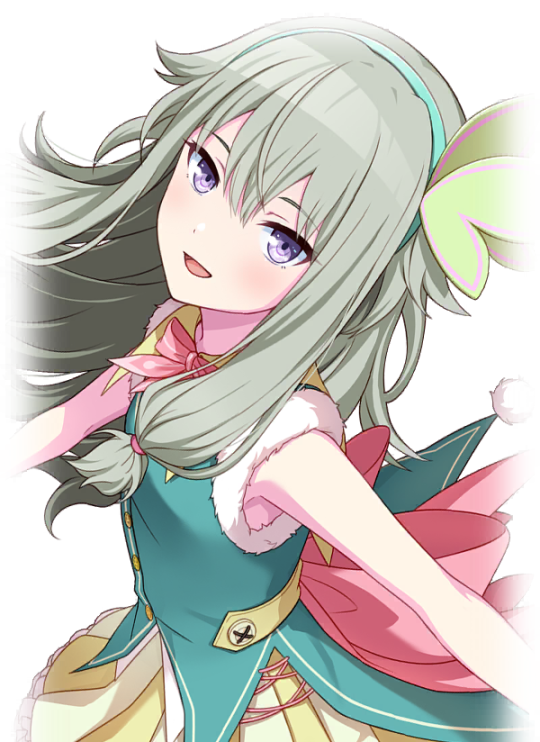
In both examples, you can notice the more "simplistic" style of shading. Now, the real question is: "How is this done?"
To explain this, I'll be using the card trim on the right as an example.
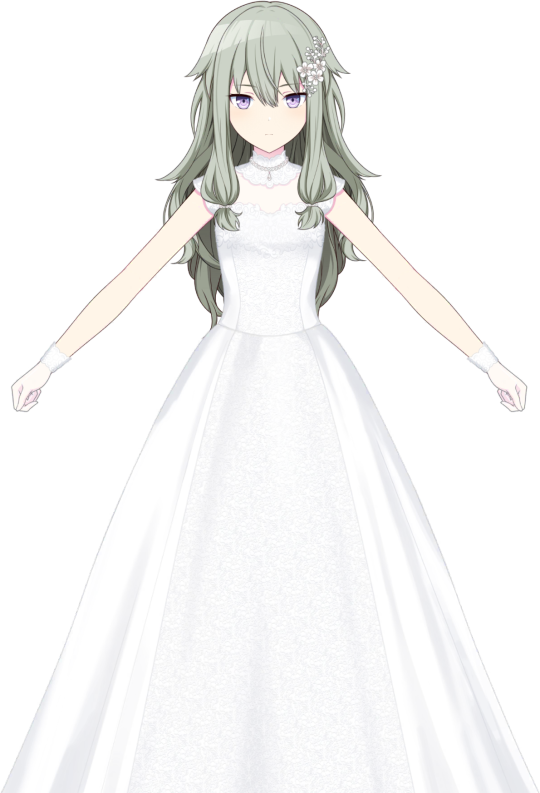
Firstly, artists need to put base colors under their lineart. Base colors are the bare-bones, not shaded colors. This is to provide a guideline as to what areas need what colors. Below, you can see the same Nene card trim, but reduced to its base colors.
It is a bit sloppy, considering I made it myself, but the point is; there is still **some** shading blocked out where it's needed. For comparison, see below.
So, now the question is: "how do I even do Cel Shading from here? I've gotten my base colors down, now what?"
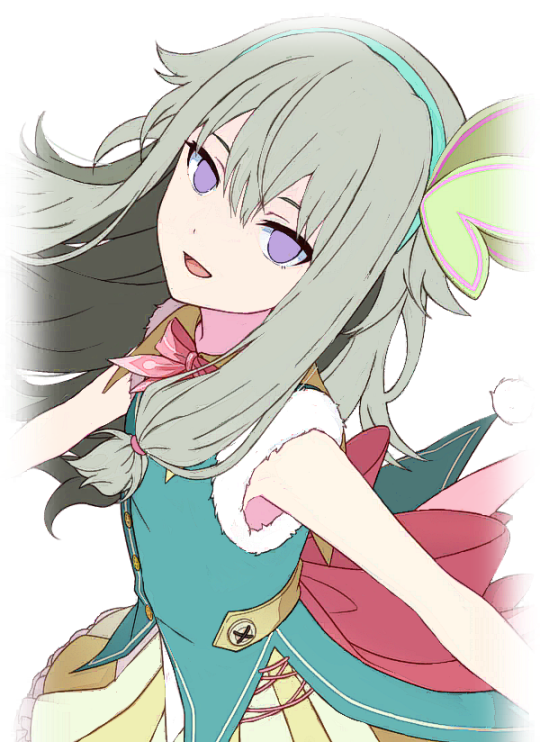
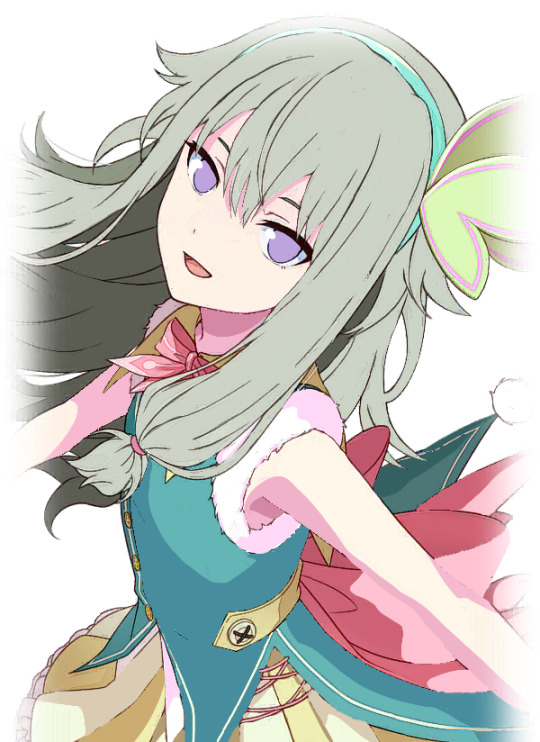
And, luckily, I can share that too! First, let's start by doing the most important thing, deciding where our light source will be.
In this card, it looks to be at the top right, coming down to shine on her.
The yellow is where I estimate the light would hit her. Now, we need to decide where our darkest areas are.
In this card, the darkest colors would be away from the light, meaning they would be to the left.
The red is where I estimate the darkest areas would be. The areas behind her arm would also be darker than the rest of the card, since they aren't being hit directly by the light.
This understanding of lighting will help me to place my shadows and highlights later!
After this, I'd suggest putting in a new layer on top of your base colors, and clip it.

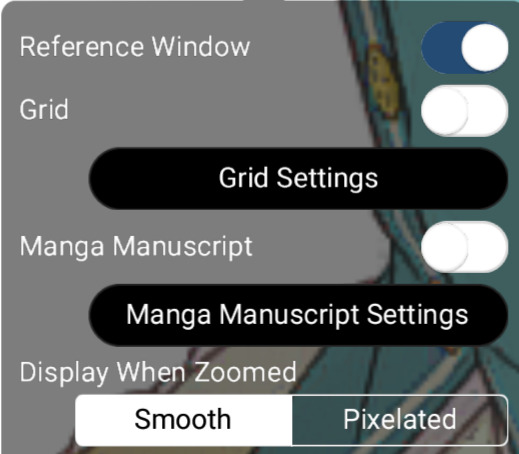
Now, I would be sure to grab a reference. For this drawing, I will be referencing the original trim, as well as the full card. I will be using a reference window, but use whatever works for you!
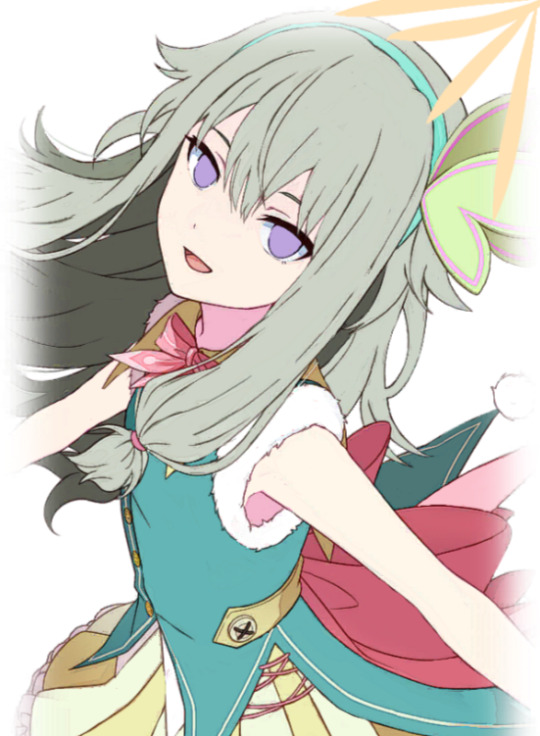
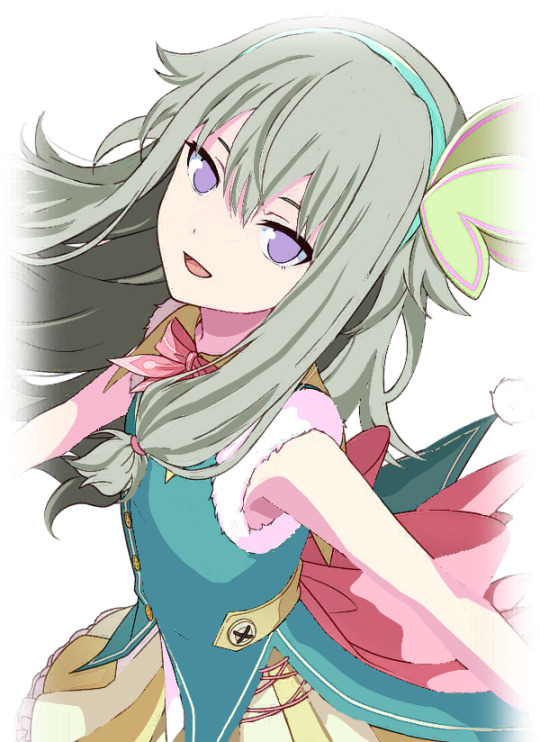
Now, we can get started! First, I'm going to block out where the **lightest** areas would be. I will be loosely following the card trim as a reference. Using the places we previously determined would be hit by the light, I blocked them out with loose colors.
We know that these areas would be directly exposed to the light if it continued at the angle we previously determined. Now, as for the headband, I decided to block out a very light yellow color. This is because of something called ambient lighting. Ambient lighting is just when highlights have a similar color to their light source. This is seen a lot in photography, and sometimes, even in cards!

As you can see here, the light itself has a yellow tint, so the wall behind it will also appear yellow as a result.
We can also see it in Rui's newest card!
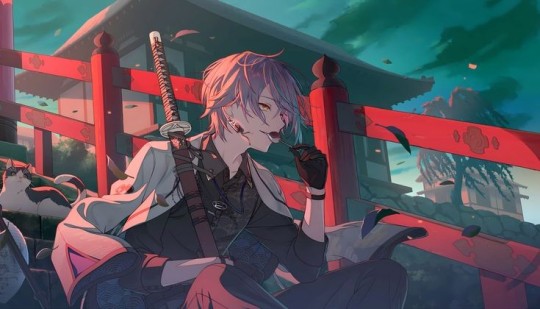
The light behind him is a reddish-pink, so that light bounces onto him, and makes the highlights appear that color. You can also see it on the railing and the building behind him!
Back to Nene, I then blocked out some of the darkest parts of her, based on our previous assumptions about the source of the light.
I shaded the areas of her dress according to how the bow was shaded. Since they were in almost the same place, we can use it as a guideline. We know that the dress isn't exposed to the light, since it is in front of the bow. As for the arms, we know the arm closest to her face would be fairly far from the light source, so I blocked out a shadow there as well.

Here, I adjusted some of the shadows, and I added some shadows to the dress. I blocked them all out in shapes, which I will go back and refine later.
I also added some shadows to the white fur on her dress. I paid specific attention to the edges of it in an attempt to make it seem "fluffier."
Here, I blocked out more shadows of her dress based on how the light would hit her. Now, we'll move on to the hair!
While it is messy, I wanted to ensure that the areas I placed shadows in would line up with my assumption of the light source. So, I toggled back and forth between the reference for the light source and the card itself to see where it fell. Now, with that, we are done blocking our our shading! I would suggest duplicating this layer to touch up everything to ensure you're satisfied with it.
The eyes will be a lesson by themselves, seeing as I didn't want to rush out two lessons in one and overwhelm people with so much information. This was a longer post than I anticipated anyhow.
If you have any questions, please feel free to shoot me a dm or an ask in the ask box! I hoped this helped at least a few people, and I will try to do weekly/bi-weekly lessons if I can!
If you found this helpful, please consider reblogging this post for more reach! I want to help as many people as I can!
#art tutorial#art study#project sekai art#pjsekai#pjsekai art style tutorial#proseka art academy#art lessons#nene kusanagi#kusanagi nene#shading test#cel shaded#prsk
34 notes
·
View notes
Text
Free VFX & Consultation for NaNoRenO 2024 Jammers!
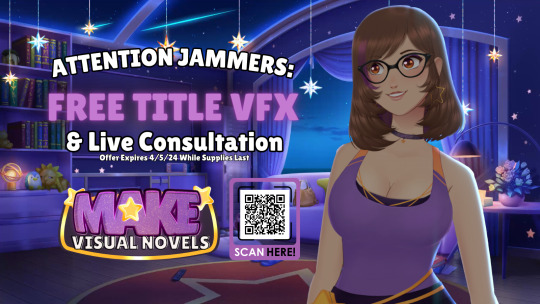
Hey everyone! I hope you've had a great time participating in NaNoRenO this year! I'm Nai from Make Visual Novels, though I imagine more of you know me either through our live team building events in DevTalk, or from the other jams and competitions I run. I wanted to let you guys know that, for a limited time, I'm offering free consultations for jammers participating in NaNoRenO2024. With those consultations, I'll also be creating VFX for your title screens to help you make a stronger first impression.
So you might be asking...
Why would I even want a consultation, Nai?
Something went really wrong and you want to know how to fix it .
Something went really right and you want to know how to take advantage of it.
You had an objective that you got close to, but couldn't quite hit it.
You want to go Pro with developing VNs, and you'd like guidance.
You feel lost in some part of the process, and need help setting goals for your circumstances.
You tasted VN Dev, you can't imagine a life without it, and you want tools, resources & opportunities.
Okay, but why you?
I've spent nearly a decade supporting and coaching visual novel developers reaching their personal and professional goals.
I've read over 500 indie visual novels. I know what your peers are doing, and where they are succeeding and where they're struggling.
I run & judge for the largest sponsored visual novel development competition. That 500 was a conservative estimate.
My network includes VN engine & game developers, game, book, comic & VN publishers, merchandise providers & manufacturers, marketing professionals, crowdfunding experts, professional programmers, illustrators, animators, graphic designers, VFX artists, 3D Artists(specifically modelling, texturing, rigging, and lighting) editors, pixel artists, Live2D capable artists, authors, narrative designers, translators, composers, musicians, singers, casting directors, voice actors (so many voice actors).And, probably most importantly, people who are living the experiences you're looking for.
In short: If I don't know the answer and/or can't come up with a solution to your very specific goals, I know someone who can.
I'm in. Now what?
To be eligible for the free consultation and the VFX, you need to have a game submitted to the NaNoRenO 2024 jam page and follow its rules.
Having a list of questions to ask is a good idea. Having goals is an even better one. If you don't have goals, we can work on setting them.
For best results, you or a team representative should be present for the consultation. These are conducted between 6:00 PM and 9:00 PM ET on Tuesdays and Thursdays.
Message me over on Discord (discord:naidriftlin) or in DevTalk(https://discord.gg/devtalk) to set up a time and day.
Some things to keep in mind:
Don't ask me to roast your game/be brutal. I don't do that. I can provide critique with suggestions and examples.
These consultations will be conducted live on https://twitch.tv/makevisualnovels. My viewers are typically your peers and VN industry folks, and usually not exceeding 10 concurrent viewers. A VOD recording will be provided to you to download for 30 days afterwards.
The free VFX for your title screen is eligible for those who complete the consultations. It will be tailored to your existing title screen visuals and delivered afterwards. I may opt to stream and record the process of making them.
28 notes
·
View notes
Text


EEE thank you @l3o-lion !! To answer your question, most of the animations I post on here are tweening, specifically with Live2D.
I like using it for gentle looping animations & backdrops. (Character animations are a whole different beast? I usually only keep them to a couple functions like 'HandMove' or 'HairGoWoosh'" but this is the VTuber-making software so it's totally possible to make more complex characters. )
I made a tutorial for how I animate with L2D below the cut, if you'd like to see the details! :D
This is the file for that Artfight attack. (quick disclaimer for anyone reading out of context: THIS IS NOT MY CHARACTER DESIGN, they belong to Finchstick over on Artfight!)
I drew the image itself in Krita - for this one I tried to go for more of a fuzzy, painterly style because I wanted to make it look like a muppet. L2D can handle fuzzy textures and gradients without too much trouble most of the time which is something I really like about animating with it.
______________
So! Each different moving piece has to be its own layer. Naming and organizing them into folders helps a lot once I export it into L2D. The finished image needs to be saved as a .PSD file.
After it's done, I'll open the .PSD file in L2D and it'll look something like this:

Once the file is open I find the moving pieces of my character and select them. (I also lock the static layers before doing anything )

_______ M E S H E S ________
Once I have my piece selected, I open the automatic mesh generator ( located above the image, to the left ) and automatic mesh it.

(Keep the mesh generator window open and select / apply mesh to each moving object.)

______ D E F O R M E R S _______
Once the pieces have a mesh on them I apply warp deformers for each part. (I try to apply the deformer for each body part to the largest piece making up that part. For example, the part being used for the head deformer here is the upper part of the head.)
Each part of the face also gets a deformer - each eye, the mouth, etc - and those get shoved into the parent "head" warp deformer.
The deformers allow for parts of the face to move with the head, but they also allow for you to set more parameters per part and make your model look more dynamic. (There's a 3 parameter limit in the free version but if I need to make another parameter work I'll just brute force it and make a 'head deformer deformer' etc)
_____ P A R A M E T E R S ______
Once the deformers are set up, I start setting the parameters.
The program opens with these default parameters which are all intended for rigging a face, you can make your own custom parameters at the bottom of the window.
As for the green dots here, they represent points of extremes on the parameter! You can change what these are by moving the slider over the green dot, and moving the mesh on the selected object.
This can be a bit tedious, but it's fun to watch the model look more alive the more parameters you finish.
______ A N I M A T I N G _______
After I save my model as a .CMO3 file I open a new animation file in L2D, and drag and drop the .CMO3 into the window.

The model shows up much larger than the window. You can resize the window in the bottom left, (third and fourth fields from the top,) and shrink the model to fit inside.
(The free version has a limitation on how big your image can be in order to be exported. It usually takes me a bit of trial and error to get the right size for the image.)
The window below your image shows your tracks. You can have multiple models per animation, I usually just use one. The purple track represents the model while the orange represents the duration of the animation.

With that out of the way, it's time to set the keyframes! Under the purple model track there's a green drop-down window called 'Live2D Parameters'. Here, you can adjust your parameters in order to move your model to the right position.
(In order to make a looping animation, you can copy all parameter values in the first keyframe by left RIGHT clicking the dot on the green Parameters track, and then paste them to the last rendered keyframe.)
I adjust the parameters and keyframes until I feel satisfied with the result. Once I'm done, I just go to File > Export Image/Video > GIF animation or Video.
I make sure my image is sized correctly, and save! And that's about it. ( For this specific animation I also put some effects over it in Clipchamp. )
20 notes
·
View notes
Text
OK HERE ARE MY 6 AM THOUGHTS UPON SEEING THIS
-It's just like the mizu5 trailer was. Mostly one color (Ena's color) with flowers, specifically, cherry blossoms. We've seen cherry blossoms being significant to Mizuki's story back in Secret Distance, but the symbolism of a cherry blossom in bloom is the more important aspect of this. They often symbolize new life, rebirth, and new beginnings. Which is by itself a huge contrast to the symbolism around mizu5, especially Bake no Hana, being a monstrous flower, or a flower of bitter transformation. you get the gist.
-The instrumentals sound so beautiful. It sounds like warmth, love, and acceptance, exactly what Ena wants to give to Mizuki. And thank fucking god. It sounds like Ena will deliver. 😭❤️❤️ I assumed this event needed to end on a positive note this time, but im so relieved that it sounds like it will. This sounds like Ena was able to reach her, and is welcoming Mizuki back with open, loving arms.
-We had predicted this to be the end of November event, but it seems like this isn't the case now. This will, without a doubt, be the first December event. Exactly two months after mizu5. This didn't end up being the limited focus event scheduled for end of Nov., so looks like that possibility is still in the air. I don't know the logistics well enough to claim that they could do two limited events in a row, but it sounds unlikely. There was also data extracted from the game files, showing that the current live2D Mizuki model (depressed menu mizuki) will be erased on Dec. 9th, supposedly after the virtual show for the end of Nov. event. I'm not sure what this means for this new information, but that was one of the reasons this was previously believed to be the final Nov. event.
That's about all I can gather right now, but guys. I'm so happy. Ena's gonna save her ass 😭🙏🙏 in Ena we trust.
EDIT: from what I understand, the december date is for the song's release, and not necessarily the event itself? so the chance of ena5 beginning nov 30th is still possible?? i could be totally wrong but i gathered this from someone else.

WAKE UP GUYS ITS HAPPENING!!!!!!!!!!!!!!!!!!!!!!!!!!!!!
ENA5 TRAILER IS HERE‼️‼️‼️‼️‼️‼️‼️‼️‼️
YEEAAAAAAAAAAAAAAAAAAAAAAAAAAAAAAAAAAAAAAAAAAAAAAAAAHHHHHHHHHHHHHHHH
95 notes
·
View notes
Text
So if I've scheduled this correctly, this should go out a short ways into the stream where the model I'm going to talk about here is debuted. I'm absolutely a novice both in art and in animating and vtubing, but this seemed like a good place to share some thoughts about it.
Before I get into any of it, there are two major steps in making one of these: The model and the rig. And that is already a gross oversimplification. People have already made plenty of tutorials and such about how to make these, no point going into that. But suffice to say I made a few mistakes and learned from them.
Building the model for rigging wasn't actually that difficult in comparison to my regular artwork. Especially as a front on, which I already had some experience in. But the piece was more...complete, for want of a better word. All the things, even parts I wasn't expecting to ever see, were drawn just in case I had miscalculated how far things would flex. And I did miscalculate! Lots of bits of leg showed in ways I didn't intend, and I still never quite got the tail worked out how I wanted.
The textures were I think the biggest hurdle I ran into. I knew that using the free version of Live2D I would be limited by the texture size, parameters, deformers etc, but I completely overestimated what that meant. The wings! They took up so much space on the limited texture map - somehow I hadn't thought about how much texture data they'd occupy. Actually fitting the texture map properly involved a lot of compromises - deciding which textures I could afford to run at lower quality and which ones (the facial features and front-face pieces mostly) needed to be at their best resolution. My time learning game development actually helped here - you can fit a lot more into a texture map than an automatic texture map will give you, so it just took some wiggling to make something I was pleased with.
This also wasn't...really my first attempt. Just the first one that worked. My first attempt at this model didn't have a proper file structure, I didn't fully understand why there were eight brow parameters, or how to organise deformers. I worked at that for two weeks on and off and in the end was left with a clunky mess that I scrapped and restarted this week. In much less time things were much more complete and actually culminated in the results here. Things moved properly, and bounced right~
Well, right enough. Another limitation I had to work around was the parameter limit on free Live2D. That came down to seeing which parameters I could ignore (not many). The wings taking up so much space was a problem...so I needed a parameter to toggle their opacity, and that inadvertently taught me about how vtubers with more advanced movement made limbs work the way they do. And this model still doesn't quite work the way intended - I had to compromise when warping certain objects because they warped in...unexpected ways.
But regardless of all that, with the amount of movement and detail I put into this one, it was always going to be an upgrade to my PNG. PNGs are perfectly acceptable and there are some vtubers with some incredible talent who make PNGs that are more expressive in the ways they want than could be achieved in 3D or Live2D. My PNG though...it was one of the first things I did and it suffered for it. And given that I wanted to learn this in the first place...well, it seemed more productive a task to work on this than making just the PNG poses.
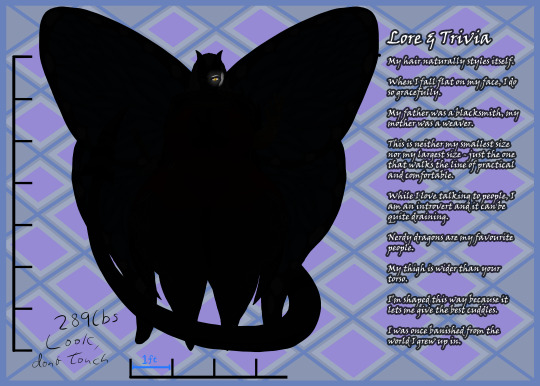
If you're just here for thicker than a snicker that's fine, I know how I've designed my look. But I wanted to ramble about things for a bit.
#live2d model#vtuber debut#thiccness#art#streaming#thighs thicker than your torso#my art#oc artwork#faerie#lap like a couch#there's a reason this stuff is so expensive
0 notes
Note
I suggest vtube studio its basically what is standard by now (its about 16 usd to get rid of the water mark but otherwise its free) and just a normal web cam from walmart (what I personally use tbh, though I am considered an unsuccessful vtuber XP) if you are on a budget. If not, then either do an iphone camera or a higher end logitech web camera. (range of 60-200 usd I think). Though the iphone camera lets you use an app called vbridger (10 usd) which allows for more accurate and all around more facial movement to your model. But! you will have to rig the model to be compatible with some of vbridger's additions to movement. Also are you using the free version or the paid version of Live2D I mean if you are using the free trail and constantly working on your model during the trail time you should be fine. but I highly suggest just going ahead and purchasing the 15 usd price point if you are just going to use it on a more regular basis or think you will outlive the trail time with your model. the free version is doable but sooooo limiting imo. anyways happy vtubing!!!
Oh! Thank you so much for the advice!! I'll look into this a bit more as I get closer to getting the model done
So far I've only been doing what I can with what I have, so I haven't installed or purchased anything yet. I appreciate other options to look into before I settle for anything concrete!
1 note
·
View note
Note
Are you going to take live2d commissions in the future?
I only have the free version of the program, unfortunately, which is a bit limited in what it can and can’t do. I’m learning how to do more complex things here and there though!!! I think I’d like to learn the program more, seeing how I can cheat my way into making more complex models with the free version.
The most recent model I posted of my cupsona, Boba can turn left and right, blink, move their eyes in every direction, raise and lower their eyebrows, and open their mouths in extremely simple lipsync (it also has “hair physics” which make the straw wobble when they turn their head).
[This is another model I made] which implements the “breathing” option to make the tail constantly move slightly, I actually tweaked this model a day or two after posting this to fix the blink, lip sync (and make the whiskers move with the mouth), and give the hair physics, so the post isn’t as good of an example of my abilities as it could be!
I feel like, if people were interested in very simple models like that, I’d be glad to make them!! But my art is super cartoony and simple, and a bit of an acquired taste, especially compared to some other live2d models I’ve seen.
I’m considering something around 350 USD for the art and rigging, maybe more if characters have Lots of moving parts or are particularly difficult to animate...
47 notes
·
View notes
Text
DDR:LF Progress Log
Hi everyone! Welcome to the first progress log.
It’s a post where I put all the things I’ve done for the fanganronpa so far that I haven’t posted anywhere; most of them are WIPs or Betas. It also works for me as a way to keep track of how far I’ve come.
Today’s post contains the following:
Character Bios (previously only available in the DR amino) and FAQ
4 WIPs of important CGs (well... more like 2)
3 Different types of Animation Tests
WIP/Beta of the GUI Design
Next objectives
If you’re interested in checking this post, keep reading it down below!

By the way, feel free to join the fangan’s discord server by going to this link https://discordapp.com/invite/aSd6PN4 ^^ with that being said, let’s begin the post~!
-------------------
Character Bios and FAQ
To start this blog AND this post on a right note, I’m finally posting on tumblr the character bios, which means you can now access to the information from each member of the cast of DDR:LF, which was previously only available in amino. You can find them in this post.
As for the other part, I wrote a FAQ with the main sort of questions there could be about the fangan. Feel free to give it a read here if you want to know about some basic stuff about the project, and if you still have doubts, please do send an ask! I’ll gladly answer it ^^
WIPs of CGs
You didn’t think that the only drawing I was working on were sprites, right?
In today’s post, here are some CGs WIPs that I didn’t get around to finish yet (since their priority is below the character sprites, but it’s a nice change instead of doing sprites 24/7).
First, the pre-trial CGs!

There are some expressions/positions that I might be willing to change, although that’ll come in later when I gotta sit down to finish these. But yeah, later. (Also, just to be clear, I drew these waaay back, so the designs might not match the current ones).
In a trial, depending the type of chapter, the 1st CG and 3rd one will switch places. The one that appears last will be the one that contains the protagonist whose POV we are witnessing.
Second, one of every prologue’s main CGs. “The killing game has begun!”
Looks of doubt and deceith are flying across the room! Who will make it through the end of the day? And who’ll be left behind~?
It might seem pretty basic without them being colored, but hopefully it’ll look better in the future!
Animation Tests
Man, this was a lot of fun to work on, and it was all worth it! I hope you all enjoy these as much as I did while trying to materialize these concepts!
#1 - Prologue Title Card
Every chapter of this story has a title card, just like the original danganronpa games. In the case of DDR:LF, this is more or less what each card will look like.
youtube
It’s kinda basic; elements being added to the screen here and there, as well as some silhouettes appearing.
What are these silhouettes, you might ask? It’s none other than the cast of the fangan, but it’s not just anybody who’s randomly picked. The silhouettes belong to the victims and the murderers of the current chapter, so for example, chapter 1 will have the silhouette of the 1st victim and the 1st murderer, but it’ll be modified enough for the silhouette to not be easily recognizable; nobody wants to get spoiled the deaths right at the start of the chapter, right?
Of course, the prologue is an exception... maybe.
A bit of the BGM was done by me, while some other elements of it were taken off from royalty free sound effects/melodies websites.
---------------
#2 - Pixel Execution
As you all know, there’s always a pixel animation that starts off an execution. I have that too, of course! and in order to avoid spoilers + show you what I was able to do, I put myself in the place of the culprit. (I swear I didn’t kill off anyone yet... only after the fangan has started I’ll be considered guilty).
youtube
The background music was also composed entirely by me, although in the future it might change- but I don’t really know for certain, so get used to this for now :)
---------------
#3 - Execution style test
I’ve recently downloaded the program Live2D, and what for? For executions, no less! After trying it for a while, I’ve concluded that it’d simplify my job a lot more than if I used sony vegas for animating the executions (not to mention it looks smoother with this new one).
youtube
For this test, I’ve used Seiji as my puppet. It might be simple, but it was to test out the limits of the program. It turned out really good imo! So I’ve decided to use Live2D to animate the executions (or at least, do most parts of them with it). I learnt some stuff while experimenting around with the program, so next time I’ll finish these sort of things even faster probably.
Also I put it on loop because a 2 second video is rather sad.
GUI Design
Now, I'll admit that I'm not the best at GUI design, but I tried my best to come up with my own design for the fanganronpa's interface, which I made based on a water-ish looking theme. The (not final) result of that is the picture below.
In case that you’re wondering, no, this isn’t any sort of canon conversation. It’s just the phrase I could come up with.
And yes, the background is from V3; I don't have any backgrounds at all for the project yet lol.
The sun and the fish on the top right corner will change depending on the time of day; but that's something that I'll keep to myself until the moment I start posting the story.
I have conflicted feelings with this GUI though, I don't know if I like it or not. It looks somewhat good but still off at the same time? Although it might just be me. If anyone has any feedback or suggestion for the GUI's design, the inbox is always open to receive such help!
So what's next?
Currently, I have loads of assignments at college, so it's kinda hard to make a balance between the project, social life and college work. However, the project is something that won’t stop.
The fangan has only one member, which is me of course; that means it’s going at a slow pace. I'm willing to make a recruitment for help, but that’ll be later once I have the basics to let someone else help me. If you’re willing to volunteer for this project, keep heads eyes up for the day I call out for help.
In the past, I tried to learn how to program with unity, but it’s hard to follow it up when the free tutorials are scattered here and there. When I have free time and everything art-related has been set up, I might try to pick it up again. I say might because I’m gonna start a tiny course for unreal engine at college. Maybe with the basics that they teach there, I’ll be able to do a better/quicker job than if I did it with unity (which I have 0 experience with). But the future is uncertain, so I’ll be the judge of that once I’m done with that course!
With that being said... as of now, the next objectives for the project (not ordered by priority) are the following:
Finishing Default Sprites.
I only have 7 default sprites done out of the 16 students, and I’m already working on the 8th. Half-way there?
Concept Art for each Room/Place.
While I have written down all the places in each dome, there are some that I need to draw the concept of the place, since the idea in my mind keeps changing them, I should settle them down.
Finishing Writing the Prologue and the Basics of Chapter 1.
I mean I already have like a half of these two things or more, but since I keep changing it, they never get any actual progress. Maybe I should learn to let it be as it is lol.
Creating 3D Assets.
Of course, I’ll make the 3D models for the rooms and props... well, I might do them; that is if I can’t find anyone that can make them. Pros of this is that I can do things exactly how I want them; cons are that it takes time and I’m not an expert in 3D modeling.
Trial GUI.
Class trials in danganronpa have a different GUI than the one used outside of them. We have a beta for the general GUI up there, now we need one for the class trial’s as well!
Concept Art for... a Trial Thing.
It’s no surprise that there are special things in fanganronpas, such as making changes to certain game mechanics, or creating completely new ones. The one I’m refering to in this case is a change to an already existing mechanic in the DR games. Can you guess which one it is~?
Splash Art.
During the first year of birthdays, I drew some sketches for the characters; those are the base for their future splash art.
---------------------
And last (and currently least important)
Recruiting Volunteers for the Project.
Obviously, I can’t do everything in this project by myself. In the future, once I have made a base for every ground of the project, I’ll recruit people that can work from there. Artists (GUI,CG and Sprite), Compositors, and 3D modelers are the ones that I’ll be looking for in this recruitment. In an even-later recruitment, I’ll make a casting call for voice actors as well. Please be patient though!
---------------------------------------------
I suppose that’s it for this very long post. It took more days than expected to put everything together, but at last I can release it now!
Now, June and July are pretty busy months at college, so unfortunatelly the progress will slow down a lot more than usual for the next few weeks. Thanks for sticking around this project despite the long road it has ahead! ^^
See you all in the next post! And if you read this entire thing, thank you for your interest in the fangan! <3
8 notes
·
View notes
Text
Devlog #6 Writing, Music, and Art
Hey y’all! I wanted to give an update since I’m pretty sure everyone thinks I’m dead ^^;
For quick updates on the project: OCG is being produced in two parts now. Part 1 will contain the many mysteries that the world of OCG has to offer and part 2 will be a sort of answer arc. The first draft of OCG part 1 is written and I’ve been hard at work revising and editing the prologue and chapter 1 of the script. For part 1, there is roughly 6-7 chapters of planned content. I’m hoping that at the end of the day, Part 1 will resonate with you, the reader.
Covid has been extremely hard on my ability to complete the project. I won’t get too personal on a devblog, but my health and finances were impacted. I apologize for the delays and this account’s inactivity. I feel like I'm letting down the people who want to read OverClock Gear and I just want to let everyone know that I'm still committed to working on the project and that despite the inactivity, I'm still working hard to improve every aspect as much as possible.
I'd like to share some of the things I learned along the way so that maybe future devs can learn something from my struggles.
WRITING:
As a warning, I want to say that none of the following are hard rules of writing. These are just things that I've observed as a writer and as a consumer.
Probably the most challenging part of a Visual Novel is writing a script that works with the format. The rules for VN writing are different from traditional novels and screenplays as many elements will be shown on screen but usually not enough to get a full sense what's going on. This is more of an opinion, but I feel that the descriptions should supplement the action and we should pick and choose when to show with sprites instead of describing. This is especially true when considering dialogue and internal monologue will make up a majority of the script akin to a movie.
It's not to say you should ignore everything you know about writing, however. There's still things about structure and character arcs that are useful.
Speaking of characters, balancing your cast is also a challenge. Every character is fighting for enough screen time to develop enough for the reader to care. As I'm writing OCG, I am trimming down and trying to give each cast member enough time to breathe while keeping in mind the characters' backstories and motivations. There's also the delicate balance between backstory and current events to keep in mind. I think it's especially hard to figure out how to reveal backstory without dumping a history lesson on the player.
There's also the issue with paragraph length for display purposes. VNs have a unique format that breaks down text into easily digestible chunks. However, overutilizing the space can sometimes make the reading experience worse.
There are a lot of things to consider visually too when writing your script. I've had to think about the actual space that they occupy so that chain of events make sense. Since there will be visual elements to the story, I need to try to figure out how those elements fit in too as I'm writing. For instance, how characters will appear, do gestures, and different CGs that need to appear are crucial to the format and needs to be considered.
From a general storytelling perspective, I've been toying with the idea of including gameplay. However, I realized that in trying to do so, I'd have to create a bunch of excuses to play the minigame which would be:
1. Unsatisfying without enough stages to challenge the player
OR
2. Disrupt the story to challenge the player
I think that if I wanted to have gameplay, I should plot out the game in a way such that the story fits the gameplay and not the other way around. Since I'm working on a primarily story driven experience, I won't be including any minigames that would take the player out of the experience. However, I have ideas for games that could take place in the world of OverClock Gear. Those are sitting in the vault until I release OCG part 1.
There's also something interesting I learned about twists and keeping people engaged in stories. Maybe this is something of a beginner's trap, but when people say a character isn't interesting it's usually because a character doesn't have anything meaningful to say or do, or they're simply floating through the story without influencing it. Giving a character powers and an award winning backstory isn't really enough to make someone interesting in a story. Giving a character flaws also doesn't make them automatically interesting. It's how you tie all these traits into story and their impact on other characters that make it interesting.
In today's day and age, readers have become more critical and perceiving than ever before, so it may seem like you'd need to hide more information to make your twists have impact. But I think it's better to show some of your hand. Twists also need room to breathe. They need to be logical but unexpected. A reader needs to convince themselves that it was possible through several minor clues leading up to the event. But balancing what to show and what to hide is a challenge in itself. Through showing off my script edits, I came to the conclusion that setting up expectations is a lot more satisfying than trying to make everything a mystery. Readers seem to get frustrated when the mystery leads nowhere in a story for an extended period of time. However, that's not to say every mystery should be revealed in a quick fashion. I think it's a balancing act, one in which we have to reveal what we can to keep the reader engaged while hiding the bigger stuff behind the curtains. In a way it's like slight of hand: We try to misdirect the audience with "true" events in the story and then blow them away with something they never saw coming.
An example of a bad twist from a scrapped project that I did several years ago: The main character meets a super secret organization who protects her from a military government. One of the people who protects her is a commander in that organization and seems to know a thing or two about the MC. However he is shot and killed before anything could be revealed.
There are elements that we can anticipate from the scenario: The MC is caught up in some crazy conspiracy with rogues and the military. However, the characters don't come off as interesting because they aren't given room to breathe. The organization became a device to set up the premise of the story. The commander doesn't impact the story and basically anybody else could've stepped in to save the MC. The MC isn't given time to bond with the commander and as such the twist at the end doesn't come across as earned.
These are just some thing that I've been thinking about as I've been consuming media and writing. There are too many games and fictional works that I've ruined for myself by being too critical. But through this, I'm hoping that the final script for OverClock Gear will be something I can be proud of.
Art:
I'm studying animation production to try to incorporate some of that knowledge into my VN. I want to be able to create a more immersive experience and make my VN more visually appealing. Some works that I really like are Muv Luv and Phoenix Wright. They're both unique in their presentation and utilize different parts of visual media that make them stand out.
The Muv Luv team are masters at using dynamic camera movement to craft visual spectacles. Despite the sprites being mostly non-moving, the way they are tweened and the few pose changes they have are combined with the camera in a way that almost makes them feel alive. Even in the first cutscene of Muv Luv Alternative, the parallax effects and strong camera angles help to sell that cinematic feel that isn't really found in any other VN's I've read.
Phoenix Wright's sprites are a joy to look at. The animations are done with such strong key poses that I sometimes forget the game's animations were meant to be limited. In the modern day, there are many tools that are used to create smooth looking animations with complex actions like 3D models or Live2D. I'm honestly not a huge fan of Live2D animations as it often looks as if a puppeteer is handling the rig. 3D also presents the issue of having to create specialized rigs that can handle weird scenarios like foreshortening. For example in Dragon Ball Fighter Z, there's a lot of model distortion in cinematics that is pretty complicated for someone with no 3D expertise. Facial expressions are also a huge part of making visual novel character appealing which can be difficult to do well on a 3D model. Not to mention, to emulate a 2D style, the frames need to be displayed at 24fps which means chopping frames in-between the interpolated keys. It can be a lot of work to create something that closely resembles "Anime". There is also a charm in a more traditional approach to animation that I think more visual novels should employ. Though I recognize that for complicated sprites, a traditionally drawn 2d animation isn't practical at all, I want to use the idea of strong key poses to create more lively sprites as well as play with depth to further immersion.
There are some more ideas that I have for creating a better visual experience, but I don't want to go into too much of a tangent ^^;
Music:
I went back to learn more about music theory and I came across some great videos that emulate the Japanese video game/Pop style. If you're curious, you can check out Gavin Leper's channel on YouTube. That being said, something I realized about music in Visual Novels and Film in particular is that sometimes the music should accompany the dialogue or actions in the work instead of overpowering it. There are moments when elevator music is important and when it's important to use a swelling emotional piece. Not everything in life "goes hard" and I think that also applies to music in stories as well. Music in games is also designed to loop in contrast to film where individual pieces can be created for specific scenes. This adds an entirely new thing to think about since it needs to be repeatable without getting annoying. I don't really have a clean answer to this, but to observe songs from games you like and see how they transition from the end to the part that loops.
This was a long post and there's so much more I want to talk about but I'm trying to stay productive and get the script done. For anyone else struggling with finishing their VN, "Finish the Script" by Scott King is an excellent book. Wishing everyone the best!
- OCGDev
0 notes
Text
Reflection - 3D work using a new programm (Blender)
Before working on Blender I used to work on Cinema 4D. It was an efficient program, easy to learn, fast to use. it did everything it needed to do for me. However as time passes by I require more from a 3D program. Anything can be done on Cinema 4D, but the more complex the project is, the harder it becomes to create something in the program since it steals a lot of ram from the computer. The program works also better for non-organic things, non human forms. It not good to create characters. So after a few researches trying to see what program would suit me better, I end up finding Blender. I had many other choices to choose from, for example Maya and with the student email I could get it for free too. Blender had everything I needed so there was no need for a heavier and more complex program like Maya. Blender is free and resourceful since it has a huge community of people that use it, there’s a lot of tutorials and models to download to the program. Because of that I believe it was a good choice to take. I’ve started learning Blender slowly, taking slow steps so that I didn’t overwork myself. Because on top of Blender I’m also learning other two new programs. After effect and Live2D, besides the fact that I’m trying to learn more animation and also improve my art. For that reason I’m taking it slow, but I’m also aware of the limit time I have. That’s why I choose to do simple projects that I can handle. So far what I’ve learned with Blender, is that it’s in fact more complex that Cinema 4D and the controls and the shortkeys or even moving the camera has nothing to do with Cinema 4D , so the transition was a bit of a shock. Nothing that makes me dismotivated. In fact it makes me quite excited to learn something new. I’ve been learning Blender using mostly youtube tutorials, and blogs. Also reaching out for people that use it and ask for help. I always make sure I research enough about what I want to do so that I’m sure it will go right. It can take hours to find what I need to do and make it work, but after I find what I need it takes me little time to actually do it in the program. This program can help my project making it easier to add backgrounds to the video, and I don’t need to animate the backgrounds frame by frame, which would require a lot of pespective knowledge that I do not have. My pespective knowledge is far too basic to know how to draw each line. Ive learned a lot with this change. Blender is complex but it’s great help. There’s so much one can do in it that I’m sure I’ll be using it more in the future mostly for backgrounds of my animation series or comics, or even my illustrations.
0 notes
Text
I agree with Ransom VT and expand on the point of the range being limited with an example for the 3D only folks. Live2d is like making a 3D sculpture with paper doll parts that can break some rules that physical paper can't. To implement any kind of significant movement is going to require exponential amounts of time and effort.
Take a non-dot nose for example. In Live2D, if your artist and rigger aren't on the same page with this then it's going to end in absolute failure.
The artist needs to know that for a semi-real 3D nose to work for a model that will be able to achieve more than the tiniest XY head movement, that they're going to NEED to break up that nose into ~10+ pieces. Mine require 13 pieces to implement.
Then your rigger needs to know what the fuck to do with all 10+ of those nose pieces and how to envision what is essentially 10+ pieces of paper sliding around to animate something that resembles a nose going from front facing to 3/4ths head angle facing. This takes a LONG TIME (for me, usually a day or two) and at the end of the day, what do you have? A nose. Its not even a feature that actively adds to your stream besides distancing you from an anime aesthetic. For 3D models, its the relatively simple matter of sculpting it and then turning the camera. Boom. Your nose works in all angles. Similarly, I imagine that there are unique challenges that take exponential effort and time facing 3D sculptors and riggers with models in achieving some things that 2D models have with ease, but I don't come from the world of 3D modeling and don't know what those things are. All I can attest to is the exponential time and effort needed to achieve any kind of movement in L2D.
I might also add that Live2D is still implementing features that some would say are vital. Symmetry meshing and blend shapes were added in the 4.2 update on June 2022. Before 4.2, if you wanted a symmetrical mesh, you'd have to manually mesh half of your piece, copy, paste, and flip (and pray L2D didn't shit its pants and send vertices flying all over the place) and then connect the center, and that was the easy trick method! Today, you can use the symmetry mesh feature, but that Shit's broken af. You'll place 30 dots and L2D will forget to put down 5 of them on the other side. So ultimately, I think that part of why there's so much energy behind improvements in the 2D space is because our key software, the only software that can do what we need it to do, is objectively kind of shit.
I know it’s cause there’s a lot more attention and energy focused on Live2D improvement and features, but man 3D feels so behind on stuff it should be able to do.
#Live2d#I'll comment on L2D's quality#my comment is that it's shit#this is a live2d slander post#all i want is a functional symmetry and movement reflection tool
55 notes
·
View notes
Text
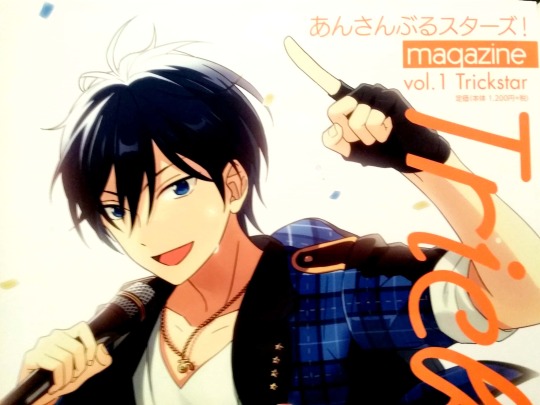
Enstars Magazine vol.1: Interview with Development Staff - The Birth of Enstars
Released in August 2016. (!!! It’s way too outdated, I’m sorry...)
You may also find similar questions discussed in this interview elsewhere, so it may feel repetitive. But I’m not very good at summarising, and you may find other interesting info and perspectives in this as well. It’s one year old though, but I will still continue with the World Navi part of the mook series as much as I can.
Click here for interview with Akira-sensei from the same magazine. And here for translations of the mook series I found on Twitter.
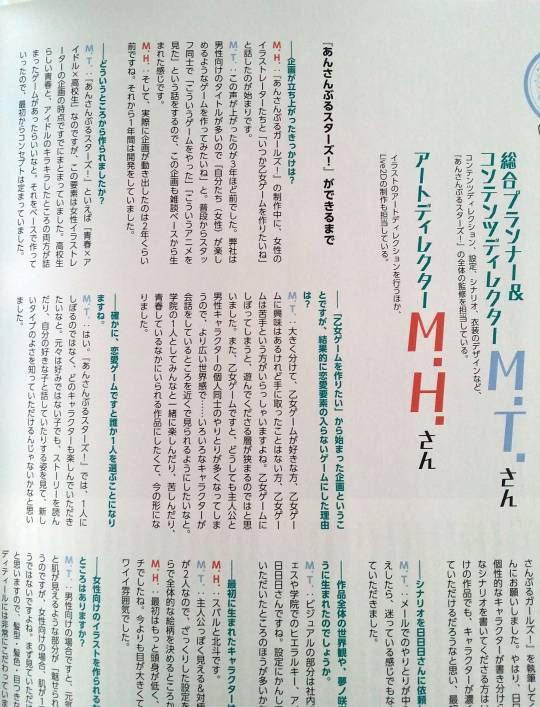
This is an interview with: M.T, Chief Planner and Contents Director. Person in-charge of overall supervision for elements such as contents direction, world setting, scenario, outfit designs among others, and M.H, Art Director for illustrations and person in-charge of Live2D creation.
Until Ensemble Stars! was made
Q: What prompted the development project?
M.H.: It started during the development of Ensemble Girls!, where I was talking with the company’s female illustrators about how we wanted to make an otome game one day.
M.T.: That was three years ago. Our company has a lot of male-oriented titles, so there were people saying, “We want to make a game that we (females) can enjoy.” The staff normally talk to each other about what games they play and what kinds of anime they watch, so this topic came up from one of those idle talks.
M.H.: And the project made real progress starting around two years ago. The development process took a year.
Q: Where did you start from?
M.T.: When one hears “Ensemble Stars!”, the words they may come up with are “youth, idols, and high school students”. That component was already settled in the project plan presented by the female illustrators. We wanted to see a game that has both youthful life typical of that of high school students and the sparkles of idols. That became the basis of the game, so from the beginning we’ve had the concept solidified already.
Q: So it’s a project that stemmed from a wish to make an otome game, but in the end there are no romance elements in the game. Why is that?
M.T.: Dividing in general, there are those who like otome games, those who are interested in otome games but never played one, and those who are not very good at otome games*. If we restricted it to an otome game, the player demographic would also narrow. And if it’s an otome game, it’s inevitable to have a lot of interactions between the protagonist and the male characters. So to create a bigger perspective… we wanted to make it so that we can observe various characters having their conversations from a close distance. We wanted to make a game where you can play as an individual in the academy and have fun and agonize with everyone together, and experience youth. That’s how the game came to be like this.
(*) I’m not sure about my choice. The Japanese uses 苦手, and depending on context it can also mean “not fond of” or “can’t handle”.
Q: Certainly, if it’s a romancing game the player would have to choose someone.
M.T.: Yes. In Ensemble Stars!, the player is not restricted to someone. We want the players to have a good time with any character. Even with boys who are not originally their type – when the player reads the story and sees them talk with their favorite boy, maybe they can discover a new, positive aspect regarding those types.
Q: Please tell us how you ended up deciding to have this game become part of the Ensemble series.
M.T.: We received good reviews from Ensemble Girls! players regarding the game’s illustrations, so maybe if we make those characters into boys they will look attractive? That kind of topic came up within the company. We also wanted to make a game that has both outstanding illustration and story, so we asked Akira-san who is writing for Ensemble Girls!. We thought there is no other person who can write every character who is full of unique traits so distinctively, and moreover, write unique script. We believed that even with a female-oriented project, Akira-san would be able to make an interesting story that stars characters with strong individuality. That is why we asked Akira-san first.
Q: When you asked Akira-san to write the script, what reaction did you get?
M.T.: Our main means of communication was through emails. We informed Akira-san of the project plan, and as a reply we received a non-hesitant consent, “I’ll do it.”
Q: How did the game’s overall world setting came to? This includes Yumenosaki Academy, among others.
M.T.: The visuals are produced in-house. Dreamfes and the academy’s hierarchy and all the implementation around idols are by Akira-san. Setting-wise, I think Akira-san contributed more.
Q: Which character was born first?
M.H.: Subaru and Hokuto.
M.T.: We had one of them look like a protagonist and the other look like from the other extreme. After deciding the profile’s roughs, we started from deciding the overall art style.
M.H.: At first, the head count was lower and they had a touch of shonen manga elements. Their eyes were bigger, and if I have to choose I’d say they had a cute feel to them.
Q: What would be the thing you pay attention to the most when creating illustrations catered towards a female audience?
M.T.: In the case of male-oriented projects, the points I get to “show off” would be the energetic feel, cuteness, and a flash of exposed skin. But for female audience, if you ask me whether the skin is the most important element, I’d say it’s not. I think the first thing that will be seen is the face, so the details in hairstyle, hair color, and gaze would be what I’m most particular about.
Q: There are over 30 characters in the game. Wasn’t it hard to come up with so many?
M.T.: When Ensemble Girls! was released, I got to experience making 60 characters, so I didn’t think it was as difficult as that. If I think about giving various traits and quirks to all characters without exception, 30 surprisingly could be done in an instant. I first came up with the character’s profile and then the visual, but us the staff exchanged opinions as we created them.
Q: Are there any characters who were born easily, and others not so?
M.T.: Creating the characters wasn’t such a difficult task, but deciding the art style was tough. Take the characters we mentioned before, Subaru and Hokuto, as examples. Their head counts and facial features are in the middle of the spectrum, and we made Rei look the most mature amongst the students. His eyes are smaller. Rei would be the character with maximum maturity, but it was difficult to decide the limit, since it can change the balance significantly at later stages. We went through quite a bit of trial and error, and the illustrators told me they also found Rei’s wavy hair to be difficult to deal with.
Q: So the character with childish looks at the maximum would be Tori?
M.T.: I suppose, yes. He’s like a little devil, has that pink hair and adorable looks. The lead illustrator who first drew the character is also someone who originally draws male-oriented illustrations, so Tori was their specialty, relatively speaking.
Q: At what point did Akira-san start contributing to the setting and characters?
M.T.: It was after we had the visuals for the 30 characters and their profiles ready. From that point on, we asked Akira-san to come up with what kind of story.
M.H.: Tsukasa and Midori weren’t around yet.
M.T.: At that time there were 30 people including the teachers, but if we’re going to label it as “There are 30 idols” it wouldn’t be right to count the teachers, we thought. That’s when we added Tsukasa and Midori.
Q: Were you surprised by any character after you read Akira-san’s script?
M.T.: We had Akira-san write the main story and character’s individual sub story concurrently. So the first time we got to know what kind of characters they were was by reading the sub stories, but…
M.H.: We can’t not mention Arashi, can we? (laugh)
M.T.: Indeed (laugh). Within the company we knew Arashi by “the good-looking model”, but Akira-san made Arashi look like an onee character*, so it took a 180 degree turn.
(*) Before, I think I translated this as “big sister character” without clarifying the connotations: often associated with gay men or queer who use feminine speech, have feminine gestures etc. The word itself stems from “big sister”.
M.H.: Also, Chiaki was more passionate than I expected.
M.T.: He was just a “refreshing and enthusiastic upperclassman”, but in Akira-san’s words he became a character who would be like, “flare up that passion even more!” and towards any character, he would close up the distance.
Q: So that’s how the character gap in each character was born.
M.H.: No one could have done it except Akira-san.
M.T.: We received feedback from the players that the characters were quite different from what they imagined pre-release.
M.H.: That’s true. There’s a lot of that kind of comments.
M.T.: Those who like female-oriented content tend to predict personalities according to appearance. It’s an idea that someone comes up with because he’s a guy, and I’m glad we asked Akira-san after all.
The game’s charming points and behind-the-scenes of the game-making processes
Q: Among the many game apps that are female-oriented, what do you think is the charming point of Ensemble Stars!?
M.T.: First thing would be the uniqueness of the characters. We were particular about their appearance. We made it so that its character design can be easily accepted not only by female audience but also by male audience. That’s why I hope it’s received well by a wide range of demographics. Then, Akira-san looked at each of the character’s visual and gave a unique personality to each and every one of them. I think there’s not a lot of titles that can let you taste both of these elements at the same time. Other than that, it’s the Live2D. Especially during the development stages, the Live2D element was not there and it wasn’t the main feature. Even up to this moment, I don’t think there’s a lot of games that have movements of the body and hands as big as Ensemble Stars!.
Q: There’s a lot of male players too, isn’t there?
M.T.: We don’t get their feedback directly, but our connections and colleagues from other companies told us, “He’s a guy but he’s really into it.” My impression is that Ra*bits is quite popular. It seems that cute characters would look cute from a guy’s perspective as well, which makes me happy.
M.H.: Actually, manly characters like Adonis and Kuro are popular among those around me. It seems like they like either the cute type or the manly type.
Q: Each month, there are two new time-limited events and two new scouting events. Could you tell us regarding the making process?
M.T.: At first we decide which characters are going to appear, and what kind of timing this event is going to be held in. Of course, we also consider the frequency of the characters’ appearance, but the relationships between the characters are also important, so we discuss which combination would be best as we choose them. In another case, when we want to tell a particular story, we choose the members based on the content of the story. After that, we establish themes to match the period or the seasons. Then we ask Akira-san or Yuki Yoshino-san to write the script, work out the details of the outfit designs… that kind of work flow.
Q: Sometimes unexpected characters appear.
M.T.: Fundamentally, we often have the whole unit appear. But leaving to that factor alone can lead to bias, and they’re students after all so we also want to show their relationships among classmates and clubmates. I think it’s nice to see a glimpse of how a senior or a junior interact with each other, that kind of vertical relationships. So you will see that kind of combination sometimes.
Q: What about the process of making the illustrations?
M.H.: After the theme is set, we will have the illustrator in-charge to make the outfits based on the document material. After that, we create the event CGs.
Q: There are also new stages and music in the time-limited events.
M.T.: Yes. At the time of release, the BGM was of quite low priority, but we thought we had to bring out the mood according to the season. The players will play the Produce courses for a long time after all, so we thought it would be good to have some variation. That’s how we added the feature somewhere along the way.* We place an order for the BGM creation after the event concept is decided.
(*) If I remember correctly, it started in Duel. So the first three events didn’t have their own event BGM.
Q: How far ahead are you in terms of event planning?
M.T.: Around two to three months.
Q: For apps, you can see the players’ responses in real time. Isn’t it tough to create new events despite that?
M.T.: In general I have a lot of things I’m particular about, so because of that I think I’m giving myself a hard time. A piece of outfit gives me trouble each time – how should I present it? What is the most fitting composition that gives the best view of a character? To also increase the player’s affinity to the stories and event CGs, the staff exchange opinions with each other as we create them.
M.H.: That’s right. We really value the characters’ expressions on the event CGs. We create them while reconciling our ideas with the illustrators, and with scenes that are easy to understand we all have the same image. But there are times where, with scenes that have complex nuances, it’s hard for us to reach an agreement. We think together about the scenario before and after the CGs while drawing their expressions, for example, “This is what this boy is thinking, but just now someone told him that. This makes me sad.”
Q: How many people are involved in the making of Ensemble Stars! right now?
M.T.: Right now it’s just under 30 people.
M.H.: There are 13 illustrators, by the way.
M.T.: For the illustrations, it’s like everyone is involved. Not just the card illustrations, we also make the Live2D and SD versions of the outfits, so often everything proceeds concurrently. We divide up tasks to one extent, but it’s difficult to divide everything, so various people are involved.
Q: A lot of projects outsource illustrators, but at Happy Elements the art is drawn in-house.
M.T.: Yes. We outsource part of the background illustrations, but the characters are all drawn in-house. We want to have a uniformed way to view things and create impression. For example, to decide on the balance of locks of hair, we decide which part should be drawn thicker or shorter. We share our opinions about every detail, and we draw as we grasp the points we agreed on.
The game’s world setting and idols
Q: Regarding Yumenosaki Academy, did you model it off a location? Or do you have an image of a location?
M.T.: We don’t have a pinpoint location to be able to say something like, “It’s this place in Japan.” As for the image of a location, it’s somewhere with a shopping district, the sea and a mountain, and a school. A place like that in Kansai region, where our company is, would be somewhere like Kobe. But during the actual design processes we don’t have anything like, “This is this place.” We also don’t have a definite setting on the climate.
Q: The four seasons in the world of Ensemble Stars! are quite pronounced.
M.H.: I suppose. It’s probably because I’m also from Hokkaido. Deciding how much snow would fall in winter was hard (laugh). We make it so that the game follows the season changes in the real world, so I hope the players can spend time with the characters in the same setting.
Q: I think each player would have their own image of the transfer student, the protagonist. What was your thinking process during the character making?
M.T.: In Produce courses, the player is able to make choices to interact with the idols. We pay attention to the differences in the use of words towards seniors, juniors, and her peers. We took her image from the story written by Akira-san. It’s rare for the transfer student to take action, so to give a comparison, I think she’s like a transparent existence. To the players, she may be whom they project themselves as, or she may be a proper standalone character. There are many ways the players can see her. As for us, we’d like to direct the players to the idols first and foremost. Which is why we headed towards this path, where we didn’t give the protagonist individuality. The transfer student is an existence that naturally supports everyone.
Q: How was each unit born? Did you decide on their music genre at that point already?
M.T.: We finalized their design aspects like appearance and outfits, but we didn’t have any precise image on what kind of melody they would sing and perform. We started to think about it during the making of the unit song CDs. For example fine has a theme of “a ruler”, so we thought of something orchestrated. Another is UNDEAD with rock songs. Well, it’s also because Koga keeps mentioning “rock” (laugh). In case of UNDEAD, every time we make the event CG we discuss whether or not we have Koga carry a guitar, and we also give quite a lot of attention to the composition to make it look “rock”.
Q: I think the leaders of the units in Yumenosaki Academy hold a special position. What is your opinion on this?
M.T.: Let’s see. For idols in the real world, someone may be assigned as a leader but they would still hold the same position as other members. When something happens, the leader would put things in order, and they are often the ones who’ll take the initiative to do the talking, but that’s about it. In Yumenosaki Academy, the leaders find jobs, cooperate with other units, and they become the point of contact for any event. So in that sense, the leaders are well-known. They’re still students, so I think that’s why they would take the initiatives themselves to take action.
Q: Also, often the unit leaders are the club captains as well.
M.T.: They catch attention as idols, and they’re also popular, so I thought they’d be appointed as club captains without any problem. One thing though, the tea club is something made by Eichi, so while he’s the club captain, he’s also like the chairman. Either way, he’s a big shot (laugh).
Q: Will the idols make a debut after they graduate?
M.T.: No, actually they’ve debuted already, so their idol activities have become part of their job. It’s just that they’re still students, so I suppose they’re active as both students and idols. After they graduate… we don’t have anything in particular set yet, but boys who want to prioritize their studies may attend college while still being idols, or they may dive into the entertainment world as idols right away. There may also be some units where the current third-years graduate and the unit may dissolve temporarily, then they gather again. Trickstar members are all in the same year, so a possible scenario for them is to work with the same members. There may also be others who will choose a path other than being an idol because something happens before they graduate. The leader of each unit seems to be the one who suggests the direction in which the unit will head to, but whether the other members would just nod to that depends on each of them. The Repayment Festival is the finale of the year, so I think you will be able to see what happens then.
Taking a look back and future prospects
Q: It has been more than a year since the game’s release. How do you feel right now?
M.T.: Before release, I couldn’t imagine how it will be received, at all. Fortunately, it’s been played by a lot of people and has been garnering attention from all sorts of directions, so I am extremely grateful. From then, we have had opportunities for mixed media adaptations, and since the project can develop and move forward further, we intend to make things more exciting.
M.H.: The players really value each and every character, and Ensemble Stars! gets its support from there. I feel nothing but gratitude. We’d like to do our best so that we can answer everyone’s expectations from now on too. Regarding illustrations and each of its expressions and gestures, we hope we can show it to you and have all of us together feel what those characters are thinking at that particular time and all those things.
M.T.: That’s right. There will be new unit song CDs coming out this year too, so I hope you can look forward to its release from now on as well. The game itself too – I think there will be chances where you’ll be able to see scenes that show a new side to a character, or interactions that are different from usual, or how a character actually feels at a particular scene. I hope you’ll look forward to it. Thank you.
79 notes
·
View notes