#border stencil
Explore tagged Tumblr posts
Text

"Borders kill people"
Stencil spotted in Ventimiglia, Italy
653 notes
·
View notes
Text

#Lynda Benglis#Clouded Border#2023#Handmade pigmented abaca paper#aluminum wire#stenciled linen pulp paint#carbon black with acrylic medium#31 × 17 × 12″.
18 notes
·
View notes
Text

#and happy birthday to me hooray!#the border is linocut based off a design i stole from 19th century wallpaper#and the text is a stencil i made on my cricut machine#i was trying to make a whole set of these to mail out to friends and then everything just took too long oops
2 notes
·
View notes
Text


New challenges.
405 freeway between La Cienega and Arbor Vitae St
Inglewood, CA
#graffiti#street art#grafitti#wheatpaste#stencil#streetart#stickers#citytattoos#city tattoo#posters#billboard#ooh#Texas#border#citytattoo
3 notes
·
View notes
Text
Effortless Elegance: Transforming Your Quilt Borders With Easy Stencils

Introduction:
Welcome to our quilting blog, where we explore creative ways to enhance your quilting projects. In this article, we will dive into the world of quilt borders and how you can effortlessly elevate their elegance using easy stencils. If you're looking to add a touch of charm and sophistication to your quilts, read on to discover the magic of quilting stencils for borders.
Quilting Stencils for Borders: Unlocking Creativity
Quilt borders play a vital role in framing and enhancing the overall design of your quilt. They provide a finishing touch that can truly transform a simple quilt into a stunning masterpiece. Quilting stencils offer an effortless way to elevate your borders, allowing you to explore various patterns and designs.
Easy Border Stencils: Simple Yet Impactful
One of the best things about using quilting stencils for borders is that they are incredibly easy to use. Even if you're a beginner, you can achieve professional-looking results with minimal effort. These stencils typically come in a variety of shapes, sizes, and designs, providing endless possibilities for customization.
How to Get Started:
1. Choose the Right Stencil: Begin by selecting a stencil that complements the style and theme of your quilt. Whether you prefer floral motifs, geometric patterns, or intricate designs, there is a stencil out there to match your vision.
2. Gather Your Materials: Apart from the stencil itself, you'll need a few basic supplies such as fabric marking pens or chalk, painter's tape, and a quilting ruler. Ensure that your quilt top is complete before moving on to the border.
3. Position and Secure the Stencil: Lay your quilt top on a flat surface and position the stencil where you want the design to appear on your border. Secure the stencil in place using painter's tape, ensuring it remains steady during the tracing process.
4. Trace the Design: With the stencil securely in place, use a fabric marking pen or chalk to trace the design onto your quilt border. Take your time and make sure the lines are clear and precise. Once you've completed tracing the design, carefully remove the stencil.
5. Quilt the Border: Now it's time to bring your traced design to life. Follow the lines you've traced using your preferred quilting technique, such as free-motion quilting or straight-line stitching. Take care to maintain even stitching throughout the border.
The Impact of Easy Stencils on Quilt Borders:
By incorporating easy stencils into your quilt borders, you can instantly add depth, texture, and visual interest to your quilting projects. The intricate designs created with stencils can beautifully complement the overall theme of your quilt, tying all the elements together harmoniously.
Tips for Using Quilting Stencils:
- Experiment with different stencil designs to create unique combinations for your borders.
- Practice tracing the design on a scrap piece of fabric before applying it to your actual quilt border.
- Consider using contrasting thread colors to make your quilting stand out and give your border more dimension.
Conclusion:
Effortless elegance is within your reach when you embrace the power of quilting stencils for borders. These easy-to-use tools allow you to unleash your creativity and transform your quilts into works of art. By following a few simple steps and selecting the right stencil for your project, you can achieve stunning results. So, go ahead and explore the world of easy border stencils, and let your quilting borders become an exquisite showcase of your artistic vision. Happy quilting!
0 notes
Text

In this informal living room one traditional stencil pattern is used across the floor and another forms a border, eliminating the need for rugs. A camelback sofa, a comb-backed Windsor, and Boston rocking chairs surround the simple table. Staffordshire figures and salt-glaze jugs decorate the mantel.
The Good Housekeeping Complete Guide to Traditional American Decorating, 1982
#vintage#interior design#home#vintage interior#architecture#home decor#style#1980s#living room#80s#fireplace#antique#furniture#Staffordshire#salt glaze#Windsor#camelback sofa#traditional#American
318 notes
·
View notes
Note
Question...how do you make your patches? They seem so fuckin cool. I'm working on a vest and a jacket atm, and I'd like for them to be done by the time a pride fest rolls around next month.
Main technique I use for making patches nowadays is linocut. Its best suited for mass production of patches.
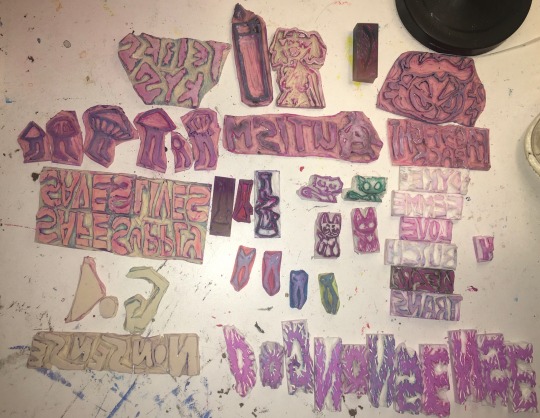
Make sure to remember your carving the mirror image so you have to flip all the text. Using tracing paper to flip the design is a good trick, as well as leaving graphite marks on side, then pressing that to the lino to leave the marks in the same spot. Another trick with pencil is to view what ur carving in negative space quickly, put a paper over your design and shade over it with pencil, darker marks will be where you haven't carved yet.
I use speedball fabric ink, it takes 1 week to set then will be fine to be washed. I have magenta, violet, turqouise, and white. They have a limited range of fabric colors at the store. I have seen gold and silver fabric paint for sale and I will investigate it one day.

I use a speedball roller, i find the smaller one to be better than the big one as I can be more precise and waste less ink.
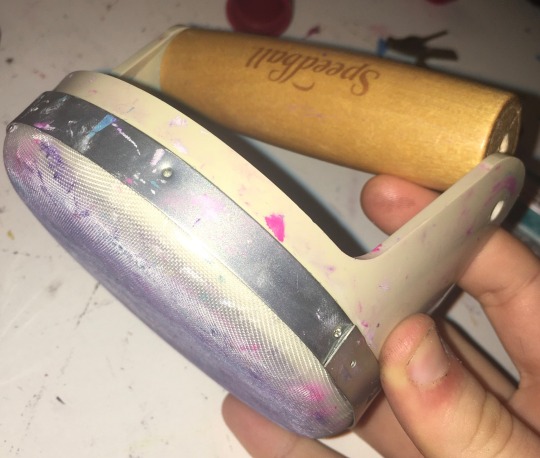
I got a fancy handle for $40 but the screws fallen out so its broken now so just get some heavy books. I used to use a mug. Whats important is pushing your whole body weight into it.
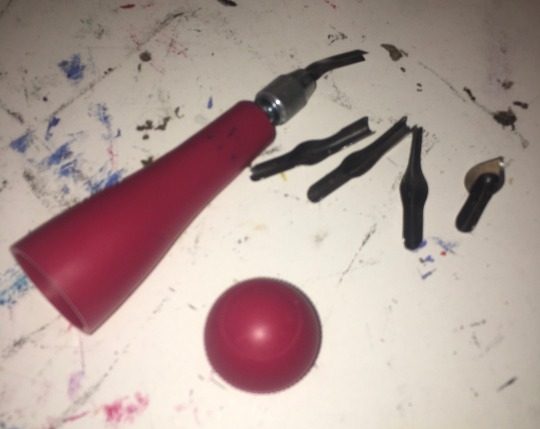
I got a speedball carving tool with different heads I can swap out so I can cut into the lino at different deepness and widths. The heads are stored inside the tool since its hollow and has a screwable removable bottom. I use linocut or dollar store erasers for my carvings. Make sure to wash the ink off your linocuts after your done using them.
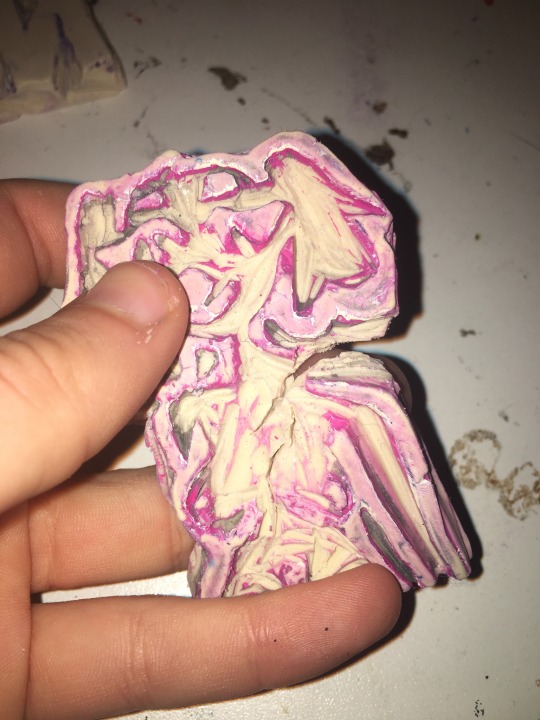
A thing to increase the lifespan of you're linocuts is to use wood glue, some cork or wood pieces, and glued the lino stamps onto them. I dont do that yet so my stamps fall appart from overuse sometime and because I cut way too deep into the lino since I hate chatter.
Chatter is the term for in linocutting when theres little messy lines and stuff. It makes the art more recognisably to be linocut. My work is very clean with no chatter which is why people don't notice its linocut usually. This is a stylistic choice, with diy styles having a lot of chatter can look really cool so experiment with leaving bits of extra uncarvered lino sticking out in ur stamp. I need to experiment and buy some more lino.
You can also use multiple linocut stamps together to make a patch. Some patches ive made have like 8 different stamps. Ive made a dog nonsense patch where each letter was their own eraser stamp. You can also use different colors between the different lino stamps on the same patch to add more color. An effect I like to do is first stamp it in color, then the next day I stamp it in white over the same spot but shifted to the right and down slightly. It makes the text have a cool border 3D effect I love doing.
If making a more detailed picture with colors, i reccomend hand painting patches. I use white fabric paint mixed with acrylics for color to get all the shades i need. Acrylic paint mixed with fabric softener works too.
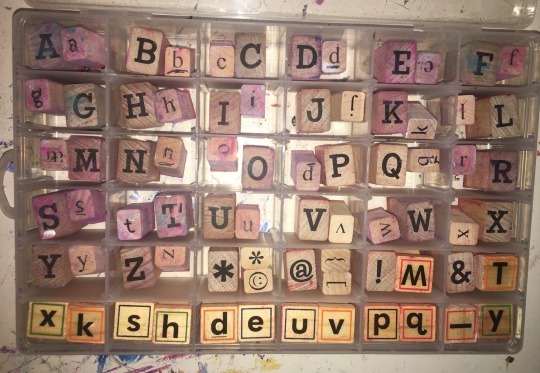
If doing words and you dont want a unique font reccomend using letter stamps. If you want a unique font for that i recommend hand paint for individual or linocut for mass produce.
The positive of letter stamps is the font is neat and can be done quickly. I know from lending them to my roommate that they are very helpful if you have dyslexia and have trouble getting letters right.
A visual effect of the letter stamps is that have a nice boxy edge effect, its an imperfection that adds a personally touch to it. I have both lower and upper case stamps that I got from michaels. You can use a hair band or elastic to hold a bunch of letter stamps together to make a word stamp.
You can use other stamps than letters that you find at craft stores for example my racoon print is a craftstore stamp.
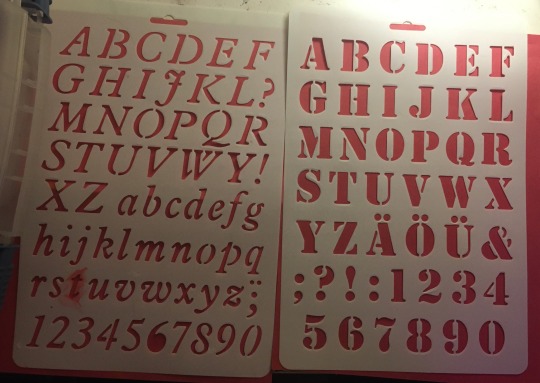
You can also find big plastic letter stencils at the dollar store that you can use to do lettering by filling in gaps with a sponge or or paintbrush. They make special paintbrushes just for using stencils.
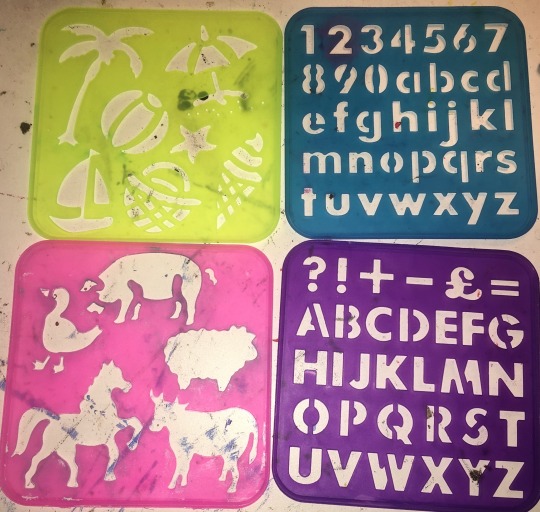
You can also get plastic stencils in the shapes of things, i got some for children and use a horse stencil for my horse smoking weed patch. Easier than drawing a horse myself.
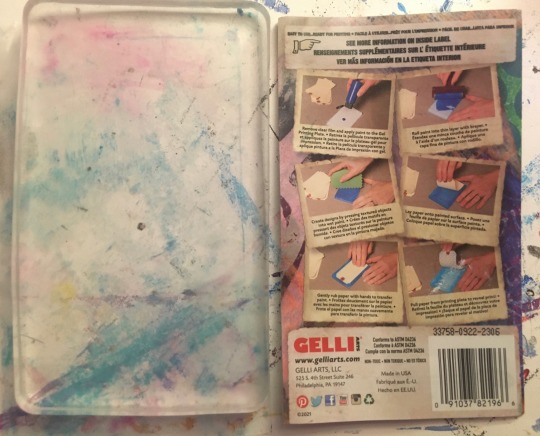
Another technique I use for more unique clean patches is gel plating. I haven't tried printing laserprint images with it as ive seen online a lot but I will try one day. What i personally do is use it to make imprints with chains and physical objects.
Another thing i use with gelplates are any stamps or linocuts that dont have words, or words ones that i fucked up with and forgot to mirror when carving. It flips mirror image twice with the gel plate so it goes back to being right again on the patch.
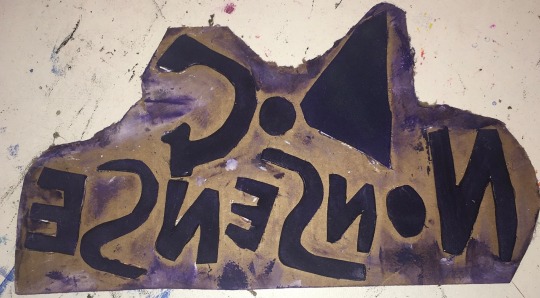
Another patch making technique is using foamboard cut into shapes glued onto cardboard. This is good for a quick test of a design and is very cheap to make. It will not hold under water so is more difficult to clean.
#punk#diy#patches#diy patches#patch pants#diy punk#crust punk#crust pants#battle vest#punk fashion#punk diy#punk patch#queer art#linocut patch#gel plate#linocut#stencil#my patches#patch tips#how to make patches#patch 101
617 notes
·
View notes
Text
you’re tattoo artist!sukuna’s favorite client. you’ve seen him so much that he gives discounts now, allowing you the financial freedom for even more tats. so now you’re coming to him like twice a month (give or take) and he can’t get enough of you.
and you’re not an idiot. he’s a talented artist, his work is worth way more than what he’s charging. and you’ve noticed the way he clings onto your body during sessions, the way his thumb rubs small circles into your plush skin as he works. always making sure his favorite girl is comfortable. you’ve been falling into his trap willingly. letting your legs open a bit more while he’s in between them working on a sternum tat. there’s something so addicting about the way he’s focused on your body, that, plus the slight pain of the tattoo in general makes you dizzy.
it’s no surprise that after a few months you start booking late night sessions with him. the shop being completely empty by the time he finishes prepping his station. when it’s time to put the stencil on your desired area, he does the honors of putting it up against you while you are both looking in the mirror. his bulky frame practically spilling out the mirror’s borders. you never realized how tall he was until now. his arms are slinked around your waist from behind, fondling with the buttons of your jeans to try and get a better placement. of course it isn’t your fault that your pants are at your ankles now as tattoo artist! sukuna rubs your clit gracefully. his other hand laced around your throat, forcing you to keep looking at yourself as he brings you to the edge. at one point you swear he was snickering, almost like you crying out his name and wiggling around in his grasp was entertaining for him.
“Shhh, pretty girl, let yourself go f’me. Such a slut, y’know that?” your head was nodding uncontrollably, his hand only gripped tighter around your throat.
“Pretty girls can use their words, yeah? Tell me how it feels baby.”
“S-so good. So good—!” your orgasm came like a massive wave, washing over both you and tattoo artist!sukuna. his movements slowed down on your pussy as he planted soft kisses on your temple.
“Now get yourself cleaned up, I got a job to do, and we don’t want yer boyfriend wonderin’ why it’s taking so long.”
oh right…. choso.
#📕 my books#sukuna#sukuna smut#black reader#jjk men#sukuna x black reader#choso kamo#jjk sukuna#pfffttttt#gettin my next tattoo soon and im just dreaming#tattoo artist! sukuna#tw cheating
821 notes
·
View notes
Text

More High Valyrian in my bind of Daemon’s Handbook, now with extra shiny!
The HV glyphs say “the blood of the dragon runs thick,” per this @dedalvs post. It seemed like a thematically appropriate quote for this fic.
I wanted the design to feel like it could’ve been a historical medievalish pattern, so I looked at a bunch of old-timey Florentine prints for inspiration. I’m gonna be honest, I’m still not sure what exactly defines a Florentine print, other than it being from Florence.
Red foil is toner reactive. Obviously the Targaryen dragon has to be red. I also made the diamond border red to evoke the sense of blood flowing around the page, as a nod to the HV quote.
My life would’ve been a lot easier if I also made the HV glyphs red, but I really wanted it to stand out in gold foil. So I made a stencil of the HV glyphs, and I hand-traced EVERY iteration of the glyphs using my foil quill. I could probably write the quote from memory now.
On an unrelated note, my hand has cramps right now.
#my writing#daemon’s handbook#bookbinding#fanbinding#endpapers#Targaryen#house targaryen#hotd#house of the dragon#high valyrian#high valyrian glyphs#foil#foil art
81 notes
·
View notes
Text

"No Borders, No Nation, Stop Deportation"
Stencils seen in Vienna
360 notes
·
View notes
Text
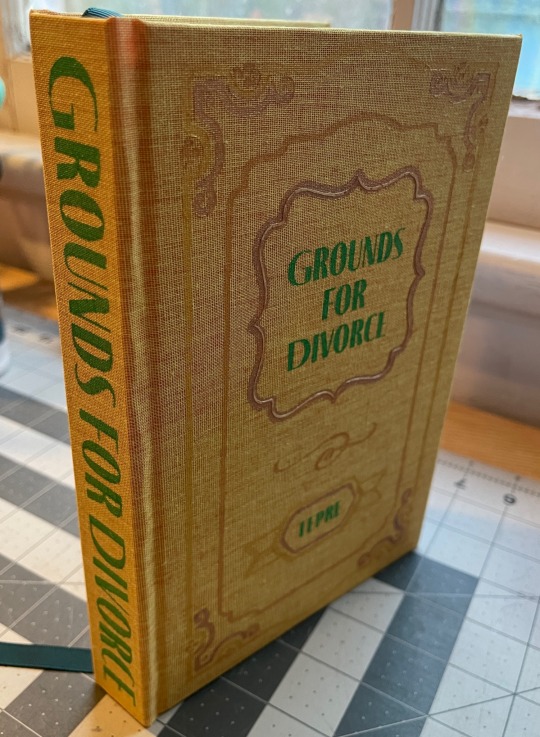

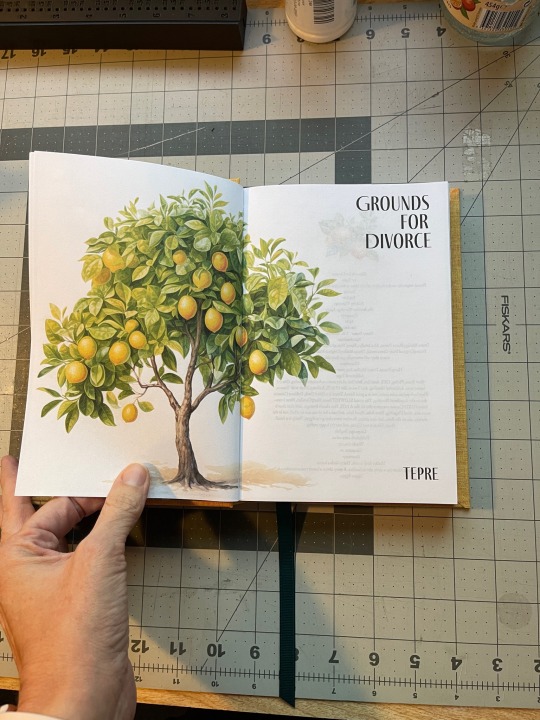
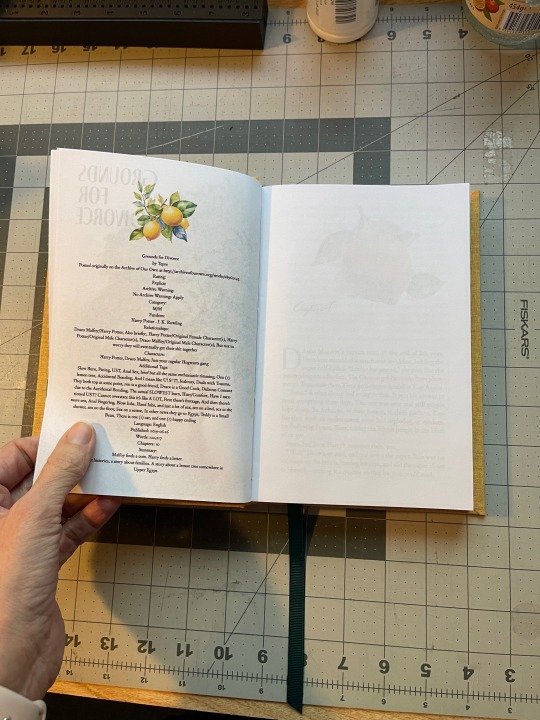
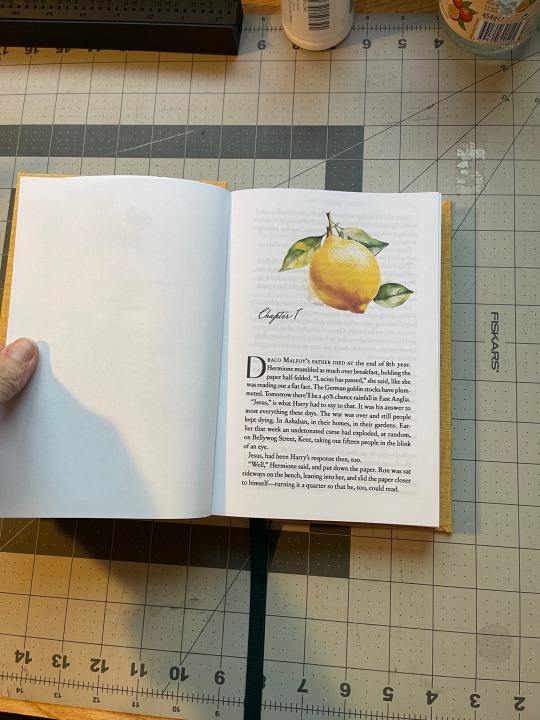
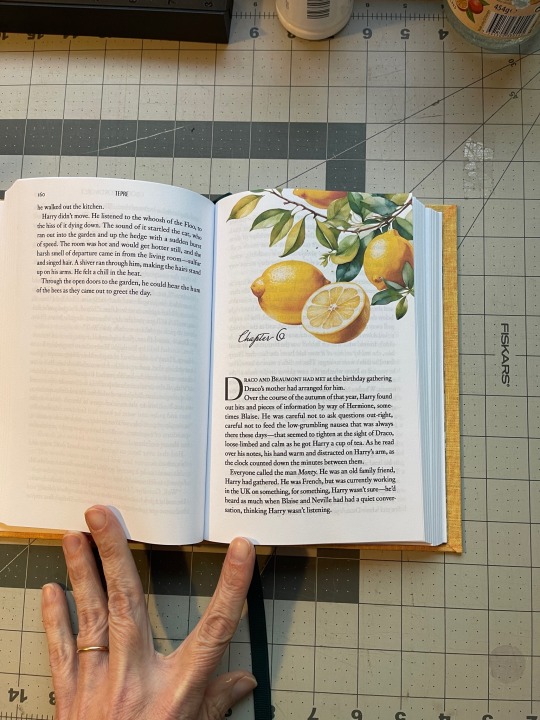
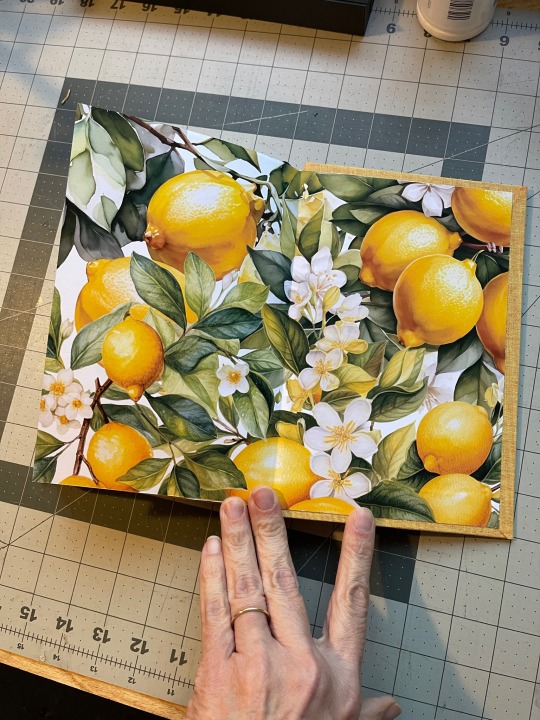
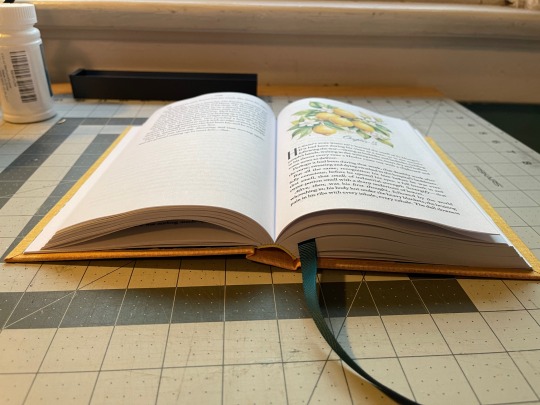
Bound: Grounds for Divorce by Tepre
For some reason, after I posted this, it disappeared. So here it is again.
I love everything about this bind. The end.
(Did I hit the lemon theme hard? Yes. Do I regret it? I do not.)
Usually, I'd complain about whatever I messed up here but I didn't mess up anything! It's perfect! I love every little bit of it! (Okay, if pushed, I'd say I wish I'd used slightly darker paint on the borders of the cover, but I also like how they're kind of invisible.)
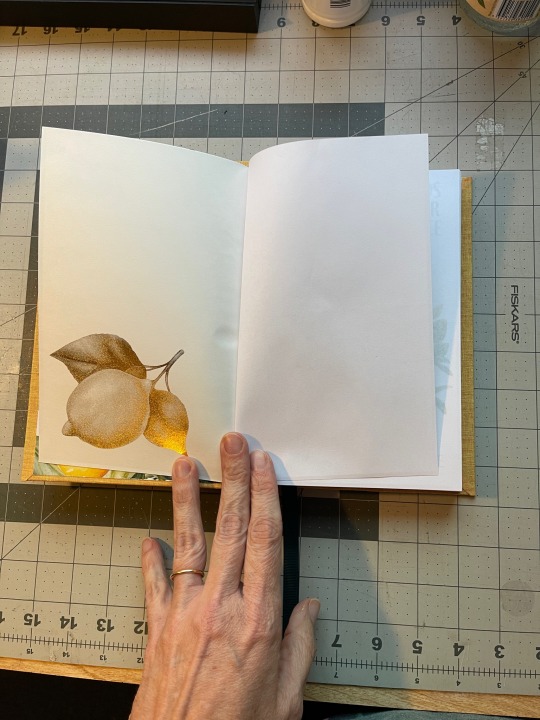
Let's see. I bought the lemon graphics off etsy, and used them all over the book. The end papers are just a bunch of them layered. I love them. I even foiled one on the other side of the endpapers, just for fun.
The stenciling came out beautifully. The vinyl gave me no trouble. I don't even know what to say about this except I can't wait to read it.
Body text: Corundum Text (as usual) Chapter titles: MrsSaintDelafield Pro Drop caps and titles: Fino Pro
Bookcloth: Dubletta in orange-yellow
327 notes
·
View notes
Text
"RESIST PROJECT 2025" Stencil - BTS
I figured I'd share a behind-the-scenes look at how I made my stencil. Feel free to use what you find in this post (and my other posts) to make your own! Just be safe, as it requires sharp blades and chemical fumes.
I started by making the following graphic:
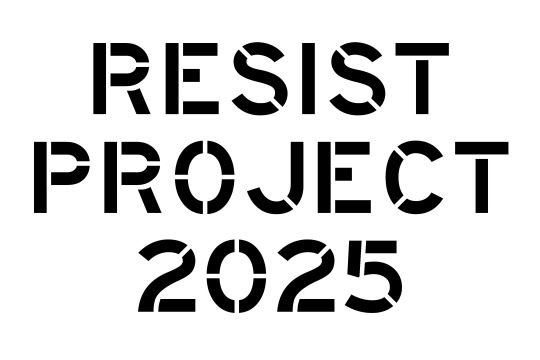
I did my usual thing of putting the graphic onto my phone, tracing it from my phone onto clear plastic with permanent marker, then projecting the shadow onto... well, usually I'd say "foam board" here, but this time it was card stock.


I first refined the pencil trace.

I then used a strip of cereal box I cut to help me consistently add bridges to the trace so no "islands" of the stencil would be completely cut off, and to "peninsulas" so they can remain ridged. I learned from looking at other stencil fonts online that following existing edges helps to keep the final product legible, but there also needs to be a balance with making the cut stencil sturdy enough to last. Most of the bridges I made were as short as possible.

I put this card stock onto a disposable hard surface so I could cut it using my box cutter. I also bought an Exacto-Knife but the blade was shit. Cutting with a box cutter is both painful and time consuming, but this ended up being the most effective tool I had available. I did end up with a blister, though.
Anyway, here's what I ended up with:

The above image was used in my second stencil post.
I ended up making a border of duct tape for my master stencil to protect its edges and to provide a surface for tape to cling to that wouldn't break down overtime.
The idea of a "master" stencil is to have a form I can quickly trace for when I want to make a new stencil. Getting paper wet will damage and warp it over time, so keeping a pristine master stencil is valuable since the copies are disposable and making one from scratch takes a lot longer.
=================================
Okay, so from here, I needed to make a stencil copy using my newly created master stencil.


After tracing and cutting the copy, I took it out in a well ventilated area to spray paint the decal onto some foam board.


A stencil copy like this one can be used multiple times, but it's recommended that you let it dry a little before uses or it will get too wet and warp quickly, ruining it sooner than later.
This was my first test with my first stencil copy:

The above image was used for my forth stencil post.
It's important to make sure the stencil is flat against the surface you're applying the decal to in order to prevent fuzzy edges. I didn't do that and you can see that the letters are not sharp in some spots.
Lastly, I did my little test where I put my sign in a distant room with all lights off except in that room, then took a photo to see how it looked:

There are tricks online about how to flatten a warped piece of paper that I'd recommend looking into, since stencils generally don't last long and will warp pretty quickly. As for how to properly secure a stencil to a vertical surface, well... I won't go there :)
Here are the original posts:
#trump#donald trump#maga#fuck maga#trump administration#elon musk#elon#musk#art#artwork#protest#america#fuck trump#fuck donald trump#fuck elon#fuck elon musk#artists of tumblr#traditional art#usa#philosophy#debate#morality#resistance#us politics#elongated muskrat#behind the scenes#diy#diy projects#diy craft#stencil
44 notes
·
View notes
Text
I don’t feel like I have any super substantive updates on my patch vest (I’ve been in a pretty bad flareup for a bit), but there are some new additions so I thought I’d share anyway.

Image description: the front of a dark grey denim vest with the arm holes hand-hemmed in red thread. On the left lapel is a large heart-shaped it/its pin surrounded by a cloudy rainbow border. On the chest beside it is an enamel Magen David pin in the colors of the trans flag, beside which is a crocheted watermelon attached with a safety pin. On the left breast pocket is a cross-stitched asexual flag secured with dark purple thread and an acrylic pin of an opossum holding a non-binary heart. On the right breast pocket there is a machine-embroidered sunflower patch, and beneath that is another machine-embroidered patch reading “disabled is not a bad word”, secured by lavender thread. Above the pocket is a genderqueer flag pin, next to that is a cross-stitched patch reading “I mask so I don’t bite you” in all caps with a red border and “bite” in red. Above that is a small holographic pin with a sparkly rainbow heart on it. /end description

Image description: the back of the same vest, with two stenciled black patches, one on each shoulder, each secured by x-shaped stitches in lavender thread. The one on the left reads “queer joy”, the one on the right reads “T4T”. /end description
I love my vest and I love talking about it, so if anyone has questions about any part of it please don’t be shy to ask!
#moss-opossum#disability#disabled#handmade patches#patch vest#patch jacket#diy patches#battle vest#watermelon#it/its pronouns#it/its#trans pride#asexual flag#asexual#ace pride#genderqueer#opossum#nonbinary#magen david#queer joy#disability pride#mask up#covid conscious#queer pride#t4t#fiber art#cross stitch#stenciled patches#queer jews#chronically ill
112 notes
·
View notes
Text


Cute house, needs a little fixing here and there, but it was built in 1898 in Weatherford, Texas, has 5bds, 4ba, and was just reduced $45K to $650K.

Love the entrance hall. That door! Beautiful woodwork and the newel post lamp still works.

Just beautiful.

I wish they hadn't painted the wood in these rooms blue, but here it is. They even got to the pocket doors. Luckily, they left the gorgeous original fireplace alone. This is the sitting room, and that wood would be very hard to strip and restore.

Nice that they left the blue carpet, though. It's like new.

The pocket doors open to the dining room that has a door to the porch.


And, from the dining room, you enter the kitchen. Love that they left the stick walls and original features. Look at the stove built around the chimney. I like the cabinet color and copper exhaust hood, too.


It's a very large eat-in kitchen. This is a great reno b/c it beautifully blends old with new.

They completely renovated this bath and it's nice for what it is, but I wouldn't have put it into a Victorian home.


In this bedroom, the floor's a little worn and needs refinishing, but it has wonderful doors with transoms and an original corner fireplace.

These rooms are very bright and get lots of natural sunlight.

The owner was into folk art, and if you like folk art, this home has a lot of nice painting. In this room they did the fireplace, a painted "carpet" on the floor, and stenciled border along the top.

It's hard to see, but there are 2 cute bears wearing pants on the fire box screen.

This must be a 3rd level bedroom and you can see the nicely stenciled art.

It has its own bath.

Here's another nice big room with a painted rug.

An interesting room.

It's very large up here and looks like this is where at least 2 or 3 of the bedrooms are located.

This is a cute bath. Love the blue floor.

How cute is this little storage building in the driveway? It says Blacksmith Shop.


It's a very nice property.

Lots of trees on the .66 acre corner lot.

And, just a few blocks from the historic downtown district.
https://www.zillow.com/homedetails/202-E-Lee-Ave-Weatherford-TX-76086/230770336_zpid/
112 notes
·
View notes
Text
Sleeping In The Garden (You Broke The Dark)
(or the single dad hasan fic no one asked for)
tw/cursing, insta-love
cavity inducing fluff below the cut, don't say i didn't warn you
more here
you arrived early to the library to set up.
you didn’t need a full hour and a half to unpack a small suitcase full of various cheap school supplies; Crayola paints and old brushes warn with age, stencils and small canvases.
it's winter break at the small school you teach, and to make ends meet, you've been doing small paint and sip activities at local libraries for the kids.
it gets the children out of their parents hair for an hour and a half, and they're usually excited to see the artwork they work on come to life-and the hot chocolate is an added bonus for most kids.
kids file in, and while the class was filled, you can't help but notice the seat in the corner unoccupied as you gather your supplies, say a quiet prayer to whatever god exists, and walk to the front of the room-
the door is thrown open, and a tall man ducks into the room, snow covering his mop of curly brown hair, hunched over so he doesn't tower over his kid, his hand on their back as he speaks quietly to them:
"Go on. You're okay."
She takes a step, but immediately retreats back and hides behind the mans leg, her tiny fingernails dig into his leg.
"Baby," he sighs, "C'mon. I promise-"
He looks up and sees you, his face turns pink and he stands a little straighter, takes the hat off his head and tries to wipe the snow out of his hair.
"I'm so sorry we're late," he sounds genuine, "I can offer you an assortment of excuses, each shittier than the last-"
"Papa."
he realizes his mistake, the curse word, and half turning around, speaks gently: "That's right. My bad. That's a quarter in the jar when we get home, okay?"
finally, a small giggle from behind his legs, and he stands a little straighter, as if proud of this breakthrough.
"You aren't too late," You reassure him, "We didn't even really start."
"Oh, good." and he sounds so genuinely happy, you have to bite your lip from smiling back, "She hasn't stopped talking about this since I signed her up."
"Papa."
A groan from behind his leg that makes him laugh
"You can stay," You say, probably too quick even, borders on pathetic, "If it makes your daughter more comfortable. Plenty of parents stay."
And that's not a lie, necessarily, a few parents stayed, but they mostly linger towards the back, by the various snacks, heads buried in their phones.
"Papa," the voice from behind his legs come, border on pleading: "Stay?"
and then, a little quieter, a little teary, she finishes with a, "Please?"
and listen, you don't know the man in front of you, or the kid either, but as he kneels on the floor, his head titled and voice low, "Okay." He nods, "I'll stay."
he pushes down the laundry list of things he needs to do; phone calls to make, grocery shopping to do-
his daughter comes first, always.
He looks up at you, a small smile on his face: "I won't get in the way, I promise, where do you want us?"
And he stands, and slings his daughter onto his hip, a carbon copy of him, a mop of curly hair on top of her head, some sloppy ponytail and a knit hat shoved over her head-
"There's a seat right there." You bite your lip and turn, pointing towards the empty chair, hoping you turned in time so he doesn't see the red of your face.
"Thank you uh-" He shakes his head, laughs, "Sorry, I didn't get your name uhm-"
You laugh, "Right, It's nice to meet you-"
And you offer your hand, hands in the air and feels awkward for half a second as you introduce yourself, but he laughs, shakes back:
"hasan," he gives the kid on his hip a gentle shake, "And this is Ophelia."
"It's nice to meet you two," You smile at the small figure on his hip, who buries her head into his shoulder blade, her hands hold tiny handfuls of his sweater, makes him roll his eyes but fond at the side of his lips as he bounces her on his hip, "Have a seat, and i'll bring everything over in a second."
He shakes his head, as if dazed, "Of course, right." and walks to the table, trips over his own feet, but manages to help himself from falling.
He sets Ophelia on a chair, and takes his own coat off, sits cross legged next to her on the floor, still towers over her, his voice low but he's smiling and pointing at everything, obviously trying to make her more comfortable-
You stand at the front, slowly starting the beginning instructions after you set hasan and Ophelia up with the supplies, watch as he carefully ties the apron around her waist, a tickle on her side as she finally giggles, reaches over and stars grabbing at the paint exctidely-
you go around, getting ready to serve the small paper cups of hot chocolate, once you realize everyone is mostly comfortable (even Ophelia, who has made friends with the little boy next to her) when you feel a presence by your elbow.
"Sorry, hope I didn't scare you," He smiles, scratches the back of his neck, "Thought i'd ask if you needed help."
He smiles weakly for a second before his eyes go wide, "Not that it doesn't look like you don't have this under control or anything!"
finally, you laugh, and it seems to make some anxiety he has go away.
"That would actually be great," You laugh, "If you wanna carry the tray, I can hand 'em out. We can doule team."
He nods, "Sure, of course-"
"And I can re-pay you," you continue, a smirk on your lips.
"Oh," He shakes his head, "No way. How happy Ophelia is, is good enough payment"
'and meeting you' hangs on the tip of his tongue, but he swallows that down
"The payment is unfortunately," you continue, turning around, "In marshmallows."
you turn back around, a large bag of mini marshmallows in your hand
he laughs, a giggle, his voice teasing, "Hot chocolate and marshmallows?"
"Marshmallows are my love language." You laugh, and before you realize what you're saying he's nodding, like that actually means something
"Good to know," he laughs, "I'll keep that in mind."
And your face blushes red again and you shrug, struggle with the ends of the bag for a second before he takes it, opens it without asking and hands it back
he snorts at himself, "I'm so sorry," he shakeshis head, "I think i'm still in dad mode."
You laugh, shake your head, "That's okay-"
He cuts you off, "You lead the way?" he says gently, "And maybe i can make it up to you later?"
for a second, you wonder what, exactly, he wants to make up, but as he looks at his dirty converse and kicks gently at the ground, his face red, you know what he's getting at.
"Yeah," you shake your head, hoping it doesn't come off as desperate as it feels, "I'd love that."
"Yeah?" his head whips up, and he nods, as if he's calm about the whole thing.
"yeah," he nods a final time, "It's a date."
and you two deliver hot chocolate with marshmallows, both of your faces tinged pink, ignoring the way your hands knock into each other the entire time.
#caroline writes#hasanabi#hasanabi x reader#hasanabi x y/n#hasanabi x you#hasan#hasan piker x you#hasan piker fanfiction#hasan piker fic#hasan piker fanfic#hasan piker imagine#hasan piker x reader#hasan x reader#hasan piker#hasan piker ff#hasan piker x y/n
83 notes
·
View notes
Text
Victoire-O-Lantern Stencil

[I did the original as a vector image, but sites don't like those, so if you'd like one or just a png of a certain size just let me know. Personally I like my stencils as vector images so I can scale it to whatever pumpkin size I wind up using.]
The Black sections are the parts you cut out completely.
The Grey sections are the parts you just merely etch into the surface enough so your candle can light up the inner pumpkin flesh. (if that makes sense?)
A nice thing about the Victoire logo is that if you want you can do it fully cut out as long as you take the border out of the design. But if you go that route just be warned that you'll be trading the tiresomeness of etching with the tiresomeness of needing to be a little meticulous with your carving as a lot of the shapes are pretty close together and the more you have cut out in a space the more delicate you'll need to be.
I haven't tried it out yet, but I think this one will make for a pretty cool jack-o-lantern.

#pwhl montreal#montreal victoire#Montreal please accept this humble offering and sign Clair DeGeorge
21 notes
·
View notes