#bookbinding asks
Explore tagged Tumblr posts
Visit Tumblr Blog
Explore Tumblr blogs with no restrictions, modern design and the best experience.
Last Seen Tumblr Blogs


Fun Fact
Tumblr.com is the 103rd most visited website in the world.
Note
First, I want to say that I adore your binds. They are stunning.
I am working on getting into book binding, but I do have some questions/things I’m struggling with that I’m hoping you might be able to help with.
I’ve designed several typesets and covers, I’ve just not yet made it to the finish line. Perfectionism is kinda kicking my butt tbh.
1. What kind of printer do you use? (And do you love it?) I’ve currently got a b&w laser printer, but I want to be able to print typesets in color, but I’m debating between an ecotank inkjet printer or a color laser printer. I’ve never had a color printer before so I don’t really have a frame of reference for what’s better.
2. My other big issue on my typesets has been figuring out the margins. I’ve been formatting my typesets in MS Word. If you use word, do you mind sharing what you set your margins at? And how much you cut off when you trim your textblocks?
I can’t seem to find the best balance between wasting space/paper and having margins that look too small.
Thank you! :)
Hiiii! Thank you for the sweet words 💖🫶🏼
For printers—I have a canon pixma ip8720 that I use for wrap covers, dust jackets, paperback covers and endsheets. I LOVE this printer so much (any of the pixmas are solid color printers) I also use off brand ink bc I can’t be bothered to spend $$ on brand name and it works like a gem.
My other printer is the canon imageclass which I love/hate. It’s a color laser printer so works like my b&w but with color (so I could do foiling on it) the quality is great but I did have issues with it once I put off brand toner and I need to clean the cartridges so I don’t fully love it 100% yet. Still a fan though for the price point. Thats what I used for my Sugar High & ‘tis the damn season typesets. Otherwise I just use my brother b&w for typesetting.
For margins I typically go for .6 on the side margins and usually .5 top and bottom for hardcover. Larger for paperbacks. I try to cut the least amount off on my guillotine but I def have cut off far too much sometimes.
Make sure your layout settings in word are for a letter sized paper and under book fold. Then update the margins and then you can upload it into book binder js to make the pdf into a signatures! (Also I would HIGHLY suggest using Blak Bindery’s macro (find them on insta) it saves me so much time with typesetting in word. (Also ALWAYS hit control A to highlight the entire doc before changing margins/page layout (have learned this the hard way hehe)
Hope this helps!
#ask jules#I love love love when new binders come to me with questions#welcome to the most fun and frustrating hobby#bookbinding#bookbinding asks
10 notes
·
View notes
Note
For the bookbinding ask game: 8 and 13 please! :D
8. What’s a binding type you’ve never done but that you’d love to try one day?
I'm fascinated by the K118 binding that @spockandawe recently did. And one day I want to do a sewn board binding.
Oh and a Springback. I got a brief lesson on them at the Renegade meetup last year but I don't really remember much so I need to study up. Since I tend to thick AF books I need to try it.
13. Do you have a favourite cover material?
I really prefer using fabric, either commercial or homemade bookcloth. And when combined with lovely marble printed fabric, it gives a lovely effect with maximum durability.
4 notes
·
View notes
Text
If you're stressing out about a part of the writing process for fanfic to the point where it's not fun anymore, just don't do that part
Post that fanfic with 1000 grammar and spelling errors. Make your characters OOC and give it a Mary Sue. It is a hobby you're sharing not a literature assignment you have to turn in by midnight
#sara shush#sorry to all the people who ask me if ill ever uber correct all the errors in my fics but i dont care enough for it#i like the fun parts of writing#like getting the story across and exploring the characters and ideas and relationships#idc if its not perfect its a fanfic#like dont get me wrong i wanna bookbind again one day so ill get around to it eventually#but if you stop having fun doing the writing then what are you writing for
2K notes
·
View notes
Text
I'm extra bored RN so please send me questions in asks please!
20 questions about bookbinding
What are you excited about binding right now?
What is your latest binding?
What was your first binding?
What is your favourite binding so far?
When did you get into bookbinding?
What is a binding by another binder you really love?
What’s your favourite type of binding? (coptic, stab, fine, Bradel, etc.)
What’s a binding type you’ve never done but that you’d love to try one day?
How would you describe your binding style?
What’s your favourite bookbinding tool?
Do you have a DIY press/what is your press like?
What is your workspace like?
Do you have a favourite cover material?
Do you have a favourite paper for textblocks?
What are your feelings about headbands?
What type of text do you usually bind?
Do you match the aesthetic of the bind to the text?
Have you ever done a rebind?
Do you have other craft hobbies besides bookbinding?
If you had to give past!you one advice about bookbinding what would it be, and is it the same advice you give newbies?
98 notes
·
View notes
Note
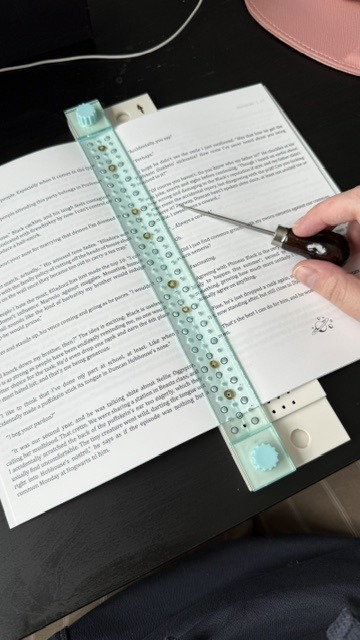
what kind/style of endbands do you usually do? they look so good 👀
hi!! sorry for taking a while to answer, I wanted to make sure I could give you my best answer.
I usually do what's called a "double core" endband. I use double core endbands over the "bead on front" method because bead on front style is not great for uneven distributions of color, irregular patterns, or using more than three colors. Functionally it works by having your extra threads wrapped up inside the thread that is showing, forming the smaller secondary core. Ultimately you are doing figure 8s around the main core & then your secondary core of thread. This keeps things pretty neat & tidy. The tutorial I first used was this one by DAS Bookbinding, though I don't think his endband tutorials are his best ones. Another binder I've spoken with endbands about a lot is maleeka, who recently did an endband tutorial herself.
maybe I should do one... but it takes a lot for me to get enough motivation to make videos. I'll take this opportunity to write up some tips I've shared when people ask instead:
1. Endband core material is the MOST IMPORTANT component. You need a core that is stiff but flexible - it should NOT be floppy because it wiggles everywhere under the tension of the thread, but still needs to flex with the opening & closing of the book. You want something that doesn't compress, to reduce tension shifts in thread creating a lumpy endband. Have a smooth core is less critical but helps to avoid snagging threads & allows you some leeway on sliding threads around for adjustments. My personal choice is smooth leather jewelers cord (link is just an example, I get mine from a local craft store).
2. Thread size. All your threads need to be the same size; it will be visible if you are using two different sizes, and mess with your front core. Additionally, I know lots of people will use larger twists of multiple strands of embroidery thread, which can work, but is more likely to compress & alter its size in unexpected ways. A single strand is preferable. If you want something thicker you can find some thread weights that are heavier twists intended to be used in a single strand, not pulled apart. I prefer smaller sizes because it works better for the gradient designs I like.
3. Silk thread is your friend (if you can spend the money on it). It reduces fuzz (no fuzz like you get with cotton/DMC embroidery thread), it's usually easier to manage, has a more compact twist, and a higher shine. I use Japanese silk hand sewing thread in size #9 (9号). There's multiple brands (Tire, Daruma, KNK/kanagawa, etc). Here's a wholesale listing (minimum 20,000�� for international). A non-Japanese brand is Guterman silk (German brand). Both the Japanese & German threads come in a heavier weight (Japanese is #16, Guterman is buttonhole).
4. Thread tension is the most important part of the actual technique. You need to ensure the threads currently wrapped in the secondary core keep tension when you are working the thread around them.
5. Working on a curve. This is only really relevant if you're doing an endband on a rounded book, but the circumference of the curve means there's more real estate on the outside vs inside of the curve. Sometimes this can cause bunching on the secondary core. My own solution to this is that sometimes I wrap the primary core but drop a wrap here or there around the secondary core (only between two wraps of the same color I'm dropping). I uh... don't know of anyone currently recommending this besides myself so I can't point to any pro endorsement for this method, it's just what works for me. Forgive my terrible writing:
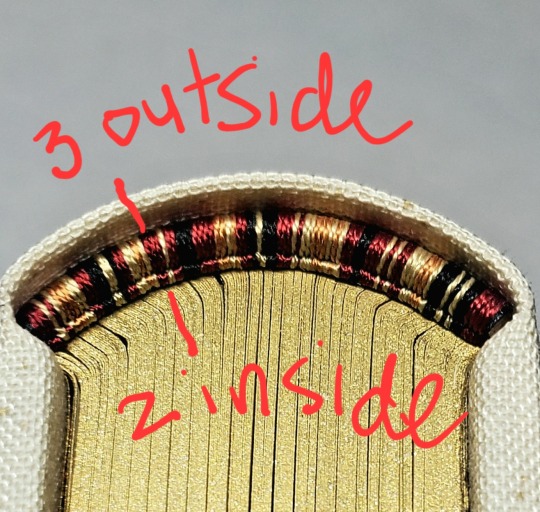
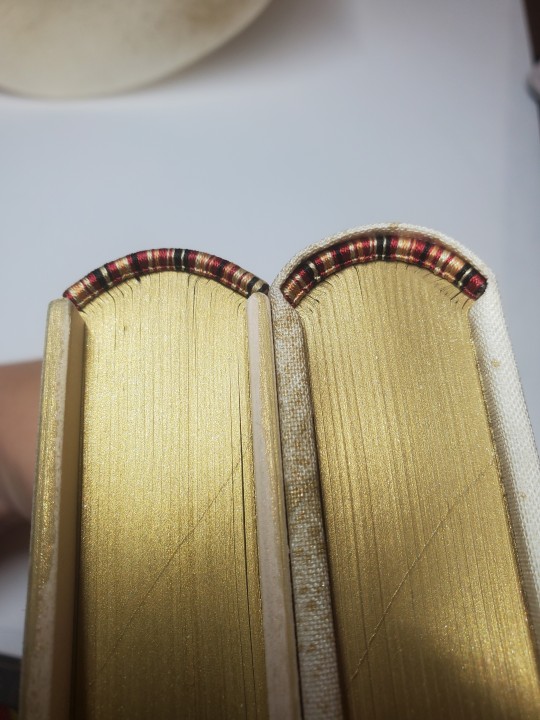
6. Pattern management. I... don't really plan much how my patterns sit on the spine, which is not very helpful. HOWEVER you can do some pattern management on the fly, if you really want your pattern to end at a certain place. Thread can be packed more or less densely on the core, resulting in some pattern compression; you could also strategically drop wraps in less noticeable locations. An unintended example: I was replicating the pattern on this endband (left) when I realize I wasn't packing the thread as densely as I had the first time around (right), which resulted in the overall pattern taking up more space. You can do this on purpose, if you need to.
this was way more than you asked but it gave me a chance to put all this in one spot. Best of luck in vanquishing the dreaded EndWyrms.
#fanbinding#bookbinding#celestial sphere press#in progress review#ask des#i tend to shock ppl a big when i say i don't actually enjoy sewing endbands#i merely Tolerate it#all of this knowledge is 100% spite driven to reduce my own frustration
381 notes
·
View notes
Text
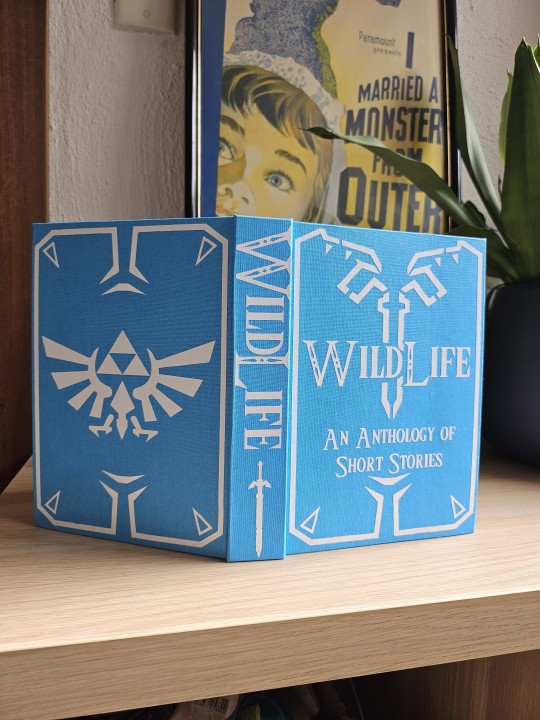
Guess who just completed their first Linked Universe Bookbinding project! 💙
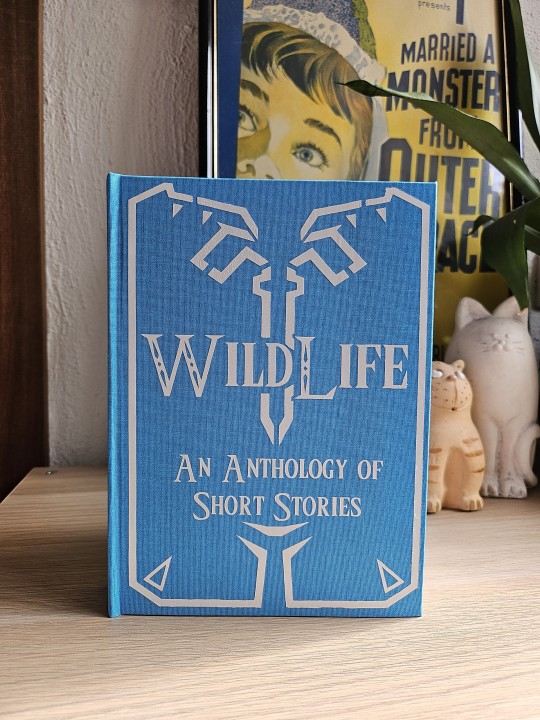
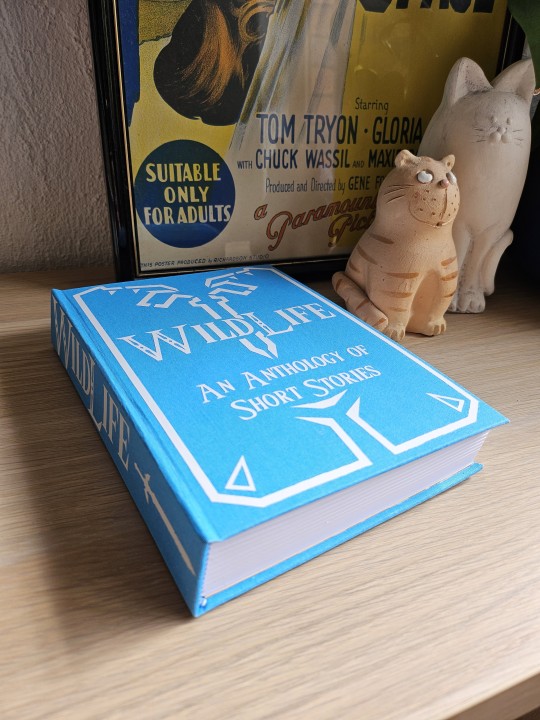
Made myself an anthology of all my favourite Wild-centric fics that were just too short to be a book on their own.
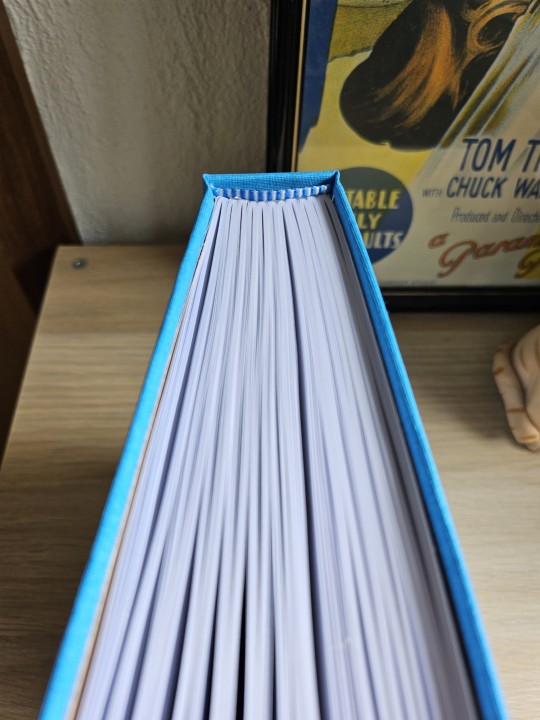
I wanted to model the cover off the Champion's Tunic so I ended up finding this gorgeous bright blue bookcloth and decorated it with white HTV, then found some blue and white headbands to match (not quite ready to try making my own just yet).
I hope people like this because I've got a big Linked Universe Bookbinding project I plan to announce soon, so stay tuned for that!
(Also please don't ask what fics I included, I feel guilty because I wasn't able to make authors copies and I don't want anyone to feel disappointed)
#linked universe#lu wild#linked universe fic#fanbinding#ficbinding#bookbinding#my books#feel free to ask me questions about the process!
370 notes
·
View notes
Text
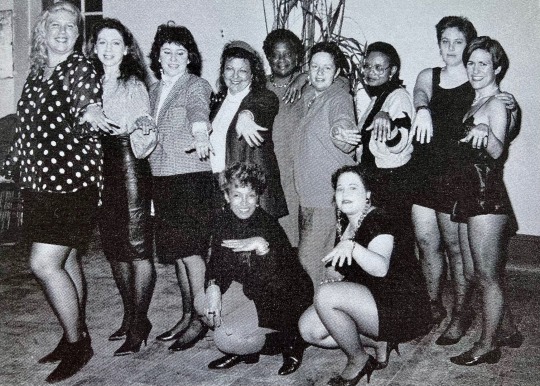
"The New York Femmes, 1991" by Morgan Gwenwald
source: The Persistent Desire: A Femme-Butch Reader, edited by Joan Nestle
#once i get a proper scanner it's over for all of you#unfortunately my printer is SHITE#also unfortunately the way a lot of these books are bound#i'm pretty sure getting a good scan would require taking the binding apart so i can get a clean scan of each pag#and i have found bookbinders in my area#i am admittedly very nervous to take these books apart though at least not without more knowledge#i'll have to ask for the advice and assistance of one of these bookbinders#let them tell me how before i ruin everything ya know#lesbian literature#lesbian#dyke#archived#thatbutcharchivist#femme#femme lesbian#femme dyke#black femme#black femme lesbian#poc femme#lesbian history#black lesbian history#black lesbian#poc lesbian#lesbian books#lesbian photography#author: joan nestle#the persistent desire#year: 1992#publisher: alyson publications inc.#photographer: morgan gwenwald
262 notes
·
View notes
Text
How obsessed and hyper-fixated are you with your fanfic characters?
Me:
BOOKBINDING!
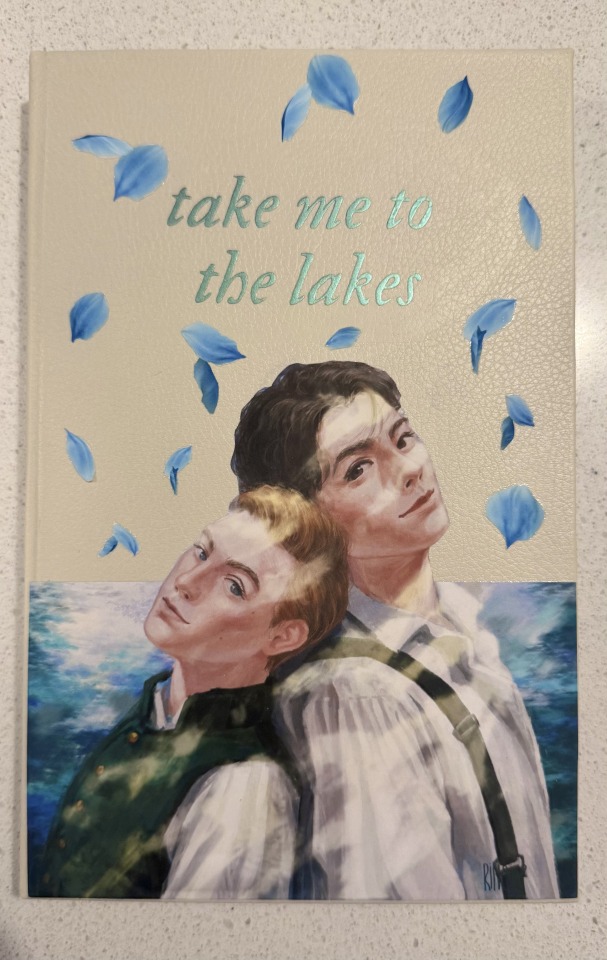
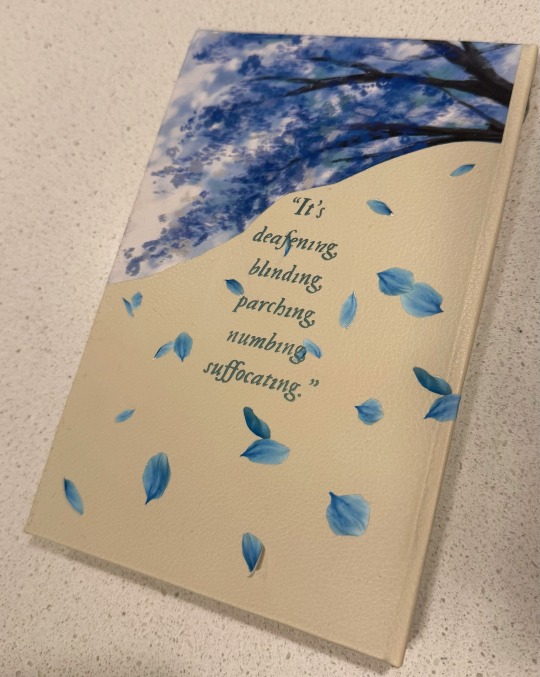
Ominis and Phineas now sit on my shelf along with my other books ♡
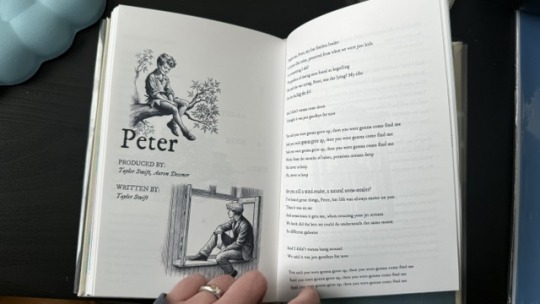
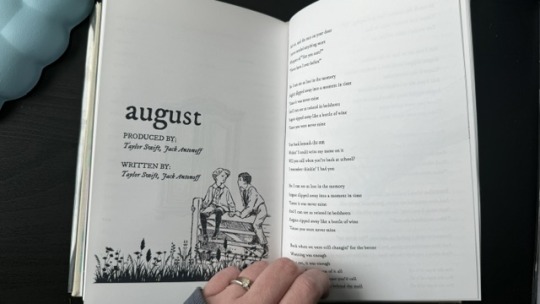
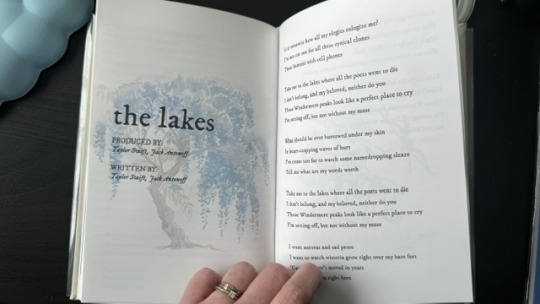
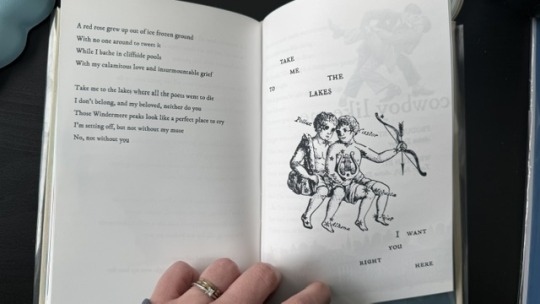
This was my first time binding fanfic, and no better choice than my own, "Take Me To The Lakes" (AO3 / Wattpad)
update (March 30): New cover art by the amazing @rinthecap 🩵
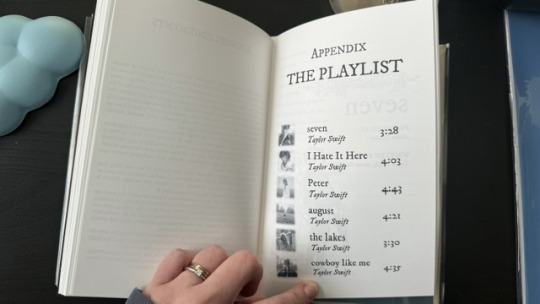
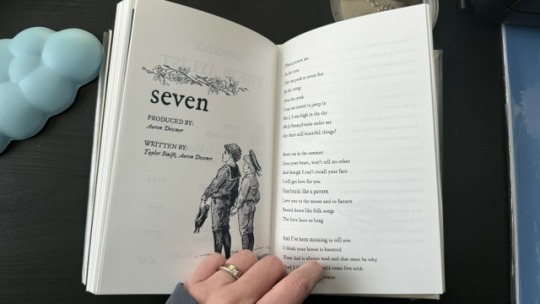
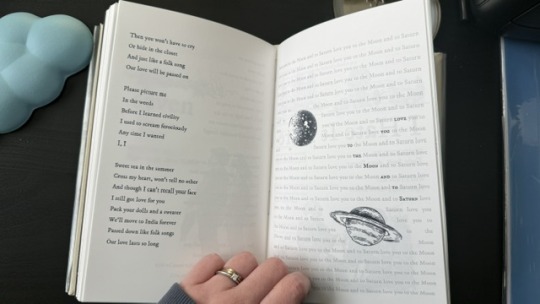
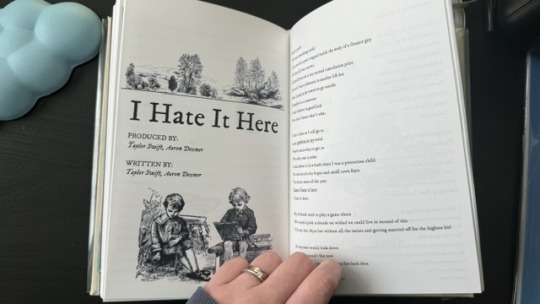
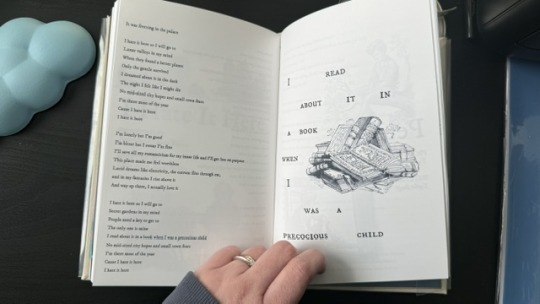
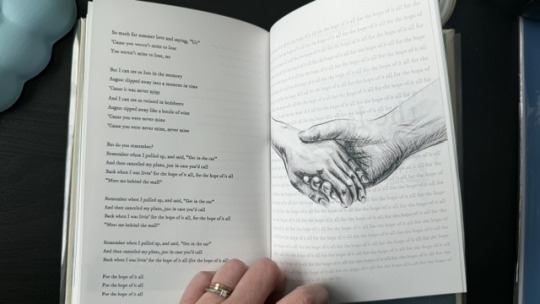
More photos and the step-by-step after the cut! (+ the appendix with Taylor Swift songs in a stylised lyric book)
I'm all about my crafty hobbies. I've been eyeing bookbinding for a while, and the algorithm finally convinced me to dive into it so I'd have a reason to procrastinate on writing
Having written a shorter fic ("Lakes" is roughly 35k words) gave me the perfect opportunity to start with something simpler.
The main tutorial used is the one by NeatFreakGeek on Tiktok.
Step 1: The typeset
I used the base template file by NeatFreakGeek, which already had the settings for printing in formatted book signatures.
With the basic body of the document formatted and ready, I started the personalization: choosing the fonts, spacing, sizing etc.
For the quote at the beginning, I chose one of the lines I wrote for Ominis + the wisteria.
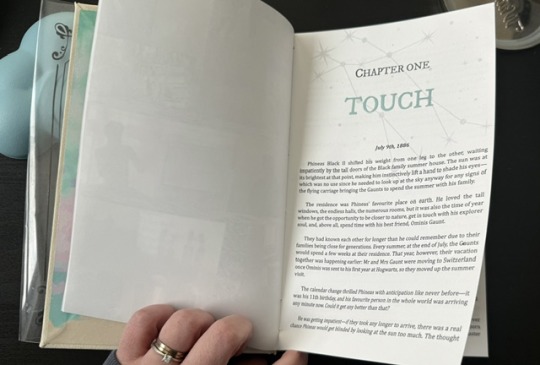
For chapter headers, I chose the Gemini constellation. (In the story, Ominis and Phineas got their middle names from the stars in the same constellation, Castor and Pollux.)
I also made the chapter titles with the HTV to give it an extra glow.
Sight is overrated. Phineas makes all my senses the very essence of life itself.
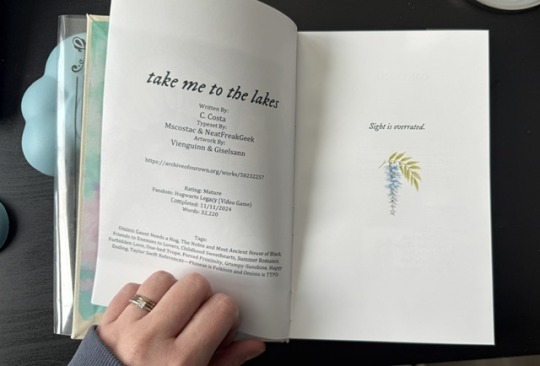
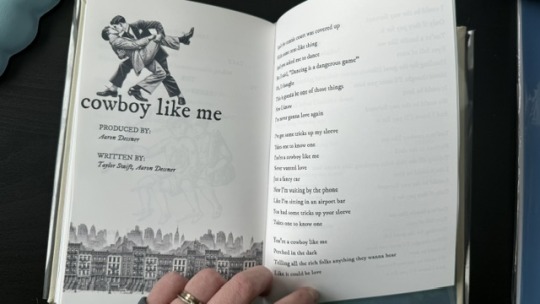
Since the story was rather "short", in order to have a thicker spine, I added an appendix with the stylised "lyric book". This was probably my favourite part of typesetting!

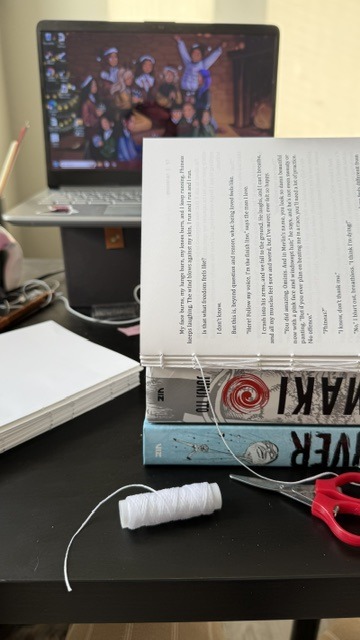
Step 2: The textblock
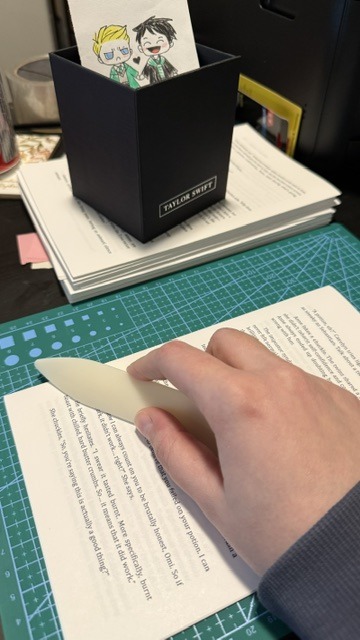
With a little lot of trial and error and more mathematics than expected, I printed each signature at a time, then folded each at a time, making sure it didn't get mixed up across the signatures. My printer does front/back automatically, but to print the commissioned arts as borderless, I gave myself a headache, printing it separately and manually. This step could have been done considerably faster with a laser printer and b&w content only :)
Next, it was sewing and glueing. I won't go into detail here because the video tutorials are way better at explaining. All in all, with the right tools, this was done rather easily and with barely any mistakes, so I didn't have to print anything again, thankfully.
Step 3: The endpapers
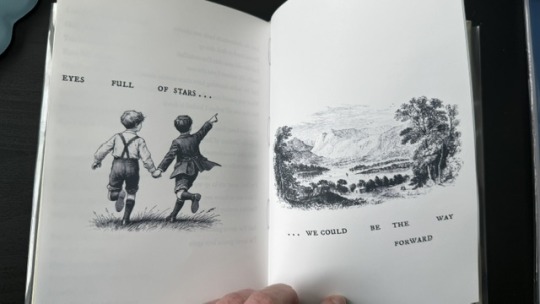
I got a scrapbook 12x12in block in this abstract colours. I had many different ideas on how to match the theme, but I ended up choosing these colourful patterns that align with how Ominis perceives the world. Then, I added the quotes from the story.
The endpaper of the front got this sky-like print to go with the dialogue Ominis and Phineas have when they are children.
P: How would you know what blue skies look like? O: I don't know. And I don't mind not knowing.
The endpaper of the back is in green x blue shades, colours that are also a big part of the story. For the quote, I chose one of their last lines when their relationship is established.
P: Ominis, you always care too much about the others... but who takes care of you? O: No one ever did. P: Let me care for you. Please. Let me love you, Ominis Gaunt. O: Will it make any difference if I say no? P: Absolutely not. O: Will it make any difference if I love you back? P: Fucking absolutely yes.


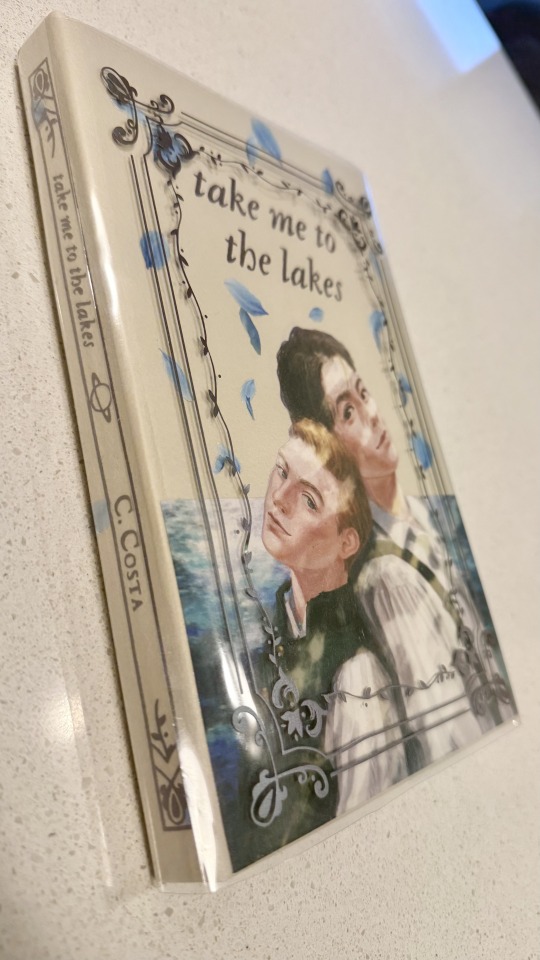
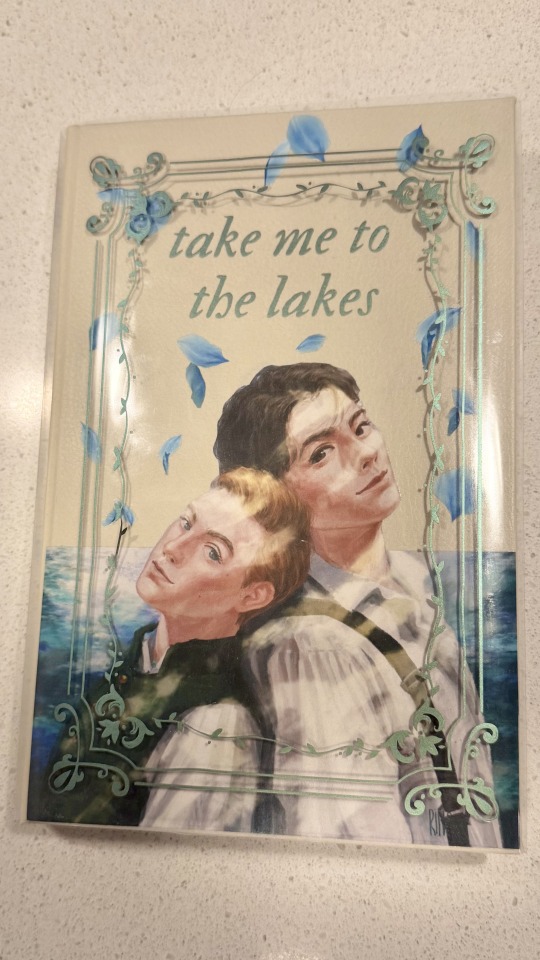
Step 4: The cover! (Yes, the most interesting part!)
This was the most challenging step in both the conception of the design (too many ideas to choose from) and the execution (I've never hated box cutters so much.)
With the basic cardboard casing cut and glued, I chose a faux leather material as a book cloth. This might be the choice I regret the most, because the glue it comes with is not that strong, so it would often unstick easily, and also, it's a bit too thick, leaving the corners a bit weird. But the final result was a bit worth it.
For the cover design, I printed the art with fabric HTV and ironed it on. On top of it, I threw in some wisteria petals (a reference to the song "the lakes", by Taylor Swift), and another quote of the story at the back.
I didn't have a cricut machine back then for the vynil pieces, so I ordered it online. This part was harder than I thought, once again because of the faux leather choice: as I ironed the HTV, some parts of the material melted lol.
Lastly, I decided last minute to create a clear dust jacket because the combination of the faux leather + printed HTV seemed tro fragile to be handled. I liked the final result, but ironing the HTV on the acetate was a pain lol.
In summary, this was so much fun and not as hard as I expected, craft-wise. The designing of it all took the most time just because I wanted every little detail to have a meaning :)
I made two copies to gift one to a friend, so it gave me the opportunity to make the first one and mess it up, then, for the second one, I had already learned from my mistakes.
There are many things I'd do differently for my next binds, but that's the most fun part: experimenting with materials, themes, and processes.
#I have a lot of free time#In crafts we trust#now I'm even more motivated to finish my other fics just so I can print them#my family asked for a copy now I don't know how to explain that I won't let them read my fic in a million years#hogwarts legacy#ominis gaunt#ominis gaunt fanfic#ominis x mmc#book binding#bookbinding#fanfic binding#gay fanfiction#gay#lgbtqia
71 notes
·
View notes
Text
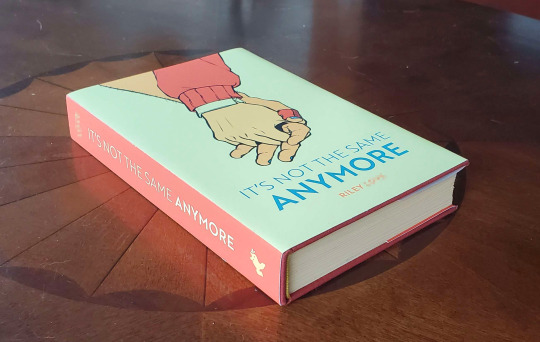
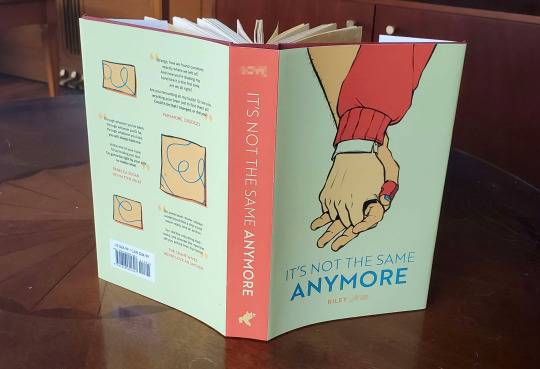
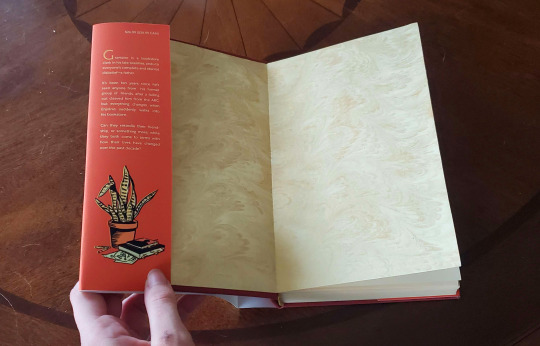

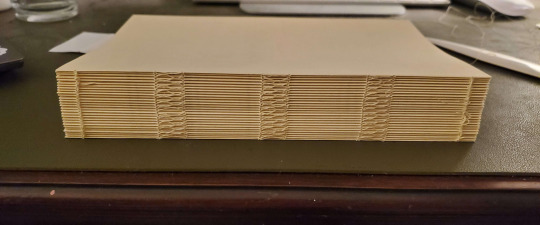
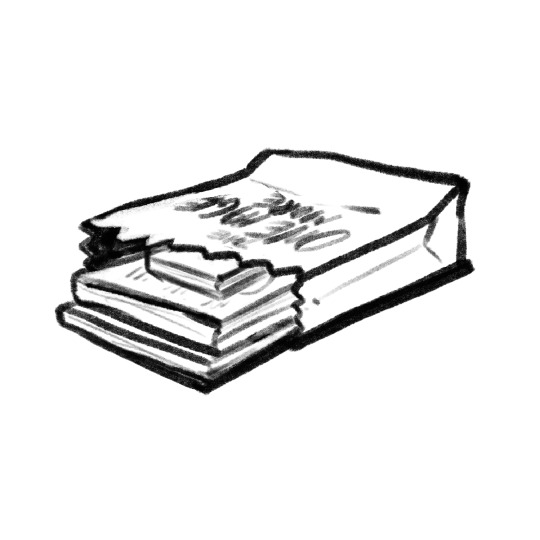
I designed and hand bound It's Not the Same Anymore into a proper book!! It's been a long but rewarding process from start to finish, and I'm so happy to have a physical version now! :))
Thank you to @renegadepublishing for having so many good resources available for beginner bookbinders. Anyone else who'd like to try, start there!
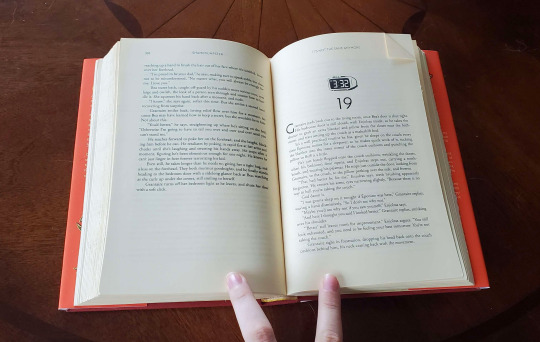
(Bookbinding progress pics and a bunch of the chapter header images below the cut, for anyone who's curious!)
Bookbinding Process Pics:


Chapter Header Images:


#les mis#exr#enjoltaire#fanfiction#bookbinding#my-art#INtSA#putting my graphic design degree to use#I had to ask the people at office depot to print this book jacket#fanfic bookbinding
220 notes
·
View notes
Text
Hey y'all!
I'm very excited to share this bind! This book was made for the winner of my Fandom Trumps Hate auction via the crafts bazaar! @fandomtrumpshate
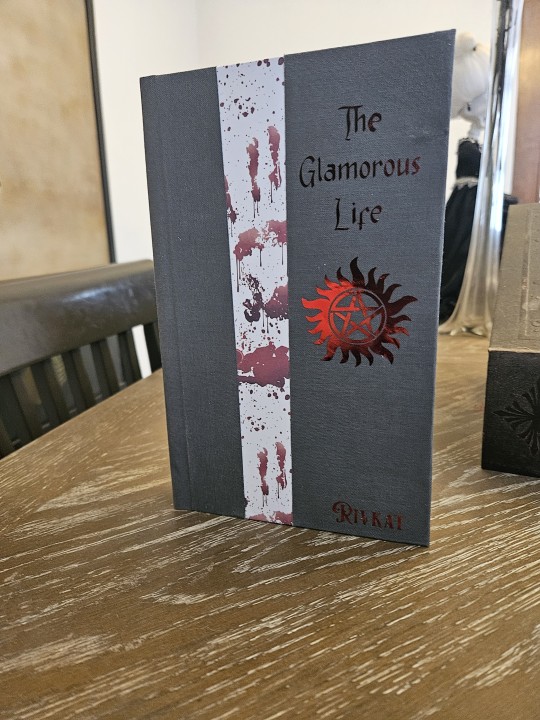
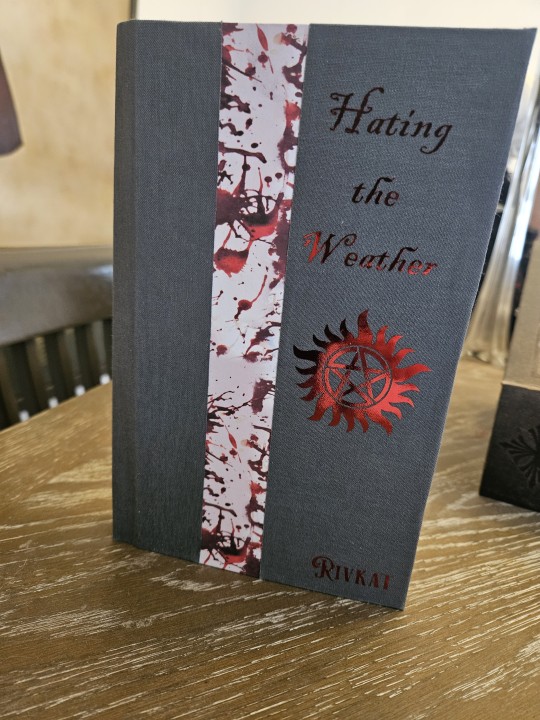
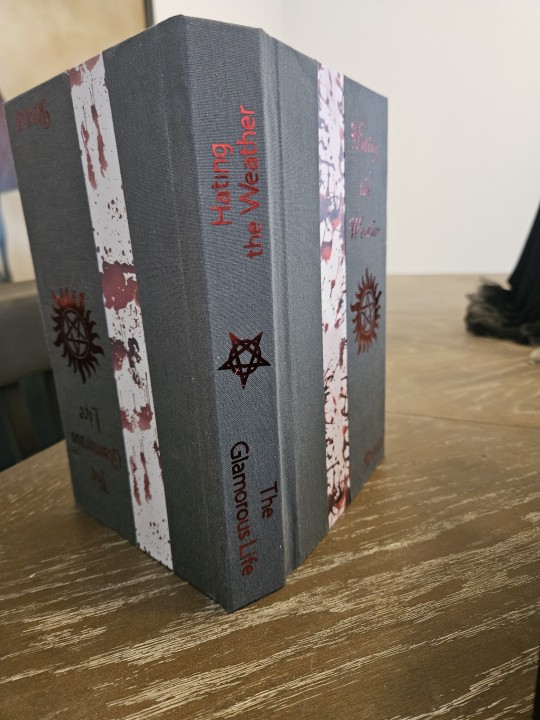
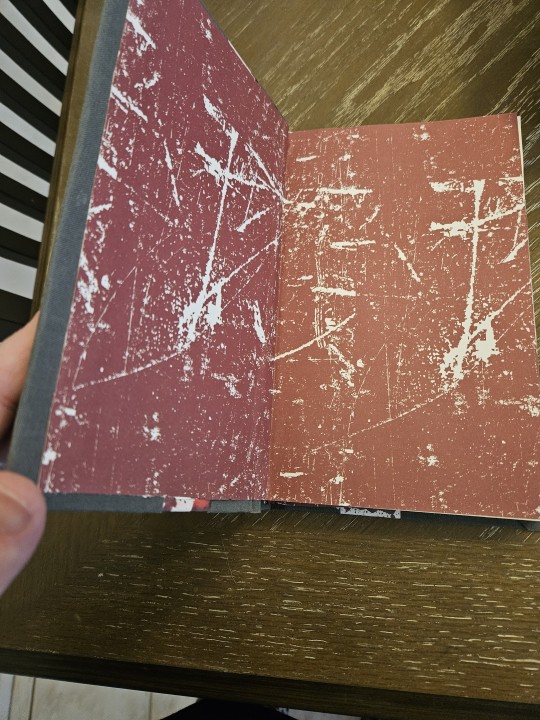
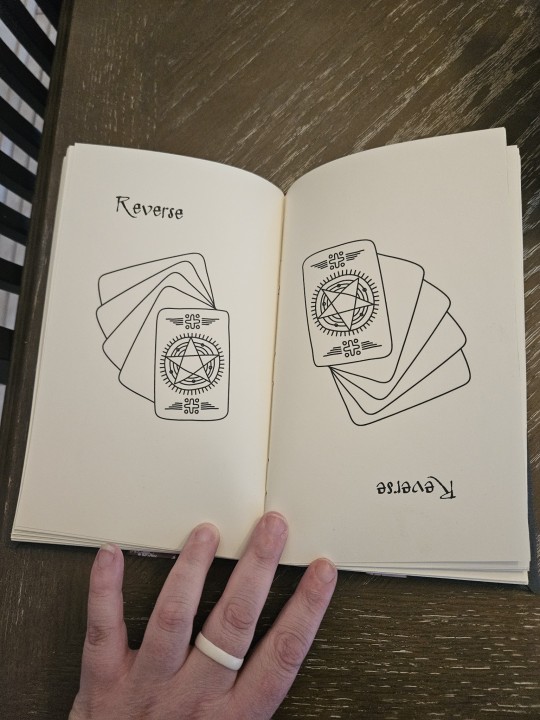
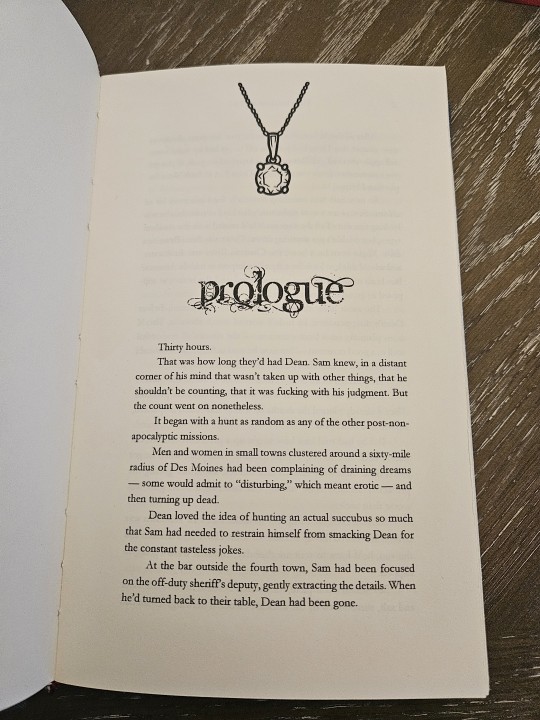
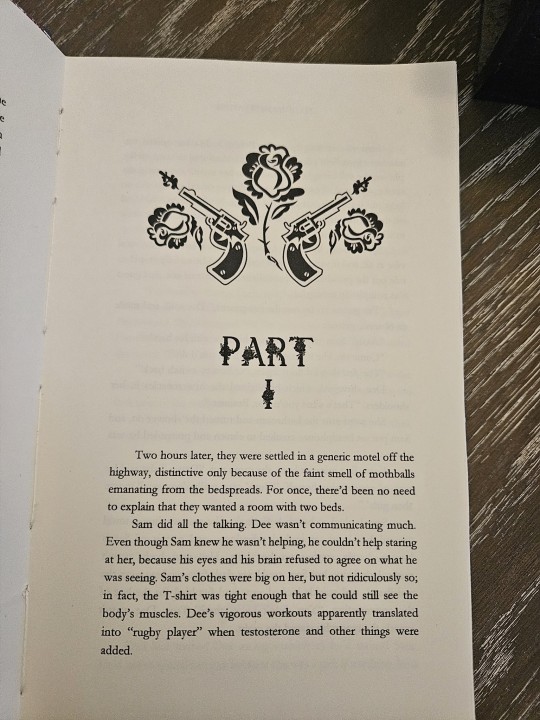
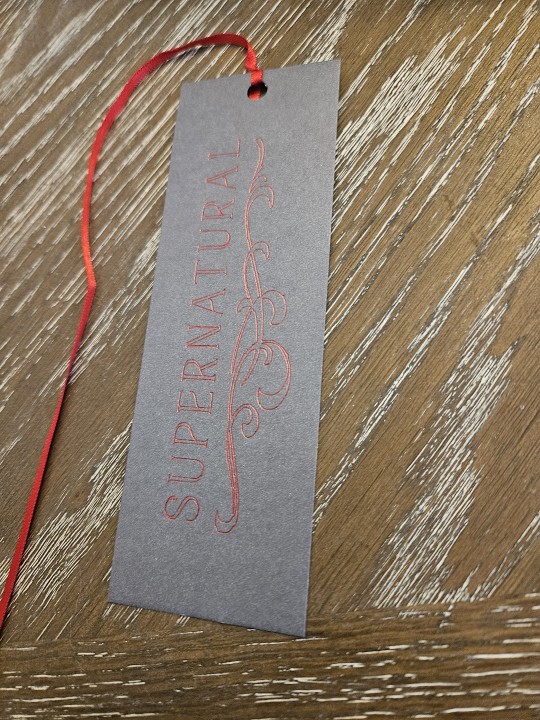
This is a tete-beche style bind where the book contains two separate fics and one is flipped upside down in relation to the other so no matter which way you hold it one of the stories is oriented for reading! The "reverse" pages with the cards are where the two stories meet in the middle. I also included a matching bookmark since the usual ribbon bookmark wouldn't make sense for this style of bind. This is my first time trying this technique (I didn't even know the name of it until I was halfway through typesetting!) But I am so happy with the result!
Fandom: Supernatural
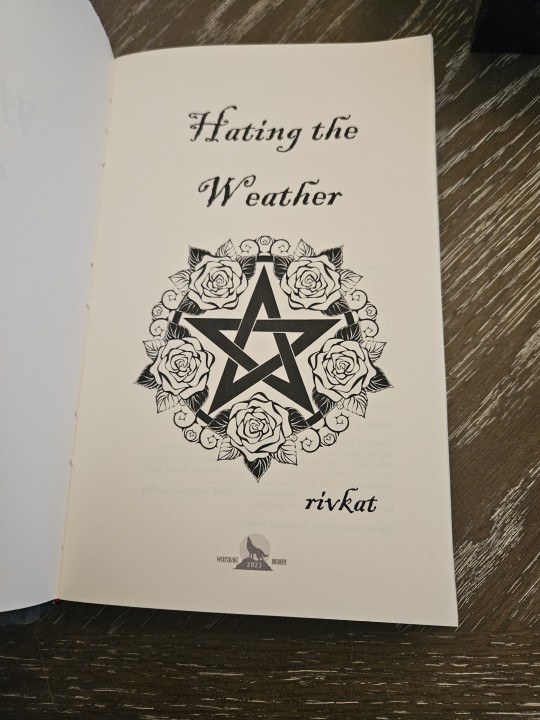
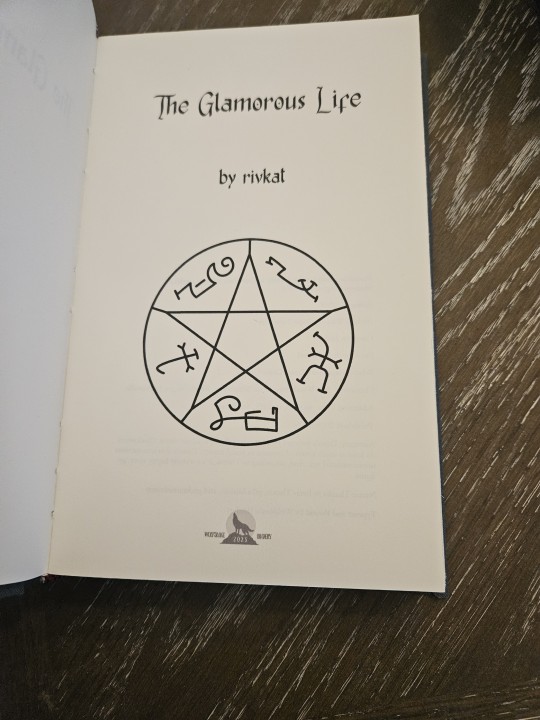
The fics are The Glamorous Life and Hating the Weather both by Rivkat.
I just mailed it off, so I'm eagerly awaiting confirmation that they got it!
#ask me whatever you want y'all#fanbinding#bookbinding#supernatural#sam winchester#dean winchester#fth 2024#fth crafts baazar#im so proud#its my first time mailing one of my binds to someone (though it wont be the last!)#i hope they like it#it was like making two books except i only needed half the glue lol
81 notes
·
View notes
Note
When Gloom and Doom is finished, would you be ok with a fan trying their hand at bookbinding with it?
Absolutely!
In fact, that's also my plan when I finish it! Maybe make a few copies for the whole 3 people who still read it by the time I finish
59 notes
·
View notes
Note
Hi! I just saw your post with your bind of Dear your holiness and it is STUNNING!!!! Seriously a work of art, the cover (that bejeweled cross), the decoration on the typeset! Even the design on the page numbers!!! Pure talent!
I decided like a week ago to start binding fics, and I’m currently working on the typeset for my first one. do you have any advice for begginers?
AHH thank you so much this means a lot to me 😭😭😭
For beginners- start simple until you learn the basics and the steps it takes to complete a bind. Don’t let imposter syndrome stop ya (I mess up every single bind and though I wanna kick my own ass sometimes, you just have to be ok with mistakes 😂)
If you have word (especially on PC) use blakbooks bindery’s macro (this is a lifesaver and it takes me 5 min to run the macro and then the typeset is ready for decor!) check her out on insta.
There’s a tonnnn of free resources and tutorials on TikTok for beginners (I have probably 10 I’ve filmed covering various stages).
Feel free to em me here or on insta if you have specifics you need help with! Welcome to the binding world 🫶🏼
Cheers,
Jules
9 notes
·
View notes
Note
#1 and #4 for the bookbinding ask!
What are you excited about binding right now?
Well, right now I'm pretty laid up and not really able to do any binding. Mostly because of my foot and how difficult it makes getting around my house, but also because I'm out of paper and can't spare the $ to order more.
But the typesetting projects I have going are two video game related projects. One is a fan novelization of the game Planescape: Torment and the other is the script of the game 999. Which I am still working on figuring out how I'm going to make it into a readable format.
4. What is your favourite binding so far?
I think I have to say my most recent one, First Step by futuresoon. Everything worked out pretty much just like I wanted it to and it looks so cool.
Asks are here.
1 note
·
View note
Text
I accidently deleted the ask because my phones broken screen did a weird touch glitch thing so just in case: you can print out / bookbind any of my fanfictions, or have someone else do it for you if you need a permission to do so (so as long as it's not being sold. Commissioning a bookbinder to bind the fic doesn't count, that's fine)
Though I would HIGHLY recommend going through with grammerly and proof reading before making signatures because I don't use a beta reader since I write for fun and escapism, I don't focus real hard on proper of it and a lot of my stuff has hidden grammatical and spelling errors (I'll get around to editing and fixing that...eventually)
#sara shush#i answered this before on someone wanting to bookbind solar lunacy and my iz stuff but i realize that was asks ages ago#i should put it in my faq
1K notes
·
View notes
Note
Do you have any advice/suggestions for getting into bookbinding? What is the process like if you don't mind sharing?
Hello! Very happy to share bookbinding advice/resources 💜 it's a wonderful and delightfully rewarding hobby, and while it can be complicated and easy to get stuck in the weeds with it, you can also get started with some really simple binds with materials you may already have around your living space.
Info below the cut:
First off, there are a lot of instructional videos and guides out there for bookbinding. My favorite YouTube channel for those just starting out bookbinding is Sea Lemon, who has a ton of instructional videos for various styles of bookbinding. Her method of explaining things is clear and concise, and she tends to work with simpler tools and materials that don't cost much and that you may already have on hand. She is not a professional bookbinder with professional tools (afaik) but in my opinion, that's perfect for a beginner because it's not as overwhelming and has a much lower barrier to entry. Perusing her channel and watching a bunch of videos was where I started before even picking up tools to start my first bind.
Another guide I highly recommend is How to Make A Book, by ArmoredSuperHeavy. This is a wonderful step-by-step guide for taking a fic from AO3 and turning it into a book. The most helpful part of this guide, for me, was the typesetting instructions. Typesetting is the act of taking a piece of text (eg. a fic on AO3) and formatting it in the correct way for printing and binding into a book. Note that this guide is specifically for MS Word, though you can also typeset in Google Docs, Libre Office, Affinity Publisher, InDesign, and other programs (even LaTex!).
(Pro tip: save yourself the headache of trying to use Word's bookfold option and just set your document page size to the page size of your finished book (if you're printing on letter paper, this is 5.5" x 8.5") and then use this software to put your pages in the correct order: https://momijizukamori.github.io/bookbinder-js/)
A final resource that I recommend, but that can also get a bit overwhelming, is the Renegade Guild Bookbinding Discord. It's a space specifically for people doing fanbinding, and there are a ton of resources within it, including typesetting guides for various softwares, guides for where to get the tools you need and which tools are best, and people who can answer any questions you may have along the way. It's gotten quite big since I joined, and it can be overwhelming since there's so much information available and so many people who have been binding for a while and thus often offer up solutions or advice that's hard for beginners to understand, but it has never failed me when I've had a tricky question that I needed answered that I couldn't find information on anywhere else.
All that said, here's some more advice from me when just starting out!
Start with a simple bind. A single-section pamphlet bind is easy, cheap, and quick. Here's a Sea Lemon video for how to put together a pamphlet bind.
If typesetting seems intimidating, you can bind blank notebooks. This is also a good way to practice new binding styles if you don't want to go through the hassle of typesetting, imposing, and printing for something you worry you might mess up.
A good word count range for fics when you're learning how to bind case-bound books (ie, the typical hardcover books you see in stores) is 25-50k. Shorter than that, and your books will be thin and a bit fiddly to work with. Longer than that is probably fine, but it will be a quicker process for a thinner book, which is nice when you're just starting out. (And then you don't have to worry about rounding and/or backing, which can be complicated.)
There are very, very few tools that you absolutely need to make a book. There are quite a few tools that will make your life easier, or that will make your book look nicer, or that will make your book last longer, but when you're just starting out (especially if you're trying to minimize cost or deal with space constraints), you can forgo a lot of "required" tools. I'll include a list below of the general bookbinding tools you'll want and some substitutions for them.
You might hear talk about the grain direction of paper or bookboard. When you're just getting started, don't worry about this. Once you get more comfortable with the bookbinding process, then you can start ensuring that your bookboard has the correct grain direction (parallel to the spine) to reduce the warping of your covers. The grain direction of your textblock paper matters the least, and I didn't start using "proper" textblock paper (ie short grain) until about 2.5 years after I started binding.
Bind something you like! Pick one of your favorite fics and bind it, even if it's your first bind and you're worried about it turning out ugly. The excited feeling of having bound your first book will be that much more exhilarating when you're able to put a story that you love on your shelf for the first time.
So you're ready to bind a hardcover book! Here are the tools you will want/need:
An awl, for punching holes in your signatures (groups of paper). You can use a thumbtack for this, or even a strong needle if you have something to cushion the end of it that you'll be holding, like an eraser. Awls are typically pretty cheap, though. You'll want a thinner one so you don't make huge holes in your paper. I have this one and it's worked just fine for me.
A bone folder, for creasing the pages. Historically, these are made out of actual bone, and the reason for using one is to get sharp creases in your paper without tearing or damaging it. You can also use basically anything else in your house that can accomplish this task. When I'm feeling lazy and just need to crease one piece of paper, I use my thumbnail. Bone folders are also cheap, though--I have this one. (As a tangent--when you're making your signatures for your book, you're going to be folding and slotting together usually between 4-6 sheets of paper. Fold the paper normally without creasing with the bone folder, slot them together, and then use the bone folder to sharply crease them all together. Trust me on this--the pages will fit together much better if you crease after putting the signature together.)
PVA glue, for all aspects of gluing involved when making the book. You can, I've heard, use Elmer’s glue for this in a pinch, but I've never tried it. PVA will dry flexible, which is what you need for your book, especially when gluing the spine. For things like attaching decorative paper to your covers, this is less important. If you're making a book that doesn't require gluing the spine (like a pamphlet or coptic stitch book), you may not need PVA. There are also lots of other glue mixtures you can use when bookbinding (paste is a popular one) but I've been a straight PVA guy for over three years now and I can't offer any advice when it comes to other types of adhesives. One note about PVA is it dries quick, so once you've stuck something to it, that's that. Prepare yourself for some crooked books until you get the hang of it.
Gluebrush/paintbrush, for applying glue. I recommend something with bristles; the foam brushes technically work but will absorb most of the glue and will probably cause you a headache. Silicone brushes are wonderful, as you can just wait for the PVA to dry and then peel it off, but a regular glue brush will also work; just be sure to put it in water immediately once you're done with it, otherwise the PVA will dry on it and ruin your brush.
Ruler + pencil, for measuring. Any kind of ruler will do, but if you have access to a quilting square or something similar, this will help you get nice and even right angles.
Needle and thread, for sewing the signatures together. You can use regular sewing needles and sewing thread (doubled up for more strength) if you don't want to buy anything specific for this. An easy step up from this that I recommend is buying a block of beeswax (I got mine for like $4 from a farmer's market) and waxing your thread (running the thread along the block a few times). This will keep your thread from tangling and make it easier to work with. You can also use embroidery thread, especially if you're doing a pamphlet or coptic stitch bind and want some color. I recently upgraded to linen thread (thread weight 35/3), which is the standard for archival-quality books, but you absolutely can use cotton thread and it will be fine.
Paper, for the textblock. You can use your standard white copy paper for this and all will be well. Or, if you want to get a bit fancier, you can use cream-colored paper; 8.5 x 11 hammermill 20lb cream colored paper is easy to find and relatively cheap and will make your books look better, as plain white paper can look almost blue in a book. (That said, I also have some actual published books that use white paper, and I've never noticed anything off about them.) If you decide you want to get really into the proper grain direction, I get my short-grain cream-colored paper from Church Paper. They have both 20lb (typical copy paper weight) and 24lb (slightly heavier) weight. I have both and I actually really like the 24lb; it has a luxurious feel to it, with less bleed from my inkjet printer. If you feel like springing for nice paper, check out their site!
Book press, for pressing your book while it dries and pressing your folded pages before sewing. There are a lot of different kinds of book presses out there, many of which are very very expensive. You can usually make do with some heavy books to weigh down your book while it dries, or thin boards and C-clamps if you have those on hand. If you have access to basic power tools, it's also super easy to make your own press with carriage bolts and cutting boards (this is what I did). There's a lot of videos out there with instructions; here's one from Sea Lemon.
Printer and ink, or a printing service/print shop like Staples. Print shops can get expensive in the long run, and it's nice to have your own printer so you can do test prints of your typesets. If you're going out and buying a printer, I highly recommend either a black and white laser printer (if you're not planning on printing in color; Brother is a good brand) or a tank inkjet printer (like the Epson Ecotank). Do NOT get a new HP if you can help it; their ink subscriptions are brutal. I'm upgrading to a black and white laser this year, but I've been using a very old, cheap HP inkjet that I got off Facebook marketplace for the past few years and it's been reliable (if a bit restrictive). If you do have an inkjet currently that takes cartridges, I highly recommend looking up how to refill your own cartridges. Buying one set of genuine HP cartridges and then refilling them with generic brand ink until they die has saved me probably hundreds of dollars by this point.
Book board, for the covers. Otherwise known as chipboard, which is easy to find on Amazon or at craft stores. This is NOT the same as corrugated cardboard; that will not work. You can cannibalize old three-ring folders, which have chipboard inside them, or even old hardcover books/textbooks. Don't bother with genuine bookbinding chipboard; imo, it's overpriced and unnecessary. You can find chipboard on Amazon for relatively cheap; I recommend the 12x12, as you can get a front and back cover out of one sheet with the correct grain direction. You can use chipboard for your book spine, if you're making a flatback, or you can use a thinner material that you can bend if you're making a rounded book (or for flatbacks as well). For this, thin cardboard (eg. old cereal boxes) or thicker cardstock will work just fine; you don't have to go out and buy genuine bristol board, and I've never bothered with it.
Exacto knife, for cutting things. You could also use a boxcutter, but a craft knife will be easier to handle. You will probably need to frequently change the blade, as cutting chipboard will dull it quickly, so get one that comes with a bunch of replacement blades.
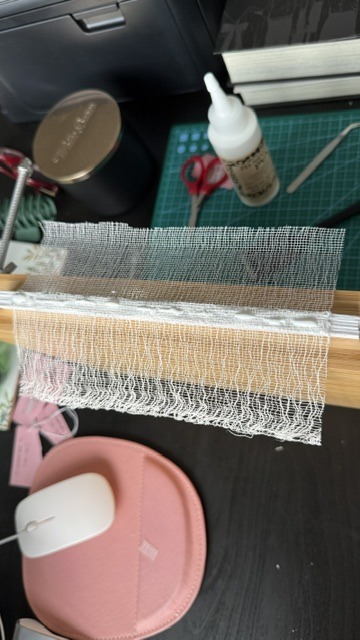
Bookcloth and/or decorative paper, for covering your book board. Bookcloth is basically fabric with a paper backing on it. You can make your own using heat and bond, tissue paper (I use white tissue paper), and fabric; iron the fabric so it doesn't have any wrinkles in it, then iron the heat and bond onto the fabric, then iron the tissue paper onto the heat and bond. There are other methods out there that you may find easier/better, but this is the one I use. The purpose of the paper backing is to prevent glue from striking through the fabric; if you use a thicker fabric or paper, this is not necessary. For your first books, you may find it easiest to just use paper, or to go out and buy some premade bookcloth.
That's a lot of information, but I hope it was helpful! I'm more than happy to answer any more questions you (or anybody else) might have, and happy binding!
27 notes
·
View notes
Text
I think the most frustrating thing about the chevron endband is that you basically uave to sew the thing twice. and then you don't see half the work.

you are never going to see this again except for a stupid tiny slip of yellow. & it took me just as long as a regular endband. now I have to sew another on top of it.
#and you might ask yourself: how did i get here?#man. praise kinked into it i guess#fanbinding#bookbinding#celestial sphere press#in progress review
73 notes
·
View notes