#bitlocker data recovery
Explore tagged Tumblr posts
Visit Tumblr Blog
Explore Tumblr blogs with no restrictions, modern design and the best experience.
Last Seen Tumblr Blogs


Fun Fact
The KCSC sent more than 20K requests to delete posts related to prostitution and porn to Tumblr from January to June 2017.
Text
Without the Bitlocker key, is there a way to restore Windows?

If you have forgotten your bitlocker key, it could be very difficult to do window restoration. Without the bitlocker recovery key, you will not be able to access your files or recover data on your Windows. If you really want to recover your bitlocker, you can use a third-party data recovery tool.
Many companies provide data recovery services like BLR Data Recovery Tool, Recuva, R-Studio, Stellar, EaseUs, etc.
A free trial version of the tools allows users to scan and view all lost and deleted data.
I strongly recommend using the trial version of BLR Data Recovery Tool because it is a powerful and user-friendly software that recovers lost or deleted files from a variety of storage media, including hard disks, SSDs, USB drives, NAS drive, memory cards, Bitlocker, and more. It supports both Windows and Mac operating systems, making it suitable for a wide range of users.
#bitlocker#bitlocker data recovery#bitlocker recovery key#bitlocker data recovery tool#blr data recovery tool#data recovery#data recovery tool#data recovery program#bitlocker data recovery tool free
2 notes
·
View notes
Text
Retrieve Bitlocker recovery key on Microsoft 365 portal

Retrieving your BitLocker recovery key via the Microsoft 365 portal is a straightforward process that can save you in critical situations where you've lost access to your encrypted drive. To start, log into your Microsoft 365 account and go to the Devices section. From there, select the device that’s encrypted with BitLocker. Under the device details, you’ll find the BitLocker recovery key, which you can use to unlock your drive and regain access to your data.
However, if you encounter issues accessing the Microsoft 365 portal or if the recovery key isn’t available, relying on a specialized BitLocker data recovery tool from BLR Tools can be invaluable. This tool is designed to help users recover data from BitLocker-encrypted drives when the recovery key is lost or inaccessible. With advanced algorithms, the BLR BitLocker Data Recovery Tool can bypass encryption barriers and restore your files safely and efficiently. This ensures that even in challenging scenarios, you have a reliable way to recover your important data without compromising security. Whether for personal use or in a business environment, this tool provides peace of mind when dealing with BitLocker encryption.
Visit:- https://medium.com/@business_35188/retrieve-bitlocker-recovery-key-on-microsoft-365-portal-full-guide-cf4ddd9c5561
0 notes
Text
Secure and Efficient Apple Data Recovery in Mumbai
In today's tech-driven world, data loss can happen unexpectedly and can be devastating. Whether you have lost important business documents, cherished memories, or critical personal files, our Apple Data Recovery in Mumbai services are designed to help you recover your valuable data quickly and securely. In addition to our Apple data recovery services, we also specialize in Bitlocker Data Recovery in Mumbai and Ransomware Data Recovery in Mumbai. Read on to find out how we can assist you in restoring your lost data and securing your digital life.

0 notes
Text
Bitlocker Recovery Service Malaysia
Data security is a crucial aspect for any organization or individual. BitLocker Recovery is a feature in Windows that provides data protection to your device by encrypting the entire disk drive.
However, there may be instances when you need to access your encrypted data and cannot do so. This is where BitLocker Recovery comes into play.
In this blog, we will explore the basics of BitLocker Recovery, including its importance and functions. We will also dive into different methods of retrieving your BitLocker Recovery Key, such as through your Microsoft account or using Command Prompt or PowerShell.
Additionally, we will discuss how to verify the correctness of your key and what steps you can take if you have lost it. Stay tuned to learn how to ensure the safety of your valuable data with BitLocker Recovery!
Data Recovery Malaysia
#data recovery malaysia#data recovery#datarecoverymalaysia#datarecoveryservices#data recovery center#hard disk repair malaysia#recovery#data#datarecovery#malaysia#bitlocker#bitlocker recovery
1 note
·
View note
Text
For those who are not aware: Bitlocker is encryption software, it encrypts your computer and makes it impossible to access the information on the computer unless you have the key.
It should be standard practice for IT companies to document the bitlocker keys as they are configuring bitlocker on a computer; generally you would do this by creating a record in your client management software for that specific device and putting the key in the record. Sometimes software can be used to extract that information in the event that it's necessary, but even if there's theoretically a way to extract the key, it should be documented somewhere *other* than on the encrypted computer.
This is something that a lot of IT people fuck up on kind of a lot (we've definitely had problems with missing bitlocker keys and I'm quite happy that the people who didn't document those keys aren't my coworkers anymore).
So what do you do if you want to use encryption software and you're NOT an IT company using a remote management tool that might be able to snag the keys?
When you are setting up encryption, put the encryption key in your password manager. Put it in your password manager. Document the important information that you cannot lose in your password manager. Your password manager is a good place to keep important things like your device encryption key, which you do not want lost or stolen. (If you run your password manager locally on an encrypted computer, export the data every once in a while, save it as an encrypted file, and put the file on your backup drive; you are going to have a bad time if your computer that hosts the only copies of your passwords shits the bed so *make a backup*)
This is my tip for home users for any kind of important recovery codes or software product keys: Print out the key and put it in your underwear drawer. Keep it there with your backup drive. That way you've got your important (small) computer shit in one place that is NOT your computer and is not likely to get shifted around and lost (the way that papers in desks often get shifted around and lost).
2K notes
·
View notes
Text
CrowdStrike'd and BitLocker'd
With yesterday's CrowdStrike outage. I'm sure a number of you are probably wondering "what does BitLocker have to do with any of this?" Well, it all has to do with an added layer of security many organizations use to keep data from being stolen if a computers ends up in the hands of an "unauthorized user."
To start, let me briefly explain what the CrowdStrike driver issue did and what the fix for it is.
After the update was automatically installed to computers running the CrowdStrike Falcon Sensor, a faulty driver file caused the Windows kernel on those computers to crash and display a Blue Screen of Death. How Windows typically handles a crash like this is to create a crash log file, then perform a reboot. Since this driver would launch shortly after Windows finished booting, it would cause the operating system to crash and reboot again. When two crashes have occurred in sequence, Windows will automatically boot into Recovery Mode. Hence why we say several pictures of the Recovery Mode screen across social media yesterday.

Unfortunately, this update was automatically pushed out to around 8.5 million computers across several organizations, causing widespread chaos within the matter of a few hours. And the fix for this issue had to be performed by physically accessing each computer, which required those of us working in I.T. to have to run around several facilities, locate each affected computer, and apply the fix one by one.
The short and simple of the fix is either one of two options. You can either use the Recovery Mode that Windows was already booted into to navigate to Start-Up Setting, and launch Safe Mode. Once Windows boots into Safe Mode, the technician can navigate to C:\Windows\System32\Drivers\CrowdStrike, and delete the file C00000291-*.sys. After that the computer can be rebooted as normal, and the crashing will stop.
Or the technician can open System Restore from Recovery Mode. And, assuming there is a recovery point, restore the computer back to a good known working state.
Now, this may all seem simple enough. So why were so many organizations having trouble running this fix? That all has to do with BitLocker. As an added security measure, many organizations use BitLocker on their computers to perform a full hard disk encryption. This is done so that if a computer ends up being lost or stolen, and ends up in the hands of an "unauthorized user" they will not be able to access any of the data stored on the computer without a password to log into the computer, or the computer's BitLocker recovery key.
This presented a problem when trying to restore all of these affected computers, because when either trying to launch Safe Mode or System Restore, the user would be prompted for the BitLocker recovery key.
In my organization's case, we found we could save time by providing our end user the steps to perform one of the two fixes on their own to save time. But the problem we still continue to run into is the need for these BitLocker recovery keys. In my case, I've been fielding several calls where I've had end users walking from one computer to another while I provide them with the key as they walk through reverting back to a previous restore point.
Again, a pretty long story, but hopefully that can provide some context as to what's been happening over the past 48 hours.
30 notes
·
View notes
Text
Supporting and Troubleshooting Windows 11 Course in Australia: A Complete Guide
Windows 11 has become the operating system of choice for businesses and individuals, offering advanced security, enhanced performance, and a modern interface. However, managing and troubleshooting Windows 11 in a professional environment requires specialized skills. The Supporting and Troubleshooting Windows 11 Course in Australia is designed to equip IT professionals with the knowledge and hands-on experience needed to support and resolve issues in Windows 11 systems efficiently.
Why Enroll in a Supporting and Troubleshooting Windows 11 Course?
With the transition from older Windows versions to Windows 11, IT support teams must adapt to new technologies, security features, and system configurations. Here’s why taking this course is beneficial:
1. Stay Updated with Windows 11 Technology
Learn about the latest Windows 11 features and enhancements.
Understand changes in system architecture and security protocols.
Gain insights into compatibility issues and best practices for troubleshooting.
2. Enhance Your IT Support Skills
Develop expertise in diagnosing and resolving Windows 11 issues.
Master tools like Windows Recovery, Event Viewer, and Command Prompt.
Improve efficiency in handling system crashes, performance issues, and network problems.
3. Increase Job Opportunities and Career Growth
IT professionals with Windows 11 troubleshooting skills are in high demand.
Employers prefer certified experts for desktop support, system administration, and IT helpdesk roles.
The course prepares you for industry-recognized certifications that boost your resume.
Key Topics Covered in the Course
The Supporting and Troubleshooting Windows 11 Course is comprehensive and designed for IT professionals, covering the following crucial areas:
1. Windows 11 Installation and Configuration
Setting up and customizing Windows 11.
Managing user accounts and permissions.
Understanding Windows Update and Feature Management.
2. Troubleshooting Boot and Startup Issues
Identifying and resolving boot failures and startup delays.
Using Advanced Startup Options and Safe Mode.
Repairing the Windows bootloader and system files.
3. Performance Optimization and System Monitoring
Using Task Manager, Resource Monitor, and Performance Monitor.
Troubleshooting slow performance and high CPU/RAM usage.
Managing background applications and startup processes.
4. Network Connectivity and Troubleshooting
Configuring and troubleshooting Wi-Fi, VPN, and Ethernet connections.
Understanding TCP/IP, DNS, and Firewall settings.
Resolving common connectivity issues and IP conflicts.
5. Security and Access Management
Implementing BitLocker encryption and Windows Defender policies.
Managing user authentication and account recovery.
Preventing and troubleshooting malware and ransomware attacks.
6. Hardware and Peripheral Troubleshooting
Diagnosing driver and compatibility issues.
Troubleshooting printer, scanner, and peripheral device failures.
Using Device Manager and Windows Troubleshooters.
7. Data Recovery and Backup Solutions
Configuring OneDrive and local backup solutions.
Recovering lost data using Windows File History and Recovery Tools.
Preventing data loss through effective backup strategies.
Who Should Take This Course?
The Supporting and Troubleshooting Windows 11 Course is ideal for:
IT Support Specialists – Handling user support and troubleshooting requests.
System Administrators – Managing enterprise Windows 11 environments.
Helpdesk Technicians – Assisting with hardware, software, and network issues.
Technical Consultants – Offering Windows 11 support for business clients.
Benefits of Certification in Windows 11 Troubleshooting
Earning a certification after completing this course offers several advantages:
Better Job Prospects: Companies prefer certified IT professionals.
Higher Salary Potential: Skilled troubleshooting experts earn more.
Enhanced Problem-Solving Skills: Learn real-world troubleshooting techniques.
Industry Recognition: Gain credibility as a Windows 11 support specialist.
Choosing the Right Training Provider in Australia
When selecting a training provider for the Supporting and Troubleshooting Windows 11 Course in Australia, consider these factors:
Accreditation: Ensure the provider is recognized by Microsoft.
Hands-on Labs: Look for courses offering real-world troubleshooting scenarios.
Flexible Learning Options: Online, classroom, or hybrid training formats.
Certification Preparation: Providers offering exam support and practice tests.
Student Reviews: Check ratings and testimonials for course quality.
Final Thoughts
The Supporting and Troubleshooting Windows 11 Course in Australia is an essential step for IT professionals looking to expand their expertise in Windows 11 support. With a structured curriculum covering installation, performance tuning, security, and network troubleshooting, this course provides the necessary skills to manage and resolve issues efficiently.
0 notes
Text
Maximize Your Control with Dedicated Windows Servers
When it comes to web hosting and managing digital resources, the need for control, reliability, and high performance is non-negotiable. This is where Dedicated Windows Servers step in, offering a premium solution for businesses, developers, and enterprises looking to elevate their web presence. Unlike shared hosting or virtual private servers (VPS), dedicated servers provide an exclusive environment, giving you full control over your resources and software configurations.
In this blog, we'll explore the benefits and reasons why dedicated Windows servers are the ideal choice for those seeking maximum control over their hosting environment.
What is a Dedicated Windows Server?
A Dedicated Windows Server refers to a physical server that is entirely dedicated to a single user or organization. This means that you don’t share resources like CPU, RAM, or bandwidth with other clients. Powered by the Windows operating system, these servers support a variety of enterprise-level applications, including SQL Server, Active Directory, and custom web hosting environments.
The Windows environment is known for its user-friendly interface and wide support for software, making it an excellent choice for businesses that rely on Microsoft-based applications and require a stable, familiar platform.
1. Full Control Over Your Server
One of the most significant advantages of using a dedicated Windows server is complete control. As the sole user of the server, you have administrative access to the entire machine. This means you can install and configure any software, change system settings, and implement custom solutions according to your needs.
With root access to the operating system, you can:
Install and update software without restrictions.
Set up complex configurations to meet business requirements.
Ensure maximum security by controlling firewall settings and access permissions.
Install custom scripts and tools that may not be available in shared hosting environments.
This level of flexibility is essential for businesses with specific software needs or those operating resource-intensive applications.
2. Enhanced Performance and Reliability
With a dedicated Windows server, performance is vastly improved compared to shared hosting or VPS. Since you're the only user, the server's resources are allocated entirely to your applications and websites, ensuring faster load times and better overall performance.
Key performance benefits include:
No Resource Sharing: Unlike shared hosting, where multiple users share the same server, a dedicated server's resources are all yours.
Better Uptime: Since the server is dedicated to your use, there's less likelihood of experiencing downtime caused by the actions of other users.
Scalability: Dedicated servers can be easily upgraded to accommodate growing needs, whether that involves adding more RAM, storage, or processing power.
This reliability is crucial for businesses that require constant uptime, such as e-commerce stores, large websites, and enterprise applications.
3. Improved Security and Customization
Security is one of the most critical factors for any business operating online. With a dedicated Windows server, you can take control of your security measures and implement custom security protocols. Unlike shared hosting, where security depends on the actions of other users, a dedicated server offers isolated resources, reducing the risk of cyber-attacks and data breaches.
You can customize security settings by:
Installing and configuring your own firewalls.
Using Windows Security features such as BitLocker and Windows Defender.
Creating isolated environments with virtual machines (VMs).
Enabling regular backups and disaster recovery plans.
Implementing SSL certificates for secure transactions.
These customizable options allow you to create a robust security framework suited to your business’s specific needs.
4. Dedicated Support and Expert Assistance
When you opt for a dedicated Windows server, you're not just paying for the hardware and software – you're also getting access to expert technical support. Most hosting providers offer 24/7 support with dedicated teams that understand the intricacies of Windows servers.
This means:
Quick Resolution of Issues: Any technical difficulties or issues are resolved faster with a team that understands your specific setup.
Proactive Monitoring: Many providers offer proactive server monitoring services to identify potential issues before they impact your operations.
Consultation and Optimization: Dedicated support staff can guide you through system optimization and help you get the most out of your server.
This hands-on support ensures you can maintain your server's performance, security, and stability with ease.
5. Cost-Effective for Large Operations
Although dedicated Windows servers are generally more expensive than shared hosting or VPS options, they can be incredibly cost-effective for larger operations or businesses with high resource demands. By consolidating multiple applications, websites, and services onto a single dedicated server, you can save money on multiple hosting solutions.
Additionally, with full control over your server, you can optimize costs by adjusting the configuration to your precise needs, avoiding unnecessary expenses for resources you don’t use.
Conclusion
A Dedicated Windows Server offers unmatched control, performance, and security, making it the ideal choice for businesses that require a customized, scalable, and reliable hosting environment. Whether you’re running mission-critical applications, handling sensitive data, or operating large-scale websites, the flexibility and power provided by a dedicated server can take your business to the next level.
If you’re ready to maximize your control and optimize your online presence, consider upgrading to a dedicated Windows server today. With the right configuration and support, you’ll experience an enhanced digital experience that positions your business for long-term success.
0 notes
Text
How to Securely Erase Data from Your SSD?
In today’s digital world, ensuring the security of your data is more important than ever. Whether upgrading to a new SSD, repurposing an old one, or just wanting to ensure sensitive information is unrecoverable, securely erasing data from an SSD is critical. Unlike traditional hard drives, SSDs (Solid State Drives) require special methods for secure data deletion due to their unique storage techniques.
SSDs use NAND flash memory to store data organized into blocks and pages, unlike the spinning platters in traditional hard drives. This architecture introduces complexities like wear leveling and garbage collection. Wear leveling ensures even data distribution across memory cells to prevent premature wear, while garbage collection consolidates unused blocks, making old data scattered across the drive and difficult to erase.
When a file is deleted from an SSD, it is not physically erased but marked as available for new data. Until overwritten, the data can be recovered using data recovery software. This is why secure data erasure methods are essential for preventing unauthorized recovery of sensitive information.
Several methods exist for securely erasing data from an SSD:
Built-in SSD Secure Erase Utility: Many SSD manufacturers offer built-in secure erase utilities like Samsung Magician, Intel SSD Toolbox, or Crucial Storage Executive. These tools use the SSD's firmware to perform a thorough data wipe. To use these tools, users need to check the manufacturer's documentation, backup important data, create a bootable USB drive (if necessary), and follow prompts to run the secure erase utility.
Third-Party Software: If the manufacturer doesn’t provide a secure erase tool, third-party software like Parted Magic, HDDErase, or DBAN (Darik’s Boot and Nuke) can be used. Similar to the built-in utilities, these tools offer additional features and allow users to select their SSD and securely erase it.
ATA Secure Erase Command: This low-level command, built into most SSDs' firmware, resets the NAND cells to their factory state. It requires technical knowledge and involves using a bootable Linux distribution like Ubuntu or Parted Magic to execute the ATA Secure Erase command.
Encryption Method: Encrypting the SSD before erasing it adds an extra layer of security. Even if remnants of data remain after erasure, they will be indecipherable without the encryption key. This can be done using encryption software like BitLocker (Windows), FileVault (Mac), or VeraCrypt (cross-platform).
For maximum data security, it’s recommended to regularly update SSD firmware, use multiple erasure methods, and physically destroy the drive if it’s no longer needed. Additionally, proper disposal of the SSD through e-waste recycling ensures that the drive is handled responsibly.
In conclusion, securely erasing data from an SSD is crucial for protecting sensitive information. By understanding the storage mechanics of SSDs and using the appropriate erasure methods, users can ensure their data is irretrievable. Always back up data before proceeding with any erasure and verify the process to ensure complete data destruction.
Want to Buy SSDs in Bulk from VSTL?
If you're looking to purchase SSDs in bulk, VSTL offers a reliable option for businesses and individuals seeking quality storage solutions. With competitive pricing and a range of SSD models to suit various needs, VSTL ensures high-performance drives for both personal and professional use. Bulk buyers can benefit from wholesale rates, making it an efficient choice for large-scale projects or tech upgrades. Whether upgrading office systems or managing data storage for a business, VSTL provides dependable SSDs to meet diverse requirements.
0 notes
Text
Recover Data from Encrypted Windows Hard Drive - BLR BitLocker Unlocker

Recovering data from encrypted Windows hard drive can be complex, especially when the hard disk drive is protected by BitLocker encryption. In such cases, it's essential to have the correct decryption key "BitLocker recovery key" or password to access the hard drive. Without BitLocker key or password, the BitLocker encrypted data remains locked and unreadable. However, if you have the necessary credentials, the process involves unlocking the drive and scanning it for recoverable files, even if the data was accidentally deleted or the drive was damaged. With professional data recovery software like BLR data recovery tool, users can recover encrypted files without compromising the integrity of the data.
Read more:https://www.linkedin.com/pulse/bitlocker-data-recovery-recover-from-encrypted-7ogkc/
0 notes
Text
How To Safeguard Your Laptop: Best Practices

How secure is your Laptop? We know today, that laptops are essential tools for work, study, and personal use. However, they are also vulnerable to cyber threats, data breaches, and physical theft. Whether you’re using your device at home or on the go, following security measures to protect your information is important.
Below are some crucial security tips to keep your laptop safe, especially if you require services like Real Expert Qatar, a trusted laptop service center Doha.
1. Use Strong Passwords
A strong password is the first line of defense against unauthorized access. Ensure your passwords are at least 12 characters long and include a mix of letters, numbers, and special characters. Regularly change your passwords, and avoid using easily guessed information like your name or birthdate.
2. Keep Your Software Updated
Outdated software can have vulnerabilities that hackers exploit. Regularly updating your operating system, antivirus software, and applications is essential to ensure your laptop is protected from the latest security threats. If you face any issues with updates, consider visiting Real Expert Qatar, a trusted Laptop Service center in Qatar for professional assistance.
3. Enable Two-Factor Authentication
Two-factor authentication (2FA) adds an extra layer of security by requiring a second form of verification, such as a text message code or an authentication app, in addition to your password. This reduces the risk of someone accessing your laptop even if they have your password.
4. Use Encryption
Encryption protects your sensitive data by converting it into a secure format that can only be read by authorized parties. You can enable encryption through built-in tools like BitLocker on Windows or FileVault on macOS. In case of any technical issues, Real Expert Qatar, a reputable laptop service center Doha can assist with configuration and troubleshooting.
5. Install Antivirus and Anti-Malware Software
Having robust antivirus and anti-malware software installed is essential for protecting your laptop from viruses, spyware, and other malicious threats. These programs regularly scan your laptop and quarantine any suspicious files. If you notice your laptop behaving unusually, it may be time to consult Real Expert Qatar-laptop repair center Doha for an in-depth inspection.
6. Avoid Public Wi-Fi Without a VPN
Public Wi-Fi networks are often unsecured, making it easy for hackers to intercept your data. If you must use public Wi-Fi, ensure you connect through a virtual private network (VPN) to encrypt your internet connection and protect your privacy.
7. Regular Backups
Backing up your data ensures that you don’t lose important information in case your laptop is lost, stolen, or compromised by malware. Use an external hard drive or a cloud storage solution for regular backups. In case you experience hardware failure, Real Expert Qatar, laptop repair center in Qatar can help with data recovery and getting your laptop back to optimal performance.
8. Physically Secure Your Laptop
When not in use, store your laptop in a safe location. Use a laptop lock to physically secure it if you leave it in public places like a café or library. This helps reduce the risk of theft, especially when traveling or working remotely.
Securing your laptop involves a combination of good digital habits and physical safeguards. By following these tips, you can minimize the risks of data breaches, malware attacks, and theft. For any technical support, whether it’s software updates or hardware repairs, Real Expert Services, a dependable Laptop service center in Doha can help ensure your laptop remains secure and functional.
Protect your laptop, protect your data!
1 note
·
View note
Text
If you have Windows 11 on your computer, drop what you're doing, back up your data and see if your Microsoft account has your BitLocker recovery key. NOW.
I will leave the reason why I'm issuing this advice as an exercise for the reader, though suffice it to say I am enraged.
1 note
·
View note
Text
Azure Premium SSD v2(Pv2) Updates For Azure Disk Storage

Premium SSD v2 (Pv2)
Premium SSD v2 is typically less expensive than Premium SSDs and provides better performance. Premium SSD v2 (Pv2) discs provide unique performance adjustments (capacity, throughput, and IOPS) that you can make at any moment to match changing performance requirements while keeping workloads economical. A gaming application might require a lot of IOPS, but only during peak hours, or a transaction-intensive database might require a lot of IOPS at a modest size. Because of this, Premium SSD v2 can offer the best price-performance for the majority of general-purpose workloads.
Premium SSD v2(Pv2) is suitable for a wide range of workloads on virtual machines or stateful containers, including big data/analytics, gaming, SQL server, Oracle, MariaDB, SAP, Cassandra, and Mongo DB.
Although 512E sector size can also be used, Premium SSD v2(Pv2) supports 4k physical sector size by default. Certain applications require 512 byte sector sizes, even if the majority of them work with 4k sector sizes. For instance, release 12.2 or later of Oracle Database is needed to support 4k native discs.
Azure Premium SSD vs Premium SSD v2
The Premium SSD v2 lacks specific sizes, in contrast to Premium SSDs. A Premium SSD v2 allows you to customise the supported size to your liking and make fine-tuned performance tweaks without experiencing any downtime. Although Premium SSD v2(Pv2) doesn’t allow host caching, it greatly benefits from lower latency, which solves some of the same fundamental issues that host caching does. The flexibility to change IOPS, throughput, and size as necessary also spares you from the maintenance burden of stripping drives to fit your requirements.
Premium SSD v2 Limitations
The OS cannot be installed on a Premium SSD v2 disc.
Azure Compute Gallery is not compatible with premium SSD v2 discs.
Premium SSD v2 discs are now limited to certain areas of availability.
At this time, only zonal virtual machines (VMs) can be connected to Premium SSD v2 discs.
Customer-managed keys for Premium SSD v2 discs are not supported at this time by Azure Government or Azure China.
With certain restrictions and in certain areas, Premium SSD v2 discs offer encryption at the host. See Encryption at host for additional details.
Virtual machines (VMs) using Premium SSD v2 discs are not supported for Azure Disc Encryption (guest VM encryption via Bitlocker/DM-Crypt). We advise using platform-managed or customer-managed keys for encryption while at rest. Premium SSD v2 is compatible with this method.
At this time, VMs in Availability Sets cannot have Premium SSD v2 discs attached to them.
The Premium SSD v2 disc is not compatible with Azure Site Recovery on virtual machines.
A Premium SSD v2 cannot have its size increased without removing the disc or deallocating the virtual machine.
Host caching is not supported by Premium SSDv2.
Azure Premium SSD v2 availability
See the Premium SSD v2(Pv2) row on the Products available by Region page for a list of the regions that are currently supported.
Only a few availability zones presently offer Premium SSD v2 in the following regions:
Italy North (two zones of availability) Central Spain (One Zone of Availability)
See What’s new for Azure Disc Storage or Azure Updates to find out when support for specific regions was implemented.
Premium SSD v2 performance
Providing sub-millisecond latencies and provided IOPS and throughput 99.9% of the time is the design goal of Pv2(premium SSD v2) discs. You may customise a disk’s capacity, throughput, and IOPS according to your workload requirements with Premium SSD v2 discs, giving you greater flexibility and lower prices. The price of your disc is determined by each of these factors. A Premium SSD v2 disk’s performance can be changed four times in a 24-hour period.
Premium SSD v2 capacity
The capacities of Pv2(Premium SSD v2) range in 1-GiB increments from 1 GiB to 64 TiBs. For specifics, refer to the pricing page. You are invoiced on a per GiB ratio.
By default, Pv2(Premium SSD v2) provides up to 100 TiB per area per subscription; however, it can accommodate larger capacities upon request. You can ask Azure Support for assistance, seek a quota increase, or request an increase in capacity.
Premium SSD v2 IOPS
There is a complimentary baseline IOPS of 3000 on all Pv2(Premium SSD v2) discs. A disk’s maximum IOPS can reach 80,000 IOPS after 6 GiB, increasing at a rate of 500 per GiB after that. Thus, the maximum IOPS for an 8 GiB disc is 4,000, and the maximum IOPS for a 10 GiB disc is 5,000. A disc needs to have at least 160 GiBs in order to support 80,000 IOPS. Your disc will cost more if you boost your IOPS over 3000.
Premium SSD v2 throughput
A free baseline throughput of 125 MB/s is available on all Premium SSD v2 discs. The maximum set throughput rises by 0.25 MB/s per set IOPS after 6 GiB. A disc with 3,000 IOPS can have a maximum throughput of 750 MB/s. This disc needs to have its IOPS raised in order to increase throughput beyond 750 MB/s. The maximum throughput that may be configured, for instance, is 1,000 if the IOPS is raised to 4,000. For discs with 5,000 IOPS or more, the maximum throughput supported is 1,200 MB/s. Your disc will cost more if you increase the throughput above 125.
Premium SSD v2 sizes
By default, the Premium SSD v2(Pv2) offers a physical sector size of 4k. Additionally supported is a 512E sector size. Certain applications require 512-byte sector sizes, even though the majority work with 4k sector sizes. For instance, release 12.2 or later of Oracle Database is needed to support 4k native discs.
Premium SSD v2 pricing
Azure Premium SSD v2 cost depends on region, disc size, and performance tier. The second-generation Premium SSD has better performance and scalability. The following things can affect pricing:
Bigger discs cost more. In gigabytes, disc sizes are measured.
Performance Tier: Azure offers several performance tiers with varied IOPs and throughput. Tiers with higher performance cost more.
Location: SSD prices vary by location.
Provisioned IOPS and Throughput: Some configurations charge by the amount you supply.
The Azure Pricing Calculator lets you enter your needs for an accurate price estimate.
These hypothetical numbers illustrate the pricing structure, however actual prices may vary:
Disk Size:
100 GB: $0.15 per GB/month
500 GB: $0.14 per GB/month
1 TB: $0.13 per GB/month
Performance Tier:
P1 (500 IOPS, 100 MBps): $1 per provisioned IOPS/month
P2 (2000 IOPS, 250 MBps): $0.75 per provisioned IOPS/month
P3 (7500 IOPS, 1000 MBps): $0.50 per provisioned IOPS/month
Region Example:
US East: Standard pricing
Europe West: 10% more than US East
Asia Pacific: 15% more than US East
For current Premium SSD v2 pricing, check Azure’s official resources or contact support.
Read more on govindhtech.com
#Azurepremium#ssdv2#pv2#azurediskstorage#gaming#workloads#virtualmacinnes#bigdata#analytics#Regionpage#Azuresupport#iops#ssdv2sizes#gigabytes#Azurepricing#technologe#technews#news#govindhtech
0 notes
Video
youtube
BLR BitLocker Pen Drive Data Recovery Tool
1 note
·
View note
Text
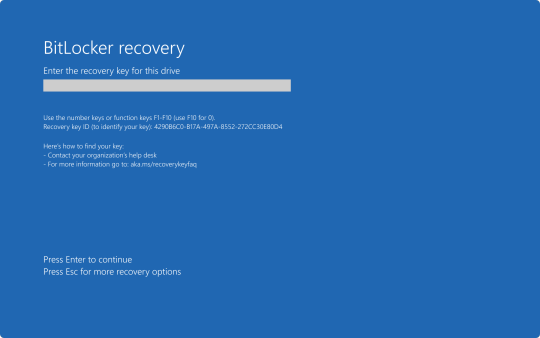
Understanding the BitLocker Recovery Key: What It Is and How to Use It

Hey Tumblr friends! 🌟
If you've recently enabled BitLocker on your Windows device and suddenly find yourself staring at a prompt asking for a BitLocker recovery key, you might be wondering what this mysterious key is all about. Let’s dive into the essentials of the BitLocker recovery key, why you might need it, and how to find it when necessary.
What is a BitLocker Recovery Key?
A BitLocker recovery key is a 48-digit numerical password that acts as a backup method to unlock your encrypted drive. This key is generated when you first enable BitLocker on a drive and is crucial for situations where you can’t access your drive through the usual means.
Why Might You Need a BitLocker Recovery Key?
There are several reasons why you might be prompted to enter your BitLocker recovery key:
Forgotten Password: If you forget your BitLocker password, the recovery key is your only way to regain access.
Hardware Changes: Making significant changes to your computer’s hardware, like replacing the motherboard, can trigger the recovery key prompt.
Software Updates: Major updates to your operating system or BIOS might require you to enter the recovery key.
Security Concerns: If BitLocker detects potential security threats or unauthorized access attempts, it will ask for the recovery key.
Where to Find Your BitLocker Recovery Key
If you’re in a pinch and need to find your BitLocker recovery key, here are some common places to check:
Microsoft Account: If you linked BitLocker to your Microsoft account, you can find your key on the Microsoft BitLocker recovery key portal.
USB Drive: If you saved the recovery key to a USB drive, make sure to keep it somewhere safe and accessible.
Printout: Some folks print their recovery key and store it securely.
Azure Active Directory (AAD): If your device is connected to an organization’s AAD, your IT department might have a copy.
File: If you saved the recovery key as a file, it’s usually named something like BitLocker Recovery Key.txt.
What to Do if You Can’t Find Your Recovery Key
If you can’t locate your BitLocker recovery key, your options are unfortunately limited. Without the recovery key, accessing your encrypted data is not possible. This is a vital reminder to store your recovery key securely in multiple locations.
Best Practices for Managing Your BitLocker Recovery Key
Store Multiple Copies: Keep your recovery key in several places, such as your Microsoft account, a USB drive, a printout, and a secure digital file.
Secure Storage: Ensure your recovery key is stored in a safe location, like a safe or encrypted digital storage.
Keep Updated: Regularly update your recovery key and ensure it’s accessible, especially after significant system changes.
By following these best practices, you can avoid the potential frustration and data loss associated with being locked out of your BitLocker-encrypted drive.
For a more detailed guide on BitLocker and managing recovery keys, including step-by-step instructions and troubleshooting tips, check out this Comprehensive BitLocker Recovery Key Guide.
Hope this helps you stay secure and stress-free! If you have any more questions about BitLocker or need further assistance, feel free to drop a comment. 💬✨
Also read our related articals:
How Ad Blockers Might Trigger BSOD Blue Screen
Audio Troubleshooter: Resolve No Sound Issues On Dell Laptop
Laptop Not Connecting To WiFi? Fix Laptop WiFi Issues Today!
How To Fix ‘No Sound’ Issues On Your Laptop Or PC: A Comprehensive Guide
1 note
·
View note