#birdsmouth
Explore tagged Tumblr posts
Visit Tumblr Blog
Explore Tumblr blogs with no restrictions, modern design and the best experience.
Last Seen Tumblr Blogs


Fun Fact
Kazakhstan’s Minister of Communications and Informatics has blocked the Tumblr site because it contained 60 sites of terrorism, extremism, and pornography in 2015.
Text

like my facebook is filled with this AI generated bullshit all the time, there are millions of real ass houses they could be posting pictures of, at least there aren't a million collar ties this time, and the birdsmouth cut is like so close if you weren't planning on eaves
7 notes
·
View notes
Text
Bridport Porcelain Coping Stones CS-BRI-90INTSB | 90° internal square birdsmouth corner
Introducing the Bridport Porcelain Coping Stones CSBRI90INTSB, the ultimate solution for your pool coping needs. Crafted with precision and quality, these coping stones are designed to elevate the aesthetics and functionality of your outdoor space. Porcelain has emerged as the top choice for pool copings, paving, and hard landscaping projects, and for good reason. The advancements in porcelain…
0 notes
Text
Birdsmouth Brewing, Oceanport, New Jersey - Monmouth County, New Jersey

View On WordPress
0 notes
Text
Living the Dream Year 3 Day 166 – Clifty Hill 2 - Ridge is going up
Year 3 Day 166 – “Living the Dream”. Sunday, 10/15/2023. Clifty Hill 2 – The ridge is going up. Two more pieces to go. I brought lunch over and I heard the phrase “Is it in the birdsmouth?”. Do you know what a birdsmouth is in home construction? A birdsmouth is a triangular right-angled notch formed in the end of a rafter to enable it to be securely be fixed to a wall-plate. It is happening on…

View On WordPress
0 notes
Photo
#Birds #birdspictures #birdswatch #birdsvillehotel #birdshoes #birdsparty #birdskeleton #birdsofbritishcolumbia #birdsofinsta #birdsflyinghigh #birdspattern #birdsmouth #birdsuniteus #birdsofparadiseremake #birdstagram #birdsdonthaveeyebrows #birdsworth #birdsofaustralia #birdseyeproductions #birdsofthenetherlands #birdsoftokyo #birdsofgoa #birdspainting #birdsmigration #birdsofworld #birdsofcentralpark #birdsphotographer #birdsperspective #birdsheadseascape #birdsofbotswana (at Rajasthan) https://www.instagram.com/p/BqWxmqQngrC/?utm_source=ig_tumblr_share&igshid=p2qnes3upneh
#birds#birdspictures#birdswatch#birdsvillehotel#birdshoes#birdsparty#birdskeleton#birdsofbritishcolumbia#birdsofinsta#birdsflyinghigh#birdspattern#birdsmouth#birdsuniteus#birdsofparadiseremake#birdstagram#birdsdonthaveeyebrows#birdsworth#birdsofaustralia#birdseyeproductions#birdsofthenetherlands#birdsoftokyo#birdsofgoa#birdspainting#birdsmigration#birdsofworld#birdsofcentralpark#birdsphotographer#birdsperspective#birdsheadseascape#birdsofbotswana
1 note
·
View note
Photo


Building a storage tray, and trying my hand at birdsmouth joinery. Plywood is perfect to show the join between the two pieces and how the laminations show off the transition.
25 notes
·
View notes
Text
My sister testing out a Pelham Puppet Angel marionette at Birdsmouth Studio’s ceramic marionette building corse.
9 notes
·
View notes
Text
8 Sticks and lots of glue.
8 Sticks and lots of glue.
Pathfinder project build post – building the rig. *Actually ten sticks at least ! If you have been following my build blog you will know that iv’e been thinking about the rig a lot and not really coming to any firm decision about what rig I was going to put on the boat until just recently ; for a while I really wanted to do an English/Breton style standing Lug – then I went back to the more…

View On WordPress
0 notes
Text

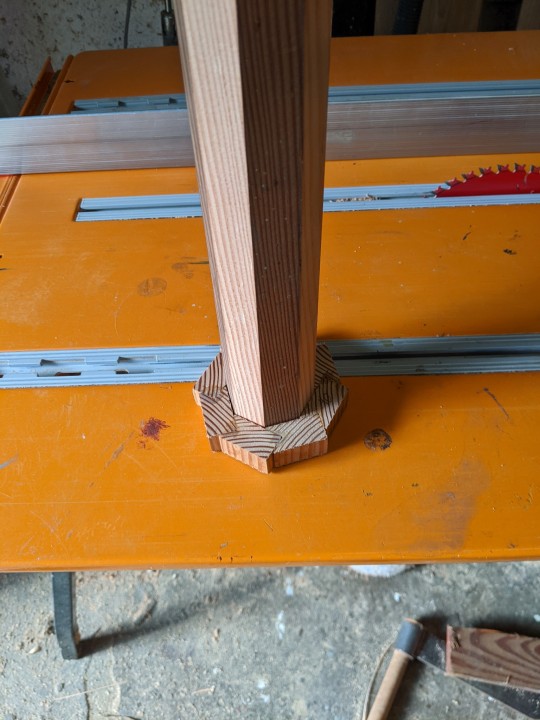
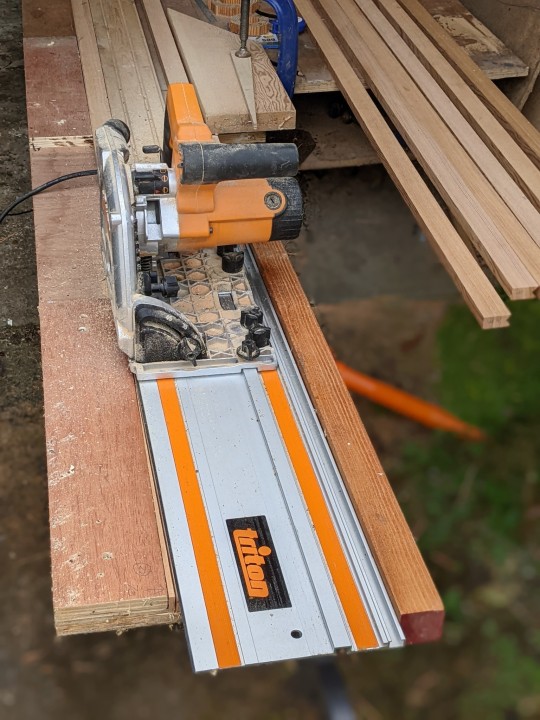


I cut it into 8 staves with two 45 degree cuts in the back - the birdsbeak. I then cut a long taper for the top and a short taper for the bottom in the front of each stave. I set up a jig to cut the tapers with a track saw. A quick dry fit made me realize that jubilee clips were necessary, I used 30 in all. Glue up was a stressful experience! I won’t go into any more detail on birdsmouth mast make making here. If you want more info on that there are great threads on the wooden boat forum. Nearly every Ilur building thread on there will contain good info...
7 notes
·
View notes
Text
O grande apontador de lápis (the huge pencil sharpener)
"Amyr, madeira é vida, descansa os olhos e envolve o espírito" (sr. Dias, segundo Amyr Klink, "Cem dias entre céu e mar" )
Minha ideia de fazer a retranca em madeira foi trazer ao barco a beleza da madeira maciça e da construção "birdsmouth", além do resultado ser mais leve, resistente e barato que o equivalente em alumínio do projeto original. Fiz essa peça baseada num projeto do Dudley Dix. Para o mastro pretendo usar a mesma técnica. As dimensões finais são 51mm de diâmetro externo e 2,5m de comprimento.
"Amyr, wood is life, it calms down the eyes and embraces the soul" (free translation of Mr. Dias, according to Amyr Klink in "Cem dias entre céu e mar" )
My goal in making a wooden boom was to have the beauty of solid wood and the birdsmouth technique. This concept is also lighter, stronger and less expensive compared to the original aluminum one. The section was based on a Dudley Dix's design and final dimensions are 2.5 meters in length and 51mm of external diameter. I intend to use the same concept for the mast.

Primeira etapa na plaina: 8 lados (Hand planning to 8 sides)

Lição aprendida, os tampões devem ser colados depois. O alinhamento ficou muito bom ainda assim (Lesson learned, glue the plugs in other step. Final result was pretty straight)
youtube
Depois de deixar com 16 faces, veio a parte mais emocionante: A técnica do "apontadorzão" foi um sucesso! (After hand planning to 16 sides comes the most exciting part: the huge pencil sharpener. The technique worked really well!)

Inspetor de qualidade dando ok no alinhamento e circularidade (Quality control... Passed!)

Peso dentro do esperado (Weight as predicted)

Torno improvisado para lixar (Sanding)

Teste de carga (Load test)

Carga máxima aplicada (35,2kg) (Maximum applied load was 35.2kg)

Deformação final: 41mm = 1,6% @35,2kg. (Final strain was 41mm or 1.6% @35.2kg)

Comparação entre a peça ensaiada, modelo teórico e equivalente em alumínio (Test, model and aluminum boom comparison)

2 notes
·
View notes
Text
Alright I did a short dive into this, and it seems that a lot of sources remove it. There's only one link with the actual list, and it's not a great site. Here's the Imgur link, I didn't check it. Here's some of my favs + what I think they roughly "translate" to:
Boye (Boy) Birdismowthe (Birdsmouth) Cryere (Crier) Curteyne (Curtain) Comforte (Comfort) Compaynowne (Companion) Creper (Creeper) Druggeman (Drugman) Dolfyn (Dolphin) Dredefull (Dreadful) Dappir (Dapper) Elfyn (Friend of the Elves) Envye (Envy) Flame Foxe (Fox) Feete (Feet????) German Gebage (GARBAGE???????) Hosewife (HOUSEWIFE) Justyne Liberall (Liberal) Labell (Label) Lewde (Lewd) Litilman (LITTLEMAN) Litilboye (LITTLE BOY) Mustarde (Mustard) Mistirman (Misterman) Organ Oribull (Horrible) Pretyman (Pretty man) Pretiboy (Pretty boy) Pastey (Pasty) Rage Soylarde (????) Salmon Spowse (Spouse) Sturdy Trailer Barefote (Barefoot) Blankette (Blanket) Badde (Bad) Balle (Ball) Brayneles (Brainless) Coke Dragon Farewell Lusty Meyntenawnse (Maintenance) Makehitgood (Make it good?) Myne (Mine) Nameles (Nameless) Purchase Swepestake (Sweepstake) Snacke (Snack) Tripper Welcome


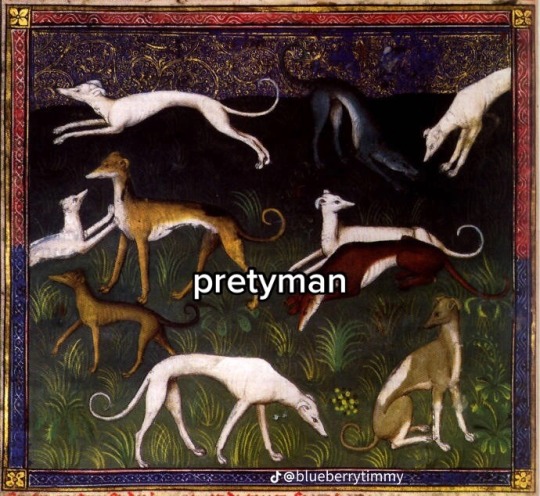


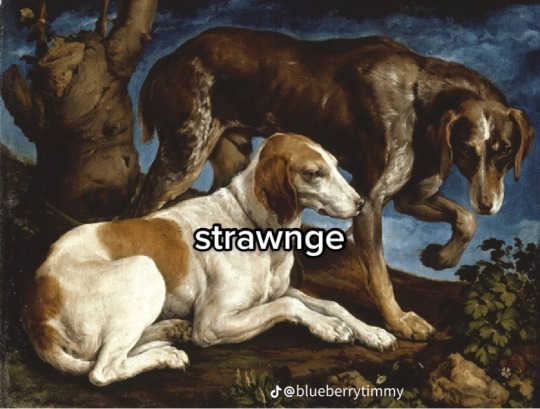


One of the most important things I have learned today..
162K notes
·
View notes
Text
Houghton Grey Porcelain Coping CS-HOUG90INTSB | 90° internal square birdsmouth corner
Welcome to the world of Houghton Grey Porcelain Coping, specifically the CSHOUG90INTSB 90 internal square birdsmouth corner. Porcelain has emerged as the premier choice for pool copings, paving, and various hard landscaping projects. With advancements in porcelain manufacturing, this coping solution stands out as the ideal option for clients seeking durability, slip resistance, and a modern…
0 notes
Photo

One of my chosen specialties (which I hope to really expand upon in the future) is mast making using the Birdsmouth method. Here I am eyeing a replacement mast for a Caledonia Yawl. I've decided to add a sparmaking class to my workshop schedule in August, 5-9th. Bring the family, they can play at the water park or beach while you learn to make solid, laminated spars and birdsmouth masts. I'm also running the I teo to Boatbuilding class again in November. Link in bio. #chasesmallcraftworkshops (at Chase Small Craft) https://www.instagram.com/p/BuSW1Uthc6S/?utm_source=ig_tumblr_share&igshid=71xtfntu3ud4
1 note
·
View note
Text
Jack rafter

They can just be square-cut to the short-point measurement. We support local and international organizations such as The Crop Walk, Marys Place, Collier House, Lunchbreak, and our Water & Economic Empowerment Project in Kivagala, Kenya. Using the skewable hanger eliminates the need to make an angle cut on the valley jacks. The Tinton Falls Rotary Club Annual Jack Rafter 5K and 1 mile Walk, is a Club-run, family friendly event designed to energize our community and raise funds for non-profits. An unskewed one is lying flat on the floor beneath one I bent and tack-nailed to the side of the valley rafter. At the birdsmouth, I supplied the 3 -inch seat and for the rafter tail, a 12-inch overhang with a 2 -inch-high subfascia (plumb cut), which dictated the level cut at the heel. The hangers used to mount the valley jacks to the valley rafter are skewable. The 7:12-pitch hip roof is framed with 2圆 common and jack rafters on 16-inch centers and with 2x8 hips and ridge. Here’s what the students came up with for the diagonal lengths for each rafter: The measurements are all runs (horizontal measurements). Join Facebook to connect with Jack Rafter and others you may know. They are not diagonal measurements.Ī view from the spot where the cross-gable ridge meets the plane of the main roof and down the center of the overlay valley area and the true valley that runs between the sub-ridge and the rafter beam that supports the sub-ridge.The valley jack layout has three jacks. View the profiles of people named Jack Rafter. So here is a plan view with measurements that the students at Warwick CTC used to calculate the jacks. central jack rafters are expected to experience the highest moments and shear internal forces, and their joints will need to resist the largest support. I didn’t have time to calculate the valley jack rafters when working on the weekend, and Monday it’s supposed to rain. On this one, the top and bottom cuts are plumb cuts with single bevels. Ordinarily a ridge-to-plate valley rafter has a top plumb cut with single or double bevels, and a seat cut. The string pinpointed the position of the valley rafter between the sub-ridge and the rafter beam.įrom there I could calculate and cut the valley to length. At the cross-gable ridge, I located the point where the main rafter plane met the edge of the ridge board. I ended up extending the plane of the cross-gable rafters to locate where it met the main roof plane on the rafter beam. I couldn’t figure out a simple way to pinpoint the center of the valley line between the rafter beam and the cross-gable ridge. The lower section is a true valley, with a valley rafter between a rafter beam and the sub-ridge, and the upper part is a layover valley. The challenging part is that the sub-ridge brakes the valley line into two sections. The valley between the north and east roofs is a common valley, with the intersecting roofs at the same 10-in-12 pitch.
0 notes
Photo

(Birdsmouth Mock-up | Port Townsend Shipwrights Co-opから)
30 notes
·
View notes
Text


The Poodle puppet was kind enough to give a couple of glamorous poses for the camera.
7 notes
·
View notes