#best softbox lighting kit
Text
Godox SK400II 2-Light Studio Flash Kit Outshines Single Light Setup

One of the most crucial aspects of photography is lighting. Having the proper lighting setup may significantly impact the quality of your images, regardless of whether you're taking them outside or in a studio. The Godox SK400II 2-Light Studio Flash Kit is one highly suggested option. Compared to individual light configurations or mismatched items from other brands, this package has many advantages. In this blog, we'll explore the Godox SK400II's unique features and reasons it's a wonderful investment. We'll also talk about the Godox Studio Flash Light's price in the UAE and the value it offers.
Balanced Lighting Setup for Professional Results
The Godox SK400II 2-Light Studio Flash Kit's primary benefit is that it offers you complete control over the lighting in your space. You can eliminate shadows, smooth out lighting, and balance light across your subject with two flashes. This kit is the best option for producing high-quality photos whether you're working on product shots or portrait photography.
Using a single flash can make it difficult to attain the same amount of lighting control. One aspect of your topic may be well-lit while the other is left in stark shadow. The Godox 2 light kit solves this problem by giving two matching lights that make a professional lighting configuration.
Consistency and Color Accuracy Across the Setup
Consistency is one of the main benefits of the Godox SK400II. The kit's two lights have the same color temperature—5600K—and power output of 400W. By doing this, you can make sure that your lighting is consistent and less post-production editing will be required.
It might be challenging to create a coherent look when using products from different kits because the lights frequently have different brightness and color temperatures. You won't experience this problem with the Godox lighting kit because both flashes function exactly the same way.
If the godox studio flash light price in the UAE worries you, it's crucial to remember that by minimizing the need for further lighting changes, purchasing this kit can end up saving you both time and money.
Cost-Efficiency of a Complete Lighting Kit
The Godox SK400II 2-Light Studio Flash Kit is more affordable when purchased as a set than when purchased separately. The kit includes two flashes, light stands, and typically softboxes or umbrellas, providing everything you need in one buy.
The cost of this entire set is far less than that of assembling individual pieces, if you're looking for the 2 light flash kit price in Dubai. Additionally, it's convenient to not have to worry about underperforming or incompatible products when you have a matching pair of lights.
Wireless Control for Seamless Operation
Wireless triggers like the Godox X1T or XPro are usually included with the Godox SK400II kit, which enables you to control both flashes remotely. Streamline your productivity by adjusting power, sync, and modes without actually touching the lights. When working in a busy studio setting or when the flashes are positioned at challenging angles, this feature is really useful.
You might require different triggers if you're using many brands or a single product, which would complicate your setup. Everything in the Godox camera flash light kit is made to function together harmoniously, guaranteeing a quick and easy shooting experience.
Versatility with Softboxes and Modifiers
Typically, softboxes or umbrella reflectors are included with the Godox SK400II 2-Light Studio Flash Kit to soften the light and lessen harsh shadows. Because of this, it's ideal for home studios as well as professional studio photography, guaranteeing even lighting for your subjects.
Although you can mix and combine items from other kits, the lighting quality may suffer as a result. Both lights will generate the same amount of soft, diffused light thanks to the Godox studio flash kit, making it perfect for commercial and portrait photography.
For photographers searching for versatile and portable options, Godox camera outside flash lights offer similar high-quality lighting solutions, making them great for on-location shots as well.
Ideal for Multi-Light Techniques
A single flash cannot accomplish the range of lighting approaches that can be achieved with two lights in a setup. The Godox SK400II 2-Light Studio Flash Kit gives photographers the creative freedom to play with light and shadow in a variety of ways, from Rembrandt lighting to three-point lighting.
Having two flashes is a major advantage whether working in portraits or product photography. You have more control over your lighting and can produce dynamic, well-balanced shots with a Godox camera flash light.
Affordable Professional Lighting Solution
The godox studio light is a very competitive option if you're looking for a high-quality lighting solution at an affordable price in the UAE. The Godox SK400II 2-Light Studio Flash Kit is a great option for photographers of all experience levels as it provides a good mix of performance and affordability.
In contrast to other lighting kits on the market, this Godox lighting kit offers every functionality you require for studio photography at a far lower cost. Godox studio flash light price in UAE is reasonably priced for the strength, dependability, and quality it offers.
At Awpro Dubai, you can find the Godox SK400II 2-Light Studio Flash Kit at competitive prices, ensuring you get the best professional lighting setup without compromising on your budget. Awpro is your go-to destination for reliable, high-quality photography equipment in the UAE.
Conclusion
For photographers who want professional lighting results, the Godox SK400II 2-Light Studio Flash Kit is a need. Its steady color temperature, cost-effectiveness, and well-balanced lighting set it apart from the competition. This kit has everything you need to improve your photography, whether your focus is on studio or outdoor subjects.
With the godox 2 light kit's capabilities and camera flash light selections, you can create a dependable, strong setup that is user-friendly and versatile. The godox studio flash light price in UAE makes this kit a great buy for any photographer hoping to get shots that rival those of a professional without going over budget, regardless of where they are in the world. You can find the Godox SK400II 2-Light Studio Flash Kit available at Awpro Dubai, your trusted source for high-quality photography equipment.
0 notes
Text
Studio Lights & Photography Lighting | Best Solutions in Dubai
Studio Lights & Photography Lighting in Dubai: Get the Best from Sky Media UAE
Great lighting is essential for taking amazing photos. At Sky Media UAE, we offer high-quality Studio Lights & Photography Lighting for photographers in Dubai. Whether you're new to photography or a pro, our lighting solutions are here to help you capture the best shots.

Lighting is one of the most important parts of photography. Without good lighting, even the best camera might not give you great pictures. That’s why Sky Media UAE has a wide range of Studio Lights & Photography Lighting options for you.
We have lights from top brands, so you know you’re getting good quality. Our products include softboxes, LED panels, ring lights, and continuous lighting kits. These tools will help you set up the perfect lighting for any type of photography, whether it’s portraits, products, or videos.
Why Choose Sky Media UAE?
Lots of Choices: We have many Studio Lights & Photography Lighting products so you can find exactly what you need.
Expert Help: Our team knows a lot about photography and can guide you to the best lighting for your studio.
Affordable Prices: We keep our prices fair so you can get high-quality lighting without spending too much.
Easy Shopping: We’re based in Dubai, with both in-store and online shopping options. Plus, we deliver quickly across the UAE.
Upgrade your photography today with the best Studio Lights & Photography Lighting from Sky Media UAE. Our products will help you get the perfect light for your photos.
FAQs:
1. What types of studio lights do you offer at Sky Media UAE?
We offer a wide range of studio lights, including softboxes, LED panels, ring lights, and continuous lighting kits. These are suitable for various photography needs, from portrait to product photography.
2. Why is good lighting important in photography?
Good lighting is essential because it helps create clear, well-exposed, and visually appealing photos. Proper lighting enhances the details, colors, and overall quality of your images.
3. Can I get expert advice on choosing the right lighting for my studio?
Yes, our team at Sky Media UAE includes photography experts who can guide you in selecting the best lighting solutions based on your specific needs and studio setup.
4. Are your studio lights suitable for both beginners and professionals?
Absolutely! We have lighting options that cater to all levels of photographers, whether you're just starting out or are an experienced professional.
5. Do you offer delivery across the UAE?
Yes, we provide fast and reliable delivery services across the UAE, so you can conveniently receive your studio lights wherever you are in the country.
6. Are your studio lights from well-known brands?
Yes, we only stock studio lights from trusted and reputable brands to ensure high quality, durability, and performance for your photography needs.
7. How can I purchase studio lights from Sky Media UAE?
You can either visit our store in Dubai or shop online through our website. We offer both options for your convenience.
8. Do your studio lights come with a warranty?
Yes, most of our studio lights come with a manufacturer’s warranty. Please check the specific product details for warranty information.
9. Can I return or exchange the lights if they don’t meet my expectations?
We have a return and exchange policy in place. Please refer to our website’s policy section or contact our customer service team for more details.
10. What payment methods do you accept?
We accept various payment methods, including credit cards, debit cards, and online payment options. You can choose the method that works best for you during checkout.
Source:- https://usedcameraindubai.weebly.com/blog/studio-lights-photography-lighting-best-solutions-in-dubai
#StudioLighting#PhotographyLighting#StudioLights#PhotographyGear#LightingEquipment#PhotographyStudio#DubaiPhotography#UAEPhotographers#PhotographyTips#LightingSetup#ProLighting#PhotoStudioGear#PhotographyEssentials#CreativeLighting#SkyMediaUAE
0 notes
Text
Horizon Communications: Home to the Best Food Photographers in Dubai
Dubai, a city renowned for its luxury, innovation, and vibrant culinary scene, is a place where food isn't just consumed – it's celebrated. Capturing the essence of this celebration through photography requires more than just technical skill; it demands an artistic eye, creativity, and a deep understanding of food. Horizon Communications stands at the forefront of this niche, boasting the best food photographers in Dubai. Here’s why Horizon Communications is your ultimate choice for food photography and the best food photographers in Dubai in this dynamic city.
1. Unmatched Expertise and Experience
Horizon Communications has built a team of food photographers who are not only experts in their field but also passionate about food and photography. Their collective experience and knowledge make them the best in Dubai.

Key Highlights:
Professional Training: Each photographer undergoes rigorous training to master the intricacies of food photography.
Extensive Experience: Years of working with top restaurants, chefs, and food brands in Dubai.
Artistic Vision: A unique blend of technical skill and artistic creativity to bring out the best in every dish.
2. Cutting-Edge Equipment
To capture the perfect shot, having the right equipment is essential. Horizon Communications invests in the latest photography gear to ensure superior quality images.
Equipment Arsenal:
High-End Cameras: Full-frame DSLRs and mirrorless cameras for unparalleled clarity and detail.
Specialized Lenses: Macro lenses for intricate close-ups and prime lenses for stunning bokeh effects.
Advanced Lighting: Portable lighting kits, softboxes, and reflectors to create the perfect lighting conditions.
3. Mastery of Lighting Techniques
Lighting can make or break a food photograph. The food photographers at Horizon Communications are masters of lighting, knowing how to use it to highlight the textures, colors, and appeal of the food.
Lighting Expertise:

Natural Light: Utilizing daylight to create fresh and inviting images.
Artificial Light: Expertly handling artificial lighting to mimic natural light or create a dramatic effect.
Shadow Management: Using diffusers and reflectors to soften shadows and enhance the food’s appearance.
4. Creative Composition and Styling
The photographers at Horizon Communications excel in composition and styling, making each dish look as delectable as it tastes.
Composition Techniques:
Rule of Thirds: Applying the rule of thirds to create balanced and visually appealing compositions.
Angles and Perspectives: Experimenting with various angles to find the most flattering perspective for each dish.
Food Styling: Collaborating with food stylists to arrange the food in an appetizing and aesthetically pleasing manner.
5. Capturing the Culinary Story
Food photography is not just about the food; it’s about telling a story. Horizon Communications’ photographers are adept at capturing the narrative behind the dish – from the ingredients to the final presentation.
Storytelling Through Photography:
Ingredient Shots: Highlighting the fresh ingredients that go into each dish.
Preparation Process: Capturing chefs at work, showcasing the artistry and effort behind the food.
Final Presentation: Focusing on the beautifully plated dish, ready to be enjoyed.
6. Excellence in Post-Processing
Editing is a crucial part of food photography, and Horizon Communications excels in post-processing, ensuring each image is polished to perfection.
Post-Processing Skills:
Color Correction: Enhancing the colors to make the food look as vibrant and appealing as possible.
Exposure Adjustment: Fine-tuning the exposure to ensure the perfect balance of light and shadow.
Detail Enhancement: Retouching images to highlight textures and eliminate any imperfections.
7. Building Strong Visual Brands
Horizon Communications doesn’t just take photos; they help build visual brands. Their images are crafted to align with your brand’s identity and appeal to your target audience.

Branding Impact:
Consistency: Maintaining a consistent style that reflects your brand’s personality.
Engagement: Creating images that captivate and engage viewers on social media and other platforms.
Professionalism: Presenting your food in the best light, enhancing your restaurant or brand’s reputation.
Conclusion
In a city where culinary excellence meets visual extravagance, Horizon Communications stands out as the premier choice for food photography. Their team of the best food photographers in Dubai brings together technical expertise, artistic vision, and a passion for storytelling, ensuring that every dish is captured in its most mouth-watering form. Trust Horizon Communications to elevate your food photography and help your culinary creations shine in the competitive and vibrant Dubai food scene.
Let's create something incredible together
[email protected]
+971 50 7810 355
Also read : The Thriving World of Video Production in Dubai
#media production company in dubai#restaurant photography dubai#filmproductioncompaniesindubai#videoproductionagencydubai#bestfoodphotographyservices#product photography dubai#food photography#video production#bestfoodphotographyservicesindubai#corporatevideopproductionindubai
0 notes
Text
Mastering Jewelry Photography: A Comprehensive Guide

Jewelry photography is a specialized field that requires a keen eye for detail, an understanding of lighting and composition, and the right equipment. Capturing the true beauty and intricacy of jewelry pieces can significantly impact their appeal and sales potential. This comprehensive guide will walk you through everything you need to know to master jewelry photography.
Importance of Jewelry Photography
In the world of e-commerce and social media, high-quality images are crucial. For jewelry, where the appeal lies in the fine details, professional photography is essential. Well-captured photos can enhance perceived value, build trust with customers, and increase sales. High-quality images make jewelry pieces appear more luxurious and help customers feel confident about the quality and authenticity of the pieces. Attractive images are more likely to catch the eye of potential buyers and drive conversions.
Essential Equipment
Cameras
While professional DSLRs and mirrorless cameras are ideal, high-end smartphones can also produce excellent results. Key features to look for include high resolution for capturing fine details, manual controls to adjust settings like ISO, shutter speed, and aperture, and macro capabilities for capturing close-up details.
Lenses
Different lenses can dramatically affect the outcome of your jewelry photos. Macro lenses are perfect for capturing intricate details of jewelry. Prime lenses, with fixed focal lengths, offer sharp images and beautiful bokeh. Zoom lenses provide flexibility in framing and composition.
Lighting
Lighting is critical in jewelry photography. Options include natural light, which provides a soft, realistic look but is dependent on weather and time of day; studio lighting, including softboxes, ring lights, and LED panels for consistent, controllable lighting; and reflectors and diffusers to help control light and reduce harsh shadows.
Tripods
A stable camera is essential for sharp images. When choosing a tripod, consider adjustable height for shooting from different angles and a sturdy build to ensure stability and prevent camera shake.
Backgrounds
Simple, clean backgrounds are usually best for jewelry photography. Options include white or black backdrops, which are classic choices that make the jewelry stand out, and textured backgrounds, which can add depth and interest to the shots.
Other Accessories
A lightbox is a portable mini studio for small items. A remote shutter release helps avoid camera shake, and cleaning kits keep lenses and jewelry free from dust and smudges.
Setting Up Your Jewelry Photography Studio
Choose a location with ample natural light if possible and minimal clutter. Ensure the space is large enough to accommodate your setup and allow for movement around the subject. A three-point lighting setup is effective for jewelry photography. This includes a key light as the main light source, a fill light to reduce shadows created by the key light, and a backlight to separate the jewelry from the background and add depth.
Use a seamless background (a background that curves from the vertical to the horizontal surface) for a clean look. Ensure it’s large enough to accommodate the jewelry and eliminates unwanted lines. Place your camera on the tripod at eye level with the jewelry. Use the rule of thirds to compose your shot, positioning the jewelry off-center for a more dynamic image.
Capturing the Perfect Shot
Adjust your camera settings for the best results. A wider aperture (lower f-number) creates a shallow depth of field, while a narrower aperture (higher f-number) keeps more of the jewelry in focus. A faster shutter speed freezes motion, while a slower shutter speed can capture more light but may require a tripod to prevent blur. Keep ISO low to reduce noise; increase it only if necessary in low light conditions.
Manual focus allows for greater precision, especially when capturing detailed shots. Use focus peaking (if available) to highlight the in-focus areas. Compose your shot by experimenting with different angles to find the most flattering view of the jewelry. Ensure the jewelry is centered or creatively positioned according to the rule of thirds. Capture close-ups to highlight unique features. Shooting tethered, which involves connecting your camera to a computer, allows you to view images on a larger screen immediately, ensuring everything is in focus and properly lit.
Post-Processing Techniques
In post-processing, make basic adjustments to exposure, contrast, and white balance to enhance the image. Advanced editing includes retouching to remove imperfections or distractions, clipping paths to create clean cut-outs of the jewelry for a pure white background, and color correction to make the jewelry look more appealing. Popular photo editing software includes Adobe Photoshop for advanced editing capabilities, Adobe Lightroom for batch processing and basic adjustments, and GIMP as a free alternative with powerful features.
Creative Techniques and Tips
Use props to add context and enhance the visual appeal of your jewelry shots. Ensure they complement the jewelry without overpowering it. Lifestyle shots show your jewelry in use or in a realistic setting to help customers envision its wearability. This can be particularly effective for engagement rings, bracelets, and necklaces. Utilize reflective surfaces like glass or water to add interest. Ensure the reflections are controlled and enhance the overall image.
Try shooting from unusual angles or perspectives to create unique and eye-catching photos. Overhead shots, low angles, and macro close-ups can add variety to your jewelry images. Capture motion blur or use slow shutter speeds to show movement, such as swinging earrings or spinning rings. This technique can add a dynamic element to your shots.
Common Challenges and Solutions
Reflections can be problematic, especially with shiny jewelry. Use diffused lighting and position lights at different angles to minimize unwanted reflections. A polarizing filter can also help reduce glare. While some shadows can add depth, harsh shadows can be distracting. Use fill lights and reflectors to soften shadows. Adjust the distance and angle of your lights to control shadow intensity.
Ensure consistent white balance settings across all photos to achieve consistent colors. Use a grey card to set a custom white balance in your camera. In post-processing, match the color profiles to maintain consistency. Transparent jewelry like crystal or glass can be challenging. Use a gradient background or light the jewelry from behind to create separation. Experiment with different angles and lighting setups to highlight the jewelry’s edges and shape.
Showcasing Your Work
Build a well-organized portfolio showcasing your best work and highlighting your skills. Include a variety of shots to demonstrate your versatility. Online portfolio platforms like Behance, Adobe Portfolio, or a dedicated website can help you present your work professionally. Share your jewelry photos on social media platforms like Instagram, Pinterest, and Facebook. Use relevant hashtags, engage with your audience, and collaborate with influencers to increase visibility.
A blog can establish you as an authority in jewelry photography. Share tutorials, behind-the-scenes content, and case studies. This not only showcases your expertise but also attracts potential clients through organic search traffic. Attend industry events, join photography groups, and collaborate with other photographers and businesses. Networking can lead to referrals and new opportunities.
Measuring Success and Continuous Improvement
Use analytics tools to track the performance of your jewelry photos. Metrics to consider include conversion rates, engagement rates, and bounce rates. Request feedback from clients and peers to identify areas for improvement. Constructive criticism can help you refine your techniques and deliver better results.
Stay informed about the latest trends in e-commerce and photography. Subscribe to industry publications, follow influential photographers, and continuously experiment with new techniques and equipment. Take online courses, attend workshops, and read books on photography to continually enhance your skills. Platforms like Udemy, Coursera, and CreativeLive offer valuable resources for photographers at all levels.
Conclusion
Mastering jewelry photography requires a combination of the right equipment, proper techniques, and continuous learning. By understanding the importance of high-quality images, setting up an effective studio, capturing the perfect shot, and utilizing post-processing techniques, you can significantly enhance the visual appeal of your jewelry and attract more customers. Remember to showcase your work through various channels, seek feedback for improvement, and stay updated with industry trends to keep your skills sharp and your photos stunning.
Lensclicker jewelry photography services in Jaipur
At Lensclicker Photography, we specialize in delivering exceptional jewelry photography services in Jaipur. Our team of skilled photographers is dedicated to capturing high-quality images that elevate your brand and drive sales. From individual shots to group shots and lifestyle images, we cover all your jewelry photography needs. Our expert editing team ensures your images are flawless and ready to impress. We offer tailored photography packages to suit your specific requirements and budget.
Contact Us: 09521324743
For more information, please visit your website: — https://www.lensclicker.com/
#photography#ecommerce#photoshoot#services#product photography#artists on tumblr#across the spiderverse#michael cera#old bollywood#succession
0 notes
Text
Create Your First Business Video: A Step-by-Step Guide
Embarking on your journey to create your first business video might seem daunting, but breaking it down into manageable steps ensures a smoother process. Start by pinpointing the purpose and who you're crafting this video for. A well-defined target directs all subsequent creative decisions. Google Forms is a handy and free resource to tap into your potential audience insights.
Before bringing your ideas to life visually, lay a strong foundation with a good script and storyboard. Tools like Celtx and Storyboard That provide free services to help craft your narrative and plan your visuals, setting the stage for the actual filming. Precision in planning equates to less hassle during filming and editing.
Engage local talent and businesses in New Jersey and New York to enrich your production. Whether it's featuring a popular local cafe or collaborating with regional artists, integrating known elements will resonate well with local audiences and can cut down broadly on location costs.
Video Production: Equipment & Setting
While professional gear can offer enhanced quality, modern smartphones equipped with capable cameras are an impressive alternative for starters. For clear audio, consider the affordable Rode SmartLav+. For your filming backdrop, utilize natural settings such as the vibrant parks in New York or co-working spaces in New Jersey, which can serve as dynamic, cost-effective locations.
Light is your best friend in video production. Aim for days with ample natural light to give your video a pleasant aesthetic without the price tag of professional lighting kits. Yet, investing in some basic softbox lights can fill in the gaps when natural light isn’t enough.
Video editing might seem technical, but with user-friendly and cost-effective tools like HitFilm Express and Lightworks, you can splice, edit, and perfect your video like a pro. Augment your visual story with sound using free tracks from Incompetech or Freesound to add depth and emotion to your production.
Distribution & Marketing
Once your video is ready, it’s time to share it. Tailor your video's format to fit different social media platforms; square videos usually get more engagement on Facebook, while Instagram stories are perfect for vertical videos. Tools like Google Analytics and built-in social media insights can be invaluable for monitoring how your video performs, helping you learn and adapt for future projects.
Keep these insights in mind throughout your project:
Establish clear objectives and understand your audience right from the start.
Leverage free and affordable tools for various stages of production.
Maximize local venues and natural scenery to minimize costs.
Adjust and optimize your video content for different social platforms to engage effectively with your audience.
With determination and the right resources, your first business video not only tells a compelling story but also serves as a profound step in your entrepreneurial journey. Whether you’re an aspiring filmmaker in New Jersey or a small business owner in New York, these steps will guide you toward producing a video that not only looks professional but also connects authentically with your audience.
/post/create-your-first-business-video-a-step-by-step-guide
0 notes
Text
How To Setup A Podcast Studio – My thoughts and what I did for a Pro recording environment.
Embarking on the journey to create PodLab Studios, nestled within Westland, Michigan, was an adventure rooted in a singular vision: to meld unparalleled audiovisual quality with a workspace that stirs the creative spirit. Each piece of equipment and every decorative choice was handpicked not only for its technical merit but for its contribution to an atmosphere where creativity knows no bounds. The essence of our studio lies in this meticulously curated collection, where functionality meets inspiration. In this opening statement, let’s explore the rationale behind the selection of key pieces that together form the lifeblood of PodLab Studios.
Sound and Vision
Central to our auditory experience is the Rode PodMic, chosen for its exceptional audio clarity, ensuring that every podcast episode we produce is of the highest quality. Complementing this auditory excellence, the Neewer cb60 RGB and Neewer 2pack 660 PRO RGB LED Video Light CRI 97+ illuminate our space not just physically but metaphorically, enhancing both the visual appeal of our recordings and the ambiance of our creative environment.
Ambiance and Aesthetics
The visual tone of PodLab Studios is set by the Art3d wall panels 12×12 black and StickGoo 3d wall panels white, which do more than just soundproofing; they add a layer of modern aesthetic that makes our studio not only a place to work but to thrive. The Padcaster Parrot Teleprompter Kit is another pivotal choice, streamlining our video production process and ensuring our message is delivered with precision.
Lighting and Adaptability
Light shaping is crucial, achieved through Neewer Foldable softbox diffuser and Neewer Larger Softbox diffuser, which soften and sculpt the light, creating the perfect mood for each session. The Neewer 2pk Triangle Wall mounting boom and Neewer 26” Lantern softbox offer versatility and control over our lighting, enabling us to capture every moment in its best light.
Ergonomics and Comfort
Acknowledging the long hours that go into podcast production, the Dreamsir Office Chair was selected for its ergonomic design, ensuring comfort throughout the creative process. Similarly, the Rode PSA1+ Boom Arm and accompanying Mic stand provide flexibility and ease of use, crucial for maintaining a fluid and dynamic recording environment.
Technical Excellence
The backbone of our studio’s technical setup includes the Rode Rodecaster Pro II for its unmatched audio mixing capabilities, and the Neewer 31.5” Motorized Camera Slider VS-80WC along with its updated version for phone compatibility, enhancing our video production with smooth, cinematic shots. The Sound Dance Laptop Stand and QianLink Headphone Extension Cable 2pk exemplify our attention to detail, ensuring every piece of equipment enhances our workflow and productivity.
Connectivity and Power
Essential for seamless connectivity, the UVOOI 8K Long Hdmi Cable 48Gbps and JSaux 8k hdmi cables 10Ft ensure our equipment communicates without fault, backed by the reliable Trond Surge Protector that powers our studio safely and efficiently.
Decorative Touches
Finally, the ambiance of PodLab Studios is softened and enriched by decorative elements such as Candles, Floor Lamps, and a 5.2 artificial palm tree, creating a welcoming environment that stimulates creativity. Enhanced by Govee RGBIC Led Strip lights 16.4ft and Govee Strip light for tv, our studio not only sounds but also looks the part, inviting podcasters into a space designed for innovation.
This photo captures the essence of PodLab Studios in Metro Detroit, showcasing a modern conference table set against a backdrop of sophisticated podcast equipment.
The space is thoughtfully designed for collaboration and creativity, equipped with state-of-the-art audiovisual gear, reflecting a commitment to providing an unparalleled recording experience for podcasters and content creators in a dynamic, professional environment.
Camera Gear:
In the realm of podcasting, where audio content reigns supreme, the inclusion of high-quality video content can significantly amplify a podcast’s appeal and audience engagement. At PodLab Studios, we’ve taken our podcasting venture a step further by integrating cutting-edge video recording gear into our setup, notably the Canon R5 and R6 cameras. These cameras are lauded for their remarkable video quality, durability, and the ability to film for extended periods without overheating—a crucial feature for long-form content creation.
Canon R5 and R6: A Game-Changer for Podcasting
The Canon R5 and R6 have become indispensable tools in our studio for several reasons. Their ability to capture 4K video not only elevates the visual quality of our podcasts but also ensures that our content is future-proof. However, the standout feature for our podcasting needs is their capability to film for hours on end through a straight feed, thanks to the Neewer Dummy Battery for Canon. This continuous power solution eliminates the worry of batteries dying mid-recording, ensuring uninterrupted filming of even the most extended interviews or discussions.
Ensuring Uninterrupted Power and Efficiency
The Neewer Dummy Battery for Canon and the Neewer Np-FZ100 Dummy Battery For Sony a7, a7s III, a7 series are pivotal in achieving this feat. By providing a direct power supply from an AC outlet, these dummy batteries allow our cameras to keep rolling without the typical constraints of battery life. This setup is especially beneficial during live-streamed sessions or when recording back-to-back episodes, where stopping to change batteries is not an option.
Stabilizing and Protecting Our Gear
To complement these cameras, the SmallRig Camera Cable Clamp and Small Rig Camera Cage kits for both Canon and Sony models offer the dual benefits of protection and functionality. The cages safeguard our valuable cameras from the rigors of studio use while providing numerous mounting points for accessories—be it microphones, monitors, or lighting equipment. This setup not only enhances the versatility of our shooting arrangements but also ensures that our gear remains secure and stable throughout the recording process.
The Half Cage solution for Canon R5, R6, C presents a cost-effective alternative without compromising on functionality. It offers sufficient protection and accessory mounting options for creators on a budget, demonstrating that high-quality podcast video production can be accessible and practical.
Conclusion: Elevating Podcast Production to Cinematic Heights
Incorporating the Canon R5 and R6 into PodLab Studios’ setup, complemented by essential accessories like dummy batteries and camera cages, has propelled our podcast production to cinematic heights. This strategic choice not only enhances the quality and reliability of our video content but also underscores our commitment to delivering an immersive and engaging podcasting experience. As we continue to explore the possibilities within the podcasting and vidcasting sphere, the integration of such high-caliber equipment ensures that PodLab Studios remains at the forefront of digital storytelling, ready to captivate audiences with both our audio and visual narratives.
Lighting and Sliders:
In the immersive world of podcasting and vidcasting, the visual component plays a crucial role in captivating the audience’s attention. At PodLab Studios, we’ve meticulously crafted a lighting and camera setup that not only enhances the quality of our content but also imbues it with a cinematic feel. This setup includes a combination of stable camera positions and dynamic movement, achieved through the integration of state-of-the-art sliding gear and sophisticated lighting solutions.
Dynamic Visuals with Sliding Gear
Central to achieving this dynamic visual storytelling is the Neewer 31.5” Motorized Camera Slider VS-80WC model. This slider has been instrumental in adding fluid motion to our shots, creating a more engaging and professional feel. The ability to automate camera movements adds an extra layer of polish to our video content, making interviews and discussions more lively and visually appealing. However, in hindsight, I found myself wishing for the Updated Camera Slider (ER1-80), which offers the convenience of smartphone control over the traditional remote that relies on an older Sony battery. This updated model would have provided us with greater flexibility and ease of use, highlighting the importance of staying abreast with the latest advancements in technology.
Illuminating Content with Sophisticated Lighting
Lighting plays a pivotal role in setting the tone and mood of our content. The Neewer cb60 RGB and Neewer 2pack 660 PRO RGB LED Video Light CRI 97+ are cornerstone elements of our lighting setup, offering a vast spectrum of colors and intensities. These lights not only illuminate our subjects but also allow us to creatively play with colors, enhancing the visual appeal of our podcasts and creating distinctive looks for different segments or themes.
To further refine the quality of light and ensure it complements our subjects, we incorporate Neewer Foldable softbox diffuser and Neewer Larger Softbox diffuser. These diffusers soften the light, reducing harsh shadows and creating a more flattering appearance for our hosts and guests. The Neewer 2pk Triangle Wall mounting boom and Neewer 26” Lantern softbox add versatility to our setup, enabling us to position lights in optimal locations and control the direction and quality of light with precision.
Achieving Cinematic Quality
The combination of our sliding gear and sophisticated lighting setup allows us to produce content that transcends the typical podcast format, venturing into the realm of cinematic production. With two cameras mounted on stable platforms and one on the slider, we can capture a variety of angles and movements that keep the viewer engaged. This setup not only elevates the production value of our content but also sets PodLab Studios apart in the competitive landscape of digital content creation.
Conclusion: Crafting a Unique Visual Identity
Through the deliberate selection and integration of the Neewer Motorized Camera Sliders, RGB LED Video Lights, and various lighting diffusers, PodLab Studios has created a signature visual style that complements our audio content. This approach to podcast and vidcast production not only enhances the viewer’s experience but also reinforces our commitment to quality and innovation. As we continue to explore the possibilities within the visual domain, our goal remains to captivate our audience with content that is both informative and visually stimulating, solidifying PodLab Studios’ position as a leader in the digital storytelling space.
Capture Your Voice: Pro Audio and Video switcher Gear
In the heart of PodLab Studios, the synergy between our audio equipment and video production tools sets the foundation for a premium podcasting experience. Central to this experience are the Rodecaster Pro II, Rode PodMics, and Rode PSA1+ Boom Arms, complemented by the precision of Blackmagic Design ATEM Mini Pro ISO for video switching. This combination, along with the integration of software like OBS Studio, empowers us to deliver content that is not only sonically rich but visually compelling, providing our clients with a product that stands out in the crowded digital landscape.
The Rodecaster Pro II: A Podcasting Powerhouse
The Rodecaster Pro II serves as the nerve center of our audio operations. This revolutionary mixer is designed specifically for podcasting, offering an intuitive interface, superior sound quality, and a range of features that cater to both seasoned podcasters and newcomers alike. Its multitrack recording capability, coupled with programmable sound pads for live sound effects and jingles, makes producing dynamic and engaging podcasts effortless.
Rode PodMics and PSA1+ Boom Arms: Perfect Harmony
Complementing the Rodecaster Pro II are the Rode PodMics, renowned for their broadcast-quality sound. These dynamic microphones capture the nuances of the human voice with remarkable clarity and warmth, making them an ideal choice for podcasting. Mounted on Rode PSA1+ Boom Arms, these mics can be easily positioned for optimal sound capture, ensuring comfort and flexibility during recording sessions. This setup guarantees that our hosts and guests can focus on their conversation, free from the constraints of static microphones.
Enhancing the Experience with Headphones
Critical to monitoring the audio quality during recording and live streaming are professional-grade headphones. These headphones provide clear, detailed sound, allowing for precise adjustments to levels and mix on the fly. This immediate feedback loop is crucial for maintaining the high audio standards PodLab Studios is known for.
Blackmagic Design ATEM Mini Pro ISO: Revolutionizing Video Production
The inclusion of the Blackmagic Design ATEM Mini Pro ISO elevates our video production capabilities. This powerful video switcher not only enables live switching between multiple video sources, creating a dynamic viewing experience but also records each input as a separate file. This feature is invaluable, offering our clients the unique advantage of receiving raw files immediately after recording. Whether for post-production edits or multi-platform distribution, this level of flexibility and efficiency is unparalleled.
Seamless Integration with OBS Studio
When paired with software like OBS Studio or OBS Live, our setup transforms into a broadcasting powerhouse. These platforms allow for the incorporation of overlays, lower-thirds, and other graphics, further enhancing the professional quality of the podcast. The ability to stream live to various platforms while recording a high-quality version for later upload means that our content can reach audiences wherever they are, in the best possible format.
Conclusion: Crafting Exceptional Podcasts with Cutting-Edge Tools
At PodLab Studios, the combination of the Rodecaster Pro II, Rode PodMics, Rode PSA1+ Boom Arms, professional headphones, and the Blackmagic Design ATEM Mini Pro ISO creates an ecosystem that is perfectly tuned for the creation of exceptional podcasts. This setup ensures that every episode we produce not only sounds great but also looks professional, offering our clients a competitive edge in their content creation endeavors. By leveraging these tools in conjunction with advanced software solutions, we’re able to offer a comprehensive service that encompasses all aspects of podcast production, from audio to video, live streaming to post-production, setting a new standard for what audiences can expect from podcast content.
A Flexible Design For All Clients:
In crafting the PodLab Studios environment, nestled in the bustling west side of the metro-detroit area, a meticulous blend of sound engineering and design innovation was essential. The studio’s layout and aesthetic choices reflect a deep understanding of the dynamic nature of podcasting, where both audio clarity and visual appeal play pivotal roles in creating compelling content.
Striking a Balance Between Acoustic Excellence and Visual Appeal
Central to achieving this balance is the strategic deployment of acoustic foam across the studio. This not only ensures that sound quality remains pristine, minimizing echoes and unwanted noise but also contributes to the studio’s overall aesthetic. Complementing this are the visually striking StickGoo tiles and 3D wall panels, which add texture and depth to the studio’s visual landscape while enhancing its acoustic properties.
Innovative Design for Dynamic Spaces
The studio’s design incorporates 4-foot extension walls on each side of the 16-foot stage, equipped with hinges for adjustable positioning. This innovative feature allows for the creation of a more intimate recording environment or a broader, open space, depending on the podcast’s requirements. The flexibility offered by these movable walls exemplifies PodLab Studios’ commitment to accommodating a wide range of recording scenarios, from solo narrations to panel discussions.
Technological Integration for a Modern Edge
A highlight of the studio’s modern side is the incorporation of a 43″ LED 4K TV, strategically placed to facilitate virtual interactions via Zoom/FaceTime, making remote guests feel as though they’re physically present in the studio. Additionally, a 55″ TV is centered within this space, serving multiple functions—from displaying videos that complement the podcast’s content to showcasing a client’s logo, providing a customizable backdrop that aligns with the podcast’s branding.
Enhancing Studio Flexibility with Mobile Dividers
Further enhancing the studio’s versatility are mobile room dividers, featuring 7-foot-tall black curtains. These dividers are not just functional, aiding in acoustic separation between the studio’s modern and organic sections; they also offer the creative flexibility to open up the space. This design choice allows for a seamless visual contrast within a single video frame, showcasing the dynamic interplay between the studio’s black, technology-rich area and the clean, simplistic white side.
Preserving an Organic Feel on the White Side
The studio’s white side, adorned with 3D wall panels, is intentionally kept clean and simple. This design decision underscores a commitment to maintaining an organic feel, providing a stark contrast to the black, modern area. This contrast is not merely aesthetic but also functional, offering podcasters a choice of backdrop that can shift the tone and feel of their content.
Conclusion: A Symphony of Design and Functionality
PodLab Studios’ design is a testament to the power of thoughtful studio layout and aesthetic choices in enhancing podcast production. The harmonious blend of acoustic foam, StickGoo tiles, 3D wall panels, and mobile room dividers creates a space that is both acoustically sound and visually appealing. The innovative use of technology, from the integration of large LED TVs for virtual guest appearances to the flexibility offered by hinged extension walls, sets PodLab Studios apart. This environment not only meets the technical demands of podcast production but also inspires creativity and engagement, making it a premier destination for podcasters looking to elevate their content. Through this careful integration of design and technology, PodLab Studios has crafted a recording space that truly reflects the dynamic and evolving nature of modern podcasting.
Conclusion: My final thoughts:
In the grand tapestry of content creation, the meticulous selection and integration of design elements, lighting and sliding gear, cameras, and audio equipment at PodLab Studios stand as a testament to the philosophy that while content is king, the environment in which it is created can significantly amplify its impact. Being in south east Michigan, our studio embodies a commitment to providing creators with a space that not only meets the highest standards of production quality but also inspires creativity and innovation.
A Harmonious Blend of Technology and Aesthetics
The decision to incorporate acoustic foam, StickGoo tiles, 3D wall panels, and mobile room dividers was driven by a desire to create an acoustically pristine and visually stimulating environment. This duality ensures that podcasts produced at PodLab Studios are not only audibly superior but are also complemented by an aesthetic backdrop that enhances the viewer’s experience. The juxtaposition of the modern, technology-rich side with the clean, organic white side of the studio allows for a dynamic visual contrast, catering to diverse creative visions.
Dynamic Visual Storytelling Through Lighting and Movement
The inclusion of Neewer lighting solutions and motorized camera sliders was a strategic choice aimed at elevating the visual storytelling aspect of podcasting. By integrating these elements, we’ve enabled a cinematic feel in our productions, where light not only illuminates but also sets the tone, and camera movement adds a layer of professionalism and dynamism to the content. This approach underscores our belief in the power of visual elements to complement and enhance the auditory experience of podcasts.
The Foundation of Quality Content: Superior Audio and Video Gear
At the heart of PodLab Studios’ operational ethos is the understanding that the quality of audio and video equipment, such as the Rodecaster Pro II, Rode PodMics, Rode PSA1+ Boom Arms, and Canon R5 and R6 cameras, fundamentally shapes the content’s reception. These choices reflect a commitment to capturing every nuance of sound and visual detail, ensuring that the content not only reaches but resonates with the audience.
The Philosophy Behind the Choices
While the amalgamation of high-quality equipment and thoughtful design significantly enhances the production value, it’s essential to remember that great content can originate anywhere. The magic lies in the story being told and the passion behind it. PodLab Studios was conceived as a sanctuary for creators seeking to push the boundaries of traditional podcasting, offering a “done for you” system where the technical aspects of content creation are handled by experts, allowing creators to focus on what they do best: storytelling.
Invitation to Creators
For those looking to elevate their content within a space that embodies the pinnacle of podcast production excellence, PodLab Studios extends a warm invitation. Whether you’re an established podcaster or just embarking on your content creation journey, our doors are open. We offer not just a studio but a partnership in bringing your vision to life, providing a seamless blend of technology and creativity. At the end of the day, it’s about the content you create and the stories you tell. If you’re ever in need of a space where all elements converge to support your creative endeavor, PodLab Studios is here to make that happen.
By Ace Assi – Owner/Engineer at PodLab Studios
youtube
#audio podcast#video content#podcast#video production#youtube#Podcast studio rental#studio rental#Studio space rental#Production studio rental#Youtube
1 note
·
View note
Text
Vlogger's Essential Equipment Guide: Setting Up for Success
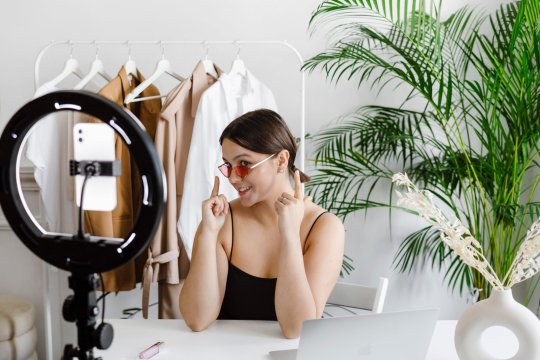
In the dynamic world of vlogging, having the right equipment can make a significant difference in the quality and appeal of your content. Whether you're a beginner embarking on your vlogging journey or looking to upgrade your setup, this comprehensive guide will walk you through the essential equipment needed to kickstart your vlogging career.
1. Camera: Investing in a good camera is crucial for high-quality video production. While many vloggers start with their smartphones, upgrading to a dedicated camera with features like image stabilization, manual focus, and high-resolution capabilities can greatly enhance the visual appeal of your vlogs.
2. Tripod: Stability is key when shooting vlogs. A reliable tripod ensures steady shots and allows you to maintain a consistent framing. Look for a lightweight and adjustable tripod to accommodate various shooting angles.
3. Microphone: Audio quality is as important as video quality. An external microphone, such as a shotgun or lapel mic, can significantly improve the clarity of your voice and reduce background noise. Choose a microphone that suits your vlogging style and shooting environment.
4. Lighting Setup: Well-lit videos look more professional and engaging. While natural light is excellent, investing in a basic lighting kit can be beneficial for indoor or low-light situations. Softbox lights provide a flattering, even illumination that enhances your on-screen presence.
5. Memory Cards and Storage: Ensure you have ample storage for your video files. Invest in high-capacity, fast-read/write memory cards to avoid interruptions during recording. Additionally, an external hard drive or cloud storage can serve as a backup for your video files.
6. Video Editing Software: Editing is where your vlog comes to life. Choose user-friendly video editing software that aligns with your skill level. From basic cuts and trims to more advanced effects, the right software allows you to craft engaging and polished vlogs.
7. Vlogging Bag: Keep your equipment organized and protected with a dedicated vlogging bag. A well-padded and compartmentalized bag makes it easy to carry your camera, accessories, and other essentials while on the go.
8. Portable Power Bank: Extended shooting sessions or vlogging on the move may drain your device's battery quickly. A portable power bank ensures you stay powered up, allowing you to capture every moment without worrying about running out of battery.
9. GorillaPod or Flexible Tripod: For vloggers who are always on the move, a GorillaPod or flexible tripod offers versatility in mounting your camera. Wrap it around poles, branches, or uneven surfaces to capture unique angles and perspectives.
10. Action Camera: For vloggers engaged in outdoor or action-packed activities, an action camera like a GoPro can add excitement to your content. These compact cameras are durable, waterproof, and perfect for capturing adventures.
Remember, the best vlogging equipment is the one that suits your style and needs. As you progress in your vlogging journey, you may choose to expand your gear based on the evolving demands of your content. With this starter equipment guide, you're equipped to create compelling and professional-looking vlogs from the very beginning. Happy vlogging!
Read the full article
0 notes
Text
Mastering Headshot Photography: Expert Tips on Lighting and Composition

Learn how to capture the perfect headshot with expert tips on lighting and composition. Improve your headshot photography skills for professional results.
Headshot photography has become increasingly important in today's digital age, where one's online presence can greatly impact their professional image. A good headshot can make you stand out and leave a positive first impression on potential clients or employers.
In this article, we will provide you with expert tips on lighting and composition to help you take the perfect headshot. Whether you are a professional photographer or simply looking to improve your own headshot photography skills, the information provided here will be invaluable.
Headshot Lighting: How to Achieve the Perfect Look
Lighting is one of the most important factors to consider when taking a headshot. It can make or break the final image, so it's essential to get it right. There are two main types of lighting: natural and artificial.
Natural Light Headshots
If you're taking a headshot outdoors, make use of natural light. The best time to shoot is early in the morning or late in the afternoon, when the sun is not too bright and the light is softer. Look for a shady spot, but make sure there is some light falling on your subject's face. Avoid shooting in direct sunlight, as it can create harsh shadows and lead to squinting.
Studio Headshot Lighting
If you're shooting in a studio, you'll need to create your own lighting setup. This can be done using various types of artificial light sources, such as strobes, softboxes, or umbrellas. The key is to use the right combination of lights to create a flattering balance of light and shadow on your subject's face.
Tip: When using artificial light, try to replicate the softness of natural light as much as possible. Softboxes and umbrellas can help create a natural-looking light.
Artificial Light Headshot Photography
If you're shooting indoors, you may need to use artificial light. This can be a challenging task, as it requires careful placement and adjustment of the lights to avoid harsh shadows or overexposure. It's important to experiment with different lighting setups to find what works best for your subject and the environment.
Headshot Lighting Equipment
The equipment you use for headshot lighting will depend on your setup and budget. Some essentials include a camera, tripod, light stands, and light sources. If you're just starting out, consider investing in a basic lighting kit that includes a softbox or umbrella, a light stand, and a strobe or speed light.
Tip: When setting up your lights, try to keep them at a 45-degree angle from your subject, slightly above their eye level. This will create a flattering look and avoid unflattering shadows.
Mastering headshot lighting takes time and practice, but with the right knowledge and equipment, you can create stunning images that capture your subject's best features. Experiment with different lighting setups and techniques to find what works best for you and your subject.
Headshot Composition: How to Frame Your Subject
Composition is a crucial element of headshot photography. Knowing how to frame your subject can make all the difference in creating a powerful and effective headshot. Here are some tips on how to achieve the perfect composition:
Choose the Right Background
The background of your headshot is just as important as the subject. Choose a background that is simple and unobtrusive, allowing the subject to take center stage. A plain-colored background or a subtle texture can work well.
Consider the colors in the background as well. If your subject is wearing a bold color, choose a neutral background to avoid clashing. On the other hand, if your subject is wearing neutral colors, a pop of color in the background can add interest to the composition.
Position Your Subject
The positioning of your subject can greatly impact the overall composition of your headshot. While centering the subject is a common technique, consider positioning them off-center for a more dynamic look. The rule of thirds can be helpful here - imagine a grid split into thirds both horizontally and vertically and position your subject along those lines.
Pay attention to the angle of your subject's face as well. A slight tilt can add visual interest and convey a sense of personality. Experiment with different angles to find the most flattering position.
Direct Your Subject's Pose
Posing is an important part of headshot photography, and as the photographer, it's your job to direct your subject's pose. Encourage them to relax and be themselves, but also provide guidance on how to position their body and face for the most flattering results.
Focus on the eyes, as they are often the most important element of a headshot. Encourage your subject to make eye contact with the camera, and adjust their gaze as necessary to capture the right expression.
Use Composition to Convey a Message
Consider the overall message you want your headshot to convey and use composition to enhance that message. For example, if you're photographing a business professional, a more formal, centered composition can help convey their professionalism. On the other hand, if you're photographing an artist or creative professional, a more off-center, dynamic composition can convey their creative spirit.
Remember to experiment with different compositions and poses to find the most effective ones for your subject. With the right composition, you can create a powerful and memorable headshot.
Headshot Retouching: How to Perfect Your Image.
Retouching is a crucial step in headshot photography. It can remove blemishes, soften wrinkles, and enhance the overall look of the image. Here are some tips to help you perfect your headshot through retouching:
Know What to Look For
Before you begin retouching, it's important to know what to look for. Start by zooming in on the image and examining it closely. Look for blemishes, uneven skin tone, and other imperfections. Take note of any areas that need to be retouched.
Use the Right Tools
There are many tools available for retouching, including the healing brush, clone stamp, and patch tool. Each tool has its own strengths and weaknesses, so it's important to use the right tool for the job. Experiment with different tools to see which ones work best for your image.
Don't Overdo It
Retouching can be a powerful tool, but it's important not to overdo it. Be careful not to remove too many details or make the image look unnatural. The goal of retouching is to enhance the image, not to completely change it.
“The best retouching is the kind you can't see.”
– Peter Hurley, world-renowned headshot photographer
Consider Using a Professional Retouching Service
Retouching can be a time-consuming process, and it requires a certain level of skill and expertise. Consider using a professional retouching service to help you get the best results. A professional retoucher can work with you to achieve the perfect look for your headshot.
By following these tips, you can enhance your headshot through retouching and create an image that's both professional and flattering.
Getting the Best Results: Tips from the Pros
Professional headshot photographers have years of experience capturing the perfect shot. Here are some tips and advice from the pros:
Focus on the Eyes
One of the most important aspects of a good headshot is the subject's eyes. Make sure they are in focus and clear, and that they convey the right emotion. Eye contact is essential, as it creates a connection between the subject and the viewer.
Find the Right Angle
Experiment with different angles to find the most flattering one for your subject. Shooting from slightly above can create a slimming effect, while shooting from below can make the subject appear more powerful.
Relax Your Subject
A relaxed subject will look natural and at ease in their headshot. Take the time to build a rapport with your subject and put them at ease. Give clear directions and check in with them throughout the shoot to ensure they are comfortable and relaxed.
Pay Attention to Posing
Posing your subject can make a big difference in the final headshot. Encourage them to sit or stand up straight, and find a pose that flatters their features. Avoid overly stiff or uncomfortable poses, and encourage your subject to move or shift slightly between shots for a more natural look.
Use Props Wisely
Props can add interest and personality to a headshot, but they can also be distracting. Choose props that are simple and meaningful to your subject, and use them sparingly. Make sure the prop enhances the shot rather than detracts from it.
Experiment with Lighting
Lighting is key in headshot photography, and different lighting setups can create dramatically different results. Experiment with natural and artificial light sources, and play around with the placement of your subject and lighting equipment. Don't be afraid to try new things and get creative.
Conclusion
By following these tips from professional headshot photographers, you can elevate your headshot photography skills and capture the perfect shot. Practice, experiment, and always be open to learning and improving your techniques.
FAQ: Common Questions About Headshot Photography
Headshot photography can be a complex art. Whether you're an aspiring photographer or a model preparing for a photo session, you may have questions about how to get the best results. That's why we've compiled a list of frequently asked questions about headshot photography.
What kind of lighting is best for headshot photography?
The best lighting depends on the look you're going for. Natural light can work well for outdoor or informal shots, while studio lighting can be better for more formal or professional settings. It's important to play around with lighting angles and intensity to achieve the desired effect.
What should I wear for my headshot photo shoot?
Dress appropriately for the occasion. If you're taking a professional headshot, wear something that is appropriate for your industry and position. Avoid bright colors or patterns that might be distracting. Keep it simple and classic.
How can I make sure my headshot looks natural?
Relax and be yourself. The best headshots capture your natural personality and style. Practice different facial expressions and experiment with angles to find the look that works best for you.
Do I need to retouch my headshot?
Retouching can help enhance your headshot, but it's not always necessary. If you do decide to retouch, use a light hand and focus on small details like blemishes or flyaway hairs. A professional retouching service can help ensure your headshot looks polished and professional. If you are interested in a headshot retouching service contact Monirretoucher.
How can I choose the right background for my headshot?
The background you choose should be appropriate for the occasion. If you're taking a professional headshot, choose a neutral background that won't distract from your image. Alternatively, you might opt for a background that is relevant to your industry or profession. Experiment with different backgrounds to find the one that works best for you.
Learn more helpful articles for the photography business.
Can I take my own headshot photo?
Yes, it's possible to take your own headshot with the right equipment and setup. However, it can be difficult to achieve the same level of professionalism and quality that a professional photographer can provide. If you're unsure, it's always better to hire a professional.
#photoretouching#photography#photography help#photography ideas#photography tips#photoshoot#photographer#headshot
1 note
·
View note
Text
Apparel Product Photography All you need to know
In the world of e-commerce, product photography is a vital aspect of online business. When it comes to apparel, showcasing your products in the best light possible is crucial. After all, your customers can't touch, feel, or try on your clothes before they buy them. That's where mastering apparel product photography comes in. With the right tips, tricks, and best practices, you can create stunning images that not only showcase your products but also drive sales. From lighting and composition to styling and editing, there's a lot that goes into creating the perfect product photo. But fear not, because in this article, we'll explore everything you need to know to take your apparel product photography to the next level. So grab your camera and let's get started!
Importance of high-quality apparel product photography for e-commerce
High-quality product photography is essential for any e-commerce business selling apparel. Your website visitors are your potential customers, and they can't physically touch or see your products. Therefore, your product photos need to be visually appealing and accurate to represent your product's quality, color, and texture. Good product photos increase customer engagement, reduce bounce rates, and improve conversion rates. By investing in high-quality product photography, you can differentiate yourself from the competition and stand out in a crowded e-commerce market.
Inaccurate or poor-quality product photos can lead to customer dissatisfaction, returns, and loss of sales. A study found that 22% of online apparel returns are due to inaccurate product representation. Therefore, it's crucial to invest in high-quality product photography to increase your customer's confidence in your products.
Moreover, social media platforms like Instagram and Pinterest are great channels to promote your apparel products. High-quality product photos can help you attract more followers, increase engagement, and drive more traffic to your website.
Essential equipment and tools for apparel product photographyInvesting in the right equipment and tools is crucial for APPAREL PRODUCT PHOTOGRAPHY. Here are some essential gear and tools you'll need: CameraA digital camera is a necessary tool for product photography. You don't need to spend a fortune on a camera, but you should invest in a decent one with manual controls. Manual controls allow you to adjust the camera settings to achieve the desired results. A DSLR or mirrorless camera is an ideal choice for apparel product photography.
A lighting kit consists of light stands, softboxes, and bulbs. Softboxes diffuse light and create a soft, even light source. Bulbs with a high Color Rendering Index (CRI) produce accurate colors in the photo.Setting up your apparel product photography studioSetting up a dedicated space for product photography is essential to ensure consistency in your product photos.
Here are some tips for setting up your apparel product photography studio:Choose a space with ample natural lightA space with ample natural light is ideal for product photography. Natural light provides soft, even lighting and accurate color representation. Choose a room with large windows that allow plenty of light to enter. Avoid direct sunlight, which can create harsh shadows and overexpose the photo.
Create a backdropA backdrop is a surface behind the product that helps to isolate it from the background. A plain white or black backdrop is a popular choice for apparel product photography. You can use a paper roll, fabric, or vinyl as a backdrop.
Make sure the backdrop is wrinkle-free and evenly lit.Set up your lighting equipment Position your lighting equipment to create an even, diffused light source. Use softboxes or diffusers to create a soft, even light source. Position the lights at a 45-degree angle to the product and adjust the height and distance to create the desired effect.
0 notes
Text
Skincare Product Photography
Skincare Product Photography 101: Techniques and Tips for Stunning Product Shots
Skincare product photography is a challenging and unique field that requires specific skills and techniques to showcase the products in the best possible way. Reflective surfaces and transparent packaging are common challenges that can make it difficult to control lighting and color in the final image. Some skincare products' glossy or oily texture can also pose a challenge, making it hard to capture the product's surface.
Finally, small sizes and intricate details in design can make photographing some products challenging. However, with the right approach and attention to the point, it is possible to create visually appealing images that showcase skincare products in the best possible way.
Skincare photography requires keen attention to detail and an understanding of lighting, composition, color, and retouching techniques to create visually appealing images that showcase the products in the best possible way. Additionally, the angles of the shots, background, props, and audience should be considered to enhance the final image. A professional photographer with experience and knowledge in this field can help you achieve great results for your brand and products. You can create stunning images to help sell your skincare products with the proper techniques and a little practice.
Lighting and skincare photography
One of the essential elements in skincare product photography and skincare photography is lighting. Proper lighting can make or break a skincare or cosmetic product photo or video. To create an attractive image, it's essential to consider the product's packaging and your model's skin tone. Use soft, diffused natural lighting to showcase the product or the model without creating harsh shadows or glare. A common technique in product photos is using softbox lighting kits or umbrellas to diffuse the light and create a more even, flattering light that is not harsh on skin tones or does not create glare.
Composition
Composition is a critical element in skin care photography. Good skincare photographs should be clean, simple, and easy to understand. A good composition will help to showcase the product and make it stand out. One of the most effective ways to achieve this is to use a shallow depth of field, which will blur the background and make the product stand out.
Skincare photography & color
Another essential element in skincare photography is color. The colors of the product should be accurate, and it's necessary to use the proper white balance to ensure that the colors are true to life. A white card should be used to set the white balance, and the color temperature should be adjusted accordingly.
Retouching images
Retouching is an essential step in skincare photography. Skincare products often have reflections and glare that need to be removed. Additionally, the product should be cleaned, and retouching should be done to remove any blemishes or imperfections. Retouching refers to digitally altering an image to improve its appearance. In particular, it involves editing and enhancing product images to make them look as attractive and appealing as possible. Retouching techniques can include:
- Adjusting the color balance.
- Removing blemishes or imperfections.
- Smoothing out textures.
- Enhancing product details to make the product stand out.
The goal of retouching is to create a high-quality image that showcases the product in the best possible way while also maintaining a natural and realistic look. Retouching is an essential step in the skincare product photography process and can significantly impact the outcome of the image.
ANGLE OF SHOTS
Another important aspect of skincare photography is the use of multiple angles of the shots you use. Depending on the product, certain angles may be more flattering or effective in showcasing the product. For example, a facial serum bottle may be photographed to show the entire bottle and label. In contrast, a jar of face cream may be photographed at a slight angle to show the texture of the cream. Additionally, it's essential to consider the background of the shot. A direct experience can be effective in making the product stand out. At the same time, a textured background can add interest and depth to the image.
USE PROPS TO ENHANCE THE IMAGE AND ADD CONTEXT
Props can also be used to enhance the image and add context. For example, incorporating a hand or a cotton pad can help show the product's size and use. Additionally, incorporating natural elements such as flowers or leaves can add a sense of freshness and purity to the image. Consider the target audience when creating skincare product photos. Understanding who the target audience is and what they are looking for in a skincare product can help guide the shoot's creative direction and ensure that the final images effectively resonate with that audience.
TECHNIQUES TO MAKE YOUR SKINCARE PRODUCTS LOOK THEIR BEST IN PHOTOS AND VIDEO
Several techniques can make skincare products look their best in photographs and videos.
One technique is to use proper lighting. Soft, diffused lighting is often used in skincare photography to create a more even and flattering light on the product. This can be achieved using a softbox or umbrella to diffuse the light and reduce harsh shadows or glare.
Another technique is to use a shallow depth of field. This can be achieved using a low aperture setting on the camera, which will blur the background and make the product stand out. This technique can also create a sense of depth and dimension in the image.
Another technique is to use a white card to set the white balance. This will ensure that the colors of the product are accurate and true to life. Additionally, the color temperature should be adjusted accordingly.
Retouching is also an important technique to make skincare products look their best. This can include removing reflections and glare, cleaning the product, and removing any blemishes or imperfections.
In videography, slow-motion shots can showcase the product's texture and consistency, and macro shots can show the packaging details and the product itself. Additionally, stop-motion animation can also be used to show the application of the product and how it works.
In summary, camera settings and techniques such as proper lighting, shallow depth of field, white balance, retouching, and specific shots in videography can make skincare products look their best in photographs and videos. A professional skincare photographer with experience and knowledge in this field can help to use these techniques effectively to create visually appealing images and videos that showcase the products in the best possible way.
EXAMPLES OF SKIN CARE PRODUCT PHOTOGRAPHY
Successful skin care product photography can be found everywhere, from magazines and websites to social media and advertising campaigns. Here are a few examples of successful skincare product photography:
- L'Oréal Paris - The brand's skincare product photography often features clean, simple compositions with a shallow depth of field to make the product stand out. Additionally, they use a simple background and a mix of natural light and softbox to create a flattering and natural look.
- Neutrogena - The brand's skincare product photography often showcases the products in a natural setting, using natural light and simple backgrounds to make the product stand out. Additionally, they use a shallow depth of field and a mix of macro and close-up shots to show the details of the product.
- Kiehl's - The brand's skincare product photography often features a natural, organic aesthetic, focusing on showcasing the product's texture. They use natural light and a mix of macro and close-up shots to show the details of the product.
- La Roche-Posay - The brand's skincare product photography often showcases the product in context, with images of the product used in real-life scenarios. Additionally, they use a mix of natural light and softboxes to create a flattering and natural look.
These are just a few examples of successful skincare product photography, but many more are out there. It's important to note that the success of skincare product photography is not only in the technical aspects but also in how it connects with the target audience and transmits the brand's message.
Read the full article
0 notes
Text
Uncovering the Secrets of a Professional Photographer's Equipment: An Insider Look with Jack Robert
Join Greenville, SC based Editorial, Commercial, Branding, and Lifestyle photographer Jack Robert as he takes you on a journey of his equipment choices, the reasons behind them, and where he buys them
Comprehensive List of Equipment (Click each subject title to jump to my reviews and how I utilize each piece)
Click here to Jump To Cameras Review
Canon R5, Canon R6
Click here to jump to Lenses
Canon RF 35mm f/1.8 Macro IS STM Lens
Canon RF 50mm f/1.2L USM Lens
Canon RF 85mm f/1.2 L USM Lens
Canon RF 70-200mm f/2.8 L IS USM Lens
Tamron 17-35 2.8-4
Click here to jump to Computer review
MacBook Pro 16" Laptop - Apple M1 Max chip - 32GB Memory - 1TB SSD - Space Gray
Click here to jump to lighting reviews
Flashpoint XPLOR 600 R2 Manual HSS Battery-Powered All-In-One Outdoor Flash
Flashpoint Portable 600ws Extension FlashHead For The XPLOR 600 (Bowens Mount)
Backup Bulb Flashpoint Flash Tube for XPLOR 600 Flash Head - AD-H600
Flashpoint R2 PRO 2.4GHz Transmitter for Canon (XPro-C)
Click here to jump to Stands & Accessories
Flashpoint Heavy-Duty Air-Cushioned Light 3-Stand Kit (9.5') (Lightweight)
ROLLING BASE Kupo Runway Stand Base (AMAZING)
Flashpoint C-Stand Riser Column (9' Silver)
10.5' Turtle Base C-Stand and Grip Arm Kit, Chrome
Super Clamp with Ratchet Handle
Click here to jump to Modifiers
Westcott 7' Parabolic Umbrella, White/Black
Godox Softbox with Bowens Speed Ring and Grid (13.8 x 63")
Westcott Rapid Box Switch Octa-S with Bowens Switch Insert
48" EZ Lock Octa Quick XL Softbox with Bowens Mount
Click here to jump to memory and hard drives
SanDisk 128GB Extreme PRO UHS-II SDXC Memory Card
Samsung - T7 1TB External USB 3.2 Gen 2 Portable SSD with Hardware Encryption - Titan Gray
WD - My Passport Ultra 4TB External USB 3.0 Portable Hard Drive - Blue
Click here to jump to Compression and Archiving Software
Rawsie (Get 10% off using code JACK10)
Carbon Copy Cloner
Why I buy all of my equipment at Best Buy
As a professional photographer in Greenville, SC, with over ten years of experience, Best Buy is my go-to destination for all of my photography equipment needs. One of the main reasons I choose to shop at Best Buy is their amazing damage policy as a Total Tech Member. Accidents happen, and it's comforting to know that if I accidentally damage a product while handling it, Best Buy will take care of it.
In addition to their damage policy, Best Buy also provides annual maintenance for my DSLR or mirrorless camera. If there's ever a failure from normal wear and tear, they'll repair it at no extra cost to me. This peace of mind is invaluable to a professional photographer like myself, as it allows me to focus on what I do best - capturing beautiful images - without worrying about the reliability of my equipment.
Another perk of shopping at Best Buy is their priority customer service. Best Buy's team is always ready to assist me with any questions or concerns I may have. As a professional, my time is valuable, and I appreciate receiving prompt and efficient service when I need it.
I've also taken advantage of their "My Best Buy" credit card, which either gives me 5% back or allows me to pay for things over 12 or 18 months with zero interest (for the love of god, only use credit cards if you pay them off EVERY MONTH IF THEY DONT HAVE ZERO PERCENT INTEREST).
Lastly, Best Buy's return policy is a game-changer. As a Best Buy Totaltech™ member, most products are eligible for a 60-day return, which means I can shop confidently, knowing that if I'm not completely satisfied with my purchase, I can return it hassle-free while not worrying about damaging the products due to their generous accidental damage coverage.
Best Buy is my go-to destination for all of my photography equipment needs. Their damage policy, annual maintenance, priority customer service, credit card options, and return policy make them the best choice for me as a professional photographer.
What if Best Buy doesn't have what I need?
While Best Buy is my go-to destination for most of my photography equipment needs, I also rely on Adorama and B&H for those niche pieces of equipment Best Buy may not carry.
Adorama and B&H are great websites to purchase equipment, and I have had great experiences with customer service from both companies. They have a wide range of options, and their prices are competitive.
One downside to B&H is that they are closed online quite a bit throughout the year. This can be an inconvenience when I need to purchase something urgently or if I am looking to buy something online. But overall, the customer service, pricing, and variety of options make it worth dealing with their closures.
In conclusion, as a professional photographer, it's important to have a variety of reliable equipment sources. Best Buy, Adorama, and B&H are all great options, each with their own unique perks and downsides. I highly recommend considering them all when making your next equipment purchase.
Cameras
Canon R5
Canon R6
Unleashing the Power of the Canon R5: The Ultimate Tool for Professional Photography
As a professional photographer, having the right equipment is crucial. That's why I rely on the Canon R5 for all my photography needs. This camera is a game-changer, packed with features that make it the ultimate tool for capturing stunning images.
One of the most impressive features of the Canon R5 is its advanced eye-tracking technology. This allows me to capture portraits quickly and easily, even on the run. The camera's autofocus system tracks the subject's eyes, ensuring that they are always in focus, no matter how fast they're moving. This is especially useful when working with children and animals, as they tend to move around a lot.
How the Canon R5's High-Resolution Sensor is a Game-Changer
As a professional photographer, editorial work is a big part of my portfolio. And when it comes to capturing images that tell a story and convey a message, the Canon R5's high-resolution sensor has been a lifesaver. With 45 megapixels, this camera can capture incredible detail and clarity. The high-resolution sensor allows me to see every detail in the image, which is essential when working on editorial projects where the image needs to tell a story and convey a message. This means publishers can print large-format photos without losing any quality.
Additionally, the camera has a wide dynamic range, which allows me to capture images with a lot of depth and dimensionality. This is especially useful when working in challenging lighting conditions, such as bright sunlight or dark interiors. The wide dynamic range allows me to capture images with a lot of detail in the highlights and shadows, which is crucial when working on editorial projects where the image needs to be as detailed and accurate as possible.
Another advantage of the Canon R5's high-resolution sensor is that it allows me to crop images without losing quality. This is particularly useful when working on editorial projects, where the image may need to be cropped or resized to fit a specific layout or format. But it's not just about the technicalities. The Canon R5 also has a great design and ergonomics; it's comfortable to hold and easy to navigate through the menu, which makes it a pleasure to work with. The Canon R5 is an essential piece of equipment for any professional photographer. It's packed with advanced features that make it the ultimate tool for capturing stunning images. Whether quick on-the-run portraits or high-resolution stills, the Canon R5 has everything you need to take your photography to the next level.
Why I use the Canon R6
When it comes to capturing stunning images and videos, photographers and videographers are always on the lookout for the latest and greatest equipment. And while the Canon R5 has undoubtedly made a splash in the world of photography and videography, its little brother, the Canon R6, is also a camera worth considering.
One of the most significant advantages of the R6 is its smaller file size. Hard drive space can quickly become an issue when working with large files. The Canon R6's smaller file size means that you can store more images and videos on your hard drive, making it easier to manage your workflow. Additionally, the smaller file size also means that the Canon R6 is less demanding on your computer's processing power, allowing you to work more efficiently and with less lag.
When it comes to image quality, the Canon R6 doesn't disappoint. The camera has a 20.1-megapixel full-frame sensor that produces stunning images with rich colors and sharp details. The camera also has a high-speed autofocus system, making capturing fast-moving subjects easy. Additionally, the Canon R6 can shoot up to 12 frames per second, making it perfect for grabbing action shots and sports.
Lenses
Canon RF 35mm f/1.8 Macro IS STM Lens
Canon RF 50mm f/1.2L USM Lens
Canon RF 85mm f/1.2 L USM Lens
Canon RF 70-200mm f/2.8 L IS USM Lens
Tamron 17-35 2.8-4
Canon RF Lenses: A Greenville, SC Photographer's Review
As a photographer based in Greenville, South Carolina, I've had the pleasure of working with a variety of Canon camera lenses. But there are a few that stand out as my absolute favorites. Allow me to share my personal experience with these amazing lenses.
Starting off strong with the Canon RF 35mm f/1.8 Macro IS STM Lens
The ultimate tool for capturing awe-inspiring close-up shots. The macro capability allows me to get up close and personal with my subjects, while the f/1.8 aperture creates a mesmerizing bokeh effect. The Image Stabilization (IS) feature is a game-changer, ensuring I can capture sharp images even in dimly lit conditions. This lens has also become my go-to travel companion, paired with my Canon R5. The 35mm focal length is the perfect balance for capturing landscapes, architecture, and cityscapes without distorting the faces of the people I want to photograph. I've used it for street photography, macro photography, landscapes, and architecture and I love that it's lightweight and super sharp.
Up next is the Canon RF 50mm f/1.2L USM Lens, a game-changer for portrait photographers. The f/1.2 aperture serves up the ultimate bokeh and makes capturing dreamy, ethereal portraits a breeze. The USM autofocus is lightning fast, never letting you miss a shot, and the 50mm focal length is a perfect balance for full-body and headshot portraits. This lens is the default on my camera, and it's so versatile and sharp I want to cry. I've had the EF versions of this lens, including the 50mm 1.8, then the 50mm 1.2 for my previous cameras, and now the RF 50 1.2. I didn't think the 50 1.2 could get any sharper, but with this RF version, they've really blown my mind.
The Canon RF 85mm f/1.2 L USM Lens is another new favorite of mine. I've resisted for the longest time getting this lens, but I've finally made the dive after five years of debating it- and I'm not disappointed. I was initially planning on just trying this lens out for an event and returning it- however, its 1.2 aperture was stone-cold amazing for low light situations and getting candids. Not only is it a powerhouse in low light- it's probably the best portrait lens if you have the physical space to be quite a distance from your subject. The f/1.2 aperture creates an incredibly shallow depth of field and produces a beautiful bokeh effect. The lens is a bit on the heavier side, but the build quality is top-notch, and the image quality is second to none.
Finally, the Canon RF 70-200mm f/2.8 L IS USM Lens is an absolute powerhouse. The older EF version was the most reliable and loyal lens I have ever used. It never missed focus and always gave me a fantastic image. I trust it with my life. The new RF version is lighter, so I went with it instead of just using the EF to RF adapter. On the RF Version, the lens extends out when zooming, and I don't particularly enjoy that- but it's not a deal breaker. Is it my go-to lens? No, but I will 100% recommend having it in your bag for many cases. This lens is perfect for capturing family photos, portraits, couples, sports, nature, and wildlife. The long focal length allows me to capture distant subjects easily, and the f/2.8 aperture creates a beautiful bokeh effect. The Image Stabilization (IS) feature is a lifesaver when working in low-light conditions. The build quality is top-notch, and the image quality is simply outstanding.
In conclusion, these four Canon lenses are my go-to choices for capturing stunning images and videos. These lenses have never let me down, from portraits to close-ups to architecture and nature. They are versatile and reliable and produce some of the most beautiful images and videos I've ever captured. I highly recommend them to any photographer looking to expand their lens collection. Whether a professional or hobbyist, these lenses will help you take your photography to the next level.
The last honorable mention is my Tamron 17-35 2.8-4. I bought this on a whim because I needed a wider-angle lens for interiors. It's a bit on the cheaper side, but I've been satisfied with it. I use it on the regular for interior photoshoots when I need that extra view and don't have the physical space to back up. At 17mm, it doesn't distort the edges enough for it to be a bad photo, but I'd be careful when shooting architecture to watch those edges. I also utilize this lens for low, wide-angle shots of models and buildings. It creates a cool effect, giving the subject an automatic power angle over the viewer.
Computer
MacBook Pro 16" Laptop - Apple M1 Max chip - 32GB Memory - 1TB SSD - Space Gray
Do I really need a MacBook Pro!? Yes. I'm also slightly biased towards Apple and know other photographers that use windows computers just fine, but Apple products' premium and luxury experience draw me in. The seamless transitions between iPad, iPhone, and Mac are absolutely magic. Did you know with Apple, you can copy text on your phone and then hit paste on your computer, and it appears there!? It's in the small details that make Apple really stand out.
Regarding the M1 Pro Max laptop, I wanted a portable powerhouse, and Apple delivered what I needed with this laptop. When I upgraded to the Canon R5 with 50MB files, I HAD to upgrade my computer to slay large file sizes with ease. When editing thousands of photos, having a photo even take .5 seconds to load wastes A LOT of time. I needed the fastest computer I could get, not the cheapest or the most bang for my buck. The M1 Pro Max Processor and 32GB of ram easily handle my 50 MB file sizes.
I know Apple products are premium. I know you can build a windows laptop or PC for WAY less and have it be WAY faster- but I put a strong emphasis on the whole ecosystem of Apple and its seamless, luxury experience.
Lighting
Flashpoint XPLOR 600 R2 Manual HSS Battery-Powered All-In-One Outdoor Flash
Flashpoint Portable 600ws Extension FlashHead For The XPLOR 600 (Bowens Mount)
Backup Bulb Flashpoint Flash Tube for XPLOR 600 Flash Head - AD-H600
Flashpoint R2 PRO 2.4GHz Transmitter for Canon (XPro-C)
The Power of Lighting Equipment
My go-to: Flashpoint XPLOR 600 R2 Manual HSS Battery-Powered All-In-One Outdoor Flash. I have three of them, but you having just one is more than enough for most situations. The Flashpoint XPLOR 600 is a powerful and versatile light that, if used correctly, can perfectly balance natural and artificial light. With its 600ws power output and fast recycling time, this light allows me to capture stunning images in even the most challenging lighting conditions. I can overpower the SUN with this bad boy.
One of the best features of the Flashpoint AD600 is its ability to be used wirelessly and portably due to its detachable battery, which gives me the freedom to move around and capture the perfect shot. The Flashpoint XPLOR 600 also has a built-in 2.4G wireless X system, allowing me to control the light remotely and make adjustments as needed. The Flashpoint XPLOR 600 is an essential piece of equipment for any professional photographer. It gives me the power to overcome any lighting challenge and capture beautiful images no matter where or when. With this light, I can unlock the full potential of my Canon R5 and achieve the desired results every time.
Another key accessory, the extension: Flashpoint Portable 600ws Extension FlashHead For The XPLOR 600 (Bowens Mount)
The Flashpoint XPLOR 600ws 8-foot extension head is a powerful addition to any photographer's gear. It transforms the XPLOR600 series monolight into a versatile powerhouse, perfect for use with softboxes or as a gridded hair light. The extension head connects easily to any XPLOR by unplugging the glass shielded flashtube from the monolight body, locking the pronged cable link in place, and then inserting the original flashtube on the head extension sockets. This simple process allows for a quick and easy setup, making it an excellent option for photographers who need to work efficiently and quickly. I don't leave home without it.
Another wise choice is to purchase Backup Bulbs for this light. Yeah, I know they aren't cheap, but I've had one rattle out of the socket and smash on the ground when rolling it along on my Kupo Runway Rolling Base.
You also need to have a way to trigger your strobes, and I use my trusty Flashpoint R2 PRO 2.4GHz Transmitter for Canon (XPro-C) Godox and Flashpoint are the same exact equipment, just different names. You can control multiple strobes and adjust them individually from this transmitter. It's a gamer changer, so you don't have to go to each strobe and change their settings physically. I've been using this trigger for years, and I've had zero issues with it.
Stands & Accessories
Flashpoint Heavy-Duty Air-Cushioned Light 3-Stand Kit (9.5') (Lightweight)
ROLLING BASE Kupo Runway Stand Base (AMAZING)
Flashpoint C-Stand Riser Column (9' Silver)
10.5' Turtle Base C-Stand and Grip Arm Kit, Chrome
Super Clamp with Ratchet Handle
Let's talk about photography's often-overlooked but essential aspect: stands and accessories. They may not be the most exciting topic, but trust me; they can make or break a photoshoot. I rely on the Flashpoint Heavy-Duty Air-Cushioned Light 3-Stand Kit for lightweight, on-the-go situations. The plastic and metal construction keeps it lightweight without sacrificing durability, making it perfect for quick in-and-out photoshoots. But be warned, if you're planning to use it outside, weigh it down with sandbags or have an assistant hold it. Otherwise, it will topple over faster than a game of Jenga. Trust me, investing in the right stands and accessories will make your photography experience smoother and more efficient.
When it comes to stands, my go-to and best purchase has been the combination of the Kupo Runway Stand Base with the Flashpoint C-Stand And an added boom arm. The rolling base feature is a game changer, making loading in and out of photoshoots a breeze by allowing me to hang equipment from the stand rather than carry it all. And during the shoot, the convenience of easily rolling the light, modifier, and stand is unbeatable. If I had to pinpoint any regret in my photography gear purchases, it would be not investing in a rolling base for my c-stand earlier in my career. I cannot recommend this combo enough; it's truly essential for any professional photographer looking to streamline their workflow and save their back from carrying heavy equipment.
Having a variety of stands and accessories at your disposal is crucial for any professional photographer; it allows you to adapt to any situation and get the perfect shot. In addition to my rolling base c-stand combo, I also have a trusty 10.5' Turtle Base C-Stand and Grip Arm Kit, Chrome. This classic c-stand is perfect when I need an extra spot to place a light or modifier. The added boom arm is essential for versatility in positioning and placing the modifier at any angle. And let's remember the importance of sandbags. They are crucial to keeping your stand and equipment safe and secure, so invest in a good set.
Light Modifiers
Westcott 7' Parabolic Umbrella, White/Black
Godox Softbox with Bowens Speed Ring and Grid (13.8 x 63")
Westcott Rapid Box Switch Octa-S with Bowens Switch Insert
48" EZ Lock Octa Quick XL Softbox with Bowens Mount
The Westcott 7' Parabolic Umbrella is an excellent option for creating a large, soft light source. Its 7' span provides ample coverage, making it perfect for achieving a natural-looking catchlight in the eyes. Additionally, the umbrella's white interior helps diffuse the light, producing a soft, even glow. Don't even think you will utilize this in small spaces, though! A tall ceiling and a must if you want to place this modifier in a way that is flattering to the subject. Using this modifier is nice if you have more than one person or groups of people you need to photograph. On another note, the umbrella is also collapsible and easy to transport, making it a convenient choice for photographers on the go. I use this modifier 20% of the time.
The Godox Softbox with Bowens Speed Ring and Grid (13.8 x 63") Can be an excellent modifier for your photography or videography, but it can be pretty tricky and time-consuming to set up. The softbox features four poles that need to be inserted into the corners of the fabric and then into the center ring, which can be a hassle and requires some muscle to assemble. It may not be the best option if you're in a rush or don't want to be seen struggling to set it up. Despite its inconvenience in setup, the rectangular shape of the softbox, measuring 13.8 x 63 inches, makes it ideal for side lighting and backlighting, allowing you to achieve beautiful and natural-looking results. It is a versatile tool that can be useful for portraits, product photography, and videography. You can still consider keeping it in your arsenal as it can be a great addition to your lighting setup, but be aware of the setup time and effort required when using it.
The Westcott Rapid Box Switch Octa-S with Bowens Switch Insert with Bowens Switch Insert is a fantastic addition to any photographer's arsenal. This is my most recent modifier, and I am thrilled that I have it in my collection. It is a portable and collapsible beauty dish that is versatile and can be used in a variety of situations. It's been especially helpful in architectural photography due to its small size- as I use it to light different parts of the subject (room, building, etc.) to combine them all in photoshop into one beautiful and seamlessly lit photo. It's also been great for fashion and editorial portraits. The octa shape of the softbox provides a beautiful wrap-around light, perfect for creating a natural and flattering light on the subject. The Bowens Switch Insert makes it easy to attach to a wide range of strobe lights, making it a convenient option for on-location shoots. All in all, the Westcott Rapid Box Switch Octa-S with Bowens Switch Insert is a great investment for any photographer looking for a portable, compact and versatile lighting solution.
The 48" EZ Lock Octa Quick XL Softbox with Bowens Mount is my ultimate go-to modifier. It's an excellent choice for any photographer looking for a versatile, portable lighting solution. Its 48-inch size is just the right size for creating beautiful, soft light that can cover a wide range of subjects. The octagon shape of the softbox provides a natural and flattering light that is perfect for portraits, product photography, and more. The EZ Lock design makes it quick and easy to set up, so you can spend more time taking pictures and less time fiddling with equipment. The included Bowens mount makes it compatible with a wide range of strobe lights, making it a convenient option for on-location shoots. Additionally, the grid that comes with the softbox allows you to control the light and direct it exactly where you need it, making it even more versatile. Overall, the 48" EZ Lock Octa Quick XL Softbox with Bowens Mount is an excellent choice for anyone needing a portable, easy-to-set-up, and versatile softbox.
Memory Cards and Hard Drives
SanDisk 128GB Extreme PRO UHS-II SDXC Memory Card
Samsung - T7 1TB External USB 3.2 Gen 2 Portable SSD with Hardware Encryption - Titan Gray
WD - My Passport Ultra 4TB External USB 3.0 Portable Hard Drive - Blue
The SanDisk 128GB Extreme PRO UHS-II SDXC Memory Card
As a professional photographer, I am always looking for the best tools to elevate my craft. That's why I love the SanDisk 128GB Extreme PRO UHS-II memory card. This little powerhouse allows me to easily capture stunning cinema-quality 8K, 4K, and Full HD video (not that I ever do as a photographer, but anyway), as well as raw photos and continuous shutter bursts. The storage capacity of 128GB gives me plenty of room to store all of my precious shots, and the UHS-II bus supports lightning-fast read speeds of up to 300 MB/s and write speeds of up to 260 MB/s. The V90 Video Speed Class rating ensures that my write speeds will never drop below 90 MB/s, giving me peace of mind when shooting in high-pressure situations.
What sets this memory card apart from the rest is its reliability. I've been using Sandisk memory cards for years, and they have never let me down. Even my card from five years ago still works like a charm. I've even tried other memory cards like CFExpress, with its impressive 1200mb/s read and write speeds, but I couldn't see any difference when it came to shooting or loading images onto my computer. The SD Card is also a convenient size and fits perfectly in my MacBook Pro's SD card slot. I don't have to lug around a card reader and cord, which is a huge plus in my book. In short, if you're a professional photographer or videographer, the SanDisk 128GB UHS-II SDXC memory card is an absolute must-have in your kit.
My working hard drive, the Samsung - T7 1TB External USB 3.2 Gen 2 Portable SSD with Hardware Encryption - Titan Gray
After a killer photoshoot, I like to transfer my shots straight to my trusty Samsung SSD. Why? Because editing on a lightning-fast hard drive is where it's at, plus it gives me the added bonus of being able to take my SSD on the road with me. That way, if my computer gets jacked, my precious pics are safe and sound. Plus, it keeps my MBP running smoothly by not clogging up valuable internal HD space. Once my edits are complete, and I send the photos to the client for approval and further edits, I use Rawsie to compress them and then back 'em up on three different hard drives. #backupqueen #workflowwinning
The WD - My Passport Ultra 4TB External USB 3.0 Portable Hard Drive - Blue
After loading my photos onto the Samsung SSD, I back them up to a larger, slower HD - like the WD - My Passport Ultra 4TB. And not just one, but two of those bad boys. Because let's face it, you can never be too safe regarding the photos you shoot for a client. Is it overkill? Maybe, but as a photographer, my job is to capture, edit, deliver and preserve photos, which means being as backed up as possible. Plus, there have been a few times where files got misplaced during transfer and having those extra hard drives saved the day. The WD 4TB is the perfect size for a year or two of content, and when it's full or two years have gone by, I put a date frame sticker on it and archive it in a fireproof safe for added protection.
file compression
RAWSIE
Picture this: you're out in the field, capturing stunning shots left and right, and then you get back to your studio and realize your hard drive is bursting at the seams with RAW files. Sound familiar? Well, not anymore. Introducing Rawsie - the ultimate raw image compression app that packs a punch. With up to 5:1 file size reduction, it's a game-changer for photographers like us who shoot with Sony, Canon, Nikon, Fujifilm, and more. And the best part? It's lossless, which means no lossy artifacts, no resolution change, no bit count change, and no color loss—just pure, pristine image quality.
But that's not all; Rawsie is incredibly user-friendly and straightforward. It's like having a personal assistant for your image compression needs. Plus, it's a money-saver in the long run. Trust me, I've been using it for a while now, and it has been a lifesaver.
So, if you're ready to revolutionize your workflow and reclaim valuable storage space, head on over to Rawsie's website and use the code JACK10 upon checkout for an extra 10% off your purchase, trust me, you won't regret it.
archiving
Carbon Copy Cloner
Having a reliable backup solution is crucial, and that's where Carbon Copy Cloner comes in. This software offers a plethora of options for creating backups. Whether it's on an external drive or another Macintosh, you have the flexibility to choose what you want to back up, be it an individual folder or an entire external hard drive.
I've been using CCC for some time now, and I have to say, it makes creating a carbon copy of my files incredibly easy. However, I did run into an issue where deleting files off of one hard drive resulted in them being deleted off the hard drive I was carbon copying to. This is something to keep in mind, but overall, CCC has been a solid choice for me.
In conclusion, if you're looking for a comprehensive and flexible backup solution,Carbon Copy Cloner is definitely worth checking out. Just be aware of the potential pitfall I encountered with file deletion.
Final thoughts
And there you have it, folks. I've just laid out all the nitty-gritty details of the tools and equipment I rely on to get the job done. But this is just the beginning. I want to hear from you too. What are your burning questions? What would you like to know more about? Let's start a dialogue on our work processes, the gear we trust, and any experiences we've had with similar equipment. We can all learn from each other and improve our workflow. So, please don't be shy, leave a comment and let's get this conversation started!
Disclaimer: All the equipment on this page has been tested and approved by yours truly. I've spilled the tea on real-world usage and am sharing my faves with you. The links provided are either the exact products I own or similar alternatives. Bonus: Using the links will support my blog and biz - love you for it!
Hello, World!
0 notes
Link


#photography lighting kit#studio lighting kit#softbox light kit#video light kit#photo light kit#led ring light#youtube light kit#film light kit#australia#buy online#free delivery#high quality#best price
0 notes
Text
Where To Find The Cheap Background Removal Free 2020

Photo Background Removing Service Photography Enhancing Backdrop
Inspired by Window Clippings, my most popular screenshot software , I wrote a small program for making image backgrounds clear. In almost an immediate the app removes that background, turns it white and asks if you want to replace your itemizing image. Zoom in on the picture, clear the world you don’t need – you could delete the pure colour layer; right-click the layer, and delete. Like I stated image editing, hair and fur is a nightmare to cut out and this one wasn't much better. The biggest query right here is why it minimize out his rump? Its an analogous color to the rest of him and a completely different color from the background so that appeared bizarre.
The Quick Selection software isn’t the only method to go about isolating topics in Photoshop, however it's undoubtedly one of many simpler ways. Click piece by piece until you have surrounded the image that you just need to stay in the foreground, or the a half of the image that can remain after the background has been eliminated. You also can faucet “Select Subject” within the higher “Options” menu bar.
In my exams, this works quick and ease with an image with a solid background (i.e the background isn't too complicated to remove). If you could have a bokeh photograph with non-solid background of various objects, you would possibly still need the Lasso device from Photoshop or different, more highly effective image editors. Background shade can be changed or altered according to certain https://clickmajic.com/ picture modifying requirements. In some cases, you could need to reduce out an image from its background so that you simply can superimpose the point of interest of the image into one other picture. A good instance of that is with company logos where you desire a transparent background in order that it is simpler to make use of across completely different channels without having to edit it every time.
Get Photoshop
But opting out of a few of these cookies could have an effect on your searching expertise. Variety of sunshine kits corresponding to ring lights, softbox kits, twin arm lights used for livestreaming, youtube videos, make up and so on. You can choose part of an image opened in Preview, then copy and paste it elsewhere or crop the content surrounding it.
Then I edited it, brightened it, add a filter … and it was like those people by no means existed . I’m kicking myself that I didn’t know this earlier, as a outcome of it’s the BEST trick ever. You take your smartphone, snap a photo of an merchandise both on the floor or holding it in your hand, and nicely – everyone can see your dodgy carpet or wallpaper. Pictures of items usually look better and extra skilled when taken against a white background, but that's not always possible. However, there's a website which can help with this. With so many resources available online it’s necessary to know tips on how to effectively handle and organise digital content that you simply rely on. Bookmarking incessantly visited websites or documents is a good way to be more efficient when working online.
You can join with me on Facebook, Instagram and Pinterest. In order to keep away from wasting your picture and use it on your new website, you can easily take away the background in Photoshop. Pull up the picture you’d like to take away the background from by clicking “File,” after which “Open…” from the top menu.
In Microsoft Office 2010 and 2013, there's a characteristic to take away backgrounds. Once you've added your picture to the doc, just selectFormat , thenRemove Background. Then, simply mark the areas you need to hold, and remove the areas you need to take away, and it’s accomplished for you. Performance cookies are used to understand and analyze the vital thing efficiency indexes of the website which helps in delivering a better consumer experience for the visitors. A image tells a thousand words, however typically the background is so distracting it takes away all of the impact of your topic. And while there are more advanced, time-consuming methods to rid your topic of its boring background, there’s a straightforward method you presumably can go about with the Quick Selection Tool in Adobe Photoshop CC 2020.
Choose Your Area
With that layer chosen, you'll now see the option “Remove Background” beneath the “Quick Actions” panel. While we didn’t need Photoshop to ascertain the latter this football season, generally, Photoshop is your go-to software to make what’s usually only conceivable a reality, or as real as an image, at least. with skilled outcomes, I highly suggest Carly from Hatched Designs. Upload your own image or select one from our image library. If the merchandise just isn't returned in its unique situation, the client is responsible for any loss in value.
This is the primary purpose why we at ArtWorkDigitizing come as one of the best image editing and background removal service supplier on-line. Have you ever taken a photograph of an merchandise, solely to find that the background isn't doing the photograph any justice? Well, if you don’t have any photo modifying expertise, listed below are three simple ways to remove the background of a picture.
So, let’s maintain studying said under causes on why you want to select a photo background removal service on-line. As the name suggests itself a photo or picture background removing service is supposed for removing the background in a picture. The primary motto behind this sort of picture elimination work is to spotlight the main content material in the image. When it comes to picking background elimination service, a lot of the novice entrepreneurs assume that they will simply do it themselves. Of course, you can change the background of a picture using free software, however in relation to getting desired outcomes, you could be confused.
Check us out at:
Name: Clickmajic
Email: [email protected]
Tool: Clickmajic
Blog: Clickmajic.com/blog/
Web: Clickmajic.com
Facebook: facebook.com/click.majic/
Youtube: www.youtube.com/channel/
Instagram: instagram.com
Google sites: https://sites.google.com/view/clickmajic-image-bg-removal/home
1 note
·
View note
Text
Product Photography Techniques

The fact of the matter is consumers today are far more discerning than they have ever been, especially in the current ever-evolving digital world, and what you see is exactly what they get – especially when it comes to the photographs of the products you’re selling. High-quality images have various benefits since they help to present the products to the customers in the best possible manner, engage customers and increase their confidence in the products they intend to purchase online. So here is the simple guide that can assist in earning great product photos that is great in selling products.
Essential Equipment
Cameras: Although it is better if you use a professional DSLR or mirrorless camera, most modern smartphones will suffice in terms of quality. Some of the main characteristics to talk about are a high resolution, manual control, and compatibility with lenses.
Lenses: Macro lenses have shallow depth of field that is perfect when one wants to capture more details, prime lenses are sharp with better bokeh and zoom lenses come with more flexibility for different shot types.
Lighting: Beginning with the physical environment, it is necessary to underline that light plays an especially significant role. Possible sources of light are natural light for a lifestyle, a realistic feel of the shoot, studio lights such as the softboxes, and LED panels for uniform lighting and reflectors for dealing with shadows.
Tripods: Make modifications so that stability is achieved to enable obtaining sharp images. In choosing the type, consider one that can offer height adjustment and is strong to minimize instability of the camera.
Backgrounds: All backgrounds should be simple and plain but this is more preferable on the back ground images. For a clean look, plain white or black backgrounds work well, but opportunities in lifestyle photography are more diverse as they incorporate textured backgrounds.
Accessories: The Items for props generally included lightbox for shooting small products, remote shutter release to reduce on product movement through the camera, cleaning kits to ensure that the products and lenses are clean.
Setting Up Your Studio
Select a clean part of the house or office, preferably with natural lighting and free from any unnecessary items. Use a three-point lighting setup: The main light is called key light, the light source used to eliminate reproduction of the shadows is called fill light, and the final light used to isolate the product from the remaining background is known as backlight. Make sure your tripod is adjusted to eye level with the product and keep the rule of thirds is mind.
Capturing the Perfect Shot
Adjust your camera settings for the best results: more aperture for less DoF, faster shutter speed to capture the movement, and low ISO so we don’t get noise in our final image. Manual focussing should be used when one needs to focus on the detail since it offers extreme accuracy and shooting with a computer screen to which the pictures are transferred immediately should be used.
Post-Processing Techniques
When compositing, one should correct the brightness, contrast and white balance of the shot. Some of the recommended post-production techniques include retouching to erase all the flaws as well as lines and clipping path for the product to be well-cut before coloring correction is done to enhance the product. Some photo editing software are well-known for their versatility, such as Adobe Photoshop, Lightroom, and GIMP.
Creative Tips
Props can be used in the scenes to give one’s product shots more depth and the sense of the environment the products belong to. Lifestyle images depict the products in action while the use of reflection and off – center angles yield interesting images. Try to reposition the item for the view to capture its movement, for example, a liquid being poured, or a moving jewel.
Common Challenges
These reflections can be reduced from shiny products from diffusing the light and using polarizing plated. Avoid harsh contrasts in lighting by softening the shadows with fill light and reflectors. Use stable and aligned key colors and cycles with a white balance, and apply gradient frames or backlights to transparent objects.
Showcasing Your Work
Create a portfolio with your selected work; later, uploading your pictures on social networks, which is Instagram and Pinterest, perfect for photography. Now, it is about creating a blog so that clients can recognize you as an expert in the field, as well as searching for new clients from other photographers and businesses.
Continuous Improvement
This is basically how you measure the performance of your photos and includes the conversion rate of the photos and the engagement rate of the photos. Ask for feedback on the work and performance, see trends for updates, and attend online courses for getting education and learning new things.
Lensclicker Photography Services
Looking for the best e commerce product photo studio in Jaipur? Welcome to Lensclicker Photography, for excellent services. The hired photographers do a splendid job of working with the best tools and methods for getting excellent pictures of your product that will help you improve the image or your company and boost the sales. What you can expect from us is: individual approach to choosing your package, fast turnaround time, and high quality.
#product photography#ecommerce#photography#photoshoot#across the spiderverse#artists on tumblr#michael cera#services#old bollywood#succession
0 notes
Text
How To Get The Affordable New Background Remover Online

Tips On How To Take Away Background From Image
This can additionally be an excellent house to write down what makes this product special and the way your customers can profit from this item. You can select a half of an image opened in Preview, then copy and paste it elsewhere or crop the content surrounding it. If the image is in a PDF, you want to extract the PDF page as a picture before you should use the image mark-up tools. To guarantee all the product’s edges are properly trimmed, zoom in on the edges to find any leftover traces of the prior background.
After viewing product detail pages, look right here to search out a simple approach to navigate back to pages you are interested in. Get Photoshop and 20+ Creative Cloud apps plus unique business features. Create beautiful images withPhotoshop brushes,Content-Aware Fill,Photo effects,Neural Filter,Sky alternative and the many tools photographers rely on. If you’d like to file an allegation of infringement, you’ll have to comply with the process described in our Copyright and Intellectual Property Policy.
When I had trouble modifying the hi-res image, Ms. Kasia Sobanska gave me very quick and skilled support to figure out the problem. Remove.bg is one of the best site for removing and modifying backgrounds, the program works very efficiently and provides the option to add a background as nicely. picture background remover now with 100+ photo stickers and Text Editor to Add textual content to your photos. The app routinely blurs backgrounds so you will get that portrait mode impact, even on gadgets that don’t usually have the feature.
Backup Your Iphone Pictures And Movies With This Slim Usb Drive
It also enables you to crop out the background entirely and substitute it with other images, almost like a green screen. You will obtain a e mail again with picture faraway from background in 1-3 enterprise days. To have order rushed to 24 hours please select choice from drop down menu. ~ If you aren't an expert, and would like your subject added to a special background, you ought to buy my modifying service and I will edit it for you. Background shade can be changed or altered based on sure picture modifying requirements.
I work with girls all around the globe to create businesses that gentle them up and encourage Get help to remove images and video others. You can connect with me on Facebook, Instagram and Pinterest.
Variety of light kits similar to ring lights, softbox kits, twin arm lights used for livestreaming, youtube videos, make up and so on. We have a global staff of gurus working 24 hours, 7 days per week to ship your photographs on time. Grest service getting my household of eight and 24 suiitcases to the sirport. Advertisement cookies are used to offer guests with relevant advertisements and marketing campaigns. These cookies track guests throughout websites and acquire info to supply custom-made advertisements. Functional cookies assist to perform certain functionalities like sharing the content material of the website on social media platforms, collect feedbacks, and different third-party features. This website makes use of cookies to enhance your experience whilst you navigate by way of the internet site.
It can sharpen the colors of your pictures, crop them, and surely do some backgrounds removal for product photographs. Dropicts will assist you to raise engagements or create consideration that your products need.
Product Description
If you may be operating a enterprise online, you first must learn about a proper art work service provider. Simply create a Pheditor account and wait a few minutes for it to be accredited. Once you’re in, addContent any pictures you wish to have edited. Just upload your image and the background might be removed routinely. In my exams, this works quick and ease with an image with a stable background (i.e the background isn't too difficult to remove). If you have a bokeh photo with non-solid background of various objects, you may nonetheless want the Lasso tool from Photoshop or different, extra highly effective image editors.
Out of those, the cookies which are categorized as necessary are saved in your browser as they're important for the working of fundamental functionalities of the website. We also use third-party cookies that help us analyze and understand how you image background removal employ this web site. These cookies might be stored in your browser solely together with your consent. But opting out of a few of these cookies might have an result on your shopping experience.
Take Away The Background From Any Picture With Hint
There are varied services provided by Dropicts ranging from color correction, take away the background from a photo or image, and even retouching. Three steps are all you have to get your images professionally edited or retouched by Dropicts. Are you struggling to get the background of the picture edited or eliminated and still don’t wish to give it a glance of a fake image? At Damco, we provide a complicated level of clipping and cropping providers for any image, using the vector-marking technique, which supplies the edited image an original look. Our group has huge expertise with picture clipping and cropping, background elimination and image masking. Remove.bg is a website whose sole objective is to take away the background from photographs. Thus, you got here to know why the background of the images has to be removed.
Check us out at:
Name: Clickmajic
Email: [email protected]
Tool: Clickmajic
Blog: Clickmajic.com/blog/
Web: Clickmajic.com
Facebook: facebook.com/click.majic/
Youtube: www.youtube.com/channel/
Instagram: instagram.com
Google sites: https://sites.google.com/view/clickmajic-image-bg-removal/home
1 note
·
View note
Text
Best photography light box
“Photography Light Box Market” research report provides an actual industry viewpoint, future trends and dynamics for market growth rate, market size, trading and key players of the industry with forecast period of 2027. This photography light box comprehensive research report is titled ‘Photography Light Box Market’ with Industry Analysis and Opportunity Assessment and it comprises a whole market scenario along with the dynamics affecting it.

The Photography Light Box market report provides an overview of market dynamics such as changing needs of customers in other regions. Valuable insights from companies have been studied using primary and secondary research methodologies in a particular way.
Photography Light Box Market analysis report expresses the growth rate of the global market up to 2027 by revenue, chain structure, industrial process, and market entrance strategies. In recent years, corresponding growths have been made in terms of technology, a trend that has driven the market to traverse exponential development paths.
The expansion of the Photography Light Box market is largely due to enlarged adoption of Industry. Among further regions, North America is expected to be the determined profitable region in the world. Furthermore, the Photography Light Box market is increasing due to growing awareness of IOT technology in the countries, such as India and China, of Asia-Pacific region.
Research Foretell provides syndicated market research on industry verticals including Healthcare, Information, and Communication Technology (ICT), Technology and Media, Chemicals, Materials, Energy, Heavy Industry, etc. Research Foretell provides global and regional market intelligence coverage, a 360-degree market view which includes statistical forecasts, competitive landscape, detailed segmentation, key trends, and strategic recommendations.
Lighting is a vital component of photography, which is why there is a sea of lighting options out there. For amateur photographers and videographers, the selection can be overwhelming. That’s where lighting kits come in, supplying a range of basic tools that will work well together. Continuous lighting kits, as their name implies, emit constant light, allowing photographers to easily make adjustments before snapping the shot. Continuous lighting is best for still life, studio work, and portraits, and obviously, it’s what you need for video as well. Beyond bulbs, most kits offer umbrellas or softboxes for evenly distributing light; these can make an immediate difference in your shots, even if you have little technical knowhow. If it’s time to shine a light on your photographic projects, take a look at our top five recommendations for kits below.
1 note
·
View note
Last Seen Blogs

restaurantfunnel
Restaurant Funnel

bryanngofafc
Bryanngo

legendary69
The Ash

indah-decil
July 22, Smart, Small, Sweet, Soft, Sexy.

artmeruna
M e r u n a