#attacking phpmyadmin
Text
LazySysAdmin - Vulnhub walkthrough
LazySysAdmin – Vulnhub walkthrough
LazySysAdmin is an easy to crack VM. There are multiple ways to crack this machine, several ports and mis-configured services are present inside this box. The takeaway from this machine for me is to understand a service better and thinking simpler to get root privileges after we are able to exploit a badly configured service.
Prerequisites:
1. Download LazySysAdmin –…

View On WordPress
#attacking phpmyadmin#attacking smb#attacking ssh#lazysysadmin#phpmyadmin#service misconfiguration#smb#ssh#sudoer#web port#wp-config.php
0 notes
Text
Changing Your WordPress Login URL

Changing your WordPress login URL is a smart move to enhance your website’s security. It helps to protect your site from unauthorized access and brute-force attacks. Here’s a comprehensive guide on how to change your WordPress login URL effectively.
How to Change Your WordPress Login URL: The default WordPress login URL is easy to guess, making it a target for hackers. By changing it, you add an extra layer of security. Let’s explore the methods you can use to change the login URL.
Change WordPress Admin Login URL Without Plugin
If you prefer not to use plugins, you can change the WordPress admin login URL without a plugin. This involves editing your site’s files directly. Here’s how you can do it:
Backup Your Site: Always start by backing up your website to prevent any data loss.
Edit the .htaccess File: You can use cPanel to access and edit your .htaccess file. Add the following code to redirect the wp-admin URL:
RewriteRulenew−login$/wp−login.php[NC,L]𝑅𝑒𝑤𝑟𝑖𝑡𝑒𝑅𝑢𝑙𝑒𝑛𝑒𝑤−𝑙𝑜𝑔𝑖𝑛$/𝑤𝑝−𝑙𝑜𝑔𝑖𝑛.𝑝ℎ𝑝[𝑁𝐶,𝐿]
Replace”new−login”withyourdesiredloginURL.𝑅𝑒𝑝𝑙𝑎𝑐𝑒”𝑛𝑒𝑤−𝑙𝑜𝑔𝑖𝑛”𝑤𝑖𝑡ℎ𝑦𝑜𝑢𝑟𝑑𝑒𝑠𝑖𝑟𝑒𝑑𝑙𝑜𝑔𝑖𝑛𝑈𝑅𝐿.
How to Change WP-Admin URL in cPanel
To change the wp-admin URL in cPanel, follow these steps:
Access cPanel: Log in to your cPanel account.
File Manager: Open the File Manager and navigate to your site’s root directory.
Edit wp-login.php: Rename the wp-login.php file to something unique.
Update Links: Update links pointing to the old wp-login.php to reflect the new URL.
Change WordPress Login URL with Wordfence
Wordfence is a popular security plugin that can also help you change the WordPress login URL with Wordfence. Follow these steps:
Install Wordfence: Install and activate the Wordfence plugin.
Login Security: Go to Wordfence > Login Security.
Custom Login Page: Set your custom login URL.
Using WPS Hide Login
WPS Hide Login is a straightforward plugin for changing your login URL. Here’s how to use it:
Install the Plugin: Go to Plugins > Add New and search for “WPS Hide Login”. Could you install and activate it?
Configure Settings: Go to Settings > WPS Hide Login and enter your new login URL.
Save Changes: Save the changes and your login URL will be updated.
Change WordPress WP-Admin URL Programmatically
You can change the wp-admin URL programmatically by adding code to your theme’s functions.php file. Here’s a sample code snippet:
function custom_login_url() {function custom_login_url() {
returnhomeurl(′/new−login−url/′);𝑟𝑒𝑡𝑢𝑟𝑛ℎ𝑜𝑚𝑒𝑢𝑟𝑙(′/𝑛𝑒𝑤−𝑙𝑜𝑔𝑖𝑛−𝑢𝑟𝑙/′);
}}
addfilter(′loginurl′,′customloginurl′);𝑎𝑑𝑑𝑓𝑖𝑙𝑡𝑒𝑟(′𝑙𝑜𝑔𝑖𝑛𝑢𝑟𝑙′,′𝑐𝑢𝑠𝑡𝑜𝑚𝑙𝑜𝑔𝑖𝑛𝑢𝑟𝑙′);
Replace “/new-login-url/” with your desired login URL.
How to Find WordPress Admin URL from Database
If you’ve forgotten your custom login URL, you can find the WordPress admin URL from the database:
Access phpMyAdmin: Log in to your hosting account and open phpMyAdmin.
Navigate to wp_options: Look for the wp_options table and find the login_url row.
Retrieve URL: The value in this row is your current login URL.
How Do I Change the URL of My WordPress Site After Login?
To change the URL of your WordPress site after login, follow these steps:
Settings: Go to Settings > General.
Update URLs: Update the WordPress Address (URL) and Site Address (URL) fields.
Save Changes: Save the changes and your site URL will be updated.
Should I Change My WordPress Login URL?
Should I change my WordPress login URL? Absolutely. Changing your login URL reduces the risk of brute force attacks and unauthorized access, enhancing your site’s security significantly.
Conclusion
Changing your WordPress login URL is a crucial step towards securing your website. Whether you use plugins like Wordfence and WPS Hide Login or prefer manual methods through cPanel or code snippets, ensuring your site’s safety is paramount. Follow the steps outlined above to successfully change your WordPress login URL and secure your site.
0 notes
Text
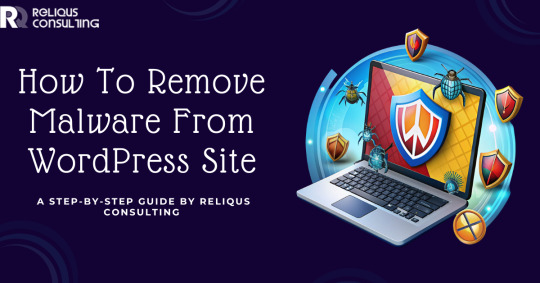
How To Remove Malware From WordPress Site: A Step-by-Step Guide By Reliqus Consulting
In the digital age, websites are the storefronts of the online world, and just like physical stores, they can fall prey to vandalism—in this case, malware.
Malware can severely damage your WordPress website, leading to data breaches, loss of customer trust, and even penalties from search engines.
If you suspect that your WordPress site has been compromised, it's essential to act quickly and methodically to remove the malware and safeguard your site from future attacks.
Identifying the Infection
The first step in dealing with malware is to confirm its presence. Several signs can indicate a malware infection:
Performance Issues: A sudden slowdown in website performance is a common symptom of malware.
Unexpected Ads or Pop-Ups: Malware can inject unwanted ads or pop-ups into your site.
Redirection: If your site redirects to unfamiliar websites, it's a clear sign of malware.
Search Engine Warnings: Google may display warnings about your site being insecure or compromised.
To accurately identify malware, use security plugins like Wordfence, Sucuri Security, or MalCare. These plugins are designed to scan your website for known threats and vulnerabilities. Installing one and conducting a thorough scan can pinpoint the specific issues affecting your site.
However, it's important to note that while effective, these plugins can be expensive and may require a certain level of technical knowledge to use effectively for malware removal. Given these challenges, it might be more efficient and cost-effective to opt for a professional malware removal service.
One standout option is the WordPress malware removal service offered by Reliqus Consulting. Priced at just $79, this service not only provides an affordable alternative to the often costly plugins but also eliminates the need for technical expertise on your part.
Backing Up Your Site
Before taking any steps to remove the malware, ensure you have a complete backup of your website. This includes all files, the WordPress database, plugins, and themes.
Although backing up a compromised site might seem counterintuitive, it ensures that you have a fallback option should anything go wrong during the cleanup process. Use a trusted plugin or your hosting provider’s backup solution to secure your data.
Removing the Malware
With a backup in place, you can begin the process of removing the malware from your WordPress site.
1. Update Everything: Malware often exploits vulnerabilities in outdated WordPress core files, themes, and plugins. Update all components to their latest versions to close these security gaps.
2. Manually Remove Malware: If the malware is not removed by updates, you may need to manually clean your site.
Access your site files via FTP or your hosting provider's file manager.
Look for recently modified files or any files that don’t belong. Malware can often be found in the wp-content folder or in the core WordPress files.
Compare suspicious files with the original files from the official WordPress repository. If discrepancies are found, delete the malicious files or replace corrupted files with clean versions.
3. Clean the Database: Malware can also infect your WordPress database.
Access your database via tools like phpMyAdmin.
Inspect the wp_options table for suspicious links or scripts, as well as the wp_posts table for any malicious content within your posts.
Carefully remove any identified malware.
4. Use a Malware Removal Service: If manual removal is daunting or if the malware persists, consider hiring a professional service like from Reliqus Consulting. These services specialize in deep cleaning and can often expedite the recovery process.
Strengthening Your Site's Security
After removing the malware, it's crucial to take steps to enhance your site’s security and prevent future infections.
1. Change All Passwords: Immediately change your WordPress admin, hosting account, FTP, and database passwords to strong, unique alternatives.
2. Implement Security Measures: Install a reputable WordPress security plugin and configure its settings to protect your site. Implementing a firewall, limiting login attempts, and enabling two-factor authentication can significantly enhance your site's security.
3. Regular Updates and Backups: Keep all site components updated and conduct regular backups. Store backups in a secure, off-site location.
Monitoring Your Site
Vigilance is key in maintaining the security of your WordPress site. Regularly monitor your site’s health through services like Google Search Console, which can alert you to security issues, and keep an eye on site performance and traffic for anomalies.
Conclusion
Addressing malware on your WordPress site can be daunting but is manageable with a structured approach. For those seeking to thoroughly understand and implement each step of this process, read our full blog. This comprehensive resource provides the in-depth knowledge needed to not only remove existing malware but also to fortify your site against future threats, ensuring your digital storefront remains secure and thriving.
0 notes
Text
PHP Form MySQL
To check if MySQL is running: mysql.server status
To start MySQL: mysql.server start
Connecting to a MySQL database
(new-connection.php)
This PHP code is a set of functions for interacting with a MySQL database. Let's break down what each part does:
Connection Process:
Constants (DB_HOST, DB_USER, DB_PASS, DB_DATABASE) are defined to hold the database connection information. These constants should be adjusted to match the database settings.
A new mysqli object is created to establish a connection to the MySQL database using the defined constants.
If the connection fails, an error message is displayed, and the script stops executing.
Database Querying Functions:
fetch_all($query): This function executes a SELECT query that may return multiple rows. It fetches all the rows as associative arrays and stores them in an array. The array of rows is then returned.
fetch_record($query): This function executes a SELECT query that is expected to return a single row. It fetches that single row as an associative array and returns it.
run_mysql_query($query): This function is used to execute INSERT, DELETE, or UPDATE queries. It returns the ID of the most recently inserted record (if applicable) or true/false based on the success of the query.
escape_this_string($string): This function is used to escape special characters in a string, making it safe to use in database queries. This helps prevent SQL injection attacks. It returns the escaped string.
Overall, these functions provide a convenient and secure way to interact with a MySQL database in PHP scripts. They encapsulate common database operations and help prevent SQL injection vulnerabilities by properly escaping user input.
Include and Require
Let's say you have two files: new-connection.php and index.php. New-connection php has the Database blueprint where you're creating an object to connect to the MySql database. Now if you want to gain access or use this inside index.php, how do you do it? Use include and require. In this case, since the new-connection.php is NECESSARY inside index.php so that it will have a connection to the database, use require. But if you have another php file that you want to add to index.php but not really necessary, just use include. When you use require but there's an error in the inserted file, it will produce an error and it will HALT the execution. If you use include and there's an error in the include part, it will display the error but will still CONTINUE executing the rest of the file.
So, if new-connection.php contains essential code for index.php to function correctly (like setting up a database connection), you should use require to include it, ensuring that if the file is missing or fails to include, the script execution stops, preventing potential errors further down the line due to the missing functionality.
For other files that are not essential for the core functionality of index.php, you can use include. If these files are missing, it won't halt the script execution, and your script can continue running without them.
What if you forgot you already included or required a file?
We can just use require_once() and include_once() instead of just require() and include(). These functions will ignore the duplicated calls.
Connection Errors
There can be multiple possible errors when connecting to a mysql database. Check the DB_HOST, the root, or the pass. When I encountered an unknown database error, all I had to do was to go to phpmyadmin and imported the database.
Sample Folder Structure
new-connection.php (database connection)
home.php (contains HTML + require('new-connection.php');
In home.php, to check if database has been sucessfully connected, do a var_dump($connection)
Accessing and Displaying Database Records
fetch_all($query), fetch_record($query), etc, will return an associative array containing details of a record/records from the database. To access a specific detail, we can just access it like how we access multidimensional associative arrays.
$query = "SELECT * FROM people WHERE id = 1";
$person = fetch_record($query);
$fetch_record() will return an associative array that contains the details of a record. Example.
array(5) {
["id"]=>string(1) "1"
["first_name"]=>string(5) "Hanna"
["last_name"]=>string(9) "Velazquez"
["from"]=>string(19) "2014-09-23 12:19:25"
["to"]=>string(19) "2014-11-20 12:19:32"
}
since this associative array is stored in $person, we can now access details of this record inside the HTML by doing:
<?php
echo $person['first_name'];
?>
INSERT, UPDATE, DELETE a record
If we want to insert, update, or delete a record, use run_mysql_query($query). If successful, it will return the id of the newly added record OR true or false if it was a success or not.
$query = "INSERT INTO people(first_name,last_name)
VALUES ('Jon', 'SNOW')";
if(run_mysql_query($query)){
echo "added";
}else{
echo "failed";
}
0 notes
Text
GoBruteforcer: New Golang-Based Malware Breaches Web Servers Via Brute-Force Attacks
The Hacker News : A new Golang-based malware dubbed GoBruteforcer has been found targeting web servers running phpMyAdmin, MySQL, FTP, and Postgres to corral the devices into a botnet.
"GoBruteforcer chose a Classless Inter-Domain Routing (CIDR) block for scanning the network during the attack, and it targeted all IP addresses within that CIDR range," Palo Alto Networks Unit 42 researchers said.
"The threat actor http://dlvr.it/Sksy99 Posted by : Mohit Kumar ( Hacker )
0 notes
Text
Phpmyadmin nginx

#Phpmyadmin nginx how to#
#Phpmyadmin nginx install#
However, because you are using Nginx as a web server you shouldn’t choose either of these options. phpMyAdmin can automatically make a number of configuration changes to ensure that it works correctly with either of these web servers upon installation.
#Phpmyadmin nginx install#
Now you can install phpMyAdmin by running the following command:ĭuring the installation process, you will be prompted to choose a web server (either Apache or Lighttpd) to configure. You can install phpMyAdmin by using APT to download the phpmyadmin package from the default Ubuntu repositories.īegin by updating the server’s package index: Once you have these prerequisites in place, you can begin following Step 1 of this guide. Warning: If you don’t have an SSL/TLS certificate installed on the server and you still want to proceed, please consider enforcing access via SSH Tunnels as explained in Step 5 of this guide. If you do not have an existing domain configured with a valid certificate, follow this guide on securing Nginx with Let’s Encrypt on Ubuntu 20.04 to set this up.
#Phpmyadmin nginx how to#
To install and configure these components, follow our guide on How To Install Linux, Nginx, MySQL, PHP (LEMP stack) on Ubuntu 20.04.Īdditionally, because phpMyAdmin handles authentication using MySQL credentials, we strongly recommend that you install an SSL/TLS certificate to enable encrypted traffic between server and client. A LEMP stack (Linux, Nginx, MySQL, and PHP) installed on your Ubuntu 20.04 server.To set this up, follow our initial server setup guide for Ubuntu 20.04. This server should have a non-root user with administrative privileges and a firewall configured with ufw. In order to complete this guide, you will need: It will also explain each measure in detail so that you can make informed decisions and protect your system. In addition to installing the application, this tutorial will go over several measures you can take to harden your phpMyAdmin installation’s security. If you install and configure phpMyAdmin without taking the proper steps to secure it from malicious actors, you run the risk of your data being lost or stolen. Combined with the fact that it’s a widely-deployed PHP application, this means that phpMyAdmin is frequently targeted for attack. Note: phpMyAdmin runs on a database server, handles database credentials, and allows users to execute SQL statements on the database.
0 notes
Text
CVE-2022-23808
An issue was discovered in phpMyAdmin 5.1 before 5.1.2. An attacker can inject malicious code into aspects of the setup script, which can allow XSS or HTML injection.
source https://cve.report/CVE-2022-23808
0 notes
Photo

@TheHackersNews : RT @Swati_THN: Researcher releases details of phpMyAdmin 4.7.x XSRF/CSRF Vulnerability (PMASA-2017-9) that could allow attackers to execute arbitrary SQL statements silently by inducing an administrator to access malicious pages. https://t.co/3SDqSKsVwC Credit: @ambulong https://t.co/NlKw1zFxrc
9 notes
·
View notes
Text
Economy Linux Hosting With cPanel
Economy Linux hosting with CPanel is one of the hosting plans we offer on Risinghost. For less than the price of a cup of coffee per month, you can get the cheapest web hosting for your website with one click software installer, free account migration and 99.9% uptime guarantee.

Features Of Economy Linux Hosting With CPanel
Easily reset admin passwords.
Each time and again, you'll need to reset your administrator password. cPanel WordPress Manager provides a one-step process that simplifies the entire process.
Single-click siteswap.
cPanel is currently working on a feature that will make it easier to develop your website. With this feature, you will only upgrade to the non-live version of your website and then replace the old version of your website once you have completed your update. (You can do this already with cheap cpanel hosting, but they are working on a faster version that will enable you to do this in one click.)
Automatic security updates.
If you want to keep your website secure, it is time consuming to keep track of every update you need. Not to mention dangerous. As a webmaster, you have to juggle a lot of things so that you don't miss the updates you need to prevent an attack on your website. With cheap cpanel hosting, you can configure your account to be installed automatically when updates are available. This gives you one less thing to worry about.
MySQL databases
If you're using WordPress as your content management system, you'll love this feature. WordPress can't work without a MySQL database and with our economy plan, you get a lot of databases! (This is Linux hosting for our Economy Linux Hosting With cPanel. Our business and ultimate plans give you an unlimited MySQL database.)
24/7 support
When you choose any of our hosting plans, you can not only host your website with a secure server that enables fast loading and gives you 99.9% uptime, but you also get 24/7 access to our veteran tech support team. That way, if something goes wrong with your website, you will have someone to talk to about it!
Raisinghost Economy Linux Hosting With cPanel Features:-
Raisinghost offers 4 plans in economy linux hosting with cpanel. The plan is as follows -
Economy-HDD
The price starts from here - $0.5/mo
Unlimited Web Space
Unlimited Bandwidth
10 Email Accounts
4 Parked Domains
0 Addon Domains
2 MySQL Databases
10 Sub Domains
FREE cPanel Control Panel
FREE PHPMyAdmin
FREE AwStats
FREE Auto SSL
FREE Migration
DDOS Protection
99.99% uptime
Softaculous Supported
Tier 1 Technical Support
Value-HDD - 50%OFF
Starting at - $1/mo
No Free Domain
Double Domain Hosting
Unlimited Web Space
Unlimited Bandwidth
Unlimited Email Accounts
Unlimited Parked Domains
1 Addon Domains
6 MySQL Databases
Unlimited Sub Domains
FREE cPanel Control Panel
FREE PHPMyAdmin
FREE AwStats
FREE Auto SSL
FREE Migration
DDOS Protection
99.99% uptime
Softaculous Supported
Tier 1 Technical Support
Deluxe-HDD - 50% OFF
Starting at - $3/mo
No Free Domain
Thirty Domain Hosting
Unlimited Web Space
Unlimited Bandwidth
Unlimited Email Accounts
Unlimited Parked Domains
29 Addon Domains
50 MySQL Databases
Unlimited Sub Domains
FREE cPanel Control Panel
FREE PHPMyAdmin
FREE AwStats
FREE Auto SSL
FREE Migration
DDOS Protection
99.99% uptime
Softaculous Supported
Tier 2 Technical Support
Ultimate-HDD - 50% OFF
Starting at - $5/mo
Free Domain
Unlimited Domain Hosting
Unlimited Web Space
Unlimited Bandwidth
Unlimited Email Accounts
Unlimited Parked Domains
Unlimited Addon Domains
Unlimited MySQL Databases
Unlimited Sub Domains
FREE cPanel Control Panel
FREE PHPMyAdmin
FREE AwStats
FREE Auto SSL
FREE Migration
DDOS Protection
99.99% uptime
Softaculous Supported
Tier 3 Technical Support
Visit our site to learn more about our raisinghost hosting plan or to learn more about Economy Linux Hosting With cPanel changes. Contact Mail ID - [email protected] More information about then Visit - https://raisinghost.com/economy-linux-hosting-with-cpanel.php
#economy linux hosting with cpanel#cheap cpanel hosting#cheapest web hosting#cheapest cpanel hosting#cheap ssd hosting#best cpanel hosting
0 notes
Text
Install WordPress in 5 Minutes
So, finally, your website is up and running smoothly but still, you have the WordPress installation pending, right?
Installing WordPress is not rocket science. You can do it yourself and it won’t take more than 5 minutes. There are multiple ways to install and run WordPress on your web server but here we are going to discuss the 3 super-easy ways to do that.
Three easy ways to install WordPress:
1. Opt for a Managed WordPress Host:
When it comes to making your website live, it needs a web server hosting plan.
Most website owners go for a shared hosting server for the budget-constrain. But, a shared server hosts lots of sites at a time.
When you are using a shared hosting server, you are responsible for
· WordPress software installation
· Keeping your entire WordPress application and plug-ins updated
· Backing up your site
· Monitoring your site all the time to avoid malware attack, security breaches and hacking attempts
· Troubleshooting any potential issues with your site
A managed WordPress hosting provider will take care of all the things mentioned above for you.
Additionally, it will..
ü Optimize their web server regularly to ensure the best hosting experience for users
ü Enable your site to handle the sudden spike in traffic
ü Provide excellent support from well-trained WordPress experts
2. Install WordPress on your personal computer with Local
Though WordPress is not designed to run on a personal computer, with Local you can do it.
Local allows you to create your private server on your local machine so that you will be able to create multiple WordPress instances.
A majority of professional WordPress Developers prefer Local.
You can make your site live with WPengine or Flywheel.
3. Install WordPress on your web server manually:
Hosting server requirements:
PHP 7.3 or higher version
MySQL 5.6 or MariaDB 10.1 or greater
An official server
Tools that you need:
FTP access with login credentials
An FTP client. It enables you to copy and transfer necessary files from your local machine to a web server.
A text editor like Notepad
The latest version of web browsers like Google Chrome or Safari
5 steps to install WordPress
1. Download WordPress 5.7 (latest version):
Go to WordPress.org and download the latest WordPress’ version from there and unzip it on your computer.
2. Upload the WordPress software to your web server using FTP client:
Use your FTP client and go to the newly downloaded WordPress file. Use the FTP login credential provided by your hosting provider and have your web server connected
In most FTP clients, you can see a two-column split view where you can find the files on your local computer on the left-hand side and the files of your web server on the right-hand side.
Go to the web server’s file system and open the root directory. Select all the files on the left side inside the root directory.
Now drag the files on the right-hand side. It will start uploading the files to the webserver.
Once all the files are uploaded, open your web browser and log in to your web hosting control panel to begin the next step.
3. Create MySQL database and user for WordPress:
In most of the popular shared web hosting plans, you can find the cPanel for complete account management.
Go to your cPanel and find the “database” module or “phpMyAdmin” and this is where you have to create a MySQL database.
Now you might be wondering to know the reason behind having a database, right? WordPress always stores content in the database, instead of storing it in files.
When it comes to creating a new database, you should put a unique name for your database.
Now you have to select the best collation for your language and encoding. Usually, it is “utf8_” series but if you don’t find it then you should choose “utf8mb4_general_ci.”
Now click on the “Create” button to finish the database creation process.
Now you have to create a user with permission to access and modify the database. Click on the “Add User” button and create a unique user name that is difficult to guess.
Now create a strong and secure password with the proper upper case and lower case combination.
It’s time to add the newly created user to the new database. Click on the “Edit Privileges” icon next to the User and in the “Database-specific privileges” section, select the database that you have just created. You can find it under the “Add privileges to the following database” option. Now you just click the “Go” button.
4. Connect WordPress with newly created database:
Go back to your FTP client and search for the wp-config file and change the file name to wp-config.php.
Open the file in your text editor and fill in the database details that you have created in the previous stage.
DB_Name: This is the name of the database that you have created for the WordPress
DB_User: the username that you created for the WordPress
DB_Password: The password that you created for the WordPress username
DB_Host: This is the hostname of your server. Generally, it is Localhost.
5. Finish installing WordPress:
This is the last and final stage. Now you have to run the WordPress installation script by accessing the URL in a web browser. Put your site’s web address to the web browser. WordPress will require you to fill up the remaining details like Site Title, an Administrative User Name, Password and a primary email address.
That’s it. WordPress is now installed on your web server.
If you are planning to build a highly functional and stunning website with the latest version of WordPress installed in it, TechRev’s market-leading custom web and mobile app development teams are always here to help you.
0 notes
Photo

https://www.wpplatformhelp.com/wordpress-tutorials-by-wp-learning-lab/wordpress-post-meta-data-what-it-is-where-to-find-it-in-the-database/
WordPress Post Meta Data - What It Is & Where To Find It In The Database
youtube
WordPress Post Meta Data – What It Is & Where To Find It In The Database https://youtu.be/N2tdhr-uajI
Join our private FB group for WordPress help: https://facebook.com/groups/wplearninglab
A common question I hear is “what is WordPress post meta data?”
The main data of a post is the url, title, and body text of the post. The meta data is things like the author’s name, the post date, categories and tags. I think the term “meta” throws people off. If you take “meta” out you’re left with WordPress post data and that’s what it is. It’s just more information about the post. The “meta” in this case means other or additional. So post meta data is other data that is different from the main data.
It is important to understand how metadata works because it is the basis of custom fields created using a plugin like PODS or Advanced Custom Fields.
You can either watch the detailed video tutorial below or scroll below that to read the image/text version of the tutorial.
Find a Post’s ID
Go to any post on your WordPress site by clicking on the posts link on your dashboard menu.
Click on edit to open the desired post inside the editor.
When you open the post, you’ll see both the main content and the meta data. The main content consists of the URL, the actual content, the title etc. Like I mentioned earlier, the metadata are things like the date, the category, author information etc.
To find the table where the metadata is inserted, first you’ll need to find the post’s ID number in the URL (see the screenshot below).
This post’s ID is 905 so keep that in mind.
Match The ID To The Postmeta Table Entries
Head over to the cPanel and open up phpMyAdmin.
Find the database for your and click on the plus sign. If you’re not sure which of the database listed in the phpMyAdmin is the correct one you can find the database name in the wp-config.php file in your website.
To get there go to cPanel, then File Manager, then the Website Root and finally find the wp-config.php file.
A little ways down the wp-config file you’ll find the database name. You’ll also see the database username and database password. Don’t worry about those. Just find the db name and find that name listed in the phpMyAdmin.
Read the rest on the blog:
Exclusive for WPLearningLab viewers, up to 50% off hosting: https://wplearninglab.com/wordpress-hosting-offer/
Stop brute force attacks before they happen with this workshop: https://wplearninglab.com/brute-force-eliminator-workshop
Grab your free 17-Point WordPress Pre-Launch PDF Checklist: http://vid.io/xqRL
Download your exclusive 10-Point WP Security Checklist: http://bit.ly/10point-wordpress-hardening-checklist
Subscribe to this awesome channel here: http://www.youtube.com/subscription_center?add_user=wplearninglab
source
0 notes
Text
How to recover hacked Magento site - Webcreta

There are main 2 reason to hack magento website.
1. Outdated Magento version.
2. Magento security patches missing. A hacked website loss trust on customer they will never do interactions on any hacked website. Generally in hacked website credit/debit card data stolen and misused. Customer may file litigation suites and you will be have to face implications regarding compliance to the payment Card Industry Data Security Standard.
New vulnerabilites are constantly discovered by hackers and use that backdoor to hack website if your site in not up to date with security patches. Do not compromise with your store
upgradtion and security patches updation if you really wants to do business and win trust of customers.
Here are some of way that can help you to determine that you are Magento store hacked.
1. New or unknown admin users in Magento Admin panel (System > Permissions > Users)
2. Host suspend for unknown malicious activities.
3. Spam keywords on product listings and other pages.
4. Customer complaint about strange credit card activities.
5. Disturbance in orders and sales.
6. Your domain get blocklisting warnings.
7. Redirection on hacked page.
8. Redirection on nude adult site.
9. Changes in files and folder.
10. Magento core files modified.
11. Database hacking.
Solution to recover hacked Magento store
Security Scan
There are many free tools available to scan magento store/website remotly. You can use below site URLs to scan your website and identify payloads.
https://sitecheck.sucuri.net/
https://www.magereport.com
https://magescan.com/
Check Core File Integratity
You can use command on ssh terminal to check recent modified files. You must have to login on ssh terminal in order to use this commands.
To check from SSH terminal
find /public_html -type f -mtime -10 (List last 10 days modified files)
grep -RE ‘preg_replace\(|eval\(|base64_decode\(‘ –include=’*.php’ . | cut -d: -f 1 | sort -u | while read line ; do echo $line | cat – $line | less ; done
You can compare source code of core files with same magento version. You can download same magento version on sub folder and upload their.
Using diff command you can check modified file list.
create magento1937 folder on public_html and upload source code for the magento latest version 1.9.3.7 on magento1937 folder and run below command
diff -r magento1937 ./public_html
diff command will compare the clean magento files with your installtion.
To check manually login to web server
1. login to web server
2. if using SFTP/FTP then review last modified date column for all files on the server
3. Note list of modified files that have been modified recently.
Unwanted changes on files on last week or month may be suspicious and require investigation.
Audit User Logs
If there are unwanted account created on admin user then that was done by hackers of course. Please identified real users and delete unwanted users from the admin panel.
1. Login to magento admin panel.
2. System > Permissions > Users
3. Delete recenlty unfamilier users.
Database table cleanup
To clean up database maleware you have to login to database phpmyadmin and search for a suspicious content like spam keyworkds, other redirection, malicious php based function such as preg_replace, str_replace, base64_decode, base64_encode, gzinflate, eval etc. Hackers are attacking on most common tables such as core_config_data to modify header and footer Miscellaneous Scripts area only.
Secure the Magento Admin Panel
Use custom admin panel path for admin panel login. Generally, magento admin panel path like http://www.example.com/admin. You can easily change this path on app/etc/local.xml file.
You can also restrict magento admin panel on single IP address by writing some rules in your .htaccess file. Make sure you have static IP address on dynamic IP address you can not restrict.
Upgrade Magento Version and Apply Security Patches
Outdated magento version is one of the biggest target for that attackers to hack your site. Same is you have to apply security patches as well.
Summary
Keep up magento and extension up to date. Set unique username and password with custom admin panel login path and SSL certificate etc.
0 notes
Text
7 - Invaluable Free Apps for Hosting

MySQL Workbench is an app that I cannot live without. In some ways, it
is slightly trickier to use than phpMyAdmin. However, it’s located on
your PC, and it gives you the power to do backups and repairs on your
databases and enables you to make changes in a slightly different
environment from phpMyAdmin through your browser. Try it; it’s a tool
I prefer to use.
You can download MySQL Workbench for Windows, Linux, or Mac OS
X at http://dev.mysql.com/downloads/workbench/.

FileZilla is one of the best — if not the best — free File Transfer
Protocol (FTP) clients available. There are other free ones and there are
many that you can pay for, but FileZilla is my go-to FTP client. It’s fast;
it’s efficient; it can do Secure File Transfer Protocol (SFTP, which you
really should be using) or basic FTP; and it lays everything out in a
simple, easy-to-use window.
One warning with FileZilla is that it stores your passwords in a nonprotected
file, which means virus and malware writers, if they write stuff
which gets onto your computer, could theoretically read that file and get
your FTP login details, including your password. Of course, that means
the attack must specifically look for your password file — and it has to
make it past the virus checker, which I’m sure you have installed on your
PC — but it is a consideration to note, and you should remember to not
store your passwords within FileZilla.
You can download it for Windows, Linux, or Mac OS X at
http://filezilla-project.org.

Notepad++ is a wonderful editor for editing any kind of files: text files,
PHP files, HTML files, CSS files. You name it, Notepad++ can read it.
One of things I like most about it is that, with PHP files, it includes color
coding to delineate different types of elements and helps you see where
you are in the file and identify where the code elements you are working
on close.
Notepad++ is free. I’ve seen no other free applications that come even
close to the facilities Notepad++ offers. (Some people use paid
applications that they say are better.) The speed, the ease of use, and the
integration with FileZilla are all excellent. You can edit a file on your
server by simply logging on using FileZilla, right-clicking on the file
you want to edit, and clicking View/Edit. The file downloads and opens
in Notepad++ so you can make the changes you need. When you save it
again, FileZilla automatically prompts you that the file has changed and
asks if you want to re-upload it. You simply click Yes or No.
Notepad++ is available for Windows only. You can download it at
http://notepad-plus-plus.org.

CoffeeCup makes a range of utilities, some of which are free, some of
which aren’t. CoffeeCup FTP is free and is a very good alternative to
FileZilla. It all comes down to personal preference, and I prefer
FileZilla. That said, CoffeeCup FTP is well worth checking out.
CoffeeCup has a premium version called Direct FTP that has
some cool additional features. If you’re looking for CoffeeCup FTP,
don’t accidentally download Direct FTP and have to pay for it by
mistake. Oh, and you can expect CoffeeCup to periodically try to
tempt you into buying the premium version. That’s one of the
things that put me off.
CoffeeCup FTP is available for Windows only. You can download it at
http://coffeecup.com/free-ftp/.

PuTTY is a powerful tool that enables you to connect to devices online,
using a system called telnet, providing you have the correct login details.
It is very useful to website owners, especially those with a Virtual
Private Server (VPS) or dedicated server, because it enables you to open
a command-line prompt on your server by logging in via Secure SHell
(SSH), so that you can run commands as needed.
PuTTY comes with dire warnings that you must not use it anywhere
where it’s illegal to use. The research I’ve done suggests that it is legal
to use it within the U.S., providing you’re using it for connection to a
device that you own or have the right to connect to.
You do not need to install PuTTY if you don’t intend to connect by SSH
and do not need to use the command line on your server. You should
only open up your server to allow SSH connections if you know there is
a good reason for using them. Otherwise, keep SSH closed to help
prevent intruders from gaining access.
PuTTY is available for Windows only. You can download it at
http://www.chiark.greenend.org.uk/~sgtatham/putty/download.ht
ml.

Hailed (by its own company) as the number-one FTP client for Mac OS
X, Transmit is a popular free FTP client for the Mac.
Transmit has a host of features and boasts super speeds especially for
smaller files. I haven’t used it extensively, but it does appear to be faster
than FileZilla, although I still prefer the layout of the FileZilla screen to
that on Transmit.
Transmit is available for Mac OS X at http://panic.com/transmit.
Cyberduck
Another FTP client? I know, I know . . . . Here’s the deal: FileZilla and
CoffeeCup are the best options for Windows PCs. Transmit and
Cyberduck are the best options for Mac OS X, even though there is now
some crossover apps that are available for each OS.
Cyberduck has to get a mention, if nothing else, for its name. I just
LOVE the name Cyberduck. It’s also an incredibly full-featured piece of
software that I am more than happy to recommend.
The great thing about all the free FTP client software is that you
can download it, install it, test it out, and, if you don’t like it, you
haven’t lost anything except perhaps a little time! Personal taste
plays into which piece of software you prefer to use, so why not
download them all and try them out?
Cyberduck is available for Mac OS X or Windows. You can download it
at http://cyberduck.ch.
Komodo Edit
ActiveState produces two code editors in the Komodo range: Komodo
Edit, which is free, and Komodo IDE, which is a premium version but
adds lots of valuable features for more advanced designers.
What I like about Komodo Edit is that there is a Linux version available,
so if you have eschewed Windows and Mac for the joy of Linux, you
can get a full-featured code editor that is designed to run on your system.
Komodo Edit is available for Mac, Windows, or Linux. You can
download it from www.activestate.com/komodo-edit.
Terminal
Terminal is built into all versions of Mac OS X and is a native telnet
command-line interface that is similar to PuTTY for the PC.
You can use Terminal to connect to your server, providing you enable
SSH connections and have the valid login details.
I’ve never heard anyone suggest you need to look any further than
Terminal for telnet connections from a Mac; it simply does its job
efficiently and easily.
0 notes
Text
7 Ways to Protect and Secure your Joomla Account/Site

As a popular open source and CMS, Joomla is subjected to attack by hackers. There is no perfect security, but It is important to take all possible measures to protect your Joomla site and improves its security. Follow our guide on how to harden your security and prevent your site from being hacked.
1. Do not use admin as your administrator login to your Joomla account.
Be sure to change the username from phpMyAdmin in cPanel to something else and reset the password. Here is a step by step procedure to effect the username change:
- Access the cPanel area
- Click phpMyAdmin
- Navigate and click the site default database (You can verify the site the current database from the configuration.php file)
- Click the Users table (tablePrefix_Users)
- Edit the administrator account and rename to something else (ensure the username is not renamed to "admin")
- Change the password and encrypt accordingly (Use md5 function). A very secured password string should be deployed.
- And finally, click "go" to save the changes
2. Update your Joomla installation to the latest version: (The latest updated version of Joomla is 3.8.3) The update could be applied at the administrative end. Joomla is usually http://domainname/administrator
Here are few security Tips on Joomla Security:
- Secure Administrator login with Strong password
- Don’t leave default administrator account as “admin” and bad password; this is probably the biggest risk in Joomla. By keeping default “admin” and guessable password, you are helping Hacker in their job. Change default administrator login “admin” to something else, which is not easily guessable.
- Use the latest version of Joomla & Extensions. Most of the website owner don’t upgrade to the latest version which is a big risk. Almost every release, you will notice some security fixes so not upgrading to the latest version means keeping your website vulnerable. Review vulnerable extension list provided by Joomla and update the outdated extension. Review the change log each time Joomla release and upgrade if you see any critical fixes.
3. Use a secret key to login into Joomla Admin- Hide your administrator backend from potential hackers and allows those that have secret URL to access the administration area.
- Use login protection extension like KSecure who helps you to add a secret key. This means whenever you need to access admin login page you need to enter the secret key after administrator?. For example: example.com/administrator?testing (testing is the secret key here. If you don’t use this key, then you will be redirected to home page.)
4. Enable Search Engine Friendly (SEF)
SEF make the URLs of your Joomla website more Search Engine Friendly. And good SEF component also gives security benefit. A SEF component masks that information and makes it harder for a hacker to find eventual security vulnerabilities.
Solution: Enable Search Engine Friendly URLs into Joomla Administration area.
- Login into Joomla Administration
- Click on Site >> Global Configuration
- On-Site, tab selects “Yes” next to Search Engine Friendly URLs
5. Keep file/folder permission appropriate
All files should have good CHMOD configuration. Preferably,
- PHP files – 644
- Config Files – 644
- Other folders – 755
6. Use Web Application Firewall
Web Application Firewall (WAF) is essential for any website to protect it from top OWASP 10 most critical web application security risks, known vulnerabilities & malware. If you are hosting your Joomla website on VPS, then you may use ModSecurity which is free. However, if you are on shared hosting or don’t have time, then you may consider cloud-based web application firewall. Using WAF will help you from following.
Bot protection
Login protection
Backdoor protection
DDoS protection
SQL injection
XSS attack
Joomla specific vulnerabilities
7. Monitor your Joomla site
How do you know when your website goes down or defaced? Get notified by email, slack or SMS when your website is not reachable so you can take necessary actions immediately.
Solution: Use a free tool like StatusCake which monitors your website and notifies you when it goes down.
If you follow this guide, the chances are that your Joomla site is more secured. I hope this helps you.
Bunmi J.
2 notes
·
View notes
Text
Jumpstart on Web Hacking Free Ethical Hacking 2020

Description
Web Hacking for Beginners - The course will introduce the various methods, tools and techniques used by attackers.
You will study web application flaws and their exploitation.
No special skills are required as the course covers everything from the very basics.
An Ethical hacker exposes vulnerabilities in a software to help business owners fix those security holes before ...
Web Hacking for Beginners
This course covers:
How the Web Works.How to use Vega Web Vulnerability Scanner.Understanding SQL Injection Attacks.Hacking WordPress with WPscan.Cross-Site Scripting & Cross-Site Request Forgery.Hook victims using BeEF Framework.Gain Full Control over the Target Machine.How Phishing Works.
After completing this course, you will understand major web application flaws and how to exploit a number of dangerous vulnerabilities such as SQL injections, CSRF attacks, XSS vulnerabilities, Phishing, etc.
Who is the target audience?
Anyone who just simply wants to learn about web application hacking.Web developers and pentesters.Hey – Just computer operation is enough and your zeal is the tool required to get on success yacht!Anyone – who is interested in their own security or someone else’s.Any one interested in ethical hacking and penetration test and want to master the art of Reconnaissance
Requirements
A basic understanding of computers.A desire to learn.Motivation, Curios about ethical hacking and pen testing, Comfortable using the command line interface (CLI), basic understanding of TCP-IP ( optional )
Topics covered in the tutorial
– Introduction and requirements
– Installing VirtualBox
– Installing VirtualBox on Windows
– Installing Kali Linux
– Finishing our Kali installation
– Installing Kali in VirtualBox on Windows 10
– Installing Virtualbox Guest Additions
– Guest additions fix
– Running Kali on a USB drive
– Essential hacking terms
– Linux terminal basics part 1
– Linux terminal basics part 2
– Using the apt package manager
– Tor part 1
– Tor part 2
– Proxychains
– Adding multiple links in a proxychain
– Macchanger
– Setting up a web server to hack
– phpMyAdmin configuration
– Troubleshooting MySQL permissions
– phpMyAdmin issue resolved
– Setting up a database
– Coding a simple PHP app
– Hacking our website
– Patching our vulnerability
– Securing strings against SQL injections
– SQLmap options and scanning a WordPress site
– Using nmap to scan a server
– Testing servers for vulnerabilities using nmap
– Brute forcing WordPress sites
– Brute forcing SSH, SFTP and other protocols
– Building a simple app to brute force
– Brute forcing PHP applications
– Phishing demonstration part 1
– Phishing demonstration part 2
– The course is divided into 3 parts- foundation, lab setup, hacking to help you learn easily
– Helpful in learning the basics of ethical hacking.
– More than 16,000 students are enrolled in the course.
– 2 hours on-demand videos + Assignments
Duration : 2 hours
Rating: 4.5 out of 5
Download
https://www.certificationsnotes.com
Free Ethical Hacking – Training Course 2019
Read the full article
#ethicalhacking#ethicalhackingonlinecourse#hackingcourse#hackingwebsites#learnethicalhacking#webhacker
0 notes
Text
Clean A Hacked Joomla Website
Scan your Joomla site to identify malware locations and malicious payloads. ensures timely monitoring and identification of a hacked Joomla site.
Need help ? Dont panic visit fix hacked Joomla website today
Thereafter, check for any modified files including your core files. You can do so by manually check your files via SFTP.
Audit for malicious Joomla! user accounts
In case your Joomla site shows as blacklisted by Google or other website security authorities, you can check the security status of your Joomla! website by using their diagnostic tools. To check for Google transparency, visit the Safe Browsing Site Status website where you can view
Site safety details which give information about malicious redirects, spam, and downloads.
Testing Details which inform about the most recent Google scan which discovered the malware.
Make use of free security monitoring tools like Google Webmasters Central, Bing Webmaster Tools, and Norton SafeWeb to check security reports for your website.
On gaining information about potential malware location, compromised users and threat assessment, opt for a full website clean. Compare infected files with previous backups to assess the extent of modifications and remove malicious changes. Clean hacked Joomla database by using a database admin panel, such as PHPMyAdmin or tools like Search-Replace-DB or Adminer.
Next step would be to secure all user accounts. Often hackers leave multiple backdoors so as to again gain access even after a website has been cleaned. Backdoors are embedded in legitimate-looking files usually but located in the wrong directories. Therefore, it is imperative to thoroughly cleanse your files from backdoors else there is a threat of re-infection.
System logs are the best tool to identify the cause of a Joomla hack. System logs record
all the previous activities that took place. So whenever an XSS or SQL injection takes place,
there is always a record of the request. Furthermore, hackers tend to create new admin
accounts. If you wish to check for any suspicious users, then:
Firstly Login your Joomla Dashboard.
Now, click on Users and select Manage.
Here check for suspicious users. Especially those recently registered.
Now proceed to Remove any unknown users.
Also, check the Last Visit Date.
Find out where the server logs are stored. Use it to identify Joomla SQL injection etc.
If you see users logging from unknown IPs, remove them.
Moreover, use google diagnostic report to find the cause. It gives you a comprehensive view
of your site. If your site is blacklisted work closer with Google. The diagnostic report will give
you the cause for blacklisting. Use it to find and weed out the infection!
Post Joomla hack removal?
Update Joomla!
Most of the time a Joomla hack takes place due to unpatched files. Hence, the first step to follow post cleaning the hack is a Joomla update. Updates essentially remove vulnerable extensions and fill in security holes thus providing you with a secure environment.
Currently, the Joomla version 3.x is the most stable major version. Those using 1.x and 2.x branches should immediately switch to 3.x.
Other than major version update, also update all Joomla core files, components, templates, modules, and plugins.
Reinstall Joomla!
Post-hack, it is also advised to reinstall all extensions to ensure they are functional and malware residual free. Further, remove defunct/deactivated themes, components, modules, or plugins from your web server. Sometimes, we forget to delete the files related to these abandoned modules & plugins, this may still leave loopholes. Thus, make sure to get rid of the files too as they may contain serious vulnerabilities
After cleaning your hacked Joomla site, make a backup. Having a good backup strategy is at the core of the best security practices. Store your backups in an off-site location, as storing them on a server can also lead to a hack.
Lastly, it is advised to scan your system with a good antivirus. There is a possibility of system compromise if a user with an infected computer has access to your website. Protect your site using a website firewall which basically shields your site from any malicious users or malware threats from the web. Astra’s Web Application Firewall mitigates against any online threats and keeps malware at bay.
Reset The Website
Reset all passwords to avoid reinfections. Ensure that you’ve set up two-factor authentication on user accounts. Also, practice the least privilege and give limited access to people who need to do a particular job.
Joomla Security Tips
Implementing the following security practices will protect your Joomla site from the majority of attacks:
Regularly update Joomla Version, Extension & Plugins:
Use Strong Passwords:
Periodic backups:
Restrict access to Admin Page:
Security Extensions:
Using Two-factor Authentication:
Be wary of corrupted downloads:
SSL Certification:
Disable FTP Layer:
Proper File and Directory Permissions:
A secure Joomla site is one which is updated regularly. Every version update is released with security enhancements and bug fixes. An outdated version of Joomla or any other outdated extensions/plugins can sneak in hackers.
Weak credentials can be ultimately leaked through Brute Force and act as common security holes, thus leading to compromised security. Easily guessed passwords and default admin accounts make it easier for perpetrators to gain illegal access to your Joomla website, thus exposing it a host of malicious activities. A long length password with multiple characters makes it for a secure passcode than a shorter one.
Regularly backing up the archives of your files and databases saves your back in case anything goes wrong. Some extensions like the Easy Joomla Backup provide automatic scheduled backups which can later be restored in case of data loss resulting from a hack.
Perpetrators often resort to brute force attacks on easily guessed admin login pages. Thus it is imperative to restrict access to your administrator area. It is advised to not use a default admin login page URL, rather replace it with a specific name. Moreover, the admin panel must be password protected. Extensions like Admin tools, RSFirewall, etc allow a Joomla site owner to change their login page URL
Using security extensions go a long way in securing your Joomla site. These extensions, when configured with your site properly, allow you to block any kind of malicious activity and cover-up security holes. extensions allow you to block hacker attacks and close security holes of your Joomla site.
A two-factor authentication code (commonly known as the One time password: OPT) makes your Joomla site even more secure. Even if your password is guessed or leaked, one still has to go through an authentication code to gain illegal access of your account.
Never download premium extensions, plugins or any items for free from unauthenticated or unofficial sources. Plugins from an unknown source may be corrupted or contain malware, which may harm your site. Do not consider saving money here, rather spend on authentic sources.
Whenever a user logs into a site, his/her credentials are sent to a server sans encryption. By using an SSL certificate, these credentials will be encrypted before sending to the server. In this way, an SSL certification provides an additional layer of protection to your Joomla website.
FTP layer is generally not needed in Joomla and it is disabled by default. It is necessary to keep it so, as an enabled FTP layer is a major security hole in Joomla sites.
Always manage permissions to files and directories, and never give full access of permission 777. Never give full access or permission 777, but rather use 755 for folders, 644 for files and 444 for configuration.php files
0 notes
Last Seen Blogs

oakfloorllcnc
12th & Oak Floor Co. LLC

srgermain
SRGermain

dragonemeryart
Existentialism & Tummy Aches Art Blog!

metrograce-blog
Metro + Grace: What to Do in NYC
metrograce-blog
Metro + Grace: What to Do in NYC