#antiseize paste
Explore tagged Tumblr posts
Visit Tumblr Blog
Explore Tumblr blogs with no restrictions, modern design and the best experience.
Last Seen Tumblr Blogs


Fun Fact
Tumblr posted its first advertisements in May 2012 and subsequently earned $13M in revenue.
Text
What if Eury and Ares are dating when Mutiny happened?
(btw, it seems tumblr is more used to release pictures and videos. If anyone can recommend me a place to post long fan fiction, I'd be grateful!)
(I put some original characters in the article, not much space, just to explain how bad the situation on the fleet is)
The situation was worsening. Eurylochus felt the churning in his stomach, the hunger-induced pain spreading, and he pressed against his abdomen, tightening his belt further in an attempt to quell the longing for food. It had been a week since his argument with Ares—no, they hadn't broken up; Eurylochus wouldn't call it that; they had simply disagreed, that was all—and the food on the ship was gone, with only limited fish catch to sustain them. The crew had been starving for days.
He spotted Perimedes on the deck. Since leaving the Underworld, days had passed in this manner: Perimedes stood silently, gazing out at the vast, boundless sea. Eurylochus knew he wasn't looking for the direction of home. During those shared, comforting nights, he had realized that few men still harbored hope of returning.
"Sometimes, I think I see Elpenor," Perimedes said almost in a trance. "He's drunk and looks happy. I told him I wanted to go down to him, and he got angry—didn't he want me to be with him?"
Eurylochus couldn't fathom what it felt like to have a loved one in the Underworld. Sometimes, he felt that Perimedes' longing for Elpenor surpassed his desire to survive. This man missed his beloved so much that he could venture into the realm of death. In that stagnant place, without tomorrow or future, they would at least have each other. Eurylochus recalled the nights he spent without Ares, chatting with his companions about those who had passed.
At one such time, Antises handed him a shabby little notebook, smelling of sea salt and ocean breeze. Eurylochus remembered seeing an identical cover with another comrade. He opened it and saw Polites' name, neatly lined up with others on the first page. Eurylochus recalled these names written there; they had all died at the feet of the Cyclops.
Perimedes reached out and flipped to the last page, where the last line read the name of his beloved, Elpenor.
"This was Crytrius's notebook," Antises said. Before the war began, Eurylochus wasn't familiar with this young man from the farmland on the westernmost edge of Ithaca. As for now—there were only 42 of them left, and it was easy to know each other.
"Crytrius wanted to record the names of every fallen comrade. He always said if we didn't remember them, the spirits of those who had passed would truly be forgotten. He sank into the vast ocean, but I took his notebook," Antises explained. "After enduring the great god of the sea, it was difficult to record the deaths. We struggled to recall the names of every comrade. At least this way, they left a trace of their existence, even though we too might follow in their footsteps and perish here."
Yes, if he died silently in the middle of the sea, he would pray that at least someone remembered him. Gods were immortal, and he hoped at least Ares would remember him, though he knew that tiny, short-lived mortals meant nothing to the gods.
"It's hard to say I don't long to reunite with them in the Underworld," Perimedes chuckled briefly. "Whether wandering the ocean or heading to the realm of death, we have no place to call home, alone and desperate—what's the difference?"
"But the blood on our hands cannot be washed away. Can we go to that peaceful land? Or must we pay for our killings?" Menechas said from the corner of the room. Silence fell upon the room.
Eurylochus pulled himself out of the abyss of memories. Now, six more names had been added to Antises' notebook, one of them being Menechas, Antises' best friend, the young man who worried about his past killings.
The pain of losing his companion made him want to vomit, but his stomach was empty, so he could only retch a few times. His good friend Odysseus was drifting further and further away from him, and he could feel the rift between them. Since hearing the prophet's prophecy, the captain had been in a bad state, silent and increasingly gloomy in his eyes. But Eurylochus never expected him to go to this extent – to sacrifice his crew willingly.
Eurylochus never thought Odysseus had an obligation to save everyone, but he couldn't accept his friend turning into a cold-blooded monster. So he told himself that the captain just couldn't think of a better way, and that Odysseus hadn't expected those six men to sacrifice themselves. He confronted his friend, praying that the other would answer as he deceived himself, but he didn't. Odysseus covered his face with his messy hair and roared two words: "I can't!"
The hunger grew fiercer, and he took a deep breath, remembering what Odysseus had told him – not to eat the cattle of the sun god.
This meant there were cattle ahead… Even if eating their meat meant death, it was still meat that could fill their stomachs. He stepped forward and patted Perimedes on the shoulder: "... I have a not-so-good idea, but I think you'll want to carry it out."
He knew the captain would eventually return home; otherwise, based on his understanding of Odysseus, the latter wouldn't have become gloomy instead of desperate after meeting the prophet. Since that was the case, whatever choices they made wouldn't drag the captain down.
"There are cattle ahead. Their meat can fill our stomachs, but we'll also incur the wrath of the gods and meet our end. What would you choose, my friend?"
Perimedes laughed: "You know perfectly well, Eurylochus, that most of us feel no difference between living now and being dead."
The two men fell silent, as if calmly accepting the fate that was approaching. After a moment, Eurylochus left the deck and entered an empty room. With the death of his friends, more and more dormitories were becoming vacant. He took a deep breath and sat down on the deck.
"Hey Ares, I don't know if you can hear me. I know our last encounter wasn't pleasant." He paused, feeling a bit awkward talking to himself like this, but continued, "Look, my companions and I have made up our minds to die because the suffering of hunger is too long. So, I want to say goodbye to you."
There was no response. Eurylochus didn't know if his words were heard by the god of war. He knew the other god always loved bloodshed and could understand his indifference to the lives of other mortals. But a few days ago, when his comrades had just died at the throat of Scylla, his boyfriend's nonchalant tone was still hard for him to accept. Ares just laughed and mocked Odysseus' cowardice in not facing the enemy head-on, which was also what Eurylochus didn't want to hear.
They had an argument then. But now that Eurylochus had made up his mind to give up his life, continuing the cold war made no sense.
"Uh, that's about it." He fell silent again. In fact, it was meaningless, wasn't it? The gods lived such long lives; how could he care about the death of a mortal?
Eurylochus sighed, stood up, and walked out of the empty room. Ares didn't respond. The man thought bitterly that maybe he had been too optimistic; in fact, Ares had broken up with him completely.
The next day, he and his comrades all agreed on the plan to eat the beef and die, and they carried it out as such. Odysseus looked pain, and he ordered them to row faster, but all thirty-six crew members knew they had no hope of survival; they had accepted it the night before. At least they would die full, and that was enough.
But strangely, nothing happened; no god became angry. The fleet was puzzled until a tall figure landed on the ship and ran quickly towards Eurylochus.
"Eury!" His tone was almost panicked, "You don't know how… It's good that this has been resolved. You won't die, at least not so soon, my love."
Everyone on the fleet was stunned. Who would tell them what was going on???
"It's a good thing you're not the first to eat the cattle. I mean, you're the first mortal, but other gods have done similar things. Hermes paid with his lyre, and what I have is not inferior to what he had." Eurylochus found the other's tone cute, like a child comparing toys. But it didn't lessen his confusion.
"I thought we broke up?" He asked cautiously.
Ares was stunned. Then the god of war erupted, roaring, "What? No!" The ship was rocking slightly because of his roar. Eurylochus was worried that the ship would be overturned, so he quickly soothed him: "No, I mean, of course I don't want to break up, but yesterday when I talked to you, you ignored me."
"That's because I was preparing an apology gift!" Ares was still roaring, but the ship had stopped rocking. After he finished speaking, he hesitated for a moment, looking somewhat embarrassed: "Uh, I'll leave for a while… I'll come to you tonight, Eury."
The tall figure left, leaving the stunned crew and the stunned Odysseus, who was also shocked but more relieved.
"... It's good that you're still alive," Odysseus said. "I have something to ask you, Eurylochus, but we'll talk about it later."
He left. Eurylochus knew his friend would leave the crowd whenever he was emotionally upset; he didn't want too many people to see how much he cared about his friends. He smiled, happy to see his familiar captain back. The rift was still inevitable, but… things were getting better.
Now he had to face the crew's questions.
51 notes
·
View notes
Text
I will posted here too regarding to forever
To his tweets
(pedofilia,rascism,antisement)
I will be no longer creating any content around forever.
Those behavior shouldn’t be normalized in any sense and I feel incredibly sorry for whose effect by his actions.
And I hope to see people speaking more about this.
Forever see that people were talking about his past action and instead of clearing his action with his fanbase, he goes back to deleted his tweet ( getting rid of the evidence)
Even with more explanation,
I will still be no longer creating any sort of content around him.
Edit: I will be deleting all the art I have involved him as well
33 notes
·
View notes
Text

By: Natalie Andrews and Douglas Belkin
Published: June 30, 2025
The Trump administration informed Harvard University that its investigation found it had violated federal civil-rights law over its treatment of Jewish and Israeli students, putting the federal funding of the nation’s oldest university further at risk.
The investigation is the latest in the battle between the White House and Harvard. The Trump administration has sought to make the wealthiest U.S. university exhibit A in its fight against liberal institutions it says didn’t take antisemitism and DEI concerns seriously.
In a letter sent to Harvard President Alan Garber on Monday and viewed by The Wall Street Journal, attorneys for the administration said the investigation found that Harvard knew Jewish and Israeli students felt threatened on its campus and acted with deliberate indifference.
“Failure to institute adequate changes immediately will result in the loss of all federal financial resources and continue to affect Harvard’s relationship with the federal government,” the letter states. “Harvard may of course continue to operate free of federal privileges, and perhaps such an opportunity will spur a commitment to excellence that will help Harvard thrive once again.”
Harvard didn’t immediately respond to a request for comment.
A formal “notice of violation” of civil-rights law generally is a step that can come before either a lawsuit from the Justice Department or a voluntary resolution with the school. Under past presidential administrations, civil-rights investigations at universities usually ended with voluntary resolution agreements.
In May, the Trump administration issued Columbia University a similar notice that a government investigation had found the school in violation of civil-rights law for allegedly failing to protect Jewish students from harassment. Columbia is also negotiating with the administration over its federal funding and autonomy.
The letter to Harvard said the university failed to act for two years while Jewish and Israeli students were assaulted and spit on. As a result many concealed their identities for fear of being harassed. It also states that images of antisemitic tropes were widely circulated on campus, including one that “showed a dollar sign inside a Star of David,” and that the campus was vandalized with antisemitic symbols, including one with “an Israeli flag with a swastika in place of the Star of David.”
Harvard in late April released its own internal reports on campus antisemitism and anti-Muslim bias that portrayed a divided campus where students on both sides of the Middle East conflict felt unsafe in the months after the Hamas attacks on Israel on Oct. 7, 2023. The university laid out changes it has made or was working to implement.
The findings are part of the Trump administration’s broader push against universities. Earlier this year, it gave Harvard a list of demands, including requirements that Harvard allow federal-government oversight of admissions, hiring and the ideology of students and staff. The school rejected the administration’s proposal. The administration then said it would freeze more than $2 billion in grants and contracts.
Trump has also tried to block Harvard’s ability to enroll international students and threatened its tax-exempt status. Harvard has sued the administration, saying the government has violated its First Amendment and due-process rights.
Earlier this month, Trump seemed to indicate that the university and administration were close to reaching some sort of deal. The president praised Harvard on social media, saying: “They have acted extremely appropriately during these negotiations, and appear to be committed to doing what is right.”
==
Notice Harvard tried to obfuscate, trying to pretend that it was a broad failing - including "anti-Muslim bias" - rather than an endorsed culture and tolerance of rampant antisemitism.
Nobody was targeting Muslims. They were targeting Israelis and Jews, or those perceived to be.
#Steve McGuire#Natalie Andrews#Douglas Belkin#Harvard University#civil rights#civil rights violations#antisemitism#israel#academic corruption#higher education#religion is a mental illness
2 notes
·
View notes
Text
its like. really shitty that. its so hard in many cases to distinguish "this person is discussing this situation and taking nuance into consideration" from "this person genuinely holds beliefs that i cannot support or stand by"
esp wrt conversations about pale/stine and isr/ael right now.
its so easy to look at a blog saying "the (specifically colonial) state of isr/ael & the id/f have been doing horrible things to pale/stinians since it was formed" and go, yeah that makes sense. it's also easy to scroll down and see the same person saying "remove isra/elis from the land entirely" or "kill them all" and go hey now. absolutely not
it's easy to look at a blog saying "antise/mitism is yet again on the rise in america in response to what's happening in ga/za" and go, yeah that makes sense. it's also easy to scroll down and see the same person saying "isr/ael has a right to defend itself and the 30,000 civilian palestinian deaths over the past 5 months are justified/a necessary evil/all ha/mas fault" and go hey now. absolutely not.
it's not so easy to determine clear cut positioning from people saying, like, "antizi/onists are just antise/mites" or "zi/onists are delusional". Too many people use too many different definitions of what 'zi/onism' means to them. Maybe to them zi/onism is the belief that je/ws deserve to be safe and have a place to live (yes, true of everyone). Maybe to them zi/onism is the belief that isr/ael is the Only place je/ws will ever be safe. Or maybe to them, zi/onism is indicative of a full support for the isr/aeli gov'ts actions and the constant oppression of pale/stinians over the past 70+ years.
The same goes for discussions of ha/mas. To some, support for ha/mas is seen as support of a terr/orist organization, point blank. To some, support for ha/mas is seen as support of a resi/stance ar/my that was formed due to the constant oppr/ession of pale/stinians in their own lands. To some, the truth lies somewhere in between these things- that ha/mas is a res/istance ar/my that has done violent acts in the name of resi/stance, and these acts have had casualties, and people are bound to have mixed feelings about that, as they had mixed feelings about the zydow/ska orga/nizacja bojo/wa, because people will the majority of the time want to say there is a peaceful solution to any problem.
idk. language is hard and nuance is hard and belief systems are contradictory or incompatible and. like on a personal level it makes me really sad to see bc it turns into this divisive "if you use this word/phrase or discuss this concept you are anathema to me" which is ofc our right. we can curate what we do and dont see in the future. but it also leads to a lot of stress and paranoia when it comes to even being able to have these conversations.
and obviously as. a non-pale/stinian non-je/w. putting my voice forward in the larger conversation is decidedly not my place, which is why im making this borderline unreadable so it stays here between me and the people who have already decided i probably dont suck too bad.
#“add tags” absolutely fucking not ideally this will get zero notes ever#this is intentionally barely readible because if someone finds this through tags or word searching i will literally throw up#also i learned abt je/wish authorities in pal/estine sending parachutists to hungary and slovakia in 1944 to give aid to je/ws in hiding#which. im going to go do more reading on actuallt
0 notes
Text
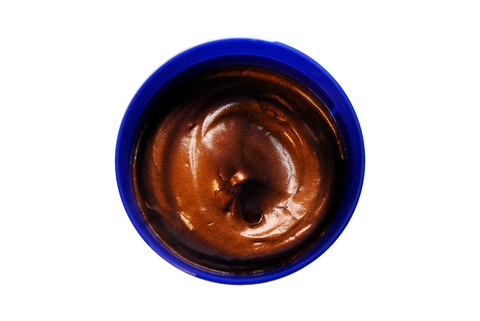
MOSIL Anti-seize Compound & Lubricants What Is An Anti-Seize Compound?
Particularly, when an anti-seize compound is applied to bolts and gaskets during assembly, it assures they can be tightened without thread damage and also dismantled easily. In addition to these, anti-seize also prevents galling.
You might wonder, what is galling? Don’t worry, we will explain it to you. Galling generally refers to cold welding of bolts in nuts due to excess pressure and friction caused during assembly.
Above all, the anti-seize compounds serve the purpose of preventing dissimilar metals from getting corrodes in immensely corrosive surroundings and also enhance the performance of machinery.
0 notes
Note
“Let me help you.” for areum !
four word starters! with @actwo }
a woman must be -a woman should be -
areum’s mother’s voice rings past the headphones she has in her ears. scolding, echoing and reminding areum exactly how inappropriate the scratches up and down her legs are.
recently, areum’s been looking like everything that would make her mother scream. inappropriate in less than appropriate places.
there’s nothing inappropriate about a school library. nothing strange about it unless it’s ass o’clock and the only people here are the losers with the shifts no one would take. it’s not a late-night shift though, in fact it’s a fairly early shift. she couldn’t head to her dorm, figuring her roommate would grill her about coming home late last night from the competition.
she remembers a rather important term paper ( punishment ) on the evolution of graphic design is due tonight and she hasn’t started and uses that excuse. she’s in the library, grabbing books from each and every shelf and ignoring the pain in her legs until she’s reaching for a shelf that’s a little too high and nearly slipping off the stool and adding another bruise to the collection. she regains her footing.
but of course someone is calling her out on it.
“you can help me by locating some antise - antier - ampliso --- something so I don’t bleed out.” she won’t bleed out. in fact she’s not bleeding much at all, just a grazes from when her legs skidded across the ground.
“or a beanbag so I don’t fall to my death.”
#actwo#{ inbox: areum. }#( fufuufu here's my darling! thank you for sending! send more send them all if you want!#( let me know if I should change anything!#( and feel free to make it a thread!
1 note
·
View note
Text
COPPER PASTE Market Risk, Industry Upstream, Forecast and CAGR 2017-2025| Planet Market Reports
COPPER PASTE Market Risk, Industry Upstream, Forecast and CAGR 2017-2025| Planet Market Reports
COPPER PASTE is a high temperature antiseize lubricant. A soft, coppercoloured paste, based on micronized copper powder and synergistic antioxidant, anticorrosion and antiwear additives suspended in premium grade stable oil. It is an effective antiseize formulation, preventing metaltometal contact, seizing, galling, and fretting corrosion. This report is a must-read for entrepreneurs, investors,…
View On WordPress
#Copper Paste#Copper Paste Market#Copper Paste Market Forecast#Copper Paste Market Growth#Copper Paste Market Share#Copper Paste Market Size#Copper Paste Market Trends#Planet Market Reports
0 notes
Link
Mosil Lubricants offers speciality lubrication solutions based on various product groups such as Moly, Graphites, Silicons, Synthetic Functional Fluids etc. by way of greases, oils, pastes, powders, aerosols, emulsions, cleaners etc.
0 notes
Text
Upgrading Your Barn Find with CPP Disc Brakes
Now that some of the cobwebs have blown off of our 1946 Chevy project since it was hauled out of the barn by Scott Roth, co-owner of Rothspeed in South Burlington, Vermont, we’ve already made plenty of progress by updating the original frame with a new suspension to add plenty of newfound handling capabilities. By laying out a solid plan for your upgrades and keeping within a reasonable budget, it’s easy to bring your vintage hauler back to the streets to enjoy once again.
With the suspension and frame already addressed, the next task at hand was tending to the brakes. While the original factory braking system might have been great in 1946, by today’s standards the old binders are about as good as tossing an anchor from your bed when you need to stop and hoping for the best. Regardless of whether you are building your truck from the ground-up or simply looking to enhance your existing ride, an upgrade to four-wheel disc brakes is a great step for both performance and safety.
Since our truck has been updated with a Fatman Fabrications Mustang II Stage III IFS and a Speedway Motors–supplied Currie Enterprises Universal 9-inch Hot Rod Rear Axle Housing Kit it was time to decide on a new braking system. We contacted Classic Performance Products (CPP), as they offer a multitude of options for our application needs. By combining all the right parts within their kits, CPP has made it easy to choose which packages are perfect for your personal needs. After reviewing their offerings we decided to opt for four-wheel disc brakes by combining two of their complete bolt-on packages.
Our selected front brake kit, designed to work with stock or drop Mustang II spindles, included 11.75-inch vented rotors that we upgraded to slotted cross-drilled units for a nominal fee, exclusive big-bore calipers, forged aluminum hubs, and all parts to complete the installation. Out back their kit for adapting disc brakes to a Ford 9-inch rear had everything we needed, including upgraded 11.75-inch slotted and cross-drilled rotors, calipers, mounting hardware, hoses, and bearings to make installation a snap. The boost in performance will truly make a difference once we hit the streets. Let’s follow along as Roth takes on the installation.
The completed chassis for the 1946 Chevy was prepped on the frame jig and ready for the installation of Classic Performance Products’ four-wheel disc brake upgrade to give the truck newfound stopping power.
Our kit arrived with everything needed to take on the disc brake conversion for adapting to our Mustang II–style spindles. Included in the kit were 11.75-inch slotted and cross-drilled rotors, forged aluminum hubs, big-bore calipers and all mounting hardware, hoses, and bearings to complete the installation.
Here you can see the completed installation of Fatman Fabrications Mustang II Stage III IFS ready to accept the CPP disc brake upgrade.
To start, the upper anchor was attached to the caliper bracket using the provided hardware in the kit.
The caliper bracket with the upper anchor was then loosely attached to the upper brake boss on the spindle using the provided 1/2-20×2-1/2-inch bolts and lock washers.
Next, attach the lower portion of the caliper bracket to the lower brake boss on the spindle using the provided spacers and 7/16-14×2-inch bolts. Then tighten to recommended specs.
Here you can see the completed caliper bracket installation to the Mustang II–style spindle.
The kit includes new forged aluminum hubs along with studs, bearings, seals, and related mounting hardware.
Pack the inner and outer wheels bearings with a good high-temperature disc brake multi-purpose wheel bearing grease to prepare them for installation to the hub.
The inner wheel bearing was then installed into the hub.
After adequately greasing the inner wall of the hub, the seal was set in place and a seal driver was used to properly seat it to the hub.
The hub assembly was then slid into place onto the axle pin.
Once the inner wall of the hub was greased, the outer wheel bearing was installed, followed by the washer and spindle nut. From there it was time to adjust the wheel bearings.
Roth followed the detailed instructions from CPP to adjust the wheel bearings. First tighten the spindle nut slightly to no more than 12 lb-ft and follow by spinning the hub in a forward direction to ensure the bearings are fully seated. Next, check to see if the spindle nut is still tight. If not, repeat the initial step.
Next, loosen the spindle nut slightly.
Hand-tighten the spindle nut and then install the nut cage and cotter pin. CPP advises to never use a wrench during this step.
To complete the hub, the bearing caps are tapped into place. Roth uses a section of pipe and a hammer to handle the job.
Slip the rotor over the wheel studs and onto the hub assembly. A couple of wheel lugs can be used to hold it in place during this step.
The new calipers come with the pads already loaded into the assemblies. We opted to have ours powdercoated in black. The calipers are installed with the bleeder screws to the top. Roth also added a good coating of antiseize to the sliding surfaces.
The completed install of the front disc brakes look great and will surely add plenty of newfound stopping power.
For the rear disc brake conversion our kit was packed with everything needed to adapt to a Ford 9-inch rear, including 11.75-inch slotted and cross-drilled rotors, calipers, mounting hardware, hoses, and bearings to finalize the installation.
Here you can see the mounting brackets, shim plate, and related hardware provided to complete the installation of the CPP rear disc brake upgrade.
With your axle slid into the axle housing see if your axle bearing protrudes 1/8 inch or more past the rear axle flange. If so, use the provided 1/8-inch-thick bearing retainer spacer to make up the difference. This is used to take up the space where the drum brake backing plate would have been. (Note at this time our wheel studs have not yet been installed to the axles).
The bearing retainer bracket was then installed to the axle housing flange with the provided T-bolts from the kit.
Follow by installing the caliper mounting bracket to the bearing retainer bracket using all of the required shims between the brackets. At each mounting point you should have two of the 3/8-inch shims along with one each of the 1/4- and 1/8-inch shims. The assembly sequence is mounting bolts through the bearing retainer bracket followed by shims, caliper bracket, washers, and nuts.
The rotor was then installed onto the wheel studs with lug nuts used to hold it in place.
Roth then added a good coating of antiseize to the rear caliper slider bolts, followed by reinstalling them to each assembly.
The caliper with pads was then installed over the rotor and onto the caliper mounting bracket with the bleeder screws to the top using the provided hardware. At this time check to see that the rotor is tight to the axle and sitting flat against the axle flange. If not you will need to make a shim adjustment to correct the alignment. Once completed, tighten all caliper mounting bolts to 47 lb-ft.
The completed rear disc brakes look great and are the perfect upgrade to give your truck plenty of enhanced stopping power.
The post Upgrading Your Barn Find with CPP Disc Brakes appeared first on Hot Rod Network.
from Hot Rod Network https://www.hotrod.com/articles/upgrading-barn-find-cpp-disc-brakes/ via IFTTT
0 notes
Text

Anti-seize Compounds and Lubricants
Mosil anti-seize compounds are best in preventing galling and seizing of the tightening parts like nut bolts.
0 notes
Text

Moly Based Anti-seize Compound
It is a highly concentrated microsize molybdenum disulphide based multipurpose assembly/lubricating paste fortified with special additives to withstand very high temperature and extreme loads. It is most ideally suitable as an assembly paste for grease lubricating system to ensure freedom from scuffing and scoring. MOSIL GM-50 eliminates metal to metal contact between nuts and bolts preventing them from seizing leading to breakage under extremely heavy load.
0 notes
Link
Anti-seize Compound for preventing seizing & galling of metal parts
We are Industrial Lubricants Manufacturers in India providing Specialty Lubricants and Rust Prevention products like Aerosol Spray, Antiseize Compound, Grease, Oil lubricants and many more.
0 notes
Link
Manufacturers of anti seize paste and compound
0 notes
Text
A front drive system to make LT1/LT4 engine swaps much easier
The huge aftermarket support for the LS-series of engines has us a bit spoiled. Swapping an LS into just about anything is nearly effortless these days, so when GM launched the new LT series of engines we knew we would have to make some adjustments. The new LT engines offer some really cool innovations, such as direct injection, but there are challenges as well. The main obstacle was the fact that no LT engines (LT1 or LT4) runs a belt-driven power steering pump. New cars have transitioned to electric power steering pumps, but grafting that system into a classic is expensive and complicated.
What was needed was a way to integrate a hydraulic power steering system onto an engine that was never designed to accommodate it. Enter Drive Junky. They have been churning out LS and Gen I drive systems since 2012 and were quick to start figuring out how to make a swap-friendly drive system for GM’s new line of LT engines. In addition to solving the power steering issue, Drive Junky wanted to integrate a Sanden A/C compressor that would play well with aftermarket A/C systems, like those from Vintage Air, and clear the obstacles found when doing engine swaps.
But Zach Schary, owner of Drive Junky, didn’t want to just make a GM-style drive system with power steering. He wanted to make a stronger, better looking system that would eclipse what the factory offered in every way. The brackets are all 6061 billet aluminum and are polished before being hard anodized. As Zach told us, “We utilize heavier stock and machine away more material than our competition. This minimizes additional parts (spacers) needed and results in a better, stronger fitment. This is more expensive and labor intensive than the ‘plate and spacer” tech you see elsewhere, but our goal is to have the highest quality kit possible.”
We had an LT1 engine for a swap project and have been working through the requisite learning curve of the new LT architecture. To make things even more complicated we had bolted a Magnuson supercharger to the top and had to deal with one more very critical belt. After talking with Zach we felt he had a fix for our problems, so we ordered a kit and set about getting our blown LT1 closer to installation.
1. Our LT1 came to us from Chevrolet Performance with a Corvette-style water pump and damper. So, first up was to sell them (surprisingly easy since they were on backorder new) and buy the Camaro water pump and ZL1 LT4 damper. This install is for an LT4 kit since our LT1 is topped with a Magnuson Eaton-based blower. Drive Junky does make a kit for the naturally aspirated LT1 as well as the ever-popular LS platform. The kit can also accommodate an ATI overdrive damper and overdrive blower pulley; up to 15 percent for max power.
2. We really like the design of the Drive Junky brackets since they seemed like they would be very sturdy. As Drive Junky’s Zach Schary told us, “Our brackets are cut from solid blocks of billet 6061 aluminum instead of the more common ‘thin plate and spacer technology’ often seen in the industry. We also package our fasteners with the associated brackets to eliminate guesswork and make the install go faster. When the pulleys and brackets are cut the way we do, it allows greater accuracy, fewer parts, better more consistent belt alignment, and long term reliability.”
3. First up was the alternator bracket. Before installing, we removed and relocated the small wire bracket that was attached to the driver-side head. The two-piece alt bracket mounted to the LT engine using two M10 85mm and one M8 85mm stainless bolts. All the stainless bolts in this installation were dabbed with a bit of antiseize.
4. The Powermaster single-wire 170-amp alternator was then secured to the bracket using two M10 65mm bolts and a pair of stainless locking nuts.
5. Moving to the passenger side of the LT, we prepared to install the tensioner bracket by removing the three factory bolts (red dots). These hold the water pump to the engine, so by doing one side at a time we didn’t have to worry about the gaskets.
6. The tensioner bracket and idler assembly were then installed using three M8 stainless fasteners. All of the billet 6061 aluminum brackets and pulleys are polished before being hard anodized.
7. The Gates heavy-duty tensioner was then installed using an M10 85mm fastener. The tensioner indexed to the bracket by way of a small pin on the rear that locked into a corresponding hole on the bracket.
8. Next up was the idler for the supercharger. There was a small stainless shim with the idler and it’s critical that this be used between the pulley and the boss on the water pump where the blower idler mounts.
9. After installing the blower belt idler we made sure it spun freely. All of the idlers feature a dual-bearing system that runs on unique stainless steel axles. This makes them ideal for high-rpm and long-term reliability.
10. Like the tensioner bracket, the power steering pump bracket used three water pump bolt locations. It was installed using two M8 85mm bolts on the bottom and an M8 90mm bolt in the top spot. Getting a power steering pump is one of the biggest advantages of going with an aftermarket pulley kit such as this.
11. We were pretty happy when we found that the aluminum GM type-II power steering pump already had the billet pulley pressed on. This saved us a time-consuming step, which would require an installation tool.
12. The pump bolted to the bracket using three M8 30mm stainless fasteners. To access these bolts the pulley has two holes in it. One is for the 12 and 6 o’clock positions and the other is for the bolt at 9 o’clock.
13. Another bonus that we really appreciated was that the Sanden A/C compressor came fully assembled and ready to bolt to our blown LT1 engine. If you look close at the A/C bracket you’ll notice two threaded holes for the main drive-belt tensioner.
14. The A/C compressor assembly was then bolted to the lower passenger area of the LT engine using one M8 and one M10 fastener. We’re pretty sure that it couldn’t get any easier than this.
15. Remember those two holes in the A/C bracket we mentioned earlier? Well, we used them to install the tensioner for the accessory drive belt. One advantage with this kit is that the supercharger belt only drives the supercharger and nothing else.
16. Since this LT isn’t installed in the Chevy yet we wanted to keep the compressor sealed up so we skipped installing the fitting block for the A/C lines.
17. The accessory drive belt, as the name implies, only runs the water pump, A/C compressor, alternator, and power steering pump. The kit comes with Gates’ RPM racing belts. These are made from a high-modulus, low-stretch polyester tensile cord with the strength to transmit load more accurately and with less vibration.
18. Last to go on was the blower belt. Now, this kit was designed to work on an LT4 engine, but our Magnuson uses a larger blower pulley so the included eight-rib belt was too short to work. We ended up grabbing a Gates K080496RPM belt that was the right length. If you order one of these kits from Drive Junky make sure you tell them exactly what engine combo you’re running so they can include the proper length belt.
Holley LT1/LT4 Swap-Friendly Oil Pan
The Drive Junky pulley system solved our power steering issue, but the oil pan that came on the LT1 was another installation obstacle to get past. The sump shape didn’t want to clear our crossmember and the large plate-style oil cooler interfered with the beautiful Ultimate Headers that came with our Art Morrison Enterprises chassis. The solution was this new wet-sump LT1 oil pan (PN 302-22) from Holley. It ditches the large side-mounted oil cooler and has a swap-friendly sump shape.
19. The Holley pan is cast aluminum like the GM pan, but the shape is far more conducive to swaps into classic Chevys. The Holley pan can accommodate up to a 4.000-inch stroke and has all the OEM bellhousing attachment points.
20. We went with the race version that had a trap-door baffle system. They also offer a slightly less expensive version (PN 302-20) that has a traditional anti-slosh plate. The pickup sealed to the pan with an included O-ring.
21. Once the baffled sump was in place we could install the included windage tray and the rest of the parts.
22. Fun fact: The new GM LT engines don’t use an oil pan gasket, just a large bead of RTV. We’re not sure if this can be considered progress. However, we are happy now that we can bolt on both of our headers and that our blown LT1 will clear our AME chassis.
Sources:
Art Morrison Enterprises
800.929.7188
artmorrison.com
Chevrolet Performance
chevroletperformance.com
Drive Junky
323.363.6070
drivejunky.com
Holley
270.781.9741
holley.com
Magnuson Superchargers
805.642.8833
magnacharger.com
The post A front drive system to make LT1/LT4 engine swaps much easier appeared first on Hot Rod Network.
from Hot Rod Network http://www.hotrod.com/articles/front-drive-system-make-lt1lt4-engine-swaps-much-easier/ via IFTTT
0 notes
Text
Bolt-On a Small-Block Billet Serpentine Accessory Drive
The accessory drives—meaning the pulleys and belts used to drive stuff like water pumps, generators/alternators, power steering pumps, air conditioning compressors, and the like—used on all vehicles from the Model A up to late-1970s cars all used the basic V-belts and grooved pulley arrangement. It was simple to understand and worked just fine, but that skinny V-belt tends to slip when the loads get big (like an A/C compressor engaged or a high-drag power steering system), and the multiple V-belts often required to drive all of the accessories looked plenty ugly.
That changed with the introduction of the serpentine belt; a single, flat, grooved belt that wrapped around the pulleys like a snake (hence the name serpentine) and had much wider contact points with the pulleys for less slippage. Plus it is easier to remove and replace since all you need is a ½-inch ratchet or breaker bar to move the idler pulley out of the way and then slip a new belt on or off. It looks much “cleaner” as well.
Hence the popularity of swapping V-belt drives and steel pulleys with factory or, better yet, modern billet aluminum serpentine pulley kits on early Mustangs. You wouldn’t do it on a correctly restored car, but even a basic restomod these days often gets a serpentine accessory drive system. To alleviate any fear you may have about installing one, we present this story on how we bolted an Eddie Motorsports S-Drive system on a small-block 302 Ford.
Two things to note: because of the design of this and many other serpentine pulley systems, an electric cooling fan and fuel pump must be used, as there are no provisions to run the mechanical drives with these kits.
The Eddie kit we used is part number MS107-63 for an 8.2-deck small-block Ford and comes with all of the necessary pulleys and brackets machined from 6061-T6 billet aluminum. That includes a billet aluminum timing cover with all mount points built in (nothing mounts off of the cylinder heads), allowing the system to universally fit all small-block Fords regardless of timing cover/water pump configuration. The kit also includes new accessories from American companies such as Power Master (170-amp one-wire alternator with a billet aluminum fan and pulley are already installed), Sanden SD7 air conditioning compressor (uses R-134a refrigerant), a Ford Performance reverse rotation water pump, Maval compact, late-model GM Type II power steering pump, a Gates “off the shelf” spring loaded tensioner and six-rib Serpentine belt, and all necessary stainless steel fasteners, O-rings, and gaskets where required. There are options for power steering pump reservoirs and other things for custom fitments, and there are seven available finishes: Raw Machined, Bright Polished, Bright Clear Coat, Gloss Black Anodized, Matte and Gloss Black Powder coat, and Clear Anodized.
Follow along and you’ll see that installing this S-Drive system is really not much more difficult than replacing a water pump, yet goes a long way in giving a modern restomod look to any engine compartment.
1. The engine we started with is a 306ci small-block from Blueprint Engines (which we purchased from Summit Racing). It was stripped of its intake manifold, exhaust, and front timing cover in preparation for the serpentine system installation. The reason this Ford is painted orange is that it’s destined to go in a 1957 Thunderbird custom.
2. The Eddie Motorsports S-Drive system we’re installing uses the matte black powdercoat finish.
3. The system comes with a new Sanden A/C compressor and Powermaster 170-amp one-wire alternator with pulleys already attached; a Ford Performance reverse rotation water pump; a compact, highly efficient GM power steering pump (in our case with the factory plastic reservoir mounted to the pump for easier and cleaner plumbing); and a Gates serpentine belt.
4. Two things you can’t use with this serpentine kit are a mechanical fuel pump and mechanical fan, so after removing the stock water pump and timing cover, remove the fuel pump eccentric from the cam gear and replace the cam bolt after hitting it with some Red Loctite.
5. To prevent galling the stainless steel fasteners, coat all the threads with a dab of antiseize. Likewise, there are four 5/16-inch mounting studs that go into the water jackets, so pay attention to the instructions and use RTV silicone sealer on those fasteners to prevent water leaks.
6. With the four cover mounting studs screwed into the block (by the water pump cooling passages), and appropriately sealed gasket in place, and the supplied rubber seal glued to the bottom of the cover, slide on the billet aluminum timing cover.
7. Four 5/16-18×2-inch socket head capscrews in the holes closest to the bottom fasten the cover in place.
8. In this case we used a Fluidampr damper, but whatever you go with, the Eddie kit uses a four-hole damper with a maximum 6.40-inch diameter and 3.950-inch overall length (such as Ford M-6316-M50). This kit has a measurement of 4.71 inches from face of the balancer (pulley mounting surface) to the block surface, so if yours varies from this, you’ll need to buy the appropriate crank spacer to compensate for the variance. Always use the correct damper installation tool and not a hammer and block of wood to press the damper in place. We did; this electric impact was just used to tighten the damper bolt.
9. The power steering bracket goes on next with two 3/8-inch capscrews. It bolts to the right side of the cover (facing the engine). If your timing pointer is on the passenger side you can reinstall it. If it’s on the driver side, you can use the new pointer included in the kit and attach it with two 1/4-20 bolts on the bottom left of the cover. Don’t forget to check its accuracy at top dead center!
10. The Ford Performance water pump installs with a gasket and a thin coat of RTV sealer. Just slide the pump over the mounting studs and fasten it with the supplied 5/16-18 socket head capscrews and stainless steel “standoff posts.”
11. These are the “standoff posts” that mount the bracket to come next. Make sure they’re installed with the grooved ends facing the water pump. The opposite (front) end of these posts have metric thread that are easy to booger up if you’re not careful. Again, be generous with the antiseize here.
12. Tighten the fasteners to secure the pump in place.
13. Now install the main bracket using four M8x1.25x25mm button head capscrews and AN washers. Make sure the standoff posts are only finger-tight before installing the capscrews, and use antiseize on all of the threads.
14. Next up is the water pump pulley, installed with Loctite to securely hold the screws in place.
15. Now the crank pulley goes on with four 3/8-inch capscrews on top of the “cone” of the Belleville cupped spring washers and more Loctite.
16. The alternator bolts to the main plate with four 3/8-16×4.5-inch button head capscrews. Use the 3/4-inch-long stainless steel spacer on the bolt and positioned between the back side bottom mount of the alternator and the timing cover. The top fastens with M8x1.25x25mm capscrew and AN washer.
17. The power steering pump bolts to the main plate with two 5/16×3-inch capscrews and lock washers.
18. We ordered the power steering pump with the reservoir attached, in which case this fitting and hard line should be installed (just finger-tight) prior to the pump going on. It will be removed later to install Teflon power steering hose after determining the length in our custom application.
19. The A/C compressor installs to the main plate with two M8x1.25 capscrews and AN washers, one each on the top and bottom mounts. Hand-tighten only at this point. On the bottom side, apply antiseize to the threads of the 1/2-inch shoulder bolt and washer and thread into the timing cover.
20. The A/C compressor is charged with nitrogen for lubrication during transport and this cover keeps it in, so only do this step when you’re ready to install the A/C lines and charge the system. We did it early to show you how it goes together. The first step is to remove this plate and replace it with the compressor manifold. While loosening the plate you’ll hear the gas escaping a little bit and then see two sealing O-rings once you remove the plate—making sure not to nick or damage the O-rings, install the manifold with two M8x25mm capscrews and fully tighten (but don’t over-torque it).
21. Install the belt tensioner on the main bracket with the supplied 3/8×2.25-inch hex bolt with Loctite.
22. A 1/2-inch drive ratchet or breaker bar fits into the little square opening of the tensioner and allows you to rotate it down in order to install the belt.
23. This billet aluminum cover hides the semi-ugly cast tensioner with two 10-32×3/4-inch socket head capscrews. Handy Tech Tip: We have learned in the past to always keep the little Allen wrench in the glovebox—if you need to swap a belt on the road and need to access the tensioner, you’ll need that tiny wrench to get this cover off.
24. And that’s it—the Eddie Motorsports S-Drive accessory bracket system installed on our small-block Ford. The engine’s owner is putting it into a ’57 T-bird, hence the Ford Red-Orange paint and valve covers. That’s a Holley Sniper fuel injection system on a Weiand intake.
Sources
Eddie Motorsports
(888) 813-1293
EddieMotorsports.com
Blueprint Engines
(800) 483-4263
BlueprintEngines.com
Summit Racing
(800) 230-3030
SummitRacing.com
Holley Performance Products
270-781-9741
Holley.com
The post Bolt-On a Small-Block Billet Serpentine Accessory Drive appeared first on Hot Rod Network.
from Hot Rod Network http://www.hotrod.com/articles/bolt-small-block-billet-serpentine-accessory-drive/ via IFTTT
0 notes
Text
Upgrade Your Suspension With a Fatman Fabrications Mustang II Stage III Kit
We’ve all heard the stories of turning down an old farm road or cutting through cornfields to find a pot of gold at the end in the form of a tattered old classic truck. Regardless of whether its final resting place was in a meadow or a cobweb-filled barn, once you haul your prize home it’s time to evaluate its future and just what you plan to do with it. You could easily approach it with the idea of a taking on full restoration, going resto-mod or fully custom. If you choose either of the latter you literally have a blank canvas of options to select from when taking on the build.
One of the most important areas to focus on is developing a proper chassis that will give your truck an improved stance and better handling, along with a rock-solid base to work with. If your truck has a nice, solid original spine there’s nothing better than utilizing it to upgrade it with the right balance of new components to give it a new life. On a recent visit to The Auto Shoppe in South Burlington, Vermont, we met up with co-owner Scott Roth who had recently exhumed a bitchin 1946 Chevy pickup from a local barn. The truck had sat for decades and was all original, wearing its factory vibe covered with patina and sitting on four flat tires. It was a perfect candidate to use as a tech-build truck to illustrate just what could be done on a budget by retaining the originality of the truck’s exterior and interior while updating the chassis, brakes, driveline, and cooling system.
When it came to evaluating the truck’s suspension needs, we contacted Fatman Fabrications to look at our options for upgrading both the front and rear suspension. Here we will spotlight the front suspension with the rear to soon follow in another article. Regardless of whether you are a pro or homebuilder, there are plenty of options available to infuse just the right amount of handling into your project. With their Hub-to-Hub suspension kits there are a number of stages offered to support a multitude of makes and models. For our purposes we selected the Stage III kit featuring their exclusive lower crossmember, TIG-welded tubular steel upper and lower control arms, new spindles, G-tech tie-rod ends, QA1 adjustable billet coilover shocks, power rack-and-pinion, all brackets, and hardware. You also get an illustrated installation manual to help guide you through the preparation and installation of the new IFS.
To prepare for the installation, the team at The Auto Shoppe wasted no time in getting the Chevy onto the lift to separate the cab and bed from the chassis. This included disconnecting the fuel lines and battery, draining the cooling system, removing the radiator, disconnecting the throttle linkage, shifter, and steering column, as well as any electrical-related items. From there the bed was unbolted and removed along with the running boards. Finally, the cab and frontend were braced and separated from the chassis. Once the frame was inspected and found to be in great condition, it was stripped of its original suspension and blasted clean to prepare it for the installation. Let’s follow along as Roth and his team get busy adding plenty of newfound handling to our hauler.
Scott Roth, co-owner of The Auto Shoppe in South Burlington, VT, gave us a call recently after unearthing this wicked, clean 1946 Chevy from a local barn. It’s a perfect candidate for an updated factory chassis with new suspension to give it a better stance and improved handling.
The truck was bone stock, including its original front axle with leaf springs, lever-style shocks, and drum brakes.
It was tough as nails and always got the job done when it came to hauling. Here you can see the original front suspension once it was removed from the truck to prepare it for the installation of the new Fatman Fabrications Mustang II Stage III IFS.
It’s very important to establish the front axle centerline as it sets the placement of the wheel and tire in the fender as well as determining the wheelbase. First a plumb bob was used to set the line.
The line was then scribed onto the framerail as well as a punch being used to mark it on the outer, bottom, side, and top.
The stock frame was stripped of its original suspension and set on the frame table. There it was first leveled from side to side.
Fatman Fabrications recommends the hot rod–style forward rake of the frame, between 2-3 degrees, be taken at the “belly” of the frame. We set our rake at 2.7 degrees using a protractor and digital angle finder. The frame was then secured in place.
To prepare for the new IFS and rack-and-pinion, the radiator support/crossmember required trimming. The area was measured, marked, and trimmed with a plasma cutter, followed by a grinder with a 36-grit disc. Be sure to wear eye protection during this step.
The radiator support/crossmember are perfectly trimmed and ready for the next step.
The Fatman Fabrications Stage III IFS kit for 1937-1946 Chevy trucks comes with everything you need to make the conversion, including their exclusive front crossmember, TIG-welded upper and lower steel tubular control arms, new spindles, G-tech tie rod ends, QA1 adjustable billet coilover shocks, power rack-and-pinion, all brackets and hardware.
Since our Chevy has a channel-style frame we needed to box it for additional strength from at least 4 inches inside the firewall forward to 4 inches ahead of the axle centerline. To do the job, 1/8-inch hot rolled plate steel was trimmed and MIG-welded into place.
The new lower crossmember was then clamped to the bottom of the framerails, carefully locating the axle center marks. The topside of the crossmember was then leveled using a digital angle finder. Cross leveling measurements were then taken from the top of the crossmember with regard to frame width.
Here you can see a closeup of the digital angle finder confirming that the new crossmember was perfectly level.
From the side you can see the new crossmember clamped in place to confirm its location and prepare it for final welding.
The new crossmember was then MIG-welded into place.
In locating the new upper control arm mounts (camber plates) and upper coilover mounts a special tool was fashioned from 3/4-inch aluminum box tube with threaded rod to hold the camber plates at a specified distance of 28 inches (outer edge to outer edge, in our case). A plumb bob was then used to center the jig to the centerline of the crossmember.
Thanks to the jig, the camber plates were accurately secured at 28 inches (outer edge to outer edge) with the upper coilover mounts at 36 1/2 inches (center to center) for our application. Note the slots of the camber plate will interlock with the tabs of the upper coilover mounts.
This is the overall view of the jig supporting the camber plates and upper coilover shock mounts in place with everything clamped and ready for welding.
With all measurements confirmed it was time to tack everything in place and follow by final welding. Weld in short sections and allow ample cooling to avoid any warping.
With the final MIG welding completed you can see just how perfect the mounts look as they await the next step.
In preparation for installation all of the suspension components it’s recommended to use a healthy coating of antiseize on all the provided bolts. Roth prefers to use Wurth’s antiseize copper paste on all his builds.
The lower steel tubular control arm is set in place using the provided hardware with the straight tube of the arm to the rear of the chassis.
For initial mockup, the control arm hardware is left snug. Final tightening will happen once the truck is on the ground. This prevents excessive binding of the control arm bushings.
The new spindle is then bolted into place on the lower tubular steel control arm.
Mounting the upper steel tubular control arms, first insert the provided 1/2×2-inch bolts through the upper arm cross shaft. Three washers per bolt are then added to space the cross shaft away from the camber plate. These washers are a starting point for alignment.
The QA1 single-adjustable coilover shocks were then assembled and fitted in place. Antiseize lubricant should be used on all coilover threads to prevent galling.
Here you can see the completed assembly of the tubular upper and lower control arms along with the new spindles and QA1 single-adjustable coilover shocks.
The provided rebuilt power rack-and-pinion was then mounted in place and secured to the new crossmember with the provided bushings and hardware.
The Fatman Fabrications exclusive G-Tech tie-rod ends were then installed. They feature a longer tapered shaft, which helps put your tie-rods back in their correct geometrical position when utilizing the boosted camber setting.
The completed installation of the Stage III IFS will give our Chevy plenty of razor-sharp handling combined with a great stance.
The post Upgrade Your Suspension With a Fatman Fabrications Mustang II Stage III Kit appeared first on Hot Rod Network.
from Hot Rod Network http://www.hotrod.com/articles/upgrade-suspension-fatman-fabrications-mustang-ii-stage-iii-kit/ via IFTTT
0 notes