#also i tried something different w lineart here that i’ll never do again!
Text

babe, there’s something wretched about this (something so precious about this).
#stucky#mcu#mcu fanart#marvel#steve rogers#bucky barnes#stucky fanart#captain america#klee.png#sorry i am thinking about them always#also i tried something different w lineart here that i’ll never do again!#god bless. it’s a learning curve
469 notes
·
View notes
Photo
So since I’m probably not gonna remember to do this later on this month, I’m doing it now-
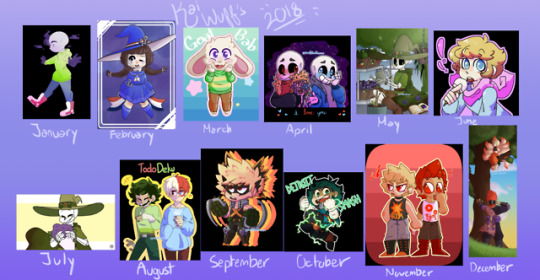
Here’s my 2018 summary of my art!
Descriptions of each month and such below the cut-
January: Ah, January. 2018. Such a simple time. I was still getting used to my new drawing tablet, and I was also getting over Remi, as it had been less than a month since I’d cut contact with her. Most of my drawings from this month are of Tek, or vent drawings- I had this trend of using the darker pencil for all my lineart, and as a result all of my lines were honestly too thick. I also had sprite commissions available, which really took a toll on me- @-@
February: February was interesting. I was still being an angsty teen, but I was also drawing a lot of... shippy things with Tek.
I was really into that ship at the time.
March: OH BOY- HERE COMES REALLY CUTESY SHIT AND OK KO MY DUDES! I binged the entire series, and then never touched it again. I should go back and do that, probably. I still love KO and Darryl, okay? It was this month when I got into using the textured pen and started making my lineart thinner. I also made Terra in March!
April: I was still drawing a lot of cutesy stuff, and a lot of it revolved around Tek. In honesty, Tek is still my favorite character of mine, with Ozzie and Terra not far behind- I really should get back to drawing those three more often :’D
May: This was the month where I tried more dynamic and interesting poses, and more detailed pieces- I’m honestly so happy with how some of those drawings came out, especially the ones of Terra- ;w;
June: SCHOOL WAS FINALLY OUT! I didn’t do as much drawing in this month as usual, as I think I was playing video games and working on Toshocon stuff for the majority of the time- @w@”” However I still drew a lot of cutesy things- That didn’t change at all.
July: Oof. I made my SMILE meme with Terra in this month. Despite it being summer, I still didn’t do much because I was still focused on Toshocon and cosplays. (Along with video games. Can’t forget video games.) Things got particularly cutesy during this month, and I also redesigned Tek-
August: And here. We can see when the age of BNHA began on my blog. There was an immediate shift. I’d been in the Undertale fandom for a long time, and I had burnt out a lot of ideas I had for it. So when I started watching BNHA, it was like that inspiration hit me again. I couldn’t stop doodling it everywhere because I loved the characters and the story so much. My style shifted a little more towards anime during this point, because y’know. BNHA is an anime. (Also I created Ryutai, along with his family-)
September: Started drawing even MORE BNHA, however a lot of it was chibis, because I still didn’t really have a grasp on how to draw male anatomy or anything like that, and if you’ve been here for a while you know I mostly draw Kirishima and Bakugou- (And they’re... pretty buff guys.) Also started shipping Kiribaku to an extreme, so I did a lot of doodles of those two in regular old MS Paint. I guess this could be my MS Paint phase?
October: Still so many chibis, dear god- However, I was changing my style for chibis slightly- facial features were slightly different, and I was also trying more dynamic poses here- (I had kind of stopped doing interesting poses between May and October.) Also had major art block for the beginning half of the month.
November: My birthday month- owo I started revisiting elements from my old art style, such as the eyes and noses- AND my style made a pretty big gap from exclusively chibis to some more regular looking figures mixed in there, and a huge part of that is my drawing class at school- I’m currently in Drawing 3, though my teacher treats it a lot like a figure drawing class, so we spent a lot of time practicing anatomy for both males and females, and honestly it helped so much- I’m not confined to only drawing chibis anymore! owo
December: It’s still the beginning half of the month, but if you compare what I do now to the things that I drew back in December of last year, you can see a pretty big difference, both in interests and style- When I first started drawing, I had the problem of using over saturated colors all the time, like many beginning artists did. When I finally realized it was a problem, sometime in 2016, I believe, I kind of went the opposite way. Even if a drawing would’ve looked a lot better if I had only used brighter colors or something, I used saturated colors because I was so afraid of making that mistake again. However, I think I’m getting better about balancing out my colors.
So that’s my 2018 summary of art! Personally I think I’ve improved a lot, though I’m sorry to all of my followers who followed me for Undertale content in the first place- I know I haven’t drawn it in several months, and I haven’t drawn anything for Deltarune yet, either- ;w; I promise I’m trying! I really love Deltarune and I can’t wait for the next installment, however the character designs don’t quite grab me like they did before-
I promise I’ll try to work on that!
12 notes
·
View notes
Note
{{ You use SAI? oh man! So do i but our outcomes are very different. Could you pretty please share with us your lineart brush settings and/or tips ;w;? }}
Sure!! Despite Sai being a simple program at first, it has a lot of tricks to it! I learn something new about it all the time!
Anyways, my lineart brush!


I’m constantly changing how I do lineart. Before I was using an oil/water brush, which had soft lines. Looked nice with multiply but was horrible to color in, even with Sai’s amazing select. This brush here is my main lineart brush- it’s sharp and solid which I really like. Unforgiving with selects/gaps but overall gives a nice clean look. Always at 4.0 size, as my canvas is always at LEAST 900 pixels in either direction- and usually more than that.
My sketch tool:


A soft, fluid tool that I’ve been using forever. I used to use this for lineart but it’s a little too soft for that and doesn’t handle transparency well
HOW TO MAKE A CIRCLE IN SAI

Using any pen, but you can also use the lineart pen tool I just gave you, increase the pen size to like… 250 px. Using your mouse or track pad, click in place a few times so that it gives you one single solid circle without line pressure
Select your magic wand (my best friend tool) and select the outside of the circle:

Hop up to Selection (that’s up there on the banner toolbar between Layer and Filter)

And select Increment. This will expand your selection by one (1) pixel. All around. Awesome!
Now head back to selection…

And hit invert!

This INVERTS your selection! Let me tell you, with this little skill you can do a lot of stuff that I’d be happy to outline (most being lazy with coloring).
Now hit the D key to delete.

And CONTROL D to deselect

And you have a perfect circle! USE THIS IN SKETCHING! I recently realized that a perfect circle in sketching is amazing…. it helps a lot. If the circle is too thick you can head back to your magic wand…. Select outside the circle…

And hit D to delete!

Boom. Thinner!
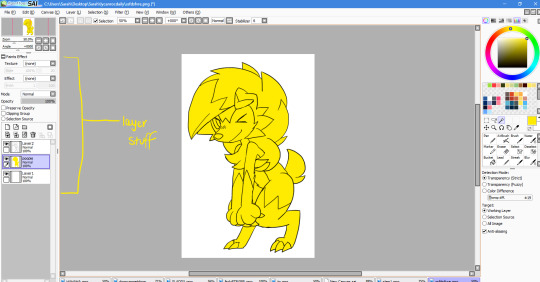
HOW TO LOCK YOUR LAYERS AND WHY YOU WOULD WANT TO LOCK THEM

I have this lineart, but it’s boring in all black. I also have to color this don’t I… Here’s what I do.

Grab your magic wand. Magic wand is now your best friend.
Select outside Lycan, as so:

Now, remember how to Invert a Selection? Head to Selection up on the banner (between Layer and Filter, remember) and select it. There’s also…

This button here! Which does the same thing. Invert your layer!

Nice! Now we’re cooking!! Now make a new layer. Name it if you want to but I never do. Make sure this layer is under the lineart…

Now, hit CONTROL F. That’s a wide fill. You could use the bucket but we’re PROS MY FRIEND

SWEET. Now remember to hit CONTROL D to deselect all that stuff.

GOOD! You’re getting the idea! Look at that fill. So easy. So pure. I can hear you. You’re saying “Lycanroc is currently yellow and I’m 20% sure that is incorrect.” And you’d be right.
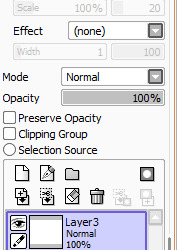
But oh no! I made you deselect! So you can CONTROL F without filling the whole layer!!! Now… you could just do the previous steps… which is tried and true. OR… You can head to your layer properties… oveerrrrr
here. Let’s take a closer look shall we?

Today we’ll be talking about Preserve Opacity and Clipping group. But for now we’re gonna talk to your lord and savior… Preserve Opacity. This is also known as Locking your Layer.
Now… lets say we don’t click that. Here’s what happens when you draw on your layer

Anarchy! Chaos! And if you hit CONTROL F (your wide fill)

Say goodbye to that lovely yellow color selection, huh? This simply will not do.
Do the right thing.
Lock your layer.

Layer locked. Good job!
Now watch what happens when you try to draw on this layer...

WHAT IS THIS MAGIC. WITCHCRAFT. I KNOW... it’s great!
Now when you hit CONTROL F...

It’ll fill only that. That and only that. Whoa. Use this new power wisely.
Lemme change our pup to the right color now, and...

Let’s get to work! For tutorial’s sake, lets make a new layer, above this blue one. This will be Lycanroc’s white layer.

Grab your magic wand (remember, this is your new best friend)... and hop over to your lineart layer!

And get selecting...!
Hmm...

We have some stubborn bits that won’t select. We could either raise our transparency difference of the Magic Wand or... we could try out another tool that is Cactus’ best friend.
Look right. Grab your SELECT PEN tool:

To call the Magic Wand and Select Pen a couple would be underplaying their devotion to each other. They work in perfect tandem, and I’ll show you why.
Hop to a new canvas. Draw a circle with the select pen.

(You suddenly realize why cactus needed the circle tutorial)
Now. Control F and then Control D. This will fill that selection and then deselect your selection.

Cool, right? Now you have this... lumpy circle. Now draw an incomplete circle, as so:

(calling that a circle is an insult to circles)
... now obviously, if you try to select the outside of the circle...

This happens. Useless!
You could just fix your lines, or... you could grab your select pen...


Close it using the select pen... and now grab your wand and select outside the circle.

Inverse, control F on a new layer and you have...

A filled circle with broken lineart. Pretty cool, right???
Anyways, back to Lycanroc!

Grab your select pen... and fill that stuff in! All those little unselected bits!

Nice!
Now hop back to your new layer (poopie 2). Select your new color (white) and control F.

Control D to deselect...!
Oops. I missed a spot. But what if I don’t want to use the select pen for some stupid reason? Why don’t I turn the white layer into a CLIPPING LAYER?
CLIPPING LAYERS
Make a new canvas. Draw a star and fill it in.

(Should you really be taking art advice from this person?)
Make a new layer. Now... if you were to draw on this layer....

You’d get this. Which is cool, I guess, but not what we want. No... we’re gonna clip this layer.

Now try scribbling on that star again.

See? It’ll only draw on the bottom, unclipped layer (the green star layer).
You’re asking me “why would you want to do this?” Well, my friend... this is awesome because you can also LOCK YOUR CLIPPED LAYERS YO. Why is that so amazing? Well lock that clipped layer!!!

Now scribble with a new color!


Star 1

Star 2
What does this mean...? Just watch! Back to doggo!

I went ahead and made each color a clipped layer. That’s 4 colors (blue,white, gray, red), 1 base layer (blue) and 3 clipped layers (white, gray, red). Lock all your layers.

I wonder what the white layer would look like with some shading...

I want some stripes on the gray layer....

Perfect.
Now let’s shade that ugly lineart. I want it to be blue... So I’ll go to my lineart layer, lock it and control F with my new color.

Hmmm... but I want some bits of the lineart to be red! Let me grab my pen...
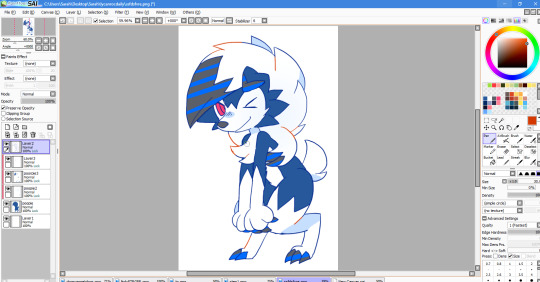
So beautiful. But now I want some airbrush in pink on top of everything...! I guess I’ll make a new clipping layer on top of the other three.

AMAZING. Is there anything more perfect than this?????
Anyways, that’s about it for my mini not so mini tutorial. I’ve given you guys some of the tricks and tools I use for this blog! If you guys have any questions though feel free to hit me up.
Also, I’ll upload this Lycan lineart so you can try the tutorial yourself!

233 notes
·
View notes
Last Seen Blogs

loverbird2025
Love Bird 2025
autistic-ranboo
c!mumza stan blog

niha-nyan
MINT JAMS

it-gets-betta
he kis thos leefs

flipperjanga11
Random thoughts