#WhyILoveYL
Explore tagged Tumblr posts
Text
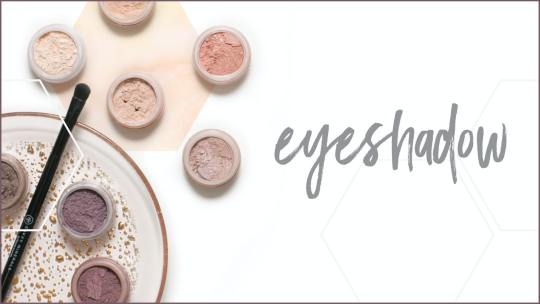
Now what about eyeshadows, which color of eyeshadow should you wear? Eye shadow can enhance the color of your eyes and a good general rule is to use an eye shadow that is the opposite color of your eye color on the color wheel.
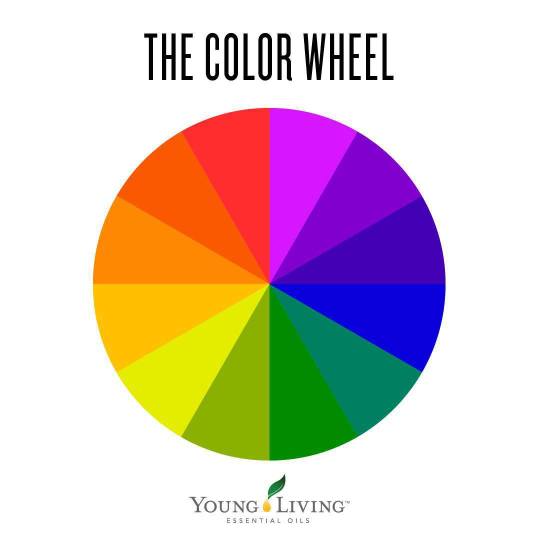
For example, if a green-eyed individual looked at the color wheel, they would see that green is opposite of red. This means, that a green-eyed person should lean towards eye shadows with reddish undertones to help make their eyes really stand out. A good plum, maroon, or browns with warm tones will do wonders for green-eyed beauties!
For blue eyes, shadows with a more orange undertones will make your eyes POP! Try a pretty copper, gold, or warm brown. Brown eyes are the most versatile and can pull off almost any eyeshadow color. Plums, blues, and bronzed browns can really make brown eyes stand out!

Young Living has a huge variety of eyeshadows for you to choose from. Now that you know how to pick eyeshadow colors, are there any shades you need to order?
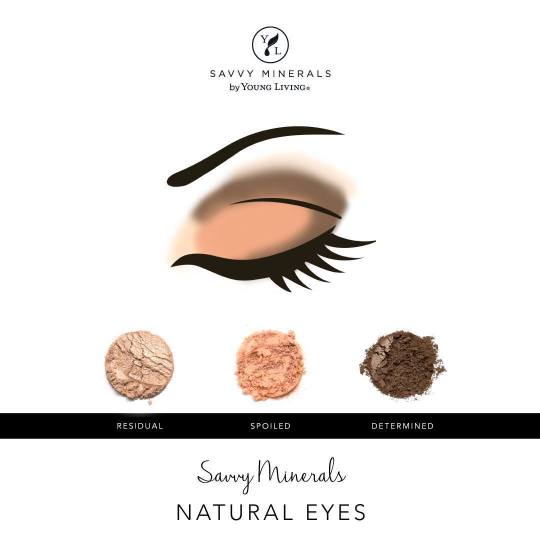

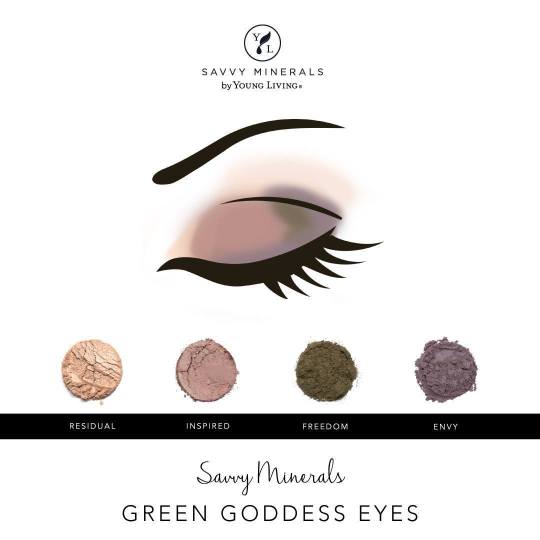
This 90-second eyeshadow tutorial illustrates how to use eyeshadow to highlight your eyes without overdoing it.
In this video we’re using mineral eyeshadow, but you can apply these techniques with any long-lasting eyeshadow. Watch Melissa Poepping, Savvy Minerals ambassador, demonstrate this quick four-step process for accentuating your eyes.

The new Savvy Minerals by Young Living Eyeshadow Palettes are AMAZING! Each shadow is infused with coconut oil, shea butter, and lavender essential oil for velvety smooth application and easy blending and building.
The Sahara Sunset, Natural Quartz, and Royal Winter palettes each contain matte, shimmer, and satin shadows to help you create endless eye-catching looks. You can easily take your eye makeup from a simple day look, to a dramatic ‘night out’ smokey eye using this palette. Since the powders are pressed, it’s convenient to take on all your travels, or if you’re a busy woman, throw it in your purse and apply it on the go! The eye shadows are vegan and cruelty-free, great for sensitive skin, and made with naturally derived ingredients.
Have you tried the new eyeshadow palettes? What are your favorite color combinations?!
👀 Check Out This Video To Get A Better Look At The Palette Colors 👀
#SavvyMinerals#OilyMama#EssentialOilsForTheWin#CleanBeauty#ResponsiblySourced#PlantBased#CrueltyFree#Natural#Naturally#WhyILoveYL#YoungLiving#SavvyMama#MomLife#ToxinFreeLifestyle#Makeup#SkinCare#SelfCare#MineralMakeup#NaturalBeauty#NaturalMama#MakeupGoals#TeamD9#SavvyClass#KnowBetterDoBetter#Eyeshadow#EyeShadowPalette
2 notes
·
View notes
Text

Hey Mama - Treat Yourself Today 🎁
You deserve to feel spoiled! 👑
The Mother’s Day Enrollment Bundles & Sale is happening ALL May Long 🎉


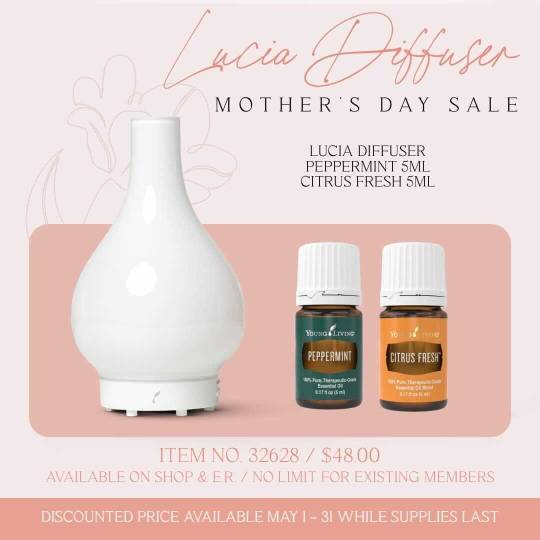
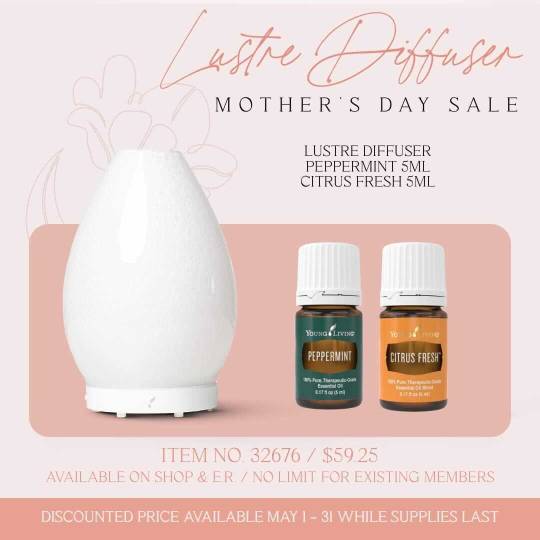
Details Here:
#HappyMothersDay#TreatYourSelf#MothersDay#Mom#Moms#Mommy#momessentials#MomsDay#OilyMama#EssentialOilsForTheWin#Natural#WhyILoveYL#YoungLiving#SavvyMama#MomLife#TreatYoSelf#SelfCare#NaturalMama#KnowBetterDoBetter#AromaTherapy#OilyFamily#JustAddOils#MomLifeBeLike#HomeschoolMama#JustBreathe#BreatheInBreatheOut#TeamD9#CruchyMama#CrunchyMom#CrunchyLife
1 note
·
View note
Text
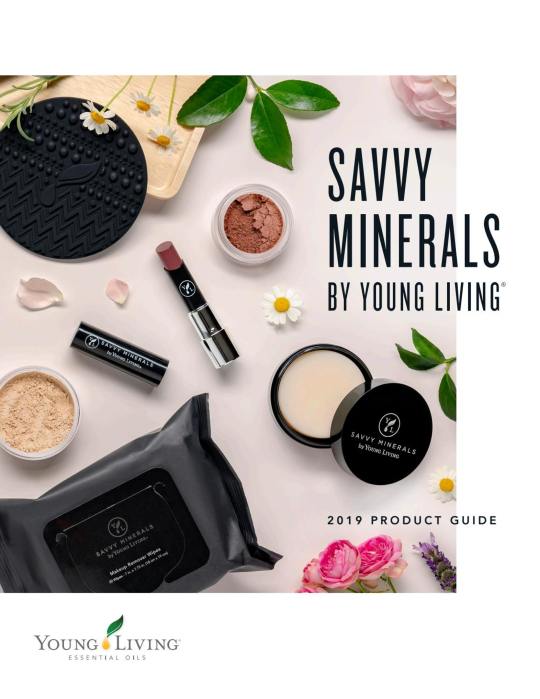
Browse the Savvy Minerals Product Catalog here:
#SavvyMinerals#OilyMama#EssentialOilsForTheWin#CleanBeauty#ResponsiblySourced#PlantBased#CrueltyFree#Natural#Naturally#WhyILoveYL#YoungLiving#SavvyMama#MomLife#ToxinFreeLifestyle#Makeup#SkinCare#SelfCare#MineralMakeup#NaturalBeauty#NaturalMama#MakeupGoals#TeamD9#SavvyClass#KnowBetterDoBetter
1 note
·
View note
Text
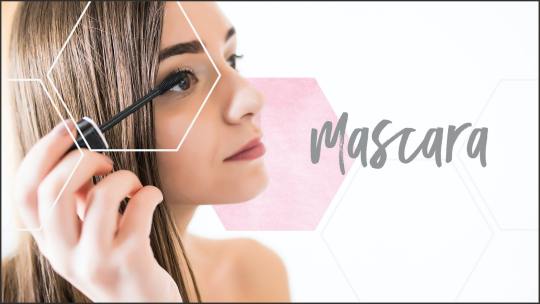
Did you know that typical mascaras contain harmful ingredients that can cause eye and health problems? Many times, these ingredients can clog the oil glands in your eyes, which can lead to dry, itchy, irritated eyes; and in some cases, these ingredients can even make your lashes fall out!
Young Living’s Mascara is infused with Lavender essential oil, which helps condition your lashes. It also has unique ingredients like hydrolyzed jojoba esters and coconut fruit extract, which are very nourishing to lashes. This mascara is perfect for giving you a natural look that makes your lashes appear longer and more defined. It is a versatile mascara that all women will love! For those of you who may want a more dramatic look, the mascara layers easily; just be sure to wait in between applications as the product needs some time to dry before adding more.
Our Mascara is formulated using non-nano and naturally derived ingredients. It was clinically tested for ocular irritation and is safe to use on sensitive eyes! You will love our Mascara!
The search for a natural, volumizing mascara is over. Savvy Minerals Volumizing Mascara is specially formulated with natural ingredients to make your lashes pop, including unique plant fibers that boost and build volume with each application.
Our clean, cruelty-free formula is infused with Cedarwood and Rosemary essential oils to help condition lashes. The brush’s unique, full shape features wavy fibers to help ensure the perfect amount of product is delivered with each stroke without clumping, flaking, or smudging. Our non-irritating, naturally derived formula is gentle on sensitive eyes and lashes.
Volumizing Mascara instantly delivers a buildable look for eye-opening results. Get incredible definition and volume with each application.
👀 Check Out This Video To Learn More 👀
Farewell to falsies, we’re going natural! Savvy Minerals® Lengthening Mascara is made with lash-loving ingredients, including Lavender essential oil, arginine, buildable natural plant fibers, and carnauba wax to take your lashes to new heights. Our clean, richly pigmented formula glides on without unwanted clumps or flakes to lengthen and define lashes.
Savvy Minerals Lengthening Mascara noticeably defines, lengthens, and curls for fuller-looking, lush lashes free of clumping or flaking. Our clean, naturally derived formula is cruelty-free and uses richly pigmented natural dye for dramatic visual impact and carnauba wax to weightlessly condition lashes. Each application creates smudge-free, flake-free lashes that are remarkably flutter worthy.
👀 Check Out This Video To Learn More 👀
#SavvyMinerals#OilyMama#EssentialOilsForTheWin#CleanBeauty#ResponsiblySourced#PlantBased#CrueltyFree#Natural#Naturally#WhyILoveYL#YoungLiving#SavvyMama#MomLife#ToxinFreeLifestyle#Makeup#SkinCare#SelfCare#MineralMakeup#NaturalBeauty#NaturalMama#MakeupGoals#TeamD9#SavvyClass#KnowBetterDoBetter#Mascara
1 note
·
View note
Text

Have you heard the phrase “You don’t wear the same clothes you did in high school, so you shouldn’t do your makeup the same either?" For some of you, this phrase may ring all too true, and that’s okay! Life is all about learning and growing, which is why you’re here learning all about Savvy Minerals. Eyeliner is one of those things that over time, we need to adjust how we apply. Eyeliner was created to define the eyes and it can also be used to make your eye shape appear larger or smaller.
Young Living has many different options that can be used as an eyeliner—Jetsetter being the most popular. We also love recommending the Dark Multitasker (a dark brown color), or to mix it up, you can use any of our Savvy Eyeshadow colors. Jetsetter is a matte black mineral powder that can be applied wet or dry to create the look you desire. Wet application tends to appear darker and more precise, whereas dry application appears more blended and softer.
As we age, it is generally recommended to switch from a harsh black eyeliner to a brown shade. If you have dark skin, black liner will always be a great option! When wearing eyeliner on aged skin, try applying it as a soft smudged look instead of a precise thick line, keeping it as close to your natural lash line as possible. As for the lower lid, you can skip it entirely, or try adding a soft brown (think Dark Multitasker) along the lower lash line and blend it gently, so it doesn’t look as harsh.
Have fun playing and discovering what works best for you!
👀 Click the link to watch Haley from our training and education team as she explains how to use and apply Savvy Mineral's Jet Setter as an eyeliner! 👀
#SavvyMinerals#OilyMama#EssentialOilsForTheWin#CleanBeauty#ResponsiblySourced#PlantBased#CrueltyFree#Natural#Naturally#WhyILoveYL#YoungLiving#SavvyMama#MomLife#ToxinFreeLifestyle#Makeup#SkinCare#SelfCare#MineralMakeup#NaturalBeauty#NaturalMama#MakeupGoals#TeamD9#SavvyClass#KnowBetterDoBetter#Eyeliner
1 note
·
View note
Text
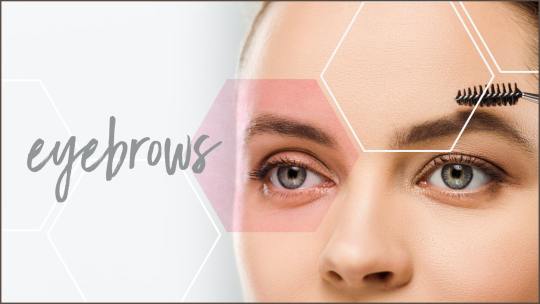
Never forget the brows! While the main function of your brows is to keep sweat, dirt, and other debris from getting in your eyes, brows also serve as a major form of communication to those with whom you come into contact! Brows can help show expression, emotion, and even mood changes. Over the decades brow shape, color, and thickness have changed, but one thing remains consistent: brows are an important part of a makeup routine!
Filling in your brows to make them more pronounced can add a whole new dimension to your make up routine! Brows make the biggest difference! Depending on your natural coloring, you can pick light or dark from our Multitasker line, which is great for filling in brows. You can also try any of the Dark Foundation colors that best match your brown color!
To fill in your brows, you will need a precise angled brush. Apply the brow filler in small strokes that follow the natural growth pattern of your hair. You will notice that your eyebrow hair grows upward then slowly fans outward. This is to protect your eyes by naturally forcing sweat and other particles outward around your eyes. Follow this stroke pattern to create a natural look. Brush out any excess if necessary.
Did you know you can shape your brows to accentuate the natural features of your face? Check out our next video to learn all about how to properly shape your brows!
Do you love bold eyebrows? I envy perfectly shaped eyebrows that perfectly frame a gorgeous eye make-up application. You can get this look using Savvy Minerals Jet Setter, Multi tasker, or for lighter shades Dark 2 foundation will work. Find a shade that works best for you and remember blending two colors may tone down things if it is too dark. Savvy Minerals is perfect for this because they are so versatile. Mix it up if you need to, get creative.
You will need a thin flat brush for application and a bristle type brush for blending. We love Savvy Minerals Eyebrow brush for this! You will use the flat thin brush to make hair like strokes and fill in the sparse areas, and then blend with the bristle brush to get rid of harsh edges. Super easy.
Before starting give your eyebrows a good smoothing brush to get them groomed, and if needed you can shape them with tweezers.
First add 1-2 sprays of Savvy Minerals Misting spray into the cap and add product to make paste. Play around with this a little. You do not want it too thick or thin. Just so it goes on nicely. If it is too thin you can build slowly to your shade so no worries. Using your make-up brush handle to make the lines across your face helps.
Start at the inner corner with light hair like strokes going with the natural direction of growth, and also grooming in the direction they need to go, working toward the outer corner. Then fill in sparse areas. The final step is to use the bristle blending brush to blend harsh edges. You can be bold or less bold…is up to you!
Watch this video to learn how to properly shape your brows to accentuate your natural face shape?
#SavvyMinerals#OilyMama#EssentialOilsForTheWin#CleanBeauty#ResponsiblySourced#PlantBased#CrueltyFree#Natural#Naturally#WhyILoveYL#YoungLiving#SavvyMama#MomLife#ToxinFreeLifestyle#Makeup#SkinCare#SelfCare#MineralMakeup#NaturalBeauty#NaturalMama#MakeupGoals#TeamD9#SavvyClass#KnowBetterDoBetter#Eyebrows
1 note
·
View note
Text
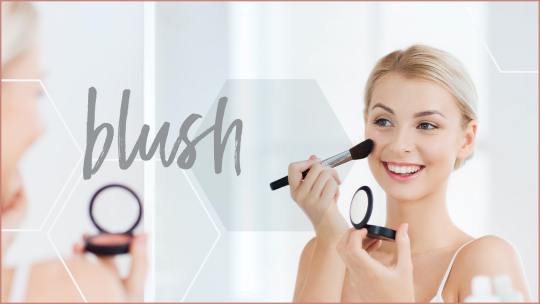
Blush is used to mimic the natural color of your skin when it’s flushed. When using foundation, we mask imperfections or any natural coloring in our face. That’s why blush was designed—to help bring natural color back to your face and give you more life! Blush is applied after foundation and contouring.
Young Living has seven different shades of blush.
• I Do Believe You’re Blushin’ (pink neutral)
• Passionate (dark burnished rose)
• Smashing (cool pink)
• Awestruck (Soft pink shimmer)
• Captivate (beige pink matte)
• Serene (soft coral-peach matte)
• Charisma (bright pink)
In general, picking a blush color depends on your preference. However, there are some tips to finding a color that will best complement your features. To start, look in the mirror when you are naturally flushed. Pay particular attention to the color of your cheeks, then try to match that color with one of the Savvy Minerals Blush swatches.
If you still aren’t sure a which blush to purchase, below are a few general guidelines on picking a blush color that complements your skin tone.
Take into consideration your shade:
• Fair skin individuals (cool 1 or warm 1) look great in pick soft, light hues like I Do Believe You’re Blushin’, or Smashing. Keep in mind, anything brightly colored will look especially vibrant on fair skin.
• Medium skin individuals (cool 2 or 3 or warm 2 or 3) look great with medium to dark hues like Captivate, Passionate, or Serene.
• Dark skin individuals (dark color line) look great in dark or bright tones like Charisma or Smashing.
• Keep in mind, as the seasons change, your blush should change, too! Adjust to lighter colors in the winter when your skin is fairer, and in the Summer months, adjust to a darker more prominent color. You can swap blush for bronzer for a sun kissed look during the summer!
Take into consideration your undertone:
• For cool-toned individuals we recommend light pink tones for a natural look, and darker pinks for a more dramatic look like Smashing, I Do Believe You’re Blushin’, or Captivate.
• For warm-toned individuals, we recommend peach tones or medium pinks like Serene, Awestruck, or Captivate.
Blush should be applied in a small sweeping motion starting on the apples of your cheeks diagonally upward toward the top of your ear. Do not carry your blush all the way up to your ear! Blush should be contained on your cheeks, right above the contour color you placed in the shadow from your ear to your lip. Accentuate that highpoint (cheekbone) with a little blush!
Do you know how to apply blush based on your face shape? Adding these techniques will help you use your Savvy Minerals blush in ways that accentuate your features best. Which lovely face type are you?? Have fun trying these tips.
Oval faces: If you have prominent cheekbones and a forehead that is slightly wider than the chin you have a lovely oval face. You will want to sweep your blush over your cheekbones. Put your blush just above the bone rather than towards the hollow under it to help lift your cheekbone.
Heart shaped faces: Do you have a wide forehead and high cheekbones, and a face that tapers to a narrow chin? You have a lovely heart shaped face. Start by brushing blush to the outer corner of your cheekbone, starting up near your ear and ending below the outer corner of your eye. Then add a touch of color by your temples, also at the center of your forehead. This will balance your features best.
Square faces: Do you have a forehead that is pretty much the same width as the cheekbones and chin? Then you have a lovely square shaped face. To help define your cheekbones, apply your blush slightly below the cheekbone. You can add blush in the hairline, and this will help soften the edges of your face.
Round faces: If your face is as wide as it is long, you have a lovely round face. You may find that matte blush would complement your features best.. Sweep your blush from the ear down the cheekbone towards your mouth. Try adding a little touch of blush to your chin and blend it well to add balance.
Oblong/long face: If your face is similar to oval and square-shaped faces. except longer and less wide (forehead, cheeks and jawline will all be pretty much the same width), you have a lovely oblong face. Try brushing blush on cheekbones below the outer corners of your eyes and blend well. You should check that the blush never goes lower than the tip of your nose. This will add balance and compliment your features.
Triangular face: Is your chin narrow and pointed with high cheekbones? Then you have a lovely triangular face. You can apply your blush in a sideways V on the cheekbones. Then blend up from your cheekbones to your temple, and then extend the blush over your brow toward the center of your forehead. This will add balance and complements our features.
#SavvyMinerals #OilyMama #EssentialOilsForTheWin #CleanBeauty #ResponsiblySourced #PlantBased #CrueltyFree #Natural #Naturally #WhyILoveYL #YoungLiving #SavvyMama #MomLife #ToxinFreeLifestyle #Makeup #SkinCare #SelfCare #MineralMakeup #NaturalBeauty #NaturalMama #MakeupGoals #TeamD9 #SavvyClass #KnowBetterDoBetter #Blush
#SavvyMinerals#OilyMama#EssentialOilsForTheWin#CleanBeauty#ResponsiblySourced#PlantBased#CrueltyFree#Natural#Naturally#WhyILoveYL#YoungLiving#SavvyMama#MomLife#ToxinFreeLifestyle#Makeup#SkinCare#SelfCare#MineralMakeup#NaturalBeauty#NaturalMama#MakeupGoals#TeamD9#SavvyClass#KnowBetterDoBetter#Blush
1 note
·
View note
Text
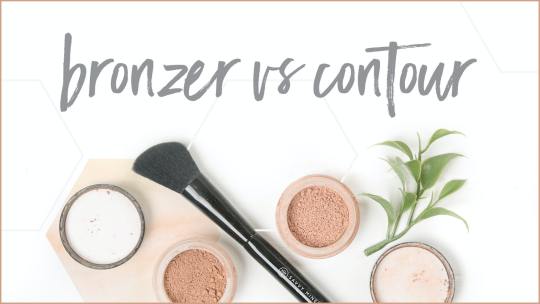
What is the difference between Bronzer and Contour?
You can use one of the Bronzer colors, Summer Loved or Crowned All Over, as Contour and apply it as we discussed in the last post or you can apply the Bronzers for an easy, sun kissed look. The difference lies in where you apply the colors on your face!
If contouring seems too overwhelming or difficult, try using a Bronzer! Simply apply Summer Loved or Crowned All Over on the apples of your cheeks, the tip of your nose, and across the top of your forehead. This creates a natural sun kissed look and you will look as if you had spent the day out in the sun! We love teaching new makeup users and teenagers this way of applying a bronzer because it is easy, gives a natural radiance, and looks great on everyone!
We like applying Bronzer to accentuate our summer tan and use the contour application on days that we are getting done up!
For the best application results, apply with a Savvy Minerals brush. After applying Foundation, sprinkle a small amount of Bronzer into the jar lid. Dip the brush into the lid to pick up the powder, then lightly tap the brush handle against the side of the lid to remove the excess. Apply Bronzer to areas of the face where the sun hits naturally, including cheekbones, bridge of nose, forehead, and chin. Build color gradually to avoid over application.

#SavvyMinerals#OilyMama#EssentialOilsForTheWin#CleanBeauty#ResponsiblySourced#PlantBased#CrueltyFree#Natural#Naturally#WhyILoveYL#YoungLiving#SavvyMama#MomLife#ToxinFreeLifestyle#Makeup#SkinCare#SelfCare#MineralMakeup#NaturalBeauty#NaturalMama#MakeupGoals#TeamD9#SavvyClass#KnowBetterDoBetter#BronzerVsContour#Bronzer#Contour
1 note
·
View note
Text

Does contouring intimidate you? Do you think it’s only for makeup artists or celebrities? Maybe you are new to makeup and have no idea what contouring even means! The basics of contouring are simple enough for anyone.
So what is contouring? Contouring is a technique that helps define your natural face shape and can give you a polished look with a few simple strokes. You apply a darker makeup shade to certain areas of your face to accentuate and define your cheekbones and help create definition and dimension.
Young Living’s Savvy Minerals line has two contour colors—Summer Loved and Crowned All Over. Summer Loved is a darker brown color, and Crowned All Over is lighter and more sheer. Both of these colors have shimmer, so if you prefer not to have shimmer in your makeup, we recommend using one of the colors in the Dark foundation line instead. These colors are matte and can give a more natural look when contouring.
Contouring is easy! To start, identify the natural shadows on your face. Most people have a shadow from the top of their ear to the outer corner of their lips. This particular shadow helps to define your cheeks. It is also very common to have a soft shadow around the top corners of your forehead and down under your jawline. These shadows shape your face. By applying a small amount of contour product on these shadows, you can naturally shape your face and give it depth.
Remember where to apply contour colors by thinking of drawing a “3” and an “E” on respective sides of your face. This is where your contour colors should go. If you feel comfortable, you can also apply a small amount of contour color down each side of your nose. This isn’t necessary, but as you get more confident in your contouring skills, you can gradually adjust your routine.
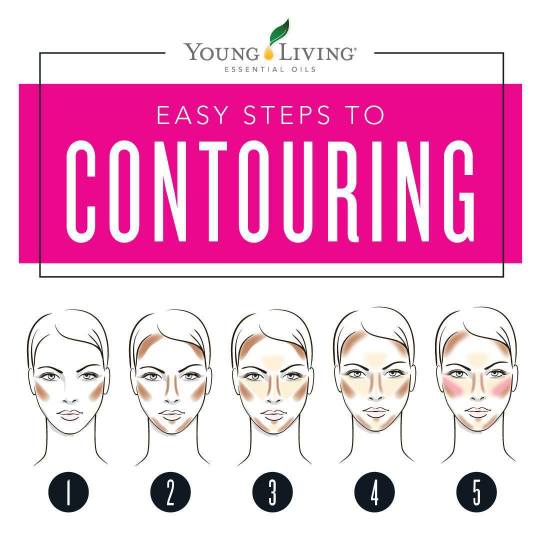
Facial contouring is trending among top makeup artists. They contour and highlight to create flattering facial lines and accentuate desired features. Want to learn how to contour? Follow these three simple steps to create your flawless look! 👀 Check out this video to learn more 👀
#SavvyMinerals#OilyMama#EssentialOilsForTheWin#CleanBeauty#ResponsiblySourced#PlantBased#CrueltyFree#Natural#Naturally#WhyILoveYL#YoungLiving#SavvyMama#MomLife#ToxinFreeLifestyle#Makeup#SkinCare#SelfCare#MineralMakeup#NaturalBeauty#NaturalMama#MakeupGoals#TeamD9#SavvyClass#KnowBetterDoBetter#Contouring
1 note
·
View note
Text

You are a clean beauty kind of girl, right? Your makeup brushes should be cleaned regularly so your Savvy Minerals makeup stays clean. Besides bacteria, brushes also accumulate dead skin cells and oil, which can clog your pores and lead to dull or broken out skin. Clean brushes apply makeup better. Even the best makeup can become streaky and patchy when applied with a dirty brush. Clean bristles will assure a smoother application. It also keeps your colors from getting “muddy” looking. Good habits will extend the life of your brushes. This plant-based soap includes shea butter, jojoba oil, and moringa seed oil to extend the life of your brushes and keep them looking brand new!
The Solid Brush Cleaner is made with all-natural ingredients and infused with Lemon, Orange, and Lavender essential oils. Pair it with our Savvy Minerals Silicone Brush Cleansing Pad for brushes that never looked—or smelled—so good!
✅ Cleanses and deodorizes brushes with plant-based soaps
✅ Maintains soft bristles with vitamin A and E from shea butter
✅ Provides a bright citrus aroma with a hint of orange
✅ Contains shea butter and jojoba oil
✅ Made without parabens, phthalates, petrochemicals, glycol, sulfates, synthetic dyes and colorants, animal-derived ingredients, EDTA, or gluten
A once-a-week deep cleaning will keep brush bristles soft and makeup application smooth.
Using the Savvy Minerals Silicone Brush Cleansing to clean your brushes can help breakup makeup residue without getting your hands too dirty. Using a textured mat is more efficient than rubbing soapy bristles through your fingertips. This one is made to do a bang-up job on all your different tools. The mat does most of the dirty work for you by breaking down the makeup residue, and making it super easy to rinse away under the faucet.
Tips:
💡 Wet the bristles of your makeup brush with warm water, try to ensure that your brush is facing downwards.
💡 Gently cleanse your brush using Savvy Minerals Solid Brush cleaner. To get a deep clean, swirl the brush on the Savvy Minerals Silicone Brush Cleansing Pad.
💡 Using warm water, wash the cleansing product out of your brushes until the water runs clearly. Once finished, gently squeeze out excess wash and use your fingers to restructure the bristles into their original shape.
💡 Lay your brushes out to dry, ensuring that the bristles are hanging over the edge of your surface. Doing this will allow them to dry quickly and evenly, as air can reach the brush from all sides.
💡 Lay your brushes flat to dry as opposed to standing up in a jar, as the moisture can run down the handles. This will extend the life of your make-up brushes and keep the bristles tight.
#SavvyMinerals#OilyMama#EssentialOilsForTheWin#CleanBeauty#ResponsiblySourced#PlantBased#CrueltyFree#Natural#Naturally#WhyILoveYL#YoungLiving#SavvyMama#MomLife#ToxinFreeLifestyle#Makeup#SkinCare#SelfCare#MineralMakeup#NaturalBeauty#NaturalMama#MakeupGoals#TeamD9#SavvyClass#KnowBetterDoBetter
0 notes
Text
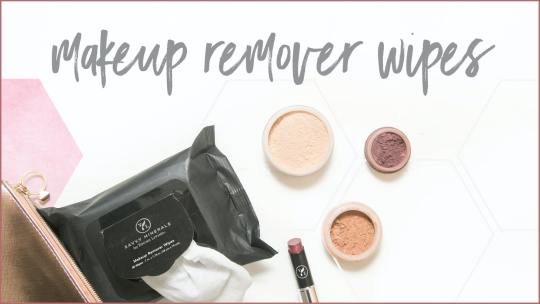
Your skin goes through its most important regenerative processes at night, shedding dead skin cells and cycling them out for new ones. Makeup actually stops the natural exfoliation process, so your skin can become duller over time. Besides the natural exfoliation being stopped…you can also get grime and yuck buildup from not removing your makeup, causing pores to become clogged! Young Living has made it easy to remove makeup in a hurry or on the go with Savvy Minerals Makeup Remover Wipes. With cucumber and marshmallow plant extract, these little hugs for your face grab hold of the makeup and remove impurities from your skin without stripping moisture.
I love that they work for all skin types and removes makeup from the eyes and face without stripping moisture. It will leave your skin feeling cool, soothed, and refreshed as it nourishes, softens, and hydrates with no residue—rinsing not required. You will find it creates a more radiant, healthy-looking complexion.
There is more to using make up wipes than just being sure you have pure plant-based ingredients. Although these wipes are so pure they do not require rinsing, using a face wipe to remove the majority of your makeup before cleansing your face with your preferred Young Living Face washing and moisturizing routine would be ideal. I love using the wipes first, then Art Gentle Cleaner, Art Toner, and then Art Light Moisturizer. It feels amazing to have clean skin and not worry about impurities!
Having a good cleansing technique can help make sure you're getting the best clean. Try starting in the middle of the face and moving outwards, making sure you don't miss your hairline or jawline.
Mascara removal tip: You can leave a wipe on the eyes for a minute or two to help loosen mascara but remember to never tug or scrub as you do not want to accidentally rip out eyelashes, and the skin is delicate around the eyes.
#SavvyMinerals#OilyMama#EssentialOilsForTheWin#CleanBeauty#ResponsiblySourced#PlantBased#CrueltyFree#Natural#Naturally#WhyILoveYL#YoungLiving#SavvyMama#MomLife#ToxinFreeLifestyle#Makeup#SkinCare#SelfCare#MineralMakeup#NaturalBeauty#NaturalMama#MakeupGoals#TeamD9#SavvyClass#KnowBetterDoBetter#MakeupRemover#MakeupRemoverWipes
0 notes
Text

Are you a busy woman who is constantly on-the-go? If this is the case, you may not have time for a full Savvy face every single day, and that’s okay! Most women would probably agree that their makeup routine changes daily depending on the time they have to get ready.
For a quick 5-minute Savvy face, the products used are going to be different for everyone.
So, how do you figure out which products you should use? We recommend considering what you believe to be your best features. Do you love your brows? Do you get a lot of compliments on your eyes? Do you love your smile? Maybe you have fabulous glowing skin! Figure out what you love about your face, and when you’re in a hurry, work to accentuate those features!
A 5-minute face could look something like this:
💋 Foundation
💋 Contour
💋 Brows
💋 Mascara
💋 Lip gloss
Or it could look like this:
💋 Blush
💋 Brows
💋 Eyeshadow
💋 Lipstick
Or it could be:
💋 Foundation
💋 Blush
💋 Eyeliner
💋 Lipstick
💋 Brows
Do you get the trend? A 5-minute face is whatever you want it to be! When you’re in a bind or on-the-go, what are your must-have Savvy products?
A fresh and beautiful makeup look doesn’t need to take up your whole morning. In fact, with this quick makeup tutorial video, all you need is five minutes. You’ll love how effortless and easy your makeup looks—perfect for the office, running errands, or a party. Wherever you go, this five-minute makeup tutorial will leave you glowing.
#SavvyMinerals#OilyMama#EssentialOilsForTheWin#CleanBeauty#ResponsiblySourced#PlantBased#CrueltyFree#Natural#Naturally#WhyILoveYL#YoungLiving#SavvyMama#MomLife#ToxinFreeLifestyle#Makeup#SkinCare#SelfCare#MineralMakeup#NaturalBeauty#NaturalMama#MakeupGoals#TeamD9#SavvyClass#KnowBetterDoBetter#5MinuteFace#FiveMinuteFace
0 notes
Photo

facebook.com/EarthFaithLove instagram.com/earthfaithlove twitter.com/EarthFaithLove #SavvyMinerals #OilyMama #EssentialOilsForTheWin #CleanBeauty #ResponsiblySourced #PlantBased #CrueltyFree #Natural #Naturally #WhyILoveYL #YoungLiving #SavvyMama #MomLife #ToxinFreeLifestyle #Makeup #SkinCare #SelfCare #MineralMakeup #NaturalBeauty #NaturalMama #MakeupGoals #TeamD9 #SavvyClass https://www.instagram.com/p/CN017m4FKmM/?igshid=1fp0c1yvy4yzh
#savvyminerals#oilymama#essentialoilsforthewin#cleanbeauty#responsiblysourced#plantbased#crueltyfree#natural#naturally#whyiloveyl#youngliving#savvymama#momlife#toxinfreelifestyle#makeup#skincare#selfcare#mineralmakeup#naturalbeauty#naturalmama#makeupgoals#teamd9#savvyclass
0 notes
Text

April Classes bring May Empowered 🌺
Reach out for the link 🤗 all classes are on Zoom and open to everyone 🤩
#OilyMama#EssentialOilsForTheWin#Natural#Naturally#WhyILoveYL#YoungLiving#SavvyMama#MomLife#ToxinFreeLifestyle#SkinCare#SelfCare#NaturalBeauty#NaturalMama#KnowBetterDoBetter#AromaTherapy#OilyFamily#JustAddOils#MomLifeBeLike#HomeschoolMama#JustBreathe#BreatheInBreatheOut#TeamD9#OnlineEducation#OilyEducation#OilsAndEmotions#Supplements#NaturalLifestyle
0 notes
Photo

#PSKCLASS Post 17 - PanAway
Turn your post-workout moans and groans into oohs and aahs with the cooling sensation of PanAway®.** This powerful blend synergistically combines Wintergreen, Helichrysum, Clove, and Peppermint essential oils.
Many sports creams try to synthetically mimic the same powerful constituents that are naturally found in PanAway essential oil blend���menthol and methyl salicylate—from pure Peppermint and Wintergreen. Why not get benefits directly from the source?!?
How can you use PanAway?
💧 Treat tired muscles to a cool, tingling sensation after a long race or a day working in the yard by combining PanAway with carrier oil in a massage. 💧 Give feet a break by applying diluted PanAway in a relaxing massage. 💧 Fight stress and let PanAway’s cool, refreshing aroma lend a little support by applying a single drop to your temple. 💧 Make your own post-workout cream by adding PanAway to your favorite DIY recipe, non-scented lotion, or coconut oil. 💧 Apply it to your neck, scalp, and shoulders in the morning with V-6 Vegetable Oil Complex for an uplifting, refreshing aroma. 💧 Dilute and apply to ankles, knees, shoulders, and joints as needed.
Remember, the oils in PanAway are very powerful, especially Wintergreen. This oil has a childproof cap because of the high amount of Methyl Salicylate from Wintergreen. Make sure to dilute with a carrier oil before application if you are new to essential oils or have sensitive skin, and use dilute heavily and use caution with small children.
👀 Watch this short video ⏩ http://m.lfstps.com/MRI/LPg ⏪
When do you like to use PanAway?
**If you are pregnant, nursing, taking medication, or have a medical condition, consult a health professional prior to use.
#WhyILoveYL #YoungLiving #EssentialOilsForTheWin #OilyEducation #OilyMama #OilyFamily #CrunchyMama #MomBoss #ThisIsHowWeDoIt #PanAway
#PSK Class#Why I Love YL#Young Living#Essential Oils#Essential Oils For The Win#Oily Education#Oily Mama#Oily Family#Crunchy Mama#Mom Boss#This Is How We Do It#PanAway
1 note
·
View note
Text

May Oil of the Month - White Angelica
Each month we focus on using an oil every day to help us in accomplishing our goals. Join us in choosing a method of application and simply getting this oil on and around you every day in May! My goal is to use up an entire bottle for my personal use!
Lovingly harvested from plants native to exotic destinations around the world, White Angelica is a combination of 10 essential oils that come together to create a one-of-a-kind blend. Geranium, Ylang Ylang, Melissa, and Rose provide sweet, floral notes; Bergamot and Melissa offer a boost of bright citrus; and Myrrh, Northern Lights Black Spruce, Hyssop, and Sacred Sandalwood balance the blend with a warm, woodsy base. With the aroma of White Angelica, you can create a positive atmosphere and inspire feelings of security and optimism—no matter what life throws at you!
Follow this link to learn more about White Angelica:
#Healthyhomewithyl#yleo#OilyMama#EssentialOilsForTheWin#Natural#Naturally#WhyILoveYL#YoungLiving#SavvyMama#MomLife#SelfCare#NaturalMama#KnowBetterDoBetter#AromaTherapy#OilyFamily#JustAddOils#MomLifeBeLike#HomeschoolMama#JustBreathe#BreatheInBreatheOut#TeamD9#NaturalLifestyle#CruchyMama#CrunchyMom#CrunchyLife#ThisIsHowWeDoIt#May#OilOfTheMonth#WhiteAngelica
0 notes