#Tut
Explore tagged Tumblr posts
Visit Tumblr Blog
Explore Tumblr blogs with no restrictions, modern design and the best experience.
Last Seen Tumblr Blogs


Fun Fact
The Tumblr office adopted Tommy, an 11-year-old Pomeranian.
Text
Everyone asked for it, so here it is :)
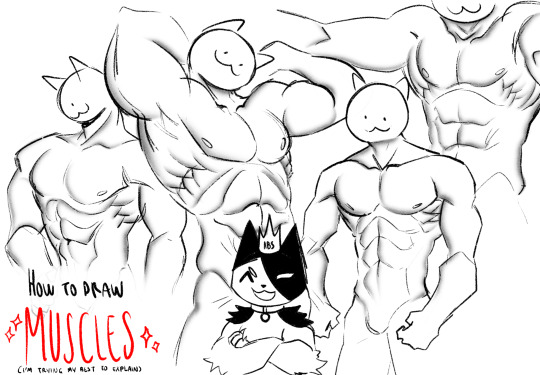
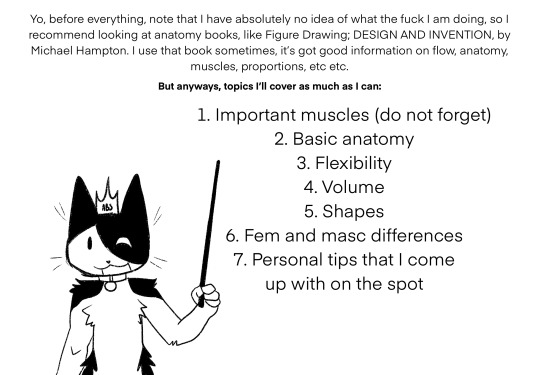
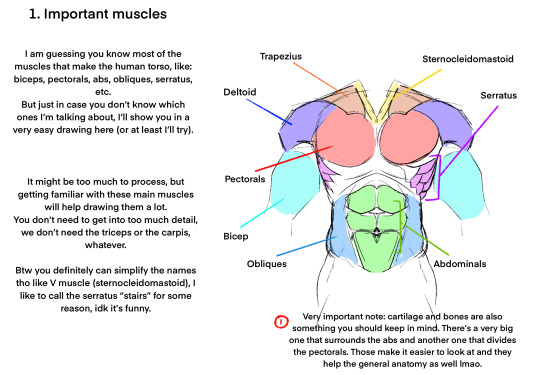

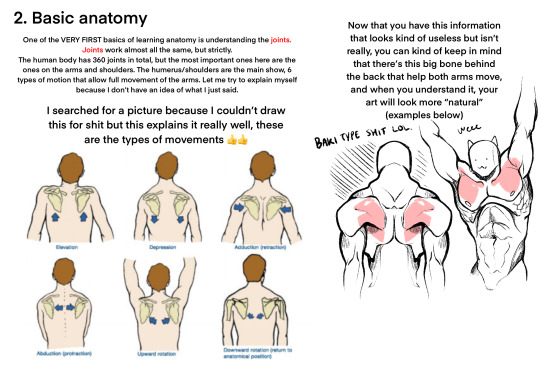

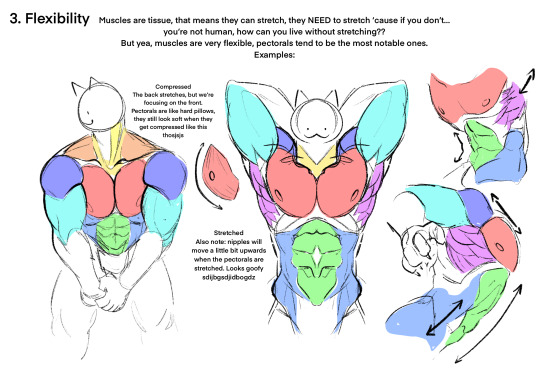

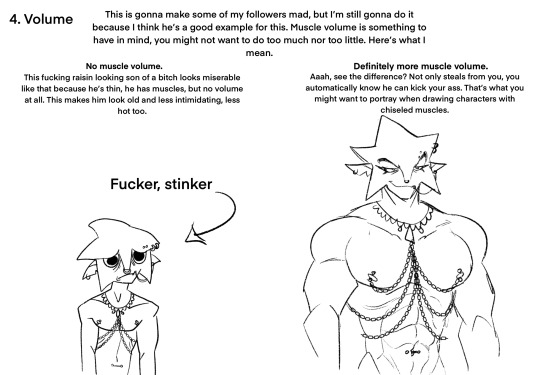
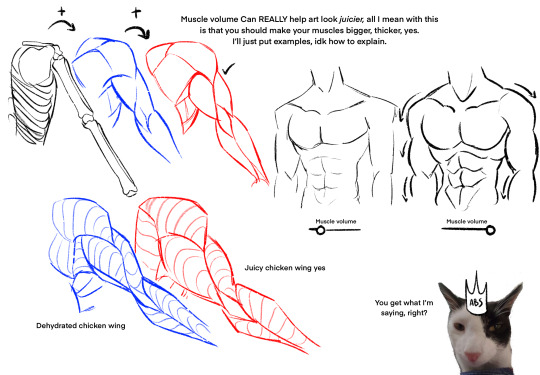

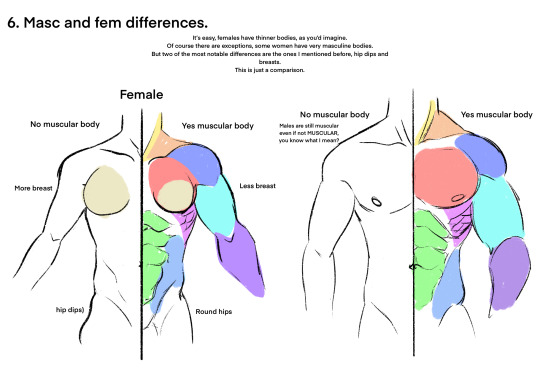
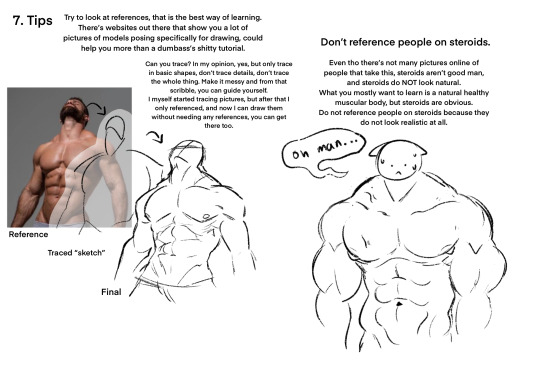
hope it helps!
#art#my art#art tutorial#anatomy#anatomy art#anatomy tutorial#art tips#art reference#anatomy tips#tutorial#art tut#tut#muscle anatomy#muscular anatomy#muscular anatomy tips#muscular anatomy tutorial#muscles tutorial#gato
5K notes
·
View notes
Text


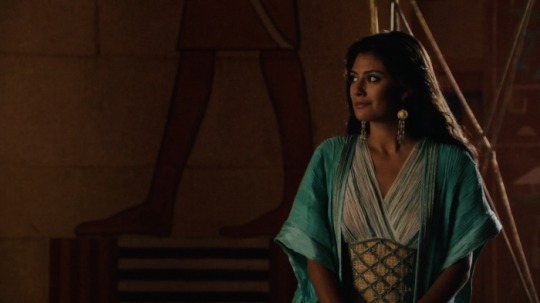
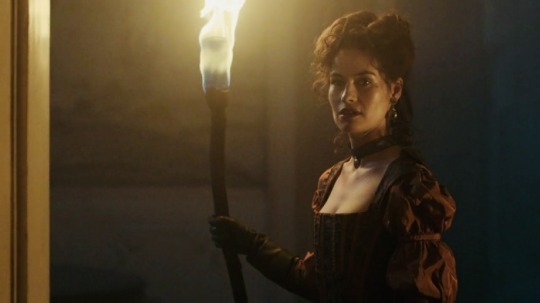
Sibylla Deen as Ankhesenamun Tut (2015) Episode 2
#tut#tut 2015#ankhesenamun#sibylla deen#stuff:mine#perioddramaedit#perioddramagif#perioddramasource#gifshistorical#tutedit
164 notes
·
View notes
Note
Fav art tips?
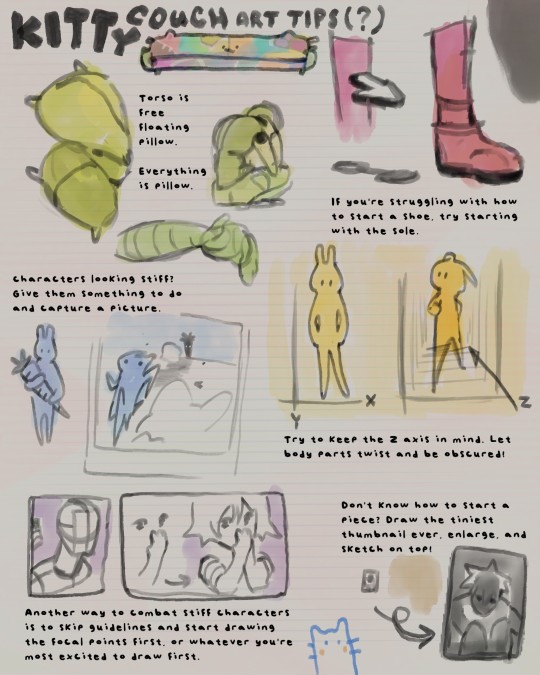
These're some of my general art / drawing tips!
✎⁾⁾ ◞
Just incase text is hard to read:
1) torso is free-floating pillow. Everything is pillow. (soft, flexible anatomy)
2) if you're struggling with how to start a shoe, try outlining the sole first.
3) characters looking stiff? Give them something to do and take a snapshot mid-action.
4) try to keep z-axis in mind! Let body parts twist and be obscured.
5) another way to combat stiff characters is to skip the guidelines and start drawing the focal points first... or whatever you're most excited to draw first.
6) don't know how to start a piece? Draw the tiniest thumbnail ever, enlarge, and sketch on top!
#hi sorry this ask has definitely been collecting dust#art help#art tutorial#art ref#art tips#how to draw#how to art#tut#ref
183 notes
·
View notes
Text
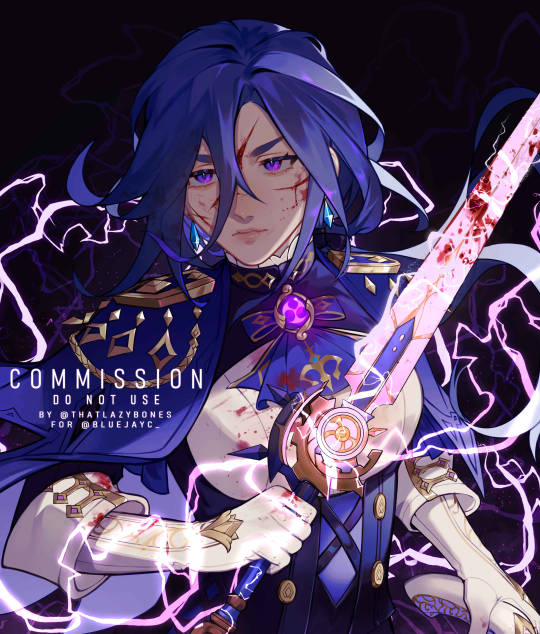
Clorinde comm for @/bluejayc_ on Twitter! 💜
#clorinde#art#my art#illustration#fanart#digital art#genshin impact#commissions open#art commissions#commissioned art#I'm so in love with this comm#TuT
846 notes
·
View notes
Note
hey big vro
question: what do you do to add a gif to your graphics
:3c < hi dude ! I mostly use ezgif for graphics BUT !!!!
for layouts I use photopea , example :


What I like to do is open photopea < pick a gif from my hoard < upload graphic < then click OPEN to upload the gif in a separate file in photopea’s editor < drag the gif and stretch it little < then move it to the spot you want the gif to move and groove
video … to show you :

The result !!!!!!!! Idk how to clip gifs in photo pea just yet but I’ll learn eventually :3c
#rentry#tut#tutorial#ignore how it’s a different frame#THE HEADER WAS TOO BIG GOR MY PHONE#PHOTOPEA KEPT CRASHING#hope this helps
107 notes
·
View notes
Text
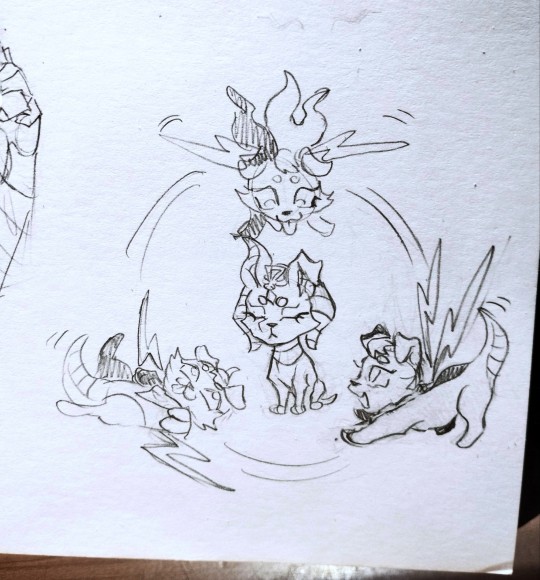
Cleo de nile g3 🥺🥺🥺✨


#aqui también lxs posteo y nimoderrimo 💅💅✨#monster high g3#cleo de nile g3#frankie stein g3#mh g3#watzie#tut#las mascotitas 🥺♥️♥️♥️
738 notes
·
View notes
Text


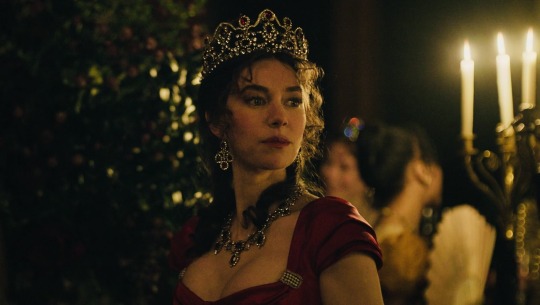
PERIOD DRAMA APPRECIATION WEEK 2024!
day two: favorite characters (1/2)
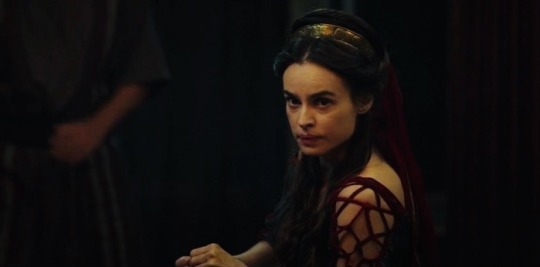
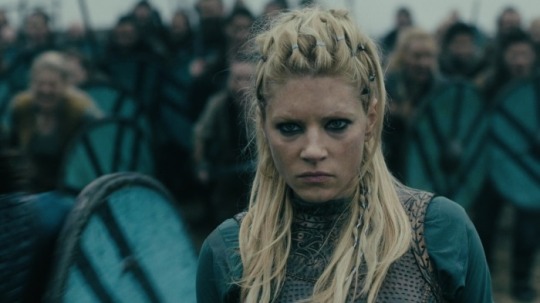
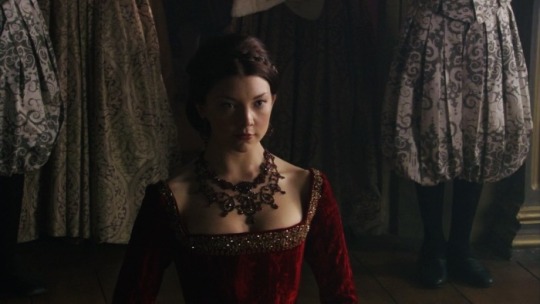
ankhesenamun played by sibylla deen in tut livia drusilla played by kasia smutniak in domina lagertha played by katheryn winnick in vikings morgan pendragon played by eva green in camelot empress matilda played by alison pill in pillars of the earth elizabeth woodville played by rebecca ferguson in the white queen anne boleyn played by natalie dormer in the tudors milady de winter played by maimie mccoy in the musketeers elizabeth chynoweth played by heida reed in poldark josephine de beauharnais played by vanessa kirby in napoleon
#perioddramaappreciation24#perioddramaappreciationweek24#perioddramasource#perioddramaedit#perioddrama#the white queen#tut#domina mgm+#vikings#camelot starz#pillars of the earth#the tudors#the musketeers#poldark#napoleon 2023
56 notes
·
View notes
Text
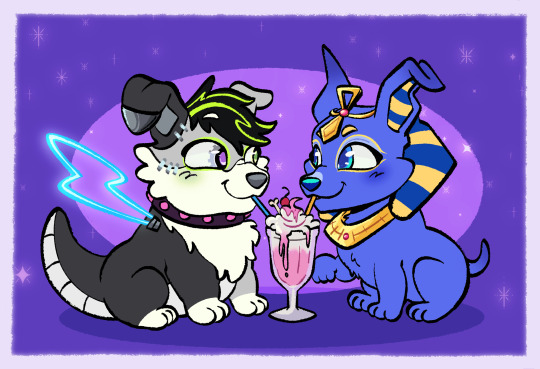
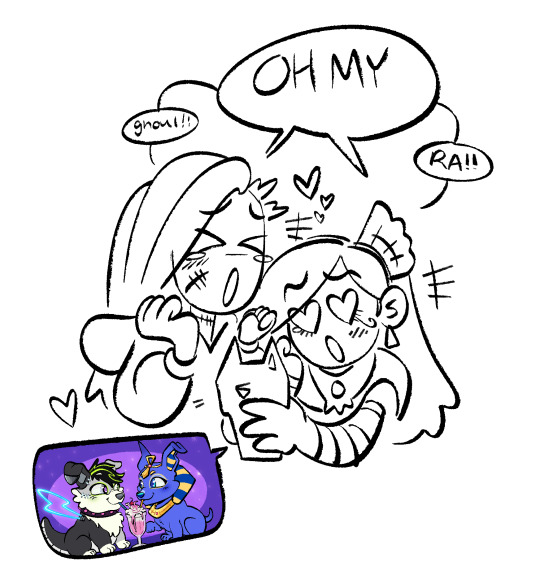
if lady and the tramp were based
BONUS: Clankie Live Reaction
461 notes
·
View notes
Note
What program do you use for your edits? And can you give us a crash course on how to use it? I'm kinda stupid so it'd help a lot
I use two programs mainly! Photopea for gifs and psds && ibis paint X for making my edits!
CRASHCOURSE(?):
okay so idk rlly how to ‘crashcourse’ ibis paint x since it’s rlly easy to use but here’s the basics uu rlly need to know for editing in that app.
It only lets you add one image at a time. unlike other websites/apps that allow uu to import multiple photos at a time, ibis paint only allows u to import one! With this is mind you want to be careful on what you click cuz if you click the wrong thing it takes up more time!!
GIFS DO NOT WORK!! I repeat, GIFs do NOT work!! Trust me, I failed miserably trying to add GIFs into the app the first time I used it. Do not try to do it, it’s very time consuming! Unless you’d rather figure it out, then be my guest!
you may see edits all over with nice gradient patterns and think “wow, that looks great I wanna try that”. It is, but you’ll need the apps premium purchase which is a monthly pay thing. BUT THERE IS A SOLUTION. You can use the clipping button and put a color in. After that you can mess around with the opacity and blending mode of the color! example:


Then you’ll be left with a beautiful product like this:


This is just the crashcourse for ibis paint x rn, I’ll do a photopea one tomorrow !! :3
#rentry#rentry graphics#— ⟢ talking !!#requests open#crashcourse#tut#tutorial#rentry tutorial#ibispaint art#ibispaint x#ibis paint tut#Photopea tut#Crashcourse tutorial
16 notes
·
View notes
Text


Someone asked for help on how 2 draw slugcats in a server so.... I'll post this here 2!!!!!!/ these r very shitty but whatever
#oc#art#character design#oc art#original character#rain world#rainworld#slugcat#rw slugcat#art tutorial#tutorial#slugcat tut#tut#rw fanart#rw artificer#rainworld oc#slugcat rainworld#rainworld slugcat#rain world slugcat#rainworld slugpup#rw slugpup#slugpup oc#slugpup#rain world slugpup#my ocs#oc stuff#ocs#yaaa
32 notes
·
View notes
Text


Sibylla Deen as Ankhesenamun Tut (2015) Episode 2
#tut 2015#tut#ankhesenamun#sibylla deen#stuff:mine#perioddramaedit#perioddramasource#perioddramagif#gifshistorical#tutedit
290 notes
·
View notes
Note
Anon here!! How did you make the heart graphic for the power rentry?

hi!! i’ll put it under the cut since there’s quite a few steps. lmk if you need a more specific tutorial or images for any of the steps!!

1) finding the base
find the shaping mask you wanna use. you can look up “shaping mask png” or “mask png” on pinterest to find some. this is the one i used:

2) removing the background
to remove the background, use the selection layer in ibis paint x. to find this layer, go to the layers panel and it should be the one all the way at the top. it is titled “selection layer.” to remove the white background, select the bucket tool and select the white background. it should turn blue. then switch from the selection layer to the layer you’re removing the background from. look at the top middle of the screen. there should be a square composed of dotted lines that looks like this:
click on it and select “cut.” this will remove the white background. click on it again and select “remove selection area.” now you’re ready to continue!
3) creating a cleaner base layer
you might want to do this if you plan to add a stroke, as once the background is removed from the mask, it tends to leave some remnants behind. this makes the stroke look choppy and pixelated. to do this, take the paint bucket tool on a new, blank layer, and fill in the black part of the base with black. then, delete the base layer underneath the new layer. the hearts will become transparent (to see this better, change the canvas from white to transparent in the layer menu) and the base will hold its shape. you can also remove the hearts in the previous step, but this tackles two birds with one stone and (in my opinion) looks cleaner.
4) filtering manga panels
to make the manga panels pink, i looked up “pink manga polarr code.” pretty much any one will do, but this is the one i used:
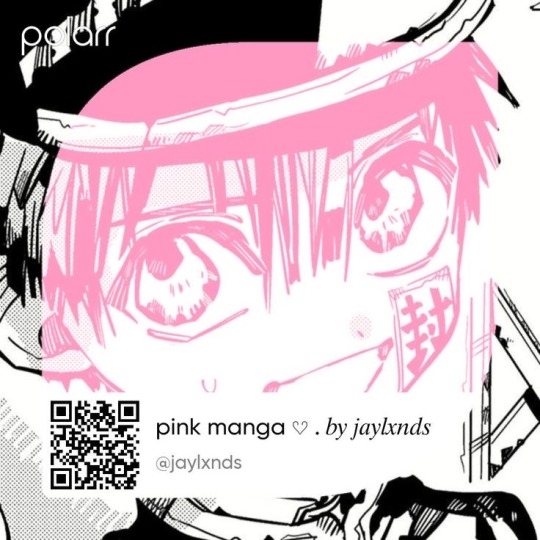
for the rest of this step, you’ll need the app polarr. once you get the app, go to the edit section of the menu on the bottom. click “open photos” and insert the manga panels you wish to change the colors of. then, click “filters” and “import filter.” from there, click “import qr code” and click on the filter in your gallery. the filter will go into polarr, and you can just click instant export or you can save it and then export it. it’s up to you.
5) masking the panels
import the images you just filtered into your canvas. now we’ll use a clipping layer to have them take the shape of the base. click on the image layer you want to do this with, and then hit the clipping option in the layer menu. this will have it take the shape of the base.
6) coloring the hearts
now we’ll add a new blank layer atop the clipping layers. i color picked the pink color from the image, and then used the bucket tool to fill in each of the hearts.
7) adding the extra pngs
for this step i used the sticker option in picsart and a transparent canvas to collect the pngs. i believe i looked up “pink png” in the search bar, but i’m not sure. then i imported them into the ibis paint x project and positioned them where i wanted them to go. download transparent pngs of the project (one of each image you added). toggle the eyes on and off so that you can save the different versions (not individual layers. i just mean if you added two manga panels, make sure you get one with one manga panel and one with the other).
8) creating the gif
search up ezgif animated gif maker. it should be the first option that comes up. for this, i typically switch to “manually ordered upload” opposed to “alphabetically ordered opload” (the default) so i have more control over the order of the images in the gif. once you upload them into the site and you get to the editing menu, set the delay time to 100 and click the box that says crossfade frames.
andddd you’re done!!! i hope this was somewhat comprehensible and i didn’t miss any steps xD
195 notes
·
View notes
Text
@fragilehiggs
HOW TO IMPORT HIGGS 3D MODEL INTO BLENDER / MODELS FROM GAMES INTO BLENDER
figured id make this a post because it’d be easier.. might help other people too!!! on how to put higgs into blender. you probably know some of the stuff i’m gonna explain but for good measure will bring up. this is extremely long because its the sort of thing i wouldve massively appreciated but i unfortunately instead basically had to figure it out going off of little to nothing
—
blender is a 3d program that allows you to import models from games into there which can then be rigged, posed, and animated. people take these models from games using programs called ninjaripper or greyhound. essentially this just goes into the files of the game and takes out the assets. if it’s an asset, it can be taken out. you would then have to rig the model yourself (basically put a skeleton to pose it.) this takes very long and is inconvenient.
luckily, people do this for you. you don’t need to rip your own assets out and rig, which is a hassle and you usually need to pay for these useful programs. a great spot for getting models that have been ripped from games is deviantart. however, there is no telling how these models can perform. they could be badly rigged, or could have messed up textures. unfortunately, such is the case for the one and only higgs model… https://www.deviantart.com/kanbara914/art/Death-Stranding-Higgs-XPS-864224744
the good news is that i fixed the textures. the bad news is that the rigging is absolutely beyond busy. he is poseable, yes, but the amount of points there are makes it really hard to. i’m yet to figure out a better way and might start ripping and rigging my own models. despite having fixed the textures i am unsure if i can export the fixed version. thus.. another tutorial will come through on to do that. unfortunately it takes awhile. all of this requires lots of patience, trial, and error.
so, now, how exactly do we start? FIRSTLY, we need to revisit downloading blender. the current up-to-date blender will NOT work. you need to download blender 2.80, NOT anything else. well, how do you get an older version?
in order to get an older version, navigate to blender.org/download/previous-versions/ and scroll down a bit to you see ‘download any blender version.’ here is a good tutorial but i believe that it is a little outdated so i will explain it furthermore. https://youtu.be/WmlijP9D67o?si=QHhpOQ_D_0LWJP9M this is the one i followed however so, the premise is the same.
we click on download any blender version and it looks quite overwhelming. dont be too worried, you just need to look closely and scroll till you see Blender2.80 . we then click on that and you need to find your operating system. im going to assume you run windows, and if so, pick blender-2.80-windows64.zip from the list.
navigate to your files, and then open up the zip file that you just downloaded. click blender 2.8 again and then what you see is going to look a little busy. dont be fooled, its actually not. just scroll down and find blender.exe. press this and itll bring up a simple process -- all you should have to do is press a few buttons and optimize it like any other download for an application such as blender. it should be installed like regular blender, and if its not on your desktop, simply go to blender.exe in your files in applications. i recommend pinning it to your taskbar.
here comes the next step. there is something called xnalara. i will keep the history of it rather brief but its quite interesting. xnalara was an older program that allowed people back then to rip models from games and import them into the xnalara program. that program is rather old and i rather not use it, however, im thinking about looking into it. its good to use blender regardless because of its studio-accredited attributes. its professional.
some awesome dude later down the line created something called a xnalara add-on for blender. this allowed you to download models ripped from games posted on deviantart that are optimized for xnalara. the file name for these xnalara optimized models end in .xps . these will not regularly be imported into blender, because it doesnt support it. however, this add-on will allow you to do such.
im going to explain how to download it but watching this video regardless is essential. you will probably need to go back to it now and then.
youtube
since youre particularly interested in importing higgs, i will keep it relatively broad but touch on his model a bit more because i am more familiar but this process applies to most models. navigate to https://www.deviantart.com/kanbara914/art/Death-Stranding-Higgs-XPS-864224744 and scroll down into the description of the post. click on the link, mega.nz/file/y88wyQpS#eDkcsSmW… so on and so forth. it will ask you if you want to leave deviantart and click the link again to go there.
you're now in MEGA. this website will allow you to store downloads for people, and i can assure you its safe. i would never download anything im not sure of -- my PC is my baby lol. look down to the bottom right and youll see "SAVE" and "SAVE TO MEGA." pick save. it will download, and you need to look to the top right and click where your downloads are. this will take a couple minutes, grab some water and a snack. when its done, click on it in the tray to open it.
youre going to be overwhelmed by everything you see. do not fret! just close it, dont unzip it. just make sure it exists. you can close MEGA and deviantart now. you now need to refer to the video i linked if you want to follow along with more resources. we need to install the XNALARA add-on for blender 2.80 which can allow us to put it into blender.
before i continue i want to say, being familiar will blender as a whole will be an insane help. unfortunately the only way i figured out some of the stuff that i did was because i knew how to just going off of the program. most tutorials will not have answers for this small issues... but i most likely do especially for this specific model.
here is the add-on. https://github.com/johnzero7/XNALaraMesh . github will look relatively the same as it does in the video. look to your right, youre going to see a bolded 'releases', and under it, XPSTools v2.0.2 or something along the lines of that. you dont need to see the other releases, it's best to have the latest one. click on it.
its going to open up the description of the file. the above is important to note because it says it works with the blender that you just downloaded. if there are any issues for whatever reason with using blender 2.80 (approximately the version from ~2020) those are other versions which are applicable. for the sake of my sanity im gonna explain how to open it in blender 2.80 .
go down to the bolded 'assets'. under it you will see 3 links -- click on the first one which ends in .zip . it will download in the download tray. if your computer tries to flag it or anything as unsafe, click away from that and allow it anyways. this program has been used by thousands for years. it will soon finish downloading. MAKE SURE THE XNALARA ADD ON IS SAVED ON YOUR DESKTOP!!!
go ahead and open up blender 2.80 now. if you have the newest blender installed already make sure youre picking the older version. it will open a terminal alongside of blender, while its running. dont close it. click general.
if you have never used blender, please watch a video on the basics such as this one. https://youtu.be/Z8sg0nHNTTo?si=zjR4aBHVF8XX_Qdn this is the only way to realistically be able to attempt messing with said model, unfortunately. unironically, rendering roblox avatars was a huge stepping stone and aid to my experience with this. i genuinely recommend you do it before you try and do something like this. here is an amazing, step-by-step tutorial that needs no explaining out of the video. https://youtu.be/kpALOtLhX-Q?si=4UrhkBTIK5qYOBfS
from here, this is a much better tutorial to follow >> https://youtu.be/8mqUqob3P3o?si=14a50v88IPZx6O8Y . find yourself at the time stamp of 1:46, the previous is the steps you have already done. go back to blender if you have made it this far, lmao. click on the cube and delete that motherfucker.
look at the top toolbar. it says things like file, edit, render, window, etc. you want to pick edit and scroll to preferences. youll see many options but youre going to want to click add-ons on the left. then, at the top left, click install. go to DESKTOP and click XNALaraMesh.2.02.zip and click install add-on from file on the top right. make sure its the ZIP. this is gonna bring you to a menu with potentially many other downloads. scroll down till you see XNALARA if so. MAKE SURE IT HAS A CLICKED CHECK MARK ON THE LEFT.
go down to the three bars on the bottom left and make sure to save preferences. you can then close that and go back to blender. it will now be one of your downloaded add-ons available! go to the top left again and hit file, import, and XNALARA / XPS. itll hover and youll see another option. make sure to pick XNALara/XPS Model (ascii./.mesh/.xps) . click it and pick Load an XNALara model file.
this will open up your file explorer within blender. click desktop and click on the higgs model you saved earlier. clicking it will lead to 2 files, click xps.xps . press Import in the top right. it will take a hot minute to pull everything into blender, be patient. once its imported scroll inwards and look at the son of a bitch. the rig is gonna be highlighted orange and hes gonna be gray. click to anywhere other than the model and face the enemy.
due to the shading settings, his textures arent showing. simply go to the top left where you see 4 ish circles, the second one should be selected. select the one to its right, viewport shading, and give it a second to load his textures in. its gonna look nothing like him. youre gonna have to fix the textures, brave soldier.
--
will post another tutorial if you decide to go through with this or if anyone does because unpacking all of that is such a pain in the ass but i promise it isnt rocket science. just not gonna do it if it isnt asked for because i spent 3 hours figuring out how to fix it the first time i imported his model -- the creator says nothing about this on the download or how to fix it unfortunately and its quite janky :(
if you even made it this far in reading, congratulations, youre a winner. IF YOU HAVE ANY QUESTIONS AT ALL PLEASE FEEL FREE TO ASK and i will answer them to the best of my ability.
SAVE THE IMPORTED MODEL TO REVISIT!!!!!!
#this took me so fucking long lmao#xnalara#blender#3d model#3d art#3d modeling#blender3d#ds higgs#higgs monaghan#higgs#death stranding higgs#tutorial#tut#tutorial blender#blender tutorial#xps#xnalara xps#Youtube
18 notes
·
View notes
Note
Do you know how to make a gif graphic? i have seen people with really pretty promo gifs but cant figure out how to make one 💔


Of course customer! it's quite simple! ^_^ just save your graphic ! im using this one as a example!

now.. I go into ibis paint , (the same page as the graphic) and click theses!
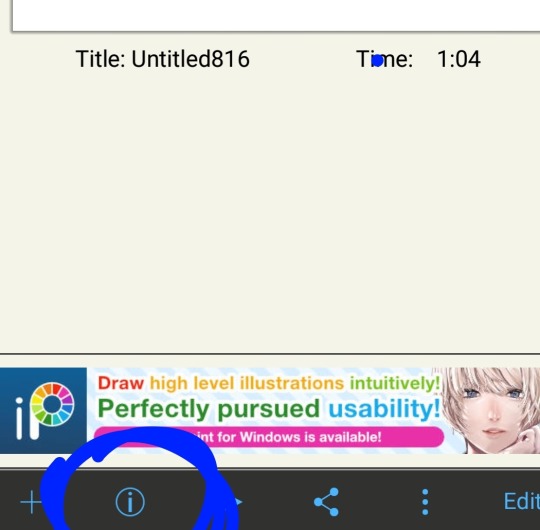
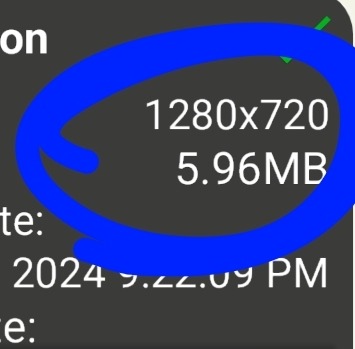
were using the sizes (whatever there called) to resize the gif, so it can fit into our graphic! I go into ezgif, and click on crop! (u don't have to do this but I normally do it!) and the last images explain themself!

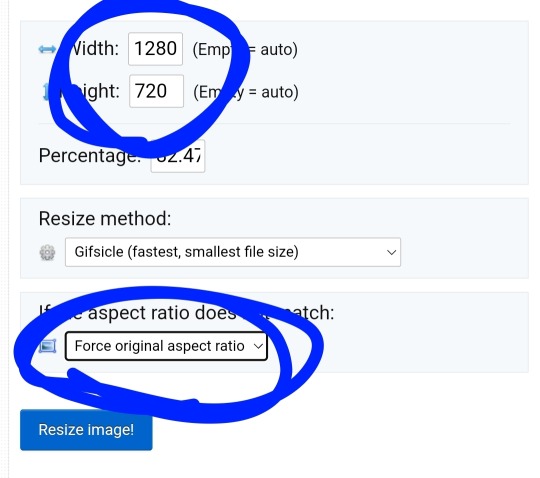
when u click in resize image! and then click to overlay, add ur graphic and bam! ur done :D
i hope this is good enough! now.. i have some orders to finish up! bye bye! (*´∇`)ノ

25 notes
·
View notes
Text
The new Stardew updates are super cool and all, but when is my boyfriend Harvey gonna stop asking me if Maru needs sunscreen on her shoulders
62 notes
·
View notes