#TSRWorkshop
Explore tagged Tumblr posts
Text
Tutorial: Transforming wsp. Files into png. Files in TSRWorkshop
Simmerit ask me if it's possible to export wsp. files as image files to use in photo editing softwares, and while I was telling them that it's not possible to do with a program or plugin (to the best of my knowledge), I remembered that, once upon a time, I made png. files from wsp. files. However, the method I applied is kind of a workaround that has to be executed in the Textures tab in TSRW. It's quite easy to do as well, but as I suck at explaining things with words, I sat down to do a little photo tutorial. It presumes that you already know how to work with TSRWorkshop!!!

Step 1: Select a random object, the plainer the better. I've chosen the room divider from 'Town Life Stuff' because it has no Overlay and Specular textures, which is convenient because I don't have to make these textures empty myself. It's also recommended that the textures of your chosen mesh are in a square format and that TSRW exports the diffuse map in a 512x512 resolution image.

Step 2: Export the Mask texture, fill it with red color in your photo editing software and import it again. Do the same with the Multiplier texture, just fill it with grey color.
Please note: By lightening or darkening the grey of the multiplier, you can affect the color temperature of your pattern, meaning that if the grey is very dark, your pattern will be very dark as well.

Step 3: Select the pattern you like to export. I've picked the crackled paint.

Step 4: Apply the pattern in the Pattern tab, but only to the first pattern group, Pattern A.
Please note: In most cases, it's best to keep the preset tiling of your chosen object to get the "basic look" of the pattern.

Step 5: Set all of the other patterns in the tab to false. The object itself might look weirdly shaded now, but that doesn't matter. All that I care about is exporting the crackled paint pattern. ;)

Step 6: Export the diffuse map as usual by selecting the folder you want to put it in.

Step 7: Assign a name to the file.

Step 8: Et voilà! The crackled paint is ready to start its career as a png file.


--- Edited to add footnotes to Step 2 and Step 4 and to add three examples of the crackled paint pattern depending on the grey tone of the Multiplier and the tiling of the pattern . ---
Disclaimer: This is my first tutorial. If I left out an important step, I apologize. If I didn't use the correct technical terms, I apologize. If there is already such a tutorial, I apologize. Feel free to straighten out any errors. Feel free to get back to me if there are any other problems.
44 notes
·
View notes
Text
Useful Programs for The Sims 3.
For fellow Simmers who want more out of their gameplay and content, we've explained some of the well known programs for The Sims 3.
TSRWorkshop - a program meant for creating game's custom content.
Delphy's Sims3PackMultiInstaller/Extractor -converts Sims3Pack to .package files.
Delphy's Sims 3 Dashboard tool - shows the Sims 3 cache files, corrupted files, Sims 2 files and/or corrupting files. + Delphy’s Dashboard – Crinrict's Sims 3 Help Blog
Delphy's Custard - serves to clean Sims3Packs and check for corruption within them. + Delphy’s Custard – Crinrict's Sims 3 Help Blog
Jonha's S3Translate - translates files into multiple languages.
RegulSaveCleaner - program meant for cleaning up save files.
S3PE - a tool to edit Sims3Packages.
3 notes
·
View notes
Note
would you be willing to share a bit about how you learned to convert 3d models into sims cc ? i've been wanting to try my hand at some free models on sketchfab, but most tutorials i can find are on creating cc from scratch or recolouring. if you could point me to some resources, i'd be super grateful ! :) (also if you get this twice, sorry, i got some error from tumblr the first time so i'm trying again)
you just need to have the model file ( obj, fbx, dae, etc), the 3d program (blender or any other) and the program from the game ur converting to. For sims 3 it's tsrworkshop and sims 4 is sims4studio.
There's this tutorial by @gruesim it's Sims 4 to ts3 but u can apply the same method for anything else, get the file>import to 3d program> make necessary changes> then import to the game program. some other tutorials: A tutorial for sims 4 cas | Sims 3 to sims 4 hope this helps!
29 notes
·
View notes
Note
Hi! Thank you so much for your cc, it's great. If you accept requests, can you convert the mugshot chart from ts4 GTW?
Thank you! I would be happy to, if you can send me the in-game name. I don't play ts4 so I get lost in the catalog if I can't search.
Anonymous asked:
Hi:), Love your conversions and your work, thankyou so much! I recently tried your tutorial on converting sims 3 objects; For some reason tsrworkshop is not recognizing sims3pack files when I try to create when trying to follow your chair tutorial, any help please?:(
I just tested it and it still works correctly for me. When you clicked New Import, did you remember to change the filetype to sims3pack? That's the only reason I can think of that it wouldn't show up.
Anonymous asked:
Hello! Do you happen to still have your TSS objects decluttered set? The dropbox link in the original GOS post is dead. :(
Anonymous asked:
Hello, could you give a new link for Teen Style Stuff "Elite" objects decluttered in GoS please, the dropbox link doesn't work anymore. Thanks in advance.
k***** asked:
From what I understand, you cannot re-upload your decluttered TSS Elite items because the file is lost in some external drive. Would you be interested in remaking the bookshelf and clothing hanger as well?
Wow, that set has been popular. I completely forgot ever making most of it, which is why I didn't redo it. Sure, I'll get it remade when I get a bit of free time.
Anonymous asked:
Hi hello,May I ask did you know where I can find non defaults replacement pizza dessert TNW,I really want the Oreo and MNM pizza because the default can't useable in my game play.I want more edible foods for my Sims to eat.
I'm sorry, I don't. Have you checked modthesims? They have a ton of really well done custom foods!
Anonymous asked:
thank you for creating the toaster pastries dr! i love it so much
I'm so glad you like it!
That's all of the anon asks that I'm aware of. Tumblr was not great about telling me they existed so I'm sure these are very late. If you sent an ask on anon and don't see it here, please resend :) I'm not full time back but I am trying to maintain my stuff at the minimum.
2 notes
·
View notes
Text
How I made the Cheshire Cat part 2/3
part 1
Part 2 - the Mesh:
You can make your mesh edits in any meshing program, but some steps will require Milkshape.
1. Go to the Geometric Data Container in SimPE. Hit export, then from the dropdown menu, choose Milkshape 3D ASCII Exporter. Save your file, then while still in SimPE, right click the GMDC, and choose extract. Save that new file for later. We’re finished with SimPE for now.


2. If you’ve already installed the TSRWorkshop and Unimesh plugins for Milkshape, skip to step 3. Install TSR Workshop in a place you'll remember, then go to the place you installed it. If you left things default, it’s probably C/Windows/Program Files or Program Files(x86)/The Sims Resource/TSR Workshop/Extras/Milkshape Plugins. Install Milkshape if you haven't already.
Take the two files from the TSRWorkshop folder, then open the folder in the programs folder where Milkshape is installed. Put those two files in that folder. That’s it for TSR Workshop. We won’t be using the program itself. If you don’t already have the Unimesh plugins, extract the Sims 2 unimesh folders, take the files out and drop those into the Milkshape folder too.
3. Open Milkshape and choose the import option: Milkshape 3D ASCII. import your skunk mesh ASCII file, leave everything default.

We can’t use this mesh and skeleton for bone assignments because the bones aren’t in the right order, but it’s useful as a guide, because the GMDC, which we will use for the bone assignments, looks like this, with unattached bones.

If you are more comfortable in another meshing program, like blender, you can take this mesh, export it in a format that supports skeletons and do the edits in that program.
4. Once you have the skunk in the meshing program of your choice, import the mesh for your new animal. Then you’ll need to edit it to be similar to the shape of your guide skeleton.
5. Skip this if your mesh isn’t rigged or if you don’t need to change the position by rotating the bones. Unlike Sim clothing conversions, I can’t give you a formula on how to rotate, because it depends on the mesh. For Blender, before you pose the mesh, make sure it has an armature modifier. Then follow the steps here. https://nixart.wordpress.com/2013/03/28/modifying-the-rest-pose-in-blender/
If you’re working in Milkshape, and you posed the mesh, go to Animate then Rotate All, then click OK to make the animation stay in place once you leave Anim mode.
I’m working with Gauntlet101010’s Sims FreePlay to Sims 4 conversion. Due to the edits this person already did, it’s already pretty similar to the Sims 2 cat skeleton. I’ll be making it a bit taller and lengthening the neck. You can see it’s not the same shape as the skunk, but that’s okay. Just position the limbs, neck, head and tail in the right area, and make sure the elbows/knees are lined up with the bones for a natural bend.

6. Once you’ve finished your edits, Delete the guide mesh skunk and its skeleton. If you didn’t do your editing in Milkshape, export your mesh (The format doesn’t matter. We don’t need those bones anymore), then import it into Milkshape. Also, if you edited outside Milkshape, you can temporarily import the skunk gmdc imported in Step 1, just to make sure that your mesh didn’t get repositioned during the export/import process.
8. Now you’re in milkshape, and the only thing that should be in this window is the new mesh, no skunk. Go to the groups tab, and if you have more than one group, select them all then regroup them into one. Name the group “group_base” without the quotes. Export this as a TSRW Object. It’ll save as a WSO file. Get rid of that Milkshape window and open a new one.

9. Go to Import, and choose Sims2 Unimesh V4.09. Navigate to the spot you saved that skunk gmdc from step 1, and bring it into Milkshape. A box will pop up. Click yes. Rename the group to group_base and export it as a TSRW Object.
10. Open Cmar’s Meshtoolkit. Choose Auto tools for WSO tab. Import the two WSO objects from step 8 and 9. The WSO Mesh to modify is the new animal, and the skunk is the reference mesh. I left the settings on default. Click “do assignments and save” name your new file, and close the program.

11. Open a new Milkshape window. Import the Skunk GMDC (NOT the Skunk.WSO). Click yes on the box. Import the WSO you made in step ten on top of the skunk. Go to the joints tab. Rename Joint@00h to anything. Go to the groups tab and delete the skunk mesh, but not its skeleton.

12. Now you should have your new mesh and a skeleton. Export as a half-life smd. Make sure Reference is selected and check the box With Vertex Weights.

13. Start up milkshape again. Import the skunk gmdc, then import the smd file over it. Uncheck “rename bones” then click ok.
14. Go to “groups” in milkshape, click the skunk. Click “comment” and copy everything in the box that comes up. Click the new animal mesh in groups, go to comment, and paste what you just copied into the box.
15. Delete the skunk, but not its bones. Rename the new animal group to: fubodyskunknpc_color Export using Sims 2 Unimesh Export. Close milkshape.
16. Open the package you cloned earlier in SimPE. Go to the texture, then replace it with the one for your new pet. Go to the Geometric Data Container, right click, and replace it with the file you saved in step 15. Commit, save. Press preview and make sure things look okay. If the texture’s wrong, recheck your work from the 3IDR linking in Part 1, steps 5 and 6.
Part 3
6 notes
·
View notes
Note
I saw that one anon asked that if you guys take suggestions. There is toddler and child glitter that was made by Sukusims. I figured out the error in the creator in which why the face glitter won't work for toddlers and children, they forgot to uncheck the young adult box in tsr workshop but I'm not sure how to fix it so I was hoping if maybe you could help a simmer out possibly :(
Hi! You can open it in TSRWorkshop and check the toddler box. :)
1 note
·
View note
Photo

MAGIC FLOORS FOR SIMS3
THANKYOU TO..
MEDIAFILE
PHOTO2021
TSRWORKSHOP
EA.SIMS3 FOR TESTING
BY DAWN.BRADLEY
0 notes
Text
Dear CC creators, I need your help:
Can You teach me how to extract a mesh directly from a TS3 package file? I don't know how to extract properly a mesh with s3pe (mlod, modl?) and import them in milkshape. Usually, I do it with tsrworkshop, but it doesn't works with certain packages. :P Thank You so much!!
10 notes
·
View notes
Text

reated for: The Sims 4
This Creation belongs to a Set - Click here to show the whole Set
I definetly needed some candles like these on my game for modern outdoors. I have created this on a big size to be wether on the floor or on the top of a table
Creator Notes
*only sims 4 base game requiered
Credits: TSRWorkshop
Short URL: http://www.thesimsresource.com/downloads/1418035
ItemID: 1418035
0 notes
Photo

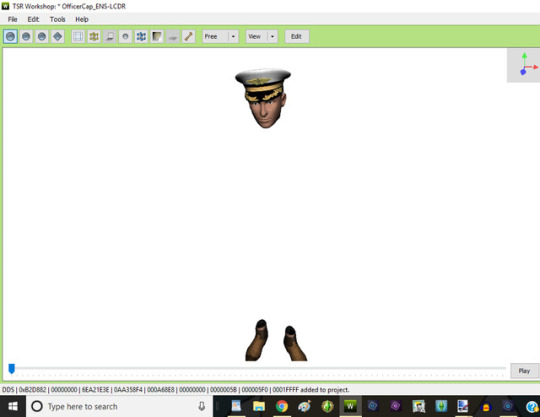
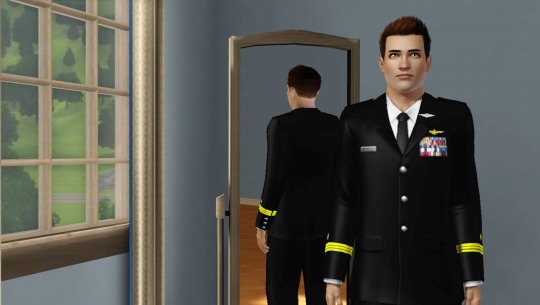
Figured out how to make some Sims Navy officers caps. Next up garbing my Navy officers in proper uniform unlike the adhoc ones I’ve been using.

0 notes
Photo

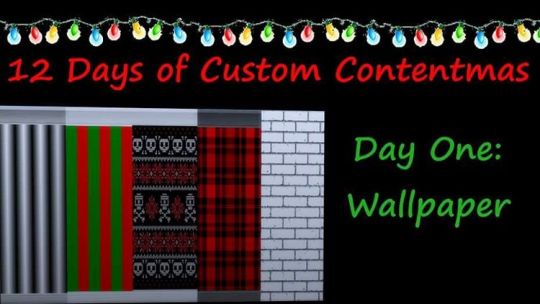
On the first day of Christmas, Mimmy gave to you... A Wallpaper Recolor ! Check out my video to see how I recolored base game wallpaper using the TSR Workshop. Got any suggestions? Let me know! [12 Days of Custom Contentmas|https://youtu.be/UtBJXTItBRI] Find me on YouTube and FB Mimmy's World Find me everywhere else @mimmysworld Link to channel in bio! #thesims4 #tsrworkshop #simscc #sims4cc #sims
0 notes
Note
Do you take requests? Or can you maybe create a tutorial on how you make build/buy objects or custom content in general I can’t seem to find helpful blogs or tutorials and sadly I’m a visual learner 🥺
Hello! :) yep, for comissions I do take requests! You can find a lot of tutorials on youtube, take a look at this and this, these are more sims focused so you can learn how to use sims cc programs, like tsrworkshop and sims4studio. Also, not related to sims, there’s this iconic donut tutorial by BlenderGuru, click here. I’m showing blender only tutorials cuz that’s what I use to make my cc, but you can always check out other programs, such as:
Maya | 3dsmax | cinema4d
Zbrush (focused on sculpting)
Marvelous designer (cloths in general)
World Machine (terrains)
For textures I mainly use Substance Painter and Photoshop, but there’s free alternatives to these programs, such as 3D Coat(scratch this one cuz I thought it was free but it’s not lol), Gimp, Inkscape, etc.
For conversions from others games I use different programs, depending on the game I’m converting from. For cities skylines I use ModTools, for Mu Online I use Pentium Tools, I was also using OpenIV for GTAV models/textures, Noesis for Yakuza Game and for many other games there’s also 3DX Ripper, NinjaRipper, etc. In case some models comes in a file format you don’t have in your 3d program then you can just download a plugin to be able to import them. Milkshape also comes with a ton of different file formats importer. Hope that helps you getting into cc creation/conversion!! my advise is to basically watch tutorials if you’re a visual learner, it’ll help you a lot! go for it nonny <33
38 notes
·
View notes
Text
Can someone help me please
So I’m learning to make clothes for my sims game I got a male shirt that’s perfect but I wanted to do female shirts with the front having sayings or words I can’t figure out how to do it. I’m using gimp. If anyone can help I’d appreciate it.
0 notes
Text
When workshop gives a error:
My reaction before to save: FUUUUUUUCKK, SAVE MY PROJECT NOW!!!!
My reaction after to save: Workshop, fuck you.
1 note
·
View note