#TS4 Base Game Households
Explore tagged Tumblr posts
Text
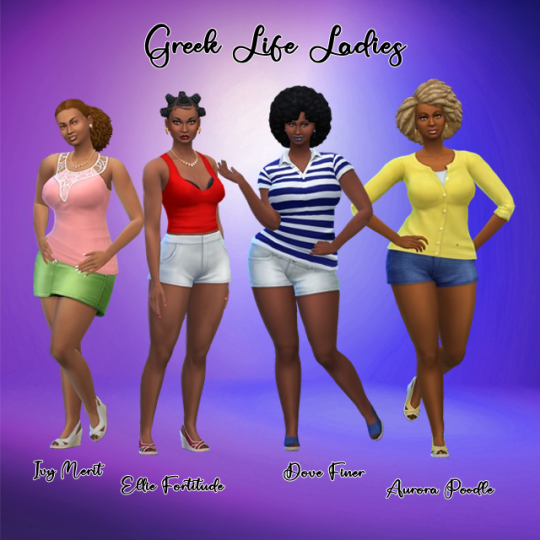




Greek Life Ladies Household (NO CC) by TajLibra Creations
For the Love of Sisterhood
Ivy, Ellie, Dove and Aurora are childhood friends that decided to attend the same college, however they pledged different sororities. These roommates still have a lot to learn about life and sisterhood.
Each member of the household has an outfit for every occasion. All outfits use only Base Game content.
Outfit Information:
Outfit Categories: Everyday, Formal, Athletic, Sleepwear, Party, Hot Weather & Cold Weather
Total Outfits: 8
Base Game Compatible
Download BASE GAME HOUSEHOLD - NO CC on 🖱️Patreon!
Unzip the file and place all items in your Tray Folder
Uploaded on 11/19/2023
Suggested Alternative Versions:
Custom Content Expanded Version by TajLibra Creations on 🖱️ Patreon! View the Full Lookbook with Custom Content Links HERE! Custom Content Hair by @sheabuttyr/savvy sweet, @qicc, @simstrouble, @shespeakssimlish, @zeussim, @candysims4, @leahlillith
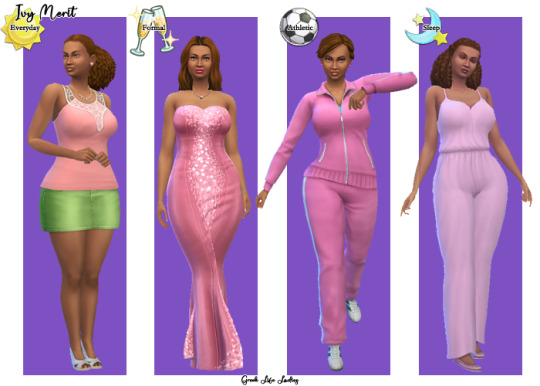
Ivy Merit
Ivy is a member of Oh So Pretty Alpha Kappa Alpha Sorority, Incorporated. She is creative and loves to write. Ivy is a perfectionist when it comes to her art.
Gender: Female
Age: Young Adult
Aspiration: Best Selling Author
Bonus Trait: Muser
Traits: Creative, Self Absorbed, and Perfectionist
Marital Status; Never Married

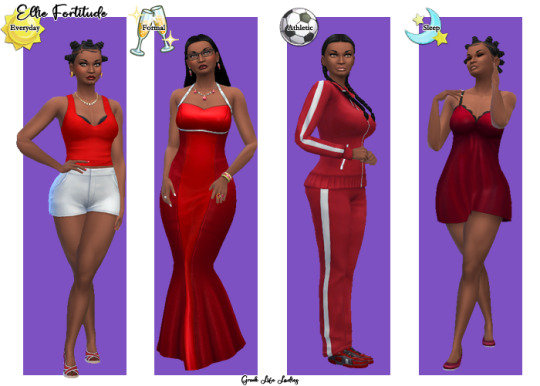
Ellie Fortitude
Ellie is a DevaSTating member of Delta Sigma Theta Sorority, Incorporated. She is a genius and learns everything quickly. Ellie is a loner and can be hot headed.
Gender: Female
Age: Young Adult
Aspiration: Nerd Brain
Bonus Trait: Quick Learner
Traits: Loner, Hot Headed, and Genius
Marital Status; Never Married

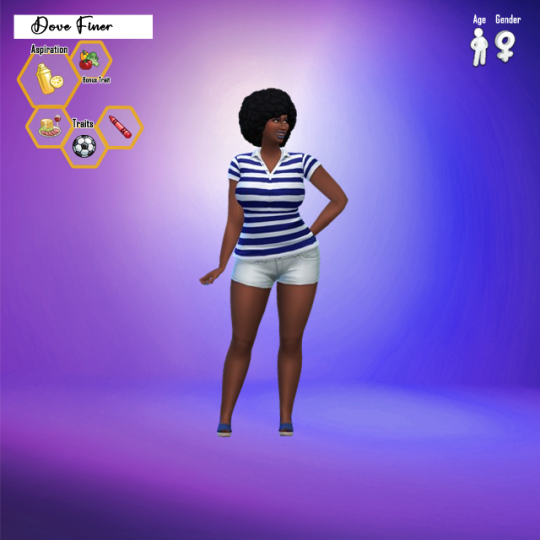
Dove Finer
Dove is a member of Zeta Phi Beta Sorority, Incorporated. She is the go to for the best drinks. Dove can be a bit childish at times and loves all types of cuisines.
Gender: Female
Age: Young Adult
Aspiration: Master Mixologist
Bonus Trait: Essence of Flavor
Traits: Foodie, Active and Childish
Marital Status; Never Married


Aurora Poodle
Aurora is a member of Sigma Gamma Rho Sorority, Incorporated. She always has a book in her hand and strives to be a friend to all. Aurora is a vegetarian and loves forcing her roommates to try her new recipes.
Gender: Female
Age: Young Adult
Aspiration: Friend of the World
Bonus Trait: Gregarious
Traits: Bookworm, Vegetarian and Good
Marital Status; Never Married

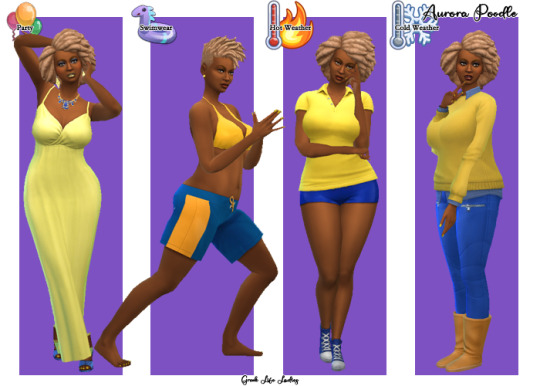
Expanded Custom Content Version Preview - Download on 🖱️ Patreon!
This version has a base game outfit, an outfit using packs/expansions and an outfits using packs/expansions with custom hair and some clothing for every outfit category.

#ts4cc#download#ccbytajlibracreations#sorority#cas#ts4#ccbytajlibra#divine9#d9#TS4 Households#TS4 Base Game Households#Sorority Households TS4
6 notes
·
View notes
Text

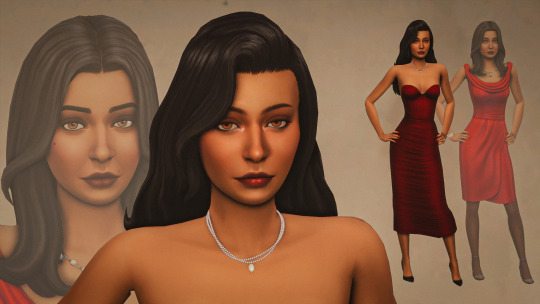
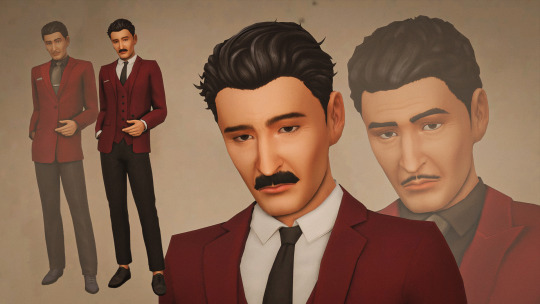
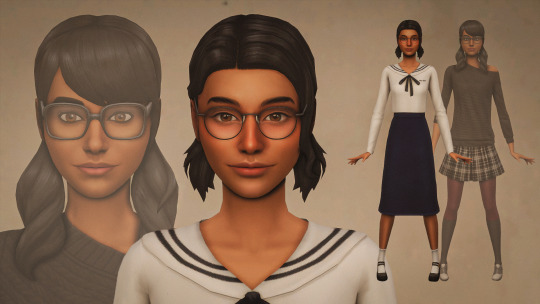
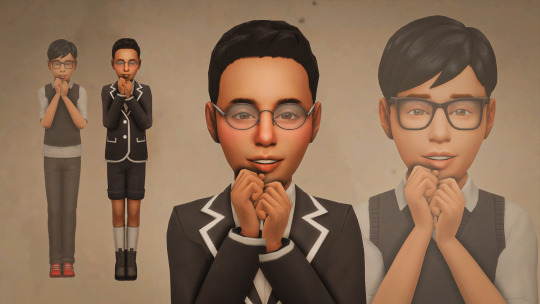
GOTH MAKEOVER
Goths had the most drastic change compared to other families, but it's just because I think they've been done dirty (minus the skintone, I think the upgrade ruined them even more). Since they are the most iconic family in the franchise, they have been inspired by their previous selves - Bella is mixture of her in TS1 and TS2, Morty is mostly TS2 with a sprinkle of TS4, Cassandra is direct remake of her in TS1 and Alexander has been remade from TS2.
Available to download on the gallery (mortanko). Don’t forget to toggle CC switch on before searching. Or download tray files here.
More of my makeovers here.
—
ꕤ Bella ꕤ
Skin | Skin details | Eyebrows | Hair* | Eyeshadow | Eyeliner | Blush* | Lips | Dress | Shoes | Necklace | Nails
ꕤ Mortimer ꕤ
Skin | Skin details | Eyebrows | Eyelashes | Hair | Eyeliner | Jacket | Pants | Shoes | Nails
ꕤ Cassandra ꕤ
Skin | Eyebrows | Hair | Lipstick* | Top | Skirt | Shoes | Socks | Glasses
ꕤ Alexander ꕤ
Skin (Birdie skinblend) | Eyebrows | Eyelashes | Shorts | Shoes
ꕤ Shared CC ꕤ
Skintone | Spotlight | Highlighter | Sclera | Eyes | Eyelashes | Blush | Lips
*simsresource. Adfly free!
Outfits in the preview are pasted through all the categories, make sure to change it accordingly.
—
Massive thank you to creators @sims3melancholic, @vibrantpixels, @pralinesims, @joliebean, @izziemcfiresims-blog,
@twisted-cat, @jius-sims, @aladdin-the-simmer, @goppolsme, @simcelebrity00,
@obscurus-sims, @sentate, @serawis, @okruee, @simandy,
@nesurii, @miikocc, @trillyke, @marvinsims, @mmsims,
@northernsiberiawinds, @magic-bot, @simstrouble, @luutzi, @rustys-cc,
@dogsill, @remussirion, @serenity-cc, @sammi-xox, @kijiko-sims,
@madlensims, @nintensims,
—
@maxismatchccworld @mmoutfitters @sssvitlanz
#mortankocreations#my sims#ts4 makeup#ts4ccfinds#ts4cc#ts4mm#s4cc#simblr#ts4 simblr#sims 4#the sims 4#ts4#simblog#sims4cc#sims 4 cc#sims 4 mm cc#s4 mm#ts4 mm#mm cc#mmcc#sims makeover#willow creek#sims 4 base game#goth#goth household#bella goth#mortimer goth#cassandra goth#alexander goth
235 notes
·
View notes
Text


welcome back Penne Pasta! now reincarnated into a ts3 AU where she is a fairy
and we cant forget Pesto <3
#my first sims game was ts3 but i only had base game#and ts4 dont have fairies#so yeah i made penne into one in this au#the sims 3#ts3#ts3 simblr#sims 3 screenshots#ts3 pictures#ts3 gameplay#sims 3#thesims3#penne pasta#pasta household#pesto pasta
25 notes
·
View notes
Text


Base Game Renovation: Johnny's Trailer
Johnny’s tiny trailer couldn’t be more different from the massive mansion he grew up in. Instead of a cold, empty, modern mansion he has a cozy, colorful space to personalize however he likes. It might not be much, but it’s his, and he’s making it count. That includes his front garden, which he managed to landscape on his own. It’s his second proudest achievement, next to his first comedy special, that is.
Available on the gallery under ID: pinie72
#ts4 build#ts4 base game#johnny zest#the zest household#ts4#the sims 4#sims 4#lore refresh save#my stuff
41 notes
·
View notes
Text


#sims 4 current household#sims 4 seasons#sims 4 pets#sims 4 screenshots#sims 4 gameplay#sims 4#sims 4 simblr#sims 4 legacy#sims 4 story#sims#ts4 edit#ts4 base game#ts4 screenies#ts4 maxis match#ts4 gameplay#ts4 simblr#ts4 legacy#ts4 screenshots#ts4#ts4 story#my sims#the sims community#simming
25 notes
·
View notes
Text
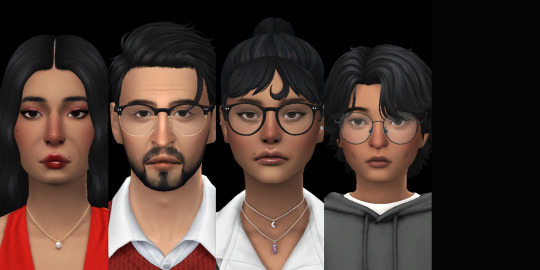

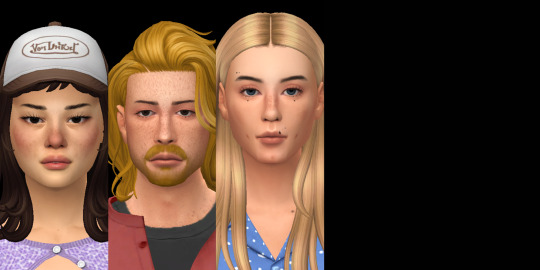
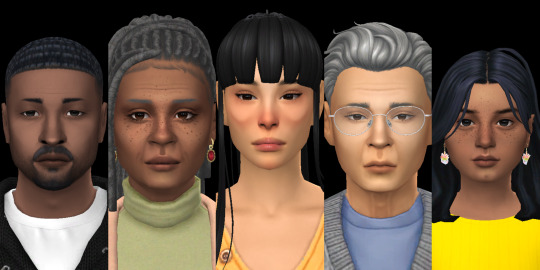
meanwhile in willow creek… (oasis springs)
#tumblr try not to eat my quality challenge#i got saur tired of this by the time i got to eric lewis lmao#so sorry besties i’ll do you better one day… just not today#i will be doing oasis springs next and starting w the roomies#for the longest time i didn’t know the roomies household existed lol#ts4 townies#the goths#the pancakes#bff household#spencer-kim-lewis household#base game#ts4 base game#ts4 makeover#sims 4 base game
30 notes
·
View notes
Text

Turn On/Off Replacements: No Zombies Edition + 3t2 Trait Support
This is basically an update of my TO replacements, but I want to keep the post clear, so I'm sharing it as a new version.
Here's what got changed:
⭐ No More Glasses Zombie TO Instead of zombies, you'll get a brand new TO: Enthusiast. It's triggered by sims who are invested in their hobbies.
⭐ 3t2 Trait Support If you use 3t2 traits, sims with fitting traits will trigger directly related turn on/offs. This is only a subtle flavor; if you want the whole chemistry system to be trait-based, this mod isn't for you. These replacements still work just as well even if you don't have 3t2 traits in your game.
⭐ Polished Icons All the TS4 icons are now slightly smaller and hopefully work better with UI replacements. I also changed or edited some that I felt needed improving.
There are still two versions of the mod: the other replaces the Grey Hair TO with the Mersim one, the other leaves it untouched. Both versions are included with the download.
Download (SFS) (alternate)
Files are compressed. Probably requires all EPs. Conflicts with other turn on/off replacements (including my old versions), tunaisafish’s Attraction Traits Fix, and might conflict with cologne-related mods.
Compatible with UI replacements as long as this mod loads after.
🚨🚨 The Mersim version requires Midge’s Mermaid Mod.
Translations included: Spanish, Italian, Swedish, Finnish.
Update (29.8.2024): Fixed the life skills TO sometimes not updating properly upon changing TO replacements.
Update (31.3.2024): The alien trait by @tammyhybrid21 now triggers the Alien TO too.
Update (11.1.2024): Enthusiast TO now replaces zombies instead of glasses.
Update (11.1.2024): Changed it so that business owners with level 6 or higher business and young adults with a GPA 3.7 or higher also count as hard workers.
Credits to @lazyduchess, @midgethetree, and simler90 for the groundwork and bits and pieces used in the mod. Translations by @bothersomecryptid, @themeasureofasim, @dystopianam, and @vegan-kaktus.
Full list of the TOs under the cut.
Replaced TOs:
Cologne -> Life Skills (has learned at least two of the life skills)
Stink -> Poor (household fortune* ~§20 000 or lower)
Underwear -> Rich (household fortune* ~§100 000 or higher)
Swimwear -> Great Dancer (dance skill 6 or higher)
Formalwear -> Pet Lover (has at least two pet friends or the Animal Lover trait)
Full Face Makeup -> Talented (has at least one silver or gold talent badge)
Hats -> Good Reputation (reputation level Reputable Resident or better)
Jewelry -> Bad Reputation (reputation level Lousy Loser or worse)
Custom Hair -> Alien (either skintone, eyes, or both, or the alien trait)
Zombie -> Enthusiast (level 5 or higher on at least one hobby)
Grey Hair -> Mersim (with Mersim version)
TOs with additional new trait support:
Hard Worker (career level 6 or higher, teen career level 3, owned business level 6 or higher, young adult with a GPA 3.7 or higher, or the Workaholic trait)
Logical (logic skill 5 or higher or the Genius trait)
Charismatic (charisma skill 5 or higher or the Charismatic trait)
Great Cook (cooking skill 5 or higher or the Natural cook trait)
Mechanical (mechanic skill 5 or higher or the Handy trait)
Creative (creativity skill 5 or higher or the Artistic trait)
Athletic (body skill 5 or higher or the Athletic trait)
Good at Cleaning (cleaning skill 5 or higher or the Neat trait)
TOs with minor fixes:
Unemployed (young adults and business owners aren't counted as unemployed)
Robot (servos don't trigger hair color TOs)
Unedited TOs:
Fatness (TS4 icon)
Fitness (TS4 icon)
Facial Hair
Glasses (TS4 icon)
Makeup (TS4 icon)
Blonde Hair
Red Hair
Brown Hair
Black Hair
Grey Hair (without Mersim version)
Vampire (TS4 icon)
Plantsim (TS4 icon)
Lycanthropy (TS4 icon)
Witch (TS4 icon)
For the sake of cohesion, all the supernatural TOs now have simpler, singular names (instead of vampirism, plantsimism, and witchiness).
*The household fortune is counted by its funds, the lot value (if the home lot is residential), and other owned lots. The precise value that triggers the TO might slightly vary.
692 notes
·
View notes
Text
Guemarasims Modern Vampire Necklace converted for TS3

Thanks to @guemarasims for this lovely necklace <3 And it's holy 500 POLYGONS, I can put it on everyone in my 16-sim household without the fear for lags. ✦ 500 poly
✦ Female and male
✦ Teen-Elder on different meshes
✦ 3 recolour channels
✦ Custom thumbnails
✦ Not valid for random
✦ Valid for maternity (both genders). I don't know if I actually had to add pregmorphs for necklaces, but I did
All credits to Guemarasims, I only converted it
TS4 original
Known issues:
-Cross stretches or shrinks depending on Sim's bodyshape, price I had to pay with morphs.
-I could't find base-game necklace with a mesh to clone, so these are made on an item that came with World Adventures.
DOWNLOADS
Archive with separate packages
Female Teen-Elder merged
Male Teen-Elder merged
#sims 3#sims#sims 3 cc#ts3#ts3 cc#sims 3 male cc#sims 3 teen cc#sims 3 elder cc#sims 3 accessories#4t3#4t3 conversion
180 notes
·
View notes
Text

The Goth Family Returns! by IntincrMars
"After their old manor, Ophelia Villa, got invaded by their evil doppelgängers, The Goths are returning from their long stay in Willow Creek, and decided to come back to where Bella and Mortimer grew up! Will this gloomy and eccentric family adapt to this old environment? About The Goth family, now in The Sims 3! The main idea of this household was "What if EA decided to make TS3 take place after TS1 but before TS2, instead of before all of them?". I tried to fully imitate the way maxis made pre-mades; stylized, with funky and outfits based on their personality, and using CaST and patterns in fun and creative ways. They are based on all Sims games, extracting most details from each of their previous iterations. Currently, they are supposed to be their TS4 counterparts that moved into TS3, but their lore is free to change. What will happen to them is entirely up you! You can make them encounter their younger selves! Or make them coexist with other premades! These are the original Sunset Valley Bella and Mortimer aged up with slightly modified facial structures, they still look close to the originals. Cassandra and Alexander are made with genetics, but modified to look closer to their TS2-selves.
...continued + more pictures on MTS."
More Info + Download @ MTS.
58 notes
·
View notes
Text
The Pleasant Family
I recreated the Pleasant Family from The Sims 2 in The Sims 4! This household was one of my favorites to play with back in the day and I love the way they've turned out!! 🖤 I especially love Lillith; I've always had a soft spot for her.
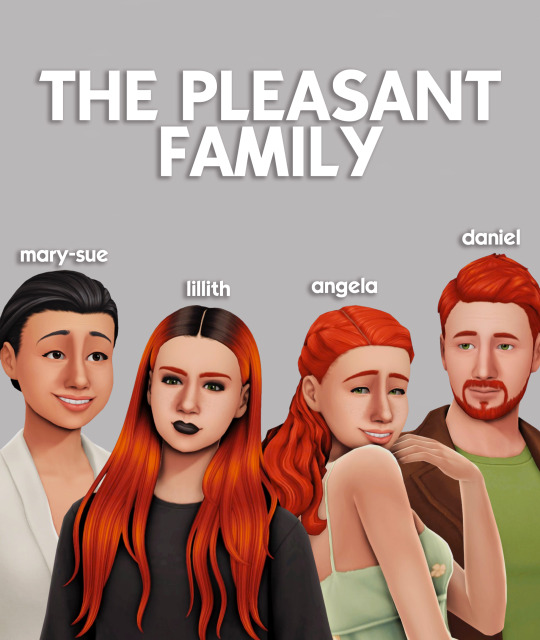
Download and more info below the cut 🖤
Within the download zip file you'll find the following: ➕ Required CC packages (it's a very short list!) ➕ Tray Files for the Pleasant household ➕ A text file with a list of required packs for the Pleasant household (only available for reference; doesn't need to be added anywhere!!)
For the most part, I tried to keep the pack usage to a minimum. If you don't have a few of the packs needed, there are easy swaps in Base Game that you could make without completely changing the sims looks! That was very important to me.
Also the CC I used could be easily swapped with in-game options. Primarily, I use some skin details that won't significantly impact the sims looks if they were not included or added to your game. The most significant piece of CC is likely Lillith's hair!
**If you have the Growing Together and Lovestruck Expansion Packs, all sims will have assigned familial and romantic dynamics. Preferences, turn-ons, and turn-offs were not designated. These sims will not come with skills, jobs, or degrees. I'll leave these things up to you to decide and play them how you'd like 😉
Check out the TS2 to TS4 comparison over on my YouTube channel as well: https://youtu.be/-Q2iaS4HO7w 🖤
DOWNLOAD 🔗: Pleasant Family (TS2 x TS4 MissSimReno)
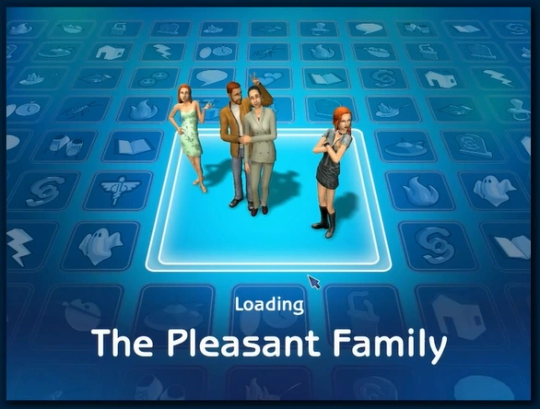
Thank you to all the CC creators: @daylifesims @miikocc @missrubybird @simcelebrity00 @rustys-cc @crypticsim @simandy 🖤🖤🖤
77 notes
·
View notes
Text
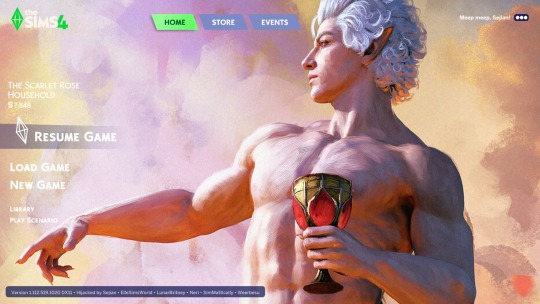
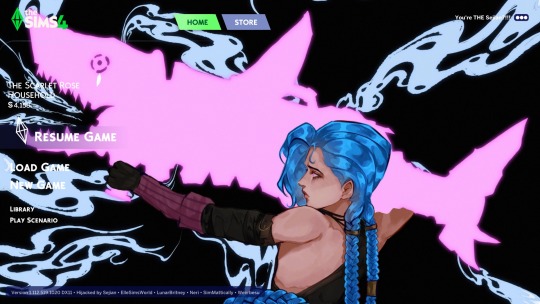
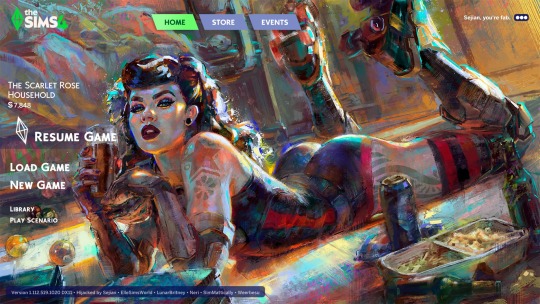
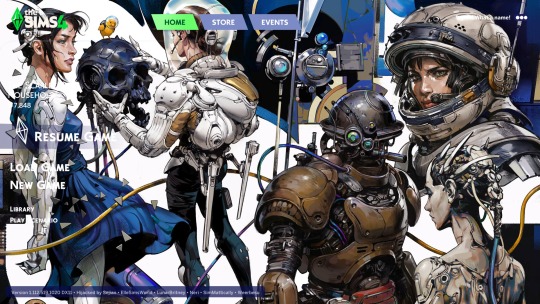
🎁 [BG] SGFX + Resource Override - Main Menu + Custom Background Template + Camera Angles
☠️ REMINDER: Double-check the OP for updates!
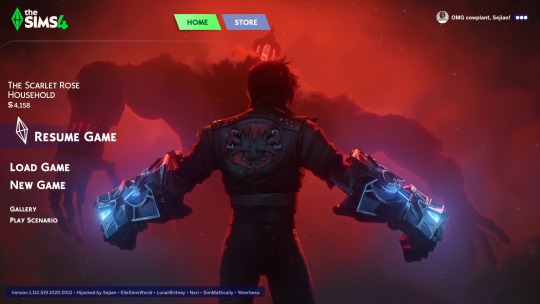
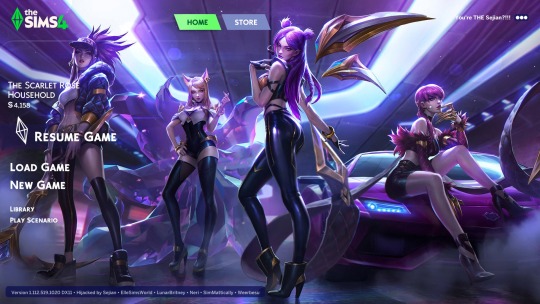
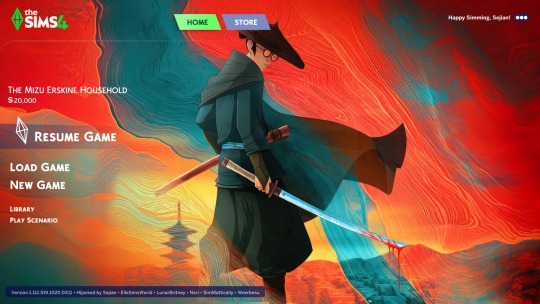
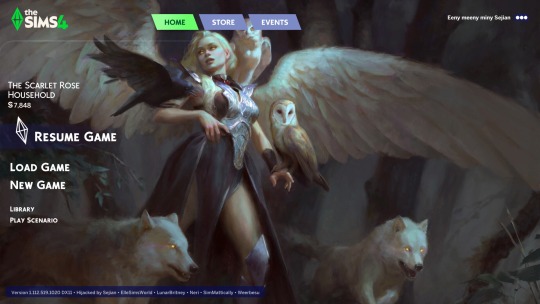
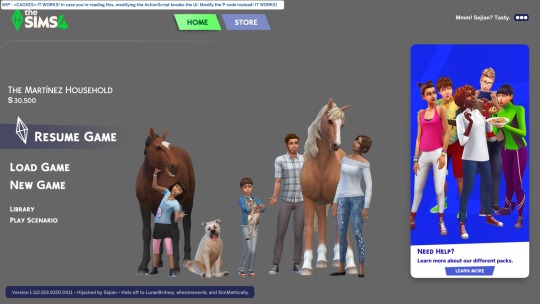
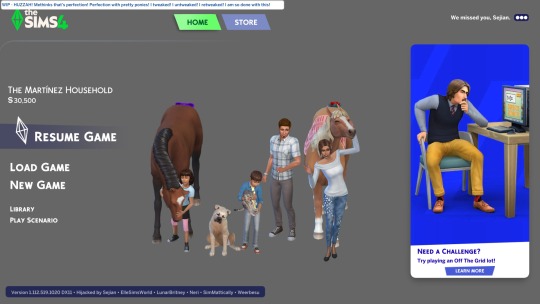
⚔️ Requires - TS4: Base Game
🌠 New Arrivals - 2/5/2025
☄️ Updated - NIL
🚀 Initial Release - 2/4/2025
🎁 Download & Discussions: https://www.patreon.com/posts/121348052
🗺️ Modding Announcements: https://www.patreon.com/posts/109291501
🪄 My SGFX Overrides Collection: https://www.patreon.com/collection/1306589?view=condensed
💬 This isn't as straightforward as it looks. This is a collection of mods meant to make your journey simpler. It includes:
STEP 1 (MANDATORY) - Download the SGFX Override what primes the Main Menu for custom backgrounds, PERMANENTLY HIDES the Household thumbnail, and adds the Household and News/Marketing "toggle" found in other third-party overrides. Press "S" to toggle.
STEP 2 (OPTIONAL) - Grab one of my two Camera Angle Patches for the SGFX Override what re-enables the Household thumbnail (when toggled) in two different camera angles - a closer and lower front-facing "LONG SHOT" and a tweaked top-down isometric "HIGH ANGLE". You have the choice between a cute isometric angle and a boring standard front angle for your Household thumbnail. 🌠 An additional "NO HOUSEHOLD" patch is included for use with third-party overrides.
STEP 3 (OPTIONAL) - Grab my D.I.Y. Custom Background Template (A.K.A. my Resource Override) so you can make your own custom backgrounds. All you need to do is ensure my SGFX Override is up to date and your backgrounds will always work. Technically, these resource overrides might work without an SGFX override if you are in Offline Mode because that's how the EAxis code is configured. These resource overrides will work with other third-party Main Menu Overrides, but might require renaming for load priority (load order) if those overrides contain custom backgrounds - yes, it's this simple. It will work with @ellesimsworld's template with renaming and @lunarbritneyy's Online Backgrounds Disabled override, but it will not work with @simmattically's Refreshed Main Menu because that's a different beast entirely.
STEP 4 (OPTIONAL) - Grab a custom background by yours truly in 16:9 (1080p) widescreen resolution or 21:9 ultrawide resolution. EAxis broke image centering on the Main Menu in Update 1/14/2025 and I don't know if they fixed it yet, but those of you with ultrawide and oddball resolutions should not have to suffer. If you need a different resolution, just ask.
💬 F.Y.I. No, this does not allow you to swap backgrounds with a hotkey. That's a @simmattically special unless I'm mistaken and I ain't about to wholesale lift another creator's invention. You will have to manually swap these custom backgrounds. The one with load priority will appear in-game, so you can technically create a sub-folder wherever you have these and move the one you want to see into that sub-folder and the game should load it first. If that fails, you can rename the one you want to be alphanumerically ahead of the others, or you can ".packageOFF" disable the ones you don't want, or you can just move them in and out of your Mods folder.
💬 Every piece of artwork or promotional image I share will be credited in the Patreon post.
📸 The internet is horrible right now:
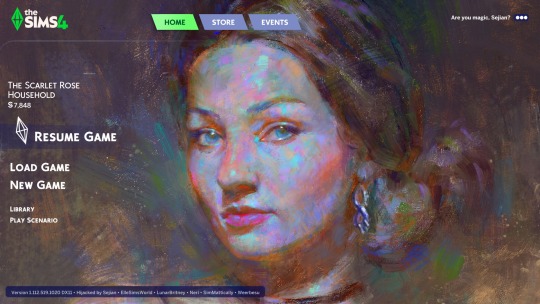
#sejianismodding#sejian ts4 sgfx override#sejian ts4 resource override#sejian ts4 tuning override#the sims 4#ts4#sims 4#the sims 4 cc#ts4cc#ts4 cc#sims 4 cc#the sims 4 custom content#ts4 custom content#sims 4 custom content#the sims 4 mods#ts4 mods#sims 4 mods#the sims 4 ui mods#ts4 ui mods#sims 4 ui mods#the sims 4 main menu#ts4 main menu#sims 4 main menu
15 notes
·
View notes
Text


Above: before-and-after pictures of this process. Thank you to @cloudywithachanceofsims, @silverthornestudfarm, and @blueridgeequines for giving me permission to use their coats as examples!
CK's Guide to Fixing Pixelated Horse Coats
As we all know, every time you paint a horse (or any pet or werewolf, really) in Create-a-Pet, it inevitably gets pixelated. This is due to the TS4 engine's compression of Sims textures, which it does to theoretically save on file space and load time. The more you paint on your horse (and the more you save it over and over again), the greater the artifact damage becomes, until you're left with a pixelated mess.
Luckily, I've figured out a way to fix it. Yay!
This method uses a program called chaiNNER, which is an incredibly versatile node-based graphics UI that (among many other things) uses AI models to upscale and process images. After a month and a half of experimenting on multiple different types of coats with about a dozen different models, I've identified two AI models that work best at repairing the artifacting damage done by TS4: RealESRGAN_x2plus and 2xAniscale. I extract the painted coats from the tray files using Cmar's Coat Converter, process them using chaiNNER, use Photoshop to make any touch ups (softening hard edges, fixing seams, adding in the appropriate hoof texture), and then create a new hoof swatch to put the newly fixed coat back into the game.
Fair warning: chaiNNER is a bit of a hefty program that requires significant RAM and VRAM to run. If you have a beefy gaming computer, you should have no issues running this (as long as no other major programs - games, graphics programs, etc. - are running as well). If you've got a lower end computer, though, your computer might not be able to handle it and this method might not be for you. Make sure to read all the documentation on chaiNNer's github before proceeding.
Before we begin, we're going to need to gather some resources. We will need:
A graphics program. I use Photoshop, but GIMP or any other program that can work in layers will work too.
chaiNNER
AI Models; these are the ones I use are RealESRGAN_x2plus and 2xAniscale
Cmar's Coat Converter to extract the coat textures from your tray files
Tray Importer (Optionally) to isolate your household tray files and save you the trouble of searching the Tray Folder
The TS4 Horse UV as a helpful guide to make sure all our textures are lined up properly
Sims 4 Studio to create your new package.
I recommend using S4S to export hoof swatch textures from the game or from existing hoof swatch cc. Some popular hoof swatch CC include @walnuthillfarm's Striped Hooves and @pure-winter-cc's Glorious Striped Hooves
This tutorial assumes you are familiar with the basics in how to use Sims 4 Studio, such as how to clone a base-game item & how to import and export textures, and the basic functions of your graphics program, such as adding multiple different image files together as layers. I'll try to keep my explanations as straight-forward as possible.
STEP ONE: Extract the Coats
Install Cmar's Coat Converter and run it. Cmar's Coat Converter works by looking through your tray files for specific texture files (ie. The coats of cats, dogs, horses, and werewolves) and converting them to png files. You can go through the households of your Tray folder one by one, but I typically just use Tray Importer to separate the household containing the horses I want to fix.
Save the extracted coats in a project folder. These are your OG coats.
STEP TWO: Extract the hoof textures
Open up S4S. To extract the hoof swatches from the base game, create a new package by clicking CAS -> New Package, filter everything by species (ie. Horse) and then part type (Hoof color). Highlight all the basegame swatches and then save your new package.
Open up that package and then extract the texture for each swatch. Save them in your project folder (In a 'basegame hooves' folder to keep things organized).
To extract the textures from Hoof Swatch CC files, simply open them up in S4S and repeat the above.
STEP THREE: Download the AI Models
Right as it says on the tin. These are the models I use currently & some notes about them:
RealESRGAN_x2plus - this model is THE workhorse. It repairs artifact damaging with minimal loss to texture quality and results in a very smooth coat. It may sometimes darken the texture a little bit, but it's not noticeable in-game. That being said, it has a harder time with finer details such as spots, individual ticking for roans, dapples etc. I run this one first on all the coats because it usually does the job.
These models are trained to find and repair any incidence of artifacting/jpeg damage and approximate what the image is supposed to look like. The reason RealESRGAN_x2plus has an especially hard time with spots/dapples/tiny repetitive details etc. because it registers those areas as particularly damaged and works extra hard to smooth it out… which can sometimes result in a bit of an iffy coat repair. When things don't turn out the way I want, I turn to...
2xAniscale - I use this model for any appaloosas, roans, sabinos etc. that have very fine detail and came out mangled by RealESRGAN_2xPlus. It's also good for light-duty repairing (in cases where people have only 'saved' the coat once, as opposed to working on it on and off). While not strong enough on its own to tackle the more heavily damaged coats, it still does a decent job while keeping the fine details intact.
Go make a folder somewhere and name it 'AI Models' or something similar, and drop these guys in there.
STEP FOUR: Setting up chaiNNER
Obviously, go ahead and download chaiNNER, and then (through chaiNNER itself) download & install the dependencies. You really only need PyTorch for this, so if you'd like, you can skip NCNN, ONNX, and Stable Diffusion.
At first glance, chaiNNER is a bit overwhelming. It is unlike any other graphics ui I've seen before, but the basic premise is pretty straightforward: you 'chain' together specific functions ('nodes') in order to get your result.
We're going to start by setting up a chain for single coat conversions.
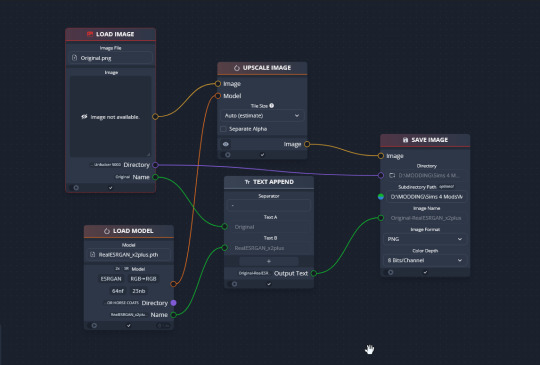
Drag & drop these nodes into your workspace:
Load Image
Save Image
Upscale Image
Load Model (From the PyTorch tab only!)
Text append
Next, connect the nodes just as I have connected them in the image.
Load Image, obviously, loads your image. We then tell the program we want to upscale that image by linking to the Upscale Image node. Upscaling can't happen without a model, so we then want to link Upscale Image with Load Model.
Text Append takes the original name of the image and combines it with the model name. This is super helpful, because if you're playing with many models at a time, you need to tell your result images apart. Link the output text to the Save Image Model.
Finally, Save Image obviously saves the image. We link the directory from Load Image to save it in the same place as the OG image, or, optionally, add in a file path link to another folder (in my case, I load images from a folder called 'Unprocessed' and save them into a folder called 'Processed'. Link the image from Upscale Image to Save Image to complete this chain.
Go in and select your image, model, and save locations.
Ta dah! You made your first chain.
To create an Iterator to batch process coats, we follow the same general idea, only we use 'Load Images'.
STEP FIVE: Run chaiNNER
Go ahead and run chaiNNER. Repeat using 2xAniscale if your spotty/dappled coat comes out funky.
Optionally, you can also add 'Resize' between 'Upscale' and 'Save Image' so the output texture is the same size as the OG. I like keeping mine big, as it makes it easier to fix any fine details in Photoshop.
STEP SIX: Combine in Photoshop
Go ahead and open up the horse UV, your coat texture & hoof swatches in Photoshop. This is a fairly straightforward process: layer the hooves overtop the texture, and then hide all hoof layers except the one you want. Make sure everything is lined up properly using the horse UV.
This is also where you would go in and fix any sharp, jagged edges you might spot. I often notice jagged edges on white face markings. Since the head is often one of the worst areas for artifacting, the AI models don't really have much to work with, resulting in jagged edges as they try to extrapolate what had been there 'before'. Either paint over it or use blur to smooth it out.
I personally would also remove any stray color that isn't the horse texture (body + ears). It won't hurt to leave it there, but I personally like things neat and tidy. Use the horse UV as a guide.
I also add in any little details using extracted stencils & layer masks.
Save your new coat as a png. Optionally, downsize it by 50% back to the original size. I don't do this because I'm very forgetful, but this would definitely help in keeping your package size smaller.
STEP SEVEN (Optional): Make a thumbnail
I make thumbnails for all the coats I do because it makes it much easier to identify them under the Hoof Swatch category. TS4 thumbnails are 144 x 148. You can label it with your horse's name, or stick a headshot in there etc. whatever works for you that will help it stand out from the other hoof swatches.
STEP EIGHT: Put it all Together
Finally, we've come to the end.
Using S4S, create a new package cloned from a hoof swatch. Import your new coat into 'Texture', and your thumbnail into 'Thumbnail'. Make sure you import the thumbnail for both Male and Female!
Check to make sure there aren't major seams, and that your texture is properly projected onto the S4S horse model. If there are seams, go back to check that your texture is lined up properly with the Horse UV. If there are minor seams (legs, chest, underbelly etc.) you can carefully paint (using the same color as on either side of the seam) just beyond the UV mesh boundaries to close the seam.
Then, go into Categories, scroll down, and uncheck Random. This will prevent random townie horses from wearing the coat.
Save your package.
Congratulations! You're done!
#ts4 tutorial#ts4 resource#ts4 guide#Ts4 horse cc#ts4 equestrian cc#sims 4 horse cc#sims 4 equestrian cc#ts4 equestrian#sims 4 equestrian#ts4 horses#sims 4 horses#ts4 horse ranch#sims 4 horse ranch#sims horses
77 notes
·
View notes
Text
1899, Part 2 (the sad part)
A fire started in the dining room, and Olivia got caught in it. She sadly did not survive.
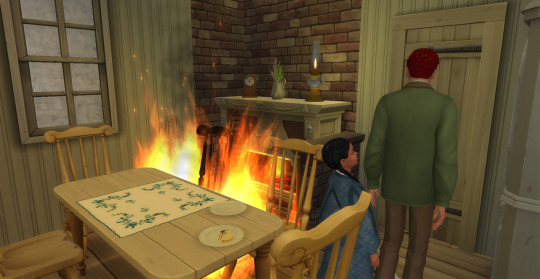
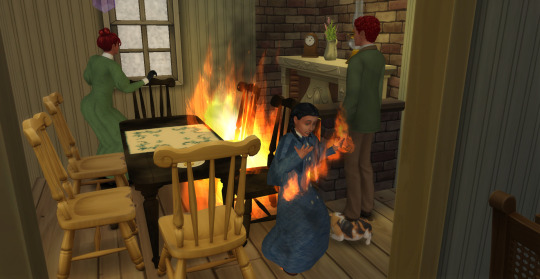
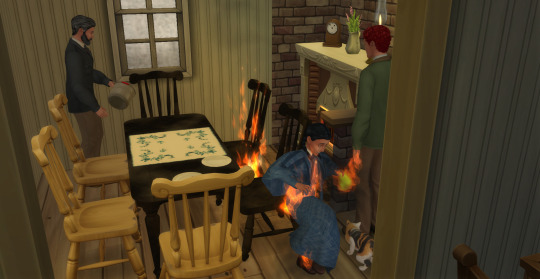
Winterfest was a very sad day, and the next day was Olivia's funeral.
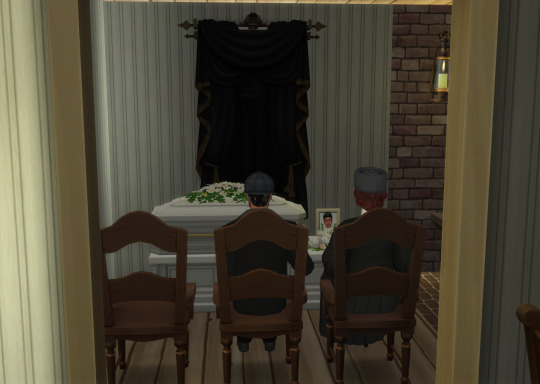


Mourning clothes below the cut. I didn't want to go there, but holding a funeral feels appropriate, and Victorians had strict mourning traditions (they were less strictly observed by 1899, but I wanted to include them as much as I could).
I was not prepared to lose Olivia. I needed room, but I was considering what to do with the animals, not a child. And then my game bugged out, and it all went wrong, and I had to watch her die over and over and it was terrible. One more time and I would have just rolled back the save and pretended it never happened. Then, when I was preparing for her funeral, there were two more fires, one of which was of her picture, next to her casket.
I love this save and this household so much. It hurts to lose one. I decided to go CC shopping instead of keeping playing for a while, since a new decade was coming anyway.
Okay, so mourning clothes. They're losing all other outfits, because when they come out of mourning, it will be the 1900s.
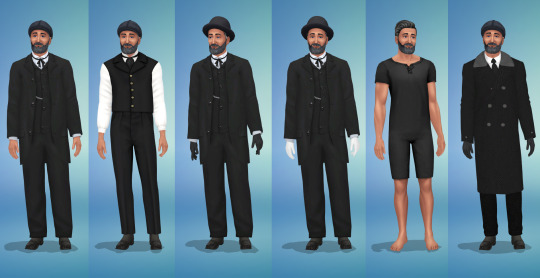
Laurence wears mostly variations on the same thing. The bowler's base game, the boots are from Vampires, beard is from Eco Lifestyle.
James hair by @aladdin-the-simmer https://aladdin-the-simmer.tumblr.com/post/635130826713071617/james-hair-base-game-compatible-hat-compatible
Gray strands for hair by @sunnybelloria https://sunnybelloria.tumblr.com/post/624160377125699584/gray-strands-for-hair-accessorylocation
Wrinkles by @nolan-sims https://nolan-sims.com/post/168894087053/wrinkle-mole-skin-detail-set-this-is-a-set-of
Graying Overlay by @igorstory https://igorstory.tumblr.com/post/686162124014272512/graying-overlay-are-your-sims-prematurely-graying
Azariah’s Sacksuit by @pandorasimbox https://pandorasimbox.tumblr.com/post/620637341853319168/azariahs-sacksuit-a-victorian-outfit-by
Piteous Outfit by @happylifesims https://happylifesims.tumblr.com/post/656693187523624960/lonelyboy-ts4-piteous-outfit-inspired-from-my
Cold weather: Wool trench coat (recolor) by @satterlly https://satterlly.tumblr.com/post/179581115290/wool-trench-coat-recolor-mesh-wool
Gloves from Wedding Stories (feminine, white) or Antique Gloves by @homelot https://homelot.tumblr.com/post/189966956154/happy-holidays-simplesion-its-me-your
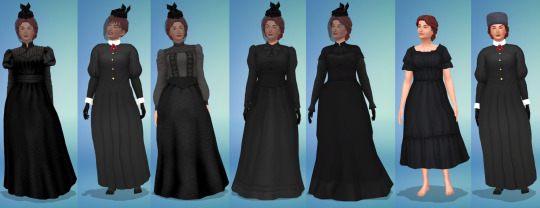
Lydia's a bit more varied, but not by much. Boots are from Vampires, gloves are from My Wedding Stories
Marjorie Hair by @buzzardly28 https://buzzardly28.tumblr.com/post/704554762855743488/weekend-number-4-of-december-1910s-set-part-1
Early 1890s hair by @buzzardly28 https://buzzardly28.tumblr.com/post/732722263683710976/1890s-hair-set-this-was-my-gift-for-week-1-of
Gray strands for hair by @sunnybelloria https://sunnybelloria.tumblr.com/post/624160377125699584/gray-strands-for-hair-accessorylocation
Hat 1b by @vintagesimstress https://vintagesimstress.tumblr.com/post/617769135396552704/1890s-hats-for-bats-04102020-edit-updated-with
Gradual Aging by @janesimsten https://www.patreon.com/posts/mod-gradual-92840449 (no idea why it shows up in tray importer for her but not him. Maybe because I gave him wrinkles?)
Dress I and Shirtwaist I and Skirt I by @gilded-ghosts https://gilded-ghosts.tumblr.com/post/689631149939736576/victorian-visions-i-a-mini-collection
Maid Dress https://www.thesimsresource.com/members/Kizaragy/downloads/details/category/sims4-clothing-female-teenadultelder-formal/title/maid-dress/id/1657487/
Victorian Dress 3 http://www.elfdor.com/2022/09/victorian-clothes-set-dress-3.html (simsdom)
Late Victorian Day Wear by @batsfromwesteros https://batsfromwesteros.tumblr.com/post/615484764292579328/late-victorian-day-wear-batsfromwesteros-bgc-14
Swim: Kirsten Dress by @sentate https://www.patreon.com/posts/april-2021-49805928
Cozy Winter Hat by @pinkpatchy https://pinkpatchy.tumblr.com/post/668840286754127872/cozy-winter-a-small-set-to-warm-up-in-these
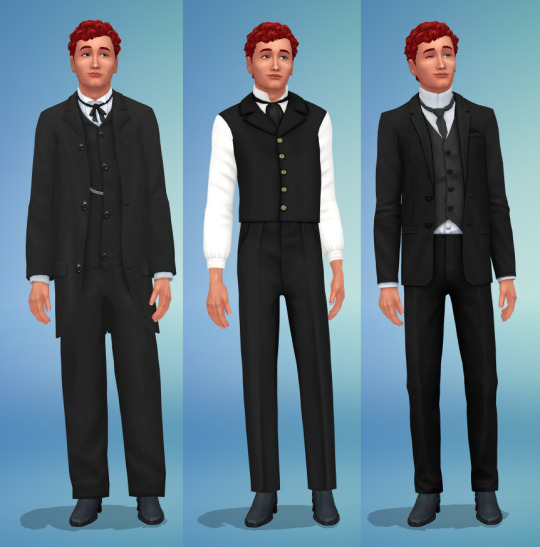
Andrew dresses pretty much like his father, but with no hat or gloves. His boots are from Life and Death. He gets ones unique outfit:
County Suit by @homelot https://homelot.tumblr.com/post/189966956154/happy-holidays-simplesion-its-me-your
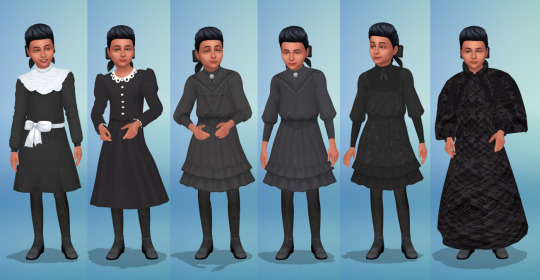
Eleanor is a child and is a llowed a bit of white decoration, even though she lost her twin.
Edwardian Braids for Girls by @the-melancholy-maiden https://www.patreon.com/posts/72265645
Samantha’s Cranberry Dress by @linzlu https://linzlu.tumblr.com/post/613615726759215104/samanthas-collection-i-teased-a-remake-of-my
Nora Dress by @cmoonsims https://cmoonsims.tumblr.com/post/732817171757039616/the-dark-shadows-1897-collection-a-simblreen
Edwardian Child Clothes (Eleanor and Millicent) by @chere-indolante https://chere-indolente.tumblr.com/post/659247573161426944/edwardian-child-clothes-this-set-include-2
Clara Dress by @alainas-sims https://alainas-sims.tumblr.com/post/657177330671927296/clara-dress-recolors-of-zurkdesign-s-sunday
1890S Fancy Coat for Girls by @vintagesimstress https://vintagesimstress.tumblr.com/post/190647997872/1890s-fancy-coat-for-girls-aka-vintage
Child’s Button Boots and Child’s Cable-knit Stockings by @dancemachinetrait https://dancemachinetrait.tumblr.com/post/185341023525/childs-button-boots-download-sfs-no-adfly
And proof that this poor child was cursed at the end. She had to die about 6 times for it to stick (I think that was a mod bugged out), and then every time I tried to plan her funeral the game crashed (that was a mod bugged out), and then, when I was placing things for the funeral, this happened. Then the Winterfest presents caught fire too.
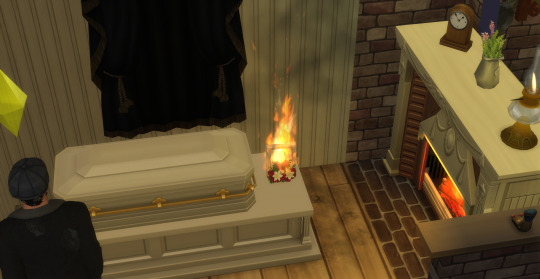
The carriage hearse is a personal recolour of this one https://simtinkeringsbytinkle.blogspot.com/2015/10/images-courtesy-of-simdougnut-vintage.html, and that's where the horses pulling it are from.
7 notes
·
View notes
Text
The Sims 4: New Game Patch (May 28th, 2024)
There is a new game update for The Sims 4, to prepare the game to the upcoming kits. Read it all on the blog post below.
If you have auto updates enabled in Origin’s “Application Settings”, the game will auto-update once you open Origin. If you have auto-updates disabled, you will need to manually update by clicking the game in your library.Advertisement
To ensure your game is up to date, check the game version found in Documents > EA > The Sims 4 > GameVersion.txt. Your game should now read: PC: PC: 1.107.112.1030 / Mac: 1.107.112.1230 / Console: 1.92
Sul Sul Simmers! It’s time for some late Spring cleaning! Let’s fix some things and make a few improvements. We’ve got quite the spread, with a host of resolutions for base game issues as well as addressing a wide assortment of packs. There’re also some performance gains, gallery updates, and DirectX 11 previews. We squeezed lots into this release, but there’s still more to come! Talk to you soon!
-The Sims 4 Team
Bug Fixes & Updates
Base Game
Oh you thought you could hide, dishes? We will find you and we will wash you. Dishes left in corners will no longer be ignored when cleaning up.
Begone weeds! Plants won’t grow weeds when Out of Season. If a plant has them when it becomes Out of Season, the weeds will be removed until it’s In Season again.
Campfires will stop causing so many fires on the lot. Campfire spreadfire was triggering a 50% chance every 10 sim-minutes to burn objects other than chairs in the area. We removed that to only focus on when Fireworks trigger (which we all know is the real danger).
“A Trash Can Is Required“ message will no longer display when trash cans are present on the active lot. Get that garbage outta here.
Skills will not randomly increase or change when leaving the lot or editing the household. If your Sim knows, they know.
The skills list is arranged in alphabetical order and my eye will no longer twitch when looking at it.
TS4 Packs are listed in the right order in the Build/Buy filter. Get back in line For Rent, Home Chef Hustle and Crystal Creations!
Careers will no longer have a blank daily task menu.
Summon Grilled Cheese interaction will no longer drop from the interaction queue.
Sim will no longer get stuck in the ground and continue to Swim Laps if the pool is removed in the middle of it. Because physics. Now the Sim will reset. Because magic.
Calendar notification light will remain on after traveling. No forgetting those important events.
Customizable pronouns were adjusted to appear correctly on a few of the Romantic Relationship phone calls and will no longer display improper usage like “ask their out.”
Sims can properly merge or move households with NPC Sims “not in world“; the merge/move button is now accessible. It’s all about bringing families together!
Console
After switching to build mode from world map a red bar will no longer display in the upper right corner.
Performance
We’ve made some optimizations so the game uses less memory. You may experience fewer crashes, better frame rate, and/or more responsive simulation.
We’ve improved the lot load process so it should happen a bit faster.
Cats & Dogs / City Living
Small dogs, puppies, and kittens will properly use the elevator to go downstairs from Penthouses. They can finally go potty! Poor little things.
Cottage Living
Hatchable and spoiled eggs will now remain visible in the Chicken coop whenever the Sim travels to the lot.
Dine Out
‘Order For Table’ interaction will properly clear from the interaction queue after the waiter delivers food to the table.
Home Chef Hustles players can now add Waffles to the Restaurant Menu. More menu additions to come.
DirectX 11 Preview
DirectX 11 is available on The Sims 4 on an opt-in basis and will be rolled out fully in a later update for Simmers running Windows. If you opt to run The Sims 4 using DirectX 11, you will potentially experience enhanced game performance and graphics quality. This update is designed to increase the overall gaming experience, with improved rendering capabilities that will allow for more details and immersive environments in future releases! We would appreciate your feedback and any issues you experience on our DirectX 11 Answers HQ thread.
Simmers running Windows and have DirectX 11 compatible hardware can now enter the argument -dx11 into the EA App or Steam to switch to using this renderer. You will be able to see which DirectX version The Sims 4 is using in your game version information displayed in the bottom right corner of the Main Menu.
You can find all the information you need to check if your PC is DirectX 11 compatible and learn how to enter launch arguments for both EA App and Steam here.
While DirectX 11 is available for those Simmers who want to try it, you may experience visual issues with mods so we recommend disabling all mods while using this command line argument.
Eco Lifestyle
Nose rings will no longer break when paired with brow piercings from this pack.
For Rent
Property Ownership of “Tam Nang Sands“ lot will be recognized in the owned rental tab.
“Unpleasant Surroundings“ Moodlet no longer triggered from the Pressure cooker and Kettle.
Tourist location icons will now appear correctly when hovering over the Tomarang world select screen.
Gallery Server
All profanity filter false positive reports sent to us via The Sims 4 Gallery Profanity Filter Feedback survey up to May 1st have been reviewed and changes implemented. We appreciate all the reports and responses and will continue to update our systems based on your feedback.
Non-anonymous Gallery users appearing in the Following and Followers tabs will once again display the number of Followers each user has.
Get to Work
Aliens will stop having noticeable changes in facial structure (placement, size, etc) when aging up. No more morph faces.
Growing Together
The “Had a Baby“ Milestone now triggers from having a Science Baby or giving birth at the hospital rabbithole.
High School Years
Teens cannot send flirty messages on Social Bunny to adults or household family members.
After a teen high school Sim completes all tasks and aces exams, they will also be promoted to a better grade. They’ve earned it!
Horse Ranch
We all know how cute they are, but Sims will no longer autonomously want to buy mini goats (causing the UI to pop up).
Nectar value is now properly increased when selling to the mysterious rancher.
Horses will no longer get stuck while sleeping too close to the Horse training ball.
Island Living
Mermaid Conservationists can now complete the “Snorkel in Mua Pel’am“ job task.
Seasons
During winter, the weeding animation will no longer repeat and the Sim will actually remove all the weeds surrounding the plants. Checkmate weeds!
20 notes
·
View notes
Text


Base Game Renovation: The Pancakes House
When the Pancakes were first married, Eliza’s parents gave her a massive sum of money to get their lives started together. Eliza spent most of it on the historic home of her dreams, leaving little left for furniture. She hoped Bob’s income would enable her to furnish it the way she’d planned, but that doesn’t seem to have panned out the way she thought. That won’t stop her from trying, though.
Available on the gallery under ID: pinie72
#ts4 build#ts4#the sims 4#sims 4#eliza pancakes#bob pancakes#iggy pancakes#the pancakes household#the pancakes family#lore refresh save#my stuff#base game build#base game
18 notes
·
View notes
Text


#my sims 4 current household gameplay#sims 4 pets#sims 4 seasons#sims 4 legacy#sims 4 screenshots#sims 4#sims 4 gameplay#sims 4 simblr#sims 4 story#s4mm#s4 legacy#s4 gameplay#ts4 screenies#ts4 edit#ts4 base game#ts4 legacy#ts4 simblr#ts4 gameplay#ts4 maxis match#ts4#ts4 screenshots#ts4 story#sims#my sims#the sims community
20 notes
·
View notes