#Linksys smart Wi-Fi router setup
Text
Ever wondered why some homes have fast internet while others don't? It's often down to a good network setup. With more of us relying on the internet for work, gaming, or smart devices, knowing how to set up a network is key. This guide will cover the basics, tips, and best practices to get your network running smoothly.Key Takeaways
Understanding the importance of a well-structured home network is crucial for better connectivity.
The right hardware, like routers and switches, is essential for a fast network.
Both wired and wireless connections have their benefits that impact network speed.
Securing our network protects our data and makes it faster and more reliable.
Quick fixes for common issues can improve network performance.
Staying updated with technology can greatly enhance our network setup.
Regular maintenance and updates keep our network running well over time.
Understanding Home NetworksOur use of technology keeps growing, making it key to know about home networks. These networks let us connect devices and the internet, making sharing files and printers easy. They're the base for using network protocols, especially the TCP/IP protocol, which helps devices talk to each other.Definition and ImportanceHome networks are crucial for our digital lives, supporting devices from computers to smart gadgets. With more devices online, we need reliable connections. Knowing how our network works helps us tackle speed, security, and connectivity issues.Components of a Home NetworkBuilding a good home network needs key network components. These include:
Modem: Connects our network to the internet.
Router: Lets devices connect to the internet and manage traffic well.
Switches: Add more LAN ports for more devices.
Wireless Access Points (WAPs): Improve wireless coverage for devices.
Knowing and using these parts can make our networks better and safer. For setting up your network, check out this guide. Wired networks are faster and more secure than wireless, less prone to interference and hacking12. Wi-Fi has improved a lot, with the latest versions offering fast speeds, making our networks more useful3.Hardware Requirements for NetworkingTo set up a strong home network, we need to pick the right devices for smooth connectivity and data flow. Key items include routers, switches, and Ethernet cables. Each plays a big part in making our network work well.Essential Devices for SetupWe need these main devices:
Modem: Connects our network to the Internet Service Provider (ISP).
Router: Directs traffic between devices and the Internet. The router's capacity affects performance, especially with many devices.
Switches: Create wired connections among devices, offering stable and secure links for high-bandwidth devices.
Choosing the right gear depends on our home size, how many devices we have, and the internet speed we need. For networks with 20 or more devices, commercial-grade Wi-Fi routers are best. Brands like Netgear and Linksys offer various options for different needs.Choosing the Right EquipmentUpgrading to newer tech, like CAT6 Ethernet cables, boosts performance by supporting faster data transfer. This is great for reliable wired connections4. When picking switches, consider unmanaged and managed options. Unmanaged switches are cheaper for small offices, while managed switches offer more features for big offices5.Here’s a table to help us decide:
Device Type
Best For
Key Features
Router
General home usage
Traffic management, security features
Switch
Connecting multiple devices
Wired connections, bandwidth allocation
Ethernet Cable
High-speed connections
Length variance, types like CAT6
Knowing what hardware we need is key to a great home network. It supports our needs and improves our connectivity. For more info, check out this detailed guide on network hardware here45.Network Setup and ConfigurationSetting up a home network is key to getting online smoothly. We start by making sure we have everything we need. We'll go through the steps and important settings to get the best internet connection.
Step-by-Step Setup ProcessFirst, we connect the modem to our Internet Service Provider (ISP). Then, we link our router to the modem with an Ethernet cable. After setting up the physical links, we log into the router’s web interface for setup. Changing the default SSID and password boosts security. These steps lead us to a stable internet connection.Configuration Settings You Should KnowUnderstanding the router's settings is crucial for managing the network well. We need to know about DHCP, NAT, and firewall settings. Setting these up right helps manage traffic, protect devices, and keep internet access smooth for everyone. Getting familiar with these settings keeps our network safe and efficient. For more on easy network setup, check out the simplified guide by Nile Access Services.Types of Home Network ConnectionsSetting up our home network means knowing the different connection types. We can pick wired, wireless, or a mix of both. Each type has its own benefits for our needs.Wired Connections and Their AdvantagesWired connections give us a stable and fast way to link devices, often using Ethernet cables like Cat6 or Cat6a6. They're great for tasks needing steady speed, like gaming or big file transfers. Though setting them up might need expert help, their dependability makes them a top choice for many.Wireless Connections and Their BenefitsWireless connections let devices connect without cables, using WLAN tech in the 2.4 GHz or 5 GHz bands7. This gives us flexibility and ease at home. Yet, we should watch out for interference or slower speeds with more devices on the network. Finding the right mix of wired and wireless can boost our network's performance.Choosing between wired and wireless depends on our home's needs and layout. This affects the best way to get efficient network performance. For more help on setting up home networks, check out resources here. Also, consider reliable repair services for devices like the latest iPhone series here8.Extending Your Network RangeHaving good Wi-Fi coverage at home is key today. We can extend our network using access points, wireless repeaters, and mesh systems. Each option has its own benefits and can greatly improve our home's connectivity.Using Access PointsAccess points boost Wi-Fi coverage by linking to our router with an Ethernet cable. They give strong signals in areas where the router's signal fades. The best part is, they keep high-speed connections without the signal loss of wireless repeaters9.Evaluating Wireless Repeaters vs Mesh SystemsWireless repeaters are simple devices that boost an existing signal, making them easy to set up. However, they cut the bandwidth in half because they use the same frequency for both receiving and sending signals10. Mesh systems, on the other hand, have multiple nodes that form a seamless Wi-Fi network. They automatically connect devices to the strongest signal, ensuring great performance as we move around10.When deciding to improve our Wi-Fi range, it's important to weigh our options carefully. Wireless repeaters might be cheaper and quicker to set up, but mesh systems offer a more advanced networking experience. By considering our specific needs, we can choose the best method for extending our network11.Network Security Best PracticesProtecting our home networks is crucial. We need strong security to keep out cyber threats. It's vital to use good network security to keep our data safe and devices secure.Importance of Strong PasswordsCreating strong, unique passwords is key to network security. Weak passwords attract cybercriminals. Using letters, numbers, and special characters makes a big difference. Updating these passwords often helps protect against breaches.Setting Up Firewalls and Security ProtocolsFirewalls are a strong security tool. They act as a shield between our network and threats. By controlling traffic, they prevent unauthorized access. Using encryption like WPA2 or WPA3 also keeps data safe from being intercepted.Network security is about using strong passwords and firewalls, along with encryption.
These steps create a safe space for everyone on our network. For more info, check out network security features to learn more12.Network Performance OptimizationTo make our network better, we need to know what affects it. Things like latency, bandwidth, and how our hardware is set up play big roles. For example, managing our bandwidth well helps by giving priority to important devices and limiting others. This can make our network faster and more reliable13.What Affects Network PerformanceThings like walls and other devices can slow down our network. Doing speed tests often helps find these problems. The design of our network parts and how busy it is also matter a lot. Using Quality of Service (QoS) settings helps make sure important tasks get done first, keeping things running smoothly14.Testing and Improving Your SetupUsing tools to check our network's performance helps us fix problems and test how it works for users. Tools like Obkio let us keep our networks running well and find issues early13. Making sure our protocols are up to date and our hardware is current is key to making our networks faster. With good testing, management, and the latest tech, our networks work their best.Common Issues and Troubleshooting TipsEven with the best efforts, connection problems can happen. It's important to find out why these issues occur for better network troubleshooting. Slow internet, dropped connections, and devices not connecting are common issues. Studies show that 53% of network problems are due to slow speeds15. Also, 28% of issues come from weak Wi-Fi signals, especially in offices15. We should check our modem, router, devices, and settings.Identifying Connection ProblemsTo fix problems, we can follow a step-by-step approach. It's found that 67% of issues come from faulty hardware like routers and switches16. Physical issues, like damaged cables, make up 12% of problems15. Making sure cables are secure helps solve these issues. Also, duplicate IP addresses cause about 15% of problems15.Basic Troubleshooting StepsLet's look at simple steps to fix these issues. Rebooting devices and checking cables are good first steps. Research shows human mistakes, like unplugged cables, cause 22% of problems16. Running diagnostics can show if we have an IP address issue, which is 9% of cases15.
Issue
Percentage of Occurrence
Slow Network Speeds
53%
Weak Wi-Fi Signals
28%
Faulty Hardware
67%
Human Error
22%
Physical Connectivity Issues
12%
Duplicate IP Addresses
15%
Exhausted IP Addresses
9%
With these tips and knowledge, we can handle potential network problems better.ConclusionSetting up a home network is key for smooth digital living. As tech gets better, knowing how to manage our networks well is more important. This article has shown us how to make networks that fit our needs.Knowing about routers and switches helps us feel confident in our network setup. As we use more tech, keeping our networks safe and running well is crucial. This is especially true in our connected world.Checking our home networks often helps them work their best. Using services like Gadget Kings Prs in Newport for repairs is smart. They fix many devices well. Making smart choices improves our online life for everyone at home. For more info, check out this research on network science and consider their repair services1718.FAQWhat is a home network?A home network links devices together and to the internet. It lets you share things like files and printers. It uses network protocols like TCP/IP for device communication.What are the essential devices needed for setting up a home network?You'll need a modem for internet connection, a router for traffic control, and switches for wired devices. Wireless access points (WAPs) can boost coverage.How do I secure my home network?Use strong, unique passwords for Wi-Fi and devices. Turn on firewalls on your router. Use encryption like WPA2 or WPA3 for wireless security.What factors can affect network performance?Bandwidth, latency, and your home's layout affect performance.
Improve it by testing speeds and managing bandwidth for important devices.How can I extend the range of my home network?Use access points via Ethernet cables or wireless repeaters. Mesh systems are great for creating full Wi-Fi coverage at home.What are common issues that can arise in a home network?Issues include slow internet, dropped connections, and device failures. Fix them by checking modem and router status, testing devices, and reviewing settings.How do I choose the right router for my needs?Look at your home size, device count, internet speed needs, and the features of brands like Netgear and Linksys when picking a router.What is network automation and why is it important?Network automation uses software to manage devices automatically. It boosts efficiency, cuts down on mistakes, and keeps your network secure and reliable.
0 notes
Text
does linksys wrt1900ac support vpn
🔒🌍✨ Get 3 Months FREE VPN - Secure & Private Internet Access Worldwide! Click Here ✨🌍🔒
does linksys wrt1900ac support vpn
Linksys WRT1900AC VPN compatibility
The Linksys WRT1900AC is a popular choice among users looking for a reliable and high-performance router. One of the key features that many users seek in a router is VPN compatibility.
The Linksys WRT1900AC boasts excellent VPN compatibility, making it a great option for users who want to ensure their online privacy and security. With VPN support, users can establish a secure connection to a remote server, encrypting their internet traffic and shielding their online activities from prying eyes.
Setting up a VPN on the Linksys WRT1900AC is a straightforward process, thanks to its user-friendly interface and comprehensive documentation. Users can choose from a wide range of VPN services and protocols to suit their specific needs, whether it's for accessing geo-restricted content, securing their data on public Wi-Fi networks, or simply maintaining online anonymity.
By using the Linksys WRT1900AC with a VPN, users can enjoy peace of mind knowing that their internet connection is protected against potential threats and surveillance. Whether you're a casual internet user or a business professional, the VPN compatibility of the Linksys WRT1900AC makes it a versatile and powerful networking solution.
In conclusion, the Linksys WRT1900AC router's VPN compatibility enhances its appeal as a secure and reliable networking device. With robust features and easy setup, it is an excellent choice for users seeking privacy and security in their online activities.
VPN support on Linksys WRT1900AC
VPN support on the Linksys WRT1900AC router allows users to enhance their online security and privacy by encrypting their internet connection. This feature provides a secure tunnel for your internet traffic, protecting your data from potential threats such as hackers, snoopers, and surveillance.
Setting up a VPN on the Linksys WRT1900AC router is quite straightforward. Users can choose from a wide range of VPN services and protocols to configure on their router, such as OpenVPN, PPTP, or L2TP. By doing so, all devices connected to the router, including smartphones, laptops, and smart TVs, can benefit from the VPN protection without the need to install VPN software on each device separately.
VPN support on the Linksys WRT1900AC also enables users to access geo-blocked content and websites that are not available in their region. By connecting to a VPN server located in a different country, users can bypass censorship and restrictions, allowing them to enjoy a more open and unrestricted internet experience.
Furthermore, VPN support on the Linksys WRT1900AC router can help users mask their IP address, making it harder for websites and online services to track their online activities. This added layer of anonymity can be particularly beneficial for users who value their privacy and want to prevent targeted advertising and data profiling.
Overall, the VPN support on the Linksys WRT1900AC router is a valuable feature that provides users with an additional layer of security, privacy, and freedom while browsing the internet. By utilizing this feature, users can enjoy a more secure and private online experience across all their connected devices.
Setting up VPN on Linksys WRT1900AC
Setting up a VPN on your Linksys WRT1900AC router can enhance your online security and privacy by encrypting your internet connection and hiding your IP address. Follow these simple steps to configure a VPN on your Linksys router:
Choose a VPN Service: Before proceeding, sign up for a reputable VPN service provider. Ensure they offer OpenVPN or PPTP protocols, as these are compatible with the Linksys WRT1900AC router.
Access Router Settings: Open a web browser on a device connected to your router and enter the router's IP address (usually 192.168.1.1) in the address bar. Log in with your username and password.
Navigate to VPN Settings: Once logged in, locate the "VPN" or "OpenVPN" tab in the router settings menu. Click on it to access the VPN configuration options.
Configure VPN Settings: Enter the VPN server details provided by your VPN service provider. This includes the server address, username, and password. Choose the desired VPN protocol (OpenVPN or PPTP).
Apply Settings: After entering the VPN details, click on the "Apply" or "Save" button to save the changes. Your router will now attempt to connect to the VPN server using the provided credentials.
Verify Connection: Once the settings are saved, navigate to the router's status page to verify if the VPN connection is established successfully. You should see information indicating that the VPN connection is active.
Test Connection: To ensure everything is working correctly, test your internet connection on a device connected to the router. Your IP address should now reflect the VPN server's location, indicating that your internet traffic is encrypted and secure.
By following these steps, you can set up a VPN on your Linksys WRT1900AC router to safeguard your online activities and protect your sensitive data from prying eyes.
VPN protocols for Linksys WRT1900AC
When it comes to ensuring your online privacy and security, selecting the right VPN protocol for your Linksys WRT1900AC router is crucial. VPN protocols determine how data is transmitted between your device and the VPN server, impacting factors like speed, security, and compatibility.
The Linksys WRT1900AC router supports a variety of VPN protocols, including OpenVPN, PPTP, L2TP, and IPSec. Among these options, OpenVPN is often recommended for its robust security features and flexibility. It uses SSL/TLS encryption to safeguard data transmissions, making it a popular choice for users prioritizing privacy.
Alternatively, PPTP (Point-to-Point Tunneling Protocol) is known for its ease of setup and fast connection speeds. However, it is considered less secure compared to other protocols and may not be the best choice for sensitive data.
L2TP (Layer 2 Tunneling Protocol) with IPSec (Internet Protocol Security) is another option supported by the Linksys WRT1900AC router. This protocol combination offers strong encryption and is widely supported across various platforms, ensuring a secure connection.
When selecting a VPN protocol for your Linksys WRT1900AC router, consider your specific needs regarding security, speed, and device compatibility. Opt for protocols like OpenVPN for maximum security or PPTP/L2TP with IPSec for faster connection speeds. Ultimately, choosing the right VPN protocol is essential in safeguarding your online activities and maintaining your privacy while using your Linksys WRT1900AC router.
Troubleshooting VPN on Linksys WRT1900AC
When troubleshooting issues related to a Virtual Private Network (VPN) on a Linksys WRT1900AC router, there are several steps you can take to identify and resolve the problem.
Firstly, ensure that the VPN client software is correctly configured on the device you are trying to connect to the VPN network. Double-check the login credentials and settings to ensure they match the information provided by your VPN service provider.
Secondly, verify that the VPN server address and protocol settings in the router configuration are accurate. Check if the VPN passthrough option is enabled in the router settings to allow VPN traffic to pass through the firewall.
If you are experiencing connectivity issues, try restarting both the router and the device you are using to connect to the VPN. Sometimes, a simple reboot can resolve temporary network glitches.
It is also recommended to update the firmware of your Linksys WRT1900AC router to the latest version to ensure compatibility with VPN protocols and enhance network security.
If the problem persists, consider resetting the router to factory defaults and reconfiguring the settings from scratch. This can help eliminate any misconfigurations that may be causing the VPN connection problems.
For advanced users, monitoring the router logs can provide valuable insights into the VPN connection process and help pinpoint the cause of the issue.
By following these troubleshooting steps, you can effectively diagnose and resolve VPN problems on your Linksys WRT1900AC router, ensuring a secure and reliable connection to your desired VPN network.
0 notes
Text
does nord vpn work on the router or device
🔒🌍✨ Get 3 Months FREE VPN - Secure & Private Internet Access Worldwide! Click Here ✨🌍🔒
does nord vpn work on the router or device
NordVPN router compatibility
NordVPN is a popular choice for securing online activities through its robust encryption and global network of servers. For users looking to protect multiple devices simultaneously, including those connected to a home network, NordVPN router compatibility is a key consideration.
Fortunately, NordVPN offers support for a wide range of router models, making it possible to safeguard all internet traffic at the network level. This means that devices like smart TVs, gaming consoles, and IoT devices can benefit from VPN protection without the need for individual installations.
To determine if your router is compatible with NordVPN, you can consult their website or contact their support team for assistance. Many popular router brands, such as Asus, Linksys, Netgear, and TP-Link, are supported, with step-by-step setup guides available for easy configuration.
Once your router is set up with NordVPN, all connected devices will benefit from enhanced privacy and security. This is especially important when accessing sensitive information or streaming content from geo-restricted services.
In addition to protecting your devices, NordVPN router compatibility also offers the convenience of centralized management. With all internet traffic routed through the VPN, there's no need to install or configure the VPN client on each individual device.
Overall, NordVPN's compatibility with a wide range of routers makes it a convenient and effective solution for securing your entire home network. By encrypting data at the router level, users can enjoy peace of mind knowing that their online activities are protected from prying eyes.
Device compatibility with NordVPN
Title: Ensuring Seamless Device Compatibility with NordVPN
In today's interconnected world, safeguarding your online activities has become paramount. NordVPN stands out as a trusted solution, offering robust encryption and privacy features. However, ensuring compatibility across various devices is crucial for a seamless experience.
NordVPN boasts wide-ranging device compatibility, catering to the diverse needs of users. Whether you're using a Windows PC, macOS, Linux, iOS, or Android device, NordVPN has you covered. Its user-friendly interface and intuitive setup process make it accessible to both tech novices and seasoned users alike.
For desktop and laptop users, NordVPN offers dedicated applications for Windows, macOS, and Linux operating systems. These applications are regularly updated to ensure optimal performance and security. Users can easily download and install the software, then connect to a server location of their choice with just a few clicks.
Mobile users can enjoy the same level of protection on their smartphones and tablets. NordVPN's mobile apps for iOS and Android devices provide seamless integration with the device's native features. Whether you're browsing the web, streaming content, or accessing public Wi-Fi networks, NordVPN keeps your data secure and your identity anonymous.
Furthermore, NordVPN supports compatibility with routers, allowing users to protect all devices connected to their home network. By installing NordVPN directly on a router, users can safeguard devices that don't support VPN applications natively, such as smart TVs, gaming consoles, and IoT devices.
In conclusion, NordVPN's extensive device compatibility ensures that users can stay protected across all their devices, regardless of the platform or operating system. With NordVPN, online privacy and security are within reach, no matter which device you use.
NordVPN router setup guide
Setting up NordVPN on your router is a smart move to secure your entire home network. By doing so, you can protect all devices connected to the router, including smart TVs, gaming consoles, and IoT devices. Follow this comprehensive guide to configure NordVPN on your router:
Choose a Compatible Router: Not all routers support VPN connections. Make sure your router is compatible with NordVPN by checking their list of supported devices on their website.
Subscribe to NordVPN: If you haven't already, sign up for a NordVPN subscription plan that allows for router connections. They offer various plans with different durations to suit your needs.
Access Router Settings: Log in to your router's admin panel using a web browser. The address to access the admin panel is usually something like 192.168.1.1 or 192.168.0.1. Refer to your router's manual for specific instructions.
Enable VPN Client: Look for the VPN or WAN settings in your router's admin panel. Enable the VPN client option and input the necessary NordVPN server information provided by NordVPN.
Enter NordVPN Credentials: Enter your NordVPN username and password in the designated fields. This allows your router to authenticate with NordVPN's servers.
Choose Server Location: Select the desired server location from NordVPN's server list. Consider choosing a server location close to your physical location for optimal speed and performance.
Save Settings and Reboot Router: After entering all the required information, save the settings and reboot your router. This allows the changes to take effect.
Verify Connection: Once the router has restarted, verify that the VPN connection is active. You can do this by visiting a website that shows your IP address and location. It should reflect the location of the NordVPN server you selected.
By following these steps, you can easily set up NordVPN on your router and enjoy secure and private internet browsing across all your connected devices.
Using NordVPN on devices
NordVPN is a popular VPN service that offers encrypted tunneling for secure internet browsing. It provides users with the ability to safeguard their online activities and protect their sensitive information from potential cyber threats. By utilizing NordVPN on various devices, users can enjoy enhanced privacy and anonymity while browsing the internet.
One of the key advantages of using NordVPN on devices is the added layer of security it provides. Whether accessing the internet on a laptop, smartphone, or tablet, NordVPN encrypts all incoming and outgoing data, preventing cybercriminals from intercepting sensitive information such as passwords, financial details, and personal communication. This encryption ensures that users can browse the web with peace of mind, knowing that their online activities are protected.
Furthermore, NordVPN allows users to bypass geographical restrictions and access region-locked content. By connecting to servers in different countries, users can access websites, streaming services, and online content that may be restricted in their current location. This can be particularly useful for users who want to stream geo-blocked content or access websites that are not available in their region.
In addition, NordVPN offers user-friendly applications for a wide range of devices, including Windows, macOS, Android, and iOS. This makes it easy for users to secure their online activities across multiple devices and operating systems. With NordVPN's intuitive interface and robust security features, users can easily connect to a VPN server and enjoy a safer and more private internet browsing experience.
In conclusion, using NordVPN on devices offers users a secure, private, and versatile solution for protecting their online activities. By encrypting data, bypassing restrictions, and providing user-friendly applications, NordVPN ensures that users can browse the web with confidence and peace of mind.
Router vs device VPN functionality
When it comes to safeguarding your online privacy and security, using a VPN is essential. However, there is sometimes confusion about whether to set up a VPN on your router or directly on your device. Let's explore the differences between the two options.
Setting up a VPN on your router allows you to protect all devices connected to the network without configuring each one individually. This means that any device - whether it's a laptop, smartphone, smart TV, or gaming console - that connects to the Wi-Fi network provided by the router will automatically benefit from the VPN encryption and security features.
On the other hand, installing a VPN directly on your device gives you more control and flexibility. You can choose when to enable the VPN on specific devices, allowing you to browse securely only when needed. It also allows you to access region-locked content on streaming services, which may not be possible when using a router-based VPN.
While setting up a VPN on a router offers convenience and protects multiple devices simultaneously, it may slow down the overall network speed, especially if you have many devices connected at once. Installing a VPN on a device, however, may provide faster connection speeds but requires manual configuration for each device you want to protect.
In conclusion, the choice between using a router-based VPN and device-specific VPN functionality depends on your preferences and needs. If you prioritize ease of use and protecting all devices on your network, a router-based VPN is the way to go. If you seek more control and faster speeds on individual devices, opt for setting up the VPN directly on each device. Ultimately, both options offer enhanced security and privacy, so choose the one that aligns best with your requirements.
0 notes
Text
does express vpn require to flash your router
🔒🌍✨ Get 3 Months FREE VPN - Secure & Private Internet Access Worldwide! Click Here ✨🌍🔒
does express vpn require to flash your router
Router compatibility ExpressVPN
If you are looking to enhance your online privacy and security, using a VPN service like ExpressVPN is a smart choice. However, ensuring that your VPN is compatible with your router is essential for safeguarding all devices connected to your network.
ExpressVPN is known for its user-friendly interface and robust security features, making it a popular choice among individuals and businesses alike. To make the most of its benefits, integrating ExpressVPN with your router can offer protection at the network level, securing all internet traffic from potential cyber threats.
Before setting up ExpressVPN on your router, it is crucial to check the compatibility of the VPN service with your specific router model. ExpressVPN provides detailed instructions and support for various router brands and models on their website, making it easy to determine if your router is compatible.
By configuring ExpressVPN on your router, you can protect multiple devices simultaneously without the need to install the VPN client on each device individually. This setup is particularly useful for smart home devices, gaming consoles, and other gadgets that do not support VPN installation.
Overall, ensuring router compatibility with ExpressVPN is a straightforward process that can significantly enhance your online security and privacy. By taking the necessary steps to set up your VPN on your router, you can enjoy peace of mind knowing that all internet-connected devices are safeguarded against potential threats.
Flashing requirements ExpressVPN
ExpressVPN is a leading virtual private network (VPN) service that provides users with a secure and private internet connection. When it comes to using ExpressVPN, there are certain flashing requirements that users need to be aware of in order to ensure a smooth and successful setup process.
One of the key flashing requirements for ExpressVPN is having a compatible router. ExpressVPN is compatible with a wide range of router models, including routers from popular brands such as Asus, Linksys, and Netgear. Before flashing ExpressVPN onto your router, it is important to check the list of compatible routers on the ExpressVPN website to make sure that your router is supported.
Another flashing requirement for ExpressVPN is ensuring that your router firmware is up to date. Outdated firmware can cause compatibility issues and may prevent ExpressVPN from working properly. Before flashing ExpressVPN onto your router, be sure to update your router's firmware to the latest version recommended by the manufacturer.
Additionally, it is important to follow the flashing instructions provided by ExpressVPN carefully. These instructions will guide you through the process of installing ExpressVPN on your router step by step, ensuring that everything is set up correctly.
By meeting these flashing requirements and following the designated instructions, users can enjoy the benefits of a secure and private internet connection provided by ExpressVPN. Whether you are looking to protect your online privacy, bypass geo-restrictions, or secure your internet connection on public Wi-Fi networks, ExpressVPN offers a reliable and user-friendly solution for all your VPN needs.
ExpressVPN router setup
Setting up ExpressVPN on your router can significantly enhance your online security and privacy. By configuring ExpressVPN directly on your router, you can encrypt all internet traffic from devices connected to your network, ensuring comprehensive protection without the need to install the VPN client on each individual device. Here's a step-by-step guide to help you set up ExpressVPN on your router:
Choose a Compatible Router: Before proceeding, ensure that your router is compatible with ExpressVPN. Most modern routers support VPN configurations, but it's always wise to double-check compatibility on ExpressVPN's website or consult your router's manual.
Subscribe to ExpressVPN: If you haven't already, sign up for an ExpressVPN subscription plan. You'll need your account credentials to proceed with the setup.
Access Router Settings: Using a web browser, log in to your router's administration panel. Typically, you'll access this by entering your router's IP address (e.g., 192.168.1.1) into the browser's address bar and entering your login credentials.
Locate VPN Settings: Once logged in, navigate to the VPN or WAN settings section of your router's configuration interface. The exact location of these settings may vary depending on your router model.
Enter ExpressVPN Configuration: In the VPN settings, locate the option to add a new VPN configuration or server. Enter the ExpressVPN server address, your ExpressVPN username, and password provided by ExpressVPN.
Save Settings and Connect: After entering the necessary information, save your settings and initiate the VPN connection. Your router will now establish a secure connection to the ExpressVPN server.
Verify Connection: To ensure everything is set up correctly, verify that your router is connected to ExpressVPN by checking the status within the router settings or using ExpressVPN's online tool.
By following these steps, you can enjoy the benefits of ExpressVPN on all devices connected to your home network, safeguarding your online activities and data privacy effectively.
Flashing vs
Flashing vs. Steady Lights: Understanding the Difference
When it comes to lighting, especially in the realm of safety and communication, the choice between flashing and steady lights can significantly impact effectiveness. Whether it's for vehicles, emergency signals, or signage, each type serves a distinct purpose dictated by its characteristics and context of use.
Flashing lights, characterized by intermittent bursts of illumination, are often associated with urgency, warning, or attention-grabbing scenarios. They are commonly employed in emergency vehicles like ambulances and police cars to alert pedestrians and other drivers of their presence. Similarly, in industrial settings, flashing lights indicate potential hazards or machinery in operation, prompting individuals to proceed with caution. This dynamic lighting pattern serves as a visual cue that demands immediate attention, making it ideal for situations requiring quick reactions.
On the other hand, steady lights provide a continuous, unchanging illumination, offering stability and visibility over an extended period. They are prevalent in everyday applications such as streetlights, traffic signals, and architectural lighting. Steady lights are preferred in scenarios where constant visibility is essential, ensuring clear guidance and navigation without inducing panic or urgency. Additionally, they are utilized in signage to convey information or denote specific locations consistently.
Understanding the distinction between flashing and steady lights is crucial for selecting the appropriate lighting solution for various contexts. While flashing lights excel in capturing attention and signaling emergencies, steady lights offer reliability and continuity in providing illumination. By leveraging the unique properties of each type, individuals and organizations can effectively enhance safety, communication, and visibility in their environments.
ExpressVPN router configuration
To set up ExpressVPN on your router, follow these steps for a secure and private internet connection across all devices connected to your network. Configuring your router with ExpressVPN ensures that your data is encrypted and your online activities remain anonymous.
The first step is to log in to your router's admin panel using the default IP address. Next, enter your username and password to access the router settings. Locate the 'VPN' or 'ExpressVPN' tab on the dashboard. If the option is not available, you may need to check if your router model supports VPN configurations.
Then, you will need to enter the ExpressVPN server address and your account credentials provided by ExpressVPN. Save the settings and test the connection to ensure everything is working correctly.
Configuring ExpressVPN on your router extends the VPN coverage to all devices using your network, including smart TVs, gaming consoles, and IoT devices. This way, you can secure all your internet-connected gadgets with a single VPN connection.
It is essential to update your router firmware regularly to prevent any security vulnerabilities and ensure optimal performance. Additionally, you can contact ExpressVPN's customer support for any assistance or troubleshooting during the configuration process.
By setting up ExpressVPN on your router, you can enjoy a seamless and protected online experience with enhanced privacy and security for all your devices.
0 notes
Text
does nord vpn upload to wifi router
🔒🌍✨ Get 3 Months FREE VPN - Secure & Private Internet Access Worldwide! Click Here ✨🌍🔒
does nord vpn upload to wifi router
NordVPN router compatibility
NordVPN is a popular VPN service known for its robust security features and reliable performance. Many users prefer to set up a VPN connection on their routers to protect all devices connected to their home network. The compatibility of NordVPN with various routers is therefore a crucial factor to consider.
NordVPN is compatible with a wide range of router brands and models, making it easy for users to secure their entire network with just a few simple steps. The VPN service offers dedicated apps and setup guides for popular routers, including brands like Asus, Linksys, Netgear, and more.
Setting up NordVPN on a compatible router allows users to protect their internet traffic, encrypt their data, and bypass geo-blocks on all connected devices, including smart TVs, gaming consoles, and IoT devices. This ensures that all internet activities conducted within the network remain private and secure.
Furthermore, using NordVPN on a router also helps users overcome device limitations, as some platforms or devices may not support VPN apps. By securing the router directly, users can enjoy the benefits of VPN protection on devices that do not natively support VPN connections.
In conclusion, NordVPN's compatibility with a wide selection of routers makes it a convenient choice for users looking to safeguard their entire home network. By following the provided setup guides, users can enjoy the benefits of enhanced security and privacy across all their connected devices.
VPN router setup
Setting up a VPN router can enhance your online security and privacy by encrypting your internet connection and masking your IP address. This ensures that your browsing activities remain private and protected from prying eyes, especially when using public Wi-Fi networks or accessing geo-restricted content.
To begin the VPN router setup process, you'll need a compatible router and a VPN subscription from a reliable provider. First, access your router's settings by typing its IP address into your web browser. This typically involves entering "192.168.1.1" or "192.168.0.1" into the address bar.
Once logged in, locate the VPN section within your router's settings menu. Depending on your router model, this may be labeled as "VPN," "OpenVPN," or something similar. Next, enter the configuration details provided by your VPN provider, including the server address, username, and password.
After entering the required information, save your settings and proceed to the connection test. This will verify that your router can successfully connect to the VPN server. If the test is successful, your router is now configured to route all internet traffic through the VPN, ensuring privacy and security for all devices connected to your network.
It's important to note that not all routers support VPN functionality, so be sure to check compatibility before purchasing. Additionally, some VPN providers offer dedicated router firmware or pre-configured routers for easy setup.
In conclusion, setting up a VPN router is a straightforward process that significantly enhances your online security and privacy. By encrypting your internet connection at the router level, you can enjoy peace of mind knowing that your browsing activities are protected from potential threats and surveillance.
Wireless router VPN integration
A wireless router VPN integration offers users an extra layer of security and privacy when connected to the internet. VPN, short for Virtual Private Network, creates a secure connection to another network over the internet. By integrating this technology into your wireless router, all devices connected to the network will benefit from the VPN protection.
One of the primary advantages of a wireless router VPN integration is the encryption of data transmitted over the network. This encryption ensures that sensitive information such as passwords, personal data, and financial details remain secure from potential cyber threats. With the rising concerns over online privacy, using a VPN through your wireless router can give you peace of mind knowing that your online activities are shielded from prying eyes.
Moreover, a wireless router VPN integration allows users to bypass geo-restrictions imposed by certain websites or streaming services. By connecting to a VPN server located in a different country, users can access region-locked content and enjoy a more open internet experience.
Setting up a VPN on a wireless router may require some technical knowledge, but many VPN service providers offer user-friendly guides to facilitate the process. It is essential to choose a reputable VPN provider to ensure the reliability and security of the connection.
In conclusion, integrating a VPN into your wireless router can enhance your online security, protect your privacy, and unlock geo-blocked content. Consider the benefits of a wireless router VPN integration to safeguard your digital presence in an increasingly interconnected world.
NordVPN router security
NordVPN is a popular choice for users seeking to enhance their online security and privacy. One effective way to leverage the benefits of NordVPN is through setting it up on a router. By doing so, you create a secure gateway for all devices connected to the network. This ensures that all internet traffic is encrypted and secure, providing an added layer of protection.
Setting up NordVPN on a router is a relatively straightforward process, with detailed instructions provided by NordVPN. This allows for easy configuration and management of the VPN connection at the router level. By establishing the VPN connection at the router, all devices connected to the network, such as smartphones, laptops, smart TVs, and gaming consoles, automatically benefit from the encryption and security provided by NordVPN.
One of the key advantages of using NordVPN on a router is the ability to secure devices that do not natively support VPN connections. This includes IoT devices, such as smart thermostats and security cameras, which may have limited security features. By routing their traffic through the VPN-enabled router, you can ensure that all data transmitted to and from these devices is encrypted and secure.
In conclusion, setting up NordVPN on a router is a convenient and effective way to enhance your online security and privacy. By encrypting all internet traffic at the router level, you can ensure that all devices connected to the network benefit from the advanced security features offered by NordVPN.
VPN-enabled router configuration
A VPN-enabled router configuration is a convenient and secure way to protect your online activities and maintain your privacy. By setting up a VPN directly on your router, you can encrypt all the internet traffic flowing through your network, ensuring that your sensitive data remains safe from prying eyes.
To configure a VPN on your router, you first need to ensure that your router supports VPN functionality. Many modern routers come with built-in VPN support, while others may require you to flash custom firmware such as DD-WRT or Tomato to enable VPN capabilities. Once you have confirmed compatibility, you can proceed to set up your VPN connection.
The exact steps for configuring a VPN on your router may vary depending on the VPN service you are using and the router model you have. Typically, you will need to log in to your router's settings panel, enter the VPN configuration details provided by your VPN service provider, and establish a connection. After successful configuration, all devices connected to your router will benefit from the VPN encryption, regardless of whether they support VPN natively.
Using a VPN-enabled router has several advantages, including encrypting all your devices' internet traffic, bypassing geo-restrictions on streaming services, and enhancing your online security when using public Wi-Fi networks. However, it is essential to choose a reliable VPN service, configure your router correctly, and regularly update your router firmware to ensure optimal performance and security. By following these steps, you can enjoy a more private and secure online experience with a VPN-enabled router configuration.
0 notes
Text
does my linksys ac1200 support a vpn
🔒🌍✨ Get 3 Months FREE VPN - Secure & Private Internet Access Worldwide! Click Here ✨🌍🔒
does my linksys ac1200 support a vpn
Linksys AC1200 VPN compatibility
Linksys AC1200 routers are popular choices for individuals and businesses due to their reliable performance and advanced features. One important consideration for many users is the compatibility of the Linksys AC1200 with Virtual Private Networks (VPN).
Virtual Private Networks have become essential tools for ensuring online privacy and security by encrypting internet traffic and masking the user's IP address. Many users rely on VPNs to access geo-restricted content, secure their internet connections on public Wi-Fi networks, and prevent monitoring of their online activities.
The Linksys AC1200 router is compatible with a wide range of VPN services, making it a versatile choice for users who value their online privacy. Users can easily configure their preferred VPN service on the Linksys router to protect all connected devices, such as computers, smartphones, and smart home devices.
Setting up a VPN on the Linksys AC1200 is a straightforward process that typically involves accessing the router's settings through a web interface and entering the VPN configuration details provided by the service provider. Once configured, the VPN will encrypt all internet traffic passing through the router, ensuring that users can browse the web securely and anonymously.
In conclusion, the Linksys AC1200 router offers compatibility with VPN services, allowing users to enhance their online security and privacy. By leveraging the advanced features of the Linksys AC1200 in conjunction with a VPN, users can enjoy a safe and unrestricted browsing experience across all their devices.
VPN support on Linksys AC1200
A Virtual Private Network (VPN) is a useful tool that helps enhance online security and privacy. If you own a Linksys AC1200 router, you might be wondering if it supports VPN connections. The good news is that many Linksys routers, including the AC1200 model, offer VPN support, allowing you to protect your internet connection and data.
Setting up a VPN on your Linksys AC1200 router can provide several benefits. Firstly, it encrypts your internet traffic, making it more difficult for hackers or third parties to intercept your data. This is particularly important when using public Wi-Fi networks, as VPNs add an extra layer of security to help keep your sensitive information safe.
Moreover, using a VPN on your Linksys AC1200 router can also help you bypass geo-restrictions and access region-locked content. By connecting to a server in a different location, you can enjoy a more open internet experience and access websites and services that may be blocked in your current location.
While setting up a VPN on your Linksys AC1200 router may vary depending on the VPN service provider you choose, most providers offer detailed instructions and support to help you through the process. By taking advantage of the VPN support on your Linksys AC1200 router, you can enjoy a more secure and versatile internet browsing experience.
Setting up VPN on Linksys AC1200
Setting up a Virtual Private Network (VPN) on your Linksys AC1200 router can enhance your online security and privacy. By encrypting your internet connection, a VPN ensures that your data remains private and secure, shielding it from potential hackers, surveillance, and other online threats.
To set up a VPN on your Linksys AC1200 router, follow these steps:
Access your router's web-based setup page by typing its IP address into your web browser. Typically, this is "192.168.1.1", but it may vary depending on your network configuration. Enter your username and password when prompted.
Navigate to the "VPN" tab or section in the router's settings menu. Here, you will find options to configure your VPN connection.
Choose the type of VPN protocol you wish to use. Common options include OpenVPN, PPTP, and L2TP/IPSec. OpenVPN is often preferred for its robust security features.
Enter the VPN server information provided by your VPN service provider. This typically includes the server address, username, password, and any other necessary details.
Save your settings and restart your router to apply the changes.
Once your router has restarted, connect your devices to the VPN network using the appropriate VPN client software or settings on each device.
Test your VPN connection to ensure it is working correctly. You can do this by visiting a website that detects your IP address and verifying that it shows the IP address of your VPN server rather than your actual IP address.
By following these steps, you can set up a VPN on your Linksys AC1200 router and enjoy a more secure and private internet browsing experience. Remember to choose a reliable VPN service provider and regularly update your router's firmware to maintain optimal security.
Linksys AC1200 firmware for VPN
Linksys AC1200 routers are popular choices for home and small business network setups due to their reliable performance and ease of use. One advanced feature that many users look for in their routers is VPN support. A Virtual Private Network (VPN) allows users to securely connect to the internet and access private networks from remote locations.
The Linksys AC1200 firmware upgrade enables users to set up a VPN on their router, offering enhanced security and privacy for their internet connection. By installing the latest firmware version provided by Linksys, users can access advanced VPN settings and configurations to tailor their network security to their specific needs.
Setting up a VPN on the Linksys AC1200 router may require some technical know-how, but with detailed instructions provided by Linksys and online resources, even less experienced users can successfully configure their VPN connection. Users can choose from various VPN protocols such as PPTP, L2TP, and OpenVPN, each offering different levels of security and compatibility.
It is important to regularly update the router's firmware to ensure smooth operation and to protect against potential security vulnerabilities. Linksys periodically releases firmware updates that may include improvements to VPN functionality, bug fixes, and security patches. By staying up to date with the latest firmware version, users can maximize the performance and security of their Linksys AC1200 router.
In conclusion, the Linksys AC1200 firmware for VPN provides users with the tools to enhance their network security and privacy by setting up a Virtual Private Network directly on their router. With the right configurations and regular firmware updates, users can enjoy a secure and reliable internet connection for their home or small business network.
VPN router options for Linksys AC1200
When it comes to ensuring your online security and privacy, using a Virtual Private Network (VPN) is essential. Linksys AC1200 routers are popular choices for home networks due to their reliability and performance. By setting up a VPN on your Linksys AC1200 router, you can encrypt your internet connection and protect your data from potential cyber threats.
There are several VPN options available for Linksys AC1200 routers, each with its own set of features and benefits. One popular choice is to configure the built-in OpenVPN client on the router itself. This method provides a secure connection and allows you to protect all devices connected to the router.
Another option is to use a VPN service that is compatible with Linksys routers. Many VPN providers offer step-by-step guides on how to set up their service on specific router models, including the Linksys AC1200. This option allows you to leverage the VPN provider's servers and security protocols for enhanced protection.
For users looking for a more user-friendly approach, installing a VPN app directly on their devices may be the way to go. While this method won't encrypt the connection at the router level, it still offers encryption and privacy for individual devices.
Ultimately, the best VPN router option for Linksys AC1200 depends on your specific needs and technical expertise. Whether you choose to set up a VPN on the router itself or opt for a VPN service compatible with Linksys routers, securing your online activities with a VPN is a prudent decision in today's digital age.
0 notes
Text
can nordvpn be used on a vpn enabled router
🔒🌍✨ Get 3 Months FREE VPN - Secure & Private Internet Access Worldwide! Click Here ✨🌍🔒
can nordvpn be used on a vpn enabled router
NordVPN router compatibility
NordVPN is one of the leading names in the VPN industry, known for its robust security features and extensive server network. For users looking to protect all devices connected to their home network, NordVPN router compatibility is a crucial consideration.
Fortunately, NordVPN offers support for a wide range of router models, making it easy for users to secure their entire network with just one subscription. Whether you have a popular router brand like Asus, Netgear, Linksys, or TP-Link, chances are NordVPN supports it.
Setting up NordVPN on your router provides several benefits. Firstly, it ensures that all devices connected to your Wi-Fi network, including smartphones, laptops, smart TVs, and gaming consoles, are automatically protected by the VPN. This means enhanced privacy and security for all your online activities, including browsing, streaming, and gaming.
Moreover, configuring NordVPN on your router allows you to bypass geographic restrictions and access geo-blocked content on devices that typically do not support VPN apps, such as gaming consoles and smart TVs. This opens up a world of streaming possibilities, allowing you to enjoy content from different regions with ease.
NordVPN offers user-friendly tutorials and guides to help you set up the VPN on your router, regardless of your technical expertise. Additionally, their customer support team is available 24/7 to assist with any troubleshooting or setup queries you may have.
In conclusion, NordVPN's router compatibility extends its protection to all devices on your home network, offering convenience, security, and access to geo-restricted content. With NordVPN, safeguarding your online privacy has never been easier or more comprehensive.
VPN-enabled router setup with NordVPN
Setting up a VPN-enabled router with NordVPN can offer enhanced security and privacy for all devices connected to your home network. NordVPN offers step-by-step instructions to make the setup process smooth and hassle-free.
Firstly, ensure your router is compatible with NordVPN. Most modern routers support VPN configurations, but it's always best to double-check compatibility on NordVPN's website or with their customer support.
Once confirmed, log in to your router's admin interface. This is typically done by entering the router's IP address into your web browser's address bar and logging in with your username and password.
Next, locate the VPN settings within your router's admin panel. This might be labeled as "VPN," "OpenVPN," or something similar, depending on your router model.
Follow NordVPN's instructions to download the necessary configuration files for your router. These files contain the settings required to connect to NordVPN's servers securely.
Upload the configuration files to your router's VPN settings. This usually involves selecting the file from your computer and clicking "Upload" or a similar button.
Enter your NordVPN account credentials into the router's VPN settings. This allows the router to authenticate with NordVPN's servers when establishing a connection.
Finally, save your settings and restart your router to apply the changes. Once restarted, all devices connected to your home network will benefit from the security and privacy features provided by NordVPN.
By setting up a VPN-enabled router with NordVPN, you can encrypt your internet traffic, hide your IP address, and access geo-restricted content on all your devices without needing to install individual VPN apps. It's a convenient and effective way to protect your online privacy and security.
Using NordVPN on a router
Using NordVPN on a router can significantly enhance your online privacy and security. NordVPN offers a convenient way to protect all devices connected to your home network by configuring the VPN directly on your router. Here's a comprehensive guide on how to set up NordVPN on your router and the benefits it brings.
Firstly, make sure your router is compatible with NordVPN. Most modern routers support VPN configurations, but it's always wise to check NordVPN's website for compatibility information or consult their customer support.
Next, log in to your router's admin panel. This can usually be done by entering your router's IP address into a web browser and logging in with your username and password. Once logged in, locate the VPN settings section.
In the VPN settings, you'll need to enter the connection details provided by NordVPN. This typically includes the server address, username, and password. NordVPN offers detailed instructions and configuration files for various router models, making the setup process straightforward.
After entering the necessary information, save your settings and establish a connection to the NordVPN server. Once connected, all internet traffic from devices connected to your router will be encrypted and routed through NordVPN's secure servers, protecting your data from prying eyes.
Using NordVPN on your router offers several advantages. It encrypts your internet traffic, preventing ISPs, hackers, and other third parties from monitoring your online activities. It also enables you to bypass geographical restrictions and access geo-blocked content from anywhere in the world.
In conclusion, setting up NordVPN on your router is a simple yet effective way to safeguard your online privacy and security. By encrypting all internet traffic at the router level, you can enjoy a more secure browsing experience on all devices connected to your home network.
Router VPN configurations for NordVPN
Router VPN configurations allow users to protect their online privacy and security by encrypting their internet connection. One popular VPN provider that offers router configuration options is NordVPN. By setting up NordVPN on a router, users can ensure that all devices connected to the network are automatically protected with the VPN connection.
To configure NordVPN on a router, users typically need to access the router's settings through a web browser and enter the NordVPN server details provided by the service. This process may vary depending on the router model and NordVPN's instructions, which can be found on their website.
Setting up a VPN on a router has several advantages. It allows users to secure multiple devices simultaneously without the need to install a separate VPN app on each device. This is especially useful for smart TVs, gaming consoles, and other devices that don't support native VPN apps.
Moreover, using a VPN at the router level encrypts all internet traffic, including devices that cannot run VPN software. This provides a seamless and comprehensive layer of privacy and security for all connected devices.
Overall, configuring NordVPN on a router is a convenient way to extend VPN protection to all devices on a network. It ensures that users can browse the internet anonymously and securely, safeguarding their sensitive data from potential cyber threats.
Compatibility of NordVPN with VPN-enabled routers
Title: Exploring the Compatibility of NordVPN with VPN-Enabled Routers
In the digital age, safeguarding online privacy has become paramount. Virtual Private Networks (VPNs) offer a reliable solution, encrypting internet traffic and masking IP addresses. While VPNs are commonly used on individual devices, integrating them with routers provides enhanced protection for all connected devices in a household or office.
NordVPN, a leading provider in the VPN market, offers compatibility with VPN-enabled routers, catering to users seeking comprehensive network-wide security. This compatibility extends NordVPN's benefits beyond individual devices, ensuring every device connected to the router enjoys encrypted traffic and anonymity.
Setting up NordVPN with a VPN-enabled router is a straightforward process. Users can either purchase a pre-configured router from NordVPN or manually configure their existing router to work with the VPN service. NordVPN provides detailed guides and support for both options, enabling users of varying technical proficiency to set up their router seamlessly.
Once configured, NordVPN secures all internet traffic originating from devices connected to the router. This includes smartphones, tablets, computers, smart TVs, gaming consoles, and IoT devices. By encrypting data at the router level, NordVPN protects against potential threats such as hacking, surveillance, and data interception, regardless of the device being used.
Moreover, integrating NordVPN with a VPN-enabled router offers additional benefits, such as bypassing geo-restrictions and accessing region-locked content on streaming platforms. Users can enjoy unrestricted access to their favorite shows, movies, and websites, irrespective of their geographical location.
In conclusion, the compatibility of NordVPN with VPN-enabled routers enhances online privacy and security for all connected devices. Whether for personal or professional use, integrating NordVPN with a router provides a convenient and effective way to safeguard digital interactions and access online content without restrictions.
0 notes
Text
can linksys router use vpn server
can linksys router use vpn server
Linksys router VPN compatibility
Linksys routers are known for their reliability and performance, making them a popular choice for both homes and businesses. One key feature that many users look for in a router is VPN compatibility, which can enhance security and privacy when accessing the internet.
Linksys routers are generally compatible with VPN services, allowing users to set up a secure connection to a remote server. This is particularly useful for those who want to protect their online activities from prying eyes, whether they are browsing the web, streaming content, or accessing sensitive information.
Setting up a VPN on a Linksys router is typically straightforward, thanks to the user-friendly interface that many Linksys models offer. Users can usually access the router's settings through a web browser and configure the VPN connection within a few simple steps. Some Linksys routers even come with built-in VPN client functionality, making the process even easier.
Using a VPN with a Linksys router can provide several benefits, such as encrypting internet traffic, masking your IP address, and bypassing geo-restrictions for streaming services. It can also add an extra layer of security when connecting to public Wi-Fi networks, keeping your data safe from potential threats.
Overall, Linksys routers offer solid VPN compatibility, making them a versatile choice for users who prioritize online security and privacy. By setting up a VPN on your Linksys router, you can enjoy a safer and more private internet browsing experience.
VPN server setup on Linksys router
In order to enhance online security and privacy, setting up a VPN server on your Linksys router can be a practical solution. A VPN (Virtual Private Network) helps to encrypt your internet connection, making it difficult for third parties to access your data or monitor your online activities.
To begin the process of setting up a VPN server on your Linksys router, ensure that you have a VPN subscription that supports router connections. Next, access the router's settings by entering the router's IP address in a web browser. This typically involves typing "192.168.1.1" or "192.168.0.1" in the address bar.
Once logged in, locate the VPN tab in the router settings menu. Here, you will find options to input your VPN credentials such as the server address, username, and password provided by your VPN service provider. After entering the necessary details, save the settings and activate the VPN connection on your router.
It is recommended to choose a VPN protocol that is supported by your router, such as OpenVPN or PPTP. Additionally, configuring the VPN server settings correctly is crucial for a secure connection.
By setting up a VPN server on your Linksys router, you can protect all devices connected to your network, including smartphones, laptops, and smart home devices. Ensure to regularly update your router's firmware and VPN client for optimal security and performance.
Linksys router VPN configuration
Title: How to Configure VPN on Linksys Router: A Step-by-Step Guide
In today's digital age, ensuring the security and privacy of your online activities is paramount. One effective way to achieve this is by setting up a Virtual Private Network (VPN) on your router. With a VPN configured directly on your router, all devices connected to your network can benefit from encrypted internet traffic and enhanced privacy. In this guide, we'll walk you through the process of configuring a VPN on your Linksys router.
Step 1: Access Router Settings
Start by opening a web browser on a device connected to your Linksys router's network. Enter the router's IP address (usually 192.168.1.1 or 192.168.0.1) in the address bar and press Enter. You will be prompted to log in to the router's admin interface.
Step 2: Navigate to VPN Settings
Once logged in, navigate to the VPN settings section of your router. This location may vary depending on your Linksys router model. Look for options related to VPN, such as "VPN Passthrough" or "VPN Configuration."
Step 3: Choose VPN Protocol
Select the VPN protocol you wish to use. Common options include PPTP, L2TP/IPsec, and OpenVPN. Consider factors such as security and compatibility with your devices when choosing the protocol.
Step 4: Enter VPN Configuration Details
Enter the required configuration details provided by your VPN service provider. This typically includes the VPN server address, username, password, and any other relevant settings.
Step 5: Save Settings and Connect
Once you've entered the VPN configuration details, save the settings on your router. After saving, you should be able to connect to the VPN server directly from your router.
Step 6: Verify Connection
To ensure that the VPN is working correctly, check the status or connection log in your router's admin interface. You should see a successful connection to the VPN server.
By following these steps, you can easily configure a VPN on your Linksys router, providing enhanced security and privacy for all devices on your network. Enjoy browsing the internet with peace of mind knowing that your online activities are encrypted and protected.
Using VPN with Linksys router
Using a VPN with a Linksys router can provide an added layer of security and privacy for your internet browsing and online activities. A VPN, or Virtual Private Network, encrypts your internet connection, making it difficult for third parties to intercept your data. By connecting your Linksys router to a VPN service, all devices connected to the router will benefit from encryption and anonymity.
Setting up a VPN on your Linksys router may vary depending on the router model and the VPN service provider. However, most VPN services offer guides or tutorials to help you configure the connection. Typically, the process involves logging into your Linksys router's settings, entering the VPN service details, and connecting to the VPN server.
One of the main benefits of using a VPN with a Linksys router is the ability to protect multiple devices simultaneously. Whether it's your laptop, smartphone, smart TV, or any other connected device, all internet traffic will be encrypted by the VPN.
Moreover, using a VPN with your Linksys router can help bypass geographic restrictions and access region-locked content. This is particularly useful for streaming services, accessing websites blocked in your region, or protecting your online identity when using public Wi-Fi networks.
In conclusion, incorporating a VPN with your Linksys router is a smart choice to enhance your online security and privacy. It provides a convenient way to protect all your devices with a single setup and offers additional benefits like bypassing geo-blocks. Consider choosing a reliable VPN service and follow the setup instructions to enjoy a safer and more private internet experience.
Linksys router VPN capabilities
Linksys routers are known for their advanced features and functionalities, one of which is their VPN capabilities. VPN, or Virtual Private Network, is a technology that allows users to create a secure connection over the internet. Linksys routers come equipped with VPN support, making them an excellent choice for users who prioritize online security and privacy.
By setting up a VPN on your Linksys router, all devices connected to the network can benefit from the encrypted connection. This means that your internet traffic is securely routed through a remote server, protecting your data from potential cyber threats such as hacking or surveillance.
Linksys routers support various VPN protocols, including OpenVPN and PPTP, giving users flexibility in choosing the most suitable option for their needs. Setting up a VPN on a Linksys router is typically a straightforward process, with many models offering user-friendly interfaces for easy configuration.
Whether you want to access geo-restricted content, secure your online activities while using public Wi-Fi, or simply enhance your overall online security and privacy, utilizing the VPN capabilities of a Linksys router can help you achieve these goals.
Overall, Linksys routers with VPN capabilities provide users with a convenient and effective way to safeguard their internet connection and data. By investing in a Linksys router with VPN support, you can enjoy a more secure and private online experience for all your connected devices.
0 notes
Text
Setting up the Linksys Smart Wi-Fi Router | +1-800-439-6173 | Smart Setup Wizard
Our Technician can help you with Setting up the Linksys Smart Wi-Fi Router Smart Setup Wizard. We also fix all kind of router and extender problems. You may call on our Toll-Free: 1-800-439-6173.

0 notes
Text
linksys extender setup
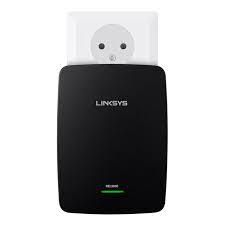
The Linksys Wifi Extender Setup is necessary to users in the modern world. Users today use expert, high-frequency WiFi routers to meet their daily Internet requirements.
However, routers show that there is little to no internet in multiple areas of the home or office. Dead points or network zones are the names for these specific areas. Instead of purchasing a new router, experts suggest using a Linksys Extender setup to resolve the problem.
How to setup linksys wifi extender?
Users must interact during setup, as implied by the names. The steps listed below should be executed in order to set up a Linksys WiFi Extender:
Connect the Linksys WiFi Range Extender to the power switch.
To connect your Linksys wifi range extender to your router or WiFi setting, use an Ethernet cable.
Open a browser and enter the IP address of the regular Linksys WiFi Extender or visit extender.linksys.com.
When you visit extender.linksys.com, you will be prompted for your Linksys Extender login details.
After entering the correct data, click the "Login" button.
Follow the instructions displayed on the screen.
Click "Edit" to make changes after you're done.
Note:Contact our team of experts or go to the official website, extender.linksys.com, if you need any help with your Linksys wifi extender.
Linksys Velop setup
Linksys Velop mesh networking devices can be set up in a manner resembling that of a typical wireless router. To get started, each Velop mesh network requires a primary computer or router. This main computer is designed to link to the modem of your Internet service provider.
The Linksys Velop Setup App can be installed by any wifi device.
At this point, connect the Linksys Velop to the power outlet.
On your smartphone, launch the app, and then follow the on-screen directions.
Make a Linksys Smart Wi-Fi account to have access to the Linksys Velop Mesh Range Extender setup page.
Select your current wifi network after logging in.
The current WiFi network will now be accessible to your Linksys New Velop.
Visit extender.linksys.com to complete the configuration.
Setup a Linksys Extender at extender.linksys.com
To access the Linksys extender setup user interface, go to extender.linksys.com and provide the proper login information, including your username and password. After successfully logging in, you can start adjusting the extender's basic and advanced settings.
To access extender.linksys.com's setup page:
To turn on the Linksys extender, go to extender.linksys.com.
Connecting the extender to the computer takes an Ethernet cable.
Look in the manual for the default login details.
Look at the tag on the extender to get the model number.
Be careful not to scratch the extension or other devices when opening it.
The extra length ought to be near the power supply.
Always use the most recent web browser version to view the New Extender Setup.
How do I login and log in to extender.linksys.com?
The first step in activating a Linksys wifi booster is to log into the Linksys Wi-Fi Extender Setup webpage. In order to finish this step, you must type the default address extender.linksys.com into the address bar of any device connected to your home Wi-Fi network's updated browser. The default login link you are using takes you to the setup page for the new extender. This page from Linksys contains setup instructions for range extenders. You'll be ready to start customising your new Wi-Fi extender after you've established the connection.
Now let's talk about how to get to the extender.linksys.com website.
Turn on your Linksys extender and wait for the power light to grow bright before continuing.
Connect a device to your Linksys WiFi extender, such as a laptop, desktop, smartphone, or tablet.
Your username and password are now required on a page.
After inputting your information, you will be able to visit the Linksys wifi extender page.
1 note
·
View note
Text
How to setup Linksys RE6300 Extender?
Linksys RE6300 is a wireless range extender that is designed to boost your Wi-Fi coverage area. The device is easy to set up and offers a hassle-free way to extend your Wi-Fi network to hard-to-reach areas in your home or office. Linksys RE6300 extender Setup is simple and quick if you are tech savvy; in this article, we will walk you through the setup process of your RE6300 wifi extender. This Linksys extender has dual band wifi range and can cover up to 7500 Sq Ft of area for good wifi signal and strength.
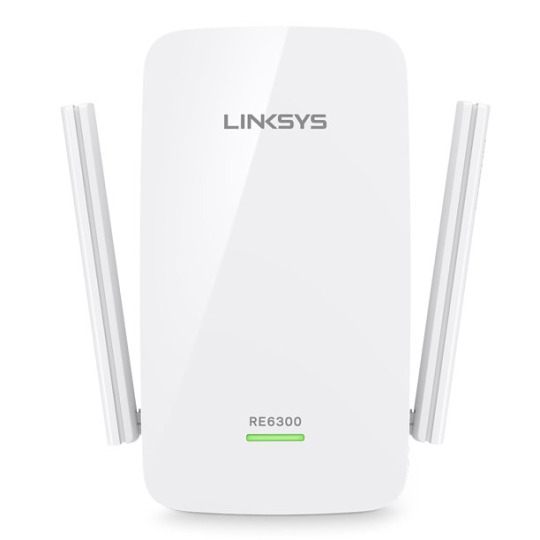
Linksys RE6300 extender Manual Setup
Follow these steps for Linksys RE6300 extender setup via manual method:
Plug the range extender into an electrical outlet near your router and wait for the power light to turn on.
Connect your device to the Linksys RE6300 Extender Setup network.
You can find the network name and password on the label attached to the range extender.
Open a web browser and type extender.linksys.com or 192.168.1.1 into the address bar.
Click on "Start Setup" and follow the on-screen instructions to complete the setup process.
If you want to connect the range extender to your router using an Ethernet cable, connect the cable to the Ethernet port on the range extender and the other end to an available Ethernet port on your router.
Once the setup is complete, you can connect your devices to the range extender Wi-Fi network.
How to configure Linksys RE6300 via WPS?
WPS is the simplest and quickest for Linksys RE6300 extender setup. Additionally, it supports Wi-Fi Protected Setup (WPS), allowing the extender and router to connect without requiring a password.
Follow these steps for Linksys RE6300 extender setup using WPS:
Press the WPS button on the range extender until the light flashes.
Within two minutes, press the WPS button on your router.
Wait for the range extender's light to turn solid green, indicating that it is connected to your router.
Once connected, you can move the range extender to a new location within range of your router's Wi-Fi signal.
Common Issues During Linksys Wifi Extender Installation
The extender has not enabled extender.linksys.com.
The web-based Linksys RE6300 Extender setup page is inoperable.
The default Linksys extender IP address is missing.
There are no visible flaws in the Linksys RE6300 Extender.
insufficient performance The Linksys RE6300 reset WiFi extender is connected, but there is no internet access.
Logging into Linksys RE6300 extender setup fails.
My password for my Linksys extender has been forgotten.
It is not possible to configure a Linksys RE6300 Extender.
An orange light error on a Linksys RE6300 Extender
Linksys extender firmware cannot be updated.
Troubleshooting tip for Linksys RE6300 Extender configuration issues
The troubleshooting procedures forLinksys RE6300 Extender are as follows:
Keep your Linksys RE6300 Extender away from metal objects, aluminium studs, microwaves, fish tanks, walls, room corners, cordless phones, Bluetooth devices, and other potential interference sources.
Check that the extender is receiving enough power from the wall outlet.
Examine the wiring connections to ensure their functionality. It is not advisable to use any damaged cables.
Take advantage of your smart device's fast internet connection.
Check the URL in the address bar if you're having trouble logging into your Linksys extender.
There should be no damage or short circuits in the wall outlet you're using.
start the most recent web browser version.
How to Update Firmware on Linksys RE6300 range extender?
A Linksys RE6300 extender firmware update is a piece of software that enhances the functionality of the device or fixes bugs. The web-based setup page for the Linksys RE6300 extender allows users to download and install firmware updates.
Follow these steps to update the firmware on your Linksys RE6300:
Open a web browser and type extender.linksys.com into the address bar.
Enter the range extender's login credentials. The default username and password are "admin."
Click on "Administration" and then "Firmware Upgrade."
Click on "Check for Updates" and wait for the range extender to search for new firmware.
If a new firmware version is available, click on "Update" to begin the installation process.
Wait for the installation to complete, and do not turn off or unplug the range extender during the update.
Linksys RE6300 range extender Factory Reset
A Linksys RE6300 extender reset involves returning the device to its original factory settings. The extender's reset button must be pressed and held for a short period of time until the LED light flashes in order to complete this procedure. Following the reset, all customised settings and configurations will be lost, and the device will return to its original settings.
Follow these steps to reset your range extender:
Locate the reset button on the range extender. It is usually located on the bottom or back of the device.
Press and hold the reset button for about 10 seconds or until the power light blinks.
Release the reset button and wait for the range extender to reboot.
Once the power light is solid, the reset process is complete, and you can begin the setup process again.
#Linksys RE6300 extender Manual Setup#How to configure Linksys RE6300 via WPS?#Common Issues During Linksys Wifi Extender Installation#Troubleshooting tip for Linksys RE6300 Extender configuration issues#How to Update Firmware on Linksys RE6300 range extender?#Linksys RE6300 range extender Factory Reset
0 notes
Text
How to Execute the Extender Linksys Setup?
The Linksys range extender is an efficient device. It will amplify your current network’s range and extend it to more than 20 ft. You can rest assured that you will be rid of all the dead zones in your building. These devices magnify the Wi-Fi signals of your router and transfer them to all the linked devices. It also results in strengthening the Wi-Fi signals.
You just have to carefully proceed with the Linksys extender setup. If you wish to know more about the process, keep reading ahead! In this blog, we’ll be thoroughly discussing the accurate procedure for the extender Linksys setup.
Steps for the Extender Linksys Setup
In order to execute the Linksys extender setup, there are two ways you can execute it. The methods are as follows:

Manual Linksys Extender Setup
Firstly, ensure the range extender is placed in the same room as your device like your PC or mobile phone.
Secondly, using an Ethernet cable connect the extender to your computer. Make sure the extender’s properly connected to the extender.
Next, make sure the extender is connected to a power source when the device is turned on.
After that, connect the computer to the extender’s network.
Then, you can either enter the IP address of the extender or visit extender.linksys.com in the address box.
Afterward, the login page will appear on the screen. To log in you can enter the login credentials of the extender.
When the extender Linksys setup page displays, enter the SSID of the router’s network in the given field.
Then, turn off the extender for a while and give it some time to rest.
After some time you can turn on the extender and complete the configuration.
Extender Linksys Setup Via the WPS Button
First of all, turn on your Linksys Wi-Fi range extender.
After powering on the extender, locate the WPS button of the extender.
When you have found it, press the button and hold it for a little while.
Then, the extender’s LED light will start blinking.
Next, within a few minutes press and hold the WPS button on the router.
When the LED light starts blinking on the router, indicates the connection has started.
Once the lights stop blinking, signifies the connection is successful.
The Linksys extender setup is successful. When you want to quickly set up the extender, you can execute this method. However, if your router doesn’t support this feature, you’ll have to try the first method.
Extender Linksys Setup Configuration
When you have successfully set up the extender and logged into it, you need to configure it now. Follow the steps below to configure the router:
Firstly, when you have logged into the extender, go to the Wi-Fi range extender smart wizard.
Secondly, tap on “Wireless” and then go to “Basic Wireless Settings”.
Now, you will be prompted to choose between Wi-Fi protected setup or a Manual Linksys Wi-Fi setup. Select the manual setup.
Then, enter the SSID in the given field.
After that, enter the password of the selected wireless network.
To save the settings, tap on “Save”.
Afterward, power cycle the router and the extender and you can start using the extended network from anywhere in your house.
The configuration of the Linksys extender is successful.
This is the procedure of the Linksys extender setup. If there’s any difficulty that you are facing during the extender Linksys setup, you can contact our team, and we’ll guide you through the process.
1 note
·
View note
Text
Linksys wifi adapter driver download

#LINKSYS WIFI ADAPTER DRIVER DOWNLOAD INSTALL#
#LINKSYS WIFI ADAPTER DRIVER DOWNLOAD DRIVERS#
#LINKSYS WIFI ADAPTER DRIVER DOWNLOAD UPDATE#
#LINKSYS WIFI ADAPTER DRIVER DOWNLOAD DRIVER#
#LINKSYS WIFI ADAPTER DRIVER DOWNLOAD UPGRADE#
#LINKSYS WIFI ADAPTER DRIVER DOWNLOAD DRIVER#
Linksys LNE100TX Fast Ethernet Adapter Driver 4. Linksys WUSB600N Wireless-N USB Network Adapter Driver 2.1.4.0 for Windows 2000/XP/Vista Linksys AE2500 Wireless USB Adapter Driver 5.100.68.46 for Windows XP/Vista/7 x86/圆4
#LINKSYS WIFI ADAPTER DRIVER DOWNLOAD UPDATE#
Linksys BEFSR81 v3 EtherFast Cable/DSL Router Firmware Update 2.51.4.4 Linksys BEFSR41 v4 EtherFast Cable/DSL Router Firmware Update 1.04.09 Linksys WVC80N Wireless-N Internet Camera Setup Wizard 1.0 Linksys USBBT100 Bluetooth USB Adapter Bluetooth Utility 1.05 for Windows 98/ME/2000/XP
#LINKSYS WIFI ADAPTER DRIVER DOWNLOAD UPGRADE#
Linksys E2100L Wireless-N Router Firmware Upgrade 1.0.00 Other problems, please try to contact publisher's official support. If you have found mistakes during downloading, please email to We will endeavour to solve these as soon as possible. If we have helped you with search of your drivers, you can help us, having put the link to us, from your site or to recommend our site to the friends. Cisco Connect Setup Software 2.1.0.6 for AE1200.AE1200 Driver 5.100.68.46 for Windows 7 32-bit, Windows 7 64-bit: Win7_WHQL,0.zip The linksys wusb6100m max-stream ac600 wi-fi micro usb adapter is a high-performance selectable dual-band wireless adapter that upgrades your old wi-fi technology to the latest wi-fi standard.Download Linksys EG v3 Instant Gigabit Desktop Network Adapter Driver for Windows to net driver. Linksys Eg V3 Instant Gigabit Desktop Network Adapter Driver freeload, and many more programs. If you are using a Linksys Wi-Fi router, click here for instructions.
#LINKSYS WIFI ADAPTER DRIVER DOWNLOAD DRIVERS#
Update drivers with the largest database available. NOTE: To check the firmware version of a Linksys Smart Wi-Fi Router, click here.
AE1200 Driver 5.100.68.46 for Windows XP 32-bit: AE1200xp.zip Get the latest official Cisco Linksys AE2500 network adapter drivers for Windows 11, 10, 8.1, 8, 7, Vista, XP PCs.
Problems can arise when your hardware device is too old or not supported any longer.To start downloading Linksys AE1200 Wireless USB Adapter Driver 5.100.68.46 for Windows XP/Vista/7 x86/圆4, please choose one of the links from the list below. This will help if you installed an incorrect or mismatched driver. Try to set a system restore point before installing a device driver. It is highly recommended to always use the most recent driver version available. Moreover, check with our website as often as possible so that you don't miss a single new release.
#LINKSYS WIFI ADAPTER DRIVER DOWNLOAD INSTALL#
Without further ado, if you intend to apply this version, click the download button and install the package. When done, don't forget to perform a system restart and reconnect the network adapter to make sure that all changes take effect properly. To install this release, simply get the package, extract it if necessary, run the setup, and follow the instructions displayed on-screen. If you are using a Linksys Wi-Fi router, click here for descargar. NOTE: To check the firmware version of a Linksys Smart Wi-Fi Router, click here. For devices such as routers, gateways and network access storage, you need to download the firmware. Updating the adapter's drivers and utilities version might improve overall performance and stability, increase transfer speeds, fix different compatibility problems and several network-related errors, as well as bring various other changes. QUICK TIP: For ethernet and wireless adapters, you need to download the drivers. This task also allows computers to properly recognize all device characteristics such as manufacturer, chipset, technology, and others. However, proper software must be applied if you want to make use of all features that the network adapter has available. When connected, the operating system usually installs a generic driver that helps the computer to recognize the newly attached device. Even though other OSes might be compatible as well, we do not recommend applying this release on platforms other than the ones specified. Improving weak signals of network adapters on Windows. This download record installs the Windows® 10 and Windows 11 WiFi package drivers 22.110.1 for the Wi-Fi 6E/Wi-Fi 6/9000/8000 series Intel® Wireless Adapters. Downloading the latest driver for your Linksys wireless USB adapter. Updating the driver of your Linksys Wireless-N USB Adapter. Keeping your Linksys devices’ firmware or driver updated. freeload - Linksys AE2500 Broadcom BCM43236 USB WiFi Adapter Driver v.6.32.145.11, v.5.100.243.6, v.5.100.68.46 for Windows XP, Windows Vista, Windows 7, Windows 8 32-bit (x86), 64-bit (圆4). If it has been installed, updating (overwrite-installing) may fix problems, add new functions, or expand existing ones. Uninstalling a Linksys network adapter driver through the Device Manager. This package contains the files needed for installing the Linksys WUSB54GP USB Adapter Driver. Do you want to remove all your recent searches Filed Under, AE, DRIVER Tagged With, cisco linksys ae2500 usb driver, linksys ae2500 chipset, linksys ae2500 driver download windows 10, linksys ae2500 driver windows 7 64 bit, linksys ae2500 usb wireless adapter driver.
0 notes
Link
Linksys smart Wi-Fi routers and accessories, as well as the latest WRT router, harness this technology for an optimal streaming experience. Additionally, Media Prioritization features from our app-enabled routers allow you to assign top priority to gaming and streaming devices with a flexible Wi-Fi coverage as it has external antennas. Linksys smart Wi-Fi router setup uses Smart setup Wizard to install and also uses the default web address linksyssmartwifi.com to go to login and setup page of the router. The Smart setup Wizard makes it easy to set up and monitor your home network. Use free Smart Wi-Fi tools to optimize your web surfing and media streaming experience at anytime, from anywhere. It also includes easy guest access, parental controls, and apps that make home networking easier and fun.If you want to setup your Linksys smart Wi-Fi router then you can either visit our site or can contact our experts at Live chat or @1-877-323-1333.
#Linksys smart Wi-Fi router setup#Linksys WRT Wi-Fi Routers#Linksys smart Wi-Fi login#Linksyssmartwifi.com#Linksys WRT Routers
1 note
·
View note
Link
0 notes
Link
Linksys Smart Wi-Fi Router provides you the high-speed Wi-Fi everywhere. They are made with high-end materials and provide a connection to multiple devices. Some users might face difficulty white setting it up or during login in. Which is not a hard thing to do. After setting up your Linksys router you can access your Wi-Fi Router easily anywhere.
0 notes
Last Seen Blogs

infinitenicoh
infinite

sunofdorne
Princess Elia Martell

gumpstuff
Gump

xios
♡ XIOS ♡

sheldenemaripola
夢想家