#I learned how to make <10 mb gifs just for this post
Explore tagged Tumblr posts
Visit Tumblr Blog
Explore Tumblr blogs with no restrictions, modern design and the best experience.
Last Seen Tumblr Blogs


Fun Fact
Tumblr.com rank in the US is 25.
Text
School Spirits - Traitor Theory
I was rewatching School Spirits Season 2 with a friend the other night and a single shot changed my entire outlook on one of the characters. I think one of the cast is a traitor, possibly working with some big bad or at least keeping secrets in a huge way.
Spoilers for School Spirits S1 & S2 under the cut!
It says Traitor theory at the top, but what I really wanted to call this was:
School Spirits: Toxic Yuri
What started this:
Episode 6 of Season 2 we see the Gals doing a lot of investigating while the Boys attend Wally's School reunion. When telling this theory to my friends I started by asking them: What was the most exciting, distracting moment in all of season 2?
After they all said seeing Wally's entire ass down the studs, I amended my question: What is the second most exciting, distracting moment of the series and got the answer I was looking for:
The well gif'd TikTok dance to David Bowie's "Let's Dance"

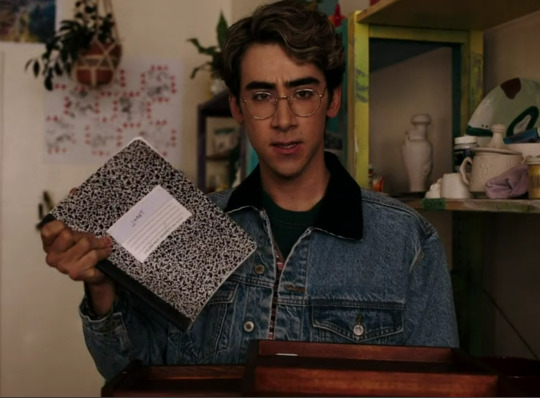
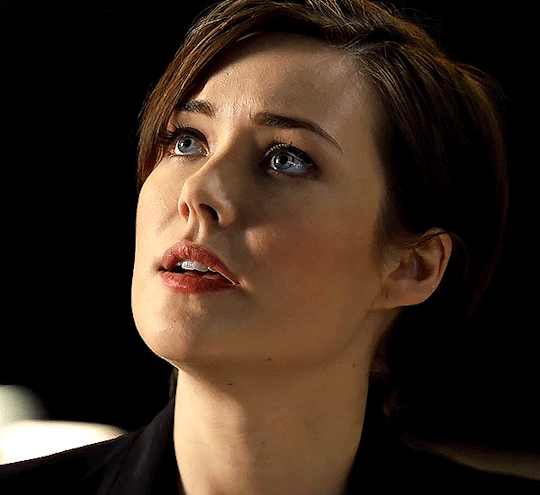
I have seen a ton of GIF sets of this moment, but when re-watching the show I realize the GIF sets always cut out the one shot we get of what Maddie is doing during this time and this shot is the basis of my theory that Wally was right the whole time,

So what shot from the dance sequence am I talking about?
This one - I couldn't find a GIF online so I had to make one myself:

In the middle of the Dance sequence they have this single shot of Maddie, who is currently and importantly NOT in a scar at this moment. We don't find out for a whole episode that the lights flicker when someone enters their scar, so this moment goes by mostly unnoticed.
We have track of most other main ghost characters: Wally, Charley, Rhonda, & Quinn are dancing in the library, Maddie is in the hallway, and Mr. Anderson, while not present, is most likely too fresh off his ghosthood to even know how to access a scar. This leaves Yuri as our only real option for a main character who could be entering his scar.
So what was Yuri Doing in there?
Well, at the beginning of the next episode, while everyone else is having sexy sexy times, Quinn goes into her scar and finds the missing page of Janet's journal, the one that claims she was going lock everyone else away in their scars and leave them there.
So why do I think this was Yuri's doing and not Quinn's? Because Yuri was the only one who had access to the box Janet left in the Pottery Studio - the box where Charley find's Janet's Journal earlier in the season, which already has pages missing from it. Its clear that Yuri knows Janet can create permanent objects and he starts talking to Charley very quickly for someone who has been lying about being able to speak English since the 70s. I would love to believe its because Charley is just that irresistible, but Charley has been around since the 90s. Why now? Why would Yuri try to get in with Charley now specifically. He gets in with Charley very quickly, explaining away his reason for not talking with the others by immediately denouncing Mr. Martin.
Watching the later episodes with this in mind I started viewing everything he said or did with a layer of suspicion. He barely walked into the book racks before coming up with a theory about dopamine receptors in the library when helping Wally and Charley decode parts of Janet's book. He agrees very quickly to going to the dance with Charley as a date for someone who's been a recluse. He even knows how to get into his own scar and that his lighter is his Key - and Yuri, unlike Quinn, never mentions to anyone about going into his scar for the first time, and when we do see him in the last episode when everyone meets up in Rhonda's scar, he doesn't look any more traumatized than the others. In fact, he looks more upset when he sees Charley's scar.
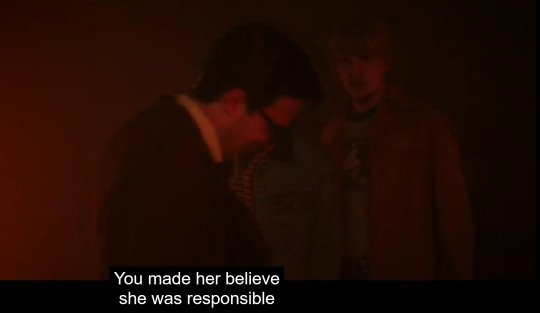
I don't know exactly what he's doing but his main objective appeared to involve making sure Janet gave back Maddie's body no matter what. He frames it as more Yoda wisdom, but I am suspicious of the way he talks to Wally in Episode 7 to convince Wally to let Maddie go. Even the way he's lit in this scene (for those of you who like lighting design theory) shows his face half in light and half in shadow, something I teach to my students as the Harvey Dent Lighting, showing a character is two faced or playing two sides at once. I'm just so suspicious of his motives here. Like why make Wally feel worse than he did before?


Finally at the end of the season I noticed that more often than not Yuri is in the background of almost all of Mr. Martins shots. This isn't so much a grounded theory as my film prof (I teach film classes) brain coming into play, where they are trying to create a visual relationship between Mr. Martin and Yuri on screen by putting them visually together, which Yuri visually having Mr. Martin's back.
My theory is that Yuri knew about Mr. Martin needing Janet to forgive him to move on, and if he does, Mr. Martin will give Yuri something in return. I don't know if Yuri's motivation will be all that bad, and I'm fairly certain he's going to catch feelings for Charley for real if he hasn't already but I do think Wally was right:
Yuri is a spy, and he is lying to all of them.
#school spirits#school spirits spoilers#school spirits season 2#Mr. Martin#school spirits yuri#wally clark#wally school spirits#maddie nears#charley school spirits#janet hamilton#janet school spirits#school spirits theories#I learned how to make <10 mb gifs just for this post#It wasnt hard I just wish Premiere had a good estimate file size for gifs so there wasnt as much trial and error#split river high#posts by me
36 notes
·
View notes
Text
My GIF Making process: Screen capturing using MPV player, Organizing files, 3 Sharpening settings, Basic Coloring PSD + Actions set

This is a very long post so heads up.
I’ll try to be as thorough and true as much as possible to the way I make my gifs (I already use Photoshop Actions which I’ve long since set up but now for this tutorial I’m reviewing them to show you the exact steps I’ve learned to create my gifs 😃) and present them to you in a semi-coherent way. Also, please bear with me since English is my second language.
First things first. Below are the things and tools we need to do this:
Downloaded 4K or 1080p quality videos (let’s all assume we know where to get these—especially for high definition movies and tv series—so this post doesn’t get removed, okay? 😛)
Adobe Photoshop CC or the CS versions can work as well, but full disclosure I haven’t created gifs using the CS versions since 2020. I’m currently using Adobe Photoshop 2024.
mpv player. Use mpv player to get those frames/screenshots or any other video player that has a screen grabber feature. I’ve used adapter for the longest time but I’ve switched to mpv because the press to screenshot feature while the video is playing has been a game changer not to mention ultimate time saver for me. For adapter you need to play it in another video player (like VLC player), to get the start and end timestamps of the scene you want to gif which takes me ages before I can even open Photoshop.
Anyway! Please stop reading this post for a moment and head over to this amazing tutorial by kylos. She perfectly tells you how to install and use mpv player, both for Mac and Windows users.
One thing I have to share though, I had a tough time when I updated my MacOS to Sonoma since MPV is suddenly either duplicating frames or when I delete the duplicates the player seems to be skipping frames :/ I searched and found a solution here, though it didn’t work for me lol. My workaround for this in the meantime is decreasing the speed down to 0.70 then start screenshotting—it’s not the same pre Sonoma update but it works so I’ll have to accept it rather than have jumpy looking gifs.
Now, after this part of kylos’ tutorial:

you can continue reading the following sections of my gif tutorial below.
I want to share this little tip (sorry, this will only cater to Mac users) that I hope will be helpful for organizing the screenshots that MPV saved to the folder you have selected. Because believe me you don’t want to go through 1k+ of screenshots to select just 42-50 frames for your gif.
The Control + Command + N shortcut
This shortcut allows you to create a new folder from files you have pre-selected. As you can see below I have already created a couple of folders, and inside each folder I have selected screenshots that I want to include in one single gif. It's up to you how you want to divide yours, assuming you intend to create and post a Tumblr gifset rather than just one gif.

Another tip is making use of tags. Most of, if not all the time, I make supercorp gifs so I tag blue for Kara and red (or green) for Lena—just being ridiculously on brand and all that.
Before we finally open Photoshop, there's one more thing I want to say—I know, please bear with me for the third? fourth? time 😅
It's helpful to organize everything into their respective folders so you know the total number of items/frames you have. This way, you can add or delete excess or unnecessary shots before uploading them in Photoshop.
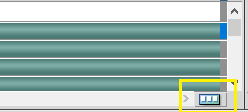
For example below there are 80 screenshots of Kara inside this folder and for a 1:1 (540 x 540 px) Tumblr gif, Photoshop can just work around with 42-50 max number of frames with color adjustments applied before it exceeds the 10 MB file size limit of Tumblr.

Sometimes I skip this step because it can be exhausting (haha) and include everything so I can decide visually which frames to keep later on. You'll understand what I mean later on. But it's important to keep the Tumblr 10 MB file size limit in mind. Fewer frames, or just the right amount of frames, is better.
So, with the screenshot organization out of the way, let's finally head over to Photoshop.
Giffing in Photoshop, yay!
Let’s begin by navigating to File > Scripts > Load Files into Stack…

The Load Layers window will appear. Click the Browse button next.
Find your chosen screenshots folder, press Command + A to select all files from that folder then click Open. Then click OK.
After importing and stacking your files, Photoshop should display the following view:

By the way, I'll be providing the clip I've used in this tutorial so if want to use them to follow along be my guest :)
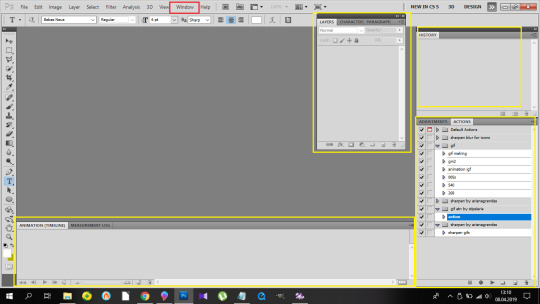
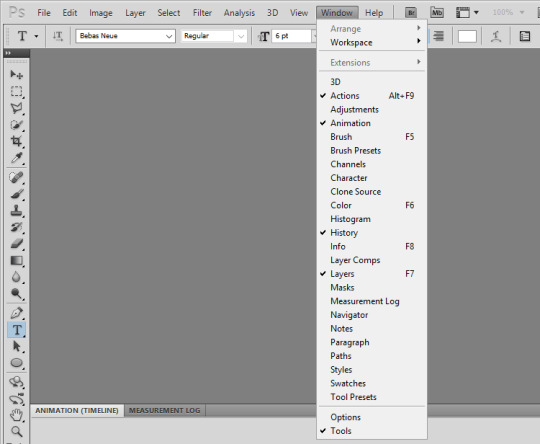
If you haven't already opened your Timeline panel, navigate to Windows > Timeline.
Now, let's focus on the Timeline panel for the next couple of steps.
Click Create Video Timeline, then you’ll have this:

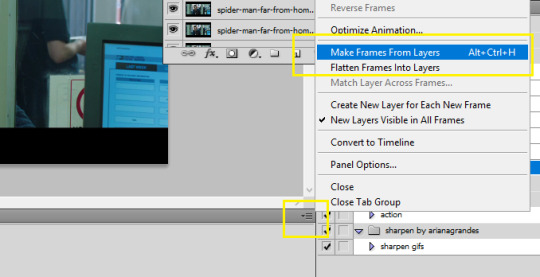
Now click the menu icon on the top right corner then go to Convert Frames > Make Frames from Clips

Still working on the Timeline panel, click the bottom left icon this time—the icon with the three tiny boxes—to Convert to Frame Animation
Select Make Frames From Layers from the top right corner menu button.
So now you have this:

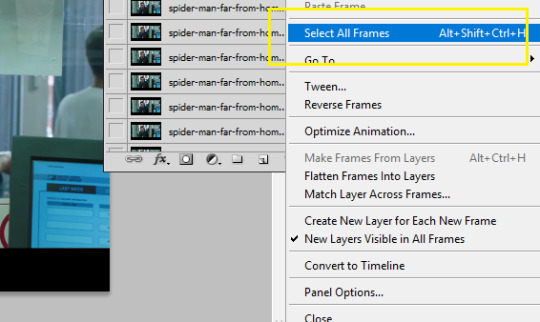
Go and click the top right menu icon again to Select All Frames
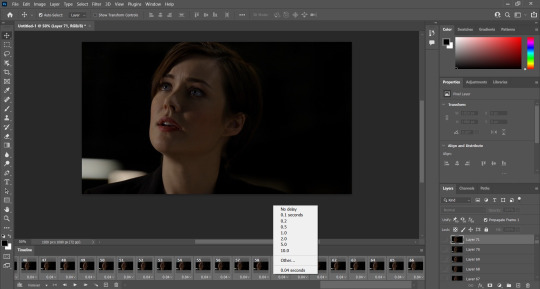
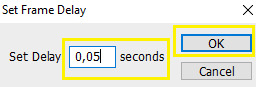
Then click the small dropdown icon to set another value for Frame Delay. Select Other…

The best for me and for most is 0.05 but you can always play around and see what you think works for you.
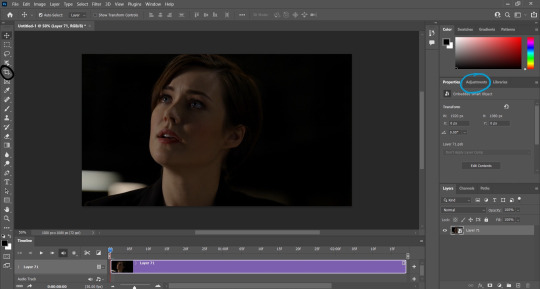
Click the top right menu icon again to Reverse Frames.
I think Photoshop has long since fixed this issue but usually the first animation frame is empty so I just delete it but now going through all these steps there seems to be none of that but anyways, the delete icon is the last one among the line of feature buttons at the bottom part of the Timeline panel.
Yay, now we can have our first proper GIF preview of a thirsty Lena 😜

Press spacebar to watch your gif play for the very first time! After an hour and half of selecting and cutting off screenshots! 😛 Play it some more. No really, I’m serious. I do this so even as early (lol) as this part in the gif making process, I can see which frames I can/should delete to be within the 10 MB file size limit. You can also do it at the end of course 🙂
Now, let’s go to the next important steps of this tutorial post which I’ve numbered below.
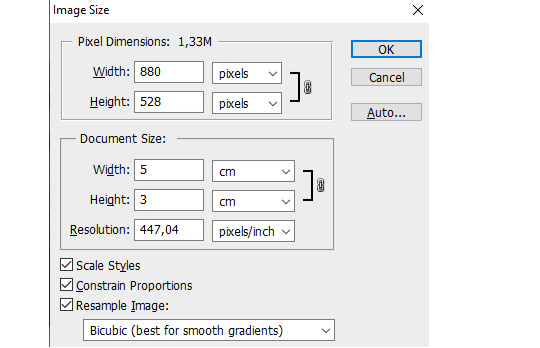
Crop and resize to meet Tumblr's required dimensions. The width value should be either 540px, 268px, or 177px.
Convert the gif to a Smart Object for sharpening.
Apply lighting and basic color adjustments before the heavy coloring. I will be sharing the base adjustments layers I use for my gifs 😃.
1. Crop and Resize
Click on the Crop tool (shortcut: the C key)

I like my GIFs big so I always set this to 1:1 ratio if the scene allows it. Press the Enter key after selecting the area of the frame that you want to keep.
Side note: If you find that after cropping, you want to adjust the image to the left or another direction, simply unselect the Delete Cropped Pixels option. This way, you will still have the whole frame area available to crop again as needed and as you prefer.
Now we need to resize our gif and the shortcut for that is Command + Opt + I. Type in 540 as the width measurement, then the height will automatically change to follow the ratio you’ve set while cropping.
540 x 540 px for 1:1
540 x 405 px for 4:3
540 x 304 px for 16:9
For the Resample value I prefer Bilinear—but you can always select the other options to see what you like best.
Click OK. Then Command + 0 and Command + - to properly view the those 540 pixels.

Now we get to the exciting part :) the sharpen settings!
2. Sharpen
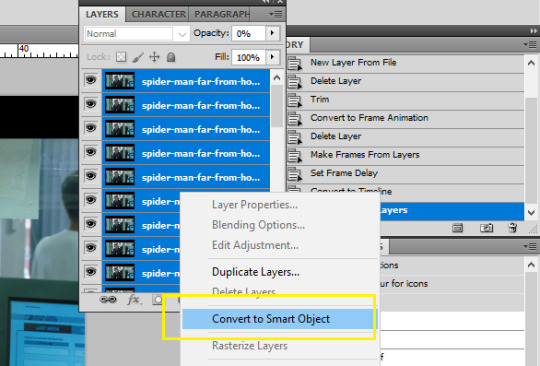
First we need to have all these layers “compressed” intro a single smart object from which we can apply filters to.
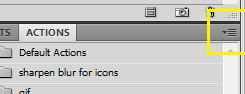
Select this little button on the the bottom left corner of the Timeline panel.


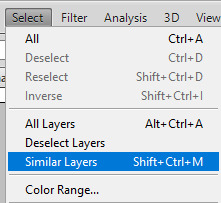
Select > All Layers
Then go to Filter > Convert for Smart Filters
Just click OK when a pop-up shows up.
Now you should have this view on the Layers panel:

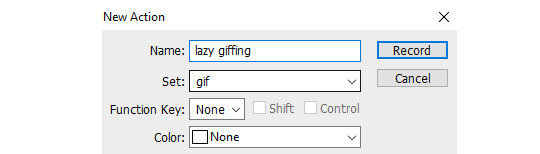
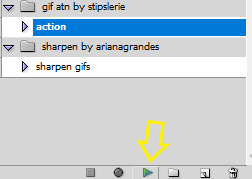
Now I have 3 sharpen settings to share but I’ll have download links to the Action packs at the end of this long ass tutorial so if you want to skip ahead, feel free to do so.
Sharpen v1
Go to Filter > Sharpen > Smart Sharpen…
Below are my settings. I don’t adjust anything under Shadows/Highlights.
Amount: 500
Radius: 0.4
Click OK then do another Smart Sharpen but this time with the below adjustments.
Amount: 12
Radius: 10.0

As you can see Lena’s beautiful eyes are “popping out” now with these filters applied. Click OK.
Now we need to Convert to Frame Animation. Follow the steps below.
Click on the menu icon at the top right corner of the Timeline panel, then click Convert Frames > Flatten Frames into Clips
Then Convert Frames > Convert to Frame Animation
One more click to Make Frames From Layers
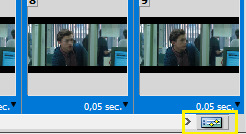
Delete the first frame then Select All then Set Frame Delay to 0.05

and there you have it! Play your GIF and make sure it’s just around 42-50 frames. This is the time to select and delete.
To preview and save your GIF go to File > Export > Save for Web (Legacy)…
Below are my Export settings. Make sure to have the file size around 9.2 MB to 9.4 MB max and not exactly 10 MB.

This time I got away with 55 frames but this is because I haven’t applied lighting and color adjustments yet and not to mention the smart sharpen settings aren't to heavy so let’s take that into consideration.
Sharpen v1 preview:

Sharpen v2
Go back to this part of the tutorial and apply the v2 settings.
Smart Sharpen 1:
Amount: 500
Radius: 0.3
Smart Sharpen 2:
Amount: 20
Radius: 0.5
We’re adding a new type of Filter which is Reduce Noise (Filter > Noise > Reduce Noise...) with the below settings.

Then one last Smart Sharpen:
Amount: 500
Radius: 0.3
Your Layers panel should look like this:

Then do the Convert to Frames Animation section again and see below preview.
Sharpen v2 preview:

Sharpen v3:
Smart Sharpen 1:
Amount: 500
Radius: 0.4
Smart Sharpen 2:
Amount: 12
Radius: 10.0
Reduce Noise:
Strength: 5
Preserve Details: 50%
Reduce Color Noise: 0%
Sharpen Details: 50%
Sharpen v3 preview:

And here they are next to each other with coloring applied:
v1

v2

v3

Congratulations, you've made it to the end of the post 😂
As promised, here is the download link to all the files I used in this tutorial which include:
supercorp 2.05 Crossfire clip
3 PSD files with sharpen settings and basic coloring PSD
Actions set
As always, if you're feeling generous here's my Ko-fi link :) Thank you guys and I hope this tutorial will help you and make you love gif making.
P.S. In the next post I'll be sharing more references I found helpful especially with coloring. I just have to search and gather them all.
-Jill
#tutorial#gif tutorial#photoshop tutorial#gif making#sharpening#sharpening tutorial#photoshop#photoshop resources#psd#psd coloring#gif coloring#supercorp#supercorpedit#lena luthor#supergirl#my tutorial#this has been a long time coming#guys. i'm BEGGING you. use the actions set - it was a pain doing all this manually again ngl LMAO#i've been so used to just playing the actions#so this has been a wild refresher course for me too 😆
629 notes
·
View notes
Note
how do u make ur gifs?
Hi, anon! I use photoshop. (there are vids on yt that show you how to get it for free)
I'm gonna use this gifset as example.
This is turned out to be a long post, so I'm gonna add the cut.
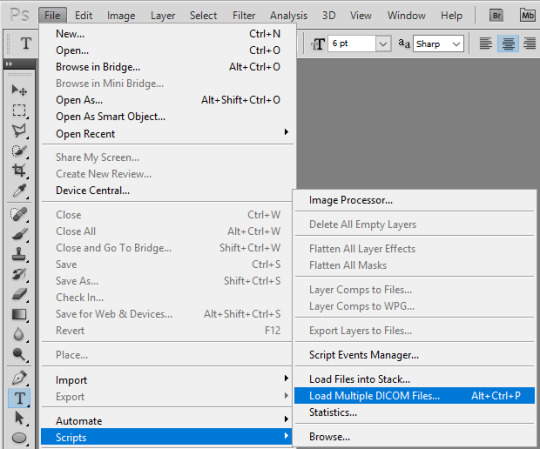
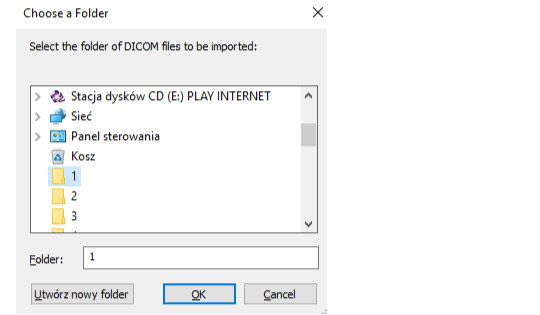
1. I cut and export - can be done with any video editor - from the ep (always give preference for the highest quality you can find) the scene(s) I wanna gif. Then, import the video to photoshop to create layers. Photoshop > File > Import > Video Frames to Layers

2. After you select the video, this window will open. I like "from beginning to end" option and after just delete the layers that you don't want.

3. Select "OK" to create the frames.

here I already deleted the ones I didn't want.
If the timeline and layers panel doesn't appear, click on "window" at the top.
4. Set the velocity. important: you have to select all frames!

(click on the symbol next to the numbers to appear the options ⬇️)
Here, it's very much the preference of each editor. Personally, I like above 0.06.
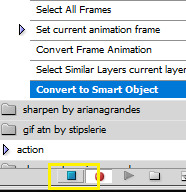
5. With the velocity set, select all layers and all frames to convert to video timeline and convert to smart filters.

⬇️

⬇️
6. Now, it's time for coloring, cutting - tool circled in black - (if you want and/or need to) and sharpen. Let the creativity flow!
What I do is:
- resize the image (Image > Image size) setting -> w: 600 pixels and leave the proportion tool on so photoshop automatically adjusts the height
- crop it - tool circled in black - to a size I like.
- color it - tools circled in blue. I come up with my own PSDs (just messing around with the colors). I have 2-4 psd of my own that I use for base.
- sharpen Filter > Sharpen > Smart Sharpen (my fav setting is amount: 400; radius: 0.2 - 1.0 - I'll be adjusting these first two settings until I find one I like - ; reduce noise: 10; remove: lens blur)
- and then, resize again for export (Image > Image size). In this part, I try to find the max size - adjusting only width and leaving the proportion tool on so photoshop automatically adjusts the height - I can export without passing 10 MB that is the tumblr limit or you can put 540x. Always paying attention to not pass the limit.
7. Done!
That's it! :) I know it can sound confusing, but it's just at the beginning. Feel free to send me a ask again if you still have a question! <3 Really, please, I'd love to help you!
Oh and when I wanted to learn how to make collage (like the ones that you can find in the mega link "+" in this post), I watched this tutorial.
#anon#gifs#gifset#resources#i would screen record my process of gif making#but idk how to#:(#i always download the 1080p versions of the eps#tbl and cm#you can try find in scenepacks accs on ig#and on logolessdesires on twitter#or if you want the links to download 1080p eps for tbl and cm DM me
13 notes
·
View notes
Photo
9k FOLLOWERS CELEBRATION: GIF TUTORIAL by winston-wilson
In this tutorial, I’ll try to show you the basics of making a gif. Of course, there are many ways for this joyful and absolutely not stressful part-time hobby slash addiction, but this is how I’ve been doing it for a couple of months now, and it’s worked out pretty well so far. I’ve learned a couple of tricks, created my own shortcuts, and at this point it’s just something that comes naturally.
I use Photoshop CS5 Portable (you can get it here)
for taking caps, I’m using KMPLayer (get the 4.2.2.22 verison, the .23 one is screwed up - you can get it here)
please, like / reblog if you find this useful
feel free to hit me up with any questions.

1. Don’t beat your laptop with a baseball bat. Yet. Use your chair.
1.1. Videos/clips/movies.
I explained that part in this tutorial. What I want to add is that if you want the highest quality of a trailer, get QuickTime, wait a day or two after it comes out, and get the trailer here.
Find a trailer you’re interested in, play it, choose the highest quality option, press ctrl+shift+i, and you’ll get this:
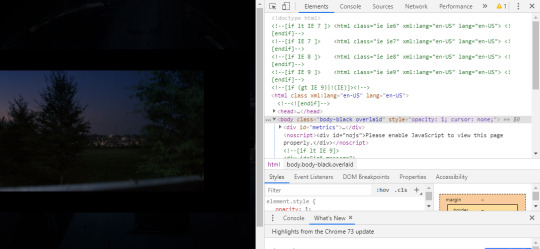
Click anywhere on that html codes and press ctrl+f. This will show up:
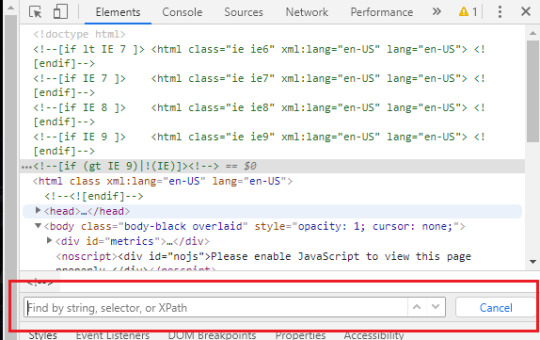
Put that brandy away. Search for ‘source’, find this:
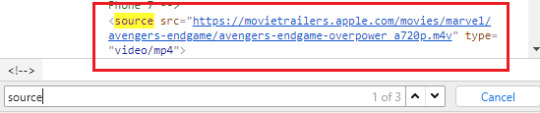
Clink on the blue link using the right-click of your mouse, choose open in new tab, and a download window should show up.
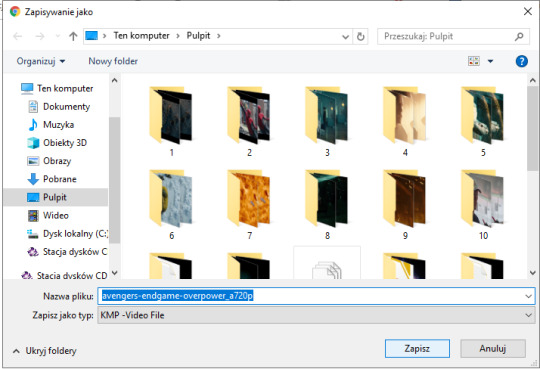
Save the video where you want to.
You can use videos from YT or movies you have on your computer or get those movies. Those movies also should be in the best quality possible. I suggest the ones with quality of 1080p and bit rate at least 6 Mb/s for best gifs.
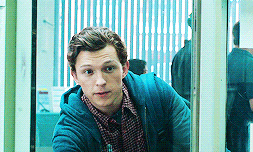
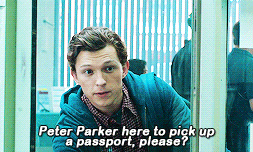
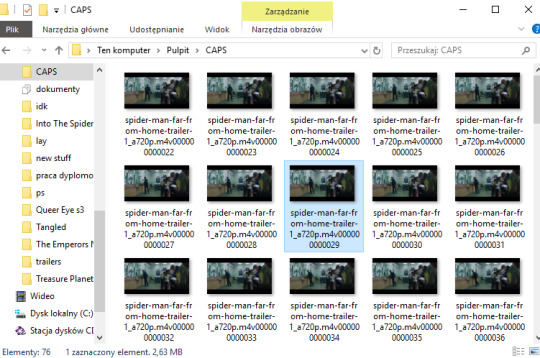
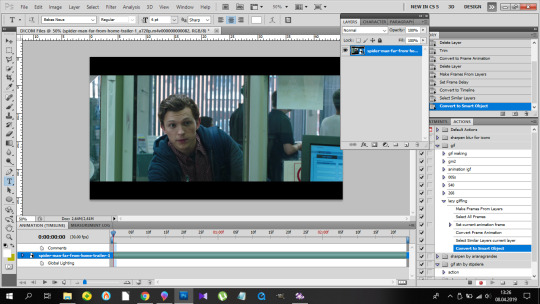
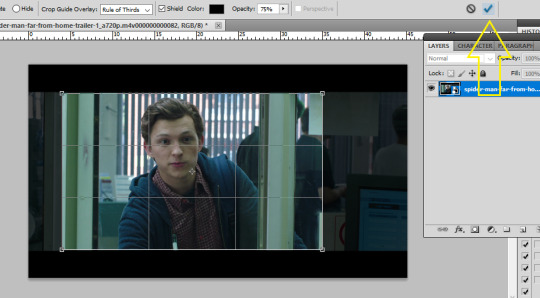
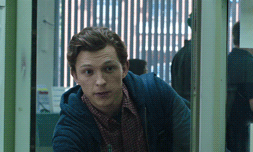
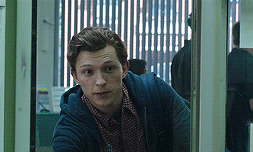
In this tutorial I’ll be using the trailer of Spider-Man: Far From Home. Because all my movies are on another disk and I, uh...
2. KMPlayer + taking caps.
Before you open a video and take caps, I suggest you create a folder that’s easy to find and use on your desktop. I have one called ‘CAPS’.
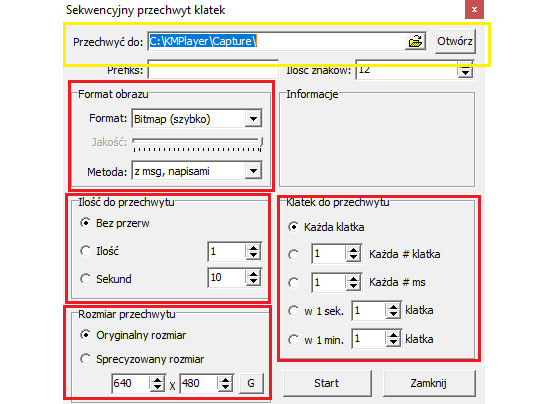
- Open your video in KMPlayer. Pause it because this version of KMPlayer stinks and you have to pause the clip in order to start taking caps. So pause it and press ctrl+g. When the caps window shows up, set it to those (red) options and choose your folder (yellow) where your caps will be stored. You have to choose that one thing every time you open that window. [Sorry for the language, but it doesn’t matter. Just choose them settings.)
- Play the video & make sure your caps window is somewhere on the side like this:
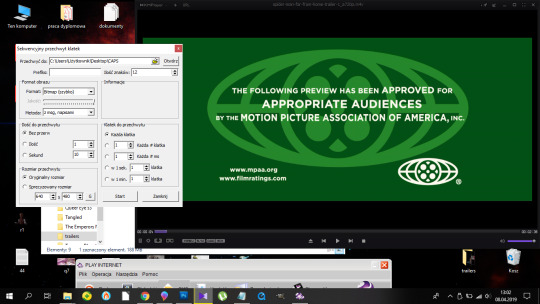
Find the part that you want to gif. You can pause before it, press start on the caps window and then play the video or just start taking caps while the video is playing. I’ll do it using the first way.
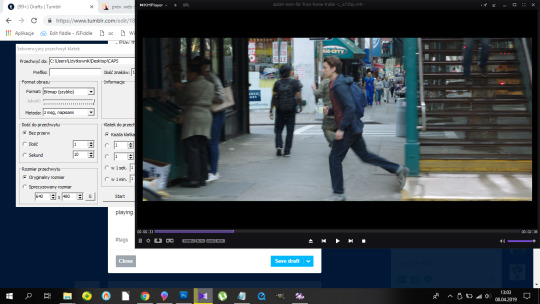
pause:
click ‘start’ on the caps:
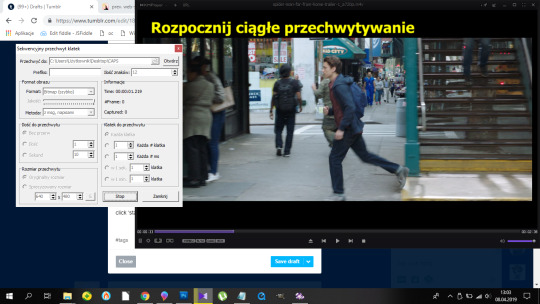
and then play the video until I get the caps I want and click stop on the caps window first, the video second.
Close that thing if you have what you want.
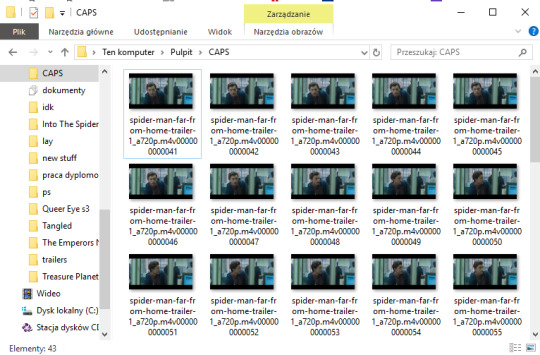
- Open your CAPS folder.
Get rid off the caps you don’t need. They’re trash and should be treated as such.
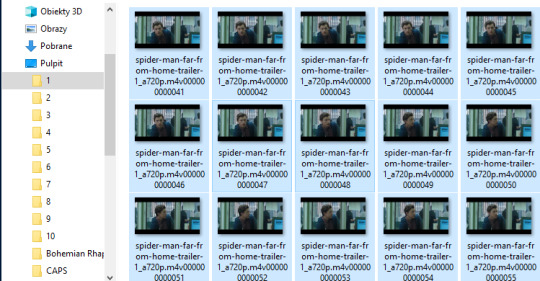
If you’re giffing more than one scene, you can sort them caps to folders. I have 10 folders named from 1 to 10 where I sort mine. And because for now I’m making just one, I’ll move those caps to folder ‘1′ on my desktop.
Time to make a gif. You good out there? If the answer is no, take Vicodin. No worries, when you’re done learning the basics, you’ll make gifs with Britney Spears playing in the background. Now shhh, focus.
3. Photoshop, aka that scary part.
- When you install it, you’ll get a folder, and in that folder there’s the app.
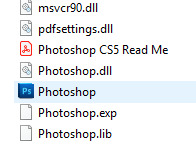
- Open that thing (and maybe copy on your desktop).
What you need is the layers window, the actions window, the adjustments window, the characters window, the animation window, the paragraph window, the history window... It... It sounds horrifying, I know, but cool your pits. It’s just this:
If you’re not laughing, take another Vicodin. Use this if those windows aren’t on display automatically:
And sort them. Now, I use my own keyboard shortcut for gifs. I suggest you do the same. Trust me, you don’t want to do this:
every time you make a gif. As you can see, I use alt+ctrl+p. You can set your shortcuts using the ‘Edit’ window at the bottom of which you’ll find the ‘Keyboard Shortcuts’ thingy. Then it’s a bit of digging but it all makes sense, ok? Ok. Yeah, no, it’s a lot of digging but I believe in you.
So you load them files, and this shows up:
so choose your folder where your caps are, and click OK. Ta-dah:

- This is the ‘make gif’ part. Click this:
so you can get this

at the bottom. I have this whole process made into an action, and if you want it in an action too, at this point you should click this:
and choose ‘New Action’. Name it. Click record.
and now 1)
2) take Tylenol
2.1.)
3)

4)
5)
(you should be here now:)

6)
7) (right-click mouse)
8) stop the action recording here:
And this is how you should be looking right now:
Oops, not this. This:
Fine? Fine. Go smoke a cigarette.
You back? K.
- Dimensions. Very important. Like, 10/10 important. Don’t cross the 3Mb size.
Fitting into the tungler dimensions means your gifs will be posted in the highest quality. This is a visual of those dimensions (depending on how many gifs per row):
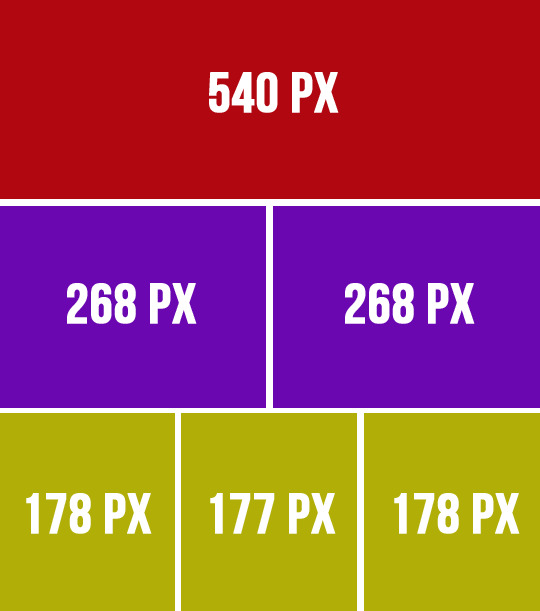
If you don’t do that, your gifs will look like blurred filmography of Zack Snyder’s.
I’m gonna make a 253px gif so it won’t stretch in that post. Gifs over I think 268px stretch on normal posts as in posts and look ugly.
So that brings us to the next steps.
- Cutting, resizing. Easy. Don’t panic.
choose that tool:
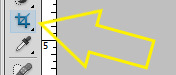
set your... this:
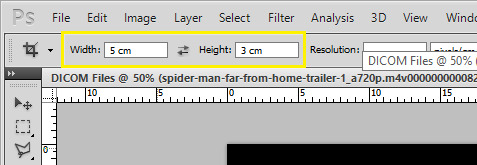
(make sure it’s ‘cm’, otherwise you’re screwed) and crop, baby, crop. I suggest the biggest area you can, of course without the black parts.
Also, depending on gifs, the dimensions can be different. For my 540px gifs I use 5x2 or 2x1 or 16x9. For my 268px gifs I use 11x7, 11x8, 5x3, 1x1. For the 177/8/7px ones, I usually use 3x5 or something. Just make it look nice. Not too thin, not too high.
Ok, so I’m cropping.
And now resizing. Crtl+alt+i.
Make sure this thingy looks like that:

My width will be 253px, you make it 268, alright? Or something. Just don’t cross 540px. And put that beer away.
So I have this now:

Doesn’t look appealing, huh? Yeah.
Also click ctrl+’-’/’+’ to zoom in/out the gif.
- Sharpening.
Some people use actions, some do their own thing, I use an action. I’m lazy. And I don’t look forward to just... You know. Clicking a lot. So I use this action. Download it, make sure you like or rb that post, and upload the action using this:
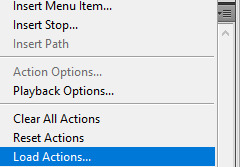
Find your action. Load. Choose it, click play.
So this is how the gif looks without:
and with the sharpening:
Magic, I know. Okay, you can have that beer. Or no, don’t mix alcohol with pills.
- Coloring.
This is the fun part. That’s where vodka comes in. The part with 390248 times you get frustrated and your laptop is in danger because it can never know when it will join the doves behind your window in a short fly. Anyhoo.
Start from brightness. This is one little trick I learned. You can use these options:
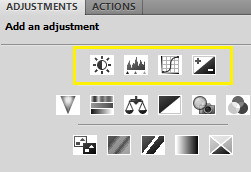
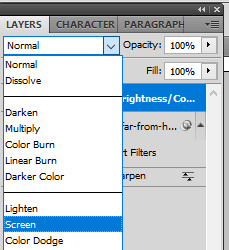
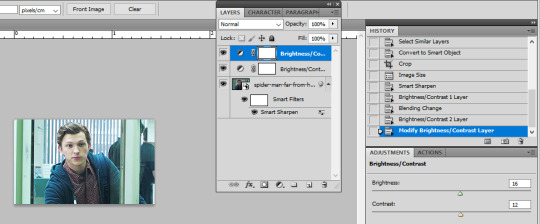
I start off with doing something else. I choose the first option, aka Brightness/Contrast, and when it appears on my layers window, I choose the ‘screen’ option.
So I’ve gone from this

to this
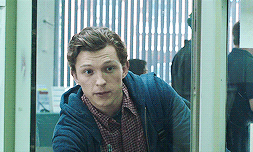
It’s clean. It’s cute. Brightens the whole gif.
Of course, you can do it traditionally and/or adjust the opacity of that ‘screen’ layer. I think I’m gonna brighten it just a tiny bit more and add some contrast.
Now cooolors. I’ll make a standard gif, nothing crazy. You can go crazy if you want to, just don’t make someone’s skin orange. It just... doesn’t look good, kay?
Kay.
Those are my options:
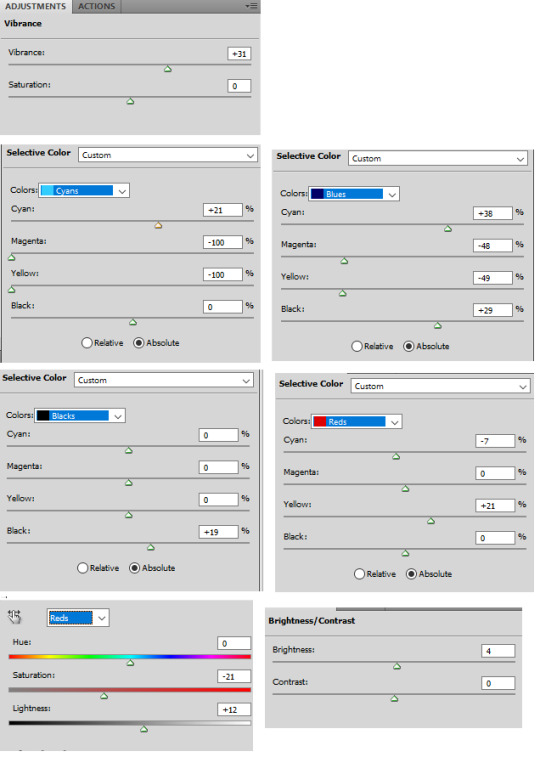
And this is the result:

Save your gif using this (once again you can see my shortcut)
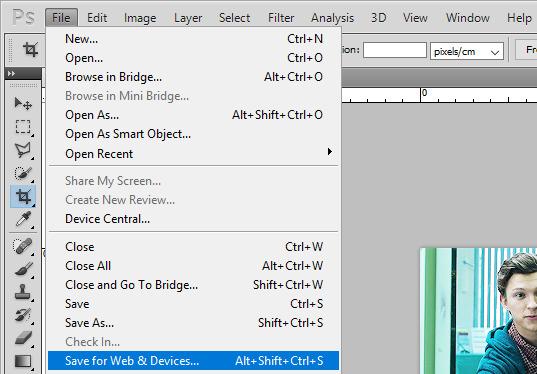
and your settings should look like this:
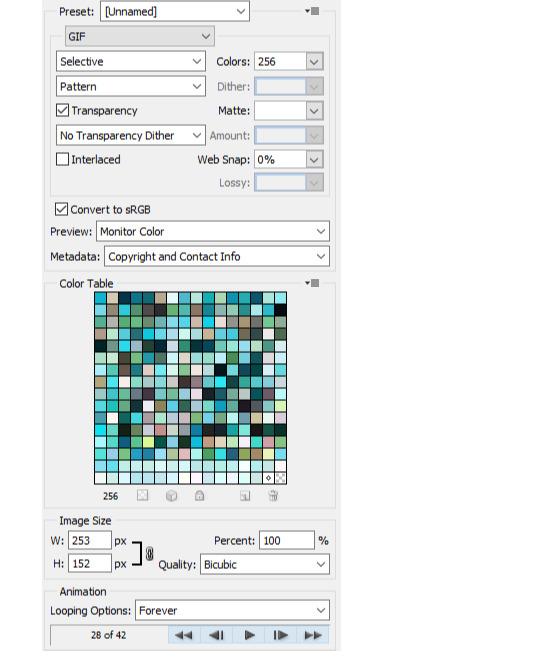
Click save, name the gif, save it wherever you want. And it’s done.
As a bonus we’ll go through...
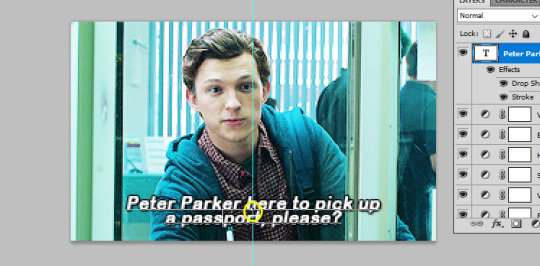
4. Text on gif.
I use Arial Rounded MT Bold. You can use Calibri, it’s the one I used to use.
Choose this:
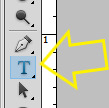
Click on the gif. Write your text. It looks like crap.
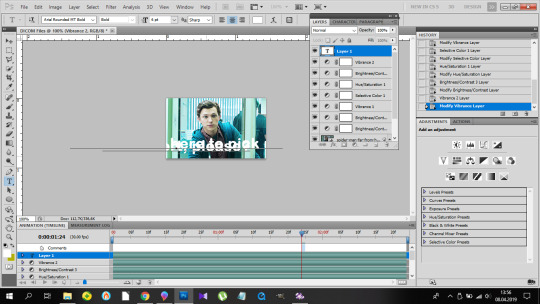
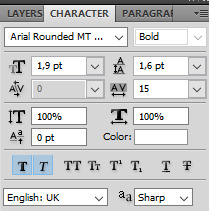
No worries. Choose the text (ctrl+a). Choose your character window. And manipulate until you get the result you’re happy with. Change the size of the font, the distance between letters and paragraphs (and choose the paragraph window to make the text centered).
My options:
and result:
Doesn’t look nice, we want it nice and clean and all that jazz. So. Back to the layers window. Choose that text layer and find this button
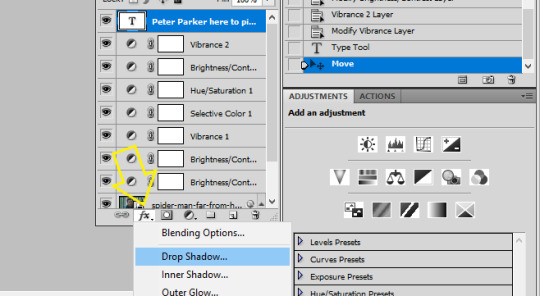
and choose drop shadow. When a window pops up, choose those settings (those are the ones I use:)
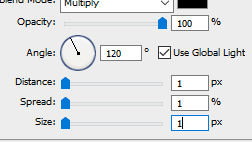
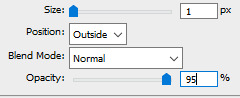
Then go to Stroke on your left and set it like this:
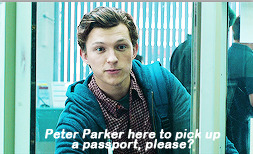
And click ok, and that’s the result:

Tips:
- create shortcuts. saves time, - make gif actions. saves time, - make sure you use the tumblr dimensions, - don’t do orange faces, ok? - when setting the text on your gif, you can do this little trick so it’s in the center:
x if my gif is 253x wide, the center is in 126,5, I make it 126px.
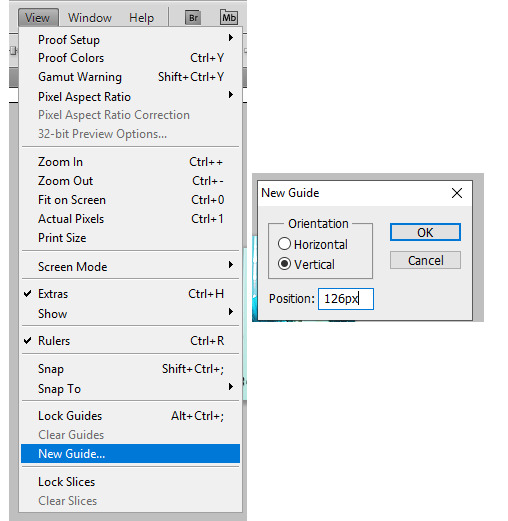
(make sure to write that ‘px’). click twice on your text layer, and this is the middle of that layer:
while moving that layer you should be able to see that tiny square and it’s the center of your text. Set it on the guide and you’re done. It’s centered.
- use these


to cut your gif. - play with the opacity and layer settings. for example, if you use color selection or saturation, you can set the layer’s option to ‘color’ and have it 70% opacity. - you can save the text layer only and reuse it by using ctrl+shit+s and saving it as psd

and then just open it again anytime with ctrl+o and duplicate it to the gif. - have fun with it. don’t throw your laptop out of your balcony, they’re expensive.
If you have any questions or want me to make a different tutorial on coloring or something, don’t be scared, I don’t bite (for real, I have braces, biting hurts).
I hope I helped and making gifs doesn’t look like magic to you anymore.
#completeresources#fyeahps#userlance#userjessie#biafrnc#userariella#photoshop help#ps help#making gifs#gif tutorial
392 notes
·
View notes