#French bookbindings
Explore tagged Tumblr posts
Text


A princess of Mars - Edgar Rice Burroughs
Full cloth binding, backed with french groove and paper onlays, coloured edge and french double core endands.
The typeset was part of Renegade's Tiny Books Bang event last year, but it took me forever to get enough distance to come up with my own cover instead of copying the wonderful bind that was exchanged in the event.
This wonderful typeset was provided by @tinwhiskerpress
Materials used:
case covers - grey board 2,4 spine stiffener - cardboard covering materials - commercial bookcloth (Duo brick, brown) paper onlays: bugra bütten (yellow, green), marbled paper (by Renato Crepaldi)
inner book bookblock paper - Schleipen fly 05 (115gsm) endpapers - marbled paper by @renato-crepaldi endbands - buttonhole silk (Gütermann), leather core (1 and 2mm) edge colouring - oak gall ink and interference chameleon acrylic ink (Nebula copper)
Size: ~A6
See WIP pictures here and some detail pictures here
#bookbinding#a princess of mars#edgar rice burroughs#renegade bookbinding guild#not my typeset#typeset by tinwhiskerpress#renato crepalid marbled paper#renegade event#tiny books bang 2023#french double core endbands#public domain
291 notes
·
View notes
Text

French double core endband as described in Greenfield and Hille's 'Headbands: How to work them'
I'm not entirely sure I did them right. The endband I was introduced to as French double core a few years back had 2 cores, but somehow I ended up with 3. Despite leaving some room for improvement, I kind of like how it came out though and for the first (the other one is still waiting to be done) I'm happy. It worked way better than anticipated.
The start was a bit fiddly, but after a few tie downs it got better.

I used a 2 mm and a 1 mm leather string for cores and a 'working thread' (which is not what the thread being wrapped around the cores is called in the book, but a secret different thread that becomes the bead). Next time I go for a smoother thread though. The 2mm is a bit coarse and the silk catches on it. I guess that's why they usually use bâtonnets made from paper. They just don't have any rough parts for the thread to catch on.
Only the backside looks a bit like a mess, but then, no one is going to see that when I'm done.

#bookbinding#endbands#french double core#I love how easy the colour change is#there will definitely be more of those.
33 notes
·
View notes
Text
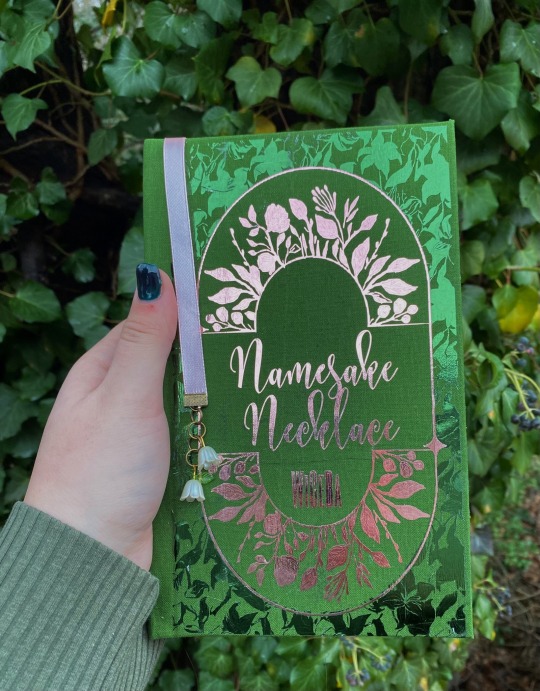
she’s here! one of the absolute best severitus fics - namesake necklace by @wiceba !!! i’ve printed this out like three different times and ended up either messing up the end papers, or the cover design (cheap htv is generally awesome until it melts bc it’s cheap and my iron is too hot). but yeah i’m calling this done!
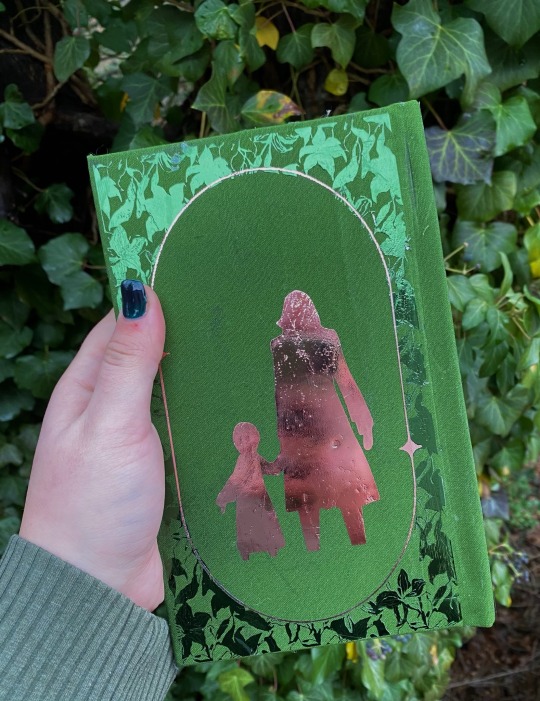


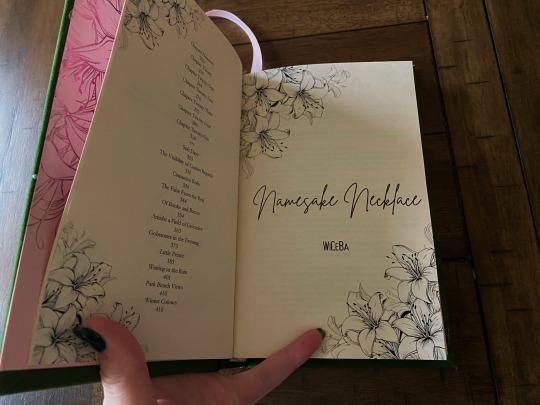
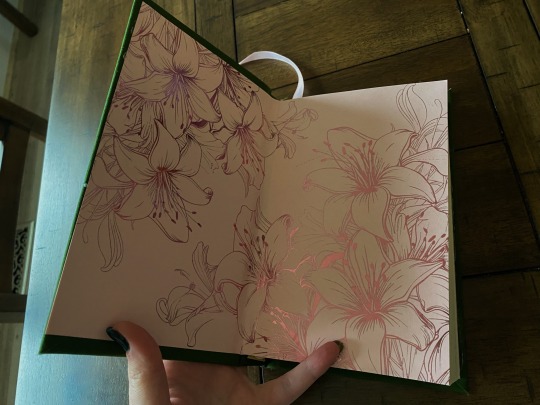
none of my binds are perfect bc i can’t seem to cut in a straight line (?) which is actually like a lot harder than it should be??? but again this is for me to have my favorite fics on my bookshelf, not to sell so i’m satisfied!
#book case#fanfiction#harry potter#harry potter fanfiction#severitus#bookbinding#french link stitch#namesake necklace#fanbinding#i got tired of seeing my bedspread in the background of all my photos so i give you:#a treat!#aka my backyard LMAO
64 notes
·
View notes
Text


My latest bookbinding project has been this french-link stitch journal, the first I've done. The cover is a very nice pattern of paper I picked up at my local art supply shop. It's a bit wonky but I think it turned out pretty good!
43 notes
·
View notes
Text

First time using a French link stitch to sew the signatures together. I really like how secure it makes it all feel, especially since I didn't use tapes.
I used Sealemon's tutorial:
youtube
I didn't think to do this until after I'd punched the holes, otherwise I would have spaced them out more.
Hopefully I can get this glued together tonight, but as you can sort of see on my table, I'm working on a (garment) sewing project right now that's pretty thorny, so I may not get to it. It's okay. I'm happy as long as I'm making something.
65 notes
·
View notes
Text
Reliure
Du fil et une aiguille
Pour tisser une histoire
Qui doucement s’habille
D’une note d’espoir.
Il traverse les pages
Les lie habilement
Par un geste sans âge
Et voilà un roman !
8 notes
·
View notes
Text
my dudes, i am so happy rn i just started working on repairs for my 1880's "Flora Orientalis" (language mixed in French, German, and Latin) and ohmygod it's beautiful


Like, I get to help fix this!! I get to help this book!!
Currently, it's in 4 pieces:
solid textblock (all one piece thank GOD)
back cover, severed
front cover, severed
half of the spine (the previous owner decided to put PACKING TAPE over the ENTIRE spine to hold it together. Needless to say, that did Not work)
My friend let me take some nice leather that I'll see if I can work with, since it's very thick and so unfortunately strong that neither of my boxcutters or my X-Acto blade can bevel the edges.
#bookbinding#antique books#old books#book repair#antique#1800s#19th century#french literature#floral guide#1880s#latin
9 notes
·
View notes
Text

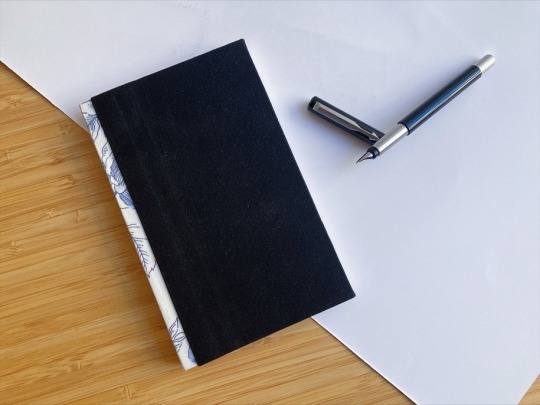
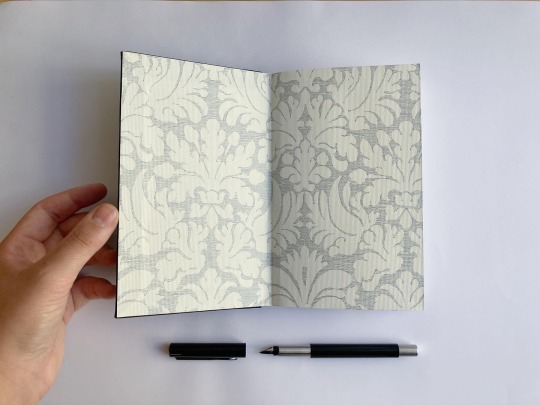
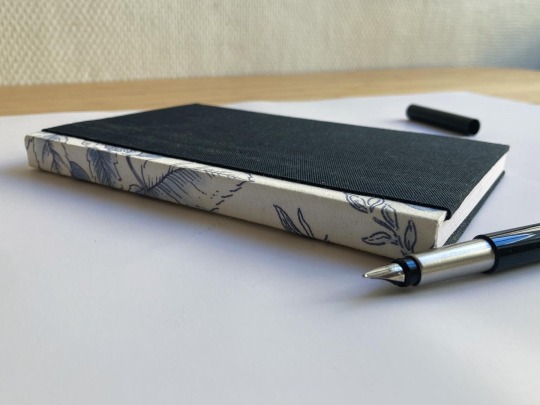

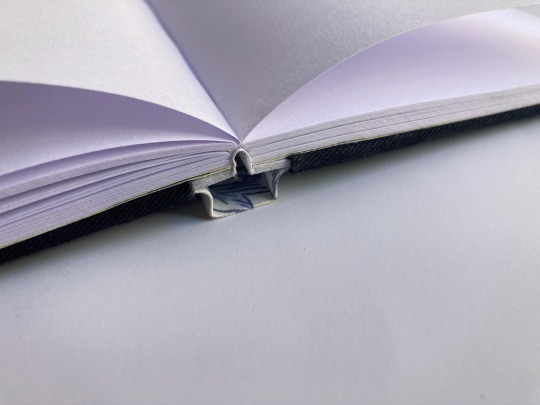
This was my first experience with sewn board binding.
It's been my favourite ever since i first learned about it, but it took me a while to figure it out - and i'm so glad i did! i absolutely love how it opens flat without loosing its shape, and how you can mix and match covers and spines.
This has been on my shelf for over a month now because I've been too scared of using it but the time has finally come!
#bookbinding#handmade#handmade sketchbook#hand binding#sketchbook#own#coptic stitch#french link stitch#hard cover#book#paper#artesanal#magnoliazul#magnoliazul.folio
9 notes
·
View notes
Text
I've always wanted to learn bookbinding, ever since I was a wee little nerd, but there are a lot of things I've always wanted to learn, and this one has both a daunting upfront materials cost and a daunting upfront research cost. however, my sister is a jewel among siblings and gave me for christmas last year a handy dandy bookbinding manual, a block of good paper, and a little bag of tools.
but I still didn't have a suitable workspace, nor any of the many important tools and materials that she didn't include in her gift. so I just read the manual and pined. until maybe a month ago I got fed up with pining, flattened a cardboard box for a cutting mat, and went to town.
and I'm real proud of myself, so here's me rambling, plus photos!
I went to the thrift store and got glue + some fabric to bind the cover, went to Michaels for a paintbrush (and later went back for a metal ruler lmao it's amazing how useful it is to have a straightedge for cutting the paper), and...could not find material for the cover boards. so I went home and pined some more. but the urges were too strong, so after a couple hours of moping I got a stack of printer paper at the grocery store (I could not bring myself to use the good paper for my first, inevitably weak attempts, I just couldn't do it) and started making a little booklet. which was a great idea, it turned out, since it makes for good practice with cutting the paper, measuring things, punching holes in the signatures, etc.
I have a big box of greeting cards from Michaels, which I used for the covers. it didn't feel like I was making a Real Book, so I got some colored paper from the stationery store and used that for end papers.
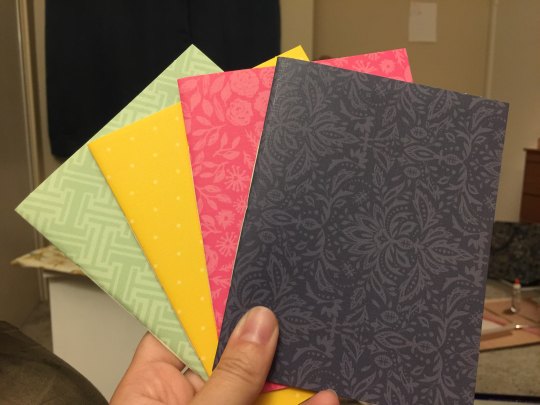
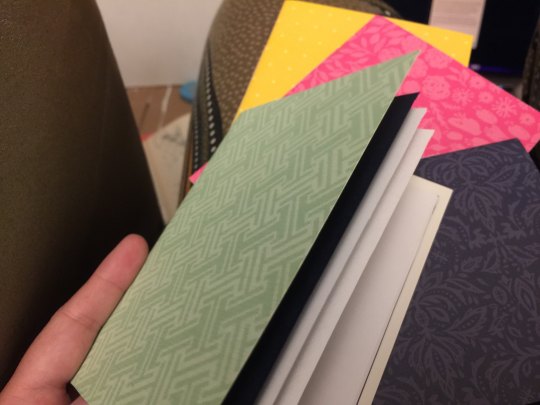
so fancy~
galvanized by this success, I ordered a stack of chipboard online to use for cover boards; and once I was confident that I could cut paper without making it look too stupid (getting that straightedge ruler sure helped lol), I made signatures out of the good paper, left them under some heavy books overnight since I don't have a book press, and then punched holes in them! (huzzah for this nice video on getting the holes right)
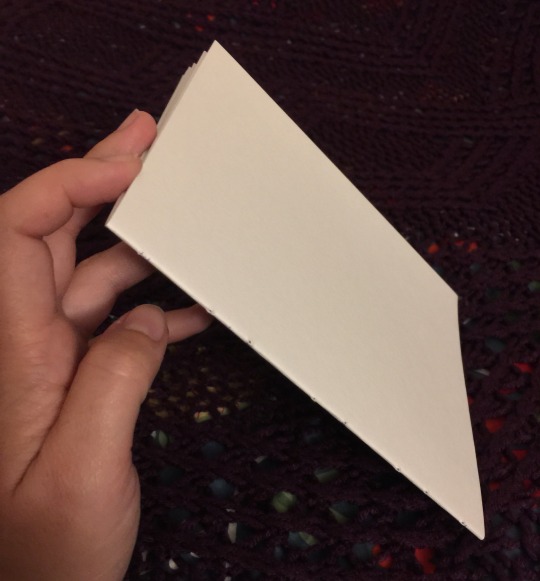
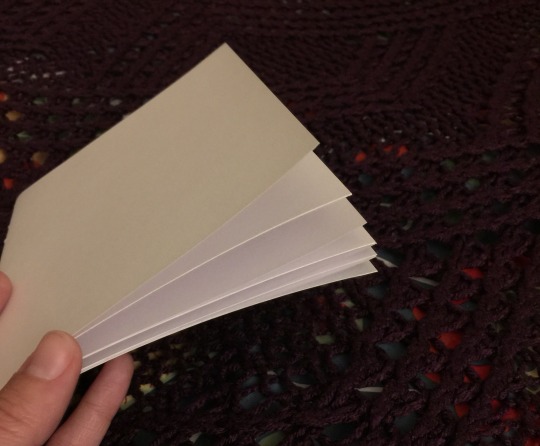
my sister's gift included good linen thread. it's unwaxed, but after some poking around on r/bookbinding it looks like that just means I'll have to be more careful to avoid tangles and keep good tension. I am fine with this. I can be extra attentive. (I considered just running it over a beeswax candle, but one commenter said if your wax has paraffin in it, it could melt in a hot car, ruining the spine. I can't guarantee my candle is 100% beeswax, I didn't make it, so maybe we just move on.)
I don't have good linen fabric to use for the tapes, but the important part there is that the fabric be thin, sturdy, and not stretchy. the probably-cotton I got from the thrift store fits the bill, so it'll do!
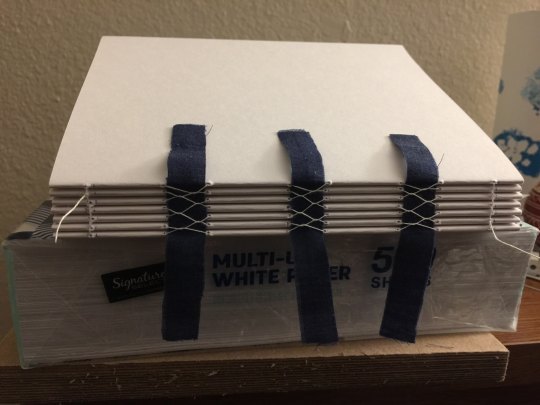
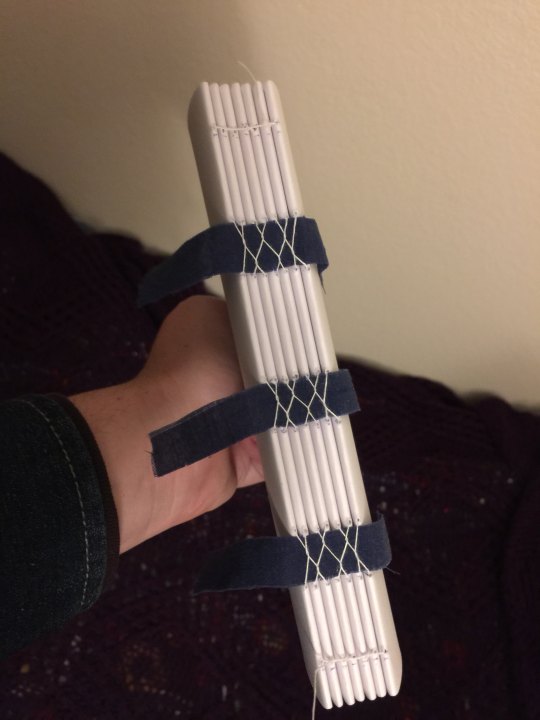
this is a french link stitch, which I got from this exceedingly good tutorial. apparently it's strong enough on its own that for a book of this size, I don't actually need tapes, but I'd already cut the things so eh here we are. and tapes plus french link will make it a stronger binding still (according to a friendly redditor on r/bookbinding), so we carry on.
specifically we carry on to the gluing step. now as I mentioned, I do not have a book press, and you....kinda need one for this step. you need to hold the book block in place with the signatures facing upwards, pressed together hard enough that the glue won't run down between them and stick the pages together (though you do want the glue to get between them just a little, just for like a 16th of an inch). you at least need some clamps and a couple boards to sandwich the book block with.
but you know what? I'm not a professional, this is my first ever book, if it's a little bit off it'll be fine. so we grab all the heaviest books off the bookshelf and improvise.
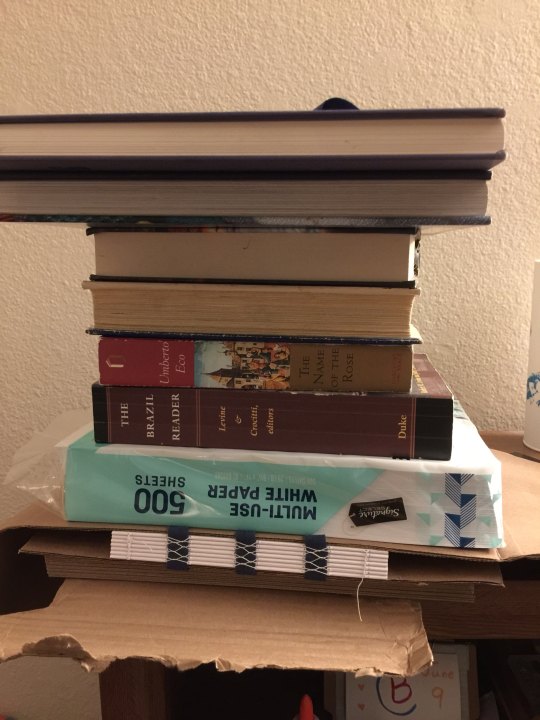
it's fine! I'm sure it's fine! and just in case it's not, I've tucked a bit of cardboard underneath to catch any glue that drips down so it won't land on the floor. see? I'm prepared! I'm acing this.
and actually, it really was fine. I used clear elmer's glue, applied with a flat paintbrush from the art supplies aisle at Michael's, and frankly I liked the way the flat paintbrush let me slip glue in between the signatures. I did poke around on a couple bookbinding sites to see what kind of glue I should use, and the gist is that although there are better options than this, elmer's glue is perfectly serviceable, and the main downside is it's not archival grade. but I don't need my first bookbinding attempts to last 200 years, that's fine.
the next step is to add the mull. mull is a specific type of fabric – extremely loose-weave linen – and the idea is to paste it down over the spine to essentially hold the tapes and signatures all in place in relation to each other.
but I don't have mull! so I'm using more of the thrift store probably-cotton, because it's thin enough and not really stretchy at all. I'm sure this will be fine too. I painted a layer of glue onto the spine, then left it to dry a bit while I measured and cut the fabric, then painted a generous stripe of glue down the center, where it'll affix onto the spine. then I added a bit more glue to the spine, just to be sure, and pressed the mull into place, rubbing it thoroughly to make sure it's firmly affixed to every signature, with no creases in the fabric or air bubbles beneath it.
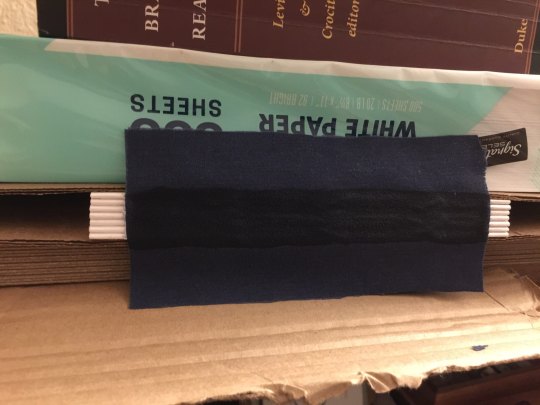
honestly I might have overdone it on the glue. I've never done this before, I don't know! I think it's okay, though – I tried not to ever let it become a thick layer, just a slight coating, since the danger of too much glue is that it might crack once dry and weaken the spine.
and now we leave it in the press overnight to dry, and pick up the next step in the morning!
#finx rambles#bookbinding#finx makes stuff#technically this is the second hardcover book I've made#but it's the first I'm making using Approved Techniques™#instead of watching a handful of half-relevant youtube videos and making up the rest#which was fun!#but did mean that once I was done I didn't know where to go from there#and at the time I couldn't find better resources#(I really wanted better youtube videos! just didn't know how to find them idk)#(it was 2020 I was unwell. as I'm sure we all understand)#but now I have an abundance of good sources#and I'm determined
580 notes
·
View notes
Text


PROBLEMATA ARISTOLELIS Binding by Jacob Krause. (1571)
Jakob Krause (circa 1532–1585) is considered the most prominent bookbinder of the German Renaissance. After completing his master craftsman’s training in Augsburg, he began working for Augustus, Elector of Saxony (1526–1586) in Dresden in 1566. Inspired by French and Italian designs, his bindings are distinguished by their highly meticulous craftsmanship.
#beautiful books#book blog#books books books#book cover#books#old books#aristotle#16th century#jacob krause#book binding#book design
227 notes
·
View notes
Photo


WIP Der Traum aller Träume; Utopien von Platon bis Morris (The dream of all dreams; Utopian dreams from Plato to Morris
Part I survey or ‘all things wrong (and the few things right) with this book’
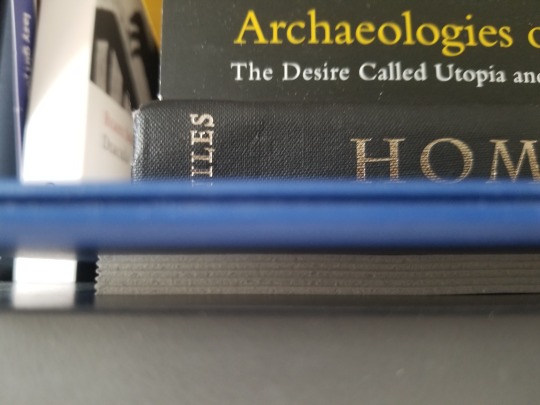
Now this one I started over two years ago and didn’t finish because of time and, to be honest, because the quality of the leather and overall sorry execution of the french binding had made me too sad to keep looking at it. It started out nice. The colour is wonderful, sadly the leather is a coated split leather (which was not clear from the description, I didn’t ask either and thus made a hasty decision because it was cheap). To work with it it was soaked with paste glue which caused the coating to detach and rub off in different areas. Most of the very prominent on the cover. I’m still thinking about how I could cover those up and at the moment I’m considering to hot stamp them. I considered dying the area, but I’m not sure I’ll like the look any better than what I have at the moment. The book as some other issues. For example was my hinge gap too small and now the cover doesn’t open to a 180° angle to the inner book but stands up. Also, when you look at it from the outside the covers are clearly not level with the spine. The pinched and tense look of the spine area in the inner book is quite normal for a French binding (it’s also the reason why it is not my favourite binding style), what is not normal, is how the signatures look kind of crumpled though. I was not careful enough when wacking it with a hammer for backing so this is what I got in return.
However the corners turned out fine, I guess mostly because I used way less paste glue there. Since the start of this bind was years ago I naturally forgot most of what I had planned. Apparently I was going for hidden/ covered leather corners. The telltale detail for those is how the edges of the leather come together on the outside of the case. A paper or other material will cover it up so only the very tip is peeking out. A larger part than usual will be visible on the inside so it makes sense to put the ‘nice’ side of the leather there. Another small detail, is the cardboard covering the standing edges of the case, which tells me I had prepared for gilding them too. What turned out really nice too is levelling the covers. Where the leather is applied there is a small step that can be made leve with the cover by adding another piece of card board the thickness of the leather. In this binding I managed to get that completly even, no ridge to find.

So this is where I am now with this book. I had some cover decoration for gold tooling prepared, but it includes tools I don’t have access to anymore. So I’ll see if I can adapt with or come up with something else.

#bookbinding#wip der traum aller träume#french binding#utopian dreams#all things wrong with utopian dreams
13 notes
·
View notes
Text
Update on fanbinding dissertation: we now have textblocks!
The folded signatures spent the night in the makeshift press (under heavy books), looking very crisp, making me very happy. Ordered the missing supplies (cutting mat, knife, metal ruler, muslin instead of mull, a big sketchbook with black pages that will hopefully become endpapers) from HobbyCraft, because the bookbinding shops’ shipping fees are no joke. Waiting for that to arrive, I sewed the signatures together!
Used my wonky homemade cradle to punch the holes, following a guide I made out of whatever cardstock was in the recycling. Was originally debating the necessity of the awl, very happy I had it.
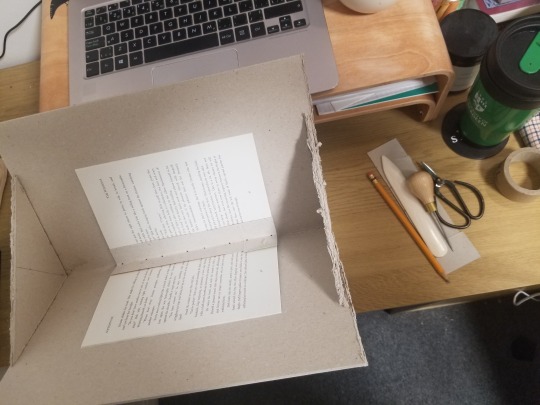
Sewed everything together following the instructions from How to Make A Book and this youtube video by DAS Bookbinding, which covers both French links and kettlestitches. As expected, sewing was really fun, very relaxing, and paired quite nicely with the ongoing supernatural rewatch.
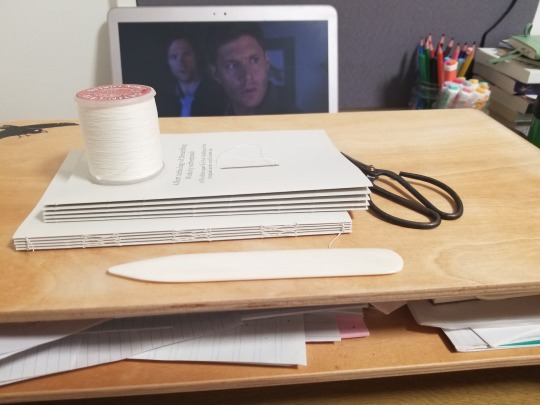
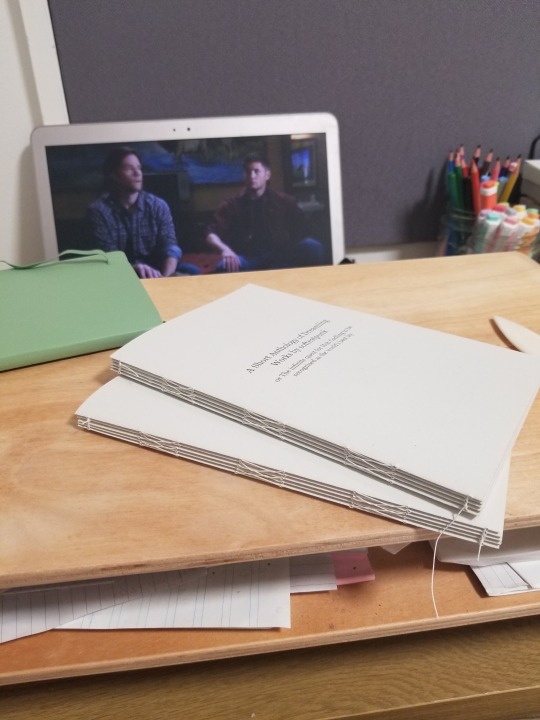
Been trying to figure out how to add the title to the cover (I sadly don’t have the time/supplies to get into stamping / HTV / letterpress printing), and was inspired by this amazing bind by @celestial-sphere-press to try and do a half dust jacket thing, so I gave it a go while waiting for the last missing supplies, using a small hardback to see what it will hopefully look like. I like it a lot, but should probably find a white pen or pencil to draw with (didn't have anything paler than a yellow pencil on hand).
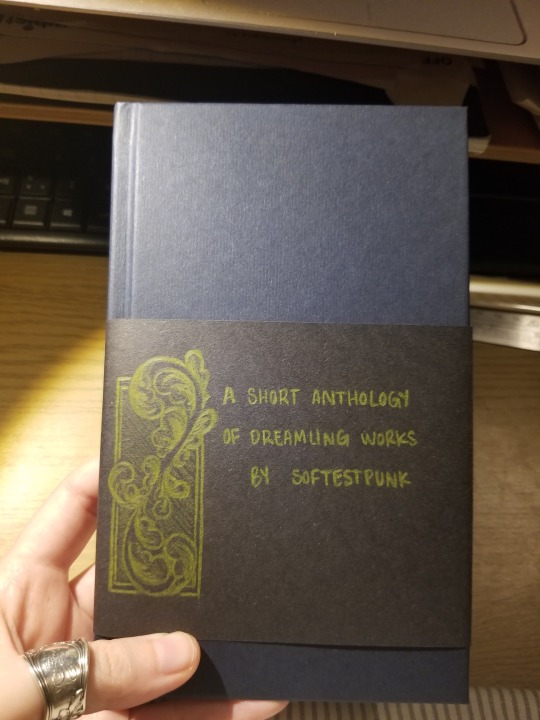
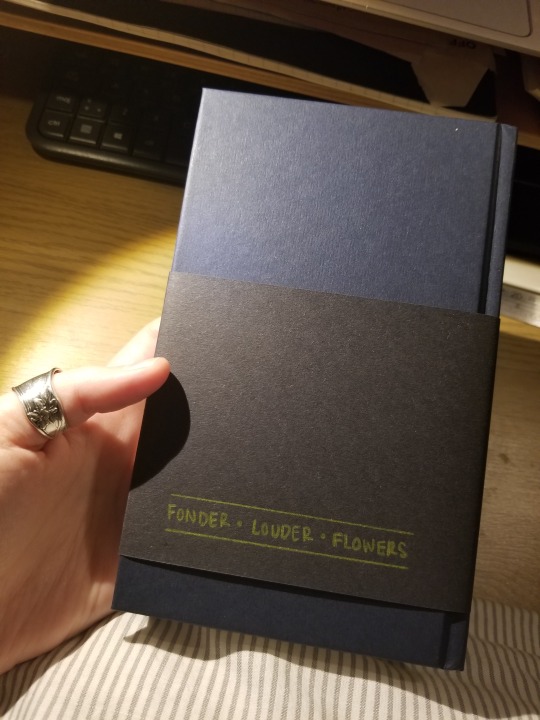
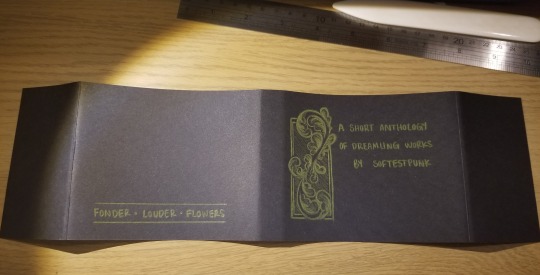
Next up: macgyvering a book press, glueing the spine, cutting the boards, sewing the headbands. Looking forward to three out of those four things.
#fanbinding dissertation#fanbinding#ficbinding#bookbinding#fanfiction#research#disser#fanbinding resources#autoethnography
136 notes
·
View notes
Text
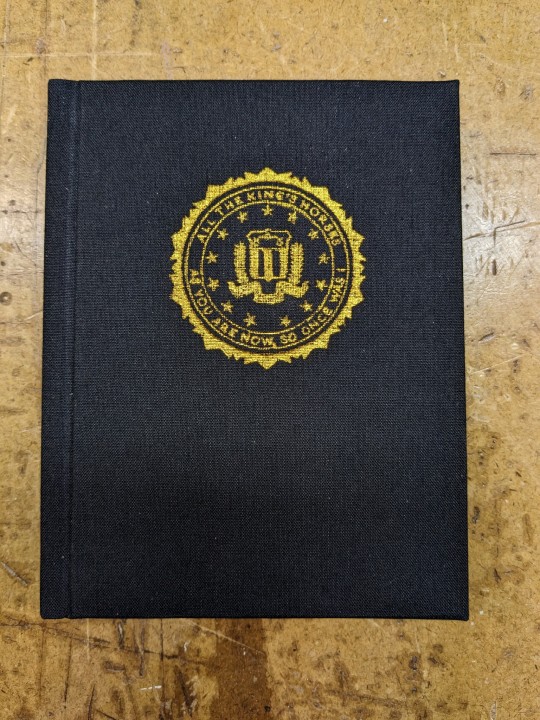
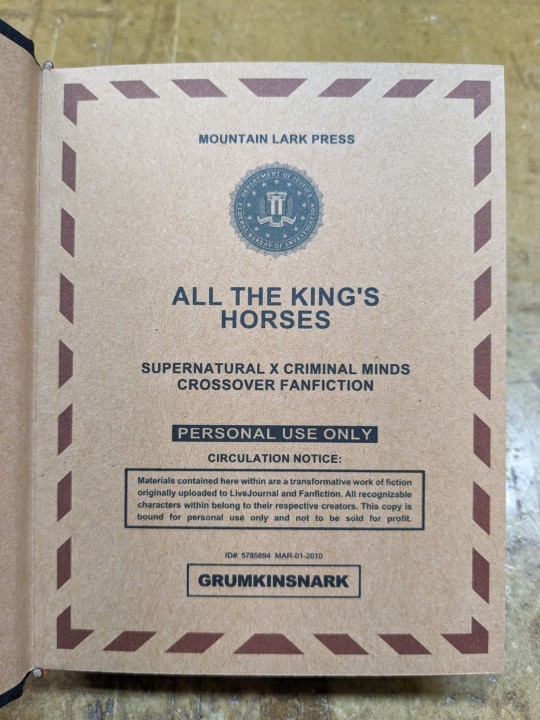
All The King's Horses | As You Are Now, So Once Was I by @samwpmarleau (grumkinsnark)
All The King's Horses [LiveJournal ch1] [Fanfiction.net ch1]
As You Are Now, So Once Was I [LiveJournal ch1] [Fanfiction.net ch1]
Fandom: Supernatural, Criminal Minds
Rating: Teen | PG-13
Category: Gen
Words: ~36,192
All The King's Horses: Protect and Serve. Fidelity, Bravery, Integrity. To what lengths would you go to uphold those oaths? When it comes to a particularly brutal and unsolvable case, the BAU just may have to resort to some more unorthodox methods. SPN/Criminal Minds crossover.
As You Are Now, So Once Was I: Sequel to "All the King's Horses." When Dean catches J.J.'s press conference on the news about a current case and notices a few...inconsistencies, he realizes the BAU is definitely going to need his help. Again. ON HIATUS

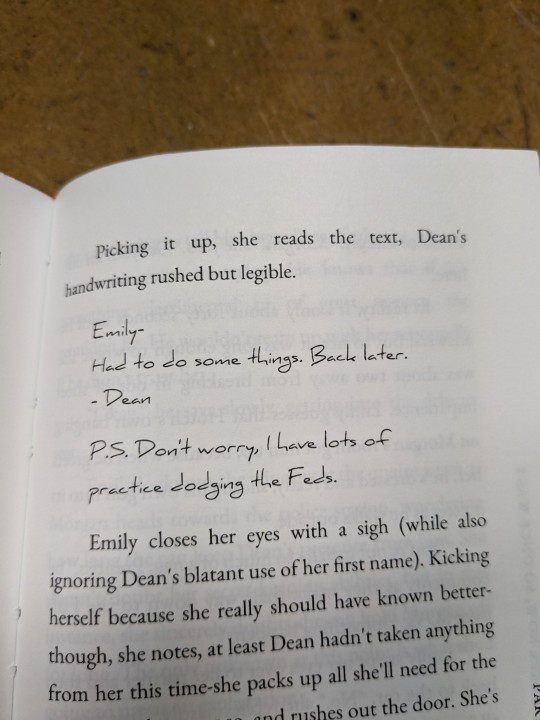
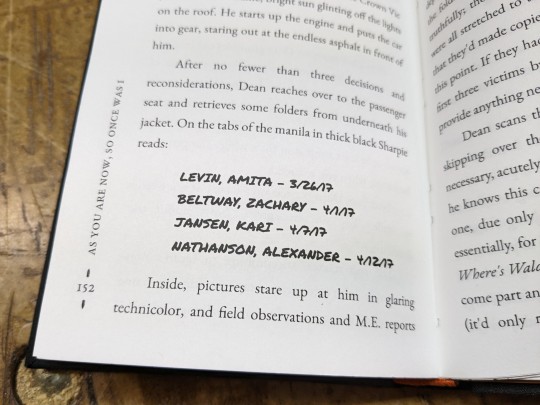
About the Book
FORMAT: Letter quarto, flatback bradel binding, french link stitch, no tapes
FONTS: EB Garamond [via Google Fonts], Supernatural Knight [via DaFont], D-Din [via Font Squirrel], Daniel [via DaFont], Permanent Marker [via Google Fonts], Arial
IMAGES: Seal of the FBI [via Wikipedia], Dean's handprint scar [by greenhorn-art]
MATERIALS: 24lb Xerox Bold Digital paper (8.5"x11"), 80pt binder's board (~2mm), 30/3 size waxed linen thread, embroidery floss (DMC #721), 1.9mm cording, brown cardstock, black Cialux bookcloth, gold foil transfer sheet (came with We R Memory Keepers hot foil pen)
PROGRAMS USED: Fic exported with FicHub, word doc compiled in LibreOffice Writer, Typeset in Affinity Publisher, imposed with Bookbinder-JS, title pages designed in Affinity Designer/Photo
.
I first read these stories on LiveJournal back in 2013, some time after I first encountered Tumblr, Supernatural, and the wider world of online fandom. Once I discovered SPNxCriminal Minds crossovers I devoured so many of them. Something about POV Outsider on the Winchesters, the existing connections with investigating monster vs human-crazy cases, and run-ins with the FBI... it's just works so well.
Of all the SPNxCM fics I read and enjoyed, All The King's Horses is among those that bookmarked themselves in my brain. Since it's been living there all these years, I thought it deserved a place on my bookshelf too.
(Rambling below)
Sourcing the Fic
I used FicHub to download the fics off of Fanfiction.net as HTML. Then I pasted them into LibreOffice Writer and created rich text documents of each fic, so I could Place them into Affinity Publisher.
The stories were crossposted, first on LiveJournal and then Fanfiction. I included the metadata from both sites in the appendices.
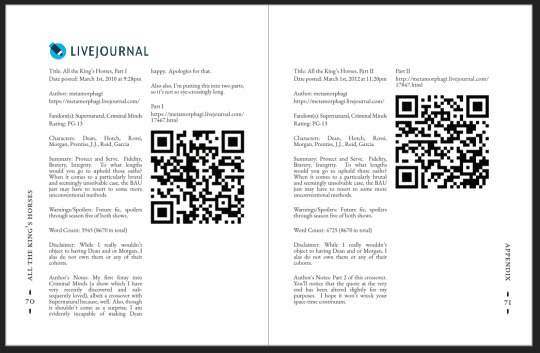
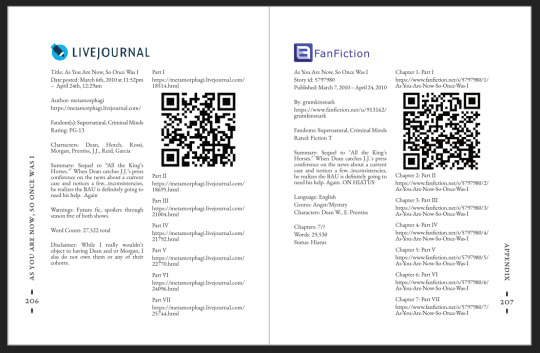
(It's fascinating to see the differences in the same work between platforms. FFN requires genres, so if the author doesn't add them on LJ then by default there's more info on FFN. But FFN limits listed characters to 2, so authors have to pick and choose the most important. Then there's the author's amusing disclaimers and spoiler warnings for these fics, which are only included in the LJ version)
Shoutout to the author for how they linked/listed their accounts on other platforms! Thanks to that I was easily able to track down all the tags/metadata for the fics, and find them here to express my appreciation for their stories!
Typesetting
Fonts
EB Garamond is my new favourite body font, 11pt as per my usual.
The title page is entirely Arial: 1) it was the closest match I have to the case file prop I was copying, and 2) if it was a government doc they wouldn't be using anything but the most basic fonts.
Headings and the the bullets bracketing the page numbers are set it Supernatural Knight, a free font in the style of Supernatural's title.
The location segments are in D-DIN, the closest free match to the font Criminal Minds uses (which is probably DIN).
Daniel is used for Dean's 'rushed but legible' note.
Permanent Marker for the 'thick black Sharpie' case file labels.
Artwork
Title pages designed as FBI case files, copied from a prop found online (specifically Etsy's propfictionstudios', but it's all over the web so no idea who actually created it). I had fun plugging in all the fanfic/bookbinding meta!
The ID# above the author's name is the FFN story ID, and the date is the date originally posted on LJ.
The handprint used in the headings of ATKH is Dean's scar. I traced off of a screenshot from s4e01 Lazarus Rising. I chose to use the handprint instead of the anti-possession tattoo or a Devil's Trap as my SPN art element because 1) it's specific to Dean, and 2) indicates/reminds that the story is not set during the season 3 Agent Henriksen/FBI arc.
Grabbed the FBI seal off of Wikipedia.
Construction
Both fics typeset and printed separately, then sewn together into one book. Title page for the sequel was tipped in like an endpaper prior to sewing.
Endbands sewn with orange embroidery floss (DMC 721) around 1.9mm cording. I chose orange because Dean's being in jail brought to mind the orange prison jumpsuits Sam and Dean wore in s1e19 Folsom Prison Blues.
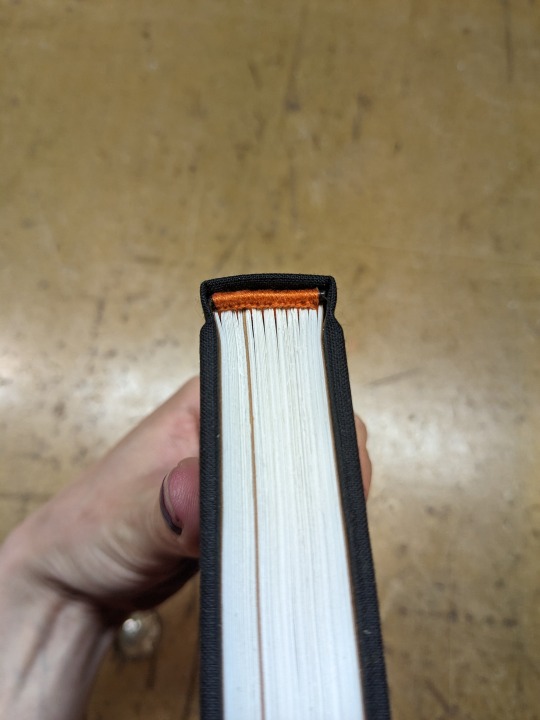
Black bookcloth for the cover, like the Winchesters' beloved black '67 Chevy Impala. (I'd wanted a Supernatural reference to balance out the Criminal Minds-ness of the FBI case files).
I'd originally planned to make lineart of the front of the car, and have it stretch across the bottom of the cover (maybe even wrap around to the back). Even found a useful reference to trace [from here], but it didn't look as good as I'd hoped. Instead I reused the FBI seal and swapped out its text with the titles.
(The effect of shiny foiled FBI symbol on small black book reminds me of one of those FBI badge wallets!)
The foiling process was an unnecessarily long and gruelling affair. My laptop served as a massive power bank for the hot foil pen as I spent 2hrs ever so slowly tracing the image, and then 15mins on the author name and touch-ups. Did it need to take so long? Moving slowly, pushing down hard, going over everything at least three times? I'm sure it didn't. BUT I did not want to chance peeling up the foil to check how I was doing and risk shifting it. It was worth it in my books (haha) ‒ I feel giddy and kick my feet like a schoolgirl whenever I see it!
New Things
Used 24lb paper for the first time, and I love it! It's a little thicker and heavier then regular 20lb printer paper, feels more substantial.
The page numbers & running/section headers are along the outer margin, instead of in the header/footer. This was my way around Affinity's buggy-ness regarding pinning things inline in master pages. (More about that below). If I had been thinking, I could have formatted them like the tabs on a file folder and cut the textblock to match. Oh well, the things you notice once it's printed 😔
This time I also started new chapters/sections using text flow & paragraph spacing settings, instead of using a master. As always, there are pros and cons.
Pro: much faster and less involved. (find chapter start, apply paragraph style VS working from the end cutting text, inserting a frame break, unlinking frames, inserting new pages with master, relinking, pasting, and adding chapter title to a different text box)
Con: images need to be added manually (whether by adding image directly, or by applying a master with the image). I forgot to do this for the second fic, so only ATKH have Dean's handprint scar.
Difficulties Encountered
Affinity Publisher is fighting me on pinning things inline on master pages. They like to disappear on regular pages I've applied the master to. Sometimes it works, sometimes it doesn't, sometimes it only works on some of the pages. Idk what's up. (The bullet character only faces one way so I had use textboxes, flip/mirror one, and pin them inline to the page number).
So instead of having page numbers in the footer, bookended left and right by text boxes with Supernatural Knight's bullet, I put it vertically down the side.
Updated Publisher and all my paragraph styles' fonts changed/went funny. Something to do with the update's variable font support, I think. What was previously 'EB Garamond' regular, was now something along the lines of 'EBGaramond-Regular' which isn't a font. Issue seems to have ironed itself out in my original (near-complete) doc while I was busy remaking it. 😐
On the bright side, the update brought QR code generation to Affinity!
#All The King's Horses#As You Are Now So Once Was I#grumkinsnark#samwpmarleau#fanfiction#bookbinding#fanbinding#supernatural#criminal minds
107 notes
·
View notes
Text


Christmas bookbinding presents. My friend group just recently started a new campaign and instead of the normal transcribed notes I went with dnd notebooks especially since our dm has stressed learning things about monsters and other skills I wanted to give everyone a great place to do it.
Two of the big ones are Coptic bound with a French link and recycled covers from cookbooks. One of the large books has a Coptic stitched cover and has a woven detail. All of them have bookmarks. Inside are tracking pages for monsters, items, locations, npcs. And the character sheet is homemade with a clear page so they can use expo markers. All the pages were made using canva and each has a personal touch for their player.
The small matching journal is a dm notebook with class tables, random encounter tables, initiative trackers and a few other things at the request of my dm. It's long stitched and man did that make it easier.
And the last is a present for his girlfriend. It's leather cover with a leather fox. A magnet to hold it closed with simple sketch paper inside.
Oh also on the matching ones the title pages are gelli printed. Almost forgot.
A lot of work but man they look amazing.
#dungeons and dragons#d&d#bookbinding#man am i proud of them#also thanks to @silverstrying for taking the pictures
47 notes
·
View notes


