#Fegon Group Ratings
Explore tagged Tumblr posts
Visit Tumblr Blog
Explore Tumblr blogs with no restrictions, modern design and the best experience.
Last Seen Tumblr Blogs

threadsfollowersgenerator2024
[HOW-TO] Threads Followers Generator 2024 Without HuMaN Verifica
1 post

darkofheartsblog
93 posts


Fun Fact
1,644 Tumblr posts in 1 second.
Text
A Guide to Delete Alexa History

Amazon Alexa, or simply referred to as Alexa, is a virtual assistant with AI technology, and it was developed by “Amazon,” a well-known technology company. Amazon Alexa can be used for voice interaction, music playback, making to-do lists, streaming podcasts, setting alarms, and one can use it for several other purposes also. It also comes with the ability to control other smart devices by using itself as a home automation system. One can also extend the capabilities of Alexa by installing skills. Alexa is the best device that one can have. And as you know that every device or app that we use stores the history depicting our previous actions. And Alexa also stores a record of all your commands.
Even though virtual assistants are great because they make our lifestyle more comfortable and better, but they can record all the conversations that you don’t want to expose to anyone. So, if you don’t want to take that chance, you can consider deleting your Alexa history. Are you also a user of Alexa? Want to delete your Alexa history but don’t know how to do so? If that is the case, then there is no need to leave this page now. Here, we will show you how one can delete the entire voice history from their Alexa. To see the methods, please consider reading this complete article.
The Method to Delete the Alexa History
Any of the Alexa users can easily and quickly delete their voice recordings. While the company has assured the protection of the privacy of users on Alexa, but if you are still concerned regarding your privacy, then it’s best to delete your Alexa history. There are multiple ways through which one can perform this task. And here, we have provided you with three different methods. So, let’s move towards the first technique now:
Method 1: Deleting the Alexa History Using the Alexa App
Here’s how one can delete the Alexa history using the Alexa app:
First of all, you will have to launch the Alexa app on your smart device.
And after launching the app, go to the three-lined icon that you will find placed in the top-left corner of your screen.
And now, a slider will appear on the left side of your screen. Here you will have to tap on the option of “Settings” given at the bottom of the sidebar.
And then, scroll down through the screen and then tap on the option of “Alexa Privacy.”
And next, choose the option of “Review Voice History.”
Now, to delete the recording, tap on the option of “Date Range.”
Finally, in the drop-down menu that appears on your screen, scroll down to choose the time frame to delete your Alexa recording history. And that’s it.
Method 2: Deleting the Alexa History Using an Alexa Enabled Device
One can also delete the Alexa history using an Alexa enabled device. Here’s how to do so:
To get started, launch the Alexa app on your smartphone and then tap on the option of “Settings” given in the sidebar menu.
And now, tap on the option of “Alexa Privacy” and then choose “ Review Voice History.”
And next, go to the toggle switch given next to the “Enable Deletion by Voice” option. And here, you will be able to delete the recordings using your Alexa enabled device.
And then, you will see a pop-up window appearing on your screen informing you that anybody who can access your device can delete the recordings. You can complete the procedure by tapping on the option of “Enable.” And that’s it.
Method 3: Deleting the Alexa History via Amazon Website
Here are the steps through which you can delete the Alexa history using the Amazon website:
First of all, open any web browser on your computer system and get to the Amazon website.
After reaching the homepage, click on the “Devices” tab.
And now, you will have to select your echo device.
And next, go to the “Delete Voice Recordings” option mentioned under the “Echo” menu.
After this, a pop-up will appear on your screen asking you to confirm your action.
At last, click on the “Delete” option, after which your Alexa recordings will get deleted.
And that’s all you will need to do to delete your Alexa recording history. All of the methods mentioned here are much straightforward and easy to follow. And that’s all we can provide you for now. Please keep following our website to get more useful information like this.
Harry Williams is an inventive person who has been doing intensive research in particular topics and writing blogs and articles for Fegon Group on Norton Products, Webroot Products, McAfee Products, Microsoft Office and many other related topics. He is a very knowledgeable person with lots of experience. To get in touch with the internet security service provider, just dial 844-513-4111.
SOURCE : A Guide to Delete Alexa History
#Alexa#Amazon#Alexa History#AI technology#google#Fegon Group#Fegon Group Reviews#Fegon Group Ratings#network security#internet security#8445134111#844-513-4111
2 notes
·
View notes
Text
Video Games That Could Be Adapted To Make Great Movies

Video games have great stories in them. But for over 30 years, there has not been any film adapted from games.
There are so many incredible video games that can be translated into an incredible screenplay. However, the filmmaker must understand the theme and source material of the game.
Marc Ecko’s Getting Up: Contents Under Pressure
Marc Ecko’s Getting Up: Contents Under Pressure is available for Xbox, Windows, and PlayStation. The game was developed and published by The Collective and Atari, Inc., respectively.
The plot of the game begins in the New Radius Slums. It follows an amateur graffiti artist who runs away from home to pursue his dreams.
Film director, producer, and screenwriter Ryan Coogler would be the best person to adapt to the film. The filmmaker is best known for his projects, including Rocky, Black Panther, and Creed. Coogler’s projects are mostly commercially successful and have received critical acclaim.
His movies are about society and politics with an enormous amount of entertainment. Coogler and actor Michael B. Jordan form an amazing duo. And Jordan will also be perfect for the role.
Shadow Of The Colossus
Bluepoint Games’ 2018 action-adventure video game, Shadow of the Colossus, was published for PlayStation 4 by Sony Interactive Entertainment. The game has received much appreciation and is critically acclaimed.
The plot of the gameplay follows the young man Wander, who goes to a prohibited land. He is then forced to kill 16 giant beasts. Gareth Edwards is the best person to direct the adapted film.
The director gained popularity for his 2010 independent movie Monsters. Later he directed many amazing movies, including Rogue One: A Star Wars Story, Godzilla, and the Star Wars Anthology.
The 2014 Godzilla had many issues with the film, but the film’s design was incredible, which helped the movie impress the audience. Hence there is no filmmaker other than Edwards to create the project.
Grand Theft Auto: Vice City
Rockstar North’s 2002 action-adventure game Grand Theft Auto: Vice City was published by Rockstar Games. It is set in the fictional Vice City, based on Miami, in 1986. The game follows gangster Tommy Vercetti after he is released from prison. Slowly he builds an empire of criminals and takes power from other criminal organizations.
Martin Scorsese should direct the film of the adaptation. According to past projects, Scorsese is best for directing gangster movies. He is best known for his work theme related to nihilism, machismo, crime, and tribalism. Some of his popular projects are Taxi Driver, The Departed, The Wolf of Wall Street, The Irishman, and many more.
God Of War
David Jaffe’s action-adventure game, God Of War, began with the PlayStation 2 video game console. The game is based on ancient mythology and follows a Spartan warrior, Kratos. Kratos’ family was killed by the former master, the Greek God of War Ares. God Of War is the story of Kratos’ path of revenge.
Zack Snyder should be considered for the project as his works’ have a dark tone in the films and consist of superhero characters. The game has enough source material that can be connected to Synder’s style.
Tony Hawk’s Pro Skater
Neversoft’s Tony Hawk’s Pro Skater was released on 29 September 1999 only for PlayStation. The game is later ported to Dreamcast, Nintendo 64, N-Gage, and Boy Color.
The game does not have a linear narrative, but there are many more games and narrative-driven entries in the series. Director Catherine Hardwicke is the best person for the direction of the movie. She has a good understanding of shooting a sequence of skateboarding. Hardwicke is best known for her work, including Lords of Dogtown, The Nativity Story, Twilight, Red Riding Hood, Plush, Miss You Already, Miss Bala, and Thirteen.
The above are a few games that can be adapted into films.
Harry Williams is an inventive person who has been doing intensive research in particular topics and writing blogs and articles for Fegon Group on Norton, Webroot, McAfee, Microsoft Office and many other related topics. He is a very knowledgeable person with lots of experience.To get in touch with the internet security service provider, just dial 8445134111.
SOURCE : Video Games
#Fegon Group#Video games#video games movies#Great Movies#Fegon Group Reviews#Fegon Group Ratings#8445134111#844-513-4111
1 note
·
View note
Text
How to Get and Use Netflix on Xbox One
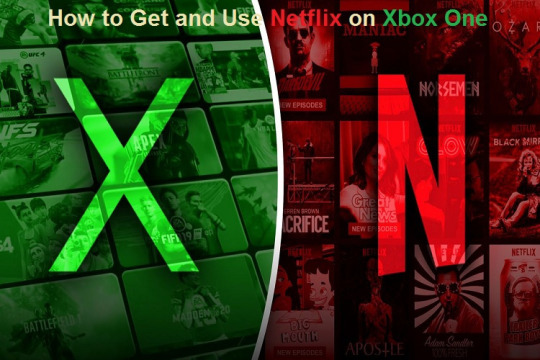
The ultimate gaming console Xbox One can do several things and can even use Netflix for more fun. Xbox One is a powerful gaming console that can run heavy games and stream them smoothly. The application store of Xbox has several streaming apps, and it gives a unique streaming experience. Users can watch their favourite movies and shows through streaming apps. So if anyone is interested to know how they can start using Netflix, here’s the guide for them.
Install Netflix on Xbox One
Before getting into the steps, just make sure you have an active Netflix subscription. If you don’t have one, then you can start it just now and can enjoy a one-month free subscription. To enjoy Netflix on Xbox One, you don’t need to have an Xbox Live Gold subscription, so it makes things easier. But you must sign in to Xbox Live Gold to enjoy Netflix. Keep your internet connectivity fast to get the best streaming experience.
Once all the minimum requirements are met, just install the Netflix application from the Xbox store. But if you have already installed the app on Windows 10, then it will appear as owned on Xbox Store. So let’s get started:
Get into the Store from the Home Screen.
Slide down to the Apps section, and tap A button.
Or you can slide down and tap Show All 50 to browse all apps.
If you want to find an app quickly, then you can try out the Search app option.
Type Netflix on the search bar, and press A to open details of the app.
On the Netflix app screen, press A on the Install app icon.
After the installation is complete, you can launch the app directly from there.
Sign in your Netflix account by typing your email and password.
Add Netflix to Home Screen of Xbox One
After a recent update, Microsoft removed the feature of manually adding apps to the home screen. If you spend a lot of time on Netflix, it will automatically get added to the home screen under My games & apps section. Once the app is added to the home screen, you can pin it right there so in future it will be easy to access the app quickly. You can also create a group of similar apps by following steps:
Choose My games & apps icon on Home Screen.
Press A button.
Click the Apps option.
Now press on the three-lines of Netflix app.
In the drop-down menu, choose Add to a group option.
Choose Create a new group if there’s no streaming group available.
Type a name for the group.
Now move back to Home.
Slide down to Add More option.
Press on See all suggestion, if there’s no group found.
Slide down to the Groups option, choose a new group.
Click A button and add it to Home.
So this is everything for now to set up and use Netflix on Xbox One.
Conclusion
Great thing about the Xbox One is that it has several popular streaming apps. People who love to binge Netflix, and if they are carrying an Xbox One, then it’s better to set it up on Xbox One and get the best streaming experience, Setting up Netflix on Xbox One is nowhere tough, and probably every user can try out the process.
Harry Williams is an inventive person who has been doing intensive research in particular topics and writing blogs and articles for Fegon Group on Norton Products, Webroot Products, McAfee Products, Microsoft Office and many other related topics. He is a very knowledgeable person with lots of experience. To get in touch with the internet security service provider, just dial 8445134111.
SOURCE : Netflix on Xbox One
#Netflix#Xbox One#games#apps#Xbox Live Gold#Microsoft#Windows 10#Fegon Group#8445134111#844-513-4111#network security#internet security#fegon group llc#Fegon Group Reviews#Fegon Group Ratings#Fegon Group Legit
0 notes
Text
How To Run Android Apps On A Chromebook

Do you want to run Android apps on your Chromebook but don’t know how to do it? Keep reading this post. This post will be an easy guide for youto get Android apps on a Chromebook. Having an Android app on your Chromebook provides you an opportunity to play some popular games and to do many more things. Let’s explore the topic and learn everything about setting up a Chromebook to get Android apps.
Do all Chromebooks support Android apps?
If the Chromebook on which you want to use Android apps has been launched in 2017 or after this year, the chances are Android apps can be run. You can ensure about it in two ways. Let’s see them.
Visit the Chromium website.
You will see a long list of Google Play Store supported devices.
Use Ctrl+F(on a Windows PC) to check your Chromebook using its model name.
If your device is found in the list, you can get Google Play Store access.
If you don’t remember the model name, then, in that case, you can use your Chromebook’s settings to make sure about Google apps’ support. Here is how to check it.
Please turn on your Chromebook and sign in to it.
Now go to Settings cog.
Choose Apps.
You will have a Google Play Store option if your Chromebook is compatible with it, meaning you can use Android apps.
What to do if your Chromebook doesn’t support the Google Play Store
There are many Chromebooks that were launched in 2017 or before this year without the support of Android apps. But many of them got the support over time with a software update. If you don’t see the Play Store on your Chromebook, you should try through a software update with the latest version. Here is how to do it.
Take your Chromebook, turn it on and sign in to it.
Go to Settings.
Choose the About Chrome OS option.
Hit on the option called Check for updates.
Follow the on-screen directions to finish the update process.
After updating the software, again go to the settings of your Chromebook and check for the Play Store support. If still, the Play Store option doesn’t appear in the settings, you should go for a new model.
Ways to enable the Play Store on a Chromebook
Take your Chromebook and go to Settings.
Hit on the option called Apps.
You will see a button next to the Play Store. You have to turn the button on.
Now you are all set with the Google Play Store to download apps. You will see it in the app drawer.
Ways to download apps on Chromebook
Access your Chromebook.
Find the app drawer.
Choose the Google Play Store and let it open.
Find an app to download.
Hit the Install button to get the app on your Chromebook.
After installing an app, you can see it in the app drawer on the Chromebook.
Can all apps be used on Chromebooks? You may have a question in your mind about the apps used on Chromebooks. Can all apps be used on Chromebooks? The simple answer to this question is that there are some apps that are specially optimized for Chromebooks to work with full potential. You can also use an unoptimized app, but it will appear in a mobile phone format. If you use an unoptimized app, you will not get an experience like an optimized app.
Harry Williams is an inventive person who has been doing intensive research in particular topics and writing blogs and articles for Fegon Group on Norton Products, Webroot Products, McAfee Products, Microsoft Office and many other related topics. He is a very knowledgeable person with lots of experience. To get in touch with the internet security service provider, just dial 8445134111.
SOURCE : Run Android Apps On A Chromebook
#Chromebook#android#apps#website#Android apps#Chrome OS#Google Play Store#Google#Fegon Group Reviews#Fegon Group Ratings#network security#internet security#fegon group llc#fegon group#fegongroup#8445134111#844-513-4111
0 notes
Text
Review of the “Weakest Link” Telecast on NBC
“Weakest Link” revamp hosted by The Fugitive actress Jane Lynch premiered on NBC on Tuesday night (September the 29th). Lynch has also been a longtime “Hollywood Game Night” host, and on Tuesday night, she led the NBC reboot emphatically with a bit of help from Glee alum.

The show is actually a brainchild of UK television as it had started there in 2000, but the show also made an appearance on NBC in 2001 during the time when the era of “Who Wants to Be a Millionaire?” had just started. Anne Robinson had made the show famous and her iconic line “You are the Weakest Link. Goodbye!” had become a sort of maxim in the US.
Jane Lynch had an uphill climb in front of her, and it was quite inevitable as some fans still haven’t forgotten the charisma of Anne Robinson. However, the general opinion on the internet suggests that she has not disappointed.
She used her experience of Hollywood Game Night really well as she settled herself down quite comfortably in the reboot, delivering jokes courtesy of her well-known sense of humor. She kept a light-hearted and an engaging aura around her as she kept the show moving and a few minutes into the show some may have even forgotten about Anne Robinson.
It is worthwhile to remind ourselves that “Weakest Link” is a simple game show and does not heavily relies on glamour, dazzling showbiz, or even gasping star power. If you can notice, Jane Lynch’s personality is the only thing on the show that you can call star power. Other shows have fancy costumes, celebrity guests, celebrity panels, and euphoric songs to support them. If I can be honest with you, “Who Wants to Be a Millionaire” reboot on ABC hosted by Jimmy Kimmel is the only thing that can come even close to the modesty shown by “Weakest Link” in the past.
Some critics have gone as far as to say that Jane Lynch’s “Weakest Link” episode has outclassed some other high-budgeted game shows’ episodes. She has run the show “Hollywood Game Night” for six years and 74 episodes so far and has used her experience well on “Weakest Link.”
Hollywood Game Night debuted on NBC on July the 11th, 2013.
One other thing that went in favor of “Weakest Link” was its highly straight-forward game rules that didn’t change much from its previous iterations. The game is so simple that it could attract the audience who are extremely new to the show and haven’t seen any episodes of Anne Robinson’s version ever.
The sense of humor was on Lynch’s side and made her job fairly simple as she kept the show ticking by dropping some periodic succinct laughing bits. She has handled the premiere without any complaints and now what will be interesting to see is whether she can establish her own intrinsic image with the show in the succeeding episodes.
The stage is now set for her to make the show her next long-running sell out.
“Weakest Link” will return again next week at 8 PM on NBC.
Harry Williams is an inventive person who has been doing intensive research in particular topics and writing blogs and articles for Fegon Group on Norton, Webroot, McAfee, Microsoft Office and many other related topics. He is a very knowledgeable person with lots of experience. To get in touch with the internet security service provider, just dial 844-513-4111.
SOURCE : Review of the “Weakest Link” Telecast on NBC
#NBC#Weakest Link#UK television#Fegon Group Reviews#Fegon Group Ratings#Fegon Group#network security#Hollywood#internet security
0 notes
Text
Did You Know About Setting Per-App Sound Outputs in Windows 10?
It is convenient when different applications on your phone ping with a different sound whenever a new notification arrives. Different sounds make it easy for you to figure out the application without looking at the phone. Thus, it makes your life easy.

What if Windows 10 had an easy framework with the sounds? If you’re expecting any good info, you’re right. Windows 10 enables you to set per-app outputs. For instance, you can set a different playback volume when you’re wearing your headphones. While any other level when the speakers are attached without manually switching between the two.
The per-app sound feature was introduced with the release of Windows 10. Unfortunately, this feature is not available on Windows 10, but don’t get too upset about it. The function can still be accessed via third-party apps like CheVolume and Audio Router.
How to set Per-App Sound Outputs in Windows 10?
The steps to set per-app sound outputs in Windows 10 are:
Go to the new ‘Sound Settings’ panel.
Right-click on the ‘Speaker’ icon on the screen.
A pop-up menu will open. Select ‘Open Sound Settings’ from the menu.
Note: You can also view these settings in the ‘Sound’ tab under settings app on your Windows 10.
A ‘Sound Settings’ window will open. Click on the ‘App Volume and Device Preferences’ option under the ‘Other Sound Options’ section.
Select the output and input devices attached to your computer from the drop-down menu on the top of the window.
Set the volume levels for each app in the ‘App Volume and Device Preferences’ window.
Note: In case an app name doesn’t appear in the list, launch the application and begin recording audio.
Tap on the ‘Input’ and ‘Output’ drop-down menu to the right of the volume slider to assign an output to the apps. For instance, you can set one app output sound to your headphones, and another app outputs sound to your speakers.
To save the changes, close the apps, and launch again. Windows 10 will automatically save the settings and remember the same when you relaunch the app.
In case you want to set a default sound playback on your Windows 10, click on the speaker icon in the notification center. Select the name of your current sound device, and then select the device you want to use. After this, all the apps are set to ‘Default’ device.
You can also get your hands on the old volume mixer in Windows 10. To access the same, right-click on the speaker icon and tap on the ‘Open Volume Mixer’ option.
The ‘App volume and device preferences’ settings work very similarly to the old volume mixer along with additional options.
Harry Williams is an inventive person who has been doing intensive research in particular topics and writing blogs and articles for Fegon Group on Norton, Webroot, McAfee, Microsoft Office and many other related topics. He is a very knowledgeable person with lots of experience. To get in touch with the internet security service provider, just dial 8445134111.
SOURCE : Did You Know About Setting Per-App Sound Outputs in Windows 10?
#Fegon Group Review#Fegon Group Rating#Fegon Group Review and Rating#network security#internet security#fegon group llc#fegon group#8445134111#844-513-4111
1 note
·
View note
Text
Tips and Tricks for Facebook Messenger App
Facebook Messenger is an in-built instant messaging feature offered by Facebook. Originally, Messenger was launched in 2011, and its official app and website were launched in 2014. The Facebook Messenger website and app has completely replaced the Facebook Messaging feature. It enables the Facebook user to connect via instant messages, emoji, photos, videos, and more.
In this article, we will mention some tips and tricks to improve your user experience with the Facebook Messenger app:
You can send a large “Like” button
The Like button is a hidden feature in Facebook’s messaging service. You can send more giant thumbs up emoji by tapping it and holding it for a few seconds. The bigger like button occupies almost a quarter of the display of your friend.

You can change your default emoji
Emojis are a fun way to express yourself, and you can use them across major messaging platforms. But in the Messenger app, the default emoji is always the “Like” button. You can change your default emoji in the app by following two simple steps:
Click on the “Information” button in the upper-right corner of your chat screen.
Then, tap on “Emoji” and select the one you like the most.
You can use GIFs in your conversations
GIFs are one of the most fun ways to express yourself on various social media platforms. To send a GIF, click on the emoji button and select the GIF tab. Once you click on the GIF tab, you can search for various GIFs by using the search bar. You can access a vast number of GIFs from the Facebook GIFs database.
You can play hidden games
Facebook Messenger offers a wide range of games that you can play with your friends. All you need to do is just launch the Messenger App and open the chat box with whom you want to play the game. Then click on the game controller near the camera icon. Or you can click on the “More” button in the toolbar and tap on the controller icon. Then, you can select a game you want to play.
You can create a room
Video chat room feature is the latest addition by Facebook, which enables you to connect to millions of people across the globe just by using a camera. Messenger Rooms are video conferencing rooms that allow you to connect to the other members of the room through links. Users who do not access the Messenger app can also join the video chat rooms by simply logging into their Facebook app. To create a room, click on the “People” option at the bottom of your screen. Then click on the “Create a Room.” option and then on the “Try it” button and then “Share Link”. Now you can share this link with people with whom you want to have a video conference.
You can set nicknames
The Facebook messenger app enables you to set nicknames to your old friends. All you need to do is just click on the “Information” button or tap on the person’s name to access the chat options. Then click on the “Nicknames”, and you can change the person’s name with their old nickname.
You can search for conversations
For users who frequently use the Messenger app must have gone through the pain of finding the right conversation at the right time because the app is stuffed with a lot of conversations. You can search for a specific conversation by tapping on the “Information” button and then look for the “Search in Conversation” option. Then you can search a particular chat by using the search bar.
Conclusion
The Facebook Messenger app enables you to connect to your family and friends with just a single tap. The tips, as, mentioned above, will help you to make the most out of the Messenger app.
Harry Williams is an inventive person who has been doing intensive research in particular topics and writing blogs and articles for Fegon Group on Norton, Webroot, McAfee, Microsoft Office and many other related topics. He is a very knowledgeable person with lots of experience. To get in touch with the internet security service provider, just dial 8445134111.
SOURCE : Tips and Tricks for Facebook Messenger App , Fegon Group
#Fegon Group Review#Facebook Messenger#Fegon Group Rating#Fegon Group Review and Rating#network security#internet security#Fegon Group#844-513-4111#8445134111
0 notes
Text
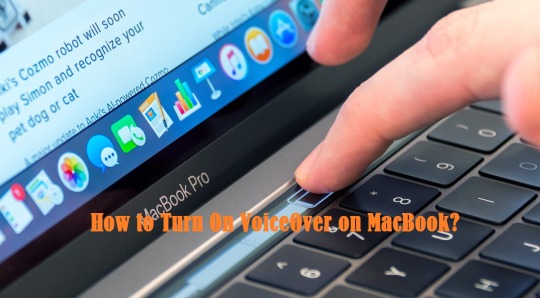
How to Turn On VoiceOver on MacBook?
VoiceOver is a feature that helps visually challenged people to access their device. It can read out aloud what’s on your screen and also guide you about how to get something done on your device. If you own a Mac, then the good news is your device comes up with VoiceOver feature, and it also offers free training to use it. In this article, we will tell you how to use this feature correctly.
SOURCE: How to Turn On VoiceOver on MacBook?
Turning On VoiceOver
If you want to turn on VoiceOver on your Mac, you need to follow the instructions given below.
Get started by clicking on the Apple menu tab on your Mac.
After that, you should click on System Preferences.
Then you have to click on the Accessibility option.
Thereafter, you should click on VoiceOver.
Later, tick the box of “Enable VoiceOver.”
If you have not turned on VoiceOver previously, then a narrator will guide you.
VoiceOver Training
You can use VoiceOver training on your Mac. Here are the instructions given below.
First of all, go to the Apple menu tab on your Mac.
After that, you have to click on System Preferences from the drop-down menu.
Then, you should click on Accessibility.
Thereafter, you have to click on VoiceOver.
Later, you should select “Open VoiceOver Training.”
Now, click on Continue.
Modify the VoiceOver Voice
If you want to modify the VoiceOver voice on your Mac, you need to follow the instructions given below.
First and foremost open the Apple menu tab on your Mac.
After that, you should click on System Preferences from the drop-down menu.
Then you have to click on the Accessibility option.
Thereafter, you should click on Speech.
Later, go to the drop-down menu near the System Voices.
Now, click on a voice.
After that, you should click on the Play option to check the voice.
Then select and move the slider near Speaking Rate to increase or decrease the VoiceOver.
Using VoiceOver Utility
You can use VoiceOver utility on your Mac. Here are the instructions given below.
To begin with, click on the Apple menu option on your Mac.
After that, you should click on System Preferences from the drop-down section.
Then you have to click on Accessibility.
Thereafter click on VoiceOver option.
Later, you should click on “Open VoiceOver Utility.”
Now, go to the dialog box and write in a new greeting if you would like to modify it from the default.
If you would like to turn on, then tick the box of “Display welcome dialog when VoiceOver starts.”
Go to the drop-down section near to “Keys to use as the VoiceOver modifier” if you want to modify them by default. You can choose the keys to only work as Caps lock, Ctrl-option, or either of them.
If you want to turn on the feature, then tick the box of “Allow VoiceOver to be controlled with AppleScript.”
Organize VoiceOver Portable Preferences
If you want to organize portable VoiceOver preferences on your Mac, you need to follow the instructions given below.
First, you have to click on the Apple menu tab on your Mac.
After that, you should click on System preferences from the drop-down section.
Then click on Accessibility.
Thereafter click on VoiceOver.
Later, you should click on “Open VoiceOver Utility.”
After that, select the “Set Up” near to Portable Preferences.”
Then choose the portable drive and click on OK
Turn On Descriptions
You can turn on descriptions on your Mac. Here are the instructions given below.
Open the Apple menu option on your Mac.
After that, you should select the System Preferences from the drop-down menu.
Then click on Accessibility.
Later, you have to click on Descriptions from the left pane.
Now, tick the box of “Play audio descriptions when available” to turn on descriptions from the default.
By following the instructions mentioned in the blog, you will be successfully able to turn VoiceOver on MacBook.
Harry Williams is an inventive person who has been doing intensive research in particular topics and writing blogs and articles for Fegon Group on Norton, Webroot, McAfee, Microsoft Office and many other related topics. He is a very knowledgeable person with lots of experience. To get in touch with the internet security service provider, just dial 8445134111.
0 notes