#Editing Tip 5: Editing for Variation
Explore tagged Tumblr posts
Text

Editing Tip #5: Editing for Variation
A couple of line and copyediting tips to help you make your story shine. ✨
Hey Story Crafters,
Fall is in the air! The days are getting shorter and cooler, and pumpkin spice is back on the menu. I’m not really a fan of cooler weather, but low humidity and crisp air is pretty nice.
In this post, I want to cover a couple of line and copyediting tips that you can use during revision to help make your story shine even more. These tips are best used after you’re confident in and happy with your story from a big-picture level (in other words, after all the developmental editing is done).
If you’re just starting out as a writer, this might be a higher level of self-editing than you want to tackle at this point of your career. You still might want to check out the following tips, just to see if you want to add them to your self-editing toolbox to use in the future.
Word Choice Variation
Ever sit down to revise your story, switch out a word to introduce a little variation (like switching “amazing” to “awesome”), only to realize that you used that word earlier in the same paragraph? Or even just in the previous sentence?
It happens to me a lot as a writer. And it can happen during revision, or during the initial process of writing (because we all have a few words that we tend to fall back on and overuse). There are words that are expected to be frequently used (e.g., “and”, “said”, “the,” etc.), and because they are used so frequently, they tend to fade into the background. They don’t draw attention to themselves. But then there are less frequently used words that do draw attention, which makes it more obvious when they are used close together.
This is where the Search/Find function in your word processer comes in handy. Just type in the word you want to search for, and review how frequently that word appears in your story, and where that word appears. Depending on the results, you might want to consider switching up your word choice.
Sentence Length Variation
If you want to experiment with tone and mood, varying the length of your sentences can give you different effects, depending on what you’re going for.
For example, long, flowing sentences can help give a sense of continuous movement.
On the other hand, if you’re going for bursts of impact, short, punchy sentences will be the way to go. Just. Like. This.
Depending on the point of view you’ve chosen to use to tell your story, there is a delicate balance between your writerly voice and the POV character’s voice. But this is still a technique you should keep in mind, whether you use it as a writing exercise or try to incorporate into your writing.
As a writing exercise, you can take one block of text and try writing it from a different POV character, using sentence length variation to reflect a specific POV character’s personality.
Upcoming Events
ACES VCON 2024: This week is the ACES: The Society for Editing Virtual Conference! I’m super psyched to attend and learn from my fellow editors.
Flights of Foundry 2024 (September 27-29): Back for its 5th year this weekend is Flights of Foundry, the virtual, worldwide event for speculative creatives! I’ll be a participating on 2 panels: Let’s Fight! [Hour 4.0 = 4PM ET on Friday, September 27] and Ask an Editor (Session 1 of 2) [Hour 29.0 = 5PM ET on Saturday, September 28]
Also, I’ve still got a few editing slots open for this year! If you’ve recently finished a project (whether it’s a short story collection, a novella, or a novel) and you’re looking for an editor, please get in touch.
Send me an email!
Until next time!
Best,
Leah
Visit The Crafty Fox Editing Services
Connect with me on social media!
Interested in getting free writing resources? Subscribe to my free Substack newsletter!
Substack post: https://thecraftyfoxwriterscorner.substack.com/p/editing-tip-5-editing-for-variation
#Writers#Editing#Editing Advice#Self-Editing#Editing Tip 5: Editing for Variation#Word Choice#Sentence Length#Word Choice Variation#Sentence Length Variation
0 notes
Text


Not my usual content, but I made something I wanted to share...
Edit: Now with an ID from @a-captions-blog! Thank you for writing it!
[Art description: A Pokémon-themed comic featuring OP as a Pikachu. Long description follows.
1. The tips of Pikachu’s ears are shown with text that says, ‘I’m a Pikachu / My world is filled with lots of cool stuff. Sometimes it feels like anything is possible!’ Under this is a collage showing a Charizard, a Pidgeotto, a Nidoking, an Eevee, and an Ivysaur, all in the background as the Pikachu looks up in wonder. Text reads, ‘All sorts of types, all sorts of attacks, all sorts of Pokemon.’
2. Text says, ‘But...only two ways a Pikachu’s tail could look.’ Two boxes in the upper corners show the male and female Pikachu tails, respectively. The male has a rectangular end to his tale, and the female has a heart-shaped end to hers. Text continues, ‘So then, what am I?’ A large drawing of the narrator Pikachu is shown, with an arrow pointing to their tail, whose end is split somewhat like scissors and doesn’t match either the male or female drawing above.
3. Text says, ‘Too pointy to be [female], too much of a V-shape to be [male]. I thought there was something wrong with me.’ Under this are three cascading panels showing the Pikachu from below at an angle emphasizing their tail. The second panel shows mel further away, and in the final panel she have disappeared entirely. Text on the panels reads, ‘I felt / very, very, very / alone.’
4. Text says, ‘But then, something happened. I found others like me.’ The art shows the narrator reaching out to another Pikachu. Under this are three other Pikachu. One has a rounded tail, one has a tail that has been stitched up to be rectangular, and one has a tail with a slight spike at the tip.
5. Closeups are shown of each of the tails from the previous panel, with text that says, ‘Round tails, scarred tails, spiky tails.’ Under this is a drawing of the Pikachu all hugging with lightning coming from their cheeks. Text reads, ‘They told me nothing was wrong with me, and I wasn´t alone anymore.’
6. Text says, ‘There are many ways a Pikachu’s tail can look. I’ve heard there’s at least over 30 different variations.’ Under this are two panels. The first panel shows the narrator lying on their back on a background of male and female symbols. Text reads, ‘Some days are still hard.’ In the second panel, the Pikachu with the scarred tail is shown with text that says, ‘My friend tells me her tail used to look just like mine. It was taken from her.’
8. The narrator is shown sitting and looking upwards. Text reads, ‘Some trainers won’t accept Pikachu that aren’t [male] or [female]. They alter our tails without our consent. But things are getting better. We are making change. We’re fighting so that our tails will be left alone.’ Under this is a panel showing the four Pikachu running happily towards the right. Text reads, ‘We’re all on a spectrum. Every tail looks different; anything is possible.’
The final text reads, ‘This is a comic about intersex people.’ The watermark in the lower right says @ PostManic. \End descriptions
89K notes
·
View notes
Text
Writing Tips - Beating Perfectionism
1. Recognising writing perfectionism. It’s not usually as literal as “This isn’t 100% perfect and so it is the worst thing ever”, in my experience it usually sneaks up more subtly. Things like where you should probably be continuing on but if you don’t figure out how to word this paragraph better it’s just going to bug you the whole time, or where you’re growing demotivated because you don’t know how to describe the scene 100% exactly as you can imagine it in your head, or things along those lines where your desire to be exact can get in the way of progression. In isolated scenarios this is natural, but if it’s regularly and notably impacting your progress then there’s a more pressing issue
2. Write now, edit later. Easier said than done, which always infuriated me until I worked out how it translates into practice; you need to recognise what the purpose of this stage of the writing process is and when editing will hinder you more than help you. Anything up to and including your first draft is purely done for structural and creative purposes, and trying to impose perfection on a creative process will naturally stifle said creativity. Creativity demands the freedom of imperfection
3. Perfection is stagnant. We all know that we have to give our characters flaws and challenges to overcome since, otherwise, there’s no room for growth or conflict or plot, and it ends up being boring and predictable at best - and it’s just the same as your writing. Say you wrote the absolute perfect book; the perfect plot, the perfect characters, the perfect arcs, the perfect ending, etc etc. It’s an overnight bestseller and you’re discussed as a literary great for all time. Everyone, even those outside of your target demographic, call it the perfect book. Not only would that first require you to turn the perfect book into something objective, which is impossible, but it would also mean that you would either never write again, because you can never do better than your perfect book, or you’ll always write the exact same thing in the exact same way to ensure constant perfection. It’s repetitive, it’s boring, and all in all it’s just fearful behaviour meant to protect you from criticism that you aren’t used to, rather than allowing yourself to get acclimated to less than purely positive feedback
4. Faulty comparisons. Comparing your writing to that of a published author’s is great from an analytical perspective, but it can easily just become a case of “Their work is so much better, mine sucks, I’ll never be as good as them or as good as any ‘real’ writer”. You need to remember that you’re comparing a completely finished draft, which likely underwent at least three major edits and could have even had upwards of ten, to wherever it is you’re at. A surprising number of people compare their *first* draft to a finished product, which is insanity when you think of it that way; it seems so obvious from this perspective why your first attempt isn’t as good as their tenth. You also end up comparing your ability to describe the images in your head to their ability to craft a new image in your head; I guarantee you that the image the author came up with isn’t the one their readers have, and they’re kicking themselves for not being able to get it exactly as they themselves imagine it. Only the author knows what image they’re working off of; the readers don’t, and they can imagine their own variation which is just as amazing
5. Up close and too personal. Expanding on the last point, just in general it’s harder to describe something in coherent words than it is to process it when someone else prompts you to do so. You end up frustrated and going over it a gazillion times, even to the point where words don’t even look like words anymore. You’ve got this perfect vision of how the whole story is supposed to go, and when you very understandably can’t flawlessly translate every single minute detail to your satisfaction, it’s demotivating. You’re emotionally attached to this perfect version that can’t ever be fully articulated through any other medium. But on the other hand, when consuming other media that you didn’t have a hand in creating, you’re viewing it with perfectly fresh eyes; you have no ‘perfect ideal’ of how everything is supposed to look and feel and be, so the images the final product conjures up become that idealised version - its no wonder why it always feels like every writer except you can pull off their visions when your writing is the only one you have such rigorous preconceived notions of
6. That’s entertainment. Of course writing can be stressful and draining and frustrating and all other sorts of nasty things, but if overall you can’t say that you ultimately enjoy it, you’re not writing for the right reasons. You’ll never take true pride in your work if it only brings you misery. Take a step back, figure out what you can do to make things more fun for you - or at least less like a chore - and work from there
7. Write for yourself. One of the things that most gets to me when writing is “If this was found and read by someone I know, how would that feel?”, which has lead me on multiple occasions to backtrack and try to be less cringe or less weird or less preachy or whatever else. It’s harder to share your work with people you know whose opinions you care about and whose impressions of you have the potential of shifting based on this - sharing it to strangers whose opinions ultimately don’t matter and who you’ll never have to interact with again is somehow a lot less scary because their judgements won’t stick. But allowing the imaginary opinions of others to dictate not even your finished project, but your unmoderated creative process in general? Nobody is going to see this without your say so; this is not the time to be fussing over how others may perceive your writing. The only opinion that matters at this stage is your own
8. Redirection. Instead of focusing on quality, focusing on quantity has helped me to improve my perfectionism issues; it doesn’t matter if I write twenty paragraphs of complete BS so long as I’ve written twenty paragraphs or something that may or may not be useful later. I can still let myself feel accomplished regardless of quality, and if I later have to throw out whole chapters, so be it
9. That’s a problem for future me. A lot of people have no idea how to edit, or what to look for when they do so, so having a clear idea of what you want to edit by the time the editing session comes around is gonna be a game-changer once you’re supposed to be editing. Save the clear work for when you’re allocating time for it and you’ll have a much easier and more focused start to the editing process. It’ll be more motivating than staring blankly at the intimidating word count, at least
10. The application of applications. If all else fails and you’re still going back to edit what you’ve just wrote in some struggle for the perfect writing, there are apps and websites that you can use that physically prevent you from editing your work until you’re done with it. If nothing else, maybe it can help train you away from major edits as you go
#perfectionism#perfection#writing#writers#writeblr#bookblr#book#writers on tumblr#writerscommunity#writers of tumblr#writer#my writing#how to write#on writing#creative writing#write#writing tips#writblr#female writers#queer writers#writer things#writer stuff#writing is hard#writing advice#writing life#writer problems#writerscreed#writersnetwork#writerblr#writersociety
1K notes
·
View notes
Text
5 Essential Tips for Mastering Scene Writing in Your Novel
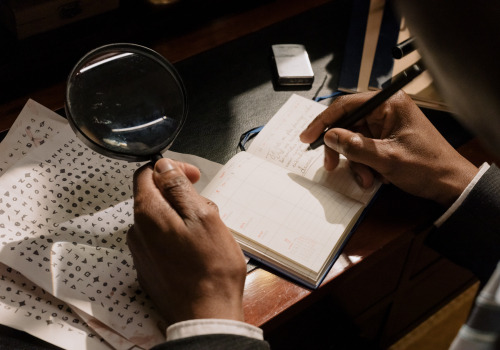
There's many parts involved when writing a scene. Knowing how these different pieces work together may help you move forward in your novel. NaNo Participant Amy de la Force offers some tips on brushing up your scene writing knowledge. Scenes are the building blocks of a novel, the stages where characters spring to life, conflicts brew and emotions run high. Mastering the art of scene writing is crucial for any aspiring writer, especially in the lead-up to NaNoWriMo. But what is a scene, and how do you effectively craft one?
What is a Scene?
A scene is a short period of time — in a set place — that moves the story forward with dramatic conflict that reveals character, generally through dialogue or action. Think of writing a scene as a mini-story with a beginning, middle and end, all contributing to the narrative.
Why Scene Writing is Your Secret Weapon in Storytelling
Well-crafted scenes enhance your story to develop characters, advance the plot, and engage readers through tension and emotion. Whether you're writing a novel, short story or even non-fiction, scenes weave the threads of your story together.
Tip #1: Scenes vs. Sequels
According to university lecturer Dwight Swain in Techniques of the Selling Writer, narrative time can be broken down into not just scenes, but sequels.
Scene
The 3 parts of a scene are:
Goal: The protagonist or point-of-view (POV) character’s objective at the start of the scene.
Conflict: For dramatic conflict, this is an equally strong combination of the character’s ‘want + obstacle’ to their goal.
Disaster: When the obstacle wins, it forces the character’s hand to act, ratcheting up tension.
Sequel
Similarly, Swain’s sequels have 3 parts:
Reaction: This is the POV character’s emotional follow-up to the previous scene’s disaster.
Dilemma: If the dramatic conflict is strong enough, each possible next step seems worse than anything the character has faced.
Decision: The scene’s goal may still apply, but the choice of action to meet it will be difficult.
Tip #2: Questions to Ask Yourself Before Writing a Scene
In Story Genius, story coach and ex–literary agent Lisa Cron lists 4 questions to guide you in scene writing:
What does my POV character go into the scene believing?
Why do they believe it?
What is my character’s goal in the scene?
What does my character expect will happen in this scene?
Tip #3: Writing Opening and Closing Scenes
Now that we know more about scene structure and character considerations, it’s time to open with a bang, or more to the point, a hook. Forget warming up and write a scene in the middle of the action or a conversation. Don’t forget to set the place and time with a vivid description or a little world-building. To end the scene, go for something that resolves the current tension, or a cliffhanger to make your scene or chapter ‘unputdownable’.
Tip #4: Mastering Tension and Pacing
A benefit to Swain’s scenes and sequels is that introspective sequels tend to balance the pace by slowing it, building tension. This pacing variation, which you can help by alternating dialogue with action or sentence lengths, offers readers the mental quiet space to rest and digest any action-packed scenes.
Tip #5: Scene Writing for Emotional Impact
For writing a scene, the top tips from master editor Sol Stein in Stein on Writing are:
Fiction evokes emotion, so make a list of the emotion(s) you want readers to feel in your scenes and work to that list.
For editing, cut scenes that don’t serve a purpose (ideally, several purposes), or make you feel bored. If you are, your reader is too.
Conclusion
From understanding the anatomy of a scene to writing your own, these tips will help elevate your scenes from good to unforgettable, so you can resonate with readers.

Amy de la Force is a YA and adult speculative fiction writer, alumna of Curtis Brown Creative's selective novel-writing program and Society of Authors member. The novel she’s querying longlisted for Voyage YA’s Spring First Chapters Contest in 2021. An Aussie expat, Amy lives in London. Check her out on Twitter, Bluesky, and on her website! Her books can be found on Amazon. Photo by cottonbro studio
#nanowrimo#writing#writing advice#scene writing#writing scenes#plotting#by nano guest#amy de la force
464 notes
·
View notes
Text
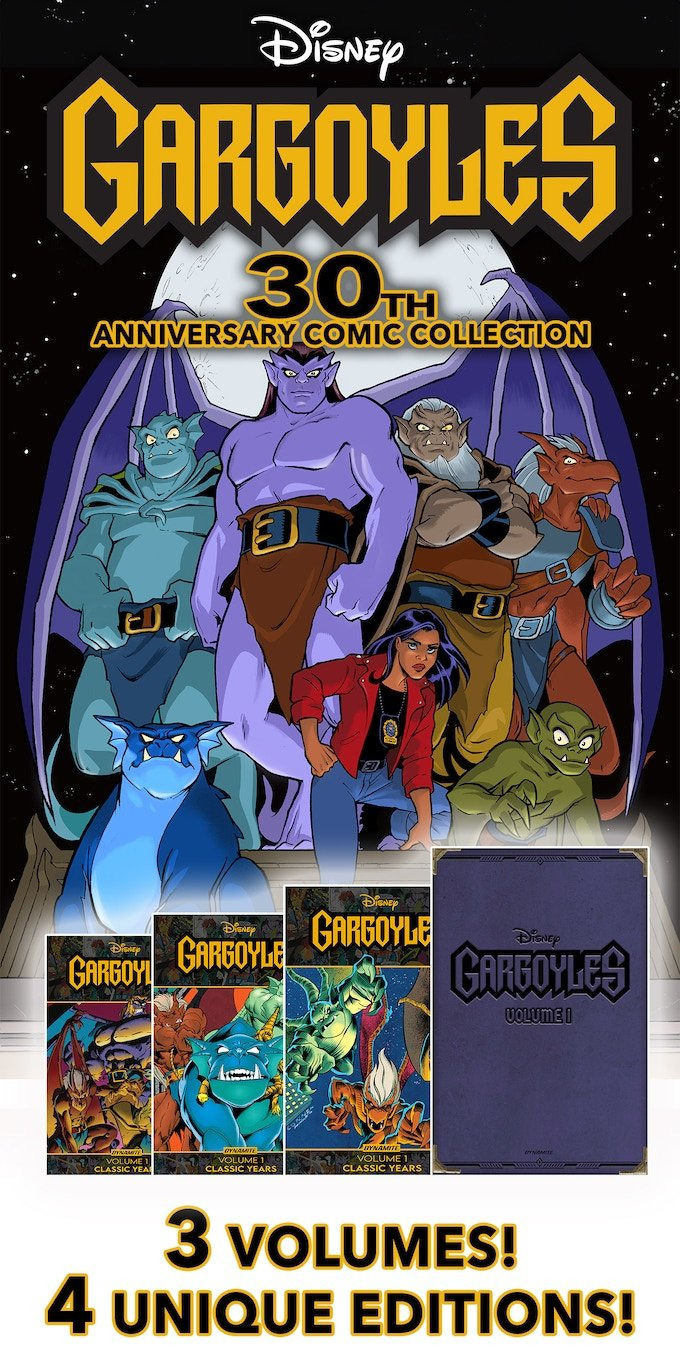
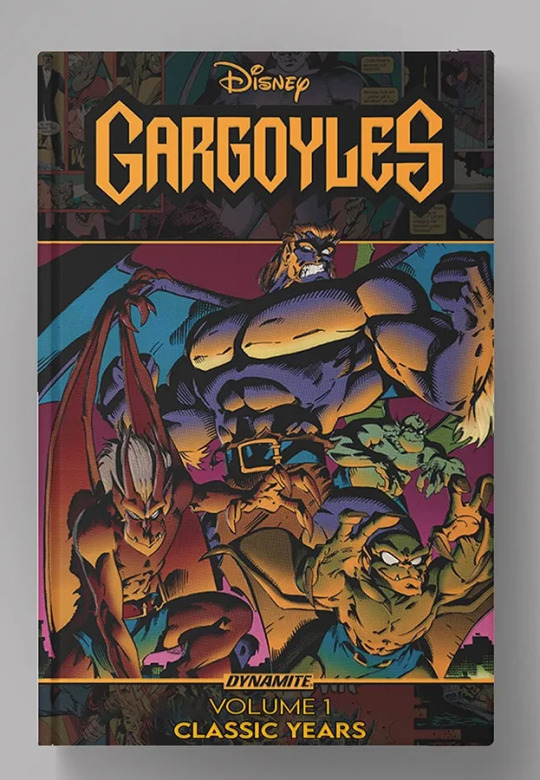
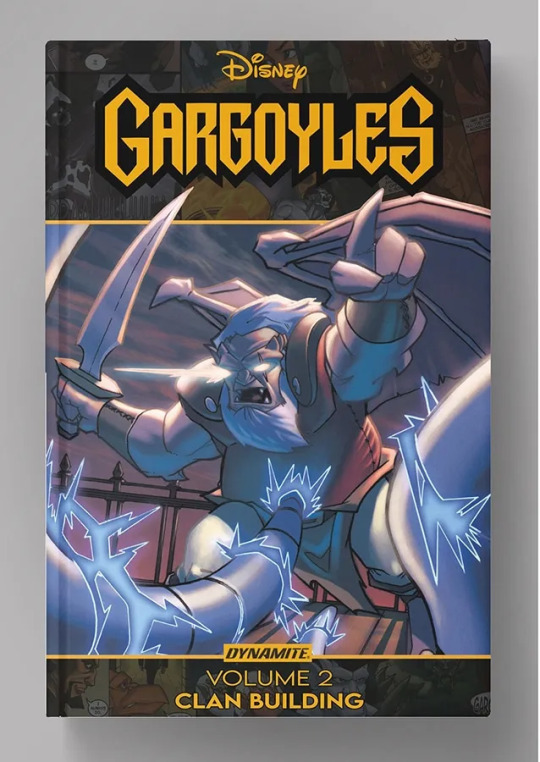
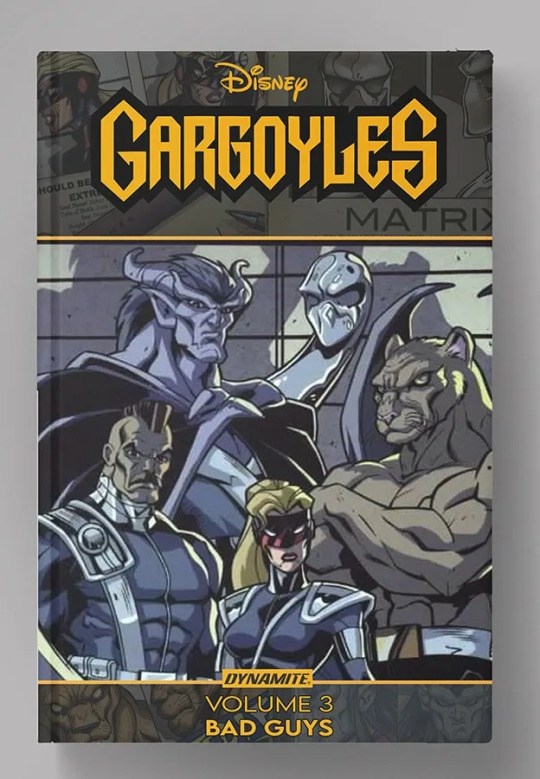
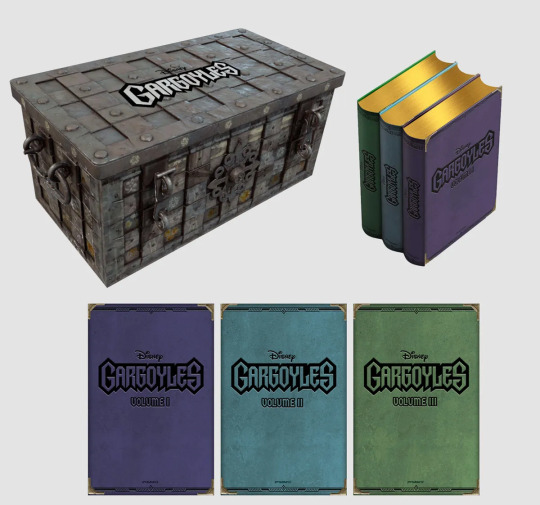
Dynamite Comics Launches Kickstarter for GARGOYLES Classic Comics As Part Of The Show's 30th Anniversary.
Dynamite Comics and Disney Comics are celebrating the 30th anniversary of Gargoyles with the first-ever Kickstarter campaign featuring brand new graphic novels collecting long out-of-print Gargoyles comic books.
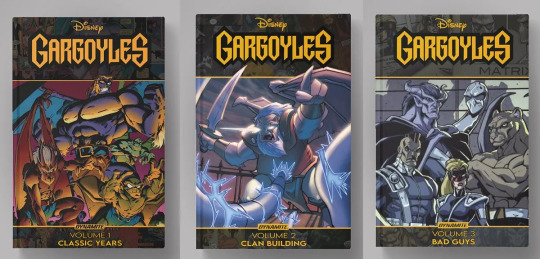
Dynamite Entertainment brought back Gargoyles as a comic series in 2022 to great acclaim. Now the publisher is crowdfunding a reprint of the classic comics based on the beloved animated series. To celebrate the 30th anniversary, Dynamite is excited to offer three beautiful tomes collecting all of these previous tales for fans. The set is initially being offered on Kickstarter to reach and communicate with diverse fans of all ages directly.
“I’m honestly thrilled that these three volumes will finally give Gargoyles fans easy access to these great stories, including the canon SLG tales!” said Weisman. “I think the Dynamite Kickstarter is a great way for Gargoyles fans to get the word out and to reserve their copies. This could be a once-in-a-lifetime opportunity, so I hope our fans don’t miss out!”
The first volume is the hotly anticipated compilation of the first-ever Gargoyles comic series from 1995. This 11-issue title was originally released by Marvel Comics and is set loosely between the first two seasons of the original TV show. The memorable first issue featured a jaw-dropping cover by artist Joe Madureira, one of the biggest superstars of the era from his work on Uncanny X-Men. The series was written by Martin Pasko (Superman) and Mort Todd.
The second and third volumes of the Gargoyles Classic Years will be an incredible treat. From 2006 to 2009, a new Gargoyles comic series was launched from SLG Publishing in association with CreatureComics — the first written by Weisman. The main series, often referred to as “Clan Building,” was joined by a companion title, Bad Guys. Issues #9-12 of Gargoyles and #5-6 of Bad Guys did not see release and were only printed in paperback collections with small print runs. They were produced at a smaller digest size and have been incredibly expensive for years on the secondary market.
The three-volume set is available in multiple variations for different kinds of fans and collectors. Each is available as either hardcover or paperback. Deluxe hardcover editions with signed tip-in pages are being offered. For the Gargoyles diehards, the most premium option will be the Gargoyles 30th Anniversary Premier Editions limited to just 1,000 copies each!
In addition to the books at the center of this celebration, the campaign will offer several add-ons for backers, including lithograph prints of Jae Lee and Amanda Conner’s covers for Dynamite’s Gargoyles #1. The most premium art piece anyone can get will be a deluxe signed and remarqued giclée print of Lee’s Gargoyles art.
In addition to the reprint of the full series, fans can get special facsimile editions of the very first issue with gold or purple foil stamping. Sketch cover options are also available, as well as commissioned original art from Lee. Plus, collector packs of variant cover sets or premium limited editions and metal covers for Dynamite’s series can be added.
#Gargoyles#Gargoyles Clan Building#Gargoyles Bad Guys#Greg Weisman#The Disney Afternoon#Disney Afternoon#Dynamite Comics#Disney Comics#Marvel Comics#CreatureComics#SLG Publishing
257 notes
·
View notes
Note
I'm always afraid that the characters I write about are, well, out of character. I try to come up with things that I think they would say and put them in my style, but I always hear myself talking, not them. Do you have some advice?
Ohh this definitely pushes a button for me because i hate the hewouldntfuckingsaythat-ication of fanfiction. How that concept has poisoned the minds of writers so they keep second-guessing and become insecure and afraid. I think writing fic should be a celebration, a hobby where you write what you want, an indulgence.
So to readers i say: cope. He would say that simply because the fic writer makes him say that 🤷♀️ fics are little free gifts!
But as a fic author to another fic author: i understand. You want to stay true to how they sound. To how you see them. I have some tricks up my sleeve.
1. Work with a beta. Someone who reads your work for you, encourages you, and pays extra attention to how the characters ‘sound’. If your beta is a writer too whose characterisations you like, you’ll know you’re safe.
2. Rewatch canon a lot. Rewatch short scenes before writing so you get how they sound fresh in your mind again (this is a tip i stole from @gingiekittycat )
3. Think of little words or phrases your characters say often in canon, and insert them into your fic. For example for aziraphale it can be ���dear” or “my dear”. Or for crowley “nknkgnk” or some variation.
4. Say it out loud. “Act” like them, say their lines as them.
5. Do one round of editing of your fic focusing ONLY on the dialogue. Ignore all the rest but just reread your dialogue and really work on it.
Also, please know, your mind lies to you. Of course it sounds “like you” because you are you, especially after you’ve worked on a fic long. But that doesn’t mean it’ll sound out of character to your readers. They’ll go along with more than you think.
110 notes
·
View notes
Note
Can we have some of your best tips on taking good in-game photos for FC5? I would like to get some good shots of my deputy OC for reference/edits. Thank you!
I’ve been thinking about writing some sort of “Photo Mode guide” and, since you’re asking, I can give you a few tips to make your Deputy “pose” even though this option technically doesn’t exist in the Far Cry 5 Photo Mode!
I made a video with several examples (detailed below):
youtube
So, if your Deputy is standing still and you want to take a picture, they will be slightly hunched over with their arms bent, but if you open the Photo Mode while you’re slowly walking, they will stand more upright and their arms will be straighter. If you make them look down or look up, their pose will be affected as well, so these two simple things already have a big impact.
You can take photos of your Deputy doing many things: punching, kicking, aiming, throwing something, shooting a gun, swinging a melee weapon, sliding, jumping, swimming, fishing, driving, petting the Fangs for Hire, performing takedowns, etc. The result can vary depending on when exactly you open the menu, so you can try to adjust your timing and see if it changes anything. Sometimes, even a fraction of a second can make a difference! Also, the more damage your Deputy has taken, the bloodier they will be in the picture.
Here are more poses/actions I didn’t include in the video:
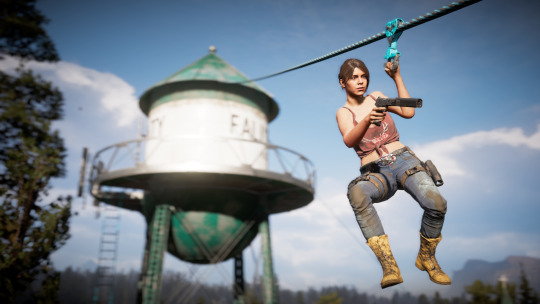
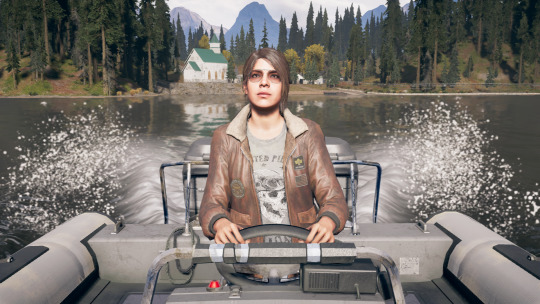
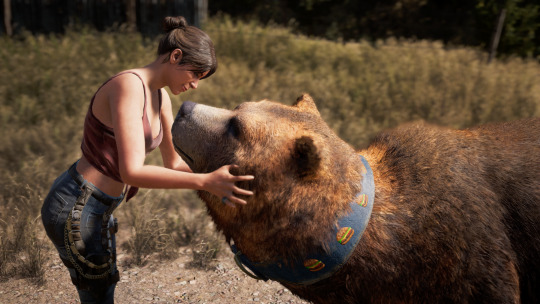
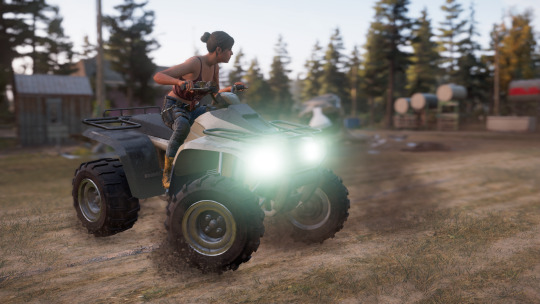
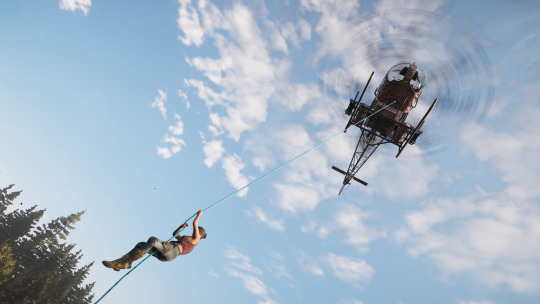
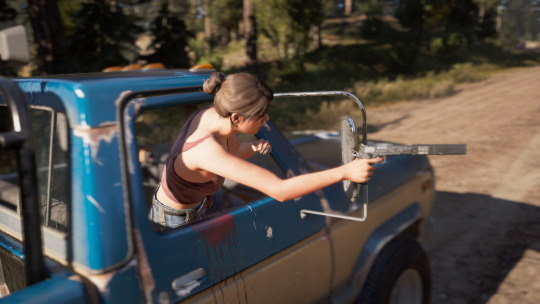
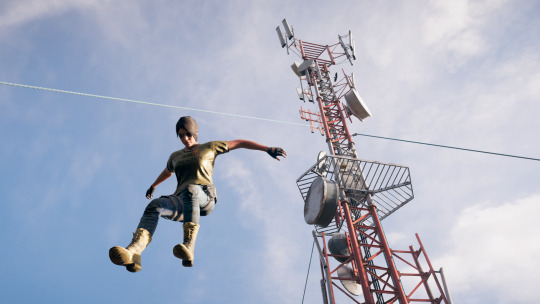
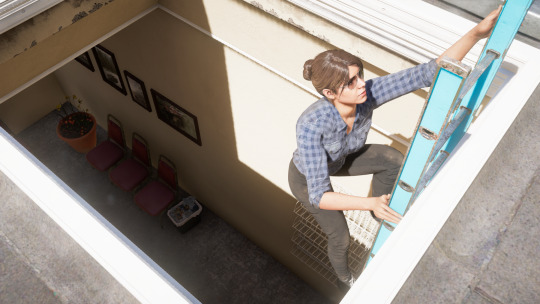
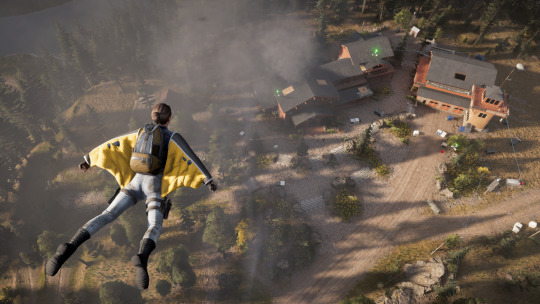
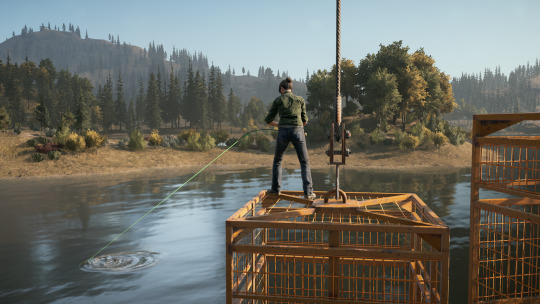
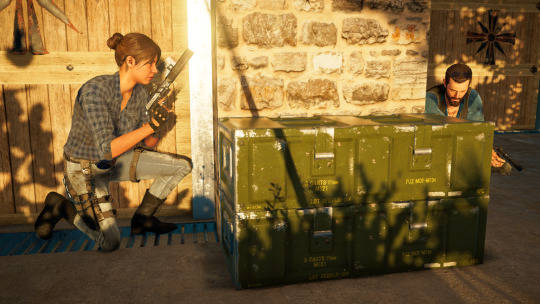
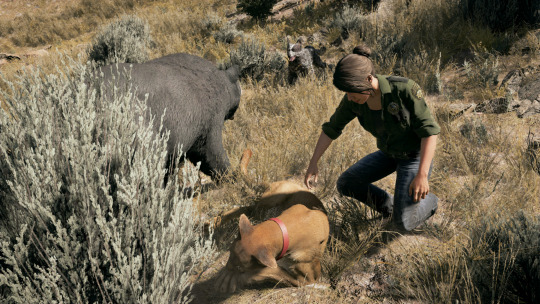
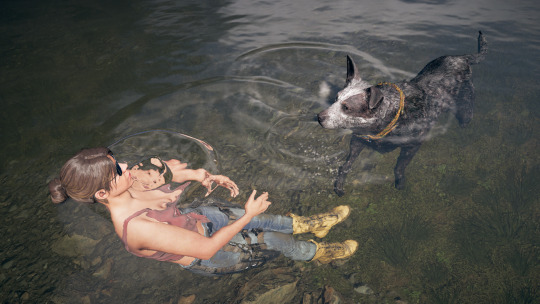
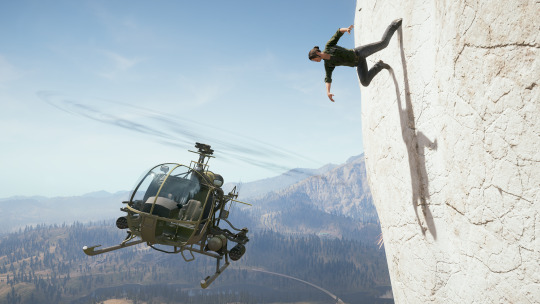
Takedowns are especially “fun” to shoot, and there are many variations depending on your timing:
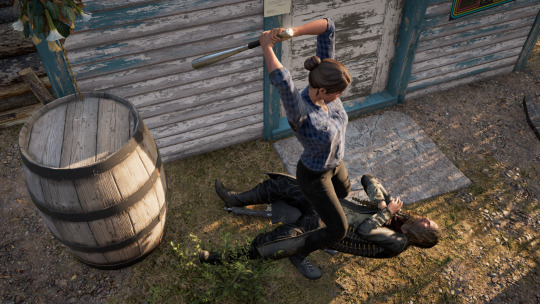
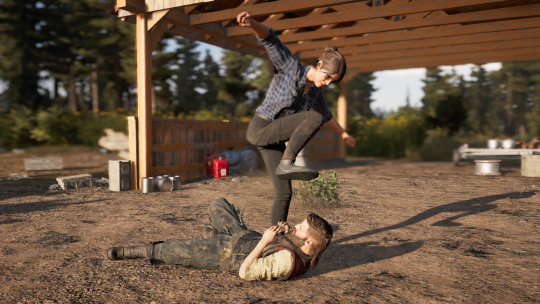
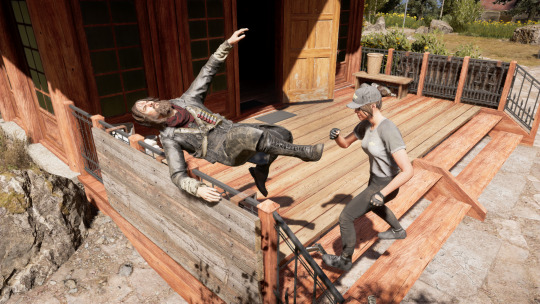
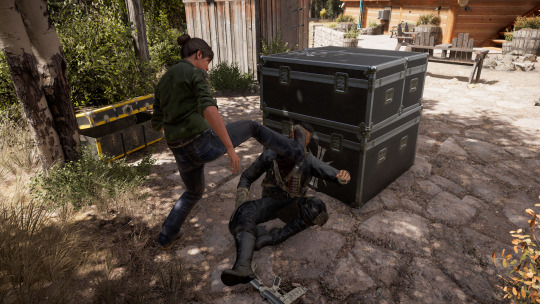
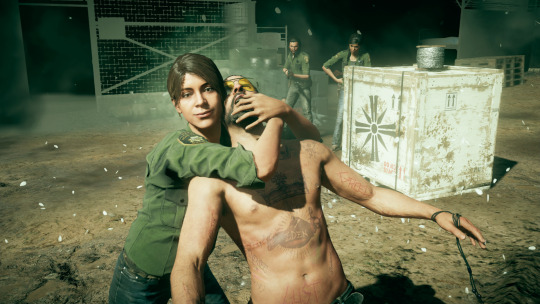
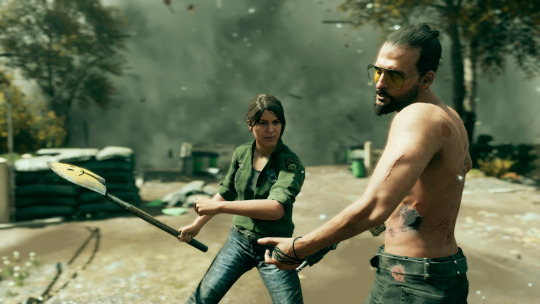
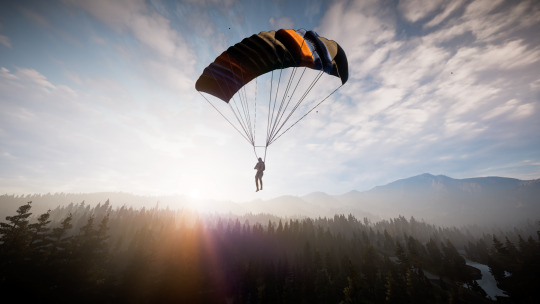
However, there are certain actions you usually can’t capture on camera, such as using the binoculars, climbing on a roof, jumping a fence, opening a parachute, or reloading a weapon. Basically, when there’s a “special animation” happening, chances are you can’t use the Photo Mode. I did manage to take pictures of my Deputy reloading the Sin Eater, though, so there seem to be exceptions. If you open the Photo Mode right when they start reloading, it can work. Sometimes.
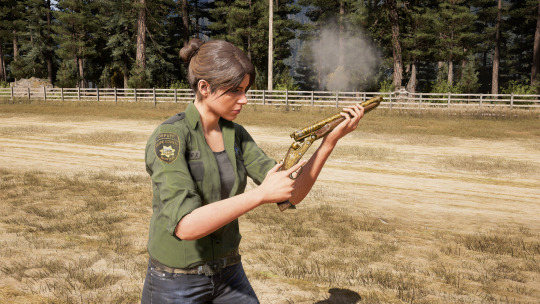
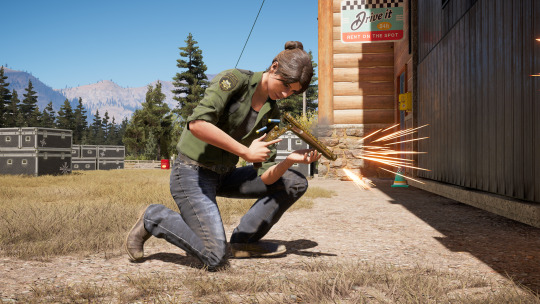
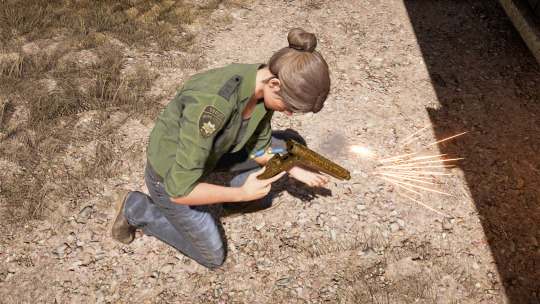
And you’ve probably noticed that, if you get too close to characters, they disappear. What I’ve observed is that, the lower the camera is, the sooner your Deputy (or someone else) will vanish from your screen when you try to approach them. If you take a picture from above instead (so a high-angle shot, basically), you will be able to get much closer.
For some vertical shots, instead of using the “Frame” option, I like to play with the “Roll Camera” setting instead. At the end of the video, I roughly recreated how I took this picture (except she was very badly hurt in the original). I used the same technique to take these in Far Cry 6. I think the photos look nicer and more spectacular with this trick than with the 6x9 frame because the angle is wider.
Then, of course, you can adjust the field of view, depth of field, facial expression, time of day, brightness, contrast, or even add filters, but I suppose you already know this. In fact, maybe you already knew most of what I’ve just said, but I wanted to share the “posing tricks” I discovered over the years, and now it’s done :)
#far cry 5#far cry 5 photo mode#photo mode#the deputy#my deputy#my screenshots#far cry 5 screenshots#I’ve already shared most of these#the last one with joseph still makes me laugh#I took the 'reloading weapon' reference pictures for my drawing of faith using the sin eater#my videos
12 notes
·
View notes
Note
Hi! I'm thinking about making a podfic of one of my favorite fics and I wanted to ask for a couple of tips because I adore your podfics and I have run into a couple problems very early on.
how do you do deeper voices? my voice is fairly high (I'm a soprano that can occasionally deep down into lower alto) and most of the voices in the fic are male. I also always sound about twelve in recordings lol
how do you make distinct voices? again, I have a lot of different voices (probably 5-7 that talk the most, with many many other reoccurring characters).
pacing of reading. I tend to speak/read very quick and in my practice recordings, it sounds like I'm talking much faster than I felt I was. any tips on that?
what recording programs are best? currently I'm using voice memos on my phone. which. is clearly not going to give me the best sound, regardless of the app I use, but I don't have many options.
I am living in a dorm right now and live in fear of my suite mates hearing me (my roommate not quite as much as she likes to dub and does a lot in our room--though she does it in mandarin so I cant understand it). not to mention background noise of doors opening and whatnot. if you have any tips on that as well, that would be great!
I love your podfic, you put so much soul into them, and I hope that I could do that too!
Hello fellow podfic-er! I’m so excited for you to make a podfic!
The nice thing about podfics is that I usually don’t have to create characters from scratch, they already exist in the TV show. If I’m struggling with a character, I just rewatch some clips of them talking and imitate it!
Deep voices: I, too, have a high, childish voice and struggle with deep, Manly Men. I guess the main tip I have is to...give up. What I mean is focus less on pitch and more on tone. If you speak too low, it’ll be less expressive and will probably hurt your throat. It can work for minor, 2D characters, but don’t do it for main characters that have a wide range of emotions (you may notice that my Mighty Oaks Fire Sage Zuko voice swings higher when he’s emotional oops). Instead, use your normal pitch, and make a character sound adult by using an authoritative tone. Another thing I do is play up the childish and feminine voices. We might not be able to make the adults sound adult, but we can make the kids sound extra kiddish by comparison.
Distinct voices: I’m a tactile learner, so for me, it’s all about the physicality. Every time I do Azula’s voice, I make a pinched face like I’m eating a lemon. When I record Ozai, I sneer. For Sokka, I jut out my chin and flail my arms. It looks silly, but no one is around to see. There’s lots of YouTube tutorials about how to make different voices by varying speed and tone and nasal quality, but I get kinda lost in the sauce with those theory lessons. The only way I can really get myself to do different voices is if I’m working off of a reference. I just watch videos of other cartoons and live actors and then copy them.
Pacing: Pacing is hard. I especially struggle with the editing and often end up cutting things wonkily. Audiobooks tend to be slow because you’re less likely to get tongue tied that way. If I have a big hunk of text that I find myself racing through, I slow myself down with physicality again. I’ll lean in on important words or mime out the actions. For example, on the line, “Zuko turns, grabs the bar at the side of the ship, and throws himself back over,” I'll turn my body on the word “turn,” grab an imaginary bar on the word “grab” and then lurch forward on the word “throw.” Adding in movement can bring variation to those big blocks of text.
What recording programs are best: I don’t know! I use Audacity because it’s free. Adobe Audition is great too, but it’s expensive. I am very lazy with the podfics. I don’t have a professional set-up. Basically, I make a comfortable nest of pillows in bed or my closet, use an iPhone VoiceMemos app to record straight into the phone mic, send the audio file to my computer, convert the audio to a WAV file, put it in Audacity, add a Noise Reduction effect, and then cut it down. Once I’m done editing it, I export the Audacity file as an mp3, upload it to archive.org and Spotify, and then embed those links into Ao3. Feel free to DM me if you have other tech questions. I am not particularly savvy, but we can Google it together? If any voice actors on Tumblr have professional advice, please chime in.
Silence and privacy: Background noise is a big headache for me too. I live in a noisy area with lots of planes and a squeaky elevator. I usually record now in my closet surrounded by pillows and blankets, so it’s fairly soundproof. If there’s a noise, I usually wait for the sound to stop, record the line again, then edit out the mistake in post. At the end of the day, though, sounds will slip in. It’s just a podfic; we’re doing this for fun not professionally, so it doesn’t need to be polished. I think most listeners’ attitudes is that something is better than nothing. If you’re in a school dorm, there might be music practice rooms, a radio recording booth, or empty classrooms you can use instead.
Storage: Something I didn’t realize going in was how much storage the audio clips take up. Make sure you save and delete projects as you go. One time I finished editing an Audacity project, but it wouldn’t let me save it because I ran out of storage and I had to start over.
I’m so glad you like the podfics I’ve done and that it could help inspire you to make one too! I started making podfics because I fell in love with @pixieinthesky’s fantastic Salvage podfic (it's an absolute gem). Keep the chain going!
Have fun!
66 notes
·
View notes
Text
♡ Tips for when your Draft feels Un-Fixable ♡
………………………………………………………………………….
Recently I tried editing one of my stories and felt everyone that could be possibly wrong was wrong. My scenes were disorganized, my plot was all over the place, and the variation between my imagery and action was horribly inconsistent. I felt so overwhelmed staring at my computer screen and my fingers inched toward the delete key. Instead of deleting all your writing and staring at the frightening, icy white span of a new page, don’t loose hope! A messy page is better than no page at all. Here’s some tips to make your draft fixable! This applies to stories, poems, and all forms of writing
1. Identify!
First things first, instead of trying to solve your problems, identify them! Don’t even think about a solution yet! Pretend you’re editing the work of someone else—Are any paragraphs wonky? Are any sentences unclear? Mark every issue you find in your piece! Next, bullet point your main issues and only then, start considering how you could fix them. Breaking down a problem is easier than handling it at once! You can’t an apple in one bite!
2. Ditch the Digital!
I find the pristine, white screen of a laptop to be very intimidating and unnurturing to developing ideas. As the perfectionist I am, I feel like I have to solidify anything I type, and that can become an issue with accepting my poor first drafts. I find much more comfortable and intimacy in writing in a journal: the delicate paper cradles your words, scribbling preserved every mistake, and everything is hidden with the flip of the journal cover. When I’m struggling with a scene, I let my mind wander and scribble whatever I can come up in my journal. Then, I transfer it onto my computer and edit away! I find this reduces the stigma of having a perfect first draft and is applicable to many of my other tips! Sometimes old-fashioned is better!
3. Plot with Flashcards!
If the string of your plot is all tangled up, a great trick I learned is plotting with flashcards! All you need is paper, scissors, string, clips, a writing utensil, and some horizontal space. On the front side of a card, write a name for the scene and in parenthesis, mark its significance. Is it significant for foreshadowing? For character development? A rise in tension? On the back, go in depth in the scene and describe what happens and what it means to your story. Then, unravel the string in a horizontal line on your floor, desk, or even a wall. With your clips, experiment with the position of scenes along the string. Maybe a scene in the beginning of your story belongs in the middle or an additional scene should be added. Is your plot missing something? Keep clipping, shuffling, and rearranging your flashcards until it makes the most sense to you!
4. Snip your Page!
If the organization of your paragraphs seems off or your piece lacks power, this might be the tip for you! I truthfully believe any writer should try this before deciding if their draft is final! First, print out your writing and grab some scissors! Cut out every paragraph and start rearranging them! Action scenes are a great hook and bundling similar paragraphs may increase the flow of your writing! Ask yourself what part of your writing you want your reader to prioritize? Not all writing has to be in chronological order!
5. Inspire Yourself with Some Reading!
The more you read, the better of a writer you are! Not only can reading inspire new ideas, it can also help you elevate your writing style. Look how other authors have fixed their writing problems! Find a book in your genre and with a similar writing style. Do you notice patterns? What do they do when a character is experiencing an emotional moment? Do they remain surface level or dive deep into the sea of feelings? What sentence variation do they have? What vocabulary do they use? How do they shift the tone? Apply your findings to your writing!
I hope this was helpful!
XOXO,
lovewashed doll ♡

#writingtips#writing#plotting#stories#novel writing#writers on tumblr#writers and poets#writerscommunity
17 notes
·
View notes
Note
I have long pondered this question and have yet to come up with anything that feels right so I'm throwing it to the crowd. What music does Bond listen to? Can't imagine him tuning in to Radio 1 iykwim but he's also not screaming Classic FM and then I thought maybe he's into jazz but it feels too chaotic for him - I think Q is the one who likes jazz. But what does Bond play at the gym??!?
Hi anon!!! I, too, will throw this out to the crowd, lmao, cuz uhh I am exactly the wrong person to ask about music and sounds and things.
I do vibe with what ur saying tho. For Bond + gym music (if he does that- he might be more of the 'I need my senses clear so I can Hear Approaching Threats kind of guy). I kind of envision something rock-y or metal-y but maybe mostly instrumental/not like, with lyrics?
or possibly he's more of a special topics podcast kind of guy, or a play the news in the background kind of guy - I imagine he's gotta keep abreast of current events quite a bit and etc. I took a gander at the BBC radio options cuz when I do listen to stuff that's not, like, various youtube videos lmao, I tend to be an NPR listener myself, and Radio 4 and 5 seem to have news content? (from Wikipedia: BBC Radio 4, focusing on news, factual and other speech-based programming, including drama and comedy; and BBC Radio 5 Live, broadcasting 24-hour news, sport and talk programming.) I will admit Radio 3 does also sound intriguing to me (BBC Radio 3, presenting classical and jazz music together with some spoken-word programming of a cultural nature in the evenings), I do kind of like the idea of this as a "can put on in the background as an 'inoffensive' option" kind of option for Bond.
Ulysses does have him liking classical music, but like the specific shoutout is Elgar's The Enigma Variations, which I do think is a very interesting choice. Like, classical music is very broad, I can see Bond favoring/enjoying some of the less... hm. "obvious"? widely famous and you hear it everywhere? kind of pieces. edit: but also as I think on it more, I DO very vibe with the idea that he'd be into like late-Romantic/early 20th century music. And especially theme & variations. It feels right & I feel like I could come up w reasons to justify it.
Tip-tap, tip-tap went the keys. Bond heard a slurp of tea, and when Q spoke, his voice was slightly less rough. “You posh git, you like classical,” Q accused. “You always say to load your cars with rock, but you always end up tuning into the local classical station, don’t think I didn’t notice. And you make fun of 009 and his big band obsession. So here you are. Something unexpectedly cultured and oh-so-very British.” What are you, my DJ? Bond thought in Q’s direction. But then the music started. And as much as Bond pretended not to love anything, he really did love The Enigma Variations. Not that he would ever admit to such a thing. He wanted, selfishly, for Q to stay on the line and keep talking to him, but he was also… strangely tired. He found himself drifting off with Elgar in his ears and an image of Q somewhere in MI6 with a mug of tea, soothing his throat, and watching over Bond.
My other idea I have on this tho is, why limit it to Western art music or Western popular music? We take as given that Bond is a well-traveled man. I can see Bond as someone who, if he listens to music, enjoys a variety of non-Western musics. Also various musics of Jamaica. No way he stays there without absorbing something of the music culture there. I can see that also being something he either enjoys or comes to enjoy.
But yeah lol. as said in the beginning, also throwing it out to the crowd.
5 notes
·
View notes
Text
Guides and Resources for New Mlp Collectors
A collection of resources I wanted to compile for fun and for easy access, in case there’s any new collectors who are interested
UPDATE: Since this post is so long and has been a little difficult to manage due to tumblrs editing tools, I am moving this "Resource Masterlist" to my Website Here, and will no longer be updating this post on tumblr. Thank you guys for sharing and supporting this post!
Disclaimer: i am still probably considered a relatively new collector, so im not an absolute fountain of information and there are probably tons of resources I have missed, feel free to add more in the comments and reblogs. I update this post when I can to add resources and give you the most accurate information, so please click on my blog to look at the most up to date version (it is my pinned post ^^)
Identifying Ponies/ Databases and Lists of Ponies
Mlp Merch Database- Visual list with pictures of pretty much every single release of Pony Dolls/merch for every single generation, in release order. Useful for if you want to scroll through a particular generation’s releases with pictures, very thorough and complete. If you make an account you can make checklists or wishlists for yourself.
Strawberry Reef- Visual list with Pictures of Pony Doll Releases. I feel like the pictures are slightly bigger (and thus easier to look at) than mlp merch database but that might just be my computer. G1-5, though I feel like the g4-5 sections are a little incomplete. For g1 and g2 you can sort by release date pretty effectively. This website is ESPECIALLY useful for quickly identifying ponies because you can sort by color, pose, or characteristics! However it’s not as complete a list as mlp merch database or my little wiki.
My little wiki- One of my favorite wikipedias ever (It’s an actual wiki, NOT A fandom wikia). Has lists of every release for every generation (Though the more recent gens might not have photos for every single release yet). The lists are NOT visual lists like the previous two resources so I use it less for identification, more for finding out more specific information about a certain toy. It will list pretty much every single variation/regional variant of every toy, as well as more information about their releases, which accessories they came with, backstories from the back of the box, ect.
Toy Sisters- I use this website less for identification and more for getting really good close up photos at every single pony and their accessories if you want to get some close up, detailed looks before you buy for example. You can sort generally by type, pose and year. As of writing this they do not have g5 info. If you collect other dolls or toys this website may be useful to you because they have more than just ponies.
Ponyland Press- Has photos and information on g1 releases in order, as well as country exclusive releases. Also has some information on certain accessories, ponywear or other merch. Also has some information on cleaning and some restorative information.
Restoration and Cleaning
(IMMEDIATE PSA IF ANYONE IS LOOKING AT THIS LIST TO RESTORE A PONY WITH MARKER OR HIGHLIGHTER ON HER: do NOT use acne cream like removezit or any other creams on her! This can lead to awful, permanent discoloration and staining! Instead I would look at what the mlp preservation project (linked below) says about sunfading!)
How to clean- Very basic guide on thoroughly cleaning toys, plus some styling tips
Hair Styling Tips
More Hair Styling Tips
Hair Styling: How to make twists and buns! This guide is intended for customs and talks about pushing pins into the pony and trimming the hair once you’re done but im sure it can be adjusted for non customs in a way where you don’t actually cause harm to the pony
MLP Preservation Project- One of the most useful guides for restoration, has sections on pretty much every major restoration need you might have. Links to so many different sources, tutorials and guides for fixing your ponies if something is badly wrong with them. godsend.
The Lavender Lagoon- A resource specifically for G2! Has identification and checklist materials but also has guides for hair matching and color matching eye crystals if your g2 pony's eyes have fallen out
Hair Matching Guide- A guide for closest hair color matches using dollyhair colors. Has g1, but it is a wip site. Looks like it will have other generations eventually too
Hair Length Guide- By no means complete, but has a bunch of the exact hair lengths for certain ponies g1-g3 written out, useful for looking for exact hair length measurements for rehairing. (Side note: If you can’t find how long a certain pony’s should be, ask around the community! I don’t bite and would be happy to measure a pony’s hair for you if I have the same pony, and I’m sure there are many other collectors who would be willing to do the same ^^)
Rehairing Youtube Tutorial: Using the main method most commonly used, in my opinion the easiest hairing method
Rehairing Youtube Tutorial: Loop And Lock Method: For if you struggle with gluing hair into the head
Alternate rehairing Method Tutorial
Rehairing with Yarn Youtube Tutorial
Little tutorial I made once about retailing (rehairing the tail)
Youtube tutorial for restoring g1 glitter symbols (Restoring non glitter symbols would be similar, just without the use of glitter)
Aikarin’s Custom Tutorials: A ton of tutorials related to creating custom ponies, also has some stuff that could be used with restoration
More Custom Tutorials: Intended for customs but techniques could also be used for restorations
Reflocking Youtube Tutorial - This video in particular shows reflocking small patches of missing fur. Be sure to look at the guide linked on the mlp preservation project as well
Materials for Restoration
Oxiclean- Good for cleaning ponies
Magic Eraser- Good for cleaning Stubborn marks on dirty ponies. Please be careful of cutiemarks, eyes or other painted symbols. For less stubborn marks or if you dont have a magic eraser you can use a toothbrush with dish soap on it :>
Baking Soda- I have heard that using this can help get rid of bad smells on toys, if your pony has a dirty odor! Have not tried this myself. Cover the pony in baking soda in a baggie for a few days. Similarly if you want to restore smells by scenting a pony you can use fragrances, though be careful because certain chemicals may damage your ponies!
Shampoo and Conditioner- Essential for washing and styling manes and tails. NOTE: If you have a pony with UV based color changing hair (like a g1 Sunshine Pony or something similar) Its recommended Not to wash it with soap or shampoo as it can damage the hairs ability to change color! be very gentle, water should wash it fine
Shimmerlocks- My personal favorite place to buy hair. They have close color matches for pretty much every single g1 (And have it set up for if you just search the pony’s name it will show you the closest hair matches for them!). Each (normal nylon) hair color is about 5 dollars, and they also have affordable rehairing tools and needles for only a dollar each. I’ve emailed them for color matching help before and they respond quickly and are very nice and helpful. They also have (slightly more expensive) color changing hair, glow in the dark hair, and textured hair (that are probably for other, non mlp dolls since i assume you need different hair plugs for them, but super useful if you’re a general doll collector, not just mlp)
RestoreDoll- I haven’t used this one personally but have heard people recommend it ^^
Dollyhair- A little controversial since the previous owner has had links to racist, antisemitic, and white supremacist sites, but the website is now under new ownership and is women and poc owned now! Wanted to get that out of the way since I was originally misinformed about the site and thought it was bad to use, it’s important to know about it’s past but also important to note the new ownership. They offer a lot of different hair colors, textured hair, Rehairing tools, Doll paint and even hair fragrances, with their (normal nylon) hairs being about 4 dollars each
My Little Customs- UK based nylon hair distributor, has a lot of nylon hairs but also other special hairs. They also have flocking and other materials useful for restoring dolls.
RIT Dye- The dye I use for pony hair (I have heard people also can use it for dying pony bodies for customs, but you have to be careful storing them because it could stain other ponies over time!). Good, high quality, long lasting and not fading. If you are repinking a pony with faded pink hair, I always use Petal Pink
Forceps- If you can find some online, wonderful tool for removing hair, rusty tails, or any object that might be inside your pony. Godsend, I use it all the time when rehairing. Tweezers can also work if you dont have.
Fabritac- Glue of choice for Rehairing and gluing heads back on
Fun Flock Cottonball white- Can be use to reflock or flock a pony. Visually looks similar to a g1 so soft, though the texture and look is slightly different. This is what I’ve used to restore a so soft in the past
Mod Podge- Glue of choice for flocking
Apoxie Sculpt- This is what many people use to restore broken or chewed off body parts. Durable, though may be a little more difficult to use and expensive than other basic air dry clays.
Model Magic- Personal choice for air dry clay to use to fix broken/chewed off body parts. You specifically need an air dry clay (as you cant really bake a pony body without it melting) and Model Magic doesn’t crumble and has a soft (? dunno how to describe it) toylike, texture when it dries. Just note you should avoid getting it wet. You could also use your own personal choice of air dry clay.
Rust Removers- I typically just use white vinegar to clean rusty bodys/tails/beddy bye eyes. Letting the rusty pony/hair sit in a white vinegar bath and scrubbing gently with a tooth brush will remove most rust. For harder to remove rust I’ve heard Rit Rust Remover works well, though this is more expensive and I haven’t tried it myself.
EcoStardust Glitter- I specifically sought out a biodegradable glitter for my restorations, and this is the one I’ve used. Has basic colors of glitter in various sizes. (Choosing the finest option they had) It isn’t exactly the same fineness as the original g1 glitters, but it was fine enough to work and look good on a complete cutiemark restoration. Here’s an example of what it looks like on an actual pony if you wanna see how it looks compared to the original glitter. Please note you can use whichever glitter you want, there are definitely better/closer matches to the look (And I’m sure normal glitter is cheaper/easier to get). If you don’t mind using a non biodegradable one look for “ultra fine”, I just specifically felt better using a biodegradable one ^^
Acrylic Paint- Good for custom work but also for restoring Cutiemarks!
Paintbrushes- You’ll need different kinds depending on what you’re doing. Get high quality nice ones if you wanna paint a custom or do detailed cutiemark work. If you have any of those cheapo, bendy, shitty dollarstore paintbrushes: those are great for gluing hair into heads because they’re bendy and can reach hard to reach areas, and you wont destroy an actual good brush with glue.
Hydrogen Peroxide: Can be used with sunfading to safely remove certain stains, read more here
Accessories
HQG1C- This is actually a huge, fan project creating a ton of “high quality g1 customs” they’re very cool. I’m putting them here not only for their customs but they also have cool stuff for customizers and collectors: Blank Pony Bases, Hair/rehairing tools, replacement shells for sea ponies, replacement cowboy hats for a big brother pony like Tex, ect. Here is Clipper’s website (Ships in USA) And here is a UK distributor and also another UK distributor
Sweetheart Sister Earring Replacements- (Sometimes I see these going out of stock, I’m linking someone who’s selling them as of writing this on july 28, 2023)
Flutter Wing Replacements and Windy and Summer Wing Replacements- (Sometimes I see these going out of stock, I’m linking someone who’s selling them as of writing this on july 28, 2023). Also worth noting the pony preservation project has a few tutorials on how to make some wings, these are just links for if you want to buy some.
Custom Flutter Wing Tutorial- This specific one is a custom look a little different from the original flutter wings, but looks gorgeous
Dress Ponywear Tutorial- A pattern I made myself of a basic ponywear dress, free to use. Works for g1 and g3 (have not tried to adjust it for other generations yet)
Pony nightcap sewing tutorial- idk thought I’d throw this in too, very simple sleepy nightcap sewing tutorial that fits ponies, free to use (I made it for a bbe)
Pony Blankets, Bandanas, diapers and other accessories patterns- To replace missing accessories if you wanted to sew them yourself
Community (Forums or Areas you may want to go to ask questions from others!)
My Little Pony Trading Post- A dedicated MLP forum, with sections dedicated to discussions (I often see people asking or answering questions about restorative measures for example), art, customs, or other topics. No profanity is allowed and you have to be over 16
My Little Pony Arena- I know this forum exists and that a lot of people discussed restorative topics on there and used it as a resource for stuff like that, and so I felt the need to mention it: but the site is quite literally unusable if you don’t have an account, you can’t access any pages, and to make an account you have to wait for it to be approved. I tried signing up but it has been awhile and I’ve heard nothing back, so I’m assuming this is one of those sites that are largely inactive in the modern day 😔
My MLP Discord Server- Figured I’d throw this in there: An MLP server I made for fans of all/any generation, not necessarily toy specific either. If you wanna ask me or anyone else a question or advice about toys or restoration or something or you just wanna say hi feel free to pop in :) Very Very causal
MLP Collectors Discord Server- Not mine but very fun, for fans of all gens, some nice people there :) Is a lot larger and more structured than my own server
108 notes
·
View notes
Text
Good News - April 1-7
(Edit to update support link) Like these weekly compilations? Tip me at $kaybarr1735 or check out my Dandelion Doodles!
1. Three Endangered Asiatic Lion Cubs Born at London Zoo

“The three cubs are a huge boost to the conservation breeding programme for Asiatic lions, which are now found only in the Gir Forest in Gujarat, India.”
2. United Nations Passes Groundbreaking Intersex Rights Resolution

“The United Nations Human Rights Council has passed its first ever resolution affirming the rights of intersex people, signaling growing international resolve to address rights violations experienced by people born with variations in their sex characteristics.”
3. Proposal to delist Roanoke logperch
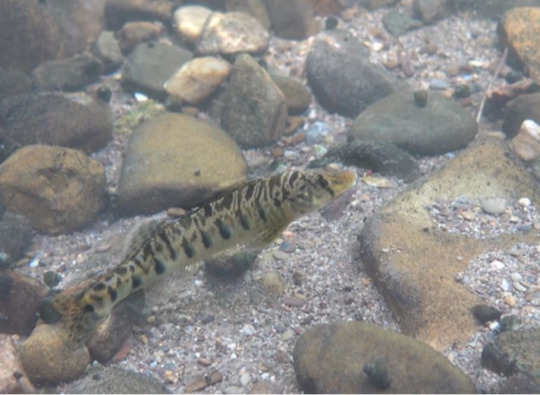
“Based on a review of the best available science, the U.S. Fish and Wildlife Service (Service) has determined that the Roanoke logperch, a large freshwater darter, is no longer at risk of extinction. […] When the Roanoke logperch was listed as endangered in 1989, it was found in only 14 streams. In the years since, Roanoke logperch surveys and habitat restoration have more than doubled the species range, with 31 occupied streams as of 2019.”
4. Fully-Accessible Theme Park Reopens Following Major Expansion

“Following the $6.5 million overhaul, the park now offers [among other “ultra-accessible” attractions] a first-of-its-kind 4-seat zip line that can accommodate riders in wheelchairs as well as those who need extra restraints, respiratory equipment or other special gear.”
5. ‘The Javan tiger still exists’: DNA find may herald an extinct species’ comeback

“A single strand of hair recovered from [a sighting] is a close genetic match to hair from a Javan tiger pelt from 1930 kept at a museum, [a new] study shows. “Through this research, we have determined that the Javan tiger still exists in the wild,” says Wirdateti, a government researcher and lead author of the study.”
6. Treehouse Village: Eco-housing and energy savings

““The entire place is designed and built to meet the passive house standard, which is the most energy-efficient construction standard in the world,” says resident Wayne Groszko, co-owner of one of the units at Treehouse.”
7. 50 rare crocodiles released in Cambodia's tropical Cardamom Mountains

“Cambodian conservationists have released 50 captive-bred juvenile Siamese crocodiles at a remote site in Cambodia as part of an ongoing programme to save the species from extinction.”
8. The Remarkable Growth of the Global Biochar Market: A Beacon of Environmental Progress
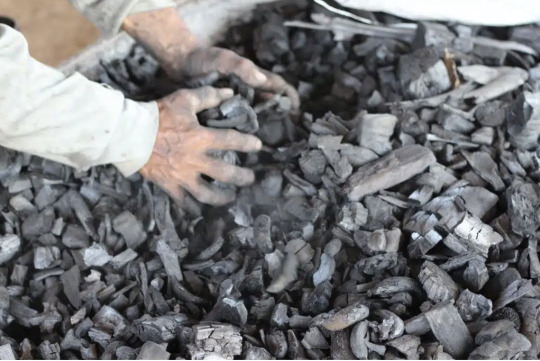
“Biochar, a stable carbon form derived from organic materials like agricultural residues and forestry trimmings, is a pivotal solution in the fight against global warming. By capturing carbon in a stable form during biochar production, and with high technology readiness levels, biochar offers accessible and durable carbon dioxide removal.”
9. 'Seismic' changes set for [grouse shooting] industry as new Scottish law aims to tackle raptor persecution
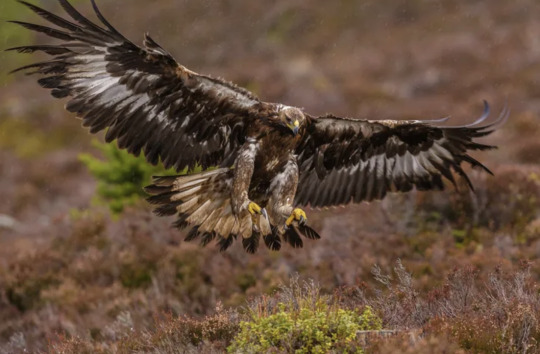
“Conservation scientists and campaigners believe that birds such as golden eagles and hen harriers are being killed to prevent them from preying on red grouse, the main target species of the shooting industry. […] Under the Wildlife Management and Muirburn Bill, the Scottish grouse industry will be regulated for the first time in its history.”
10. White House Awards $20 Billion to Nation’s First ‘Green Bank’ Network

“At least 70 percent of the funds will go to disadvantaged communities, the administration said, while 20 percent will go to rural communities and more than 5 percent will go to tribal communities. […] The White House said that the new initiative will generate about $150 billion in clean energy and climate investments[…].”
March 22-28 news here | (all credit for images and written material can be found at the source linked; I don’t claim credit for anything but curating.)
#hopepunk#good news#lion#conservation#zoo#india#intersex#lgbt rights#human rights#fish#endangered#disability#accessibility#amusement park#tiger#big cats#extinction#extinct species#ecofriendly#affordable housing#energy efficiency#crocodiles#global warming#climate change#scotland#raptor#eagles#hunting#solar panels#solar energy
9 notes
·
View notes
Note
How do you write so well?? Your writing is so so beautiful!!! Any tips?
Oh this is so sweet 😭😭 First of all, thank you! I don’t feel like I have any particularly revolutionary advice to give, but these would be my main points:
1. Practice!!! Write. A lot. I posted my first fanfic in 2017 and had already been writing a lot before that, including original stories, poetry, and just about anything else I could think of. From what I’ve seen, I definitely skew on the older side of enha writers on tumblr, so please remember to be patient and gentle with yourself, especially if you’re young and/or newer to writing. The stuff I was writing at 16 certainly doesn’t read like the stuff I write now, but all of that practice helped me to get there. Writing is hard. I think it always will be. But give yourself grace and keep at it, and you’ll only keep getting better.
2. Read!!! There are so many great authors out there that do amazing, innovative, exciting things with words. I always feel inspired to write after I read a really great book, and reading will also strengthen your vocabulary, grammar, and sense of personal style/voice.
3. Let your writing be “bad” !!!! I very rarely reread stories after I post them, because every time I do, I find at least twenty things I want to change. 😭 Writing and words are a living thing, and there’s absolutely a certain amount of subjectivity to what makes writing “good.” There’s always going to be room from improvement, and you’re always going to be able to find something to nitpick or criticize if that’s the perspective you take. Fanfiction in particular is great, because if your story is something you’re excited about, there’s a 99.99% chance that other people will be excited about it too. It doesn’t have to be perfect. Take that pressure off of yourself, and enjoy the process. Use the experience and the feedback and the practice to write something even better the next time around.
4. Develop a strong editing routine. This is probably the most technical and specific point, but I think it gets overlooked. My first drafts look a LOT different from what I post, usually. I don’t remember where I found this tip, but my writing changed for the better when I started rewriting all/most of my story as part of the editing process. Literally, once I finish a draft, I’ll open a new document and will retype most/all of it, changing things as I go. This helps me to catch little errors and also to improve the overall flow and pacing of a story. I recommend trying it if you haven’t! Like I said before, a lot of “good” writing is subjective, but editing is where you improve the more objective aspects. Making sure that things like grammar, word choice, sentence variation, and general plot are solid will absolutely strengthen your writing.
5. This last tip is actually more for readers: INTERACT!!!!! Reblog, comment, send asks, scream in the tags!!!! Do all of the above!!!! Writing is a long, difficult process, and it takes a lot of effort to post a story. It’s especially hard when you’re new. Like I mentioned above, I posted my first fanfic almost seven years ago, and the only reason I kept posting more was because people interacted with my work and took the time to tell me that they enjoyed it. If you want to read better writing, if you want to read longer stories, if you want more stories to read in general, give writers the incentive to write! I love writing. I really do. But it takes a lot of time and effort, and it’s a labor of love. Posting a story feels a bit like shouting into the void. At the end of the day, your interactions are what make it worth it for myself and a lot of others that publish in the fanfic space. If you’re a writer that is struggling to get any kind of interaction/feedback, a good place to start can be connecting with other writers and building a little community! It will help tumblr (or wherever you write) to not feel so lonely. Plus, having writer friends is a wonderful way to share your woes and get inspiration.
At the end of the day, I think that genuinely enjoying writing is half the battle. If you’re already there, that means you like words. You like stories. You like putting puzzle pieces together and making characters come to life. Liking those things is where it all starts, so keep at it, trust the process, and the rest will follow. 🤍
#WHEW this got long#I hope there’s something in here that’s helpful for you!!!!#ask#anonymous#writing
6 notes
·
View notes
Text
thinking more about writing techniques in my theoretical introduction to creative writing course
1) there is no bad writing. only writing that doesn't achieve what it's set out to do
2) following from this, in workshops and critique, listen to the writer first. find out what type of story they want to create. your job is to help them towards that goal, NOT towards what you personally would write or want to read in their position
3) how to write with good flow. musically. sentence variation and length. impactful and deliberate word choice and connotations
4) you have complete control over time-- how long or short a given length of time within the story takes, and how to manipulate this. how to create a sense or urgency or boredom.
5) sense of scale. use of reference images and tapping into other media for inspiration. make a scene grand or claustrophobic
6) characters, characters, characters. don't start with those endless OC questionnaire checklists. instead take them along for the day with you. imagine how they would react to every mundane scenario. exercises in bouncing characters off each other. how to recognize when they get their own Voices
7) and from that, dialogue and speech tips
8) finally, for now: how to get yourself to just sit down and write. write the most self-indulgent thing possible. start from a place of joy whether that joy is wholesome or disturbing. find excitement in your scene-building. the magic of knowing you can edit anything. permission to be very very bad, for real this time. the magic of writing something with the understanding that you are Not going to show anyone else. how to write every day like this. how to remind yourself of how to do this
2 notes
·
View notes
Text
Some quick tips for peeps using MJ that don't want it to look like everyone else using MJ.
1. The Ultra Stylish All Dress Alike
First, adjust your style setting (--s (number)). This is how much of the Midjourney 'secret sauce' is added. The lower this number, the closer to your prompt the style will be, at a cost of coherence and 'prettiness'.


Same prompt, same seed, style 500 on the left, style 25 (my preferred setting) on the right. The differences in lighting, pose, skin reflectivity, etc are apparent. You can think of it as a "de-instagram" setting.
3. Use your Variations


"A dinosaur astronaut", original gen, vary (subtle) and Vary (strong) results
If you get something you like for an initial result, the first thing I tend to do is immediately to a Vary (Strong) on it. The results are usually better than the original one because you're essentially re-running the initial prompt with the first result as an additional image prompt, reinforcing the subject.
Using subtle variations to get closer to what you want is one of the big features of MJ, and it's sorely underused.

I recommend setting to low variation mode so your normal variations are subtle ones, and putting on remix mode. Remix mode prompts you to change the prompt every time you do a variation. If you're close but something's not right, that's an easy way to go.


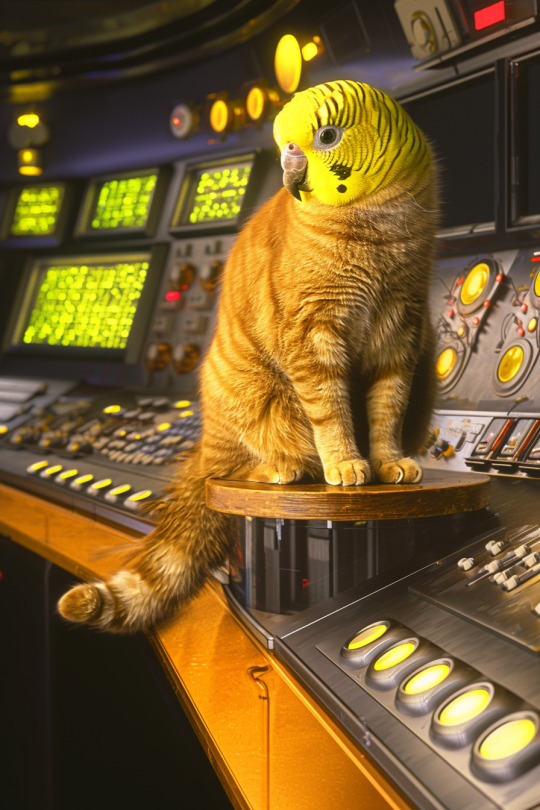
Changing prompts is especially useful if combined with Vary (Region). Basically, if you like everything about a pic but some select details, you can highlight an area and have the system produce new variations just changing that region. It's obvious use is fixing generation errors, but by changing the prompt, you can get results that the robot can't imagine as a solo prompt.
3. Get Weird With It
--weird is a highly unused setting. It's also very powerful, while it goes up to 1000, I tend to not go above 1-5.
A cartoon penguin made of knives at 0 weird, 1 weird, and 50 weird:
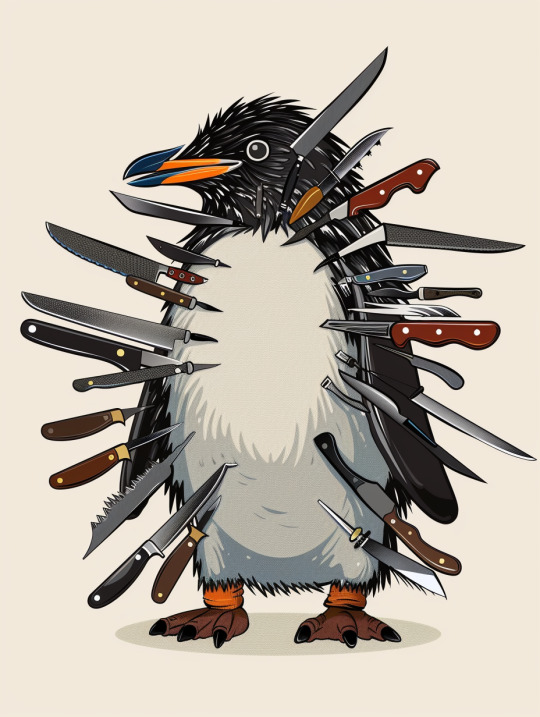
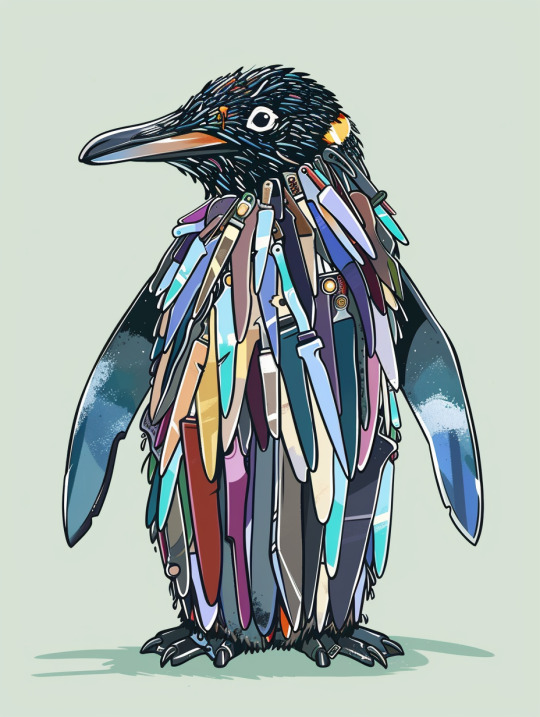
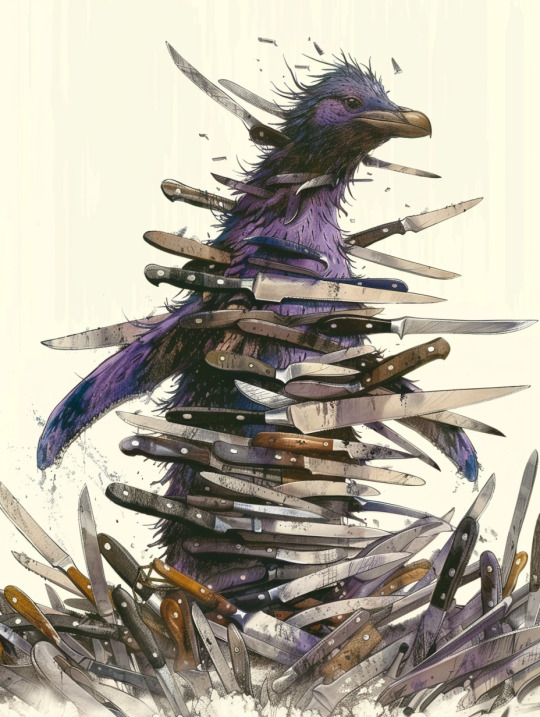
Near as I can tell, weird restricts the 'does this make sense' checks, allowing for more out-there results, both in terms of style and subject matter. At the very low levels (1-5) it increases prompt adherence, at higher levels it reduces it substantially.
4. Prompt Big and Blend your Concepts
MJ deals with short prompts by filling in its own leanings where there's gaps, so short prompts look the most midjourney-esq while longer ones (especially when combined with --weird or a low --s value) fight back against it more.
When prompting for art styles, prompting for multiple art styles/artists at once produces weird hybrids. Prompting an artist with the wrong medium (A painting by a sculptor, a drawing by a cinematographer, etc) also can produce new, strange results.
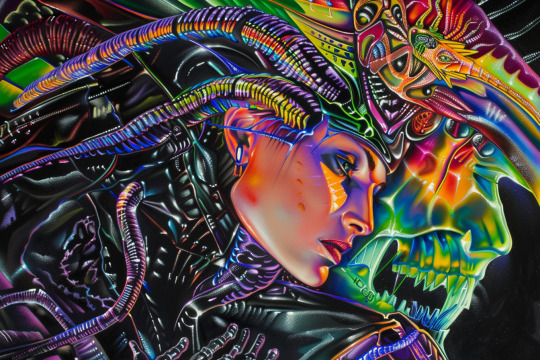
(Lisa Frank/H.R. Giger style mashup using :: technique (below))
But the real trick is in "prompt smashing" or multi-prompting. Basically, midjourney uses :: to split prompts. Intended function is to allow you to add individual weights to each section, if you want something strongly emphasized.


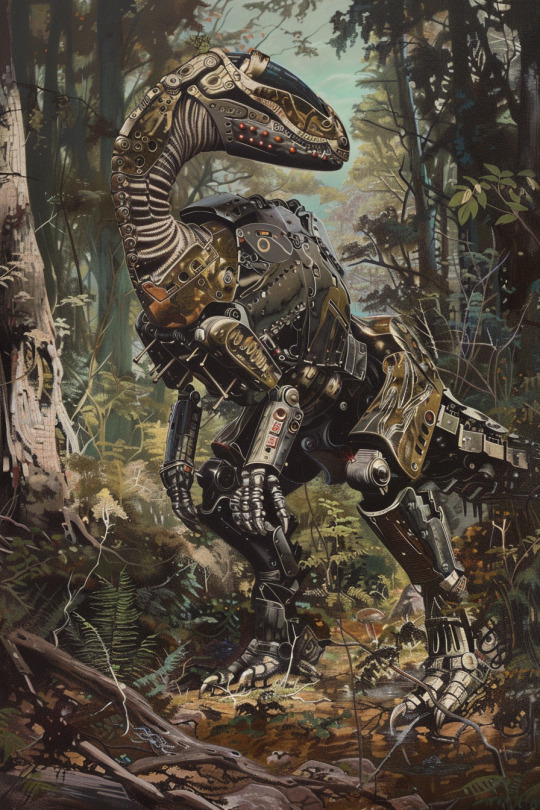
But in practice, it blends the concepts of the two prompts to create a new, third thing.
As above with "an illustration of an armored dinosaur in the woods, in the style of vibrant comics, toycore, ps1 graphics, national geographic photo, majestic elephants, exotic, action painter" then "daft punk & particle party daft punk world tour, in the style of romina ressia, polished craftsmanship, minimalistic metal sculptures, ultra hd, mark seliger, installation-based, quadratura" and then the two prompts run together separated by ::.
Each one was also iterated to produce a better result than the initial gen.
5. Just edit the darn thing.
Learning to edit your works outside of the AI system will always improve your work beyond what the machine itself can do. Whether it's just the simple matter of doing color adjustment/correction:
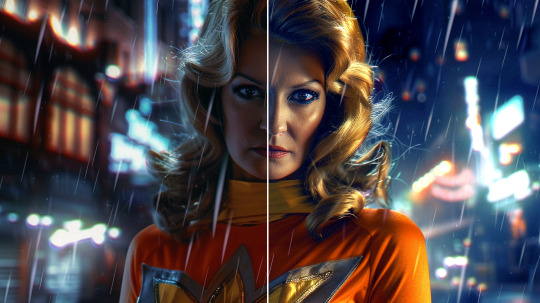
Or more heavy compositing and re-editing combined with other techniques:

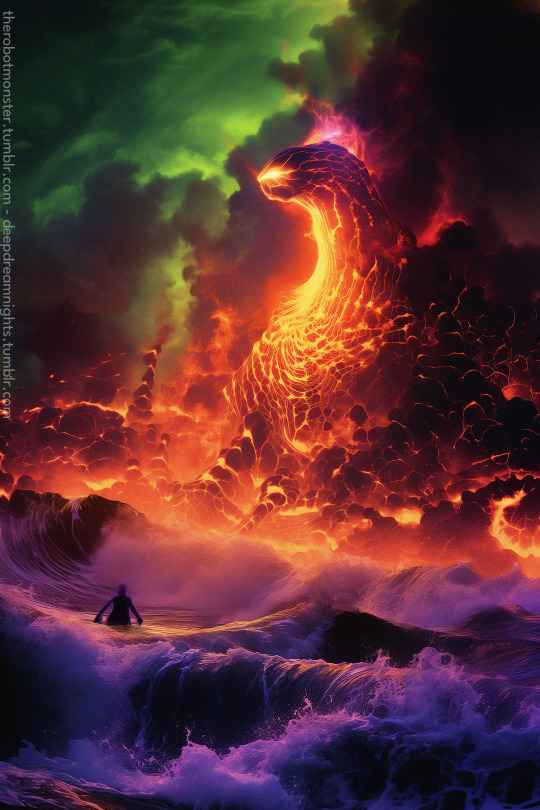


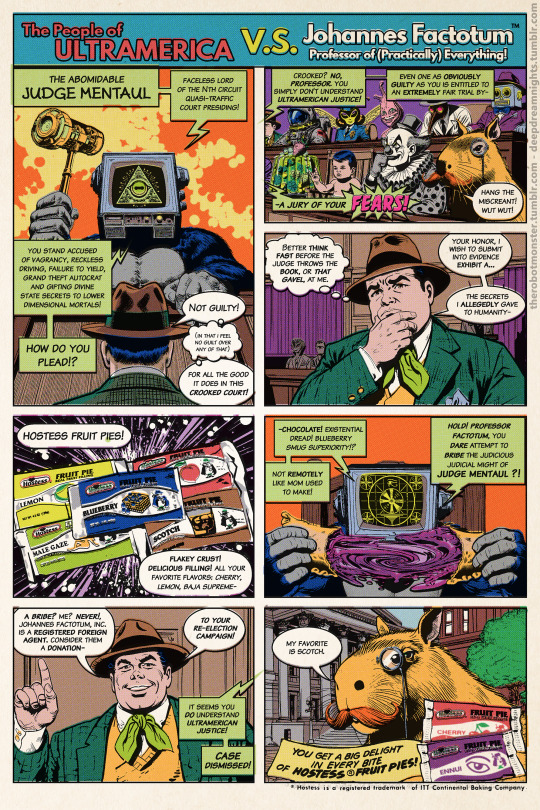

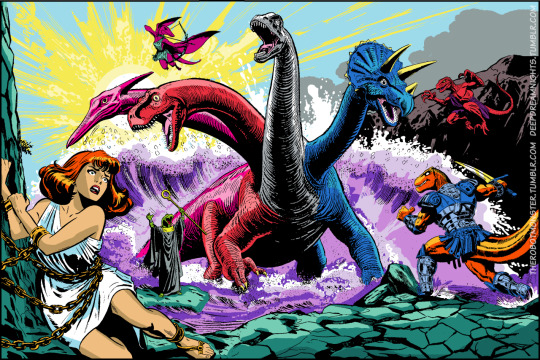
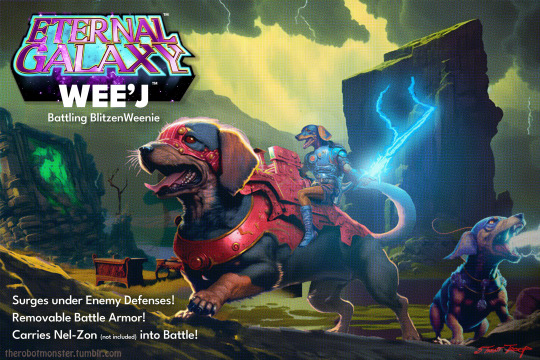
Editing and compositing your gens is always superior to just posting them raw, even if its just a little cropping to get the figure slightly off-center or compiling 20ish individual gens into a single comic-style battle scene before recoloring it from scratch.
But at the very least, before you post, go over the image and make sure there's nothing glaring.
I don't think that making or using AI art/image generation is morally wrong, as you guys know, but I have to admit that slotting a wibbly-lined low effort image selected from the first result set from Midjourney in your content is incredibly tacky. At least select something that looks good. Maybe something without the boring AI "sheen" look either.
You see this a lot in clickbaity content like web spam and youtube shorts attempting to algorithm game.
1K notes
·
View notes
Text
Ultimate Guide to Using Suno AI for Song Generation
Lyrics Formats, Tips, and Proven Techniques
Leverage structured prompting, phonetic hacks, and filter work-arounds to turn plain text into full-blown tracks—lyrics, music, vocals, the whole stack. Everything below is battle-tested by Redditors, Discord gremlins, and a few caffeine-overdosed engineers.
🏁 1. Getting Started
Sign-Up & Modes
Create a free account on suno.com or the mobile app.
Simple Mode → quick one-liner prompts (“upbeat pop song about summer”).
Custom Mode → drop your own lyrics + style blurb. This is where the real control lives.
Credit System
Free tier ≈ 500 credits / month (~10 songs per day). Each generation burns credits—experiment with purpose.
Prompt Structure Hot-take
Write a clear emotional/story theme.
Brainstorm via ChatGPT if you’re clueless.
Generate 2-4 versions, pick the least offensive one, then iterate from there.
Use the extend from timestamp trick if vocals are off (saves credits).
🎤 2. Lyrics Formatting: Make the AI Sing, Not Stutter
Core Section Tags (wrap in square brackets)
[Intro] – mood-setter, often instrumental or whispered. Works 80-90 %.
[Verse] / [Verse 1] – 4-8 bars of story. Prevents rushed verses.
[Pre-Chorus] – 2-4 bars tension builder. Pop/K-pop lifter.
[Chorus] – hook city. Repeat as needed.
[Bridge] – mood pivot. Adds depth.
[Rap Verse] – forces rap flow even in genres that hate rap.
[Instrumental Break] / [Solo] – no vocals, go nuts.
[Outro] – graceful exit instead of AI face-plant.
Micro-Formatting Tricks
Punctuation = rhythm control.
Comma → quick breath.
Period → phrase end.
Line break → new bar.
ALL CAPS → shout/sustain.
Phonetics – stretch vowels (“seeeeeen”) or fix weird pronunciation.
Parentheses – (background vocals), (echo), (harmony). Think ad-libs.
Asterisks – gunshot, whistle. Hit-or-miss (~50 %), but fun.
Drop-in Template
textCopy
Edit
[Intro] 2–4 lines of setup [Instrumental Break] [Verse 1] 6–8 lines, storytelling [Pre-Chorus] 2 lines building tension [Chorus] Catchy, repeatable hook [Verse 2] Variation on Verse 1 [Bridge] Emotional twist [Chorus] Repeat for emphasis [Outro] Fade with echoes (echoes)
Consistently spits out coherent, radio-length songs.
🎛️ 3. Style Prompts & Genre Mashups
Basic Style Line → “syncopated trap with 90s soul, 120 BPM, Key: G Major.”
Want a blocked artist vibe? Use obfuscation: “Tay Swifty,” “Sw*ft,” etc. ~80 % success.
Instrumental-only → put [instrumental] in lyrics or leave box blank, then style prompt = “airy jazz instrumental, wavy vibes.”
Blend genres → “London jazz × trap” + “male vocals, emotional” for unique color.
Ditch cliché fillers (“heart,” “dreams”) unless you’re writing Hallmark -core.
⚙️ 4. Advanced Wizardry
Iterate & Extend – regenerate from specific timestamps for surgical fixes.
Section Replace (Pro/Premier) – highlight 10–30 s chunk, tweak lyrics, regenerate.
Filter Bypass – asterisk profanity (“f**k”); AI still sings it, filter stays calm.
Stems – Pro plan splits vocals/instrumentals = remix playground.
Upload Your Own Beats – feed Suno a beat from Reason/Ableton, let AI lay vocals.
ChatGPT Lyric Helper – “Rewrite with same syllable count, no copyright.” Feed to Suno.
Nightmares & Fixes
Too similar? Vary prompt wording.
Abrupt endings? Add [Outro].
Glitched extension? Switch to model V3.
🧠 5. Field-Tested Best Practices
Experiment > Theory – top users (~1 k tracks) live in iteration hell.
Write Your Own Lyrics – AI-generic lines feel wooden. Personal = authentic.
Leverage Community – download LRC/SRT, share on Discord/Reddit, absorb roasting.
Cheat Codes Recap
Tags + phonetics → smoother flow.
Genre blend + BPM → fresh vibes.
Asterisks → creative (or explicit) freedom.
🚀 Go make noise.
Start tiny, iterate ruthlessly, and drop the link when you craft your first banger. I’ll pretend to be shocked.
Suggested Tags: #SunoAI #AImusic #Songwriting #MusicProduction #PromptEngineering
0 notes