#Denim Craft
Explore tagged Tumblr posts
Text
Denim Halter Top: Sew It Simple, Sew It Fast - Free PDF!
In this post, you will learn how to sew denim halter top with free PDF pattern. Step into the world of DIY fashion with this beginner-friendly guide to creating a stylish denim halter top. This backless beauty, complete with a lining and button-up back, is a fun and quick project to enhance your sewing skills. Plus, I’m giving away a free PDF pattern in five sizes to help you tailor the perfect…

View On WordPress
#Backless Top#beginner sewing#Buttoned Back#Denim Craft#Denim Halter Neck#Denim Top#diy fashion#fashion DIY#free pattern#halter top#sewing#sewing tutorial#Tie-Neck Top
8 notes
·
View notes
Text

My Boyfriend is a Lesbian (2024)
(details under cut)


#butch lesbian#butch#crust punk#crust jacket#denim jacket#fiber art#fiber crafts#photography#sewing#crafts#jean jacket#queer#queer archives#transgender#transmasc#trans man#transsexual#gay#gay history#queer history#lgbtqia#lgbt
1K notes
·
View notes
Text


The jackalope jacket, front and back of the sleeve.
#ahhhhh SKREEEEE I finished all#I’m so happy#I did give myself an injury doing this one#it was hand stitching through denim seams over and over#anyway my thumb still hurts I didn’t let it heal properly#cause I had to finish the jacket!#hand embroidery#embroidery#fiber craft#slow art#jackalope#jacket embroidery#denim embroidery#cryptid art#embroidery art#artists on tumblr
65 notes
·
View notes
Text


A jacket I embroidered a few years ago :)
124 notes
·
View notes
Text

Behold, my new storage!
This is a shortened jean leg, but cut open from just near where the fly goes to the centre of the bum, to give two pockets. Then I just cut out and sewed on some other pockets from my collection of jeans rags, and voila!
33 notes
·
View notes
Text
easy diy accessories
fingerless gloves
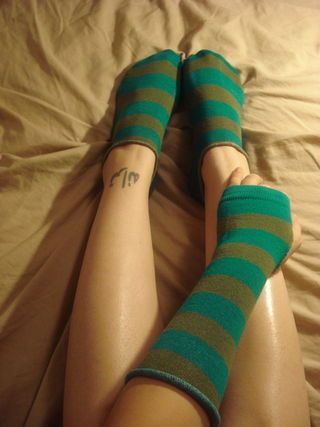


different methods: cutting socks, sewing old shirts/sweaters together or knitting/crocheting
45 notes
·
View notes
Text


The jacket is coming along. Another reminder you don't have to have talent to diy!
#punk#diy#punk clothes#art#punk culture#punk diy#punk fashion#sewing#patches#diy patches#diy punk#arts and crafts#denim#battle jacket
69 notes
·
View notes
Text

SOOOOO for my friends birthday I trifted a denim jacket and embroiderd her favorite flowers on it. She is really happy with it and I havent been on tumblr in a while so i decided why not post it.
31 notes
·
View notes
Text

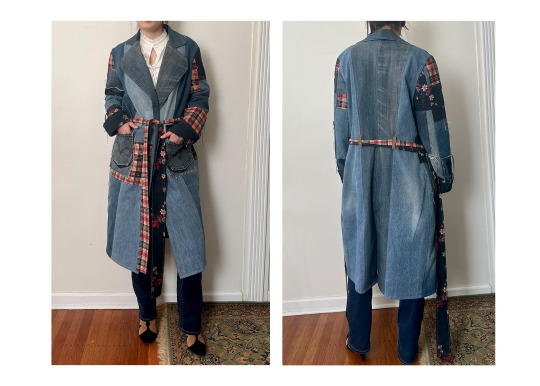
Patched and Reworked Denim Jacket - Sketch & Final Garment
Personal project for myself reworking dad's denim
All the denim used in this oversized trench was pieced and patchworked together from several pairs of old jeans. The mismatched, patchwork affect from the differing denim washes is amplified with plaid and floral cotton patches.
67 notes
·
View notes
Text


I finally got to cutting the "patches" for my jacket and sewing them on, plus picking out the new pins for when the weather is finally cool enough to wear a jacket. The only three actual patches are the "eat shit and die" racoon patch, the potion bottle with skull, and the corgi with a knife patch. The alien head is an old nipple pastie I sewed on, and the rest are old t-shirts that were falling apart but I couldn't bring myself to throw away (Pac-Man and ghosts on Abbey Road, various cacti with their names, and Brandon Rogers saying "move, im gay"). It was rather therapeutic after putting this off for so long, finally finishing the project
#battle jacket#denim jacket#patches#tshirt patches#pins#buttons and pins#buttons#system punk#cripple punk#pac man#brandon rogers#cactus#cacti#autistic stoner#stoner aesthetic#stoner nerd#nerd aesthetic#jacket patch#diy craft#crafts#clothing#clothing crafts#sewing#sailor moon#sailor uranus#sailor neptune#queer punk#they/them#pronouns pin#queer
19 notes
·
View notes
Text
This particular mend turned out to be MUCH more complex, involved, and fussy than I really ever expected it to be at the outset. That said, after all the work where I focused on taking my time to get things just so, I found out that I'm quite capable of handling larger projects like this!
First up, here, before starting, my partner Razz and I sat down, and went through our clothes with a careful eye. More and more of her pants in particular were in need of little fixes here and there, and I figured rather than going about it all piecemeal and in no particular order, not accomplishing the fixing of clothes she needs, we put them together into an order of "most wanted fixes" to "least pressing fixes".
Once I had all that info, I settled in with a measuring tape, and got to identifying all the mends that needed to happen. For every piece that was more than, say, a few inches of rip, or of a shape that standard embroidery wouldn't cut it for a fix, I cut out a piece of patch fabric, with the intention of making use of these patches by doing sashiko mends.
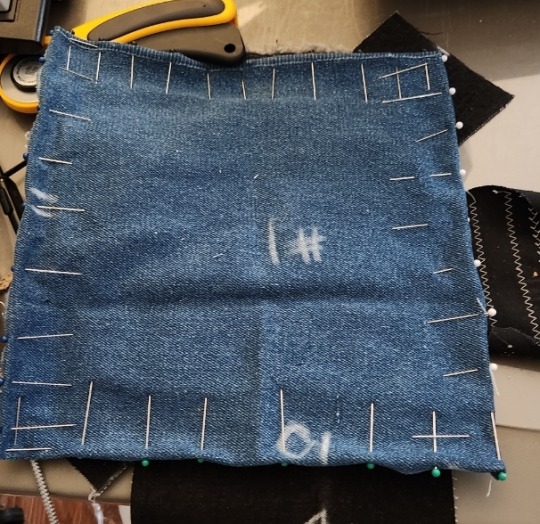
Step 1: pin the hem of the patch down, initially hoping to run it through the sewing machine to have a nice hem! Sure, it was kinda fussy doing the quarter inch hems, since I hadn't really done this before, but it's not _too_ bad in hindsight!
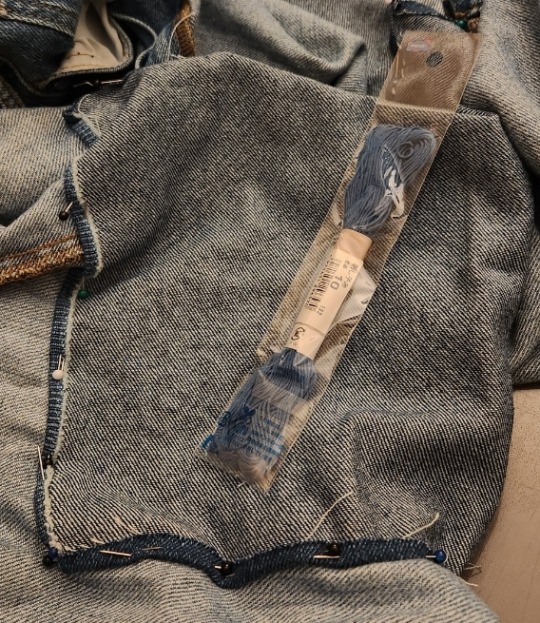
Step 2: Realize that the sewing machine foot you have on hand got mixed up with a family member's in a move, and begrudgingly realize you have to re-pin the hemmed patch directly to the jeans being mended. Grumble, grumble! Oh well, at least this light blue thread is going to be really cute on the jeans, so there's that.
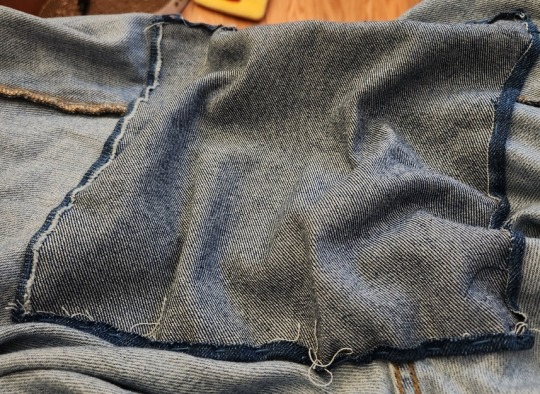
Step 3: stitch down the patch to the fabric, blissfully unaware that this big of a patch which interacts with the main seams four times like this is going to be a huge pain later!
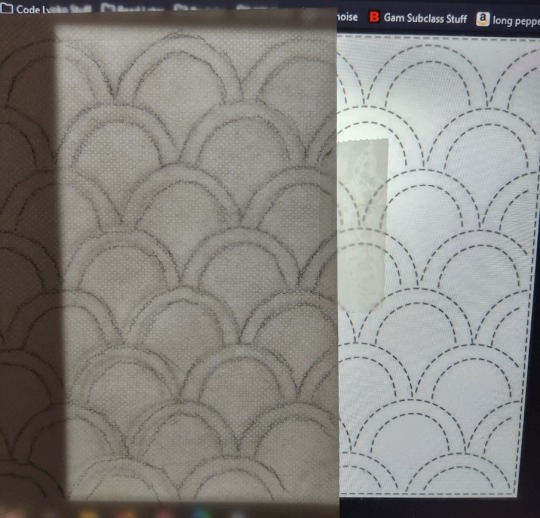
Step 4: with some clever use of tape and bumping the laptop brightness, make a tracing of the segaihana pattern onto the dissolvable backing. (I did realize later, mind you, that I could have just used something small and circular to draw this manually, but the tracing worked out just fine, so we take those!)
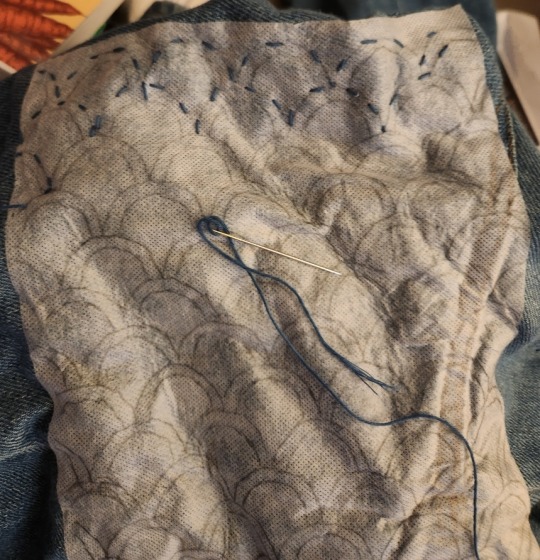
Step 5: get stitching, following the pattern on the backing! I get about this far before two things happen: first off, the sewing machine foot returned from family-home purgatory, and secondly, I realize that pushing this needle over and over with my bare hands is REALLY wearing out not only the muscles in my hands, but also thoroughly frustrating my skin, in the process.
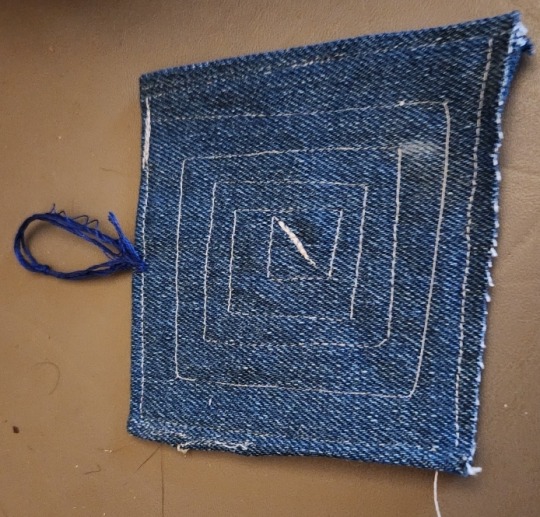
So, as a little test of the sewing machine, I made this little palm thimble! the loop of thread on the left there loops around my middle finger, and then the denim takes the brunt of pushing the needle, instead of my poor fingies!
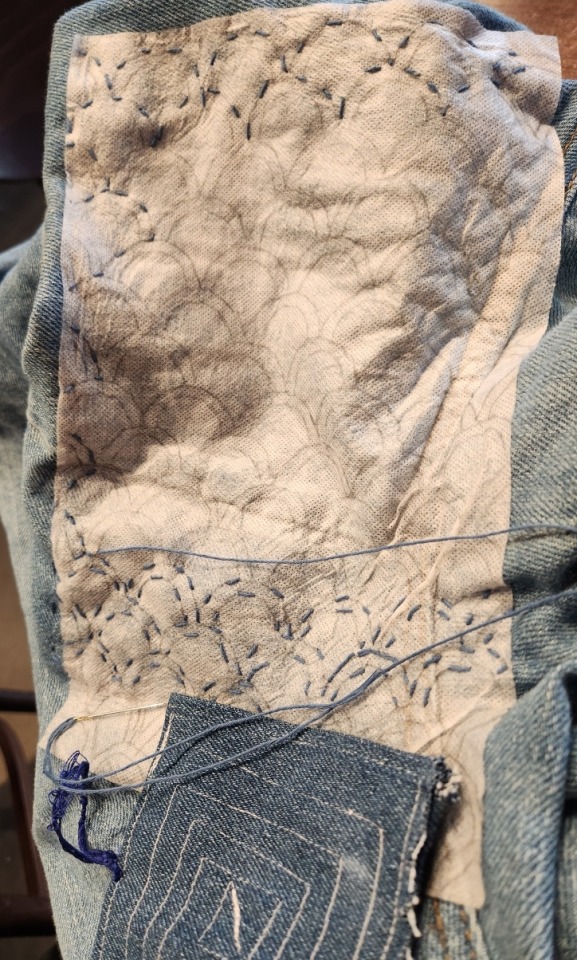
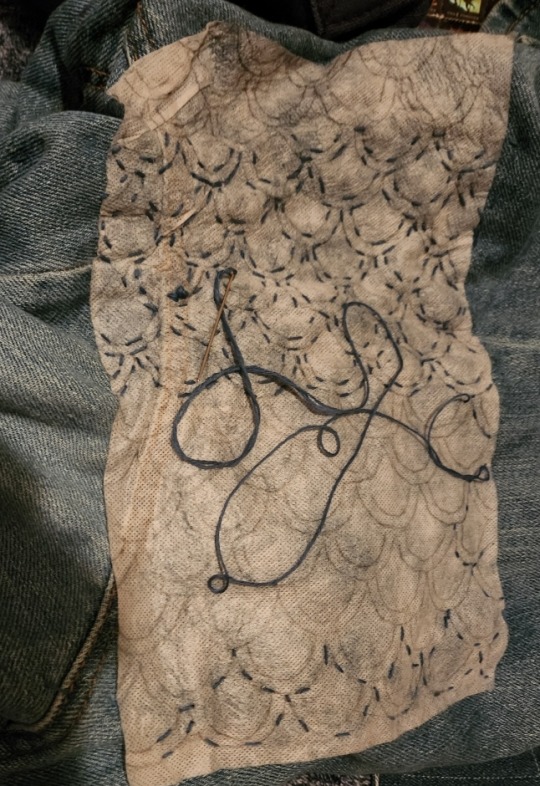
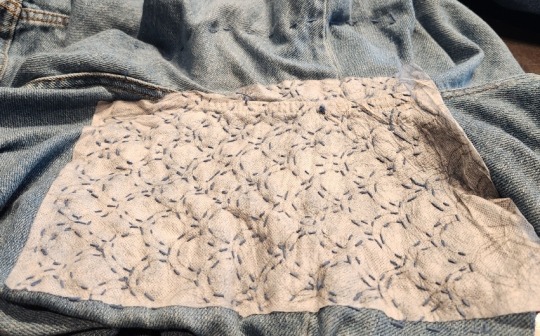
So, over the course of a few days, with a LOT of help from the palm thimble (some pieces even getting done on stream, go check out the vods: https://youtu.be/oeytUetT2Z0 and https://youtu.be/u6k-Yr4Vjn0) we get the first (major) panel done! Might not be super visible in these shots, but there is in fact a second piece to be stitched here!
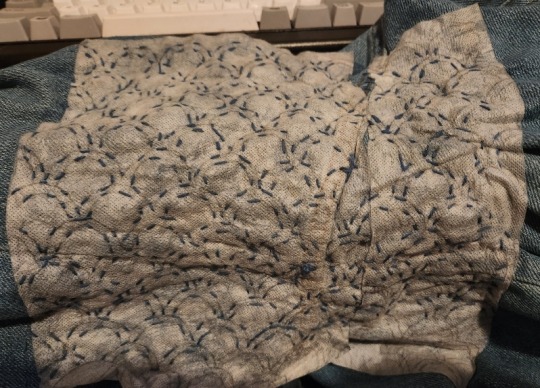
So, after yet more tracing (which took a good bit more fuss, since I had to align it with the previous panel!) we find ourselves at step 6: do the second batch of stitching! Overall, I actually really enjoyed the way this piece came together, the segaihana pattern is super pretty to look at. Plus, I learned a LOT in doing this one, the big thing being, if you're going to have trouble on both sides of a thigh of a pair of jeans, even if the damage is spread evenly on either side, break the patches up along the main seam. Sewing through the many layers of that denim is particularly taxing, especially when I'm struggling to nail the positioning of the stitches to carry on a nice pattern!
#solarpunk#slow fashion#sashiko#embroidery#hand embroidery#fiber arts#fabric art#visible mending#sashiko mending#denim mend#diy craft#hand sewing#handmade#sewing#mending#fix your clothes#queue.queue#a thousand words#sproutleboople#nesterian lifestylings
25 notes
·
View notes
Text


McCalls M8027 Shirt - uk size 16
I learned a couple of new things on this pattern - I attached trims, I learned how to put on snaps AND how to make 2 part sleeves.
The pattern intructions were a bit shoddy - they didn't explain the collar well at all, and didn't tell you when to hem OR attach the shoulders.
But as I've made more basic shirts in the past those were things I was able to work out on my own.
I really feel like my sewing skills are getting so much better! I really ENJOYED the making process and the end result was less important - however it is super nice.
The fabric is an incredibly light denim in 100% natural fiber so it feels nice, it's a cotton/linen mix. It was £12 a yard from my local fabric place.
I'm going to wear this tomorrow at my work roadshow with the jeans I made - double denim for sure.
20 notes
·
View notes
Text


Not a 100% happy with how the design is, especially on the lack since I wanted Sabine's starbird to be 9 x 9 inches but my machine is very limited with its sewing field. For now, I am content with it. I do plan on adding more Rebels/Thrawn embroidery onto it. I also think I want to add a giant purgill on the yoke of the jacket.
#star wars#star wars rebels#rebels#ezra bridger#kanan jarrus#garazeb orrelios#sabine wren#hera syndulla#chopper#zeb#sw rebels#swr#ghost crew#cosplay#embroidery#crafts#denim jacket#jean jacket#thrawn#grand admiral thrawn#loth cats#lothcat#loth cat#spectre 1#spectre 2#spectre 3#spectre 4#spectre 5#spectre 6#mandalorian
25 notes
·
View notes
Text

My jacket for Halloween! I'm going as Optimus so I wanted to give my denim jacket a little pizzazz to it. I'm thinking about adding Optimus to the top but I'm a bit nervous to fuck it up 😭
#transformers#optimus prime#halloween#halloween costumes#denim jacket#crafts#diy#diy projects#autobots#wooooo!!#low-key i cooked
10 notes
·
View notes
Text


And the base is done!! With massive pointy hood, that’s detachable with snap buttons
Now… pockets!

Many many pockets
#things I made#handsewn denim jacket#crafts#fibre arts#fibre crafts#diy#diy clothing#handsewing#sewing#denim vest
121 notes
·
View notes
Text

Me summoning art n craft blogs so I can have links for their cool Etsys to buy enamel pins
#oddly specific but you must understand#i have an undecorated denim jacket. what else do i do with it#art and craft#etsy#gecko boy
15 notes
·
View notes