#DIY Tutorial
Explore tagged Tumblr posts
Visit Tumblr Blog
Explore Tumblr blogs with no restrictions, modern design and the best experience.
Last Seen Tumblr Blogs


Fun Fact
Tumblr’s reach among the 26-to-35-year-olds in the US is 11%.
Text
IDK WHO NEEDS THIS
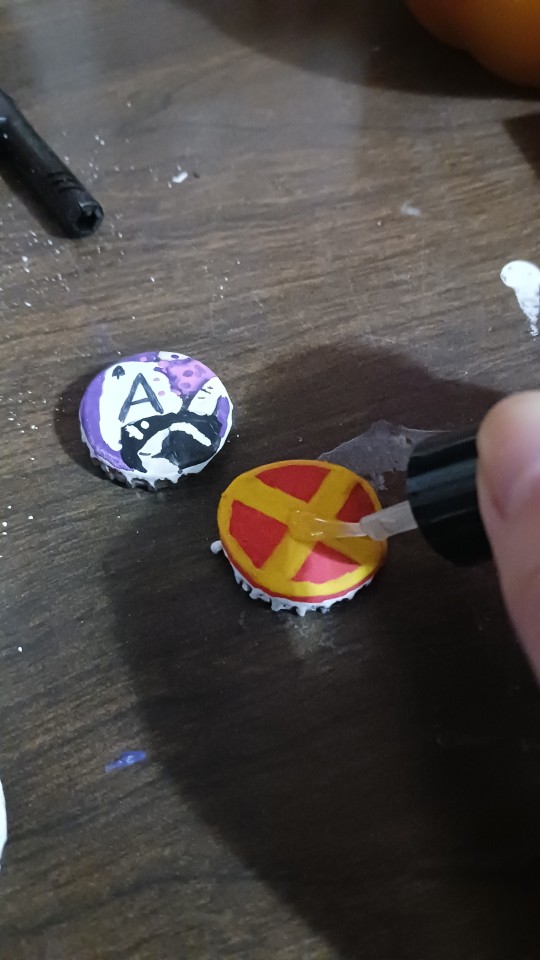
But here's how to make diy pins with a bottle cap!
☆ You will need: A bottle cap, a soda tab, and a safety pin first
☆ Then: Pliers, paint (optional), and clear nail polish later

Put the safety pin through the soda tab like this, make sure the part of the safety pin that opens is facing up


Place the soda tab with safety pin in the bottle cap, double check to make sure the opening part of the safety pin is facing up!
Then use pliers to crunch the sides of the bottle cap down on the soda tab
This will keep the tab and safety pin in place!


Then you can paint whatever you want onto the bottle cap or keep it plain
If you paint it you might want to sand the surface first or cut it up lightly to make the paint stick better
After you're done painting you can use clear nail polish as a top coat!


#diy pins#bottle cap pins#diy pin tutorial#diy tutorial#punk diy#pin diy#pin making#traditional art#art#illustration#artists on tumblr#art tutorial#tutorial#how to make pins#how to make bottle cap pins#recycling pins#ace artist#trans artist#x man pins#recycling#recycling bottle caps#romanisweirdart
98 notes
·
View notes
Text
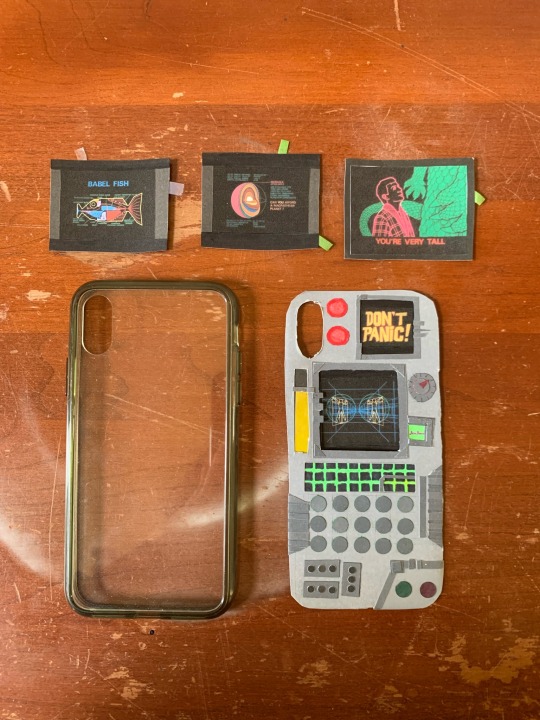
Last winter I made this Hitchhiker’s Guide to the Galaxy phone case and I’ve been waiting for today to share it!
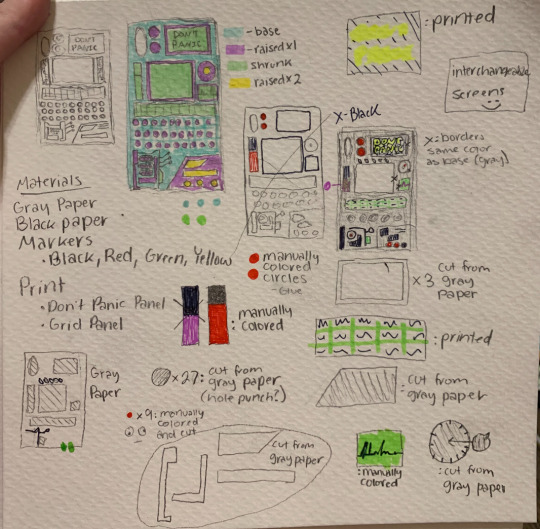
I started with this rough plan. I kinda based it off the one in the tv show but mainly pulled from my own imagination.
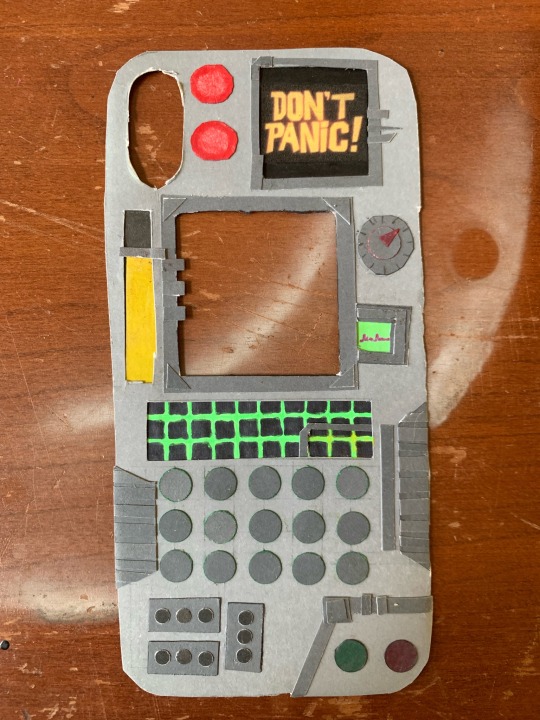
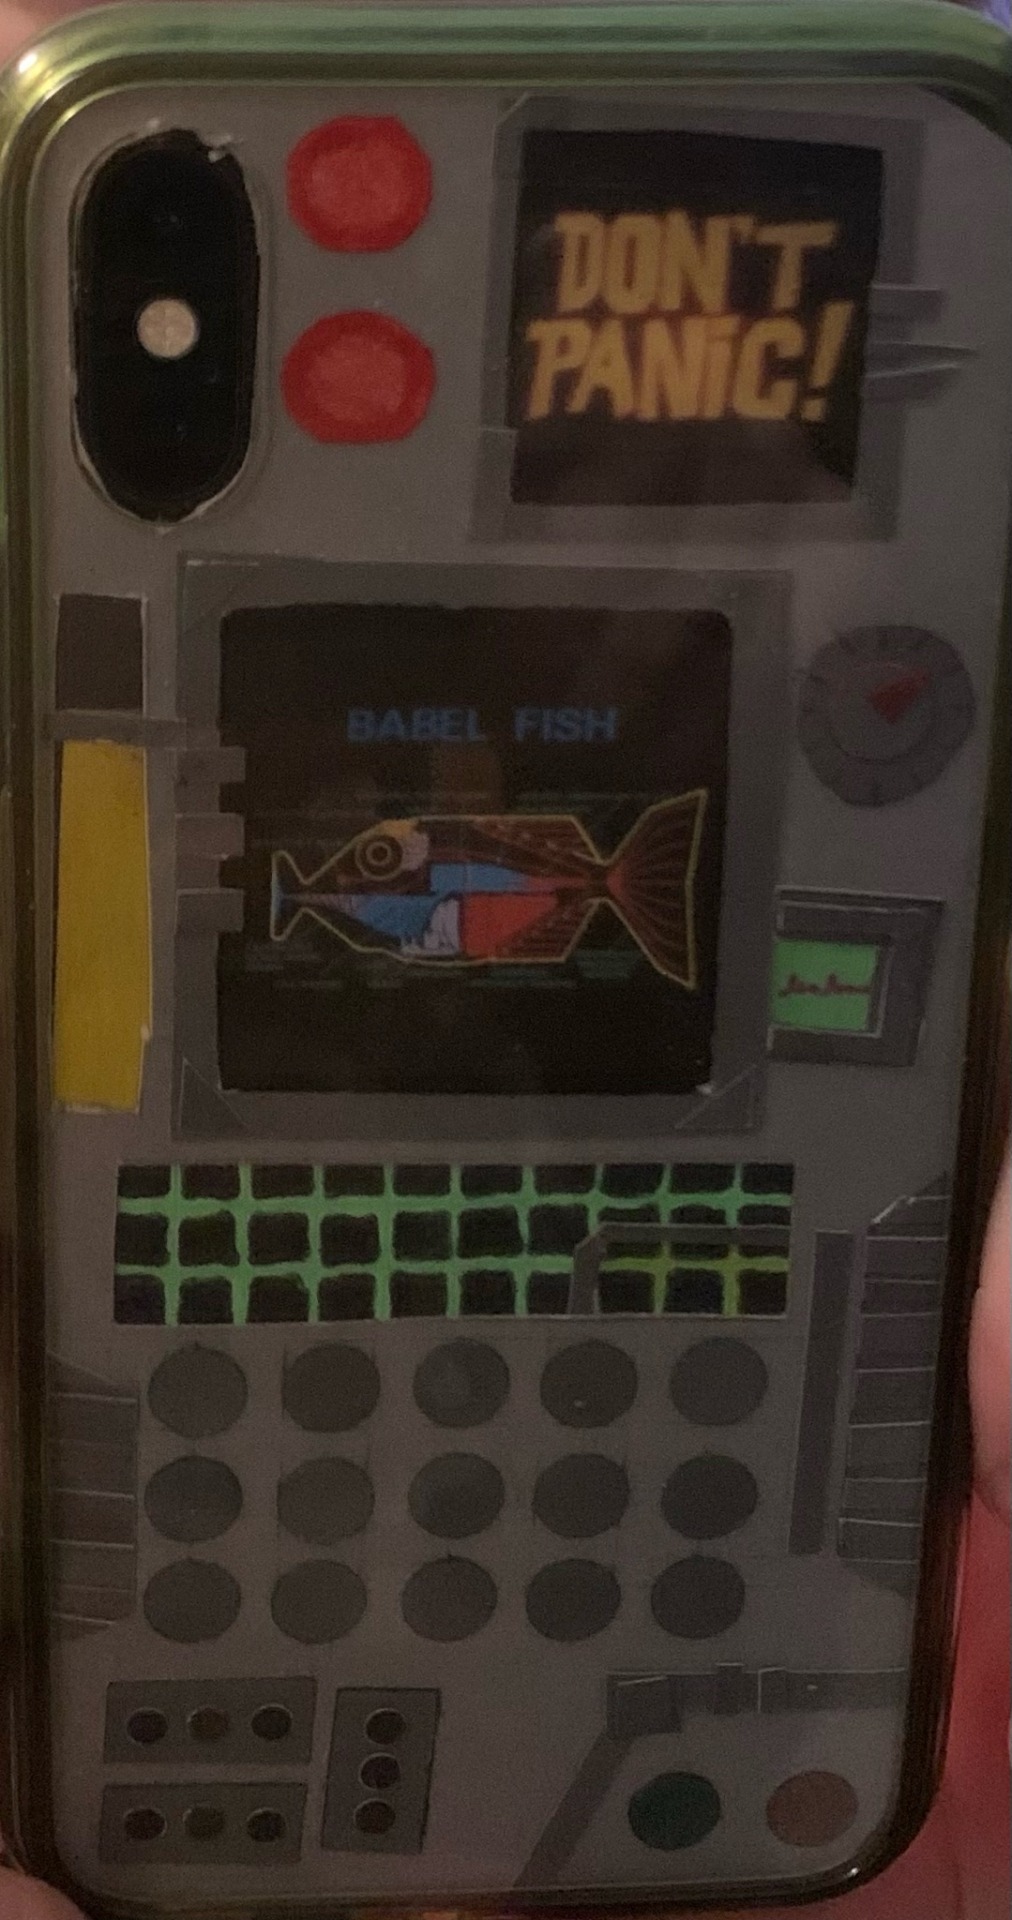

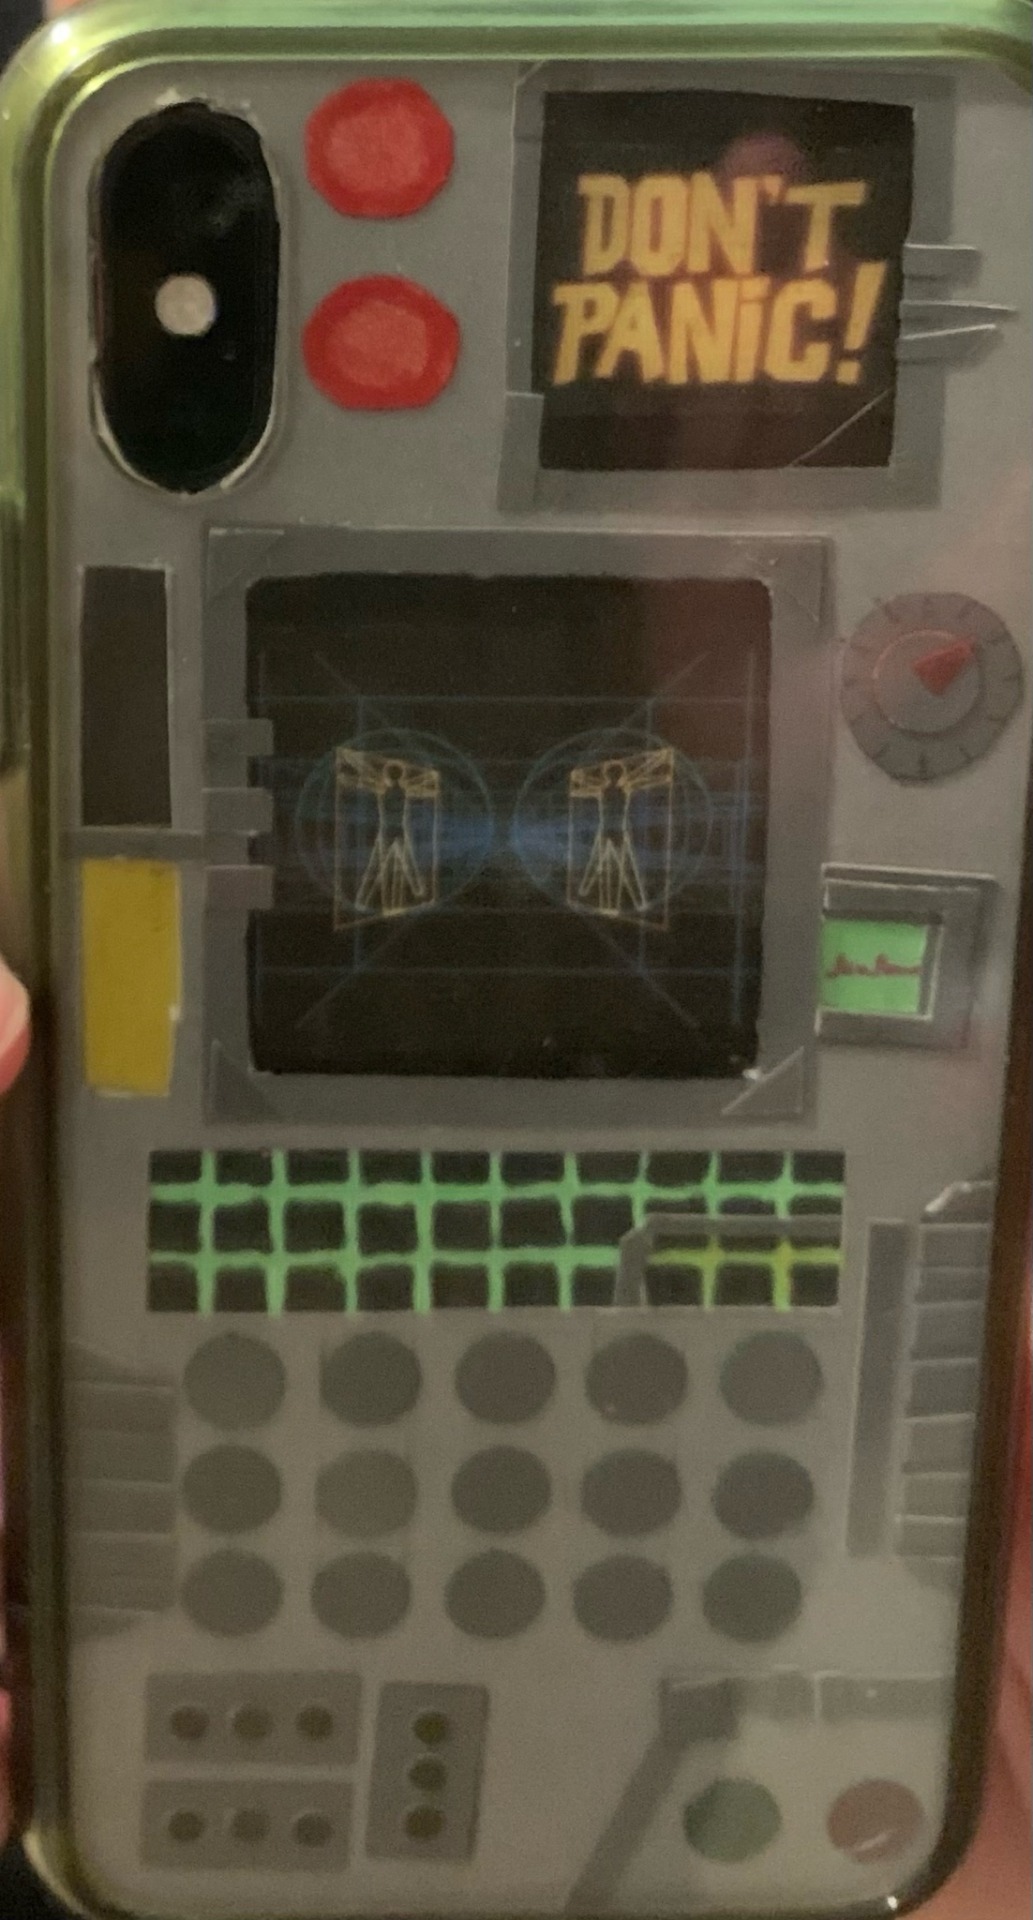
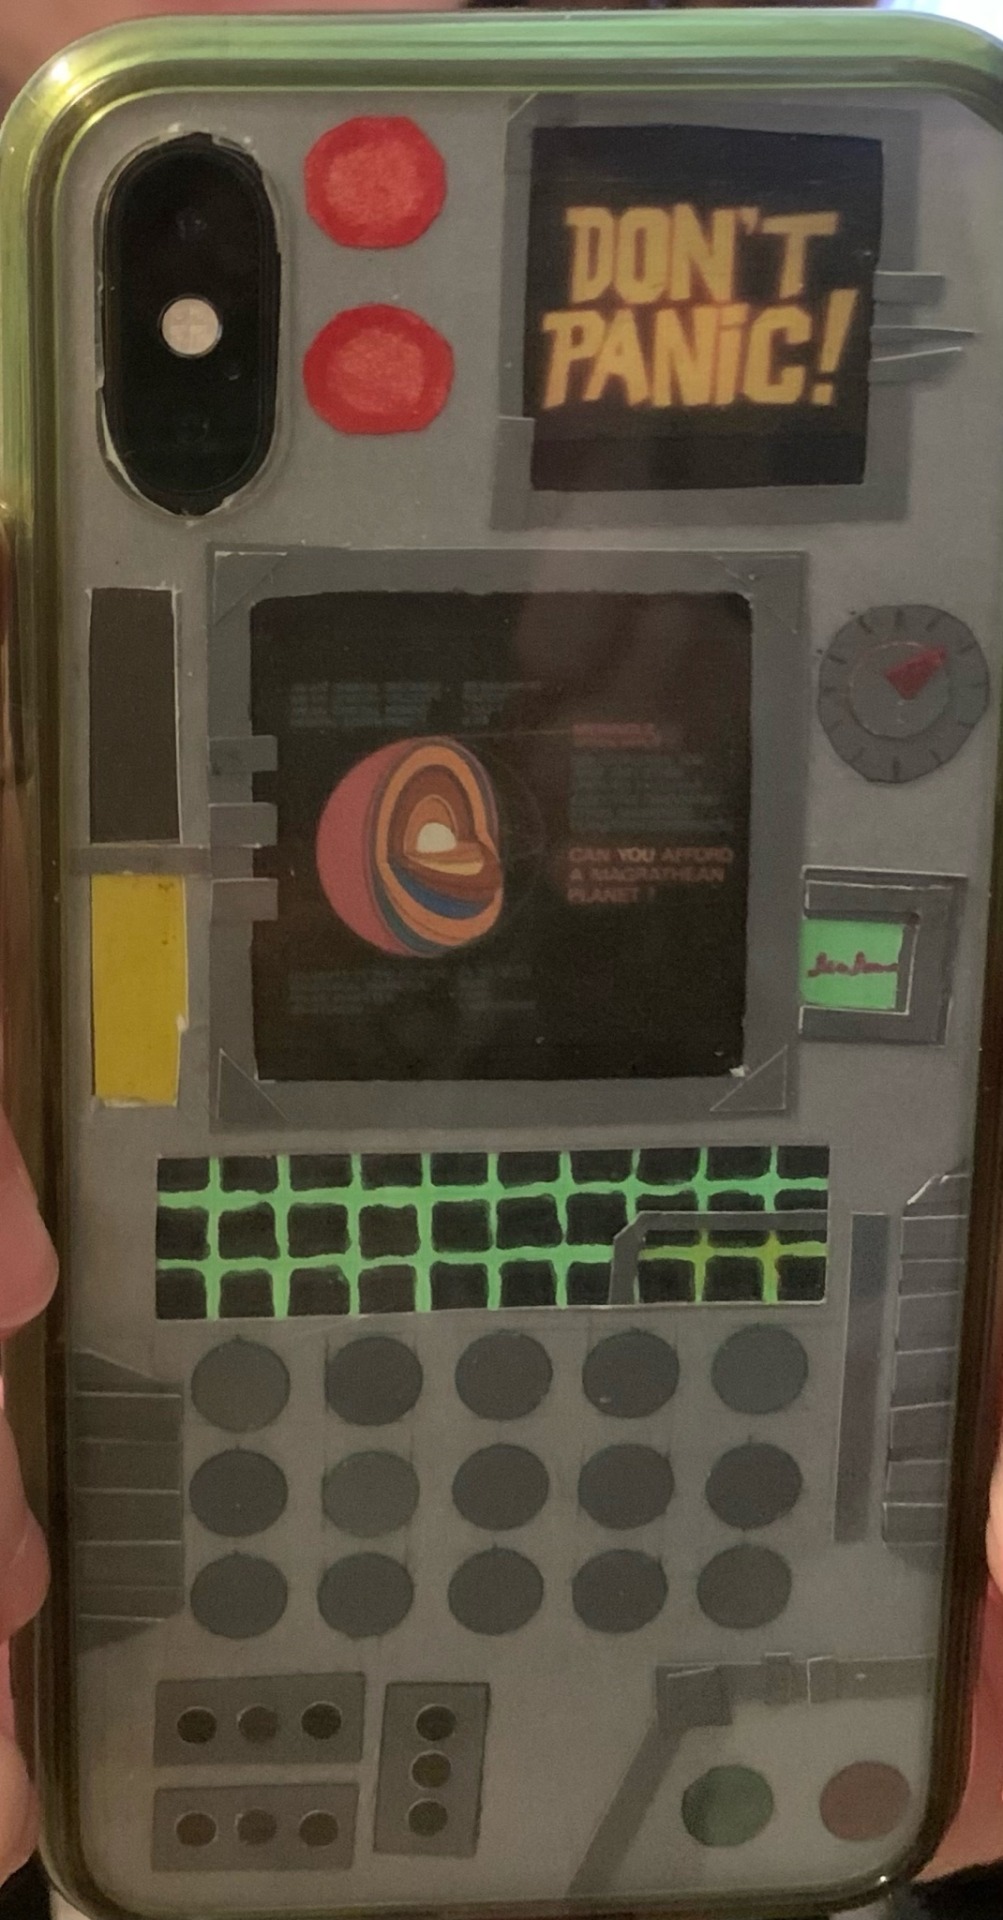
Best part! The interchangeable screen! Right now I have four screens from the tv show. Pinterest has a lot of high quality images of them. I have a few more saved that I’ll eventually size and print. My favorite is the babel fish.
You may also notice the bar on the right moves up and down. It doesn’t do so very elegantly but it was a last minute thought that I really like.
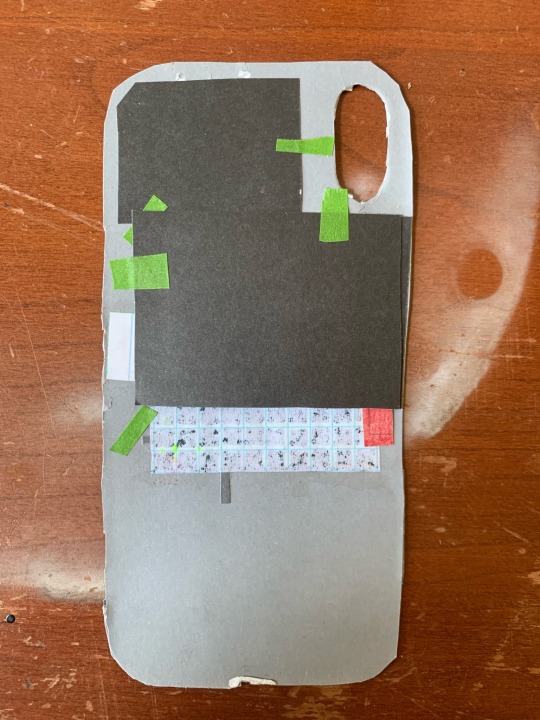
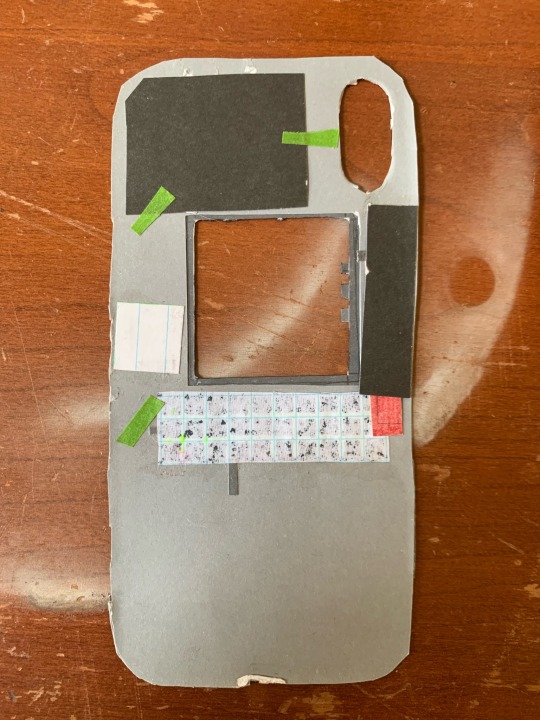
And here’s backstage! I have lots of layers for a more realistic effect. It was my first time doing a paper craft like this so maybe I’ll be able to make an even better one in the future!
Happy towel day!
#h2g2#towel day#may 25#papercraft#diy craft#diy tutorial#the hitchhiker's guide to the galaxy#thgttg#hgttg
188 notes
·
View notes
Text
Hey yall please don’t roast me for this, but does anyone know how shoe polish works?
I work in very wet conditions, and my shoes are in fine condition but they get stripped cause of the water. I’m not gonna buy new ones and I want to keep these in good condition for as long as possible
I don’t know how to use it and what to do, and I’m too embarrassed to ask anyone in real life cause they always act like I’m fucking stupid for not knowing
Thanks, sorry
#punk#anti facist#punk rock#baby punk#crust punk#alt aesthetic#diy or die#punk fashion#punx#too scared to ask#leather#diy punk clothes#punk diy#diy tutorial#help#no buy
48 notes
·
View notes